Plus - Nähmaschine Zippy - Kostenlose Bedienungsanleitung
Finden Sie kostenlos die Bedienungsanleitung des Geräts Plus Zippy als PDF.


Benutzerfragen zu Plus Zippy
0 Frage zu diesem Gerät. Beantworten Sie die, die Sie kennen, oder stellen Sie Ihre eigene.
Eine neue Frage zu diesem Gerät stellen
Laden Sie die Anleitung für Ihr Nähmaschine kostenlos im PDF-Format! Finden Sie Ihr Handbuch Plus - Zippy und nehmen Sie Ihr elektronisches Gerät wieder in die Hand. Auf dieser Seite sind alle Dokumente veröffentlicht, die für die Verwendung Ihres Geräts notwendig sind. Plus von der Marke Zippy.
BEDIENUNGSANLEITUNG Plus Zippy
Contents
Part 1\~Getting to know your new knitting machine
Page
How to set up your machine 1
Names and Functions of each part 4
Needle positions 5
Yarn and Stitch Dial 6
Accessories 7
Preparing your Yarn 7
Part 2\~ One hour guide for beginners
(All you need to knit simple garments.)
Bringing out needles 8
Threading up 9
Open edge Cast On 10
Increase and Decrease 12
Casting Off 13
Easy 1×1 double welt 14
Finishing your welt 15
Tension Piece 16
Measuring a tension piece 17
Making simple Garments 18
Putting in yarn marks 18
Part 3\~ Punchcard patterning
(An introduction, how to do pattern knitting on your machine and details of each stitch pattern.)
See page 19 for the contents of Part 3.
Part 4\~Detailed methods and techniques
(Each technique simply explained.)
See page 45 for the contents of Part 4.
How to set up the machine
Zippy Plus owners start here Zippy De-Luxe owners start on the following page.
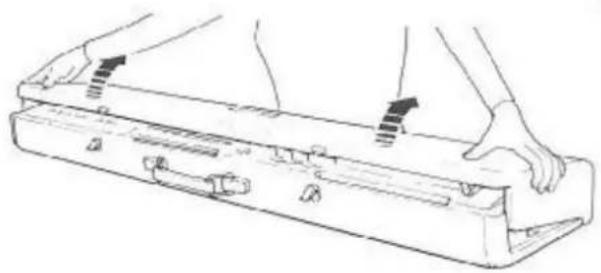
Put the machine on the front edge of the table, with the carrying handle away from you. Unfasten both clips, and lift off the lid. Put the lid down. Remove the polystyrene and paper packing from the carriage and needle bed.
natural_image
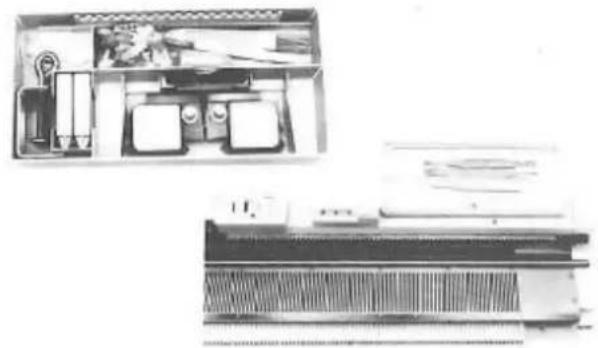
Line drawing of a briefcase with hands holding it, showing internal components and handle (no text or symbols)Take the accessories box off the needle bed, and put it on the table behind the machine. Take off the lid, turn it over, and slide it onto the studs at the left end of the machine as a tool tray.
natural_image
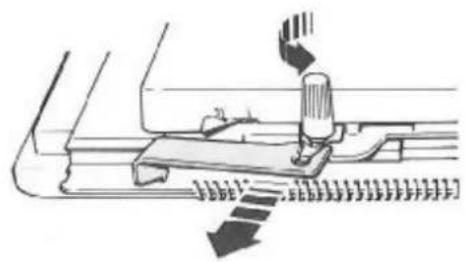
Two black-and-white photos showing a vintage office setup with display cases and equipment, no visible text or symbols.Unscrew the left hand white thumb screw on the front of the carriage, then slide the carriage lock forwards and lift it off.
natural_image
Diagram of a mechanical device with motion arrows indicating movement (no text or symbols)Find the two clamps, the auto tension, the yard rod and the row counter.
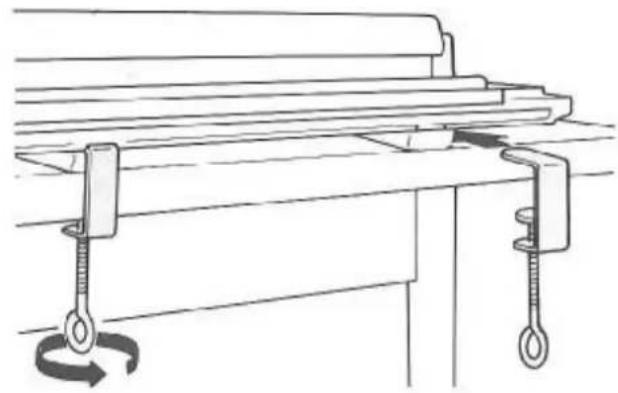
Place the Needle Bed of the machine on the front edge of the table. Insert the Clamps into the slots above the rubber feet.
Fasten the Clamps by turning in the arrowed direction.
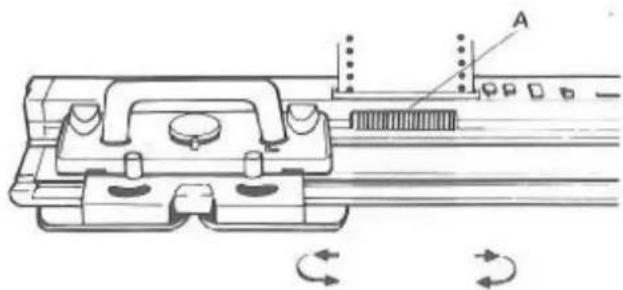
Attach the Row Counter to the back of the machine bed by putting the keyhole slots (B) onto the two studs (A) and pushing the Counter back firmly.
Turn the Tension Springs of the Auto Tension until they click into position (see picture below).
Insert the short bent end of the Yarn Rod into one of the sockets on the handle bracket, and lift the Yarn Guide.
Put the Auto Tension onto the top of the Yarn Rod.
natural_image
Technical line drawing of a mechanical assembly with clamps and a rotating knob (no text or symbols)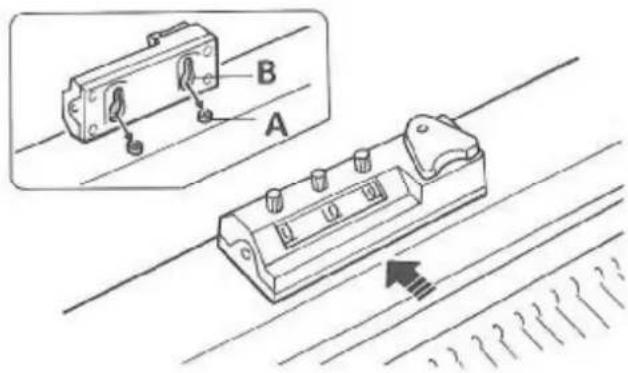
text_image
Technical diagram showing a component labeled A and B with an arrow indicating direction, alongside a schematic of a circuit board or connector.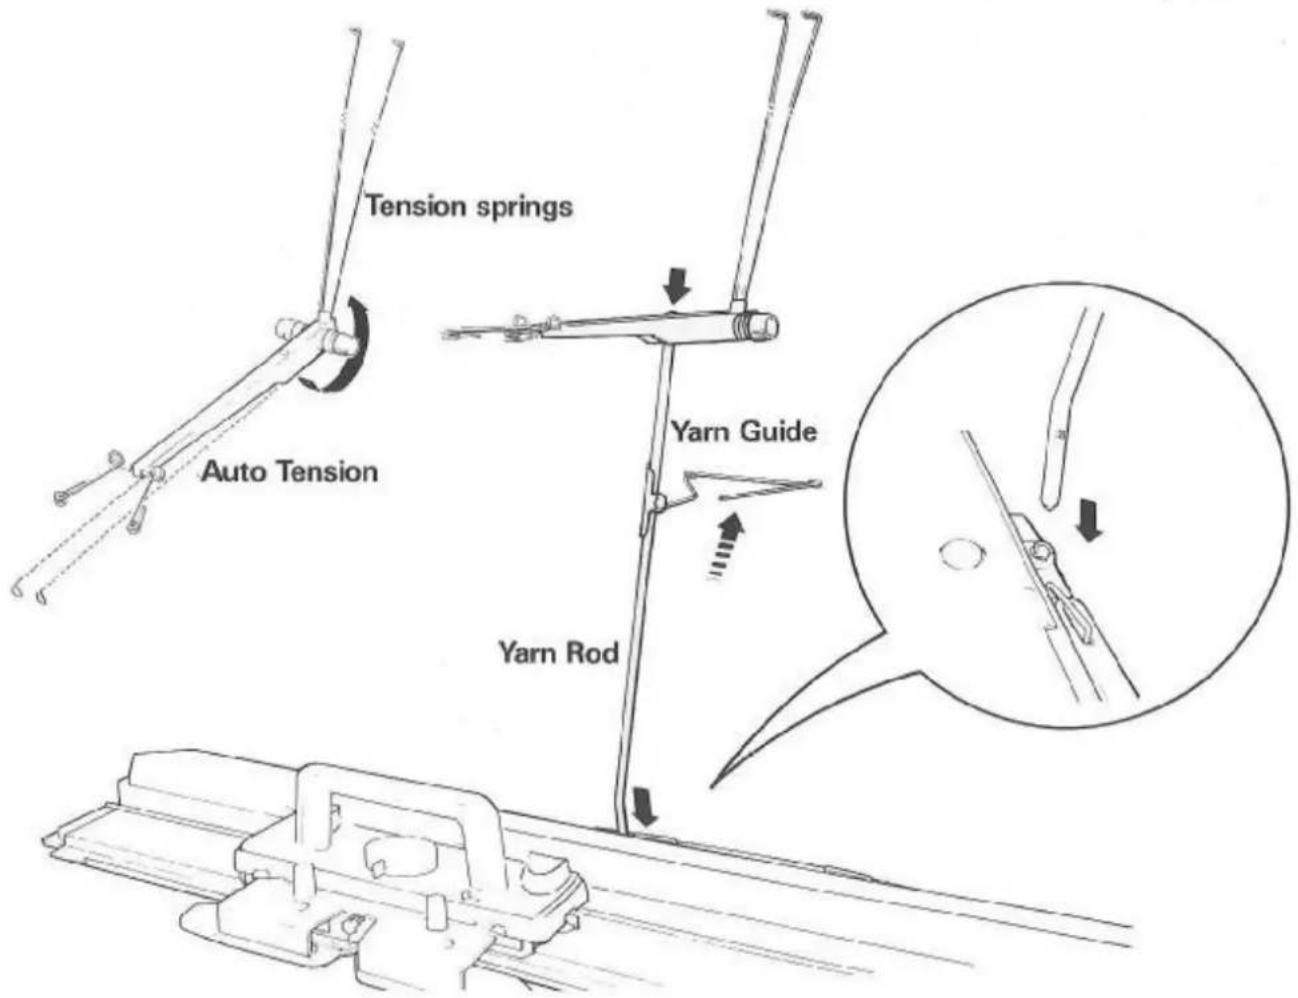
text_image
Tension springs Auto Tension Yarn Guide Yarn RodAttaching the Brush Plate
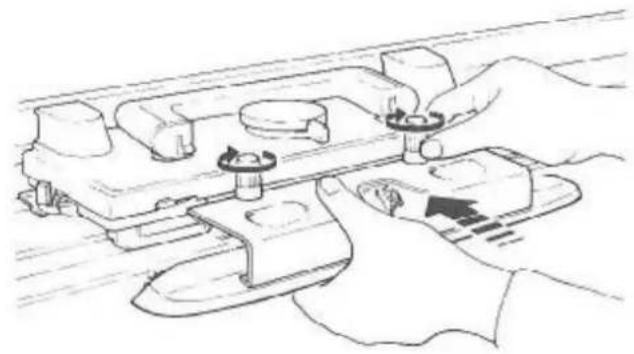
Unscrew the two Nuts by several turns.
Put the Brush Plate onto the Carriage as shown, and tighten both nuts firmly, making sure that they fit into the cut-out parts of the Brush Plate, when you tighten them.
Carriage Handle
Pull the Carriage handle upright until it clicks into position.
Carriage Release Lever
The small lever in front of the Carriage handle is the Carriage Release. If you slide it to the right, the top of the Carriage swings up, which releases the needles. Press down on the handle and the Carriage closes and is held shut. This lever is useful if the Carriage should jam while you are knitting. You can then return the Carriage to the start of the row.
Row Counter Tripper.
To make the Row Counter operate, lift the tripper and turn it to point backwards. To disengage it, lift and turn it to the side.
Row Counter
Turn the knobs A B C in either direction to reset the numbers in the window.
natural_image
Line drawing of hands operating a mechanical device with adjustment knobs and a scroll (no text or symbols)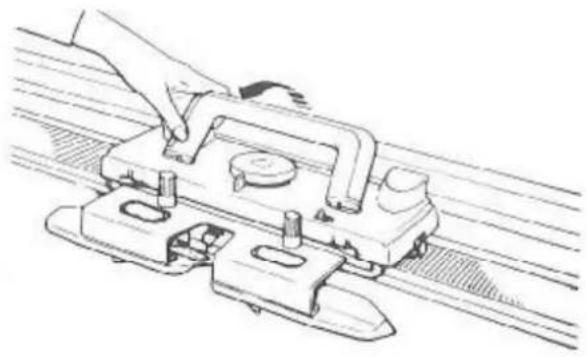
natural_image
Line drawing of a hand operating a mechanical device on a rail track (no text or symbols)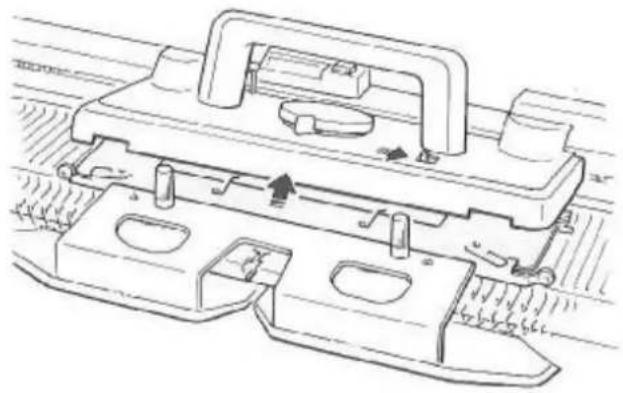
natural_image
Technical line drawing of a mechanical assembly with no visible text or symbols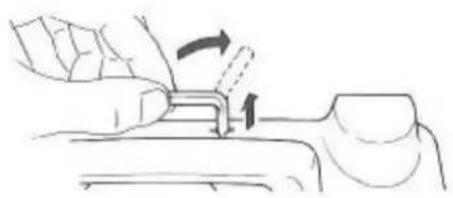
natural_image
Line drawing of a hand using a tool to adjust or install a mechanical component (no text or symbols present)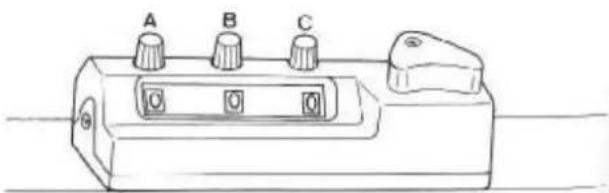
natural_image
Line drawing of a mechanical device with three labeled ports (A, B, C) and a handle, no text or symbols present.Names and functions of each part Bed
text_image
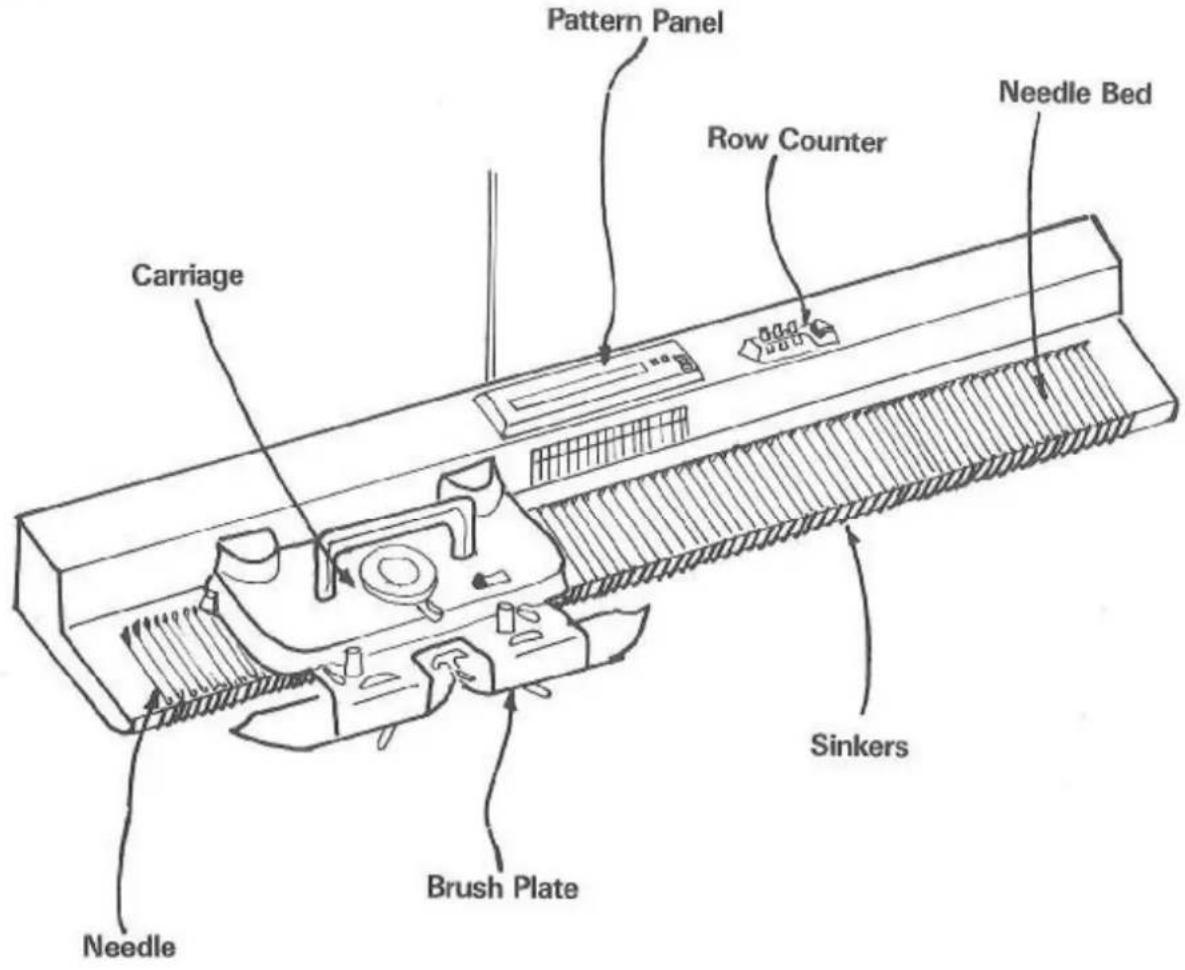
Pattern Panel Row Counter Needle Bed Carriage Sinkers Brush Plate NeedleThe Pattern Panel is shown in detail on page 21 in the pattern knitting section.
Needle

text_image
butt latch hookCarriage
text_image
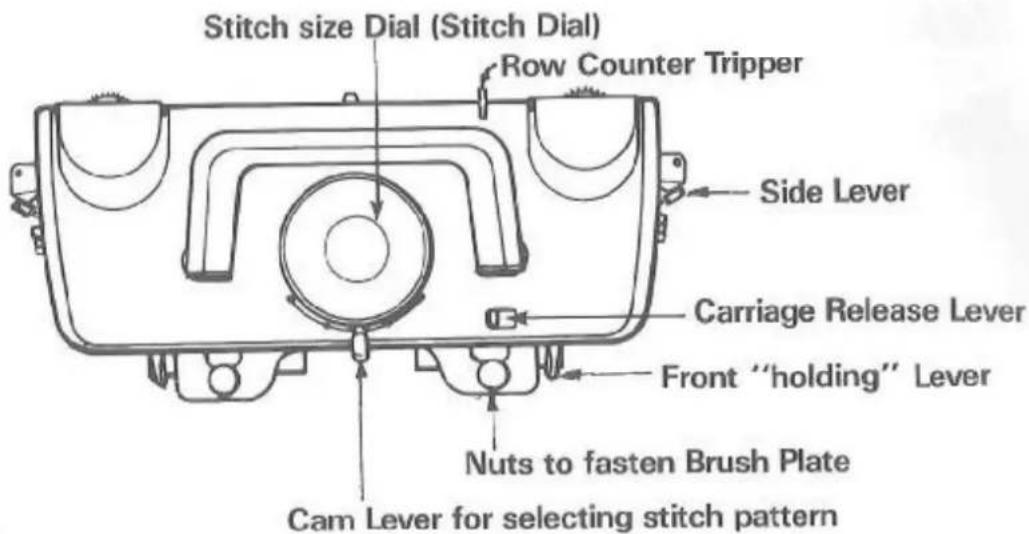
Stitch size Dial (Stitch Dial) Row Counter Tripper Side Lever Carriage Release Lever Front "holding" Lever Nuts to fasten Brush Plate Cam Lever for selecting stitch patternBrush plate
text_image
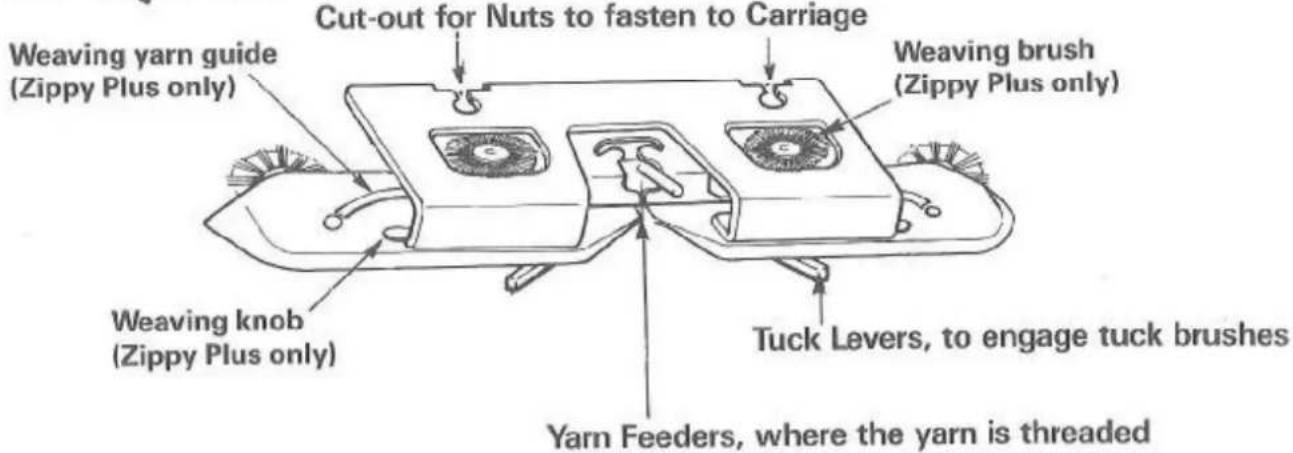
Cut-out for Nuts to fasten to Carriage Weaving yarn guide (Zippy Plus only) Weaving brush (Zippy Plus only) Weaving knob (Zippy Plus only) Tuck Levers, to engage tuck brushes Yarn Feeders, where the yarn is threadedNeedle positions
The letters A, B, C and D at both ends of the Needle Bed show different positions. Each letter indicates a different function for the needle in that position.
A- needles do not knit.
B-normal knitting position. Needles can knit both plain knitting (stocking stitch) and stitch patterns from this position.
C—knitting position for needles pushed back from holding position. Needles will knit stocking stitch but not patterning stitches from this position.
D—needles can either be held (and do not knit back at all) or they can knit stocking stitch (according to the setting of the front levers on the Carriage).
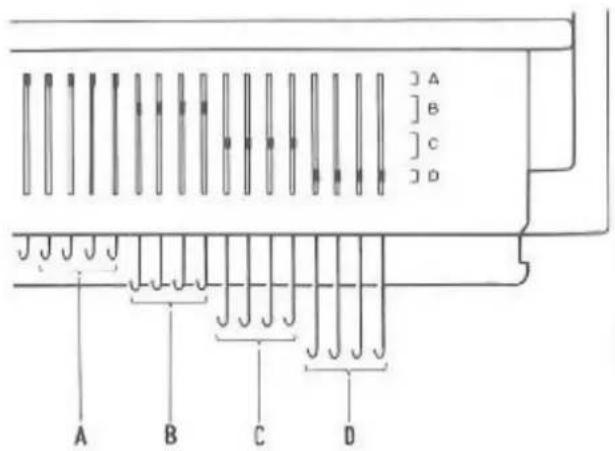
text_image
A B C D A B C DYarn and stitch dial
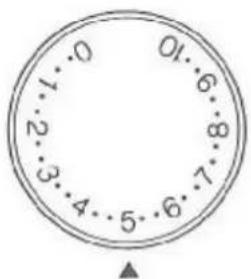
Turn the Stitch Dial to change the stitch size.
When the Stitch Dial is set to 0, the stitches knitted are very small and tight.
When the Stitch Dial is set to 10, the stitches are large and loose.
For thin yarns, you need small stitches (low numbers) and for thicker yarns you need larger stitches (high numbers).
To change the stitch size, turn the Stitch Dial until the number or dot you want is opposite the arrow (at the front of the Carriage). The sketch shows stitch size 5.
text_image
0 1 2 3 4 5 6 7 8 9 10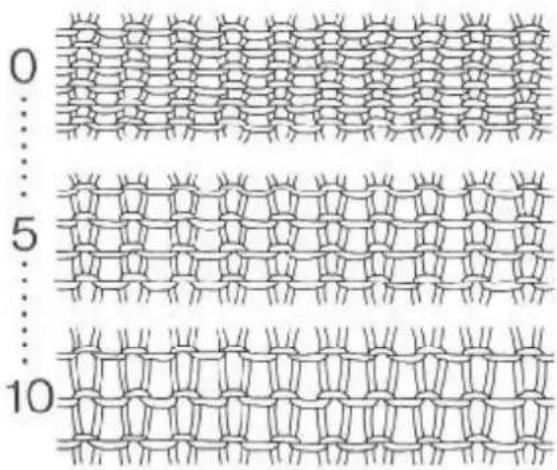
natural_image
Three identical woven fabric patterns with no text or symbols, arranged horizontally (no text or symbols present)Experiment with your yarn at different stitch sizes to find one at which your machine knits easily and produces the fabric you like.
For example, a two-ply yarn will give a firm fabric at stitch size 1, and a softer fabric at stitch size 2 or 3. A four-ply yarn may be knitted at stitch sizes 5, 6 or 7, depending on the type of yarn and the feel of the fabric which you like. Slightly thicker or textured yarns will need stitch sizes 8 to 10, and some, for example mohair, may be better knitted on alternate needles only.
But until you are used to your machine, practice using a good quality 4-ply, at about stitch size 6, Knitmaster Kone 4-ply is ideal, and is specially made for machine knitting.
Each dot between the numbers gives a slightly different stitch size, so you can experiment and get the exact feel of the fabric you want. These intermediate sizes are called, for example, "five and two dots" (5..) or "six and a dot" (6.). Those are the two stitch sizes on each side of 6 of course.
When you are using a new yarn or stitch pattern, try knitting at different stitch sizes, and then take the knitting off the machine and see which stitch size gives the fabric you like. You might want a firmer fabric for a skirt, and a softer one for a sweater.
Main tension
The stitch size which seems right for any particular yarn (and which is also the stitch dial number at which you would knit your garment) is called the Main Tension (MT for short) for that yarn.
Accessories
natural_image
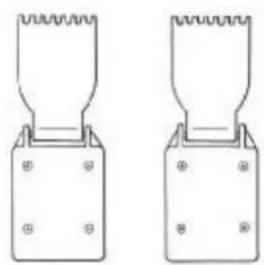
Two identical mechanical component diagrams with no text or symbolsClaw Weight (2)
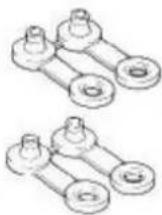
Card Clips (2)

Gauge Scale
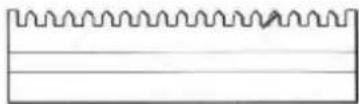
Needle Pusher

Latch Tool (Tappet)
natural_image
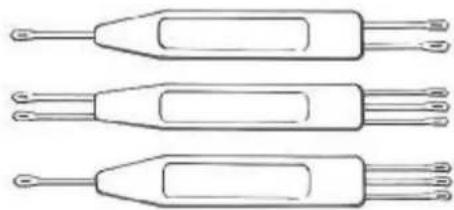
Three identical types of electronic components with leads, arranged vertically (no text or symbols visible)Transfer Tools 1-2
(one of each) 2-3
1-3
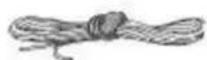
Cast-on Cord (Ravel Cord)
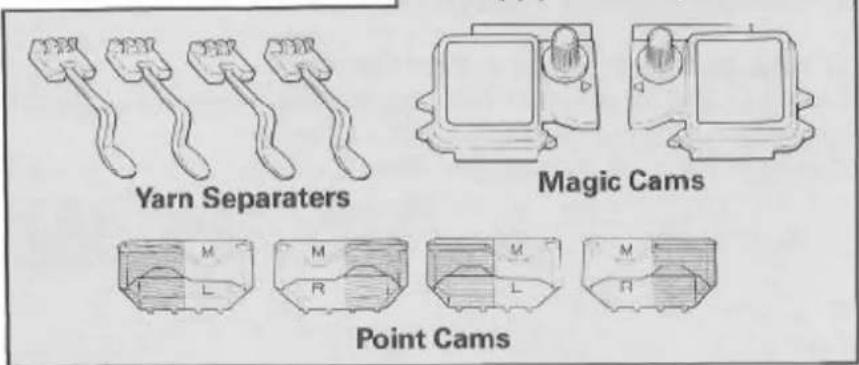
text_image
Yarn Separaters Magic Cams Point CamsPreparing your yarn
To start with, use a nice smooth four-ply yarn such as Knitmaster Kone 4-ply. It is much easier to learn with a good quality smooth yarn, then you can progress to all kinds of different yarns later on!
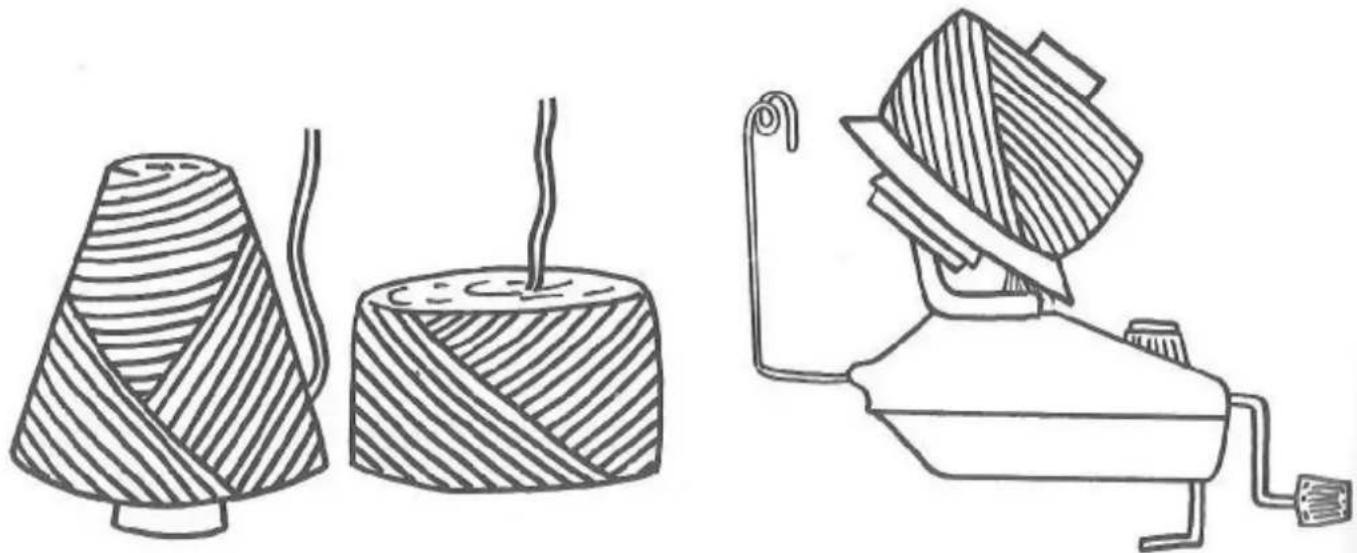
Knit from a cone, or from a ball which has been rewound on a woolwinder. Use the yarn from the centre of a ball made on a woolwinder.
natural_image
Line drawings of textile spools and a hair dryer (no text or symbols)Your knitting machine uses yarn so quickly that hand wound balls can't unwind fast enough, and will catch up, making your knitting difficult and uneven.
Beginners start here
Have you followed the first 7 pages of the book carefully, and is your machine now firmly clamped to the table with its accessories beside it and you in front ready to start?
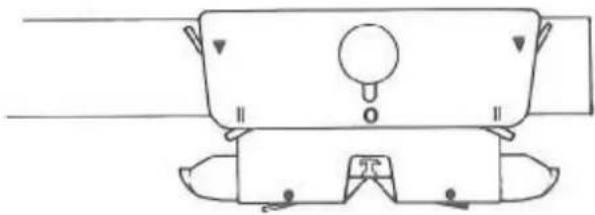
Put the Carriage with the Brush Plate attached, at the right hand end of the Needle Bed, and check that the levers are set as follows. When this has been done, we can forget all about most of them until we come to pattern knitting. Just make sure that you have them set correctly now, for plain knitting.
- THIS IS IMPORTANT. Put the Cam Lever to the centre (0).
- Put both the side levers back (▼)
- Put both the front levers to II
- Put both the tuck levers on the Brush Plate to ●
- Weaving knob to 0 (Zippy Plus only).
Done that?
natural_image
Line drawing of a mechanical component with no visible text or symbolsLook at the numbers on the front of the Needle Bed, under the needle hooks, and find the 0 in the centre. The needles are numbered in tens on both sides of this centre 0.
All needles should be in A position, that's right back in their slots, as far as they will go. Check that they are.
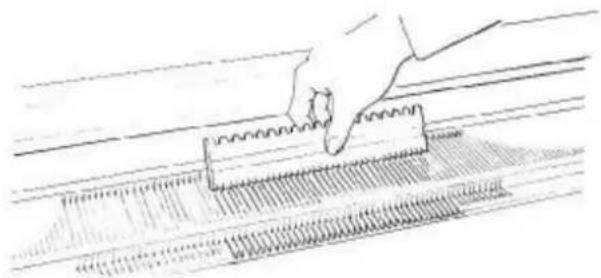
Now using the straight edge of the Needle Pusher, bring 35 needles on each side of 0 (70 needles altogether) forward to B position. (We saw a picture of the needle positions on page 5.)
natural_image
Line drawing of a hand using a tool to clean or trim a surface, with no text or symbols present.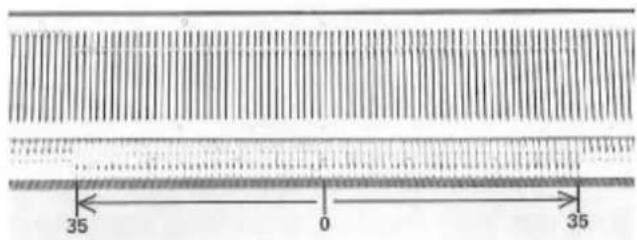
text_image
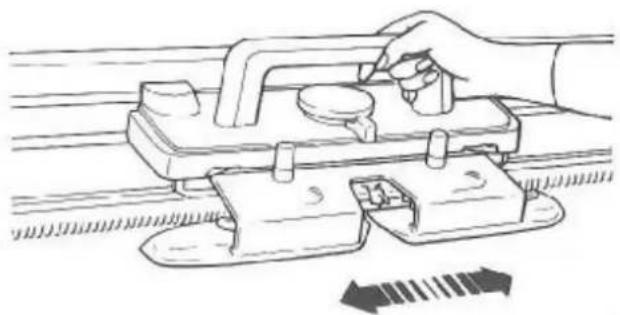
35 0 35Move the Carriage slowly to the left across all the needles, making sure that it does clear the end needle on the left—then return it to the right. This will make sure that the needles are in a nice straight line in B position as the machine likes them.
natural_image
Illustration of a hand using a tool to adjust or install a mechanical component, with no visible text or symbols.Threading-up
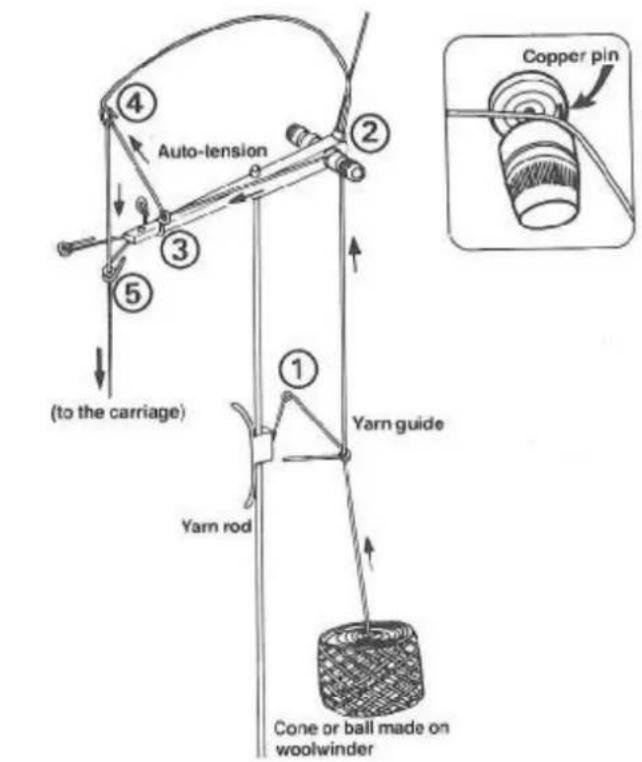
Put your cone or rewound ball of yarn on the table behind the yarn rod.
Take the end of the yarn up through the guide (1) and between the tension discs (2) (pull it firmly so it goes underneath the retaining pin.)
Now bring the yarn forward and through the eyelet (3). Bend the tension spring towards you, so that you can thread the yarn through the eyelet at the end of it (4).
The yarn now goes down through the front eyelet (5), and you can fasten the end of it in the clip on the front of the yarn rod until you're ready to thread up the Carriage.
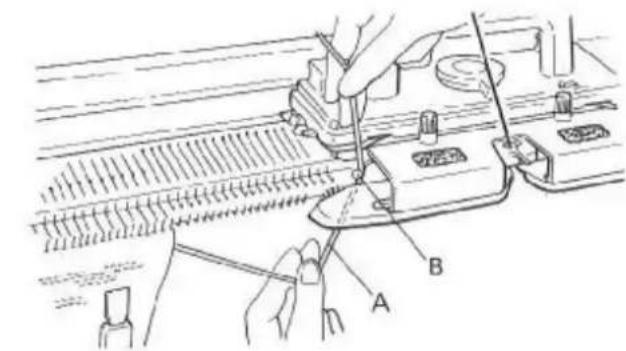
Now look at the Carriage. In the centre of the Brush Plate is the Yarn Feeder. Move the gate pin of the Yarn Feeder gate (A) towards the left, and you will then be able to see into feeder 1. That is where the yarn must go.
Take the end of the yarn from the clip on the yarn mast, and tie a loop in it. Hold the yarn in both hands, one above and one below the feeder, and slide it into feeder 1. Put the loop over the screw of the nearest table clamp.
Close the Yarn Feeder by moving the gate pin to the right. Now pull back any slack yarn by pulling down on the yarn behind the yarn rod (below the yarn guide) until the tension spring is almost horizontal.
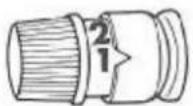
Note: For 4-ply yarn, set the Dial on the Auto Tension to 1 (lowest pressure). Only increase the pressure if the yarn slides through too freely, or for thinner yarns.
text_image
Auto-tension (to the carriage) Copper pin Yarn guide Yarn rod Cone or ball made on woolwinder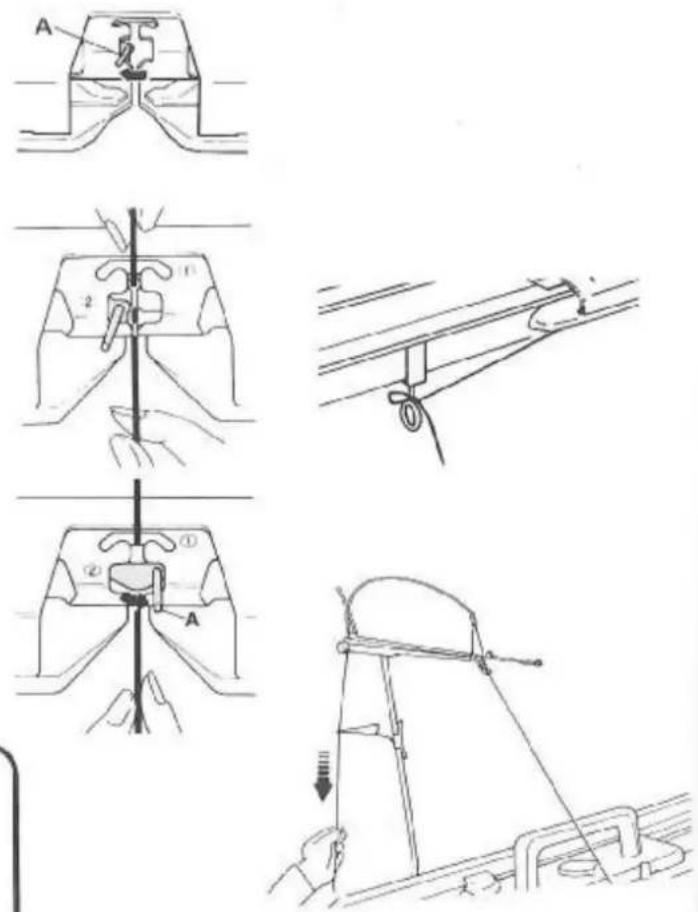
text_image
Technical diagram showing mechanical assembly steps with labeled components A and numbered parts ①, ②, and ③.To cast-on... Open edge cast\~on
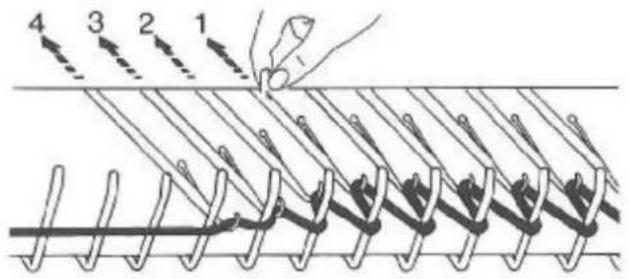
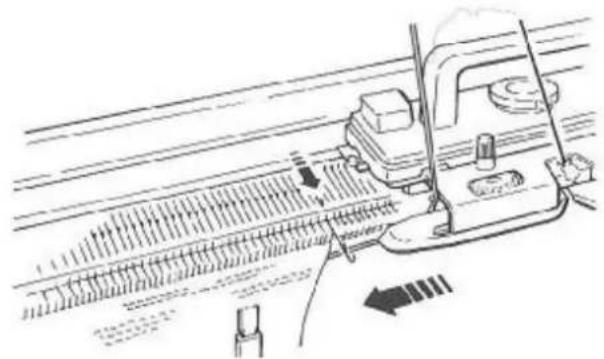
First of all, set the Stitch Dial to 8 (for knitting loose stitches), then take hold of the Carriage handle with your right hand, and move it slowly and carefully from right to left across all the needles in B position. Make sure that you take the Carriage well clear of the end needle by 2 or 3 cms. Open loops will have been formed between the needle hooks and the sinker posts.
Sometimes the last 2 or 3 needles of this first row (those on the left) are pulled forward a bit by the yarn. If this does happen, pull down a little extra yarn above the Carriage and push those needles back into line, one by one, by hand.
Pull back any spare yarn behind the yarn rod, and at the same time, check that the yarn can run freely from the ball or cone.
text_image
4 3 2 1That's the first row knitted. Now before you can knit back, that row of loops formed between the needles and the sinkers has to be held down. To do this we use the cast-on cord.
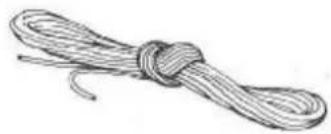
Find the cord, undo it, and make sure that there are no knots in it. With even the smallest knot, you will be unable to pull it out of the knitting after casting on.
natural_image
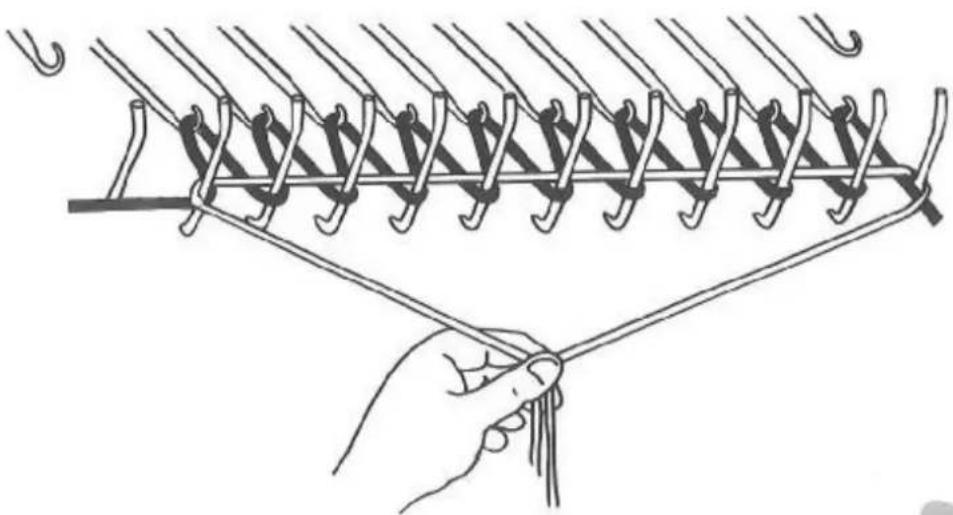
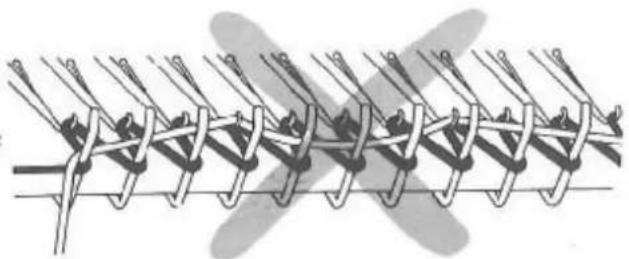
Simple line drawing of a rope tied with a loop (no text or symbols)Lay the nylon cord over the zig-zag of knitted loops between the needle hooks and the sinkers. Look closely at the sketch. The cord lies straight across all the stitches and drops down just beyond the last needle in work at both ends.
natural_image
Illustration of a hand holding a string tied with a spring, showing rope routing (no text or symbols)The cord must not get caught in any of the needle hooks.
natural_image
Diagram of a coiled spring with multiple springs and connectors (no text or symbols)Change the number on the stitch dial back to 6 (for a 4-ply yarn) or to a tighter tension for hems and welts as shown later. Check that the cord is lying correctly over the knitting between the needles and the sinkers.
Take hold of both ends of the cord with your left hand and hold it down very firmly beneath the Needle Bed whilst you now knit back. Move the Carriage from left to right (row 2).
Still holding the cord beneath the Needle Bed, knit 4 more rows. Knit at an even speed, making sure each time that the Carriage has passed the end needle in use, before knitting back.
Let go of the right hand end of the cord, and with your left hand, pull the cord to the left. Keep pulling until it comes completely out of the knitting.
That is the end of the cast-on. Knit a few more rows slowly and carefully.
Right-continue knitting.
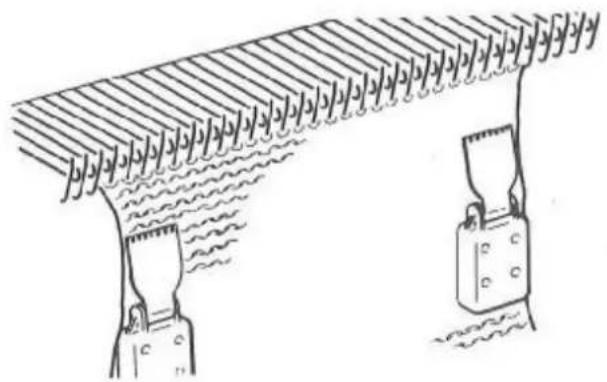
Experiment with different stitch sizes. Try moving the stitch dial to different numbers, and knit a few rows at each. High numbers give big stitches, low numbers smaller stitches. Before trying the highest numbers (9 or 10) hang a claw weight on each side of the knitting, a few rows below the sinkers, to keep these loose stitches well down into the needle hooks.
natural_image
Diagram showing two mechanical components with wavy lines and circular features, no text or symbols presentFinish by knitting several rows at the Main Tension (e.g. approximately 6 for 4-ply yarns).
text_image
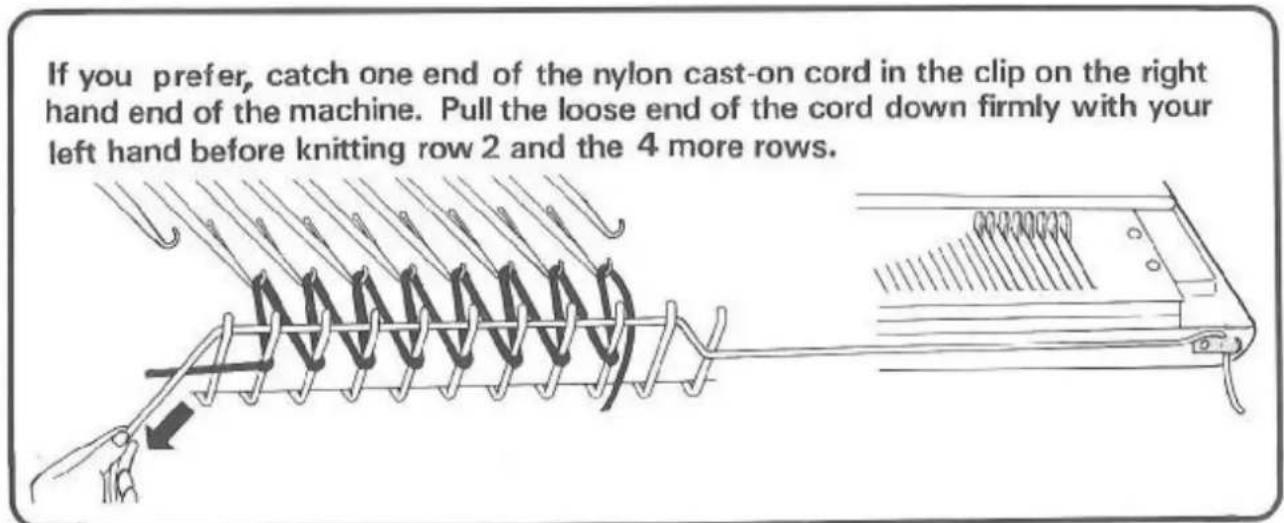
If you prefer, catch one end of the nylon cast-on cord in the clip on the right hand end of the machine. Pull the loose end of the cord down firmly with your left hand before knitting row 2 and the 4 more rows.Easy single stitch increase
Bring forward to B position one empty needle at the edge of the knitting. You can do this at both edges of the knitting at the same time. Knit 2 rows. Try doing this a few times.
Single stitch decrease
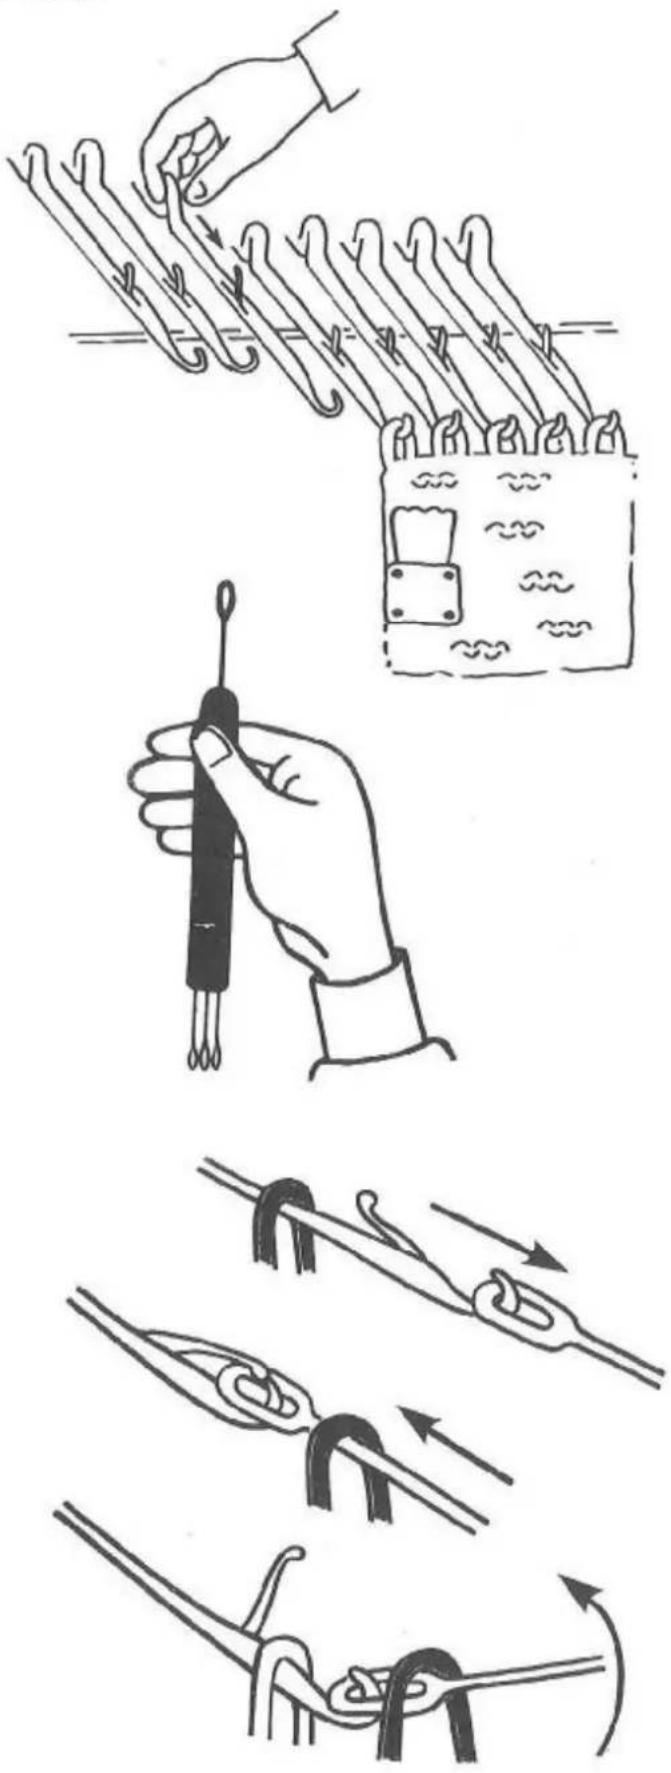
Holding the tool.
Use the single end of the tool as shown to pull the end needle forward, so that the stitch goes behind the latch. Then push the needle back, in a straight line, so the stitch comes onto the tool. Now lift the tool across to the next needle and tip it so that the stitch slips off into the hook of that needle. With your finger on the needle butt, push back the emptied needle to A position.
You can do this, also, at both edges of the knitting at the same time. Knit two rows. Practice holding the transfer tool correctly, it's by far the easiest way when you just get the hang of it, and do a few single stitch decreases.
text_image
Illustration showing a hand using a tool to tie with coiled wires, illustrating the process of cord fastening or wire tightening.Casting-off
Have the Carriage on the right hand side of the knitting, and unthread the yarn.
Hang a claw weight right on the edge of the knitting, on the first stitch, about 2 cms below the needles.
START. Just as for a single decrease, transfer the end stitch nearest the Carriage to its neighbouring needle. Push the empty needle back to A position.
Hold the yarn lightly across the fingers of your left hand, and use the back of your left forefinger to stop the knitting coming forward. With your right forefinger, bring forward the needle butt of the needle with two stitches on so that both stitches slip behind the latch.
With your left hand, lay the yarn across the open needle hook. Then with your right hand, push the needle butt back into B position again. This will knit off the two stitches, and leave a single stitch in the needle hook. Don't pull this stitch tight.
Now repeat from the START above, alternately transferring a stitch from the end needle using the transfer tool, and knitting off the two stitches by hand to make a new single stitch.
Keep going until there is a single stitch left in the hook of the last needle. Break off the yarn and pull it through this last stitch.
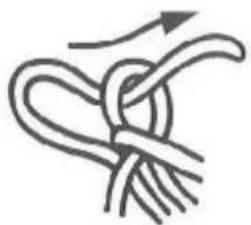
natural_image
Simple line drawing of a rope knot with arrows indicating direction (no text or symbols)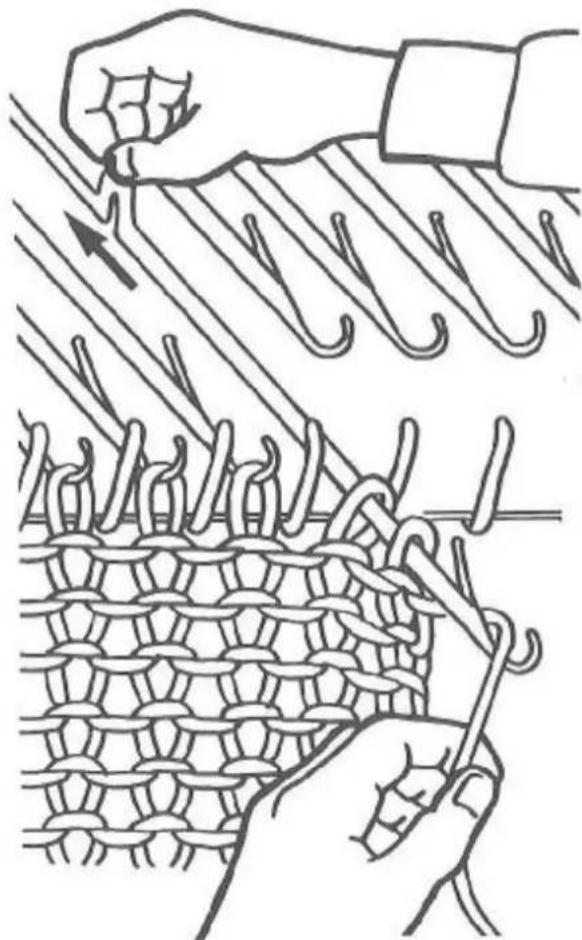
natural_image
Illustration of hands tying a knitted mesh knot, showing thread arrangement and stitching (no text or symbols)HINTS when casting off.
Don't forget to pull the yarn end through the last stitch—or one tug on the end of the yarn and your neatly cast off stitches will happily undo themselves at great speed!
Remember to push the last needle back to A.
Put the weight on the end stitch to make the stitches large and the cast off loose, to begin with.
An easy 1x1 double welt
You need a small amount of "waste yarn"—yarn of a different colour from the main colour to be knitted. You can use up oddments if you like, provided that the yarn is smooth, and each piece is long enough to knit several rows.
Now do the open-edge cast-on (page 10) on alternate needles only. Bring the required number of needles to B position as before. Turn over your Needle Pusher and use the 1 × 1 side to push every alternate needle from B position back to A position.
Take the Carriage across and back to line up the remaining needles in B.
Thread the Carriage with waste yarn.
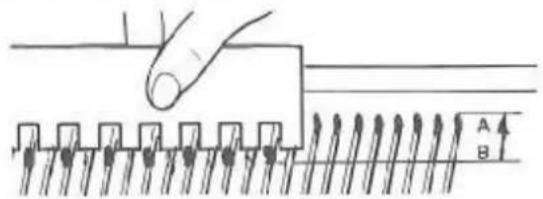
text_image
Diagram showing a hand pressing down on a surface with labeled points A and B, likely illustrating a mechanical or electrical process.Knit one loose row and lay the cast-on cord across the open loops. Set the stitch dial to three numbers tighter (lower) than your Main Tension. (If you have been knitting at stitch dial 6, set it to 3 now.)
Holding the cord firmly, knit 5 rows. Pull out the cord and knit several more rows, finishing with the Carriage on the left. Break off the waste yarn and unthread it from the Carriage.
Now we are going to use the cast-on cord again, but in a completely different way this time. It will be threaded up for knitting just like ordinary yarn, and we shall knit one row with it. This will give a nice clear dividing line between the waste yarn and the main knitting, and will also give us a quick and easy way of removing the waste knitting when the welt is complete.
First of all, check that the cord has no knots in it. Then thread it into the Yarn Feeder on the Carriage just as though it was a normal yarn.
Let the shorter end hang down under the Carriage, or take it towards the left, and fasten it in the clip. The longer end comes up out of the feeder, lies lightly over your left hand, and hangs down to the floor in front of the Carriage.
Hold your left hand about a foot above the Carriage, and a bit forward and to the left of it. The cord should hang down freely not touching the Carriage or anything else it could get caught on.
Set the stitch dial to 8 for loose knitting.
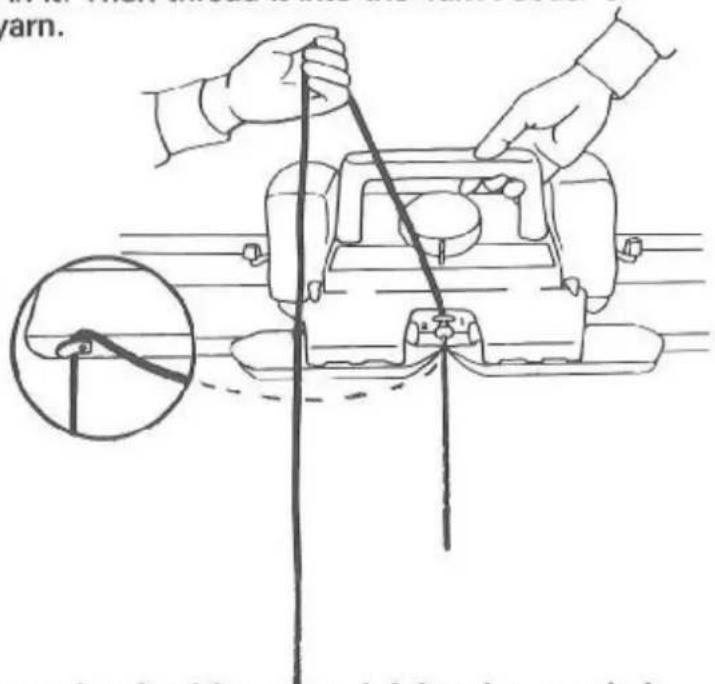
text_image
Diagram illustrating a sewing machine operation with hands operating the needle and a magnified inset showing the thread detail.Knit across slowly and carefully allowing the cord to feed from your left hand as you knit. Knit one row only, and then unthread the cord from the Carriage, unclip the other end if necessary, and allow both ends to hang down beside the knitting.
Now thread up with your main yarn and set the stitch dial to 3 whole numbers tighter than your Main Tension for that yarn. Knit 30 rows. Because this is a double welt, this will give you a 15 row finished rib. (Always knit twice the number of rows required for the finished rib.)
Fold the knitting up and use the single transfer tool to pick up loops of the first row knitted in main yarn, the row next to the row of cord stitches, and place one loop onto each empty needle between the ones you've been knitting on. Bring each of those needles forward to B as you do it.
You may find it easiest to pick up the stitches like this:
Fold the knitting up towards you and then bring the waste knitting forward over your left forefinger. This makes it easy to follow the row of cord stitches which are lying along the top of your finger, and, next to the cord, the main knitting loops which are the ones you want. Try not to hold the knitting too high or you may get stitches caught on the sinkers.
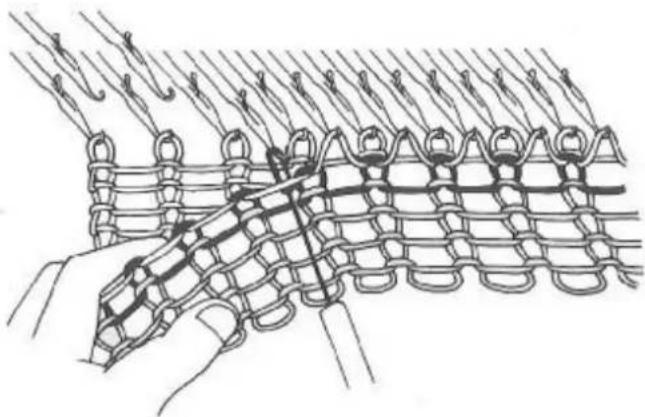
natural_image
Illustration of a hand weaving a knitted fabric with threads and loops (no text or symbols)All the needles should now be in B, each with one stitch on it.
Using the tool, loosen and pull out the first stitch of the nylon cast-on cord at the left hand side of the knitting. This may make a little knot sometimes.
Now hold the knitting back against the machine with your left hand, and pull out the cord to the right, with your right hand. Suddenly the cord will be out and the waste knitting will have dropped off.
Change the stitch dial back to the Main Tension (eg 6) and continue knitting for about 20 more rows.
Because we are only practicing, now break the yarn and unthread it from the Carriage.
Remove the knitting from the machine by taking the empty Carriage once across the needles.
To finish your welt
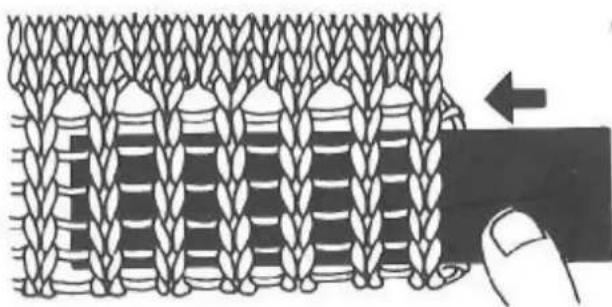
Thread something long and flat, like a ruler, through the rib, and pull it lengthways. Close the stitches together as you pull.
And there's your 1×1 double welt!
natural_image
Diagram of a knitted fabric with layered patterns and a finger pointing to a specific section (no text or symbols)Knitting a tension piece
When garments don't fit because you haven't done a tension piece, your poor knitting machine is often blamed unfairly.
To make sure this doesn't happen, you must know BEFORE you start knitting any garment, exactly how many stitches and how many rows there are to 10 cms.
The "tension" of your knitting is affected by the type of yarn, the kind of stitch used (tuck stitch for instance would give very different figures to plain stocking stitch), and of course by the stitch dial number (stitch size) which you are using.
So the tension piece must be knitted with the same yarn, and at the same stitch size (and in the same stitch pattern if you are using one) as you are going to knit the garment.
Knitting a stockinet...stocking stitch... tension piece
Using the same yarn and stitch dial number as you intend to use for the garment, cast on 70 stitches (35 each side of 0) using the open edge cast on as before. Knit 20 rows at Main Tension.
Thread the Carriage with a contrast yarn, and knit two rows.
Rethread with main yarn. Set the row counter to 000. Knit 30 rows.
Push the 21st needle on the left of 0 forward to D position. Hang a short piece of contrast yarn in the hook of that needle, and push it back to B position, so that the contrast loop knits in. Repeat with the 21st needle on the right of 0. There should be exactly 40 stitches in main yarn between the two contrast marker stitches which you have just put in by hand.
Knit 30 more rows.
Change to contrast yarn and knit 2 rows.
Rethread main yarn and knit 20 rows. Cut or break the yarn, unthread the Carriage, and take the empty Carriage across the needles to remove the knitting from the machine.
natural_image
Illustration of a person standing in front of a wall with multiple figures and a flag, no text or symbols present.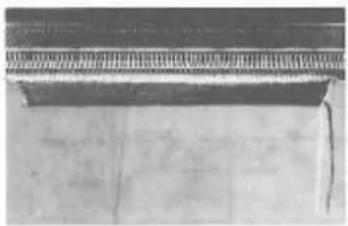
natural_image
Close-up of a wooden beam with textured surface and visible bracing (no text or symbols)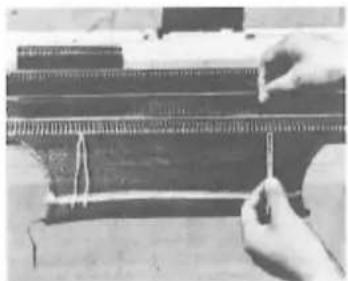
natural_image
Close-up of hands using a tool to interact with a wooden beam or wire (no visible text or symbols)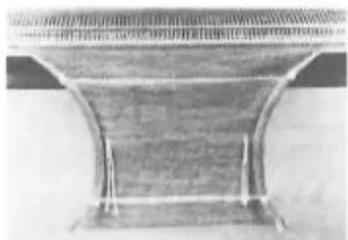
natural_image
Close-up of a metallic curved structural component with no visible text or symbolsBe sure to make a note of the stitch dial number used for your tension piece.
Measuring your tension piece
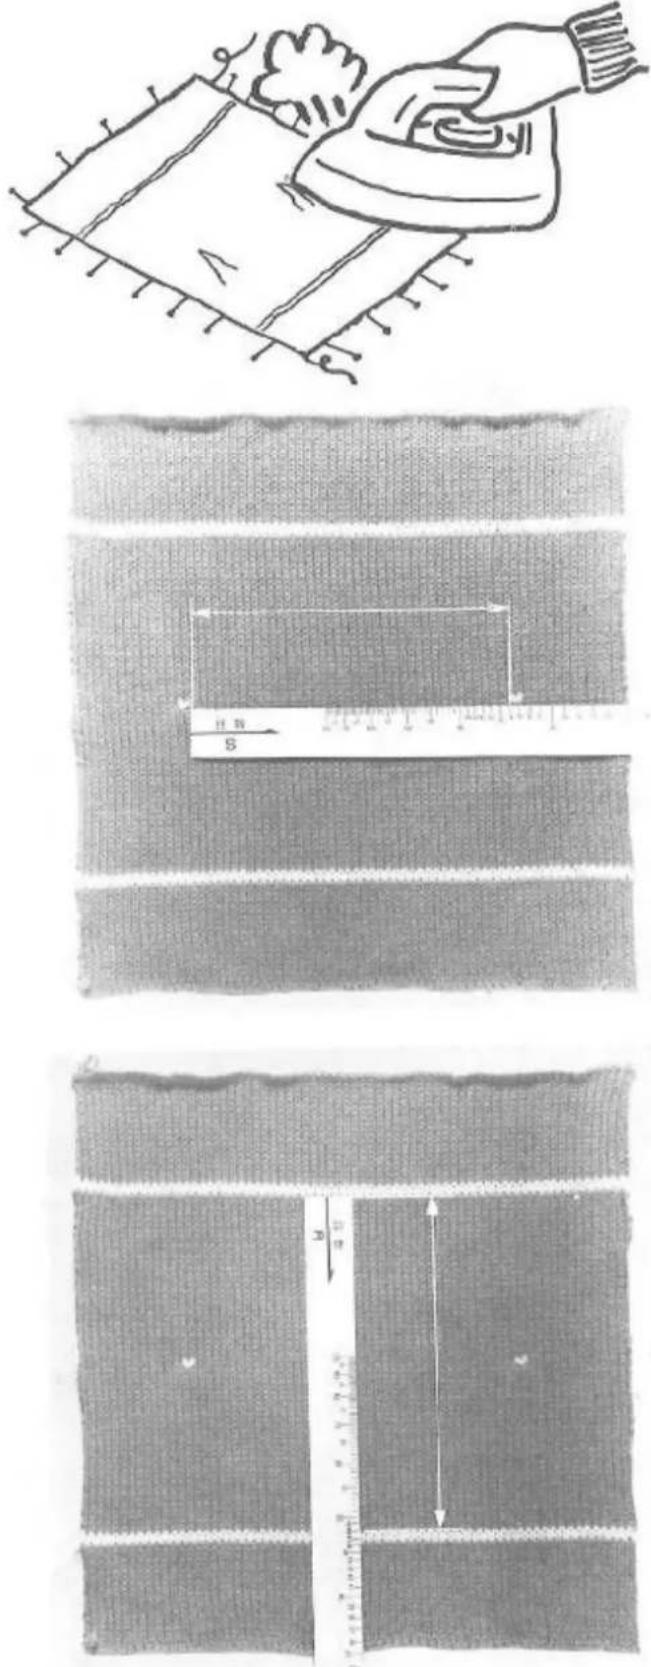
Now roll your tension piece into a tube, from side to side, and pull it lengthways. This allows the stitches to go back into shape after having been stretched across the machine needles.
The piece should now be pinned out flat, making sure not to stretch or distort the knitting.
Using a steam iron, or a dry iron over a damp cloth, steam your knitting. No pressure required! You are simply putting steam into the knitting to set the stitches and stop the edges from curling.
Allow the piece to dry before removing the pins. It should then be allowed to relax for several hours.
Place the tension piece ('knit' side up) on a smooth flat surface so that it lies flat without distortion.
Put the green gauge scale with the S side up to that the left end of the scale (where the S is) is touching the inside of the contrast marker stitch on the left. Read the number nearest to the inside edge of the other contrast marker stitch.
The scale is used to gauge the 40 main yarn stitches between the contrast stitches.
Now turn the scale over to the R side, and place the left end (where the R is) just touching the inside of one pair of contrast rows. Read the number nearest to the inside of the other pair of contrast rows.
The scale is used to gauge the 60 rows in main yarn between the pairs of contrast rows.
text_image
Technical diagram illustrating fabric cutting process with labeled measurements and stepsWrite down the tension and stitch size
The figures that you get are the stitches to 10 cms. and the rows to 10 cms. for that piece of knitting, and are usually called the tension for that particular piece.
Do remember to make a note of these figures. And even more important, note the stitch size (the number on the stitch dial) at which it was knitted.
Simple garments
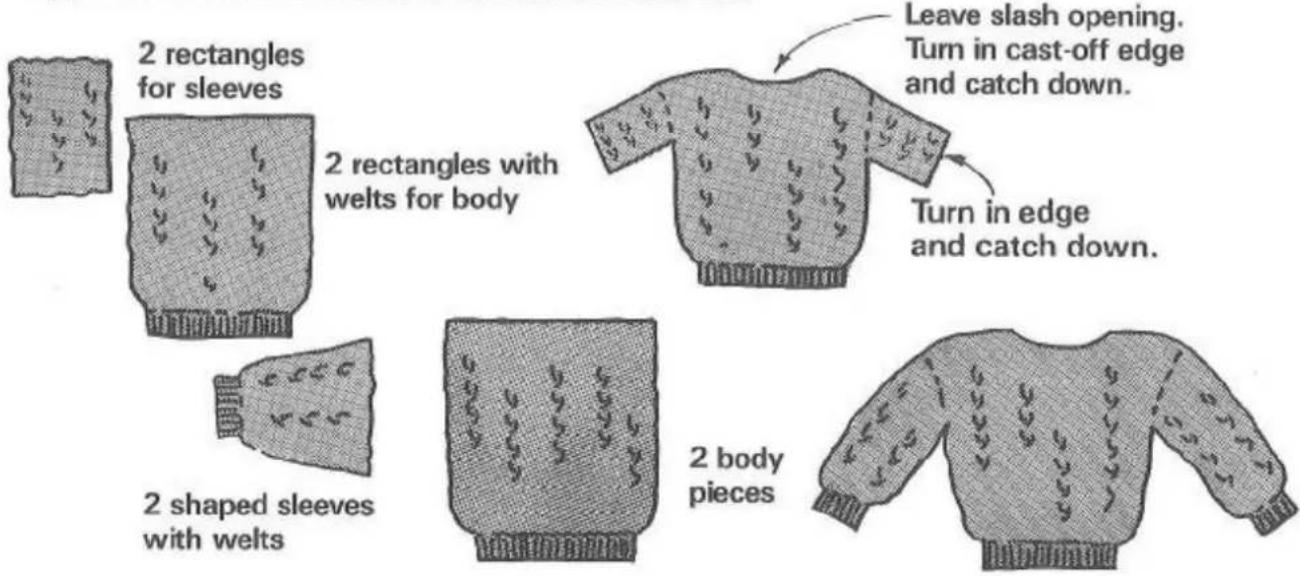
Now with just these basic techniques you could knit a simple garment—a sweater with dropped shoulders and slash neckline, for instance.
text_image
2 rectangles for sleeves 2 rectangles with welts for body Leave slash opening. Turn in cast-off edge and catch down. Turn in edge and catch down. 2 shaped sleeves with welts 2 body piecesIf you like doing rather than learning—have fun using your new machine to knit some basic shapes for a while—then we'll go on to find out how to do lots more interesting things on it. For making up and finishing, see also section four of this book.
Putting in yarn marks
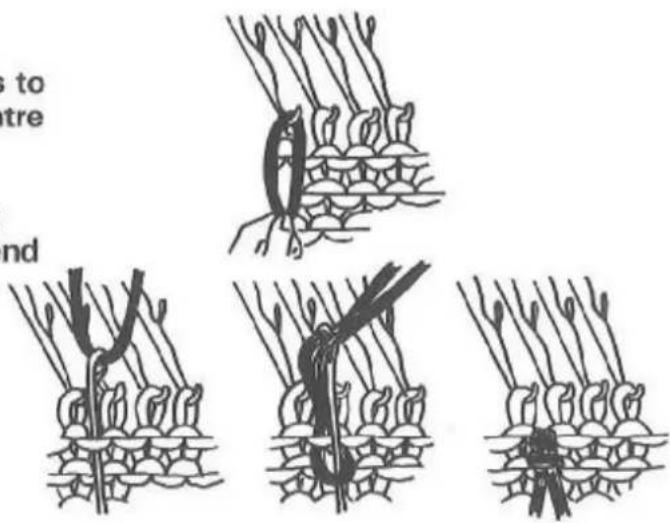
Patterns often suggest putting in yarn marks to show where to join pieces or where the centre of a neck is.
Method 1—marking the edge. Place a short piece of contrast yarn into the hook of the end needle and hold it while you knit across.
Method 2 – marking between stitches. Put the Latch Tool up under a loop of knitting, put a piece of contrast yarn in the hook and pull it through. Catch both ends of the contrast yarn in the hook, and pull them through the loop.
text_image
to tre ndPart 3\~ Punchcard patterning ... Contents
Page
Pattern Knitting Introduction 20
Pattern Panel 21
Putting in a Punch Card 21
Where will the pattern come? 23
Setting the machine for pattern knitting 24
Fairisle 25
Tuck Stitch 27
Tuck Stitch in Colours 28
Tuck Lace 30
Slip Stitch 31
Slip Stitch in Colours 32
Punch Lace 33
Weaving 34
Single motif 36
L Knob function 40
Useful Information for Pattern Knitting 41
Pattern knitting
There are 10 Punch Cards supplied with the Zippy de Luxe, numbered 1, 2, 3, 9, 10, 11, 12, 16, 17 and 20.
There are 20 Punch Cards supplied with the Zippy Plus, numbered 1 to 20.
Other card sets, also blank cards for punching your own patterns (later!) are also available.
IMPORTANT. Do not bend or fold the Punch Cards. Keep them away from heat, including continuous strong sunlight, when they are not in use.
All the cards are suitable for knitting Fairisle—the chart shows which cards are most suitable for the other pattern stitches.
text_image
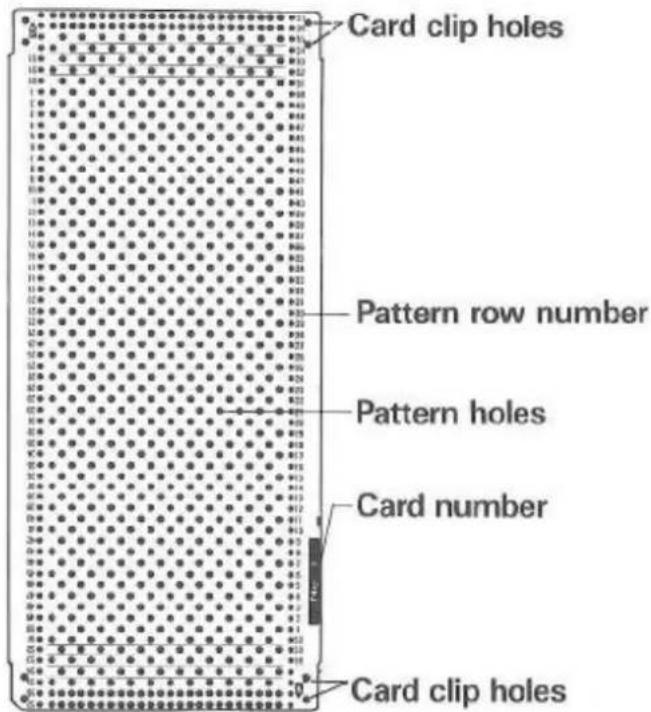
Card clip holes Pattern row number Pattern holes Card number Card clip holes| 1 | 2 | 3 | 4 | 5 | 6 | 7 | 8 | 9 | 10 | 11 | 12 | 13 | 14 | 15 | 16 | 17 | 18 | 19 | 20 | |
| Fair Isle | √ | √ | √ | √* | √* | √* | √* | √* | √ | √ | √ | √ | √* | √* | √* | √ | √ | √* | √* | √ |
| Tuck | √ | √ | √* | √* | √* | √ | √ | √ | √ | |||||||||||
| Slip | √ | √ | √* | √* | √* | √ | √ | √ | √ | √* | √* | |||||||||
| Punch Lace | √ | √ | √* | √* | √* | √ | √ | √* | √ | |||||||||||
| Weaving | √ | √ | √ | √* | √* | √* | √ | √ | √* | √ | ||||||||||
| Single Motif | √* | √* |
* Not supplied with Zippy De-Luxe ☐ For Zippy Plus only.
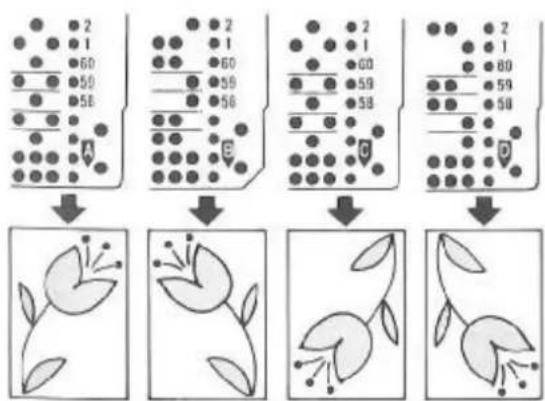
Each card can be used with either A, B, C or D letter in the bottom right hand corner.
Always use the A position unless you know that you want a different effect.
flowchart
graph TD
    A["First Step: Fruit with 2, 1, 60, 59, 58"] --> B["Second Step: Fruit with 2, 1, 60, 59, 58"]
    B --> C["Third Step: Fruit with 2, 1, 60, 59, 58"]
    C --> D["Fourth Step: Fruit with 2, 1, 60, 59, 58"]
natural_image
Line drawing of a stylized cat in motion, no text or symbols presentPattern panel
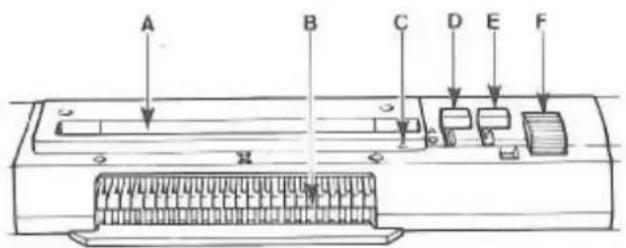
A Punch Card Slot
B Touch Levers
C Arrow pointing to card row number.
D Stop Knob
E L Knob
F Punch Card Feeding Dial
text_image
A B C D E FPutting in a punchcard
Get out a Punch Card (card number 1) and the Card Clips.
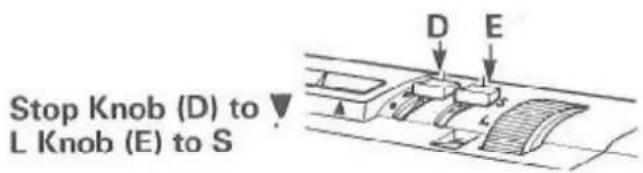
Put each of the two Knobs on the Pattern Panel to its back position.
text_image
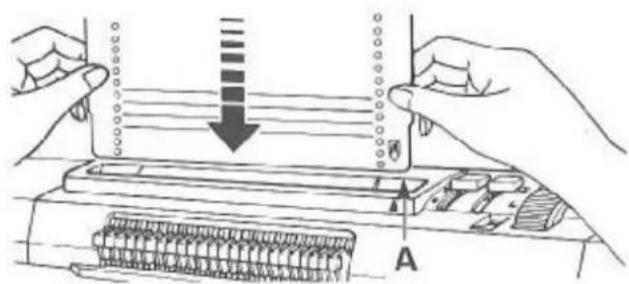
Stop Knob (D) to L Knob (E) to SHolding the Punch Card straight with the letter A on the bottom right hand corner facing you, put the bottom edge of the card into the long slot (A) in the Pattern Panel and push it down slightly.
text_image
Diagram illustrating a process with labeled components and directional arrows, likely depicting a mechanical or electronic assembly.Turn the Punch Card Feeding Dial (F) towards you and at the same time check that the red horizontal lines on the bottom of the card are horizontal. (If they are not, reverse the direction in which you turn the Feeding Dial, wind the card out and try again.)
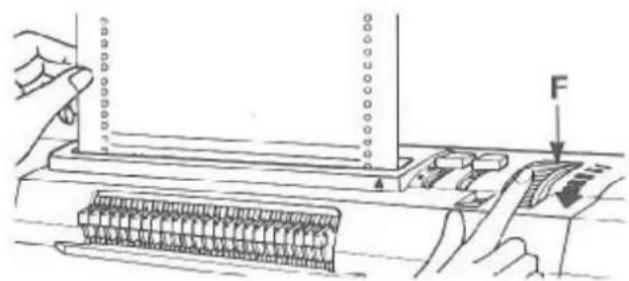
text_image
Diagram illustrating a mechanical assembly with labeled force F applied to a component, showing hand positioning and assembly steps.Continue turning the Feeding Dial until the card comes out at the back of the Pattern Panel. Keep turning until about 23 rds of the card is sticking out of the back, then fold the back, longer, piece forward and put it behind the front, shorter, piece.
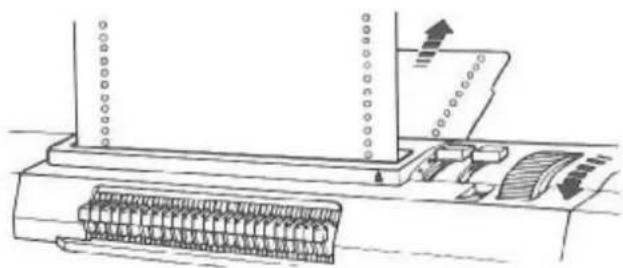
natural_image
Technical line drawing of a mechanical assembly with gears and a component (no text or symbols)Line up the two pairs of holes at the right edge and clip those together with a Card Clip. Do the same on the left.

natural_image
Mechanical assembly diagram showing two components: a chain link and a motor drive (no text or labels)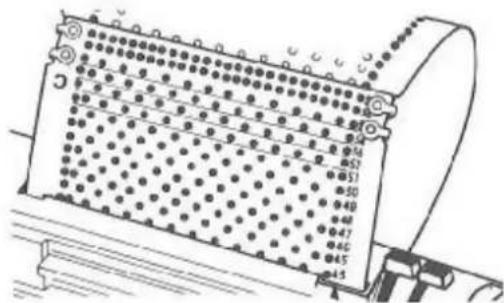
text_image
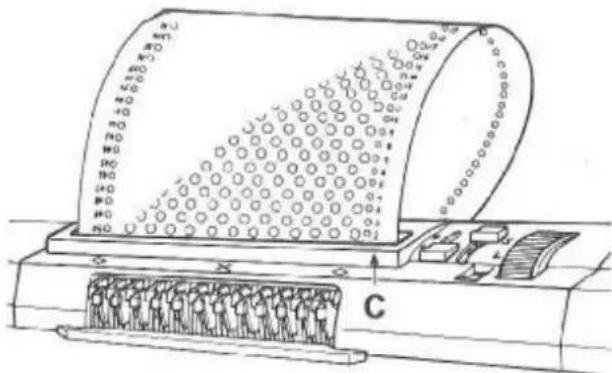
Technical diagram of a mechanical device with numbered components and alignment markersIt is important that the card is overlapped correctly. To check, look at the numbers on the right hand side of the card. When these are continuous, the card is joined correctly. If there is a gap in the numbers, the back piece has been put on top of the front piece. This is wrong and must be changed, or the card may jam. Look at the pictures and try again. All right?
You now have a continuous loop of pattern which will go round and round as you knit.
Turn the Feeding Dial until pattern row number 1 shows above the arrow (C) on the Pattern Panel.
Move the Stop Knob forward to ●
Did you notice the Touch Levers move when you moved the Stop Knob? Move the knob again and watch the levers. When the knob is back, the levers are in a straight line. When the knob is forward, the levers are set one back and one forward alternately—which is just the same as the pattern on the Punch Card.
text_image
Technical diagram of a mechanical device with labeled components and a group of people inside, marked with 'C' at the bottom.
natural_image
Simple line drawing of a fluffy cat lying down (no text or symbols)How do you know where the pattern will come on the knitting?
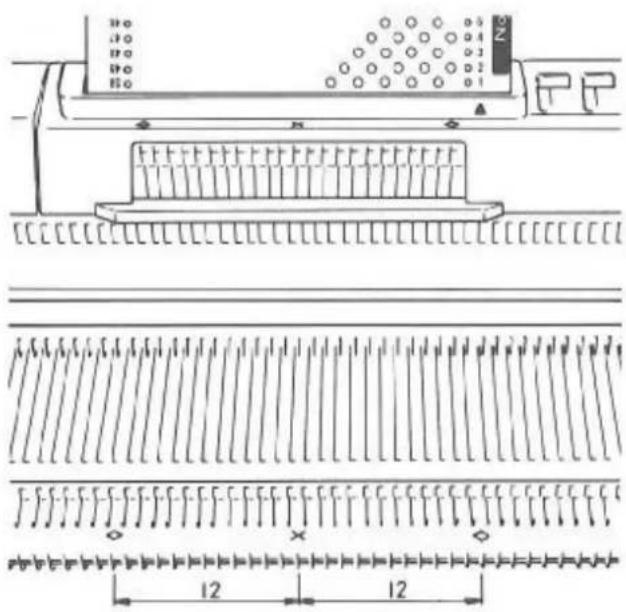
Look at the Pattern Panel again, and you will see a diamond mark at each end of the slot, and a cross in the middle, just above the Touch Levers.
Diamond to diamond is one complete pattern width of 24 stitches. The cross marks the centre of the pattern.
Look now at the front of the Needle Bed. Find the nought in the centre, and you'll see a cross beside it, which means that the centre of the pattern will be here. Immediately past needle 12 on each side of nought are the diamond marks showing where the edges of the pattern will come.
All the way along the Needle Bed are more diamonds, each 24 stitches apart, showing exactly where each pattern repeat will come.
text_image
No No No No N 12 12IMPORTANT. When you are pattern knitting, the Carriage must go at least 5 cms past the Pattern Panel every time you knit across.
Take particular care with this when you are knitting on needles on one side of the bed only, as for example when you are knitting the shoulder of a garment. Failure to take the Carriage right past the Pattern Panel on every single row will result in faulty patterning.
natural_image
Technical diagram of a mechanical assembly with labeled component A and rotational arrows (no text or symbols)
natural_image
Line drawing of a cat in a relaxed posture, no text or symbols presentSetting the machine for pattern knitting The carriage
The Side Levers on the carriage must always be set back (to the ▼ mark) for pattern knitting. (In fact they stay back almost all the time unless you have a ribber for your machine.) So make sure they are back, and we can forget about those.
The Front Levers are used only for holding position, (see page 66) so put these on II, and we can forget about those, too, until we want to have needles in holding position.
The tuck brushes on the brush plate are used only for doing tuck stitch. At all other times, the Tuck Levers should be set to the ●, non-working position. Make sure they are on ● now.
Zippy Plus only: The weaving brushes are used for weaving patterns, or the automatic closed edge cast-on. Set these to 0.
Right, that leaves us with the Cam Lever. This we shall be moving frequently, because this is what tells the Carriage what pattern stitch to knit.
The Pattern panel
The L Knob we will leave set back in S position for now—we shall come to that later.
The Stop Knob 'locks' or 'stops' the card from going round when it is set to the ● mark. When the knob is set to the ▼ mark, the card is free to move either automatically when you knit, or by hand when you turn the feeding dial.
The pattern knitting table
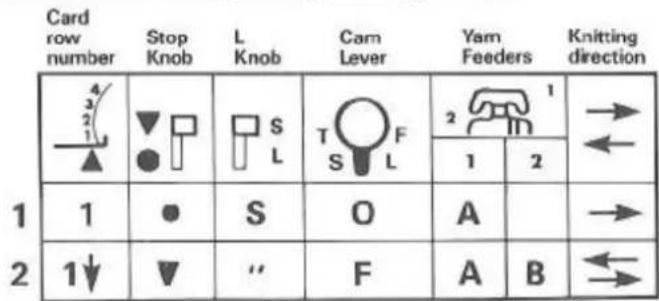
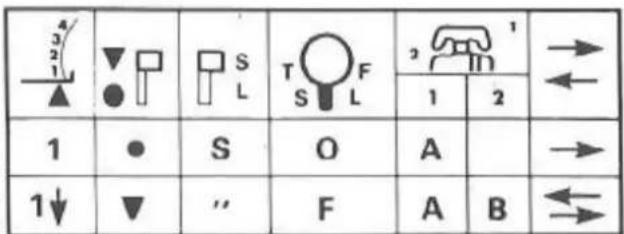
To help us to set the machine correctly when we start pattern knitting, we shall use a simple table, like this, and then nothing will get forgotten.
text_image
Card row number Stop Knob L Knob Cam Lever Yam Feeders Knitting direction 1 2 3 4 5 6 7 8 9 10 11 12 13 14 15 16 17 18 19 20 21 22 23 24 25 26 27 28 29 30 31 32 33 34 35 36 37 38 39 40 41 42 43 44 45 46 47 48 49 50 51 52 53 54 55 56 57 58 59 60 61 62 63 64 65 66 67 68 69 70 71 72 73 74 75 76 77 78 79 80 81 82 83 84 85 86 87 88 89 90 91 92 93 94 95 96 97 98 99 100The first row, step 1, is knitted from left to right (you will see this if you look in the far right hand column) and is for setting the machine ready for doing pattern knitting. Step 2 shows the settings needed for the actual pattern knitting itself.
Let's see how easy this is to follow by knitting some Fairisle. Take out Punch Card No 1 from the Pattern Panel.
Bring out 70 or 80 needles in the centre of the Needle Bed. Cast on and knit about 20 rows of stocking stitch. Finish knitting with the Carriage on the left.
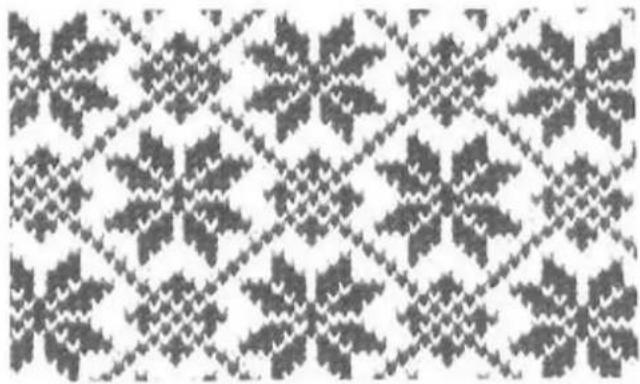
Fairisle
Two yarns of different colours are knitted in the same row to produce the Fairisle pattern.
The card used for this pattern is No 16-A (that is, Punch Card No 16, with the A at the bottom right).
Put this card into the Pattern Panel.
Set the controls as shown in step 1 of the That is:
The card is set so that row 1 is opposite the arrow.
The Stop Knob is brought forward to ●.
The L Knob is on S.
The Cam Lever is still on O for stocking stitch.
There is yarn threaded in feeder 1, but none yet in feeder 2.
Knit 1 row from left to right.
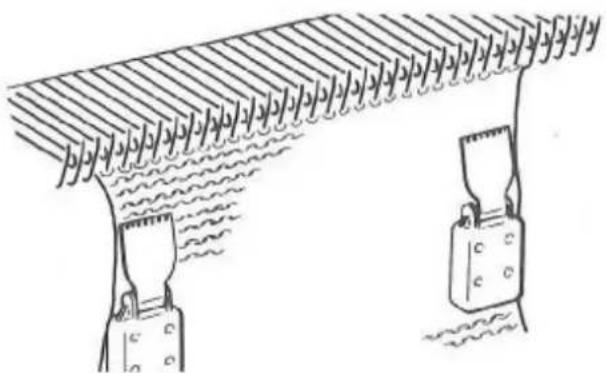
Hang a Claw Weight on each edge of the knitting.
Now set the controls as shown in step 2 of the Pattern Table. That is:
Release the card so that it can move on (an arrow beside the row number) by moving the Stop Knob back to ▼.
(The L Knob remains on S.)
Turn the Cam Lever until it points to F for Fairisle.
natural_image
Black and white geometric pattern with interlocking diamond shapes (no text or symbols)| 1 | 2 | |||||
| 1 | ● | S | O | A | → | |
| 2 | 1↓ | ▼ | " | F | A | B |
natural_image
Diagram of textile fabric with hanging clips and wavy fabric background (no text or symbols)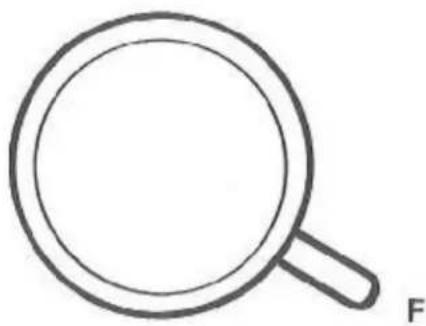
natural_image
Simple line drawing of a magnifying glass with a handle, labeled 'F' at the bottom right (no other text or symbols)Thread the contrast yarn (B) as follows.
Thread the yarn through the second side of the Auto Tension and catch the end in the Yarn Clip.
Now have a look at the Yarn Feeders on the Brush Plate. Check that after the first yarn was threaded (in feeder 1) the Yarn Feeder Gate was closed.
Take the end of the contrast yarn from the Yarn Clip and slide the yarn into feeder 2. The yarn just rests in front of the closed gate, and you will see it move from side to side as you knit. Don't worry, it won't come out!
Fasten the yarn end to the Table Clamp. Make sure that there is no loose yarn, by pulling the yarns down behind the Yarn Rod until both Tension Springs are almost horizontal.
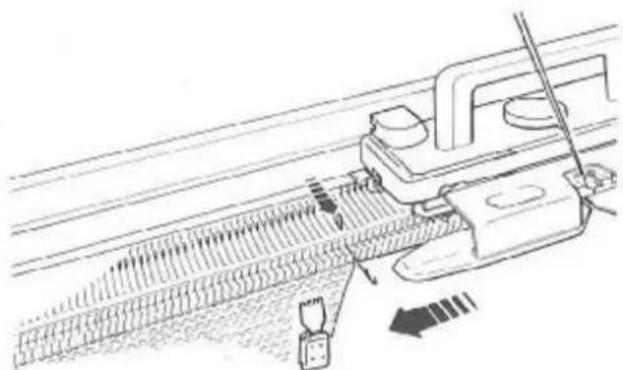
Knit 1 row carefully from right to left.
Continue knitting, making sure that the Carriage clears the end needle by at least 3 cms every time.
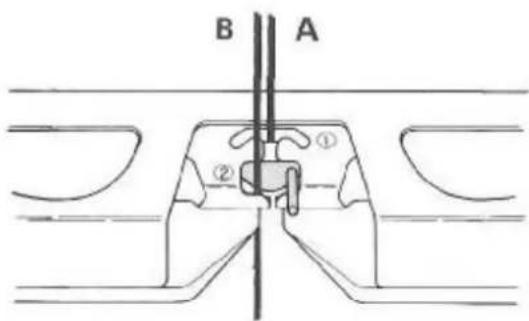
text_image
B A ① ②NOTE Move the Claw Weights up at intervals as the knitting grows.
If you find that the edge stitches are not knitting properly, even with the Weights on, bring the end needle on the side of the knitting next to the Carriage to D position before knitting each row. (If there are some needles already in Holding Position, bring the end needle to C instead of D.)
natural_image
Technical line drawing of a mechanical assembly with no visible text or symbolsTuck stitch
The card used for this pattern is Punch Card No 12-A.
Put this card into the Pattern Panel.
Set the controls as shown in Step 1 of the Pattern Table.
Knit 1 row from left to right.
Hang a Claw Weight on each edge of the knitting.
Move both Tuck Levers (those on the front of the Brush Plate) to-
Set the controls as shown in step 2 of the Pattern Table:
Stop Knob to ▼
Cam Lever to T for tuck stitch
Notice that there is no second yarn threaded for this stitch.
Continue knitting.
When you have finished knitting tuck stitch, remember to put the Tuck Levers back to ●.
NOTE
If you find that the edge stitches are not knitting properly, even with weights on, bring the two end needles on the side away from the Carriage forward to D position before knitting each row. (If there are some needles already in Holding Position, bring the end needles to C instead of D.)
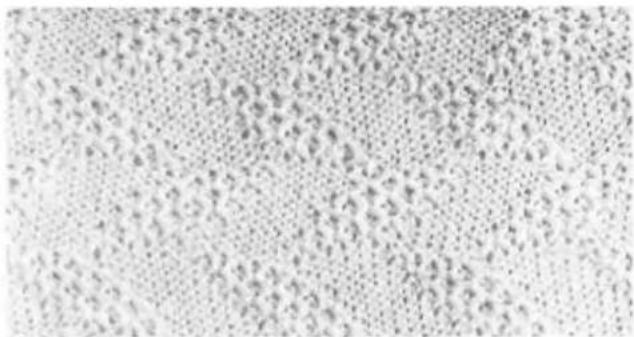
natural_image
Abstract pattern of scattered dots and lines on a white background (no text or symbols)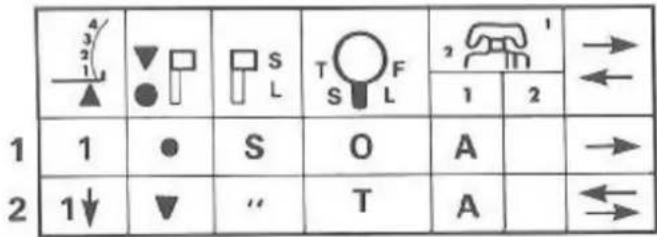
text_image
1 2 3 4 5 6 7 8 9 10 11 12 13 14 15 16 17 18 19 20 21 22 23 24 25 26 27 28 29 30 31 32 33 34 35 36 37 38 39 40 41 42 43 44 45 46 47 48 49 50 51 52 53 54 55 56 57 58 59 60 61 62 63 64 65 66 67 68 69 70 71 72 73 74 75 76 77 78 79 80 81 82 83 84 85 86 87 88 89 90 91 92 93 94 95 96 97 98 99 100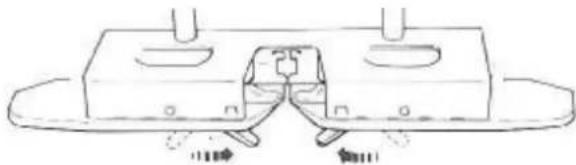
natural_image
Technical line drawing of a mechanical component with two ports and a central bracket (no text or symbols)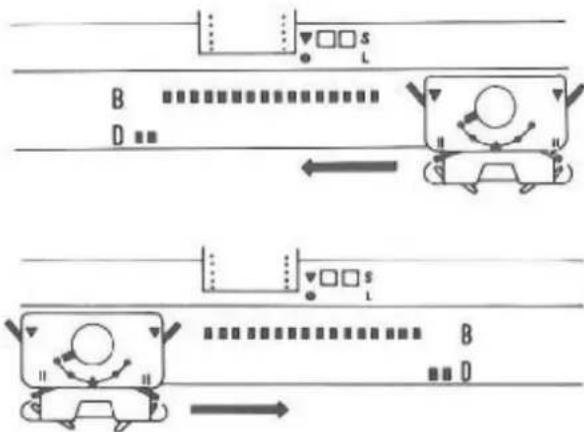
text_image
B DTuck stitch in colours
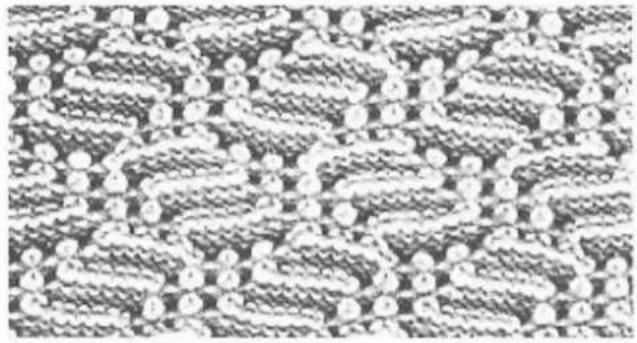
Only 1 yarn is knitted at once, but by changing the colour in feeder 1 every few rows, some fascinating colour effects can be achieved.
Punch Card No 12-A is still being used.
Set the controls as shown in Step 1 of the Pattern Table.
Knit 1 row from left to right.
Hang a Claw Weight on each edge of the knitting.
Move both Tuck Levers (those on the front of the Brush Plate) to-
Set the controls as shown in step 2 of the Pattern Table:
Stop Knob to ▼
Cam Lever to T for tuck stitch
Knit 2 rows.
Remove the main yarn from Yarn Feeder 1 and either place it in the cut-out at the end of the Needle Bed, or take it right round the end of the machine.
Thread a contrast yarn into Yarn Feeder 1.
Knit 2 rows with this second yarn.
Remove the second yarn from Yarn Feeder 1 and place it in the cut-out or round the end of the Needle Bed.
Thread the main yarn again into Yarn Feeder 1.
Knit the required number of rows, using the two yarns alternately, two rows knitted in each colour, as shown by the arrows in the end column of the Pattern Table.
Notice from the table that even for multi-colour tuck stitch, there is never any yarn in feeder 2.
natural_image
Close-up of a textured fabric with repeating white circular patterns on a dark background (no text or symbols)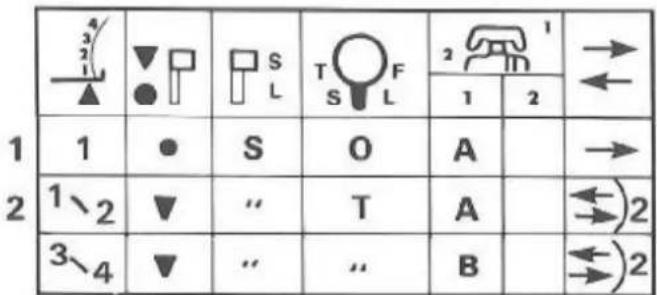
text_image
1 2 3 4 5 6 7 8 9 10 11 12 13 14 15 16 17 18 19 20 21 22 23 24 25 26 27 28 29 30 31 32 33 34 35 36 37 38 39 40 41 42 43 44 45 46 47 48 49 50 51 52 53 54 55 56 57 58 59 60 61 62 63 64 65 66 67 68 69 70 71 72 73 74 75 76 77 78 79 80 81 82 83 84 85 86 87 88 89 90 91 92 93 94 95 96 97 98 99 100
natural_image
Technical line drawing of a mechanical assembly with no visible text or symbols
natural_image
Line drawing of a mechanical device with a handle and lever mechanism, no text or symbols presentWhy not try knitting some of the other cards, first in single colour tuck, then using two or more different colours. See page 20 for suitable cards.
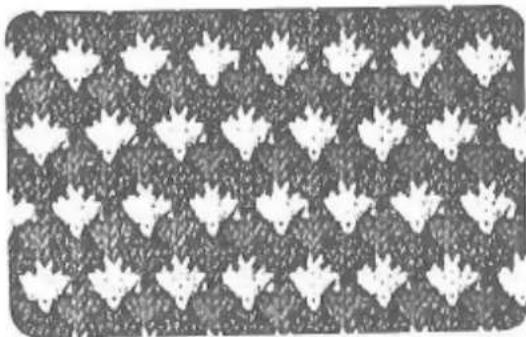
Punch Card No 3-A is an excellent tuck stitch card.
Knit it in a single colour first, then try knitting it in 3 colours as shown in the Pattern Table.
natural_image
Patterned fabric with repeating white leaf-like shapes on a dark background (no text or symbols)Look in the right hand column and you'll see that 4 rows are knitted in each colour this time. The third colour you could try feeding by hand (as you knitted in the cord) if you didn't want to re-thread one side of the Auto Tension.
Note: For doing a lot of multicolour tuck knitting, it might be worth getting a second complete Auto Tension assembly for your machine.
Note: End needle settings to stop faulty edge stitches are the same as for single colour tuck stitch (page 27).
Remember to put the Tuck Levers back to ● when you finish knitting in tuck stitch.
| 1 | 2 | |||||
| 1 | ● | S | O | A | → | |
| 1~4 | ▼ | .. | T | A | ←)4 | |
| 5~8 | .. | .. | .. | B | ←)4 | |
| 9~12 | .. | .. | C | ←)4 | ||
natural_image
Line drawing of a rodent-like animal with long antennae and curved horns, resting on a body (no text or symbols)Tuck lace
This is another variation of Tuck Stitch. Only one yarn is used, but the needle setting is changed. Previous patterns have been knitted on all needles. For this pattern, only selected needles are used, 1 needle out of 4 being returned to A position before knitting.
The card used for this pattern is Punch Card 3-A.
Put this card in the Pattern Panel.
Set the controls as shown in step 1 of the Pattern Table.
Knit 1 row from left to right.
Hang a Claw Weight on each edge of the knitting.
The next step is to transfer every 4th stitch to its adjacent needle as shown, but before you do this, look carefully at the Pattern Table. The important thing is that your stitches are transferred exactly as shown. Find the O on the Table which corresponds to the O on the Needle Bed. Notice that the 3 needles on the left of O are knitting but that the one directly to the right of O is not knitting. Start at O and set your needles exactly as shown on the table, transferring the stitches and pushing the empty needles back to A position.
Set the controls as shown in step 2.
Knit the required number of rows.
An even more lacy fabric can be produced by transferring the stitches from the centre needles of each group of three, leaving only alternate needles in B position.
Check that the needle on the left of O is still in B position, and that the one on the right of O is back in A.
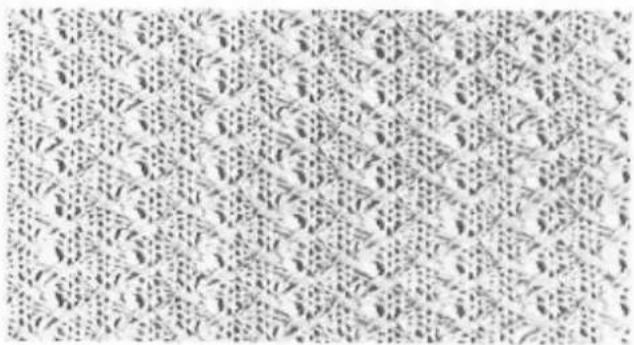
natural_image
Abstract pattern of repeating diamond-like shapes with no text or symbols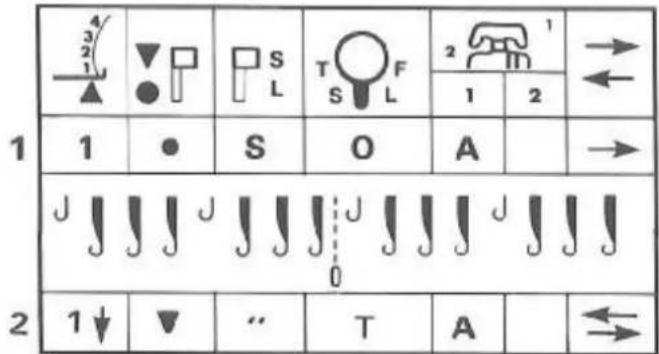
text_image
1 2 3 4 5 6 7 8 9 10 11 12 13 14 15 16 17 18 19 20 21 22 23 24 25 26 27 28 29 30 31 32 33 34 35 36 37 38 39 40 41 42 43 44 45 46 47 48 49 50 51 52 53 54 55 56 57 58 59 60 61 62 63 64 65 66 67 68 69 70 71 72 73 74 75 76 77 78 79 80 81 82 83 84 85 86 87 88 89 90 91 92 93 94 95 96 97 98 99 100
text_image
J J J J J J J J J J J J J J J J J J 0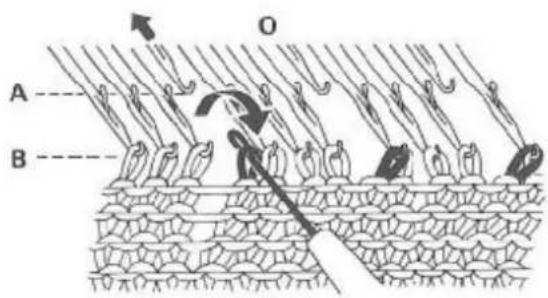
text_image
A B O
natural_image
Line drawing of a cat playing a stringed instrument (no text or symbols)Slip stitch
The card used for this pattern is Punch Card No 10-A.
Put this card into the Pattern Panel.
Set the controls as shown in Step 1 of the Pattern Table.
Knit 1 row from left to right.
Hang a Claw Weight on each edge of the knitting.
Set the controls as shown in step 2 of the Pattern Table:
Stop Knob to ▼
Cam Lever to S for slip stitch
Notice that there is no second yarn threaded for this stitch.
Continue knitting.
You may find that the fabric is nicer knitted at a slightly higher Stitch Dial setting than the usual Main Tension for that yarn. Try it.
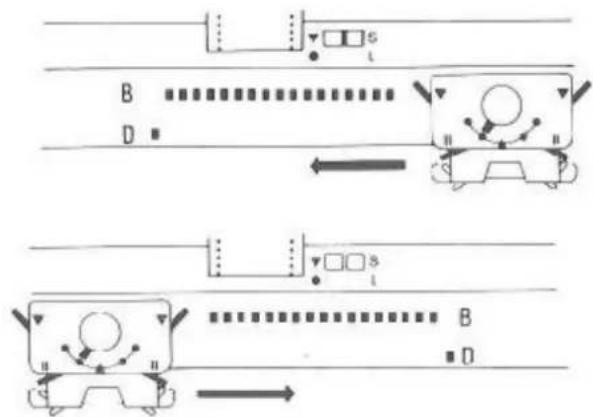
For neat edges, push one end needle on the side away from the Carriage forward to D position before knitting each row. (If there are some needles already in Holding Position, bring the end needle to C instead of D.)
natural_image
Simple line drawing of two cats in a row, one lying on the other's back (no text or symbols)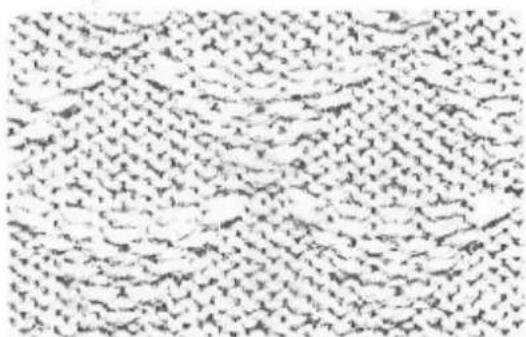
natural_image
Abstract pattern of scattered black dots on white background, no text or symbols present| 1 | 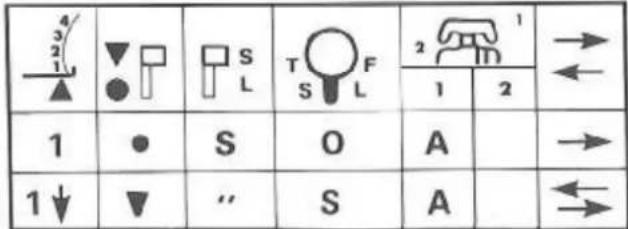 |
| 2 |
flowchart
graph TD
    A["Process 1"] --> B["Component B"]
    C["Process 2"] --> D["Component D"]
    B --> E["Arrow to Process 1"]
    D --> F["Arrow to Process 2"]
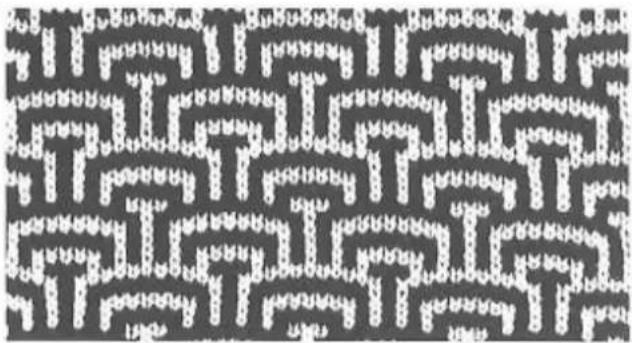
Slip stitch in colours
Only 1 yarn is knitted at once, but by changing the colour in feeder 1 every few rows, some fascinating colour effects can be achieved.
Punch Card No 10-A is still being used.
Set the controls as shown in Step 1 of the Pattern Table.
Knit 1 row from left to right.
Hang a Claw Weight on each edge of the knitting.
Set the controls as shown in step 2 of the Pattern Table:
Stop Knob to ▼
Cam Lever to S for slip stitch
natural_image
Patterned fabric with repeating white and black motifs on a dark background (no text or symbols)1
| 2 | → | |||||
| 1 | 2 | |||||
| 1 | ● | S | O | A | → | |
| 1、2 | ▼ | .. | S | A | ←)2 | |
| 3、4 | .. | .. | .. | B | ←)2 |
Knit 2 rows.
Remove the main yarn from the Yarn Feeder and place it in the cut out or round the end of the Needle Bed (as for Tuck Stitch).
Thread a contrast yarn in Yarn Feeder 1.
Knit 2 rows with the second yarn.
Continue knitting, using the two yarns alternately as shown.
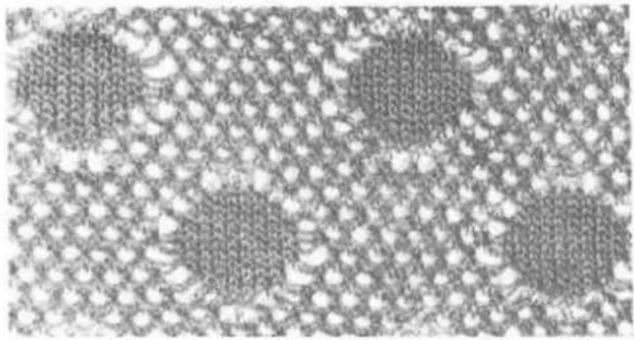
Punch lace
This stitch is knitted using 2 yarns, a main yarn plus a much finer yarn. A fine transparent nylon thread has been used here.
The card used for this pattern is Punch Card No 17-A.
Zippy Plus owners: use Punch Card No. 18-A. This will produce a diamond pattern (not illustrated).
Put the card into the Pattern Panel.
Set the controls as shown in Step 1 of the Pattern Table.
Knit 1 row from left to right.
Hang a Claw Weight on each edge of the knitting.
Put the left Front Lever to position I.
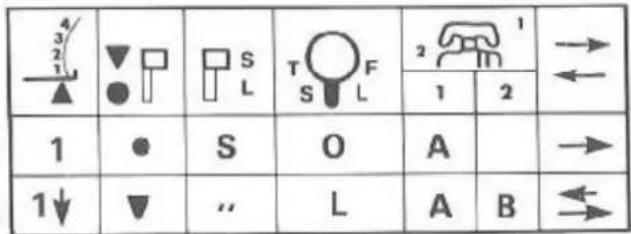
Set the controls as shown in step 2 of the Pattern Table:
Stop Knob to ▼
Cam Lever to L for Lace
Thread the nylon thread through the empty side of the Auto Tension (put the dial at the top of the Auto Tension to 7, the tightest setting).
Now slide it into Yarn Feeder 2 exactly as we put the second yarn in for Fairisle knitting.
Bring the end needle at both edges of the knitting forward to D position.
Knit from right to left. The end needles will not knit.
Knit from left to right. The end needles will knit back to B position.
Continue knitting, bringing the end needles forward on alternate rows as you do so. This makes sure that the fine nylon thread knits correctly at the beginning of the rows.
Instead of the nylon thread, you could try using a cotton in a toning colour with your main yarn.
natural_image
Close-up of a woven fabric with repeating geometric patterns and small circular holes (no text or symbols)1
2
text_image
4 3 2 1 ▲ ▼ □ ● S L T ○ F S L 2 1 1 2 1 ● S O A → 1↓ ▼ .. L A B ←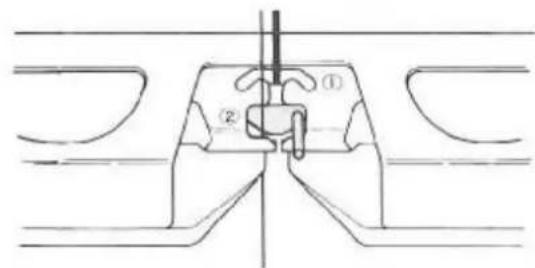
text_image
Technical diagram showing a mechanical assembly with labeled parts ① and ②, likely illustrating a valve or actuator mechanism.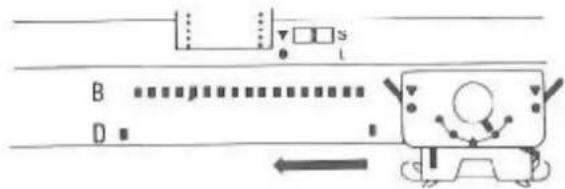
text_image
B D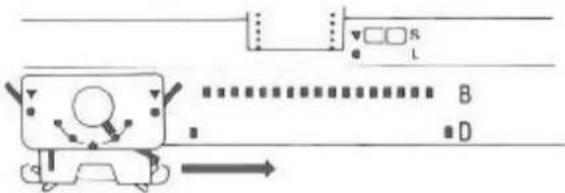
text_image
Diagram showing a device connected to a control panel with labeled ports S and L, and a directional arrow indicating flow or movement.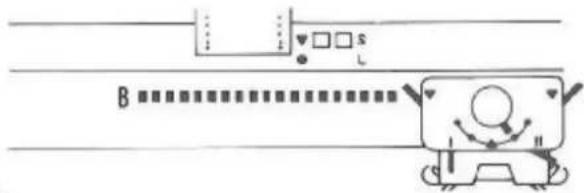
text_image
BPut the left Front Lever to position II after knitting.
Zippy De-Luxe owners can knit weaving patterns, using the AW-1 automatic weaving arm, which is an optional accessory.
Weaving patterns are made by passing thick or fancy yarns over and under stitches knitted in the main yarn.
The card used for this pattern is punch card No 9-A.

natural_image
Abstract pattern of interlocking black and white shapes on a white background (no text or symbols)Put the card into the pattern panel.
Set the controls as shown in step 1 of the Pattern Table.
Note the new instruction column for the weaving knobs, marked 'W'. Knit 1 row from left to right.
Hang a claw weight on each edge of the knitting.
Set the controls as shown in step 2 of the Pattern Table:
Stop knob to ▼
Weaving knobs to 📋
1
2
| W | |||||||
| 1 | 2 | ||||||
| 1 | S | O | A | O | |||
| 1↓ | ” | “ | A | ||||
text_image
Technical diagram showing mechanical assembly with labeled parts A and B, likely illustrating a lathe or cutting process.Thread the weaving yarn through the empty side of the Auto Tension.
Place the weaving yarn "A" inside the weaving yarn guide "B" at the left side of the brush plate. The main yarn stays in yarn feeder 1.
Set the stitch dial one number higher than for stockinet.
Bring the end needle on the carriage side to D position. Knit from right to left.
Remove the weaving yarn from the weaving yarn guide. Bring the weaving yarn underneath the brush plate, and move it to the right side of the carriage.
Place the weaving yarn inside the weaving yarn guide on the right of the brush plate.
Bring the end needle on the carriage side to D position. Knit from left to right.
Continue knitting, moving the weaving yarn to the side of the carriage nearest the knitting on every row.
natural_image
Technical line drawing of a mechanical assembly with no visible text or symbols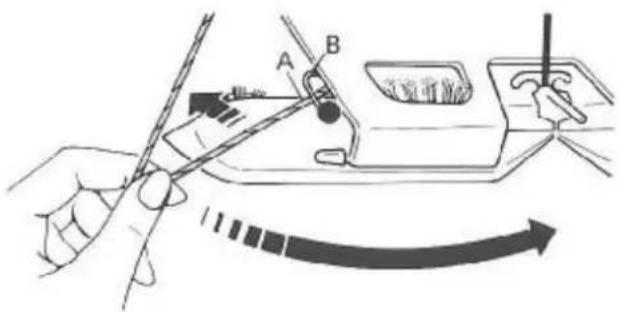
text_image
Diagram illustrating a mechanical or electrical procedure with labeled components A and B, showing hand tooling and directional arrows.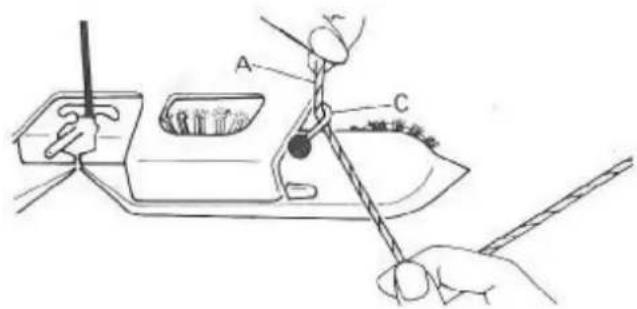
text_image
Diagram illustrating a mechanical or electrical setup with labeled components A and C, showing hands operating a tool and interacting with a device.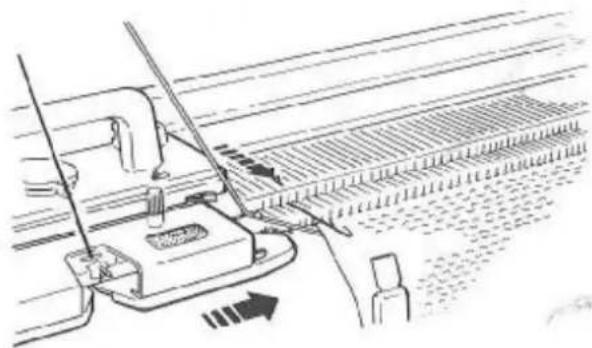
natural_image
Technical line drawing of a mechanical assembly with no visible text or symbols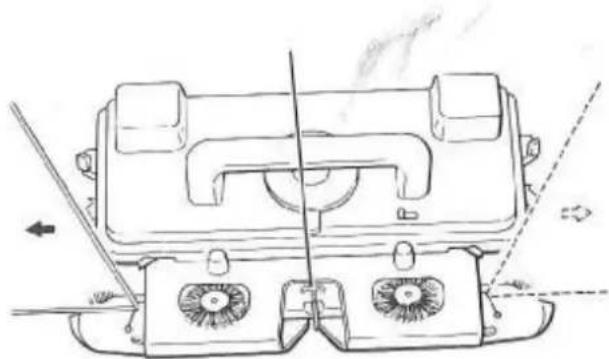
natural_image
Technical line drawing of a mechanical component with no visible text or symbolsSingle motif
for Zippy Plus only.
Zippy De-Luxe owners can knit single motif patterns, using the magic cam set, which is an optional accessory.
Single motifs can be knitted, usually in Fair Isle, in small areas of the knitting, not right across the needle bed.
The card used for this pattern is Punch Card No 5-A. Put the card into the pattern panel.
Set the controls as shown in step 1 of the Pattern Table. Knit 1 row from left to right. Hang a claw weight on each edge of the knitting.
Take the left and right magic cams from the Accessory Box. Set both the side levers forward, to the spot.
Place the magic cams onto the plate "A", making sure that the triangle marks on the magic cams, and on the carriage are facing each other.
Fasten the magic cams to the extension plates, by turning the knobs clockwise.
natural_image
Pixelated black-and-white image of a stylized human face (no text or symbols)1
2
text_image
4 3 2 1 ▲ ▼ ● S L T S F L 2 1 2 → ← 1 ● S O A → 1↓ ▼ "" F A B ← →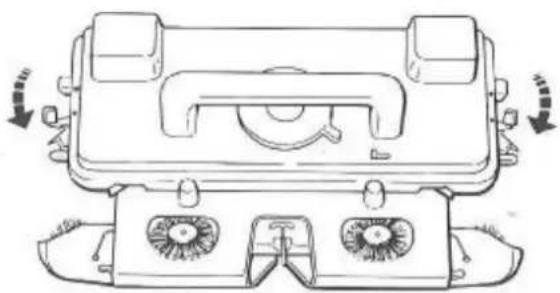
natural_image
Technical line drawing of a mechanical component with two flanged parts and directional arrows indicating motion (no text or symbols)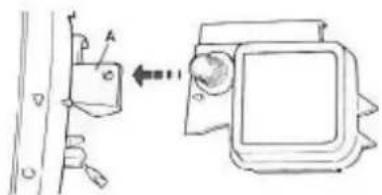
text_image
Diagram showing a hand holding a device labeled A connected to a device with an arrow indicating direction, alongside a separate view of the device.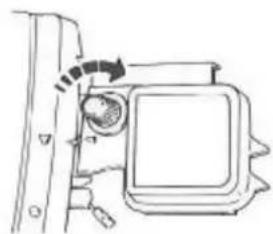
natural_image
Simple line drawing of a mechanical component with a circular feature and a rectangular body (no text or symbols)Now put both side levers back to ▼
If you make a mistake while knitting, and want to move the carriage using the Carriage Release Lever, remove the magic cams from both sides of the carriage.
Take the left and right point cams from the Accessory Box. The left point cam is marked M for motif, and L for left. The right point cam is marked M for motif, and R for right.
Set the point cams behind needles in working position. Place the right point cam between the 12th and 13th needles on the right of centre 0. The division between orange and white on the point cam goes between the 12th and 13th needle.
Place the left point cam between the 12th and 13th needles on the left of centre 0. The division between orange and white on the point cam goes between the 12th and 13th needle.
Make sure that the studs of the point cams fit into the needle grooves at the back of the needle bed.
Take the yarn separators from the Accessory Box. Open the latches of the 4th, 5th and 6th needles in A position at the left and right of the B position needles. Place the yarn separators under these three needles, and push them back as far as they will go. Place the main yarn (in feeder 1) over the yarn separator.
Hang the claw weight on the knitting, below the left and right point cams.
Set the controls as shown in step 2 of the Pattern Table. Stop knobs to ▼ Cam lever to F Thread the contrast yarn into feeder 2. Knit 1 row from right to left.
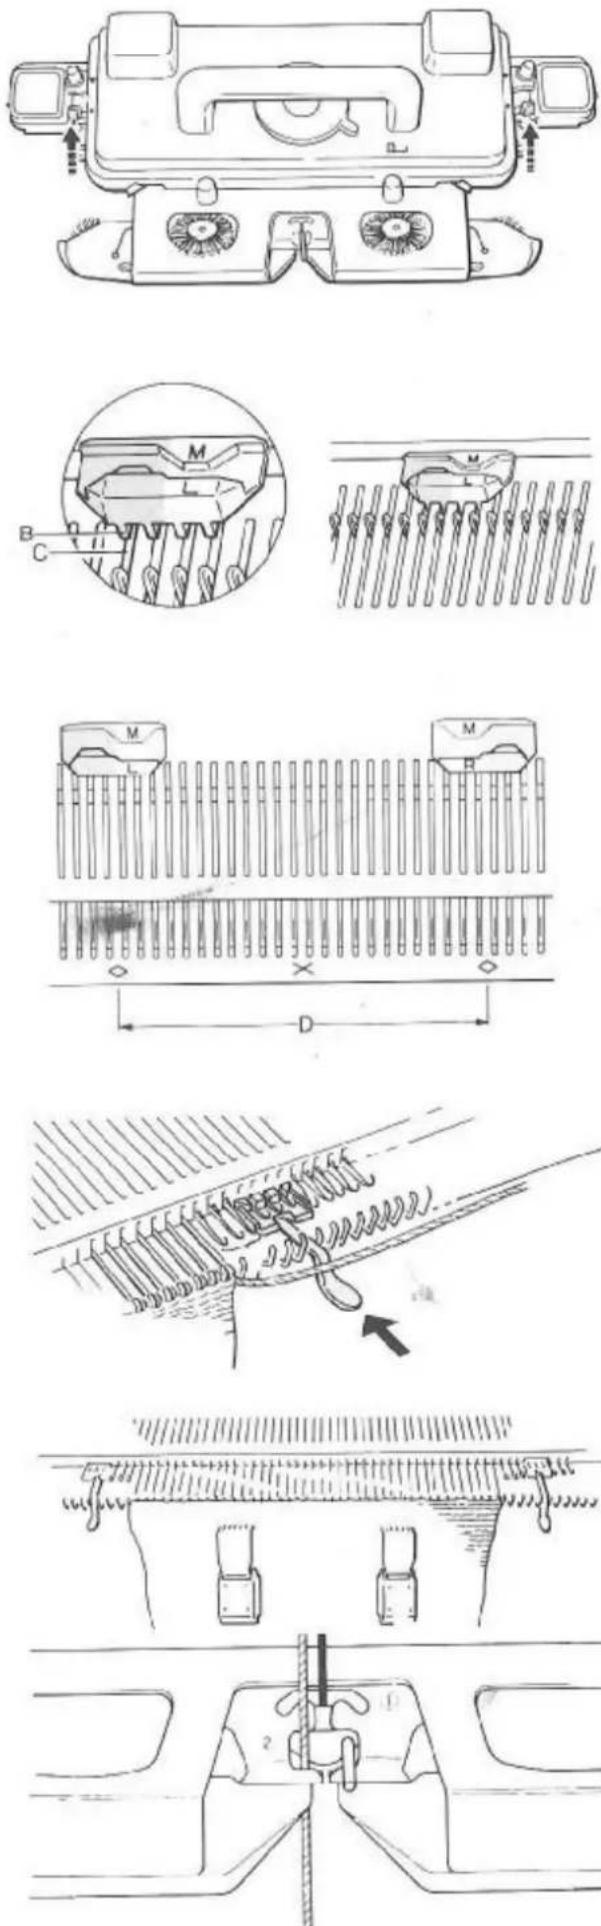
Make sure that the carriage passes the yarn separator by about 2-3 cm before starting the next row.
When knitting a single motif in Fair Isle, the yarns must be arranged as follows: - yarn in feeder 1 – over the yarn separator yarn in feeder 21 – under the yarn separator
To prevent the single motif separating from the main knitting and making loose stitches:
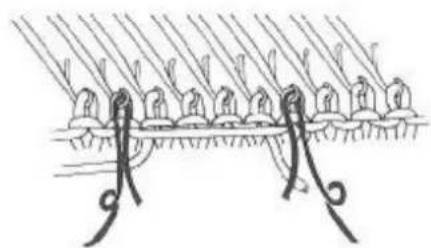
Cut two pieces of the main yarn, about 50-60cm long. Place the yarn in the hook of the needle, next to the last stitch of the single motif at the carriage side only. Knit one row, and place the yarn in the hook of the needle, next to the last stitch of the single motif at the carriage side only.
Repeat on the carriage side only on every row.
natural_image
Diagram of a plant seedling with leaves growing from soil, showing root system and stem structure (no text or labels)
natural_image
Diagram of a mechanical or structural assembly with curved elements and vertical lines, no visible text or symbols.
natural_image
Diagram of a layered structure with curved elements and diagonal lines, no text or symbols presentTo knit stockinet after single motifs, remove the point cams, the magic cams, and set the cam lever to 0.
Single motif variation
There are two sets of point cams in the Accessory Box.
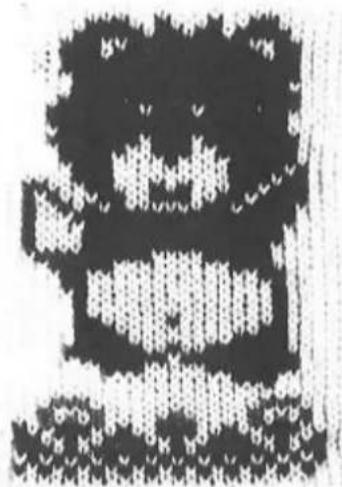
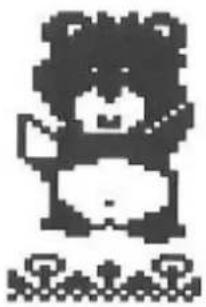
You can vary single motif patterns by using the point cams as shown below. Your machine will always make one complete pattern between two diamond marks. Have another look at page 23. To knit 1 bear, place one set of point cams – one left and one right – at adjacent ◇ marks.
natural_image
Pixelated black-and-white illustration of a bear holding an object, standing on grass (no text or symbols)
natural_image
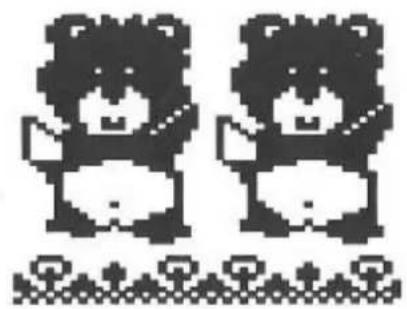
Pure electrical circuit lines without any symbolsTo knit 2 bears, move the left or the right point cam to the next adjacent mark.
natural_image
Pixel art illustration of two bears holding books, standing on a patterned floor (no text or symbols)
text_image
Diagram illustrating a process with labeled components and directional arrow, showing a container with 'M' and a dashed box with an arrow.To knit 2 bears with a gap in between, use the second set of point cams at ◇ marks away from the first set.
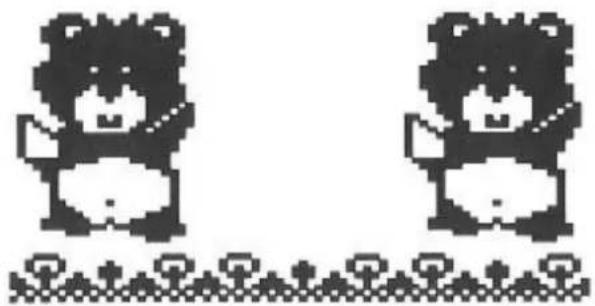
natural_image
Pixel art illustration of two bears standing side by side with flowers at the base (no text or symbols)
text_image
Diagram showing a mechanical or electrical system with labeled components M and H, connected by spring-like elements and directional arrows.L knob function
When the L Knob is set to L, the Punch Card moves only on alternate rows, thus producing an elongated pattern.
The card used for this pattern is Punch Card No 16-A.
Zippy Plus owners: use Punch Card No 18-A. This will produce an elongated diamond pattern (not illustrated).
Set the controls as shown in Step 1 of the Pattern Table.
Knit 1 row from left to right.
Hang a Claw Weight on each edge of the knitting.
Set the controls as shown in step 2 of the Pattern Table:
Stop Knob is still on ●
L Knob is still on S
Cam Lever to F for Fairisle
Thread second yarn in Feeder 2
Knit one row from right to left.
Set the controls as shown in step 3 of the Pattern Table:
Stop Knob to ▼
L Knob to L
Continue knitting.
Note: When you are using the L Knob, you must remember to do step 2 if you want your elongated pattern to start correctly. That is, for the first row of the pattern, the card remains locked on row 1 and the L Knob stays on S.
The colours in the Indicator beside the L Knob alternate.
Red-a new pattern row will be knitted next.
Blue—the pattern row will be repeated.
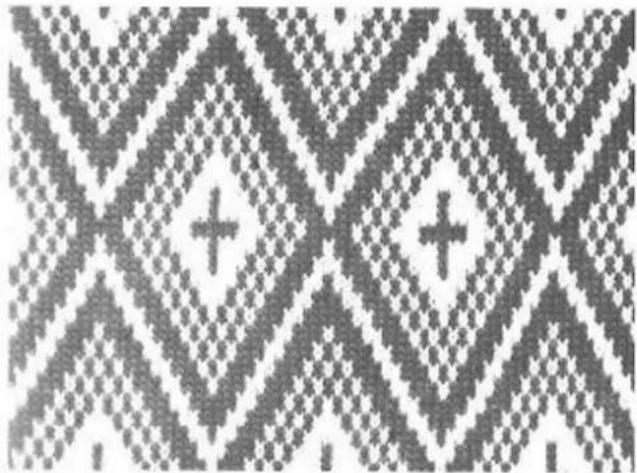
natural_image
Abstract geometric pattern with repeating diamond shapes and central cross-like elements (no text or symbols)| 2 | ||||||
| 1 | 2 | |||||
| 1 | 1 | ● | S | O | A | |
| 2 | 1 | ● | S | F | A | B |
| 3 | 1↓ | ▼ | L | .. | .. | .. |
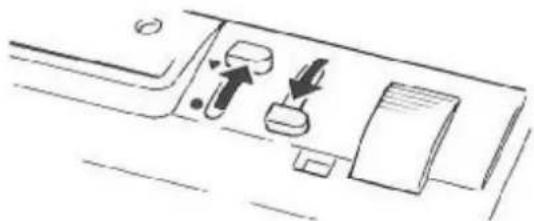
natural_image
Diagram of a car interior showing directional arrows and compartments (no text or symbols)
natural_image
Line drawing of a cat resting on a coiled cord (no text or symbols)Useful information for pattern knitting
How to pick up the pattern without knitting a stocking stitch row. (Step 1 of the Pattern Tables, or after unravelling.)
With the carriage on the right, push the Carriage Release Lever. Unthread the yarn.
With the Carriage lifted, and the controls set for Step 1, take the Carriage from right to left across the Pattern Panel, and return it to the right.
Close the carriage. Rethread the yarn.
Set the controls for Step 2 and continue.

text_image
4 3 2 1 S L T S F L 2 1 2 → ← 1 ● S O - - → With the Carriage liftedIf the carriage is removed from the needle-bed during knitting
If for any reason the Carriage is taken completely off the Needle Bed during pattern knitting, the pattern must be picked up again before you continue knitting.
To find which pattern row will be knitted next
How do you find out, for certain, which pattern row will be the next row knitted? Use the Stop Knob.
When the Stop Knob is brought forward to ●, the Touch Levers are locked in two different positions that you can see. The upper position, the ones further back, show where the holes are in the Punch Card. Those which move less and remain in the lower position have come up against blank card (solid card). If you have moved the Punch Card, use the Stop Knob to identify the particular row that you want, then lock the Punch Card with the Stop Knob, and pick up the pattern with the carriage as shown above. Release the card and continue knitting.
Holding position for pattern knitting
As we said at the beginning of the section on pattern knitting, the front levers on the carriage are the only levers which have nothing at all to do with pattern knitting.
If the front levers are in position I, needles put into D position will not knit. You are able to have some needles with stitches on them in B position—which of course will knit when you take the Carriage across—and at the same time have other needles in D position, and these will not knit, the stitches will just be held.
This is explained in detail on pages 66 to 68 in part 4.
The important thing to remember about using D position when you are doing any kind of pattern knitting is that needles knitted back from either C or D position will not knit pattern, they will only knit stocking stitch.
So when you are doing pattern knitting, you must use a transfer tool to put the needles back to B, one at a time, tipping the stitch off the tool into the needle hook as you do so.
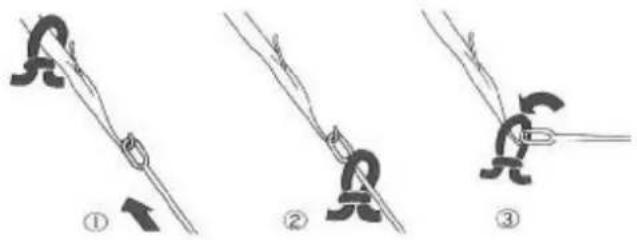
text_image
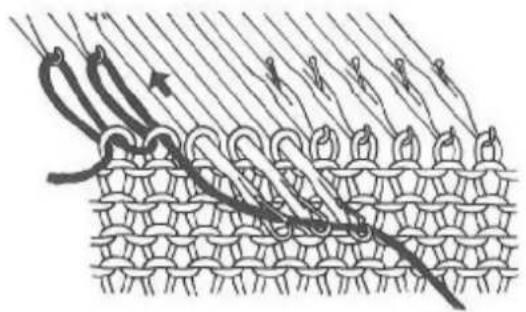
Three-step diagram illustrating the technique of tying a knot, labeled ①, ②, and ③.An alternative way of "holding" stitches is by using the cast-on cord to knit them back to A position.
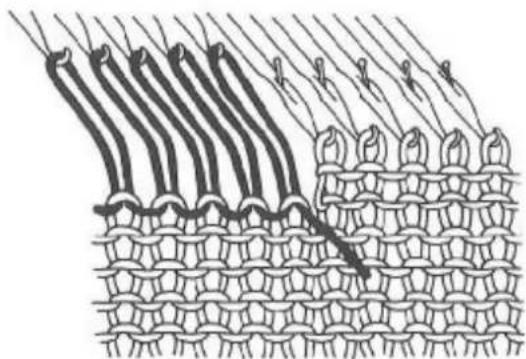
Bring the needles of the stitches which you want to "hold" forward to D position. Lay the cast-on cord into the open needle hooks and knit the needles back one by one from D to A position, by hand.
natural_image
Diagram of knitted fabric with curved threads and stitching details (no text or symbols)Do this slowly and carefully, making sure as you do so, that no needles get pulled forward accidentally.
natural_image
Diagram of a woven textile or mesh structure with parallel strands and a separate curved band, no text or symbols present.All the needles must be right back in A position or they may catch as the carriage crosses them.
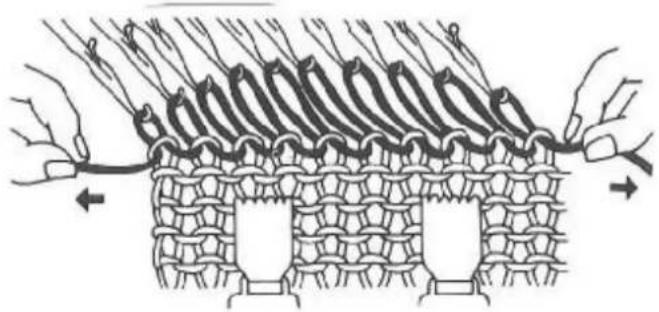
To replace the stitches in the hooks, hold the cord firmly at both ends and pull outwards.
This will bring the needles forward into the B position, and will also replace the stitches in the needle hooks, ready for you to continue pattern knitting.
natural_image
Diagram of a traditional woven textile or fabric structure with hands manipulating fibers and structural details (no text or symbols)This method of holding stitches is quite often recommended for tuck stitch and slip stitch patterns, when the purl side of the knitting is the "right" side.
Which yarn knits the holes in the punchcard?
| Fairisle | Where there are holes in the card, the contrast yarn (in Feeder 2) will knit the pattern. Where the card is solid, the main yarn will knit the background. |
| Tuck Stitch Slip Stitch | In both these stitch patterns, the needles governed by the solid part of the card do the pattern. The holes are plain knitting. |
| Punch Lace | As with Fairisle, the holes in the card produce the lacy part knitted by the fine yarn in Feeder 2. However, unlike Fairisle, where the card is solid the main yarn and the fine yarn knit together. The fine yarn knits on all needles, the main yarn knits the background only. |
| Weaving | The holes in the card pass the weaving yarn over the stitches knitted in main yarn. The solid part of the card passes the weaving yarn under the main yarn stitches, making a pattern on the side of the knitting facing you. |
natural_image
Simple line drawing of a cat in profile view (no text or symbols)Your Machine is complete in itself, and the following pages show how to do many methods and techniques which we have not yet covered.
For garment patterns, the Knitmaster Pattern Pack gives you several drawn patterns, and a very simple way to use them, and also shows how to draw your own. This is ideal for machines without a Knit Radar (Knit Contour), and is available from Knitmaster stockists.
You may also like to add accessories to your machine, and there are many 'standard gauge' accessories which are ideal. For now, practice the new techniques in the following pages, so that you will be a skilled knitter, and your work will be the envy of all!
Part 4\~Detailed methods and techniques
(Each technique simply explained)
Page
How to knit a shaped neckline 46
Welt, hems and Ribs Knitting a neckband to match a double welt 48
1×1 double welt 51
2×1 double welt 52
Picot hem 54
Knit 1 Purl 1 Rib 55
Shaping 1 stitch plain increase 58
1 stitch plain decrease 58
1 stitch fully fashioned increase 58
1 stitch fully fashioned decrease 59
Increase several stitches 60
Decrease several stitches 61
Automatic closed Edge cast-on 62
Casting On 64
Casting Off 65
Using Holding Position and shaping a shoulder 66
Necks and Neckbands Round neck, double band 69
Round neck, K 1 P 1 rib band 70
V neck, double band 71
V neck, K 1 P 1 rib band 72
Finishing your knitted pieces 73
Making Up Joining on the machine 74
Blind Stitch 75
Grafting 76
Buttonholes 77
Knitting a Cord 78
Cables 79
Useful Hints Picking up a dropped stitch 80
Unravelling a row 81
What to do if the Carriage jams 82
Replacing a damaged needle 83
Simple maintenance hints 84
Successful Knitting 85
How to knit a shaped neckline
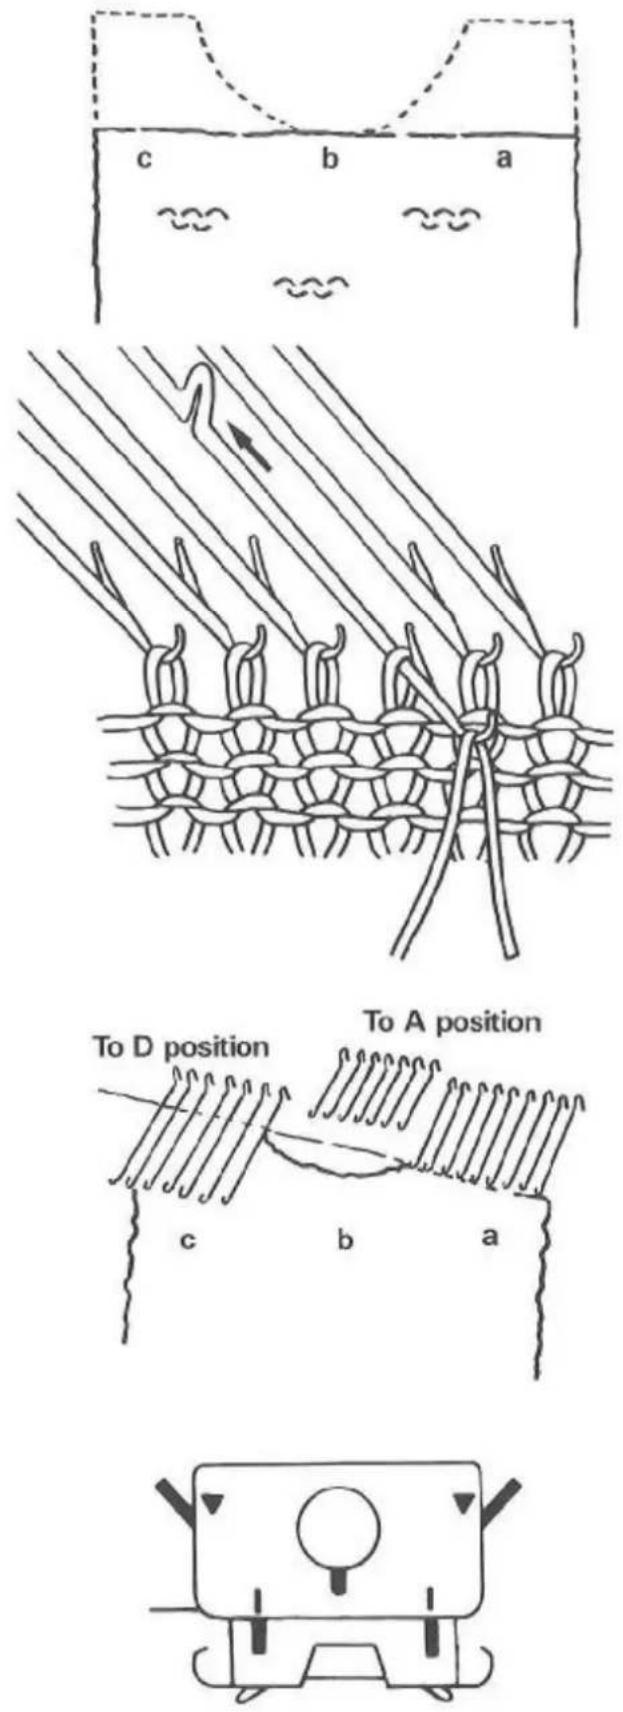
When the centre front of the neckline has been reached, stop with the Carriage on the right hand side of the knitting. Divide the work into three sections like the sketch.
"a" and "c" are shoulders, and "b" is the centre straight section of the neckline.
Using a length of main yarn, cast off the stitches of the centre (b) section by hand. Join the yarn to the adjacent stitch in the shoulder section by knitting it by hand as you would put in a yarn marker in a tension piece. Push back the empty needles to A position.
Use the Needle Pusher to bring the needles of "c" section right forward into D position. That's as far forward as they will come.
Put both Front Levers on the Carriage to I so that these needles will now remain in D position. The Carriage will safely pass over these needles in D position and the stitches will not knit.
Section "b" stitches are now cast off and section "c" stitches are "held" in D position, so we can now knit the right shoulder, (section "a"). Hang a Claw Weight near each edge of section "a". Continue to knit, shaping the neck edge by decreasing (or casting off) one or more stitches as required.
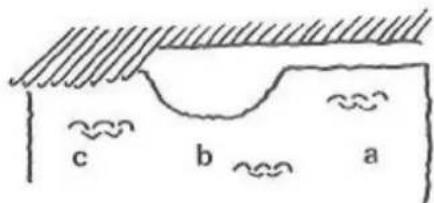
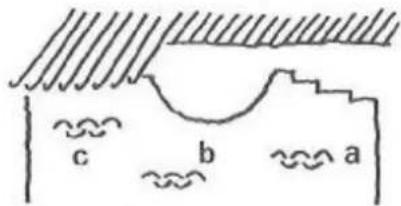
Cast off the shoulder as required, either straight, or in sections on alternate rows as in hand knitting.
Straight shoulder
text_image
c b aSloped shoulder
text_image
c b aPush back the empty needles to A.
To knit the second shoulder, take the Carriage across to the left hand side of section "c".
Thread up with main yarn.
Put both Front Levers on the Carriage to the II position (which means that the needles previously "held" in D position will now knit).*
Knit this shoulder to match the first one, with the shapings reversed.
* stocking stitch only. When you are doing pattern knitting use a transfer tool to put the needles back to B, one at a time, tipping the stitch off the tool and back into the needle hook as you do so.
This is because patterning can only work when needles are in B position.
natural_image
Line drawing of a cat with long hair and curled tail, no text or symbols presentHow to knit a crew neckband to match the double welt
- Join the right shoulder seam.
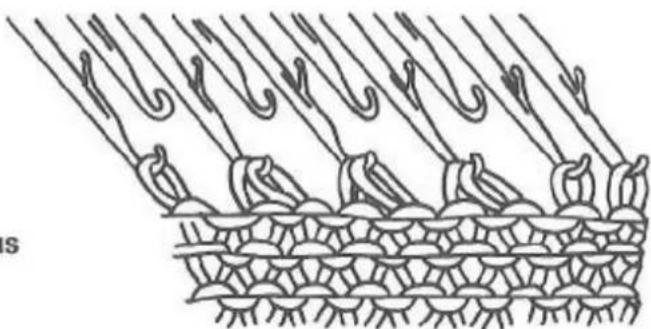
- Use the Needle Pusher to bring the required number of needles forward to D position. Open all the latches with the Transfer Tool. Push the needles back to B.
- With the right side of your garment facing you, and starting with the open shoulder, pick up the stitches from around the neck and place one on each needle. It will be easiest to do this in the order shown.
Pick up onto a few needles at one end, then stretch out the knitting and place stitches from the other end onto the end few needles. Then follow the sequence of the numbered sections in the sketch below.
Bring forward one extra needle at the right hand end. This extra stitch is for making up.
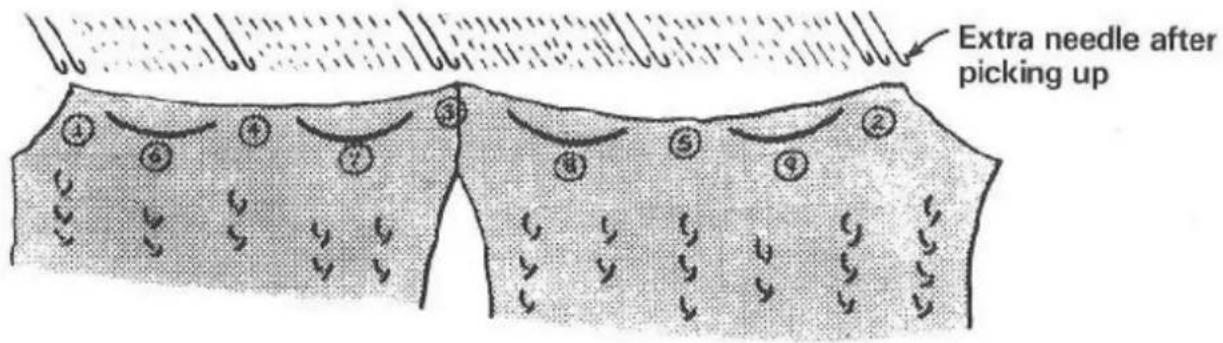
text_image
Extra needle after picking up- With your left hand holding the knitting back against the machine—carefully bring the needles forward from B to D position and check that the Carriage Front Levers are on II. This will help your machine to knit the first row which may be a bit tight.
- Thread up with main yarn and with the Stitch Dial at main tension, knit 1 row.
natural_image
Line drawing of a cat in a relaxed pose, no text or symbols present- Starting with the third stitch from the right, use your Transfer Tool to transfer alternate stitches to their neighbouring needles. If there are two stitches together at the left end, move the end stitch out one needle to the left. Push the empty needles to A.
- Set the Stitch Dial to Main Tension minus 3 and knit 20 rows.
- Set Stitch Dial to Main Tension. Bring the empty needles (those returned to A in step 6) forward to B position.
- Knit 3 rows.
- Cast off with waste yarn. That is, using waste yarn knit a further 6 rows, unthread and release the work from the machine.
natural_image
Diagram of a woven textile or mesh structure with curved and straight lines, no text or symbols present(Alternative method to eliminate the row of decorative holes.)
In Step 9, don't knit 3 rows as before, but work as below.
Pick up a loop from below the second needle on the right, and place it on the empty needle next to it. Continue along the row picking up a loop from below an existing stitch and putting it onto the empty needle to the left. Knit one row.
natural_image
Diagram of a knitted fabric pattern with curved folds and a central rod (no text or symbols)
natural_image
Diagram of interwoven fabric or mesh structure with no text or symbols
natural_image
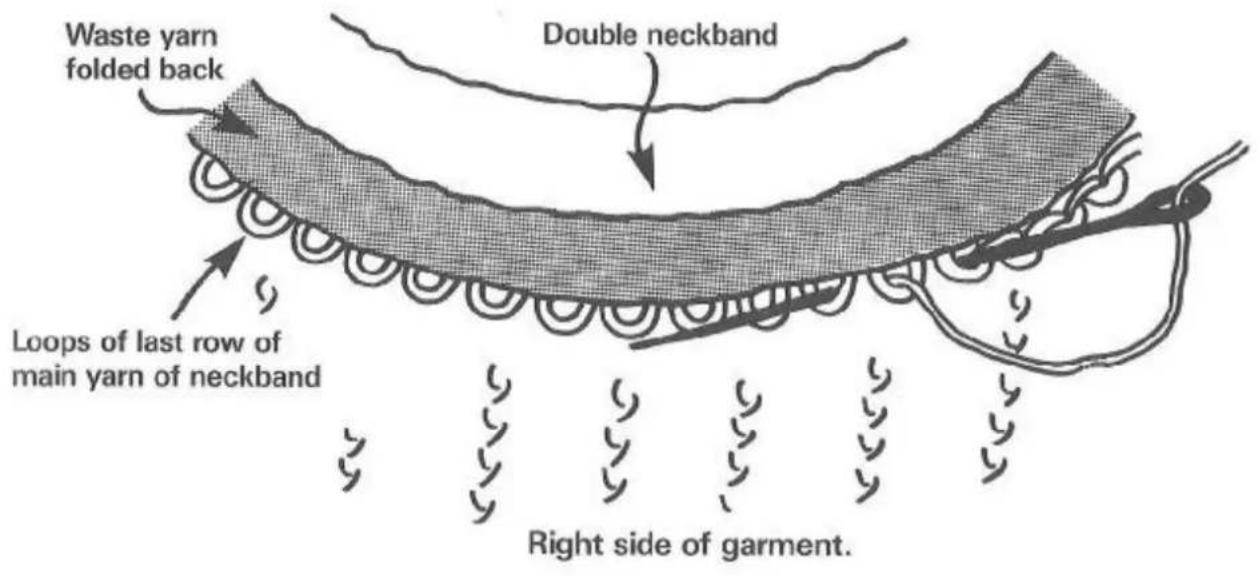
Simple line drawing of a mouse lying down (no text or symbols)- To finish the neckband, join the remaining shoulder seam. Join the neckband seam. Fold the neckband in half onto the outside and pin into position, taking the last row knitted in main yarn far enough over to conceal any irregularities that there may have been with the pick up row. Fold the waste yarn back onto the band to expose the loops of the last row knitted in main yarn.
text_image
Waste yarn folded back Double neckband Loops of last row of main yarn of neckband Right side of garment.Using main yarn, back stitch loosely through these loops. Pull off the waste yarn.
natural_image
Line drawing of a stylized animal holding an object (no text or symbols)Double welts
Sometimes called "mock ribs" or "Continental Ribs".
This is a summary of the detailed explanation on page 14 where you will also find illustrations.
-
Open edge cast-on with waste yarn on ALTERNATE needles. (Needles to B, alternates back to A, thread waste yarn, knit one loose row, lay in cord and hold down firmly, knit 5 rows at Main Tension minus 3, pull out cord, knit a few more rows finishing on left, unthread waste yarn.)
-
Thread the cord in the Yarn Feeder and knit 1 row at a loose tension. One row only (page 14).
-
Unthread cord from Carriage, thread up with main yarn.
-
Set Stitch Dial to 3 numbers tighter (lower) than main tension.
-
Knit twice the number of rows required for the finished welt (40 rows knitted for 20 row welt).
-
Use single Transfer Tool to pick up loops from first row knitted in main yarn. Place one loop onto each empty needle between those in B, bringing each forward to B as you do so.
-
Use a tool to undo first stitch of cord at left, hold the knitting against the machine and pull out the cord to right. All needles are now in B, each with one stitch on it.
-
Change Stitch Dial to Main Tension.
Continue knitting. (See page 15 for finishing your welt).
natural_image
Simple line drawing of a fluffy cat lying down with a curved tail (no text or symbols)2 x 1 Double welt
natural_image
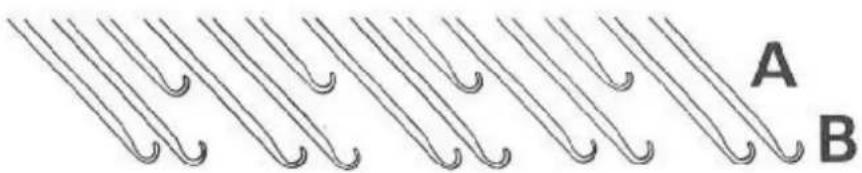
Repeating pattern of curved lines with labeled points A and B (no text or symbols on the lines themselves)- Set up needles as shown above, that is 2 needles in B, 1 in A, 2 in B, 1 in A all across the width required, finishing with 2 in B. Use the Carriage to line up the needles left in B position.
- Open edge cast-on with waste yarn over those needles. (Thread waste yarn, knit one loose row, lay in cord and hold down firmly, knit 5 rows at Main Tension minus two, pull out cord, knit a few more rows finishing at the left, unthread waste yarn).
- Thread cord in Yarn Feeder and knit 1 row at a loose tension. One row only (page 14).
- Unthread cord from Carriage and thread up with main yarn.
- Set Stitch Dial to 2 numbers lower than Main Tension.
- Knit twice the number of rows required for the finished welt. (40 rows knitted for a 20 row welt).
natural_image
Line drawing of a cat interacting with a rod (no text or symbols)-
Using the single Transfer Tool pick up the loops from the first row knitted in main yarn, placing them on corresponding needles. With this needle arrangement, there will be two loops for every 3 needles So place one loop onto an empty needle, and another loop onto only one of the next pair of needles which already have stitches on.
-
When all the loops have been picked up, every needle should have at least one stitch (every third needle should have 2).
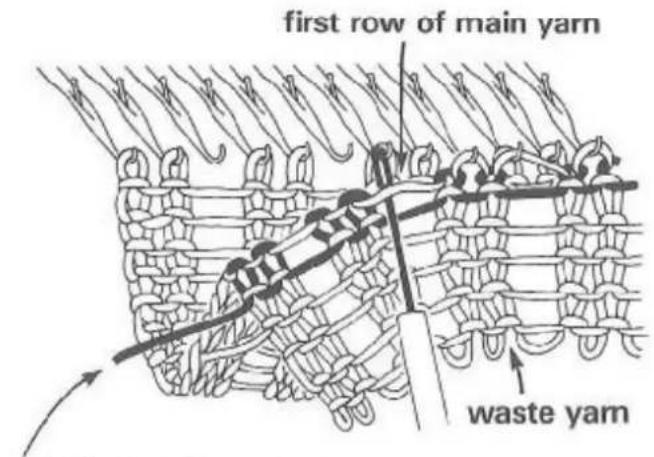
text_image
first row of main yarn waste yarncord knitted between main yarn and waste yarn
- Check that you have picked up the very end stitches which can sometimes pull tight, and may easily be missed.
- Use a tool to undo the first stitch of the cord at left, hold the knitting against the machine and pull out the cord to the right.
- Set Stitch Dial to Main Tension plus 1. Knit 1 row.
- Change Stitch Dial to Main Tension.
Continue knitting. (See page 15 for finishing your welt).
natural_image
Simple line drawing of a cat in motion, no text or symbols presentPicot hem
-
Open edge cast-on with waste yarn on ALL needles. (Knit one loose row, lay in cord and hold down firmly, knit 5 rows at Main Tension minus 1, pull out cord, knit a few more rows finishing at the left, unthread waste yarn.)
-
Thread cord in Yarn Feeder and knit one row at a loose tension. One row only (page 14).
-
Unthread the cord from the Carriage, thread up with main yarn.
-
Set Stitch Dial to 1 number tighter (lower) than Main Tension.
-
Knit number of rows required for finished hem (eg 8 rows).
-
Use the single eye Transfer Tool to transfer every alternate stitch onto it's next door needle, leaving all the emptied needles in B position, as shown below.
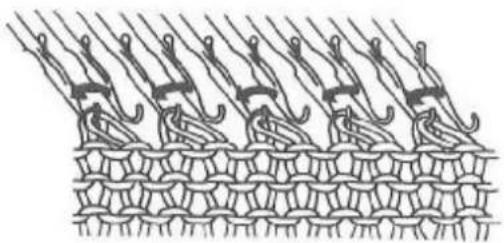
natural_image
Diagram of a woven textile or mesh structure with multiple hanging clips (no text or symbols)- Set the Stitch Dial to Main Tension (that is one number looser (higher) than for the first part of the hem).
- Knit the same number of rows as for the first part of the hem (eg 8 rows).
- Use the single Transfer Tool to pick up the loops from the first row knitted in main yarn. There will be one loop for every needle except the last. So all needles except the last will now have two loops on.
- Use a tool to undo the first stitch of the cord at the left, hold the knitting against the machine and pull out cord to right.
- Set Stitch Dial to Main Tension plus 2 (two numbers looser than the Main Tension).
- Knit one row.
- Change Stitch Dial to Main Tension.
Continue knitting.
natural_image
Simple line drawing of a cat in profile view (no text or symbols)Knit 1 purl 1 rib
Open edge cast-on with waste yarn on ALTERNATE needles. (Needles to B, alternates back to A, thread waste yarn, knit one loose row, lay in cord and hold down firmly, knit 5 rows at main tension minus 3, pull out cord.)
On the left hand side of the knitting, bring forward to B one extra needle on the left of the end working needle in B position.
Knit a few more rows, finishing on the left. Unthread waste yarn.
Knit in the cord, one row only.
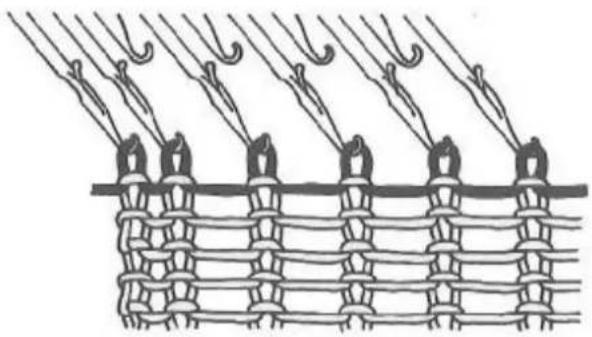
natural_image
Diagram of a knitted fabric with hanging clips and mesh texture (no text or symbols)Hang a Claw Weight near each edge of the knitting.
Unthread the cord from the Carriage and thread up with main yarn. Set stitch dial to O (tightest tension). Knit 4 rows.
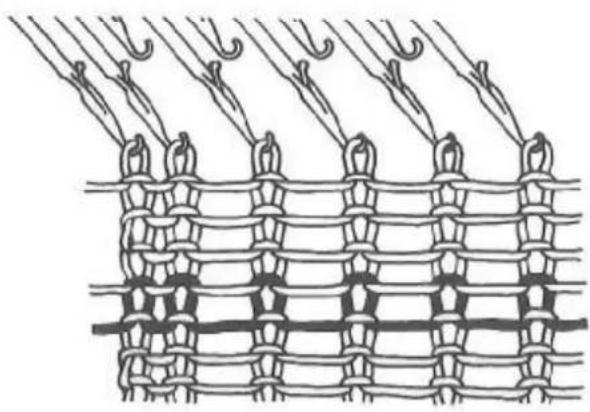
natural_image
Diagram of a woven textile with hanging clips and interlaced bands (no text or symbols)Insert Transfer Tool into the left end loop of the first row of main knitting. Lift that loop and put it onto the end needle.
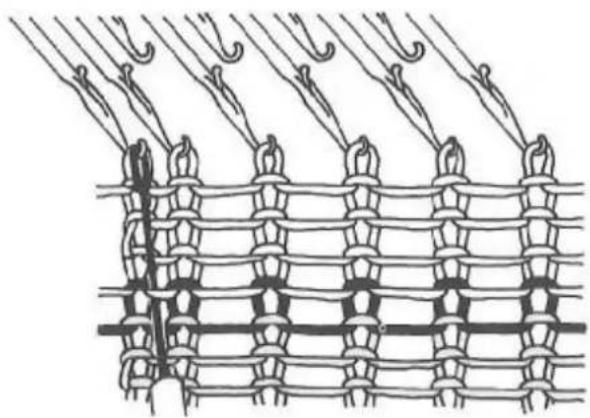
natural_image
Diagram of a woven textile with hanging hooks and interlaced bands (no text or symbols)
natural_image
Simple line drawing of a cat in motion, no text or symbols presentBring the alternate needles forward to B position.
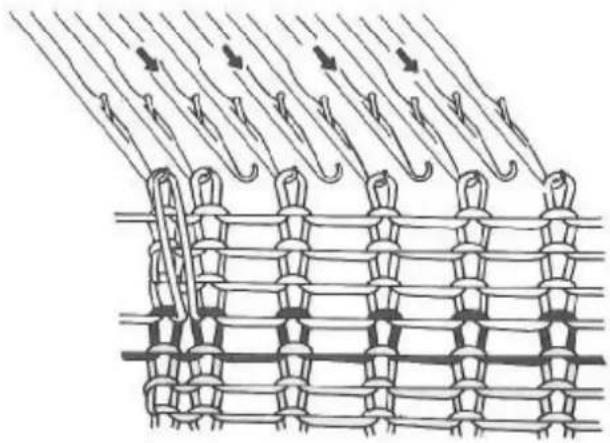
natural_image
Diagram of coiled fabric or mesh structure with multiple curved connectors and vertical threads (no text or symbols)Set the Stitch Dial to 2 numbers lower than Main Tension.
Knit the number of rows required for the finished rib.
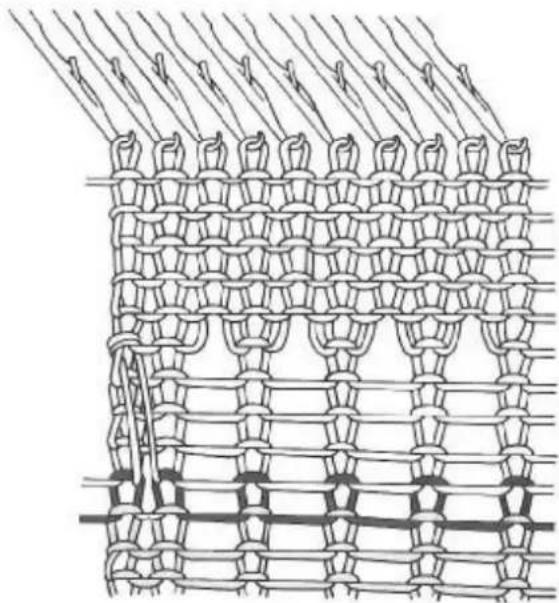
natural_image
Diagram of interwoven fabric structure with repeating patterns and no visible text or symbolsWith your fingers, take hold of the needle butt of the third needle from the left, and bring the needle forward to D position, and then back to B.
The stitch will have dropped off.
Use the end of the single prong transfer tool to undo the stitches right down to the nylon cord.
Then use the latch tool to remake those stitches into "knit" stitches like this. Insert the latch tool under the loop of the first row of main knitting. Ignore the next three bars, then catch the yarn of the fifth row in the hook of the latch tool.
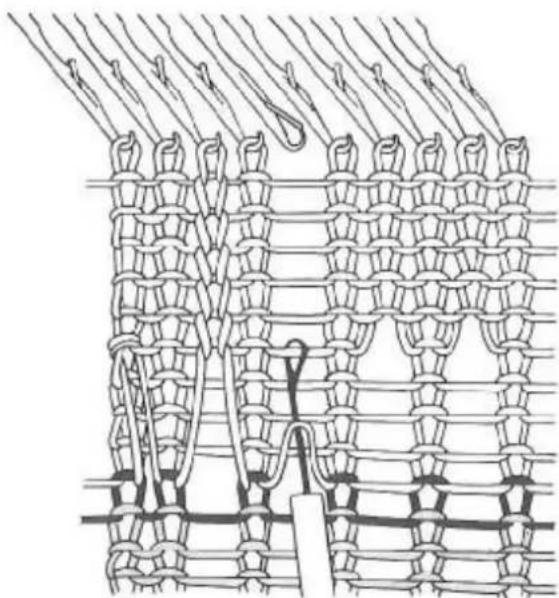
natural_image
Diagram of a knitted fabric pattern with coiled threads and a hook, no text or symbols presentPull the tool towards you, and the first loop will slip over the hook of the tool forming a new stitch.
Slide the stitch on the tool behind the latch, catch the next bar of yarn in the hook, and pull that through.
Work your way up until the stitch of the last row knitted has been formed, and replace this on the needle.
Drop down and reform each alternate stitch in the same way.
The reason for missing the three bars at the bottom is that this makes a nice firm edge to the rib.
Leave the waste knitting and cord attached until you have completed the piece, and taken it off the machine. Then use a tool to undo the left end stitch of the cord and pull it out to the right carefully.
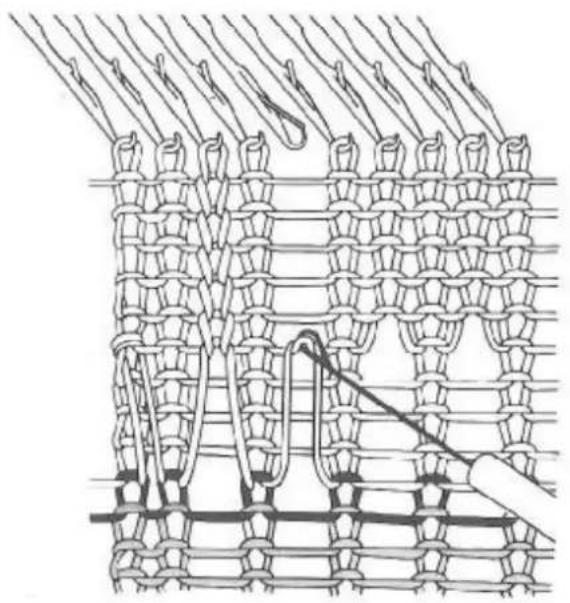
natural_image
Diagram of a knitted fabric pattern with coiled threads and a hook, no text or symbols present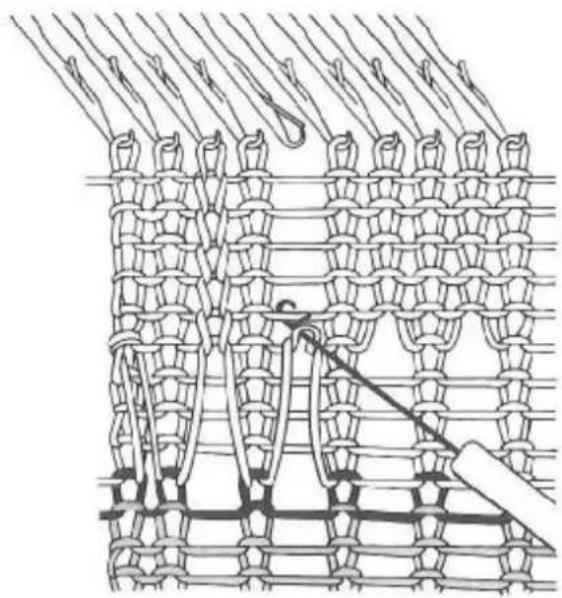
natural_image
Diagram of a woven textile or mesh structure with interwoven strands and a hook, no text or symbols present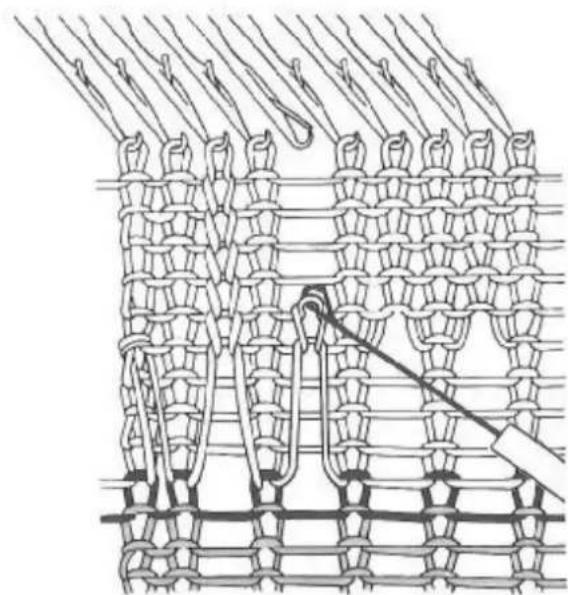
natural_image
Diagram of a woven textile or mesh structure with interwoven threads and hanging clips (no text or symbols)Shaping
Single stitch plain increasing.
Bring forward to B position one empty needle at the edge of the knitting.
You can do this at both edges at the same time.
Knit two rows.
Single stitch plain decreasing.
Use the single Transfer Tool to transfer the end stitch to the next to the end needle. (see page 12).
Push the empty needle back to A position.
You can do this at both ends of the same row.
Knit two rows.
Single stitch fully fashioned increasing.
Bring forward to B position one empty needle at the edge of the knitting.
Using the three prong Transfer Tool, transfer the three end stitches one needle outwards, leaving the fourth needle in from the edge of the knitting empty.
Use the single end of your tool to find the stitch from the previous row knitted below the fifth needle along. Pick up this loop—often called the "heel" of the stitch—and put it onto the empty needle next to it.
You can increase at both ends of the same row like this.
Knit 2 rows.
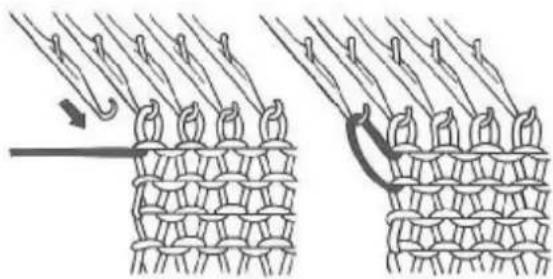
natural_image
Diagram showing two stages of textile fiber meshing, with arrows indicating direction and structural details (no text or symbols)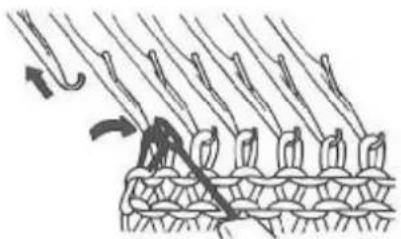
natural_image
Diagram of a knitted fabric pattern with arrows indicating texture changes (no text or symbols)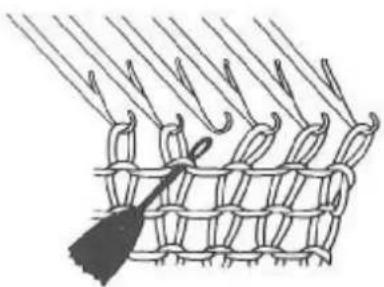
natural_image
Illustration of a woven basket with tassels and hanging needles (no text or symbols)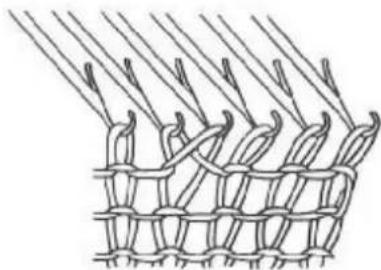
natural_image
Diagram of a knitted mesh structure with multiple strands and loops (no text or symbols)Single stitch fully fashioned decreasing.
Use the three prong Transfer Tool to transfer three stitches one needle in, leaving one empty needle at the edge.
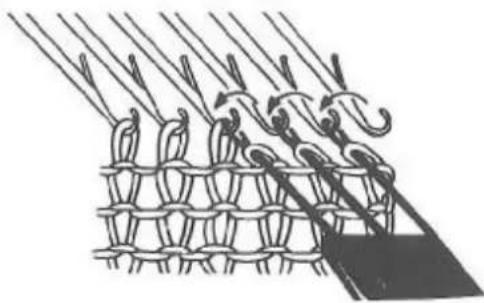
natural_image
Diagram of a knitted fabric with coiled loops and hanging clips (no text or symbols)Push this needle back to A position.
This time the needle with two stitches on it will be the third one in from the edge.
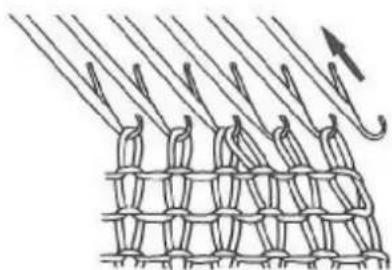
natural_image
Diagram of a mesh structure with diagonal lines and a curved hook, no text or symbols presentFor a less pronounced fully fashioned shaping, use the two prong tool.
This method can be used to decrease at both ends of the same row.
Knit two rows.
natural_image
Line drawing of a cat in motion, no text or symbols presentIncreasing several stitches.
You can only increase several stitches on the side of the knitting where the carriage is. To increase on the right side, the Carriage must be on the right. To increase on the left side the Carriage must be on the left.
To increase on the right, have the Carriage on the right, bring forward the required number of needles from A to D position.
Pull down some free yarn from the Yarn Feeder.
Wind the yarn in an anticlockwise direction around each needle in turn, starting with the empty needle which is next to the knitting and finishing with the one next to the Carriage.
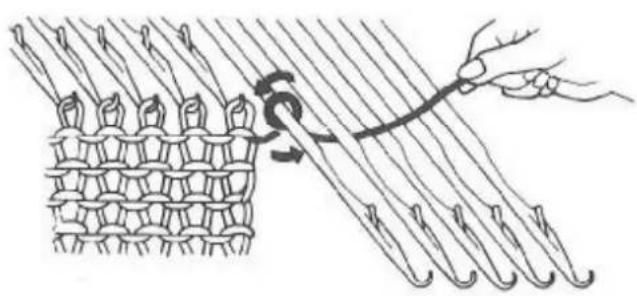
natural_image
Illustration of a hand tying a knot between two rows of knitted fabric (no text or symbols)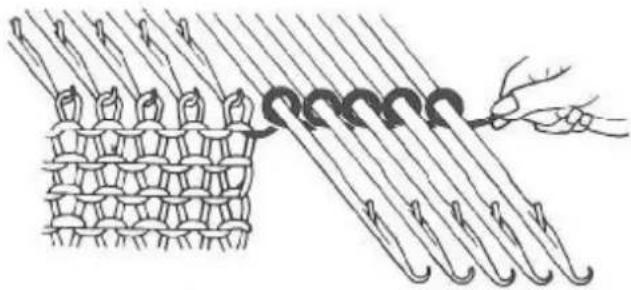
natural_image
Illustration of a hand pulling a rope tied with a coiled spring (no text or symbols)Use your thumb to hold each loop back against the machine as it is completed.
Pull excess yarn back through the Carriage and behind the yarn rod so that the tension spring is pulled well down.
Either use your Needle Pusher to gently push the needles back to C, or have the Front Levers set to position II, and the needles will knit back directly from D.
Knit two rows carefully.
Hang a Claw Weight on the new stitches at the edge.
Continue knitting.
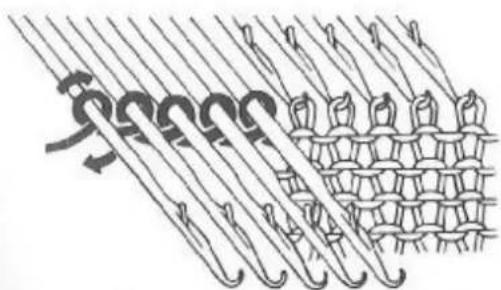
natural_image
Diagram of coiled metal rods with mesh patterns, no text or symbols presentTo increase on the left, have the Carriage on the left and wind the yarn round the needles in a clockwise direction.
Decreasing several stitches.
Unthread the yarn from the Carriage.
Hang a Claw Weight right on the edge of the knitting, on the first stitch, about 2 cms below the needles.
Transfer the end stitch nearest the Carriage to its next door needle, which will then have 2 stitches on it.
Push the empty needle back to A.
Hold the yarn lightly across the fingers of your left hand and use the back of your left forefinger to stop the knitting coming forward.
With your right forefinger bring forward the butt of the needle with two stitches on it, so that both stitches slip behind the latch.
With your left hand, lay the yarn across the open needle hook.
Then with your right hand, push the needle butt back into into B position again.
This will knit off the two stitches and leave a single stitch in the hook. Don't pull this stitch tight.
Repeat for as many stitches as you want to decrease.

natural_image
Illustration of hands tying a knitted mesh structure with threads and hooks (no text or symbols)
natural_image
Sketch of a mouse with long antennae and curved body (no text or symbols)Automatic closed edge cast on Zippy Plus only
This is a quick and easy way of casting on for knitting samples.
Push 70 needles from A to D position with the straight edge of the needle pusher.
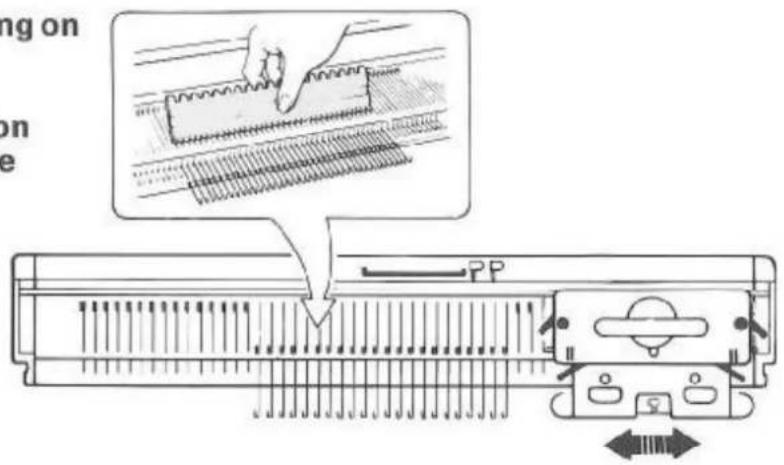
text_image
ng on on e PPSet the carriage as below: Cam lever to 0 Side levers to ● Front "holdings" levers to II Weaving knobs to (√)
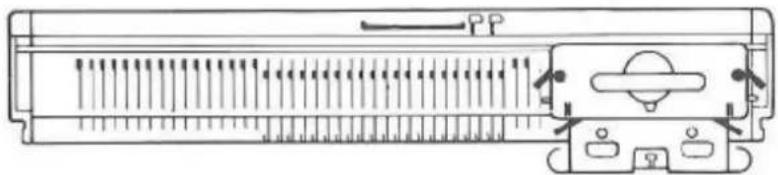
natural_image
Technical line drawing of a mechanical component with internal channels and mounting features (no text or symbols)Move the carriage across the needle bed to line the needles up in B position. Finish with the carriage at the right.
Using the 1 x 1 side of the needle pusher, push every alternate needle to D position.
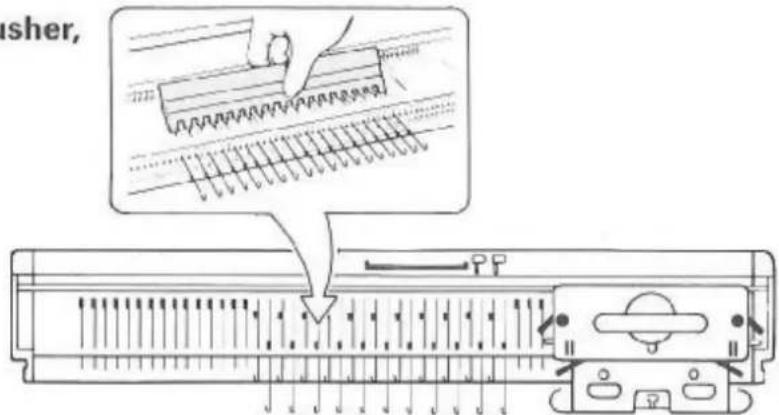
text_image
usher,Put the yarn in feeder 1.
Pull the yarn end from underneath the brush plate and lay it over all the needles in D position, in front of the sinkers. Hold the yarn end loosely at the left, about 30 cm below the end needle.
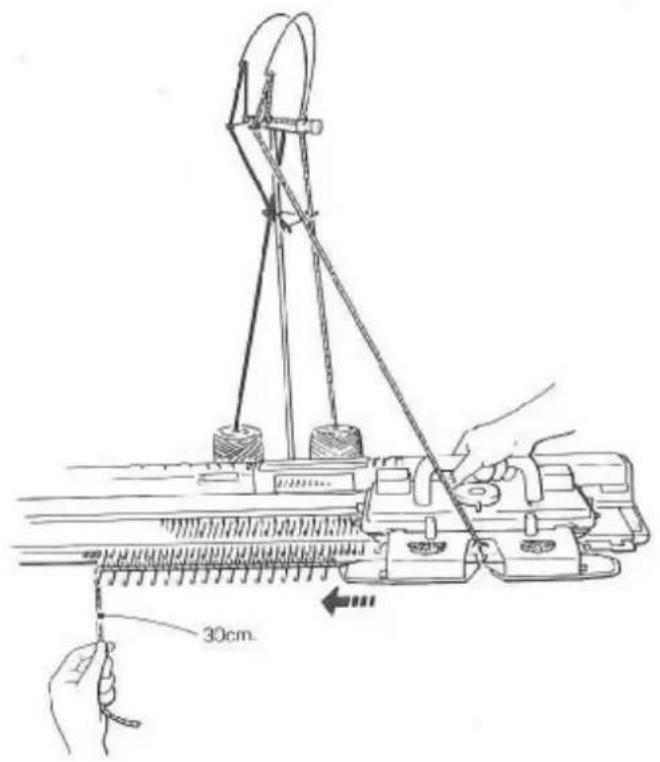
text_image
30cm.Slowly move the carriage from right to left until you have passed the end needle by about 3 cm.
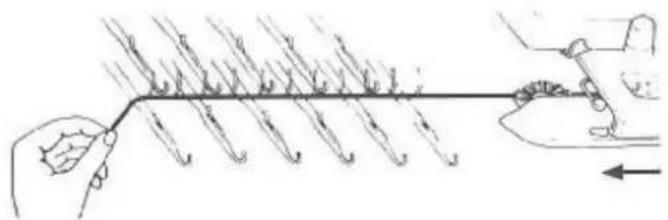
natural_image
Diagram showing a hand pulling a string of wires with arrows indicating direction (no text or symbols)Knit 4 to 5 rows, and hand the claw weights at both edges of the fabric.
Set the side levers to ▼ and the weaving knobs to 0.
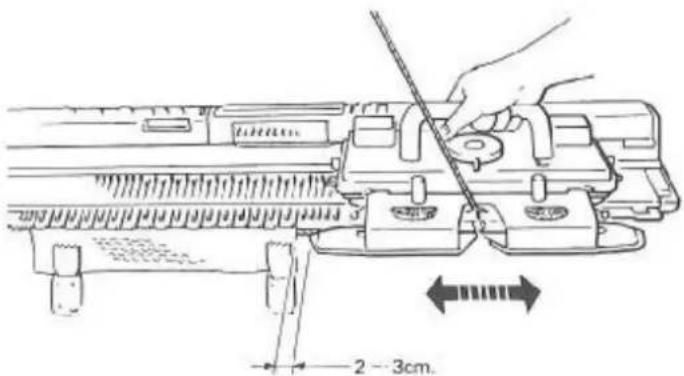
text_image
2 - 3cm.Open edge Cast-on Summary (see also page 10)
- Bring required needles to B position.
- Knit one row at a loose tension.
- Lay in the cord between the needle hooks and sinkers.
-
Hold the cord down firmly.
-
Knit 5 rows at the correct tension. (Either main tension, for stocking stitch on all needles, or lower tensions for hems and welts.)
-
Pull out the cord and continue knitting.
Hand Cast on. (Closed Edge).
Open edge cast-on with waste yarn on ALL needles, as above.
Knit one loose row with the cord. Unthread the cord from the Carriage. (Carriage is at the right.)
Bring all needles to D, holding the knitting back against the sinkers.
Thread up with main yarn and pull plenty of yarn down through the Yarn Feeder.
Make a loose knot in the end of the yarn and loop it over the end needle at the left.
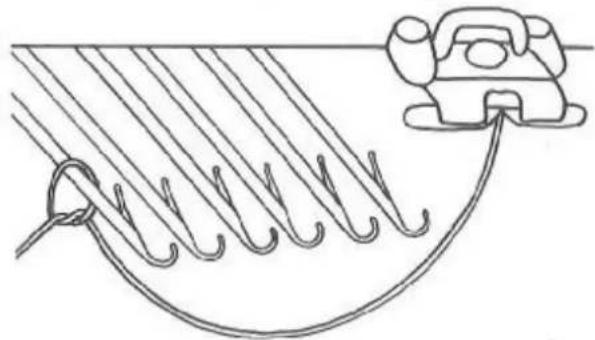
natural_image
Diagram of a rope tied with a hook, showing rope routing and a telephone handset (no text or symbols)Working towards the Carriage, wind the yarn anticlockwise in a loose "e" around each needle in turn, exactly as we did for increasing several stitches. (see page 60).
Pull any extra yarn back up through the Yarn Feeder and down behind the Yarn Rod.
Either push the needles carefully back to C, or have the front levers set to position II, and the needles will knit back directly from D.
Set Main Tension and knit about 6 rows.
Pull out the cord and continue knitting.
Note: If you wind the yarn too tightly round the needles, your machine will complain and may even refuse to knit. If your main yarn is rather thick, cast on and knit with alternate needles with waste yarn, bringing in the remaining needles for the main yarn cast-on row.
Casting off by decreasing.
Follow the instructions on page 61, repeating until you have one stitch left on the last needle.
Break off the yarn, and pull the end through this last stitch, to stop the cast-off edge from undoing itself.
Casting off by the back stitch method.
Finish with the Carriage at the left. Unthread and leave a length of yarn about three times the width of the knitting. Thread a tapestry needle with the end of the yarn, insert it into the first stitch and pull through.
Put the needle into the second stitch, and back out of the first stitch. Pull through.
Put the needle into the third stitch and back out of the second stitch. Pull through.
Continue to close all stitches. Finish the last stitch by bringing the needle through it from back to front.
Release the knitting from the machine.
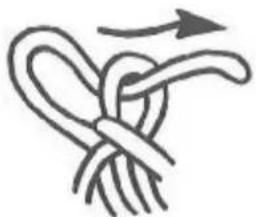
natural_image
Simple line drawing of a rope knot with an arrow indicating direction (no text or symbols)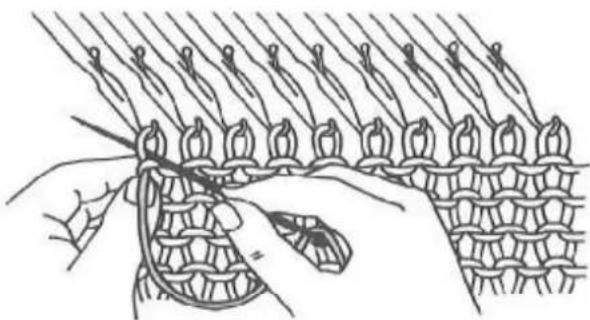
natural_image
Illustration of hands weaving a knitted fabric with threads and loops (no text or symbols)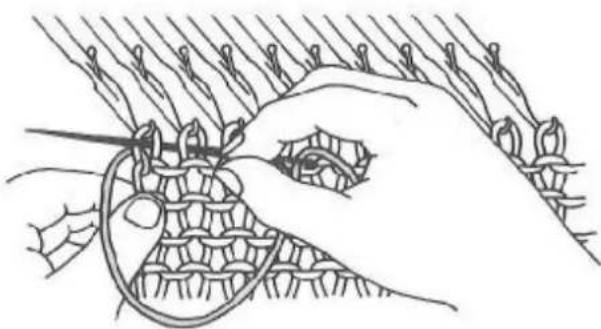
natural_image
Line drawing of hands knitting a knitted fabric with threads and a string (no text or symbols)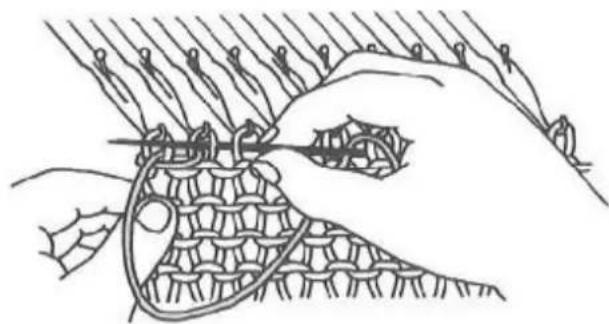
natural_image
Line drawing of hands knitting a knitted fabric with threads and stitching (no text or symbols)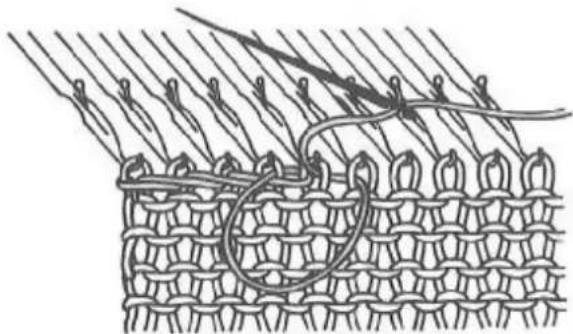
natural_image
Diagram of a knitted fabric with rope routing and stitching details (no text or symbols)Holding position
If the Front Levers are in position I, needles put into D position will not knit. D position is often called the "holding" position.
You are able to have some needles with stitches on them in B position—and these will knit when you take the Carriage across—and at the same time have other needles in D position, and these will not knit, the stitches will just be held.
To make the needles which are in D able to knit again, you can either push them back to C, or move the Front Lever on the side of the Carriage next to the knitting to position II.
If you push the needles back to C, do it carefully, because if you push them right back to B by mistake, the stitches will fall off.
These two methods are for plain knitting (stocking stitch) only. When you are doing pattern knitting use a transfer tool to put the needles back to B, one at a time, tipping the stitch off the tool and back into the needle hook as you do so.
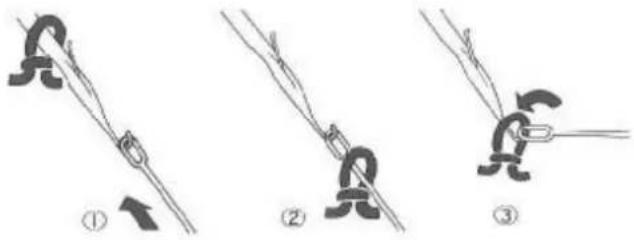
text_image
Three-step diagram illustrating cable knotting process with labeled steps ①, ②, and ③This is because patterning can only work when needles are in B position.
REMEMBER, needles in C and D position will knit stocking stitch only.
How to slope a shoulder using holding position (Sometimes called "partial knitting").
You can of course shape a shoulder by casting off as you would in hand knitting, but this does give 'steps' at the shoulder edge.
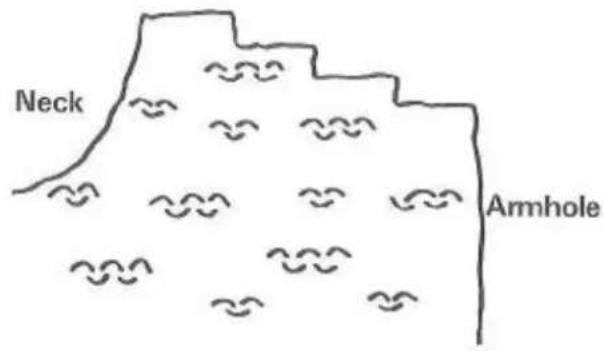
text_image
Neck Armhole
natural_image
Simple line drawing of a fluffy cat lying down (no text or symbols)A much neater way is to shape using holding position. Let's try a small piece to show you the idea. Bring forward to B position 16 needles. Cast on and knit about 30 rows. Finish with the Carriage on the left.
Put both Front Levers to position I, that is pointing straight forward.
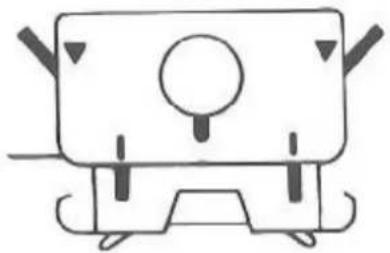
natural_image
Simple line drawing of a mechanical device with no text or symbolsAt the right hand edge of the knitting, bring 4 needles forward to D position.
Knit one row from left to right. The B needles will have knitted, the D needles will not, they will still be out in D with the yarn lying across them.
To prevent an untidy hole being formed at the point where the B needle is next to the one in D, take the yarn under the first inside needle in D position.
Make sure that it still lies over the remaining D position needles.
Knit 1 row.
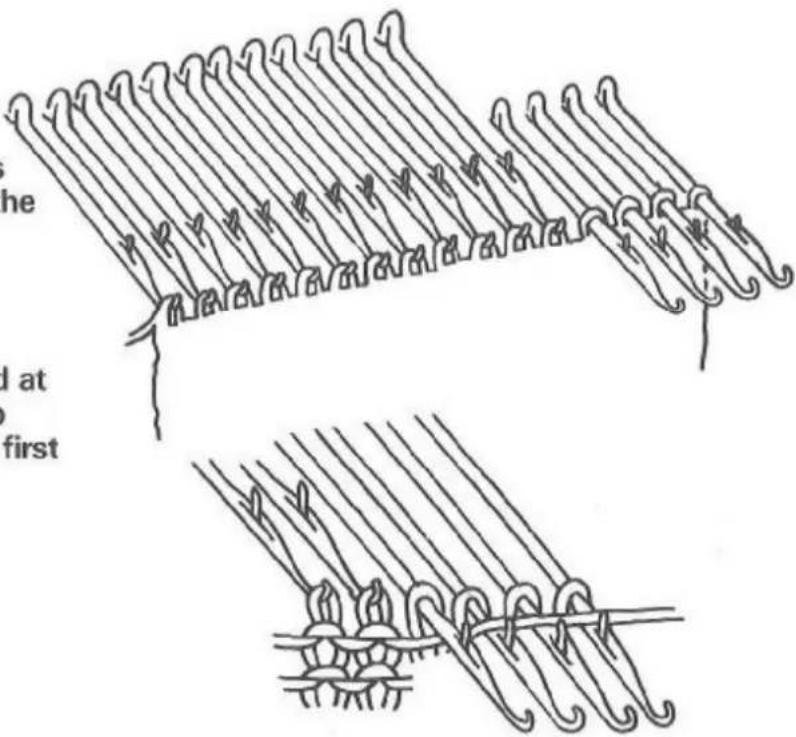
text_image
the at firstWith the Carriage again on the left, bring forward to D position 4 more needles, next to those already in D.
Knit from left to right.
Take the yarn under the new first needle in D, and knit back to the left.
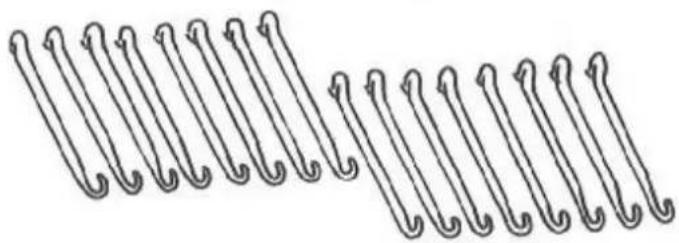
natural_image
Pure diagram of coiled wire or paper clips without any text, numbers, or symbolsCarriage on the left, bring four more needles at the right to D.
Knit across, yarn under, and knit back as before.
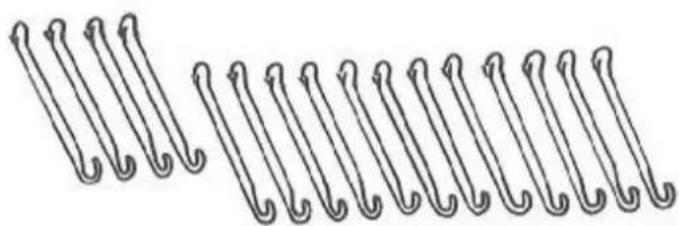
natural_image
Illustration of multiple curved, coiled metal rods or wires arranged in a row (no text or symbols)With the Carriage on the left, put the right Front Lever to II. (see below.)
Knit one row.
All the needles will have knitted this time.
Thread up with waste yarn and knit 6 rows.
Take the knitting off the machine.
There you have a smoothly shaped right shoulder.
natural_image
Simple line drawing of a mechanical device with no text or symbolsRepeat in reverse for a left shoulder. Start with the Carriage on the right, and bring out needles to D on the left side of the knitting.
If you practice the left shoulder now, starting with 16 stitches, and bringing needles out in fours, you'll have a left and right shoulder ready for when we learn how to join them together to make a neat shoulder seam. That will be on page 74.
(Hint: If, when you are knitting a garment, you have other needles in holding position which you don't want to knit back, when you get to the step at the top of this page, then instead of moving the Front Lever, leave it on I and push all the D needles which you do want to knit, back carefully to C position. Then knit across, and they will all have knitted.)
natural_image
Simple line drawing of a cat walking (no text or symbols)Neckline and necks
Round necks
Double neckband (as for double welts)
(This is a summary of the details and illustrations on pages 48 to 50).
- Join one shoulder seam (or three raglan seams out of four).
- With the right side of the work facing you, pick up stitches around the neck as shown on page 48.
- Bring the needles forward to D. Have the Front Levers set to position II.
- Knit one row on all needles at Main Tension.
- Transfer stitches as required—alternates for a 1×1 band, every third for a 2×1.
- Set Stitch Dial to Main Tension minus 3 (for 1×1) or Main Tension minus 2 (for 2×1).
- Knit twice the number of rows required for the finished height of the neckband.
either
8a. Bring the A needles forward again to B. Knit 3 rows.
or
8b. Optional step to omit row of decorative holes. Pick up the loops from below adjacent needles and place them on the empty needles. Knit 1 row.
-
Change to waste yarn.
-
Knit 6 rows and release from the machine.
-
Finish by folding the band over to the right side, and back stitch through the loops of the last row knitted in main yarn.
natural_image
Simple line drawing of a rodent walking (no text or symbols)Knit 1 purl 1 neckband (knitted separately).
- Push the required number of needles forward to B.
- Knit the number of rows needed for your finished neckband following the method given for knitting a knit 1 purl 1 rib on pages 55 to 57.
- After dropping down and picking up the plain stitches, set Main Tension and knit one more row.
- Change to waste yarn.
- Knit 6 more rows and release the knitting from the machine.
- To finish, join the shoulder seams of the garment and join the neckband seam. Attach the neckband to the right side of the garment by backstitching through the open loops of the last row knitted in main yarn. Remove the waste yarn.
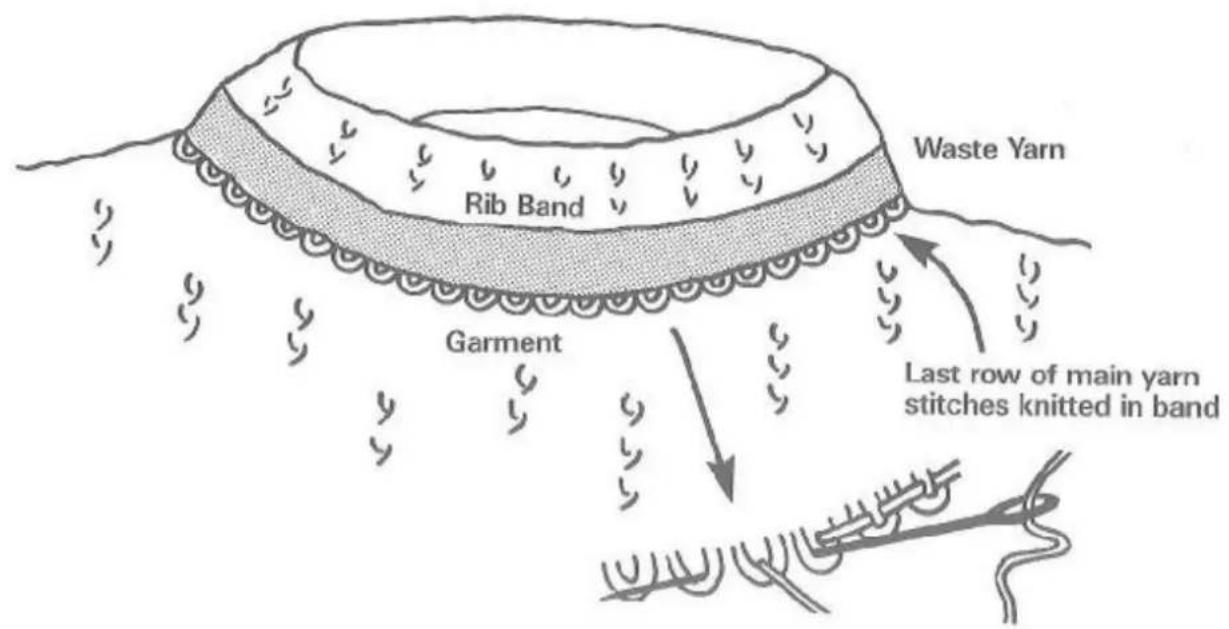
text_image
Waste Yarn Rib Band Garment Last row of main yarn stitches knitted in band
natural_image
Line drawing of a cat in profile, no text or symbols presentV-necks
Double neckband
- Join one shoulder seam (or three of the four raglan seams).
- The stitches are picked up and knitted in two sections. One section starts at the point of the V and includes one side of the V and the back of the neck. The other section is the second side of the V.
- With the right side facing, pick up the stitches for the first section.
- Bring needles to D.
- Knit one row at Main Tension.
- Transfer as required, or for a narrow stocking stitch band, leave stitches on all needles.
- Knit twice the number of rows required for the finished band, either shaping at the V edge according to your pattern, or knitting the band straight and finishing the V in one of the ways shown below.
- Bring A needles forward to B and pick up loops from below adjacent needles and place them on the empty needles (as in fully fashioned increasing, page 58).
- Knit one row at Main Tension.
- Change to waste yarn.
- Knit 6 rows and release from the machine.
- Pick up the stitches from the second part of the edge.
- Knit exactly as before.
- To finish the band join the remaining shoulder seam and the back seam of the band. Fold the band in half onto the right side of the garment, and back stitch through the loops of the last row knitted in main yarn. Remove the waste yarn.
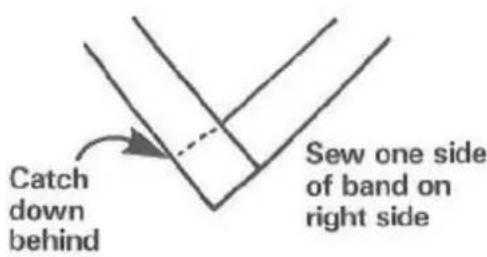
text_image
Catch down behind Sew one side of band on right side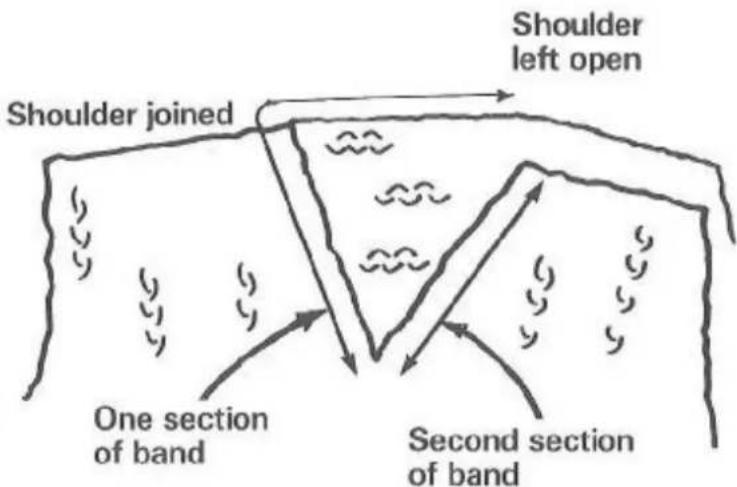
text_image
Shoulder left open Shoulder joined One section of band Second section of band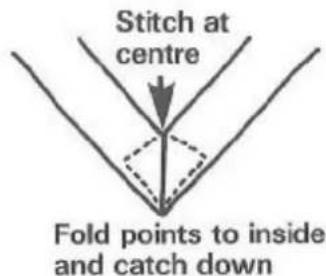
text_image
Stitch at centre Fold points to inside and catch downKnit 1 purl 1 rib neckband for V-neck (knitted separately).
- Following the method for knitting a knit 1 purl 1 rib on pages 55 to 57, cast on the number of stitches and knit the number of rows required for the finished neckband.
- After reforming the alternate stitches, set Main Tension and knit one row.
- Change to waste yarn, knit 6 rows and release the knitting.
- To finish, join the shoulder seams of the garment, but do not join the ends of the band.
- Attach the neckband to the right side of the garment by backstitching through the open loops of the last row knitted in main yarn. Remove the waste yarn.
Overlap the ends of the band at the centre front and sew down, or fold points to inside, as shown on the previous page.
Sew one end of the band to the right side of the garment
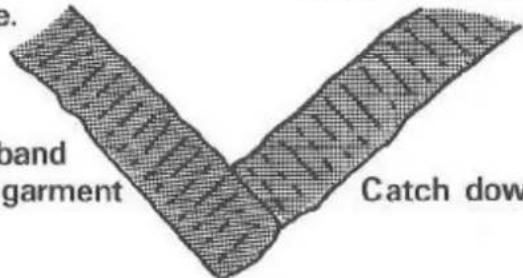
text_image
band garment Catch dowCatch down the other on the inside
Note: for a deep V which needs a long band, in a fine yarn, you may have to knit the band in two sections, and join them before attaching to the garment.
Finishing your pieces
If you have used double hems or welts, thread a ruler or similar through the welt, and pull the garment firmly, closing the stitches up on the ruler as you do so.
Now use a damp cloth or a steam iron to thoroughly steam the welt, then still pulling, allow to dry. No pressure required! You are simply putting steam into the knitting to set the stitches.
When you pin out the pieces, do not pull out the welts. Pin out each piece of the garment to the correct size. (A folded blanket, or a large piece of thick foam, covered by a sheet, is useful for this.)
Put each piece wrong side up, then pin the widest part out to the correct width.
Next, pull the piece to the correct length, and pin round the edges to shape.
Put some steam into each piece and allow to dry before unpinning. This will "set" the piece to the right size and shape, ready for completing the garment.
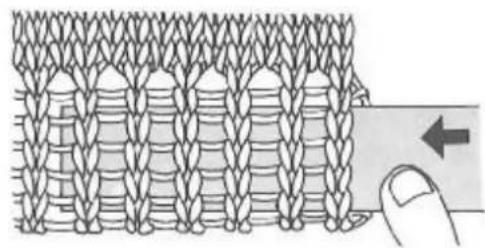
natural_image
Diagram of a knitted fabric pattern with a finger pointing to a rectangular object (no text or symbols)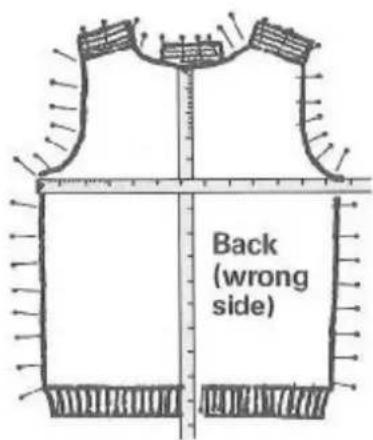
text_image
Back (wrong side)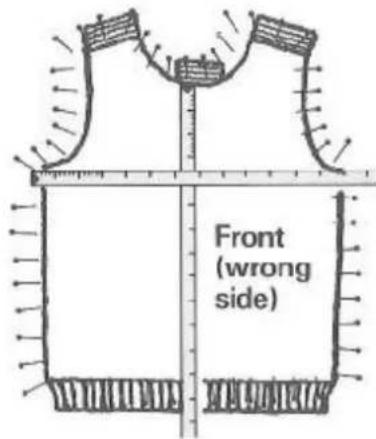
text_image
Front (wrong side)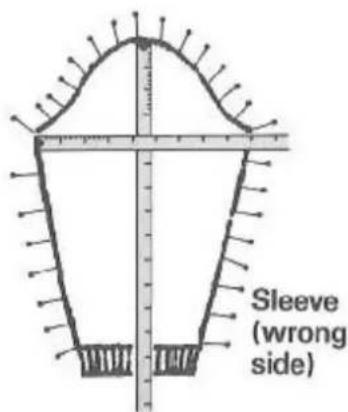
text_image
Sleeve (wrong side)Making-up
Joining Open Stitches on the machine.
If you shaped the shoulders using holding position, you can use this method. Use it also for joining any other open stitches.
With the right side of the first piece facing you, hold the waste yarn down towards you and pick up the loops of the last row knitted in main yarn.
Remove the waste yarn.
With the wrong side of the second piece facing you, and the waste yarn folded down away from you, pick up and place into the needle hooks the loops of the last row knitted in main yarn.
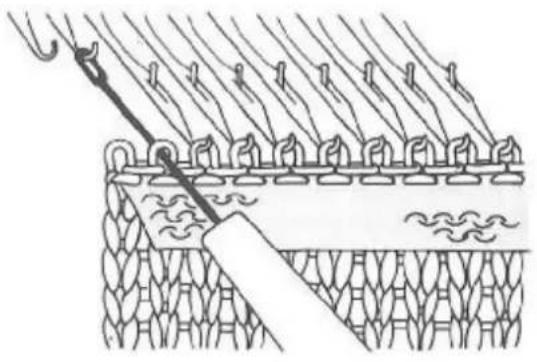
natural_image
Diagram of a textile or fabric structure with layered patterns and a diagonal tool, no visible text or symbols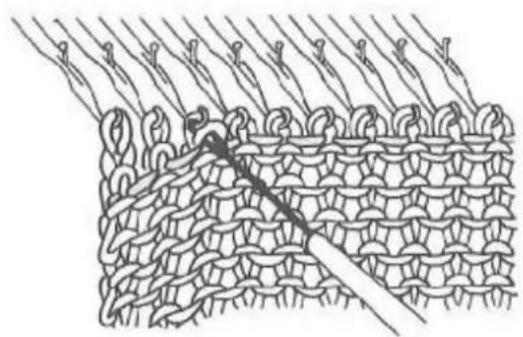
natural_image
Diagram of a knitted fabric with interwoven strands and a central seam (no text or symbols)Remove the waste yarn.
Knit 1 row and cast off using the back stitch method (page 65).
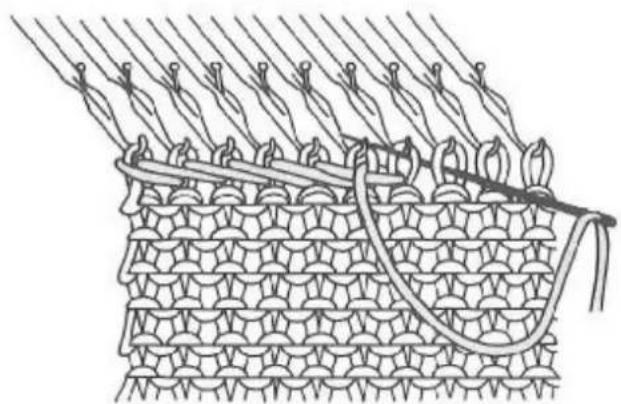
natural_image
Line drawing of a knitted fabric with threads and stitching details (no text or symbols)If the purl side of the knitting is the "right" side, pick up the pieces so that the purl sides are together.
The Automatic Linker attachment casts off stitches automatically, and would be very useful for joining stitches on the machine instead of back stitching.
Blind stitch.
This is ideal for joining side seams, sleeve seams, ribs and bands.
Knit side as the right side.
Use the same yarn as the main yarn. Work on the right side of the garment. Pick up the loop between the first 2 stitches at the edge of one piece and pull the yarn through. Then pick up the loop between the first 2 stitches at the edge of the other piece. Return to the first piece and pick up the next loop, and so on. As you pull up the yarn, the seam will close and the yarn will not show.
Purl side as the right side.
Work exactly as above, but with the purl side of the pieces facing you.
Knit 1 Purl 1 Rib
With the right sides facing you, work in exactly the same way as above, picking up loops beside a plain stitch on one piece and beside a purl stitch on the other.
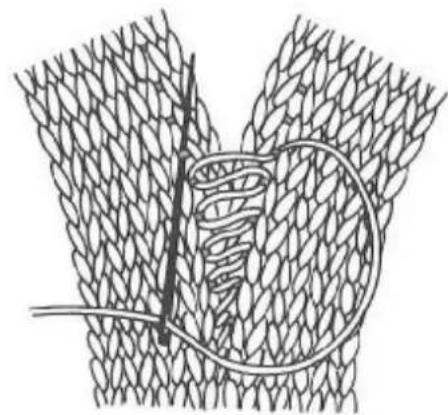
natural_image
Diagram of a knitted fabric with a coiled rope and a central knot (no text or symbols)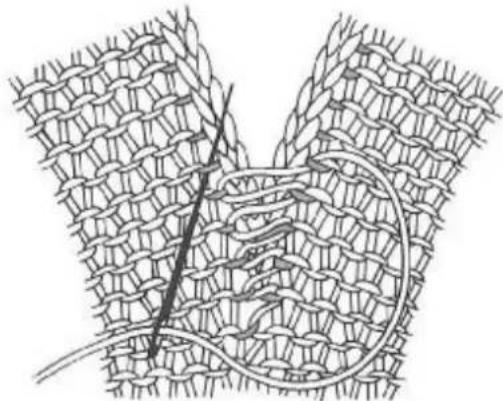
natural_image
Diagram of a knitted fabric with visible fibers and a central knot (no text or symbols)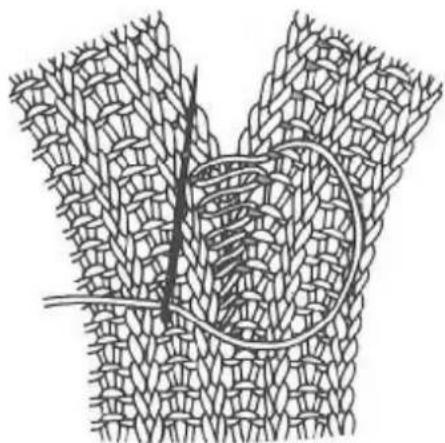
natural_image
Diagram of a knitted fabric with a central knot and visible fibers (no text or symbols)Grafting
If you want a soft invisible seam where you have open loops, you can graft the loops together so that it looks like continuous knitting.
Attach the yarn and bring it out through the first loop of main yarn. Cross to the other piece, and bring the needle out through the first stitch on that piece.
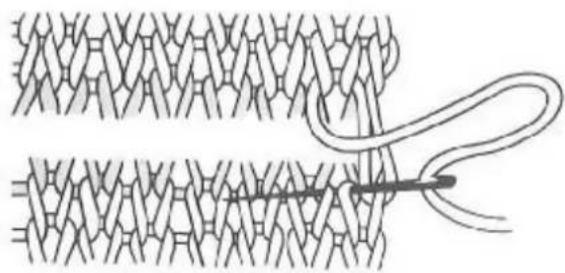
natural_image
Diagram of a knotted fabric with a coiled string and interwoven threads (no text or symbols)Go back to the first piece, put the needle in through the loop where your yarn comes out, then back up through the next loop. Cross to the second piece. Put the needle in through the first loop where the yarn comes out, and bring it out of the second loop. Continue crossing from piece to piece, always putting the needle in through a loop with yarn coming out of it, and bringing it back up through the adjacent empty loop.
Joining a side edge to open stitches.
With the right side of the fabric facing you, pick up the stitches along the side edge and put those on the machine first.
You may need to count the open stitches on the other piece, so that you pick the side edge up onto the correct number of needles.
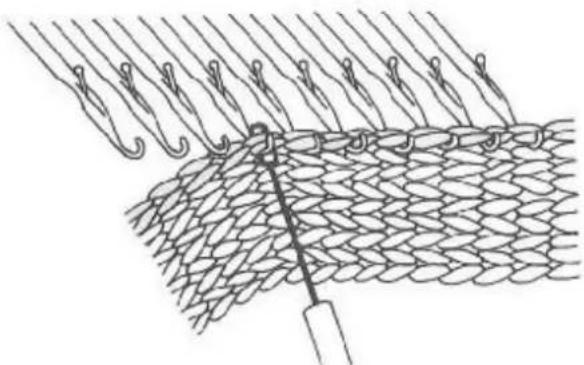
natural_image
Diagram of a knotted fabric mesh with hanging clips and a central rod (no text or symbols)Bring the needles forward so that the stitches all go behind the latches.
With the wrong side of the second piece facing you, pick up and place into the needle hooks the loops of the last row knitted in main yarn.
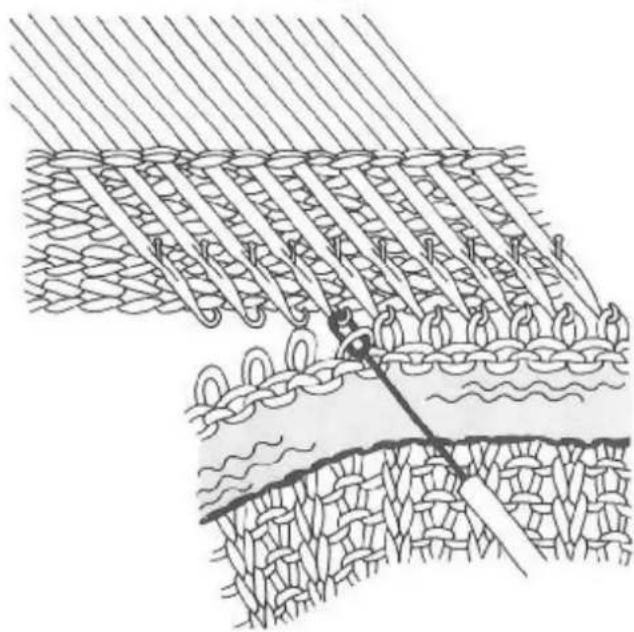
natural_image
Diagram of textile weaving process showing threads and fabric layers (no text or symbols)Remove the waste yarn.
Push the needles carefully back to B. The side edge knits over the open stitches when you push the needles back to B, leaving one set of stitches in the needle hooks, ready to back stitch as shown on page 65.
Buttonholes
1. Simple single stitch buttonhole or eyelet.
Place one stitch onto its adjacent needle, and leave the emptied needle in B position.
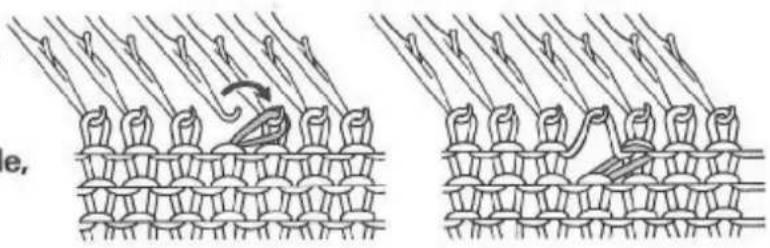
natural_image
Diagram showing two stages of hair follicle meshing, with no text or symbols present.2. Larger two stitch buttonholes.
Transfer 2 stitches to their adjacent needles, one to the left and the other to the right, as shown. Leave the empty needles in B position. Knit 1 row.
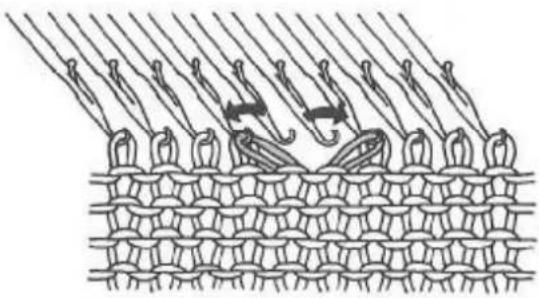
natural_image
Diagram of textile weave pattern with threads and knots (no text or symbols)Lift the yarn off the right hand needle, so that the loop is only hooked up on the left one. Knit 1 row.
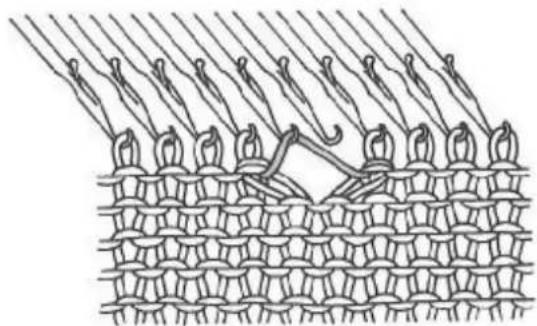
natural_image
Diagram of knitted fabric pattern with threads and stitching details (no text or symbols)Pick up the loop which is now crossing the buttonhole, (which is the loop you lifted off the right hand needle), and place it onto the needle to the right of the buttonhole, as shown.
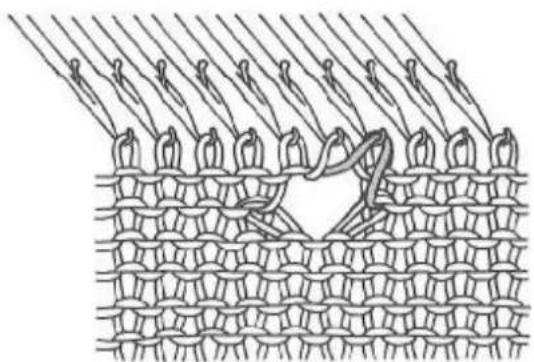
natural_image
Diagram of knitted fabric pattern with threads and stitching (no text or symbols)3. Buttonholes in a stocking stitch vertical double band.
Usually 3 stitch or 4 stitch buttonholes are made this way.
As you reach the point where you want the buttonhole, bring forward the 4 needles in each of the two positions where the buttonhole is to be. Bring them forward so that the stitches go behind the latches. Now lay a short length of contrast yarn in the hooks, and knit each needle back to B, one by one by hand.
Do this for as many buttonholes as you need.
When you have finished knitting the band, fold it so that the buttonholes match exactly, remove the contrast yarns, and back stitch through the pairs of open loops, from the right side, as shown in the sketches. Turn the band the other way up to back stitch the top of the buttonhole in the same way.
Knitting a cord
-
Push 3, 4 or 5 needles to D position and cast-on by hand. You may be able to cast-on directly, without using waste yarn if you check the first knitted rows carefully, to make sure the stitches knit off properly.
-
Knit 4 rows.
Check that the stitches have knitted correctly, and hang a claw weight.
- Make sure there is no punchcard in the mechanism, then bring the left Side Lever forward, leave the right Side Lever back, and turn the Cam Lever to S. The Carriage will knit in one direction, and will not knit in the other.
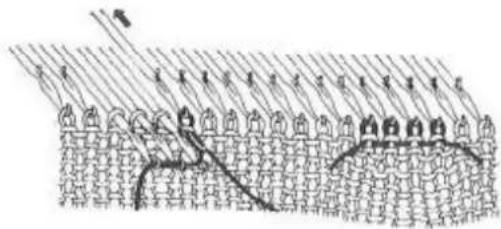
natural_image
Illustration of a crowd with birds in the background and a fence, no text or symbols present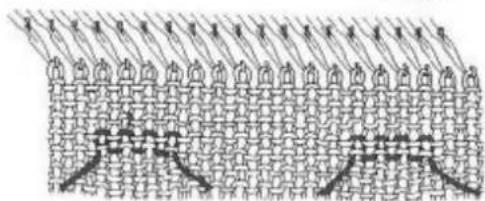
natural_image
Diagram of a mechanical or structural assembly with multiple components and curved elements (no text or symbols)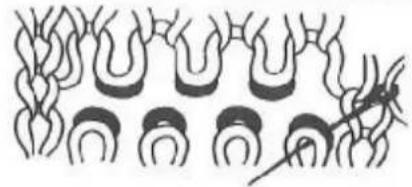
natural_image
Abstract line drawing of interlocking curved shapes with a central arrow (no text or symbols)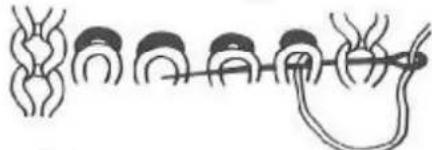
natural_image
Diagram of a chain of rope or cable structures with no visible text or symbols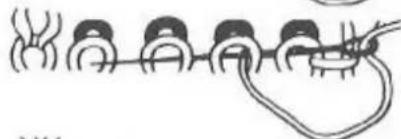
natural_image
Pure electrical circuit lines without any symbols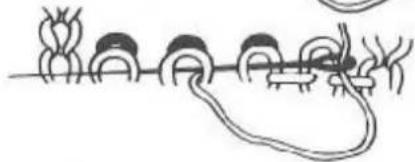
natural_image
Simple line drawing of a rope knot with multiple loops and a string (no text or symbols)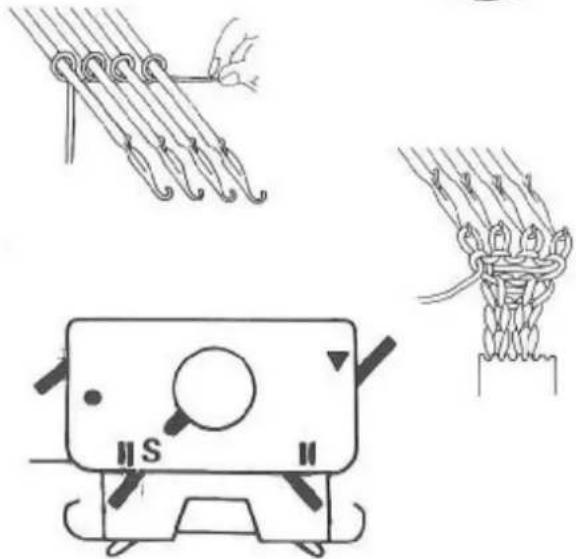
natural_image
Illustration of three different rope knotting techniques: string, hook, and presser (no text or symbols present)Note: This is best done on a low tension—lower than you would knit stocking stitch with that yarn.
Cable pattern
Cable patterns can be made by crossing 1, 2 or 3 stitches—but for 3 stitch cables (which can be very tight), use a yarn which has plenty of give in it.
Practice first with a 2 stitch cable.
2 Stitch Cable
Choose 6 needles. Release the stitches from the two outside needles and let them drop down.
Use a 2-prong tool to take the left hand 2 stitches of the group of 4 (numbered 1 and 2 in the sketch) off the needles. Move the tool to the left and hold it in your left hand. With your right hand, use the other 2-prong tool to transfer the right hand two stitches (3 and 4) to the left hand needles. Now put the remaining stitches (1 and 2) onto the right hand needles.
Latch up the dropped stitches and replace on their needles.
Bring the 4 needles to C.
Knit 6 or 8 rows and repeat. Knit fewer rows between cables for a 1 stitch cable, and more rows for a 3 stitch cable.
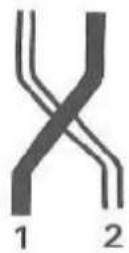
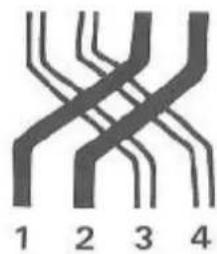
flowchart
graph TD
    A["1"] --> B["2"]
    B --> C["3"]
    C --> D["4"]
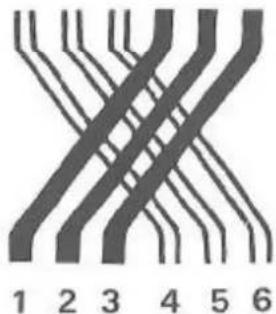
natural_image
Abstract pattern of intersecting diagonal lines forming a cross shape (no text or symbols)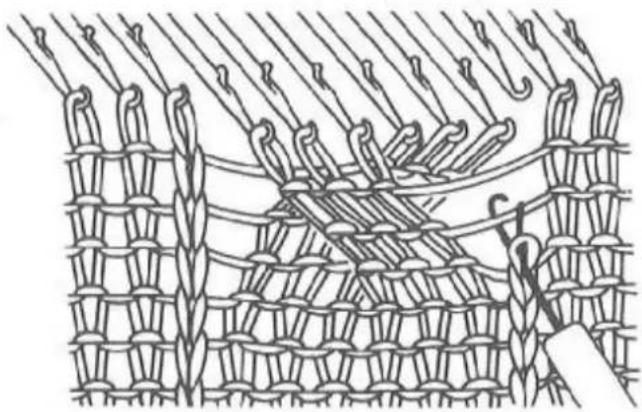
natural_image
Diagram of knitted fabric pattern with interwoven strands and a small object, no text or symbols presentLatching up the stitches on each side of a 3 stitch cable.
natural_image
Line drawing of a cat resting on a coiled cord (no text or symbols)Helpful hints
To pick up a dropped stitch
- Insert a prong of the Transfer Tool into the stitch one row below the dropped one.
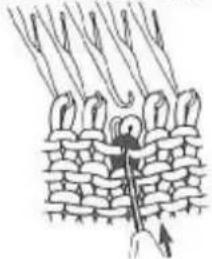
natural_image
Diagram of a hair follicle with multiple teeth and a central needle inserted (no text or labels)- Replace the stitch onto the empty needle together with the bar above the stitch.
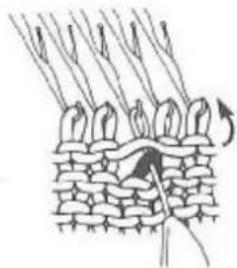
natural_image
Diagram of a knitted fabric with pleated texture and directional arrows indicating movement (no text or symbols)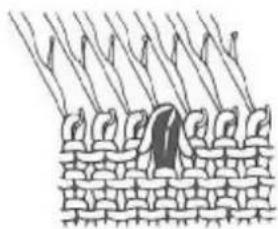
natural_image
Illustration of a person standing on a brick wall with hanging objects, no text or symbols present- Lift up the bar using the tool and bring it in front of the latch.
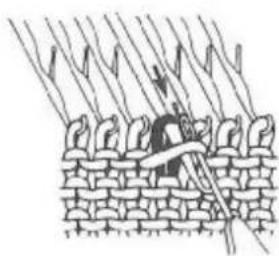
natural_image
Diagram of a person climbing a rope with chains, no text or symbols presentPush the needle back firmly to correct the size of the stitch, then line the needle up in B position.
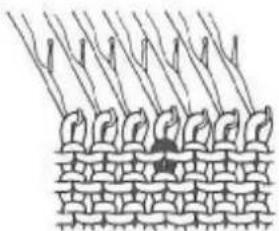
natural_image
Diagram of a woven fabric pattern with hanging objects, no text or symbols present- Unravel the dropped stitch, holding the stitch below on the tool.
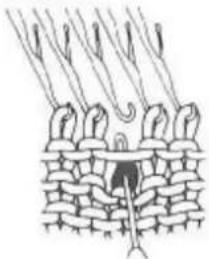
natural_image
Diagram of hair follicles interacting with a brick wall (no text or labels)- Push forward the needle until the stitch and the bar are behind the latch.
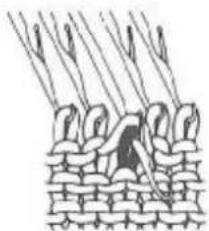
natural_image
Diagram of knitted fabric with pleated texture and central seam (no text or symbols)- Push back the needle until the stitch behind the latch slips off the needle.
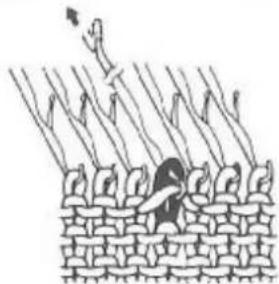
natural_image
Illustration of a person standing on a brick wall with multiple arms raised, no text or symbols presentIf a dropped stitch has run down for several rows ...
Latch up the stitch from the back of the knitting using the Latch Tool, and replace the last stitch on the needle. You may find it useful to practice this, to get used to latching up from the back.
Unravelling a row of knitting
Hang Claw Weights at both edges of the knitting.
If you have decreased at either end of the row, replace the stitches on their original needles.
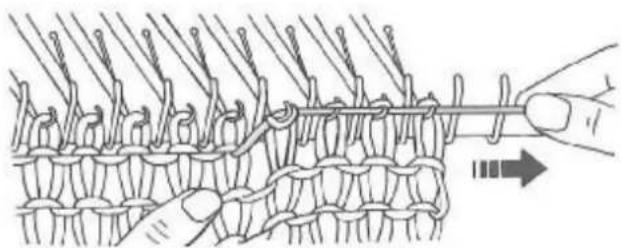
natural_image
Illustration of a knotted fabric with threads and a hand holding a string (no text or symbols)- Hold the fabric down, and pull the yarn to the side, to tighten the stitches.
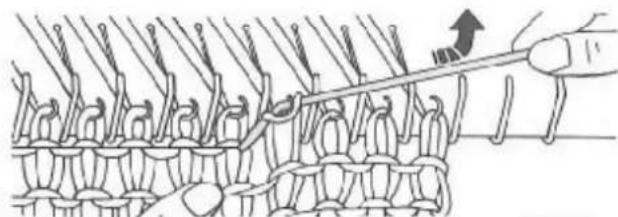
natural_image
Diagram of a hand holding a knitted fabric with a finger, showing stitching details (no text or symbols)- Lift the yarn upwards and very slightly backwards. The stitches of the previous row will slip back into the needle hooks.
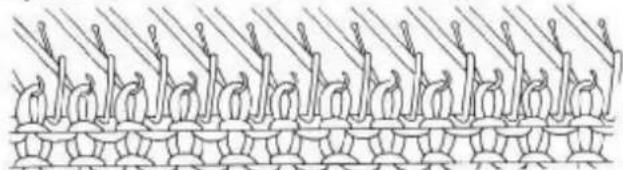
natural_image
Diagram of a woven fabric pattern with repeating geometric shapes and diagonal lines (no text or symbols)-
When you have unravelled as many rows as you need, check that the stitches are all in needle hooks, and line the needles up in B position.
-
Turn the Row Counter back the same number of rows as you have unravelled.
-
If you are doing pattern knitting, turn the Punch Card back the same number of rows as you have unravelled, and memorise the pattern (see below).
-
Pull the yarn down towards the ball or cone to remove any slack, and continue knitting, checking that the first row has knitted off properly.
Memorise the pattern row
-
Check to see if the Carriage passed the Pattern Panel far enough to move the pattern on for the row when you stopped knitting.
-
Turn the Punch Card back the number of rows you have unravelled. The pattern must be set to the row for the next row to be knitted.
-
Bring forward the Stop Knob to lock the Punch Card.
-
Use the Carriage Release Lever to open the Carriage, and take the Carriage carefully right across the Pattern Panel and back again to the start of the row.
-
Close the Carriage and release the Punch Card. Pull back the slack yarn and continue knitting.
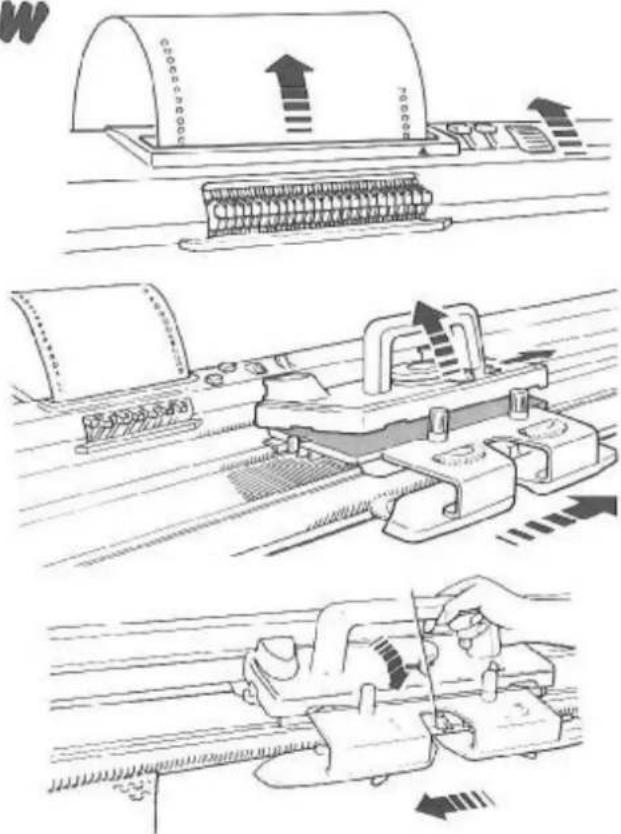
natural_image
Three-panel line drawing showing mechanical assembly steps: top panel with upward arrow, middle panel with tool path, bottom panel with hand cutting tool (no text or symbols)If the carriage has jammed....
Unthread the yarn from the Carriage, use the Carriage release to lift up the Carriage and return it to the beginning of the row on which it jammed. (If you were knitting from left to right, put it back on the left).
Pick up any dropped stitches (page 80).
If any stitches are behind the latches, use your Transfer Tool to push the needle back, then tip it up to put the stitch into the needle hook.
Push all the needles to B after you have made sure that no stitches are behind the latches.
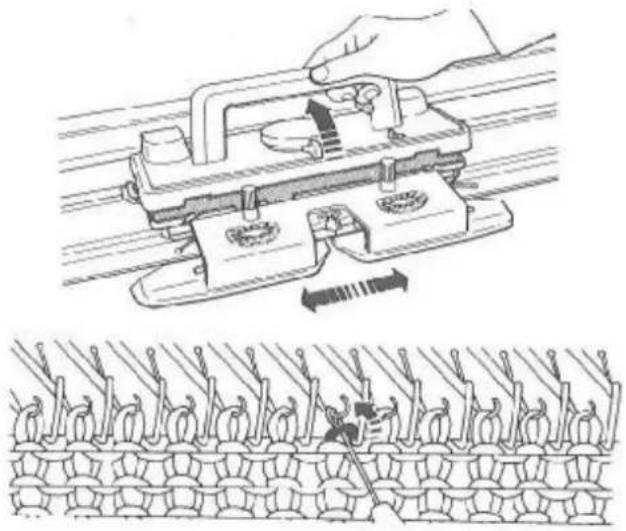
natural_image
Technical illustration of a hand operating a mechanical device with directional arrows, alongside a close-up of a meshed metal structure (no text or symbols)Unravel the stitches in the incomplete row.
Turn the Row Counter back.
If you are pattern knitting, turn the Punch Card back as needed and memorise the pattern (see previous page).
Thread up the Carriage and continue knitting.
If yarn is entangled in the memory drum
While knitting, make sure the back of the Carriage and Needle Bed are always kept clear of yarn.
If yarn, or your cast-on cord, should accidentally become caught in a memory drum, cut away any visible yarn, move the Carriage to overlap the end of the Needle Bed, and carefully pull out the yarn from the drum. Do not force it, or you may damage the memory drum.
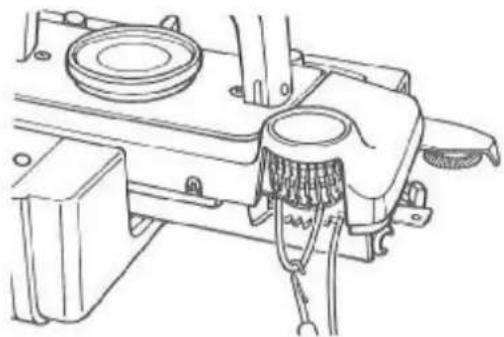
natural_image
Technical line drawing of a mechanical assembly with gears and springs (no text or symbols)Replacing a damaged needle
A needle with a damaged latch or bent hook will cause incorrect knitting or dropped stitches.

text_image
a bThe needle latch "a" must move freely, and must lie flat over the hook "b".
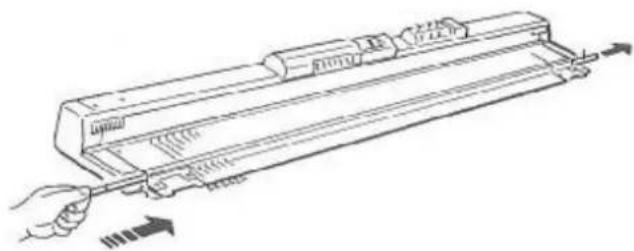
natural_image
Line drawing of a mechanical device with a hand operating it, showing internal components and directional arrows (no text or symbols)- Push the damaged needle to D position and close its latch.
- Use the flat end of a pencil to push the needle retaining bar at the end of the bed nearest to the damaged needle. When it comes out at the opposite end, pull carefully until you see that the needle is released. Don't pull too far.
- Now lift the needle butt, so that the back of the needle comes out of the needlebed, and slide the needle back, lifting the back to clear the rear of the machine. Pull the needle right out.
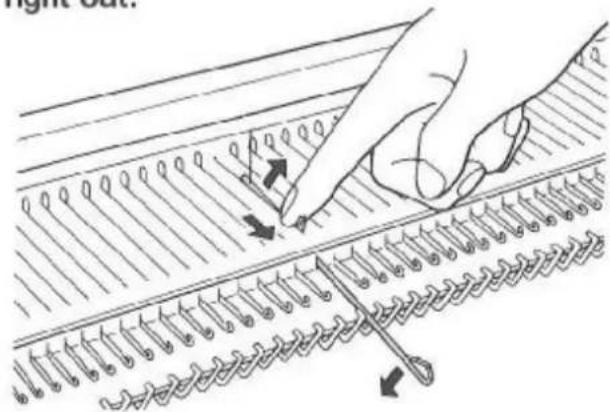
text_image
Diagram illustrating a hand using a tool to mark writing or editing on lined paper strips, with arrows indicating movement.- Open the latch of a new needle and insert it into the empty slot. Bring it right forward so that the back of the needle drops into the slot. Push it down, gently, and slide it back to A position.
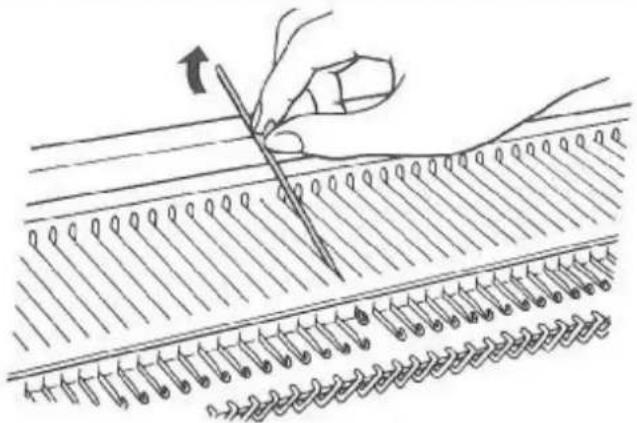
natural_image
Illustration of a hand using a pen to draw or mark a patterned surface with parallel lines (no text or symbols)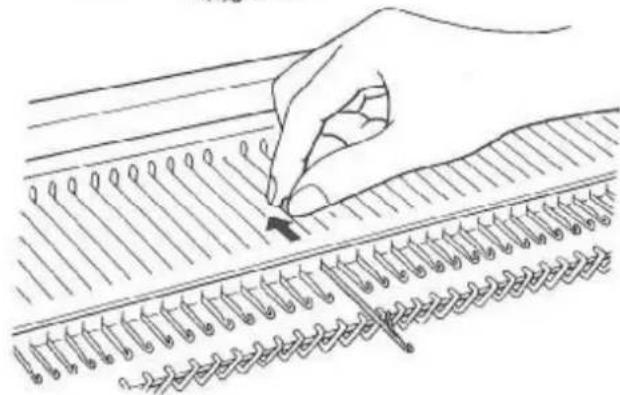
natural_image
Illustration of a hand using a pen to draw or mark a patterned surface with spiral lines (no text or symbols)- Now carefully push the retaining bar back into the bed. You may need to push the needle hooks down a little so that it slides freely.
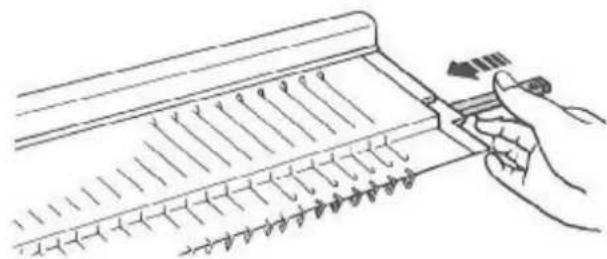
natural_image
Line drawing of a hand using a tool to press or adjust a mechanical component with no visible text or symbolsNote: If a latch has broken off completely, you will need to be very careful when removing the damaged needle, or it may catch.
Maintenance
To clean your machine, remove the Carriage from the needle bed.
Remove all fluff from the needles and needle bed—a vacuum cleaner is useful for this.
Apply two or three drops of oil along the front edge of the bed where the Carriage runs, and on the rear rail. Use a thin transparent (not 'yellow') knitting or sewing machine oil, from your supplier.
Put a very little oil on a soft cloth and wipe the needle bed and needle butts with the cloth.
Turn over the Carriage and clean out the 'pipe' at the back, brush off all fluff and then oil the carriage pipe and the other marked parts on the diagram.
Replace the Carriage and move it once or twice across the Needle Bed.
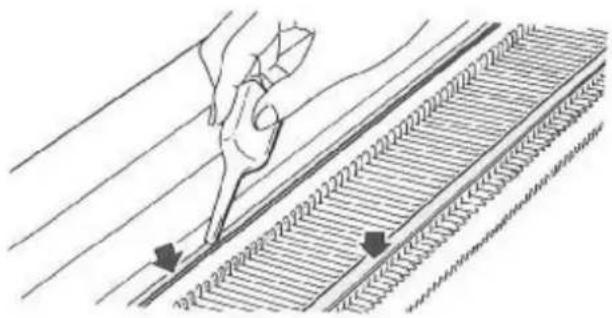
natural_image
Technical line drawing of a hand using a tool to inspect or install railway tracks (no text or symbols present)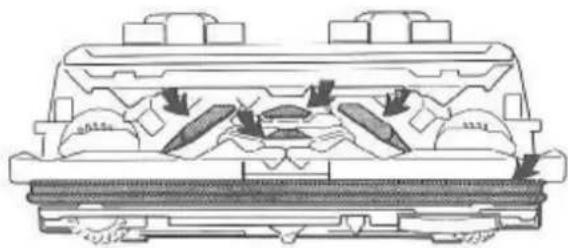
natural_image
Technical line drawing of a mechanical assembly with internal components and directional arrows (no text or symbols)DO NOT USE THINNERS, PETROL, ALCOHOL OR WHITE SPIRIT.
If your Carriage is heavy to use, it may have a build-up of old oil and fluff, particularly on the back rail. Before taking the Carriage off, put a few drops of oil on the back rail, and move the Carriage across and back a few times. Then remove the Carriage, clean the Carriage and rail, put it back and re-oil with 2 or 3 drops only on the front edge and rear rail.
Hints for successful knitting
* Keep your machine really clean and oiled.
* Use cones or rewound balls of yarn, and make sure the yarn can feed freely and smoothly.
* Use an appropriate stitch size for the thickness and type of yarn you are using.
* Check that the needles are correctly in A, B, C or D position, not half-way between.
* At the end of a row, make sure the Carriage is completely clear of the last needle in work.
* Do not take the Carriage too far past the end needle in work, or you will get slack yarn and dropped stitches at the edge of your knitting.
* Knit a tension piece for each yarn that you use. The same brand of yarn, but in a different colour, may need a different size of stitch—so do check.
* Pull each knitted piece lengthwise, then pin out to the right size and steam gently (page 73). Because the knitting is stretched across the needles, it will need pulling to shape after you take it off the needles.