
XM-DTSBN905 - Gps Xomax - Kostenlose Bedienungsanleitung
Finden Sie kostenlos die Bedienungsanleitung des Geräts XM-DTSBN905 Xomax als PDF.


| Produkttyp | GPS-Navigationsgerät |
| Marke | Xomax |
| Modell | XM-DTSBN905 |
| Displaygröße | 7 Zoll |
| Displayauflösung | 800 x 480 Pixel |
| Touchscreen | Ja, kapazitiv |
| Abmessungen (B x H x T) | 178 x 102 x 12 mm |
| Gewicht | 200 g |
| Stromversorgung | 12 V DC (Zigarettenanzünder) |
| Akku | Lithium-Ion, 1500 mAh |
| Betriebssystem | Windows CE 6.0 |
| Kartenmaterial | Europa (vorinstalliert) |
| Speicher | 4 GB intern, microSD-Slot |
| Anschlüsse | USB 2.0, 3,5 mm Klinke, AV-In |
| GPS-Empfänger | SiRF Atlas IV, 32 Kanäle |
| Sprachausgabe | Ja (TTS, verschiedene Sprachen) |
| Verkehrsinformationen | TMC (über RDS) |
| Bluetooth | Ja, für Freisprechen |
| Zusatzfunktionen | Mediaplayer, Bildbetrachter, Rechner |
| Lieferumfang | Navigationsgerät, Saugnapfhalterung, USB-Kabel, Kfz-Adapter, Bedienungsanleitung |
Häufig gestellte Fragen - XM-DTSBN905 Xomax
Benutzerfragen zu XM-DTSBN905 Xomax
0 Frage zu diesem Gerät. Beantworten Sie die, die Sie kennen, oder stellen Sie Ihre eigene.
Eine neue Frage zu diesem Gerät stellen
Laden Sie die Anleitung für Ihr Gps kostenlos im PDF-Format! Finden Sie Ihr Handbuch XM-DTSBN905 - Xomax und nehmen Sie Ihr elektronisches Gerät wieder in die Hand. Auf dieser Seite sind alle Dokumente veröffentlicht, die für die Verwendung Ihres Geräts notwendig sind. XM-DTSBN905 von der Marke Xomax.
BEDIENUNGSANLEITUNG XM-DTSBN905 Xomax
CONTENTS
1.Before Use
How to Read this Manual....02
Safety Warning 03
Operation Precautions....04
. Reset Device 04
.Cleaning Device 04
. Lens Fogging.... 04
. Use of Disc 04
.About Audio File....06
. About Image File 07
.About Video File....08
2.Basic Operation
Panel Introduction....09
Remote Controller Operation……12
Turn the Unit On/Off 14
Enter into the Main Interface……14
3.Function Operation
Radio Function Operation....14
Disc Function Operation……16
. Play/Eject Disc 16
.DVD/VCD Disc Playback 16
.CD Disc Playback....17
. Touch Menu Function....17
. MP3/WMA Format Disc Playback… 21
Calendar/Time Setup 21
AVIN1/AVIN2 External Input 21
U Disc/SD Card Function
Operation 22
Bluetooth Function Operation……23
GPS Navigation Function
Operation 25
Other Function Operations....26
. Back Rearview Function 26
4. Setup
Navigation Path Setup.... 26
Video Setup 26
Touch Screen Calibration....27
Sound Setup 28
Language Setup 29
Backlighting....29
Foreground/Background Setup....30
...Radio-Area Setup
5. Additional Information
Product Specifications 31
Troubleshooting 33

To properly and safely use the product, please read through this instruction manual carefully, and keep it in a safe place for future reference.
INSTRUCTIONS
Before Use
How to Read This Manual
This manual uses illustrations to explain its operations.
The pictures shown in this manual are for reference only, the actual items are the standards.
Marks

Important precautions are described, please read carefully to prevent injuries etc.

Special remarks, supplementary explanations, limitations and reference pages.

Additional information to assist operation.

Warm Notes:
The functions described in this manual may be different from the actual functions, please refer to the actual functions for standard.
Before Use
Warning
To ensure your safety and the safety of your car and others, please make sure you follow the basic requirements below:
Before using the unit, please read all the relative instructions carefully. Warranty does not apply to any damage caused by noncompliance with the instruction.
To ensure driving safety and avoid breaking traffic regulation, please do not watch program or operate the unit while you are driving.
Do not expose the unit to rainwater in case of short circuit.
To prevent a short circuit, never put or left any metallic objects (such as coins or metal tools) inside the unit.
⚠️ Please use the unit according to this instruction manual. Do not open the unit to repair by yourself. If necessary, please go to the professional repair station for help.
Do not use the car audio for a long time after the engine is turned off, otherwise the battery shall be used up.
Do not insert any object into the ventilation slot or other openings.
Do not touch, rub or knock the screen with sharp objects.
INSTRUCTIONS
INSTRUCTIONS
Operation Precautions
Reset Device
If the unit or the connected unit fails to operate properly, press the reset hole with a pointed tool. The unit returns to factory settings after the unit is restarted.
Cleaning Device
If the faceplate of this unit is stained, wipe the stain off with a dry soft cloth such as a silicon cloth.
If the faceplate is stained badly, wipe the stain off with a cloth moistened with neutral cleaner, and then wipe it again with a clean soft dry cloth.
Applying spray cleaner directly to the unit may affect its mechanical parts. Wiping the faceplate with a hard cloth or using a volatile fluid such as thinner or alcohol may scratch the surface or erase characters.
Lens Fogging
When you turn on the car heater in cold weather, dew or condensation may form on the lens in the disc player of the unit. Called lens fogging, this condensation may not allow discs to play. In this situation, remove the discs and wait for the condensation to evaporate before playing the discs again.
Use of disc
To obtain the best image and sound performance, please take the following precautions:
- Do not touch the recording surface of the disc.
- Do not stick tape etc. on the disc, or use a disc with tape stuck on it.
- Do not use CD type accessories.
- Clean from the center of the disc and move outward.
- When removing discs from the unit, pull them out horizontally.
- If the disc center hole or outside rim has burrs, use the disc only after removing the burrs with a ballpoint pen etc.
Unusable Disc
- Discs are not round cannot be used.


- Discs with coloring on the recording surface or discs that are dirty cannot be used.
- The unit can only play the CDs with disc disc disc . This unit may not correctly play discs which do not have the mark.
- You cannot play a CD-R or CD-RW that has not been finalized.
- If you try to load a 3-inch disc with its adapter into the unit, the adapter may separate from the disc and damage the unit.
Additional Information
Trouble Shooting
| PROBLEM | CAUSE | SOLUTION |
| Cannot power on | Check whether power fuse melt or not | Change fuse same as the old one |
| Some factors cause MPU wrong operation | Press RES button on the panel by penpoint, then, power on | |
| After ignition switch off, setting information all lose | Change battery or fuse | Reset information and save |
| Poor performance of radio station | Weak signal | Move the car to another place,then research |
| Cannot load disc | There is a disc inside. | Eject disc,then,slot in new disc |
| Cannot play disc | Disc is scratched | Change new disc |
| Put wrong side of disc into the unit | Slot in the disk with sign side up | |
| Lens has dirty | Clean lens by lens clean disc | |
| Cannot switch language/subtitle | There is only one language/ subtitle in disc | If disc is not with multi-language/ subtitle, it cannot switch language/ subtitle |
| No image | Other factors cause MPU wrong operation | Press [RES] button on the panel by penpoint, then ,power on |
| Cannot watch image during driving | It's not allowed to watch image during driving | Park the car in a safe place, Put the car stall in "P" postion, pull upthe hand brake |
INSTRUCTIONS
INSTRUCTIONS
Additional Information
Video Section
Color System of External Video Input NTSC/PAL
External Video Input Level (RCA jacks) 1 Vp-p/75 Ω
Audio Section
Maximum Power (Front & Rear) 40W X 4
Full Bandwidth Power (Front & Fear) (<1% THD)
22W×4
Speaker Impedance 40
General
Operating Voltage
14.4V (10.5-16V allowable)
Current Consumption 10A
Power-down Current <10mA
Operational Temperature Range -20°C α :70°C
α Temperature Range -30°C α 80°C
NavigationSection
Receiver
High-sensitivity GPS Receiver
Reception Frequency
1575.42MHz (C/A code)
Acquisition Times
Cold : <40 seconds
Factory Reset
<40 seconds
(On average for a stationary receiver with a clear view of the sky)
Update Rate
Location: 1/s; Signal: 5/s
Accuracy
Position <10m (typical)
Circular Error Probability <2.5m
Mean Error Probability < 10m
Velocity
0.05m/s RMS
Position Method
GPS
Operation Precautions
playable Disc
| Type | Standard | Support | Remarks |
| DVD | DVD video | ○ | |
| DVD audio | × | ||
| DVD-R | ○ | MP3/WMA/AAC/JPEG/Divx/MPEG play multi-border/multi session (depends on authorized situation) | |
| DVD-RW | ○ | ||
| DVD+R | ○ | ||
| DVD-RW | ○ | ||
| DVD-R DL(double layers) | ○ | VIDEO format only | |
| DVD+RDL (double surfaces) | ○ | ||
| DVD-RAM | × | ||
| CD | MUSIC CD | ○ | |
| CD-ROM | ○ | MP3/WMA/AAC/JPEG play, support multi session does not support packet write | |
| CD-R | ○ | ||
| CD-RW | ○ | ||
| DTS-CD | × | ||
| VEDIO CD (VCD) | ○ | ||
| Super video CD | ○ | ||
| photo CD disc | ○ | ||
| CD--EXTRA | △ | can only play music disc session | |
| HDCD | △ | voice quality of normal CD music | |
| CCCD | × | ||
| Others | DualDisc | × | |
| Super video disc | △ | can only play CD layer |
○ : Can play
△ : Partial playback
× : Cannot play
Use of "DualDisc"
"DualDisc" is a disc with one surface contains DVD standard signal and the other surface contains music signal. If you play "DualDisc" in this device, when you insert or eject the disc, the un-played surface may be scratched. The surface of music discs does not comply with disc standard so it cannot be played.
INSTRUCTIONS
INSTRUCTIONS
Operation Precautions
About Audio File
playable Audio File
MP3(.Mp3),
WMA(.wma)
playable MP3 File
Format: MPEG 1/2 Audio Layer 3 file
Transmission Bit Rate: 24-320kbp/VBR
Sample Rate: 8, 11.025, 12, 16, 22.05, 24, 32, 44.1, 48kHz
ID3 Labels: Version1.0, 1.1, 2.2, 2.3, 2.4 ( Title/Artist/Album: does not support image display )
Playable WMA File
Format: files conform to Windows
Media Audio
(Files for Windows Media Player9 or utilize new function excepted)
Transmission Bit Rate: 48-192kbps/VBR
Sample Rate: 32、44.1、48kHz
WMA Label (content description):
Title/Artist
WMA Label (extended content
description): WM/Title of Album

-
If normal disc music and other playback systems are recorded in the same disc, only the playback system recorded at the first setout is played.
-
Do not add an extended name to a non-audio file. Otherwise it will cause big noise during play and damage the speaker.
-
Files protected from copy cannot play.
-
Audio files may not be able to play due to code software setup or recording situation
-
The unit is not compatible with additional specification or non-standard upgrade of compressed format.
-
Due to recording situation of audio files, play time sometimes cannot display correctly
-
Optimum setting can not be used for VBR-encoded song.
Usable Media
CD-R/RW/ROM, DVD±R/RW
Plavable Disc File Format
ISO 9660 Level | 0½, Joliet, Long file names.
Limits of Files and File Folder
Structure
Max Layer of Contents: disc: 8; SD
card/USB: 16
Max File Folder: 128
Max File per Folder: 2400
Max File: 2400

You may have to wait a while for some files to be played due to different recording conditions such as file layer and file folder structures, etc.
Additional Information
Specification
Monitor Section
Display System
Transparent TN LCD panel
Drive System
TFT Active Matrix system
Number of Pixels
152,000(800H X 480V X RGB)
Effective Pixels
99.99%
Pixel Arrangement
RGB striped arrangement
Back Lighting
LED
FM Tuner
Usable Sensitiveness(S/N: 30dB)
10dBu (75Ω)
Stop Sensitivity (dBu)
25±5dBu (75Ω)
S/N Sensitivity (dB)
55dB (75Ω)
Frequency Response (±3.0dB)
30Hz-15KHz
Selectivity (±400KHz)
≥80dB
Stereo Separation
35dB (1 Khz)
AM Tuner
Usable Sensitivity
35dBu
DVD Player Section
D/A Converter
24 bit
Audio Decoder
Linear PCM/MP3/WMA
Video Decoder
MPEG1/MPEG2/MPEG4 (DivX)
Wow & Flutter
Below Measurable Limit
Frequency Response
Sampling frequency: 96kHz: 20-44, 000Hz
Sampling frequency: 48kHz: 20-22, 000Hz
Sampling frequency: 44.1kHz: 20-20, 000Hz
Total Harmonic Distortion
0.1% (1kHz)
S/N Ratio (dB)
98dB (DVD-Video 96kHz)
Dynamic Range
98dB (DVD-Video 96kHz)
Disc Format
DVD-Video/VIDEO-CD/CD-DA
Sampling Frequency
44.1/48/96kHz
Quantifying Bit Number
16/20/24 bit
Basic operation of setup menu
Foreground/background Setup
You can enable background mode by foreground/background setup. When the unit is connected with background device, you can enable background mode of the unit to play audio and video files.
- Touch [Setup] icon in the main interface.
Enter into setup interface. - Touch [Foreground/background] icon.
Enter into foreground/background setup interface.
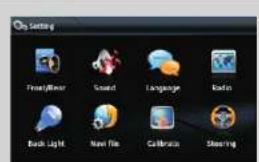
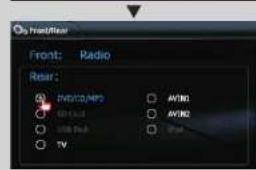
Only in radio/bluetooth/navigation mode can background mode be enabled. After background mode is enabled, long press [IR-SW] button on the remote controller to switch to background control status and perform various playback controls.

When there is no disc or the unit is connected to a SD card/U disc, relevant action icons appear grey.
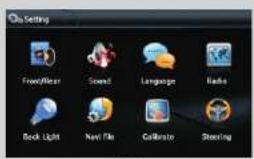
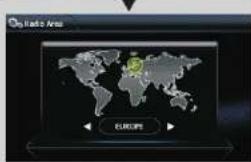
Radio Area Setup
You need to select your radio area before you use radio function.
- Touch [Setup] icon in the main interface.
Enter into setup interface.
- Switch page, touch [Radio] icon.
Enter into the radio area setup interface.
Operation Precautions
Max Displayable characters
File/File Folder: 128
MP3 ID3 Label: 30
WMA Content Attribute: 30

- Character number depends on byte unit.
- The unit can display the following version of MP3 ID3 label: version 1.0/1.1.
- ID3 label cannot be displayed.
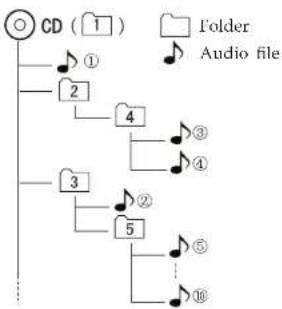
Playing Sequence of Audio File
In the example of folder/file tree shown below, the files are played in the order from ① to ⑩.
About Image File
Acceptable Image File JPEG
Extended Name
.jpg、jpeg、jpe
Usable Media
CD-R/RW/ROM、DVD±R/RW
Baseline Format
8192(W) X 7680 pixel max
Progressive Scan Format
1600(W) X 1200(H) pixel max
Usable disc, disc format, files and file folder
Name and playing sequence are the same as audio file.
flowchart
graph TD
    A["CD (1)"] --> B["1"]
    A --> C["2"]
    A --> D["3"]
    A --> E["5"]
    B --> F["10"]
    C --> G["4"]
    C --> H["3"]
    D --> I["5"]
    E --> J["10"]
    F --> K["1"]
    G --> L["4"]
    H --> M["3"]
    I --> N["5"]
    J --> O["10"]

as Exif)'s image file may not be able to normal display or operate (such as rotate display).
Operation Precautions
About Video File
Acceptable Video File
MPEG1、MPEG2、DivX
Acceptable MPEG-1 File
Extended Name: .mpg,.mpeg,.mpe,.mlv
Image Size: 320x240、352x240
Audio Format: MPEG Audio Layer 2
Audio Sample Rate: 32/44.1/48kHz
Audio Bit Rate: 32-320kbps
(Constant bit rate only)
Acceptable MPEG-2 File
Extended Name: .mpg, .mpeg, .m2v
Image Size: 640x480|704x480
Audio Format: MPEG Audio Layer 2
Audio Sample Rate: 32/44.1/48kHz
Audio Bit Rate: 32-320kbps
(Constant bit rate only)
Acceptable DivX File
Extended Name: .divx, .div, .avi
Image Size: 352x240, 352x288, 720x450,
720×576
Audio Format: MP3
Audio Sample Rate: 32/44.1/48kHz
Audio Bit Rate: 32-320kbps
(Constant bit rate only)
Useable Media
CD-R/RW/ROM, DVD ± R/RW, VCD
usable disc, disc format, file and file
folder
Name and playing sequence are the
same as audio file.
DVD Disc Marks
| Symbol | Description |
| [1853] | Indicates a region number. Discs with this mark can be played with any DVD player. |
 | Indicates the number of audio languages recorded. Up to 8 languages can be recorded in a movie. You can select a favorite language. |
| [2X0D] | Indicates the number of subtitle languages recorded. Up to 32 languages can be recorded. |
 | If a DVD disc has scenes shot from multiple angles, you can select a favorite angle. |
| [2X0X] | Indicates the type of screen for the image. The left mark indicates a wide image picture (16:9) is displayed on a standard TV set screen(4:3) with a black band at both the top and bottom of the screen (letter box). |
Operation Regulatory Marks
With this DVD, some functions of the
unit such as the play function may be
may be restricted depending on the
location where the DVD is playing.
In this case, the following marks will
appear on the screen:

Discs with Limited Period of Use
Do not leave discs with a limited
period of use in this unit. If you load an already expired disc, you may not
able to remove it from the unit.
Basic operation of setup menu
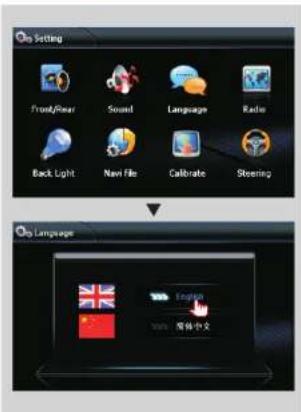
Language Setup
During use, you can select your familiar language to display menu by language setup.
- Touch [Setup] icon in the main interface.
Enter into setup interface. - Switch page, touch [Language Setup] icon.
Enter into language setup interface.
Setup method
Click appropriate language icon, the selected language will be displayed as the menu language.
Backlight
Via backlight setup interface, you can manually adjust the display screen brightness according to the intensity of light of the environment to achieve satisfactory effect. At the same time, to ensure that the driver's sight will not be affected during night driving and driving safety, you can also set the time for display screen to enter into sleeping status.
- Touch [Setup] icon in the main interface.
Enter into setup interface.
- Touch [Backlight] icon.
Enter into backlight setup interface.
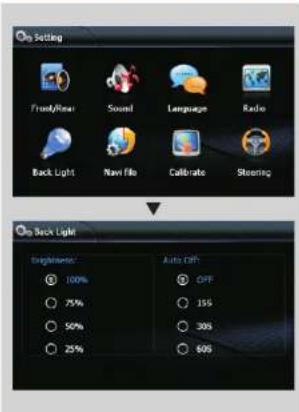
Brightness: 4 brightness values are available: 100%, 75%, 50%, 25%.
Auto close: you can select 15s, 30s, 60s or close.
Basic operation of setup menu
Sound Setup
Touch [Sound Setup] icon to enter sound setup interface as is shown below:

flowchart
graph LR
    A["Loading"] --> B["Color Mode"]
    B --> C["View"]
    C --> D["Action"]
    D --> E["Add/Remove"]
    E --> F["Output"]
Sound effect setup: select general, pop, classic or rock, you can adjust to the best audio effect according to your preferences.
System volume: adjust volume level of the whole unit
Bluetooth volume: adjust volume level of bluetooth mode
Navigation volume: adjust volume level of navigation mode
Reverse volume: adjust volume level of reverse mode
Screen click sound: select to turn screen click sound on/off. After click sound is turned off, there is no beep sound when you touch the screen.
Tweeter/woofer/subwoofer: adjust volume level of tweeter/woofer/subwoofer.
Left front speaker attenuate: adjust volume level of left front speaker
Right front speaker attenuate: adjust volume level of right front speaker
Left rear speaker attenuate: adjust volume level of left rear speaker
Right rear speaker attenuate: adjust volume level of right rear speaker
Basic Operation
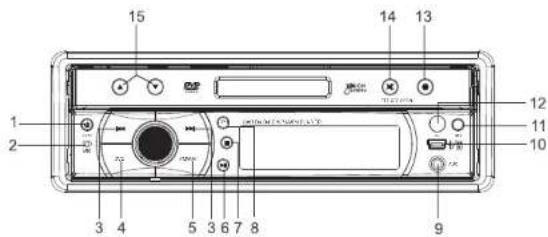
Panel Introduction
Basic Operation
1. ⏻ SRC
When the power on, press this button to turn on/off host; in any application procedure, press this button can switch to the main interface.
2. MIC
Input interface of bluetooth microphone
3.
In radio mode, short press this button to micro-adjust frequency manually; long press it to seek station automatically. In DVD/USB/SD card playback mode, short press this button to access previous track/next track; hold the button for 2 seconds or longer to speed forward/backforward.
4. DVD
In any mode, press this button to read the disc.
5. FM/AM
In any mode, press the button to radio mode.
In radio mode, press the button to switch band.
6.
In playback mode, press the button to pause, repress it to continue playing.
7.
In playback mode, press the button to stop playing
8.RPT
In playback mode, press the button to repeat playing.
9.AUX
Insert AUX input cable, then press AVX icon enters AUX mode.
10.USB
Insert USB device, the unit will play the files automatically.
11.REL
Press the button to release the front panel.
Basic operation of setup menu
Touch Screen Calibration
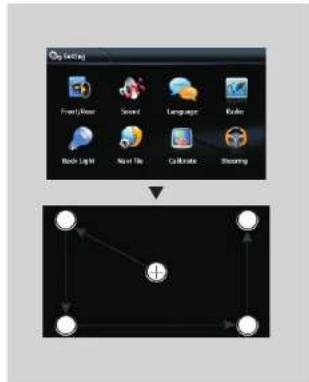
If errors occur in touch position, you can calibrate touch coordinates.
- Touch [Setup] icon in the main interface.
Enter into setup interface.
- Switch page, touch [Touch Calibration] icon.
Enter touch calibration interface.
• Perform calibration with a touch pen.
flowchart
graph TD
    A["Start/View"] --> B["Stream"]
    B --> C["Language"]
    C --> D["Radio"]
    D --> E["Rock Light"]
    E --> F["Next File"]
    F --> G["Calculate"]
    G --> H["Streaming"]
Touch method:
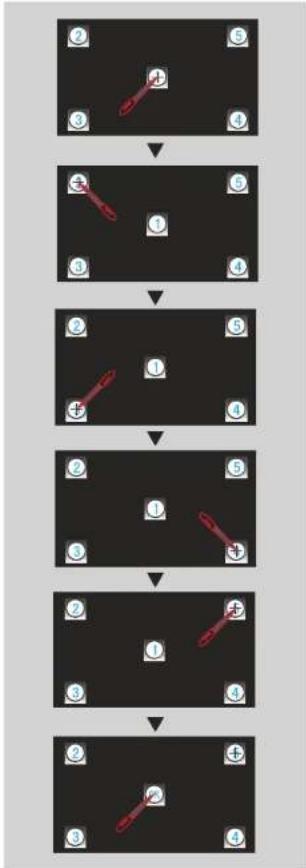
Use a touch pen to click the central area of symbol “+”, calibrate the screen in the moving sequence of the central area of “+”. After calibration is completed, system will automatically save data and exit the screen.
During touch, make sure you click each position on the screen accurately; otherwise calibration accuracy will be affected.
flowchart
graph TD
    A["②"] --> B["③"]
    B --> C["④"]
    C --> D["⑤"]
    D --> E["⑥"]
    E --> F["⑦"]
    F --> G["⑧"]
    G --> H["⑨"]
    H --> I["⑩"]
    I --> J["⑪"]
    J --> K["⑫"]
    K --> L["⑬"]
    L --> M["⑭"]
    M --> N["⑮"]
    N --> O["⑯"]
    O --> P["⑰"]
    P --> Q["⑱"]
    Q --> R["⑲"]
INSTRUCTIONS
INSTRUCTIONS
Function Operation
Other Functions
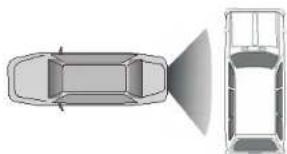
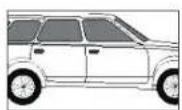
CCD system (back rearview function) During back, if your rearview mirror device has been connected, after the car is put in reverse, system automatically switches to the rearview mirror function screen and display the back scene video shot by your rearview mirror.
natural_image
Top-down diagram of a car with a side view showing the front and rear views (no text or symbols)Reverse field simulation
Rearview backup image
Warning
Do not rely on CCD system completely, please make sure your car is safe by your eyes during driving. Back rearview system only assists in driving. As the distance range of rearview system is limited, completely relying on the rearview system during driving may cause accidents.
Basic operation of setup menu
Navigation Path Setup
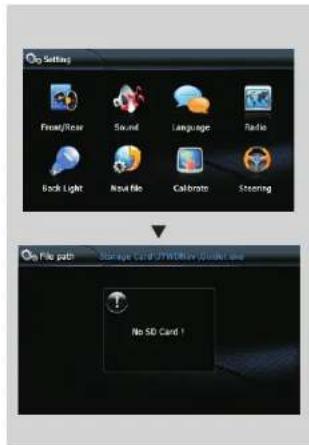
Navigation path is already set when you buy the product. Do not enter into the navigation setup interface to change path arbitrarily. Otherwise you may cause navigation program abnormal.
Video setup
You can adjust screen brightness and contrast etc. by operating 【】 button on the panel. Setup method is follows: In DVD/AV/TV mode, when the volume display has not disappeared, press【】 to switch to video setup function of brightness and contrast etc. After you switch to the video parameter you wish to adjust, rotate the button to adjust its level.
Basic Operation
12.IR
To receive infrared signal from the remote controll.
13.OPEN
Press the button to open/close the screen.
14. /TFT-OFF
Press the button to highlight the liquid screen; long press the button for 1 second or longer to close the screen. When the screen is highlighted, press the button to close volume output; repress it to return volume level to its previous status.
15. ▲▼
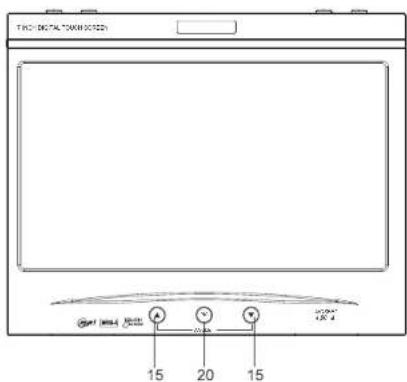
Press the button to adjust the angle of screen.
16. RESET
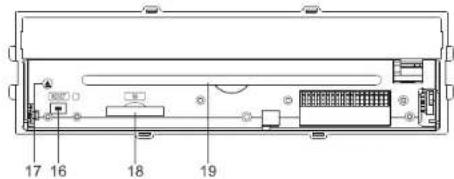
If the unit or its connected device does not work normally, use prong object to press the button. After the unit restart, the setup returns to its previous status.
17.
When there is a disc in the unit, press the button to eject the disc.
18.SD
Insert SD/MMC card, the unit will play the files automatically.
19.Disc Loading Slot
Window for the disc's in/out.
20.PIC
Press the button to switch between the following video modes:
BRIGHT→HUE→CONT→SHARP
Work with [VOL] knob to setup relative parameters.
Basic Operation
Remote Controller Operation
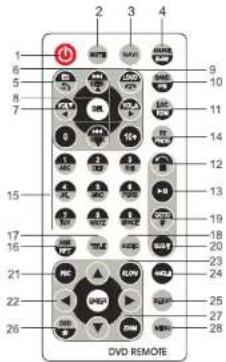
1.PWR
Press the button to turn the power on/off.
2.MUTE
Press the button to turn the volume output on/off, repress it to resume previous volume level.
3.NAVI
Press the button to enter/exit the navigation interface.
4.SOURCE/IR-SW---mode switch Short press the button to switch th mode.
Long press the button to switch between foreground/background controls for the remote controller.
Only effective when the background mode is enabled.
5.EQ/△ preset equalizer select/answer Press the button to select different sound effect mode.
When the unit supports bluetooth function, press the button can answer a call.
6. SEEK ▲▼ ◀◀ ▶◀
In playback mode, short press the button to select the previous/next file; long press the button to fast forward/backward play. In radio mode, short press the button to fine-tune and search station manually; long press the button to scan station automatically.
Under analog TV status, short press the button to fine-tune and search station manually; long press the button to scan channel automatically.
7.VOL
Press the button to increase/reduce the volume.
8.SEL---sound feature
Repeat to press the button to select sound feature.
9.LOUD/---equal loudness compensation/hang up
Press the button to turn the LOUD function on/off.
When the unit supports bluetooth function, press the button to hang up a call after the call is completed.
10.BAND/P/N
in radio mode, press the button to switch the band. Under playback and TV status, press the button to switch the system.
11. LOC/RDM
In radio mode, press the button to switch between local/distant. In playback mode, press the button to start random play. 12.STOP
Press the button once to pause, press it twice to completely stop.
13. ▶---Play/pause
Press the button to switch between play and pause; under stop status, press the button to start playback.
Function Operation
GPS Navigation Function Operation
1 Enter/exit
- Touch in the main interface to enter navigation.
. Touch [Exit System] icon in the navigation main interface to exit navigation system.
2 Navigation PPT
You can enable DVD/video/radio function simultaneously during navigation by navigation push-to-talk function.
For example:
Press [NAVI] button in navigation interface to switch to the main interface, select DVD icon, system will read the disc and switch to DVD playback screen while the navigation tone output continues. Then, press [NAVI] button on the system operation panel, system switches to navigation screen, at this time, DVD playback continues but only sound output. If you wish to exit DVD mode, press [NAVI] button to switch to the main interface, then press 📄 icon to exit DVD mode.
3 Navigation function operation The unit supports enquiry function of destination by touch input and handwriting input. For detailed operation of navigation function, see "Navigation Operation Manual".
4 Receiving signal error
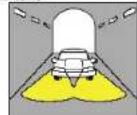
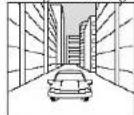
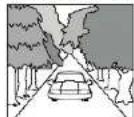
When the satellite signals can be normally received, the error of standard GPS shall be about 7 meters. Driving on parallel sections, there shall be error even the product has auto-correct function. The normal receiving of satellite signals shall be affected and cause error in following environment:
In tune
Among tall buildings
At the boulevard
LThe antenna is sheltered
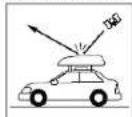
Underground parking
Overpass or viaduct
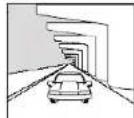
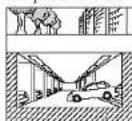
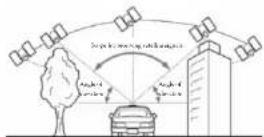
5 Receiving of satellite signals Navigation system can keep receiving 8 satellite signals. As a general rule, the navigation system can figure out your accurate location after received 3-4 satellite signals. But some times, weather and tall buildings in the city shall affect the signal receiving effect, as is shown n following figure:
Function Operation
Receive a call
• In any mode, when a call arrives, system will automatically switch to bluetooth function interface, and switch from speaker to phone ring.
- Touch 📋 button in the bluetooth interface to answer a call;
touch 📋 button to refuse a call.

You can dial/answer/refuse a call by your cellphone.
Switch
During a call, touch 📄 button to switch voice output between car speaker and cellphone.
Hang up
After conversation with the other party completed, touch 📞 button in the bluetooth interface to hang up the phone.

Phonebook
After the cellphone gets connected to the unit, you can read records in the phonebook of your cellphone and store information in the phonebook of the unit. Touch [Download] icon in the phonebook interface, the unit will automatically download phone numbers and put them in order.
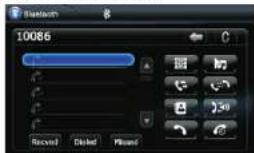

Call records
Recent dialed calls, received calls and missed calls can be saved in call records.
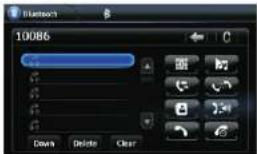

- Some phones may not be able to read information in the phone and phone card due to different download mode.
- Up to 20 recent call records can be saved in received calls/missed calls/dialed calls.
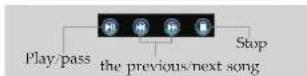
6 Bluetooth music playback Bluetooth player can play music files in cellphone via wireless audio device on condition that the cellphone supports relevant bluetooth protocol. After bluetooth device gets connected to the unit, audio system will automatically link with the paired cellphone.
In some cases, you need to enable the playback of audio files by phone keypad due to different phone models.

Basic Operation
14.ST/PROG---stereo/programmed playback
In radio mode, press the button to select stereo or mono station; in playback status, work with number buttons to start programmed playback.
15. 0-10+---number button
In radio mode, press number buttons to select to play pre-stored stations; long press the number button (1-6) to store the current frequency in the pre-stored position.
In playback mode, press number buttons to directly select songs and chapters. In analog TV mode, press number button (1-9) to select station.
16.AMS/RPT
In radio mode, press the button to browse memory stations; in playback status, press the button to select repeat to play mode.
17. TITLE
In DVD mode, press the button to return to the top menu of the disc.
18. AUDIO
In DVD mode, press the button to switch the dialogue language of the played program. Under VCD status, press the button to select L/R channel/stereo.
19.GOTO---play time setup
Under playback status, after the button is pressed, work with number buttons to select track/time play.
20.SUB-T
In DVD mode, press the button to switch subtitle language.
21.PBC
In VCD mode, press the button to display all tracks menu of the disc, work with a number button to select a track. In DVD mode, press the button to return to the root menu.
22. ▲▼◀▶ Enter
In DVD mode, press the button to move the cursor up/down/left/right to select an item in the system setup menu, and press the ENTER button to confirm the selected item.
23.SLOW
Under playback status, press the button to start slow forward playback.
24.ANGLE
In DVD mode, press the button to change the shooting angle of the played program.
25.SETUP
In playback mode, press the button to switch among different setup options.
26.OSD
Press the button to display title, chapter, playing time and remaining time.
27.ZOOM
Under VCD/DVD reading status, press the button to zoom the image in/out.
28.MENU
Press the button to switch between the main interface and the current mode.
Battery Change
If the remote controller operates only over shorter distances or does not operate at all, replace the battery with a new one, and confirm polarities before you change the battery.
• One hand press stopper, then pull out battery.
- Put battery into battery holder.
- Put the holder into the remote controller.



Basic Operation Function Operation Function Operation
Turn the unit on/off
On
When the ignition switch is turned to the ACC or ON position, press【 ⏻】 button on the panel to turn the unit on.
Off
After the unit is started, hold [⏻] button for 3 seconds or more to turn the unit off.

After the unit is started, turn the ignition switch to the LOCK position or take out the key, the unit will turn off automatically. Next time the ignition switch is turned to the ACC or ON position, the unit will turn on automatically.
Enter into the Main Interface
When the unit is turned on, press [⏻] button on the panel to switch to the main interface.
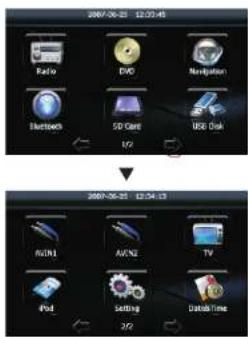
Touch each function icon to enter into the corresponding function operation.

If a function icon listed above
appears grey, it indicates there is no device get connected to the unit under the current status, operation is ineffective.
Radio Function Operation

Enter/exit
Touch icon in the main interface to enter into the radio interface.
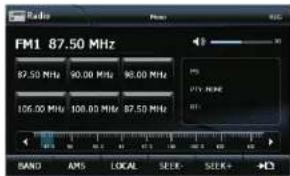
After touching Radio icon and entering into the radio main interface, touch other function icons to exit the radio mode.

In any mode, press (FM/AM)
button on the panel to enter into the radio mode.
Bluetooth Function Operation

Enter/exit
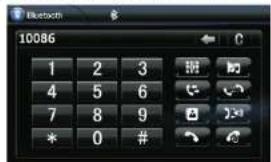
The system provides bluetooth hands-free communication function, if your cellphone supports bluetooth function, you can establish a point-to-point connection between your cellphone and the system. The system can also achieve the dialing, answering function and the function of phonebook on the screen.
Touch 📄 icon in the main interface to enter the bluetooth interface.
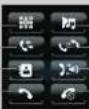
Music playback Pair/link Switch Hang-up/refuse
Touch interface.
icon to exit bluetooth

Pair/link
The first time you pair your callphone with the unit, the procedures below should be followed:
①Turn the bluetooth function of your callphone on.
② Press button on the unit.
③Screen displays "Searching".
④ Recognized phones will be displayed.
⑤ Select the phone you wish to connect on the phone list. Only one phone can be connected.
⑥ A virtual keypad is displayed on the screen; enter the numeric code (1234) and press [OK] button.
⑦ A prompt is displayed on the screen of the phone, to accept pair, enter the same numeric code on the phone and press [OK] button.
⑧ After the pair is completed, the name of the connected cellphone is displayed on the screen.
⑨ After recharged, the bluetooth system will automatically get connect to the lastly disconnected cellphone.

After the successful pair, connecting status displays " * ", otherwise it displays " * ".
Touch [Disconnect] to disconnect the current connection; after disconnected, touch [Connect] to connect the selected bluetooth device.
Touch [Reset] icon to clear all pair records.
3 Dial/answer/switch/hang up Dial a call
• After the cellphone gets connected to the unit, enter a phone number by touching number buttons on the screen, and then touch 🔒 to dial a call.
- During dialing, if wrong numbers are entered, you can click ← to delete one by one, touch C to delete all.
- During dialing, touch to hang up the connecting phone.
Function Operation Function Operation
U Disc/SD Card function operation
When there is a USB device/SD card connected, the unit can conduct the playback of audio/video/image files in the USB device/SD card.

-
This operation is only effective when the unit has USB connectors.
-
The unit only supports U discs/SD cards with memories less than 8G.
Insert/Eject USB storage device
-
Connect a U disc recorded with media information to the unit by a USB connecting cable.
-
When there is a need to eject the USB device, exit the USB device playback screen first, and then take out the device.
Insert/eject SD card
-
Insert a SD card recorded with media information into the SD card slot in the unit correctly until it is locked.
-
When there is a need to eject the SD card, exit the SD card playback status first, then press the SD card, after the SD card is unlocked, it will automatically pop up.
Enter/exit
Insert a USB storage device or SD card to automatically play data contained in it. If the unit has connected with a USB device or SD card, touch icon in the multimedia interface to enter into the external storage playback interface; Touch icon to enter into the SD card playback interface. During playback, touch the top center area of the screen to pop up the touch menu, operate touch menu to perform various playback controls.

-
For the function of touch menu, see 4 Touch menu function description in page 15.
-
During driving, you cannot watch video files.

Search/store/browse station
Auto search and store station
(1) Touch [AUTO] icon in the radio interface or press [AMS] button on the panel to search for station automatically. During search, the searched stations will be stored automatically.
(2) During search, retouch [AUTO] icon or [AMS] button to stop auto searching. (3) After stations are searched and stored, the unit will start browsing each station for 5 seconds. During browse, when you find your favorite program and need to stop browsing, touch any position on the screen to stop.
Manual search and store station
(1) Touch [Search+/-] button in the radio interface to search for station manually. Touch [Search-] button to search for a station upward; Touch [Search+] button to search for a station downward.
During search, after a station is searched, the unit will stop searching automatically and play the searched station radio.
(2) Directly touch ◀▶ icon in the radio interface to fine-tune station frequency.
(3) After a station is searched, (such as: 98.00M/LZ), long press any position in the pre-stored station list in the radio main interface, the searched station will be stored in the selected position
(such as:

(1) FM band can save 18 stations (Fm1/FM2/FM3 can each save 6), AM band can save 12 stations (AM1/AM2 can each save 6).
(2) During search, the unit will automatically stop searching after it has searched for all stations through once.

Select station/band switch/switch between LOC/DX
(1) Directly touch any station in the pre-stored station list in radio interface to play the selected station.
(2) Touch (Band) button in radio interface to switch band among FM1, FM2, FM3, AM1 and AM2.
(3) Touch (LOC) icon to switch search mode between LOC and DX. When LOC function is turned on, only those radio stations with strong signals and good reception can be received; When DX function is turned on, distant weak radio signals can be received.

RDS function
RDS provides a series of information (such as traffic information and station name), and can automatically switch to a station with strong signals and carries the same program.
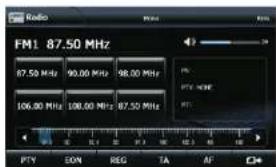

RDS data contains the following contents:
PI--program identification
TA---traffic announcement
PS--program service name
PTY--program type name
AI—alternative frequencies
EON—enhanced other network
TP--traffic program
Function Operation Function Operation
1.AF
Touch the button to turn the AF function on/off.
When the received station signals become weak, the radio will automatically fine-tune to other frequencies.
When receiving an emergency announcing, the screen will display warning message "ALARM".
Receive traffic information
①Press [TA] button to open TA mode. ② When the traffic station is turned on, the radio will automatically search for traffic stations. After a station is searched, screen displays "TP". Only when traffic information is broadcasted can it be received, after traffic information is completed, the radio will automatically switch to the previous mode.
③ Repress [TA] button to close TA function. In other modes, traffic announcement will automatically switch to radio mode, after the traffic announcement is completed, it will automatically switch to the previous mode.
2.PTY
PTY function allows searching for special program types. ① Touch PTY button to select searched program type.
② Three seconds after the program type is selected, the radio will automatically search for station to the selected program type.
3.EON ON: Open EON function, another AF list is received. OFF: Close EON function.
4.REG
ON: Open REG function, only local RDS stations can be received. OFF: Close REG function.
Disc Function Operation
1 Play/eject disc
Play disc
Insert the disc into the disc slot with the printing surface up, system will detect the disc and automatically take it in to read and play.
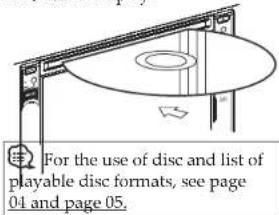
Eject disc
(1) Click【▲】button on the panel to eject the disc. (2) If a disc has not been took away 15 seconds after it is ejected, system will automatically take in the disc but not play.
Do not insert two discs or more.
2 DVD/VCD disc playback
When there is a disc in the unit, touch icon in the main interface, system enters into disc reading status. When the disc does not have play menu, system will automatically read the disc and directly play; when the disc has play menu, system displays DVD menu, you can touch appropriate options on the screen to access the corresponding items.
5 MP3/WMA format disc playback
Put the MP3/WMA disc in DVD player, after the disc is read, system enters into the interface as is shown below:
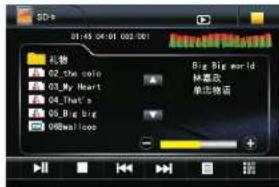
Playback
Touch the file name icon and the song to read and play. Touch [▲] [▼] to select the previous/next file.

-
For the function of touch menu, see 4 Touch menu function description in page 15.
-
MPEG discs available in the current market adopt different recording formats, if some discs cannot be played in the unit for format's sake; take it as a normal phenomenon.
Calendar/time setup
Touch icon in the main interface to enter into the calendar setup interface.
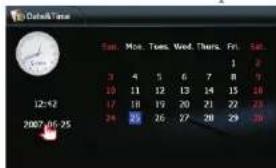
Setup method:
Click the display position of years/months/days/hours/minutes and drag upward/downward to reset the current parameters as is shown below:
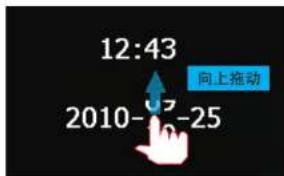
AVIN1/AVIN2 external input
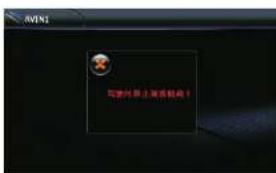
Put video/audio input plugs into AUX video/audio input jacks respectively. Touch / icon in the multimedia interface to enter into AUX status.
Function Operation Function Operation
3.3 Disc select menu language
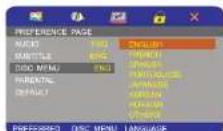
Select a language (which the disc supports) for the menu.
3.4 Age control
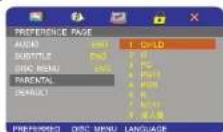
Select a lock level.
3.5 Defaults
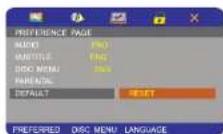
Restore settings of each option.
4. Code setup
Change code: you can change child lock code, you need to enter the 6-digit code (The initial code is: 888888).
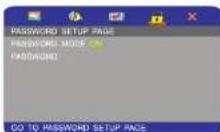
Select to start the code mode.
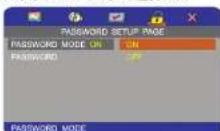
Select to change the code.
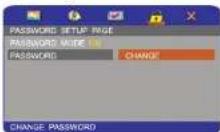
Touch the code display area to pop up the number buttons 1-9, users can enter a code by touching the number buttons.
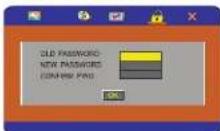
- Child lock is also called parental lock; some DVD discs possess parental lock function. Use this function can prevent children from watching violence or sexuality scenes in the movie and restrict the movie at an appropriate level for children.
- Enter the code; after the child lock is open, the entered code is automatically cleared. To carry the change into effect, you need to enter the code again. Child lock level is recorded on the disc, users can confirm from the disc package, attached description and the disc itself. If a disc is not recorded with child lock level, you cannot use child lock function.
- The child lock of certain discs can only skip some scenes, and then resume normal playback

During playback of disc, touch the middle lower area of the screen to pop up the touch menu, operate the touch menu to perform various playback controls.
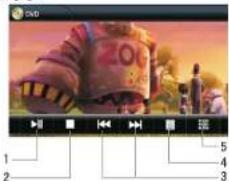
- Play/pause
- Stop
- The next/previous song
- Enter into DVD setup menu
- Numeric keypad

For the function of touch menu, refer to 4 Touch Menu Function Description in page 15.
During driving, you cannot watch video files.
3 CD Disc Playback
When there is a disc in the unit, touch
icon in the main interface, system enters into disc reading status. After disc format is read, the screen will display the CD playback interface, system will automatically read the disc contents and display on the screen,
You can directly click song name to select and play, you can also click the numeric keypad button and enter song number to selected your favorite song to play.
During playback of disc, touch the bottom center area of the screen to pop up touch menu, operate touch menu to perform various playback controls.

For the function introduction of touch menu, see 4 Touch Menu Function Description in page 15.

Touch Menu Function Description
During playback of disc, touch the middle lower area of the screen to pop up the touch menu below, operate the touch menu to perform various playback controls.
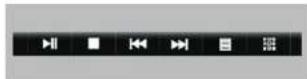

Play/pause
Touch the button to pause, retouch it to continue to play.
Function Operation Function Operation

Stop
Touch the button to enter into prestop status, and then touch ▶ to continue to play.
Double touch □ button to enter into completely stop status, then touch ▶ button to restart playing in the song sequence of disc.

→
The previous/next song
Touch the button to select the previous/next song.

Numeric keypad
Touch the button to pop up the numeric keypad. Directly select a song to play by touching the numeric keypad.

Enter into DVD setup menu
System setup modes contain basic setup, audio setup, video setup and code setup.
1.Basic setup
Set TV system, audio mode and all DVD functions.
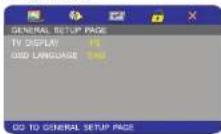
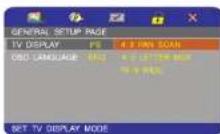
1.1 TV format
Different display ratios can be selected in TV format (Pan & Scan, Letterbox, Widescreen), there are various sizes of display ratio during TV and disc playback.
When the image is set in the 4:3 standard format, no matter which kind of display mode you select, the image is displayed in 4: 3 aspect ratio.
See detailed DVD title information. If the DVD is recorded in 16:9 ratio and the image is set in 4:3 display, then the image will be horizontally compressed when it is displayed.
Some DVD titles are recorded in special format, no matter which kind of system you choose, only the DVD title's own format will be displayed.
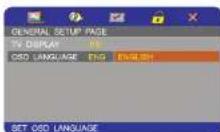
1.2 Display language
By "Image display language", users can select the image display language. (Language kinds can be increased or reduced due to user's need.)
2. Audio setup
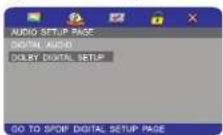
You can complete "Coaxial digital output" and "Digital audio setup".
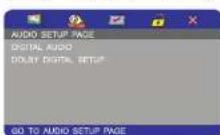
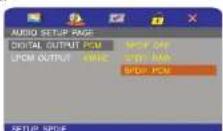
2.1 Coaxial digital output. (This function can be added or deleted according to requirements.)
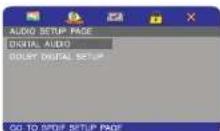
You can switch digital output mode among coaxial off, source code and PCM.
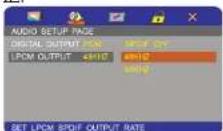
You can switch between 48KHZ and 96KHZ.
2.2 Digital audio setup
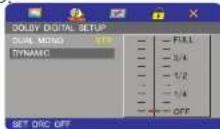
You can select stereo, left channel, right channel or mix.
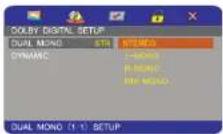
You can select dynamic audio compression ratio, only effective for DVD.
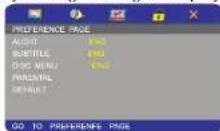
3. Initial settings
In the initial settings page, you can set audio language, subtitle language; menu language and child lock or resume factory settings during DVD playback.
3.1 Sound setup
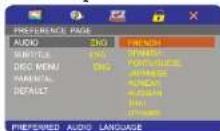
Select a language (which the disc supports) for the sound during DVD playback.
3.2 Subtitle language
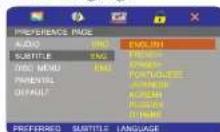
Select a language (which the disc supports) for the subtitle.
- CONTENTS
- 1.Before Use
- 2.Basic Operation
- 3.Function Operation
- Setup
- Additional Information
- INSTRUCTIONS
- Before Use
- How to Read This Manual
- Marks
- Warm Notes:
- Warning
- Operation Precautions
- Reset Device
- Cleaning Device
- Lens Fogging
- Use of disc
- Unusable Disc
- Additional Information
- Video Section
- Audio Section
- General
- NavigationSection
- Update Rate
- Use of "DualDisc"
- About Audio File
- playable Audio File
- playable MP3 File
- Playable WMA File
- Usable Media
- Plavable Disc File Format
- Limits of Files and File Folder
- Structure
- Specification
- Monitor Section
- Display System
- Drive System
- Back Lighting
- FM Tuner
- AM Tuner
- DVD Player Section
- Basic operation of setup menu
- Foreground/background Setup
- Radio Area Setup
- About Video File
- Operation Regulatory Marks
- Discs with Limited Period of Use
- Language Setup
- Setup method
- Backlight
- Sound Setup
- Basic Operation
- ⏻ SRC
- MIC
- 3.
- DVD
- FM/AM
- 6.
- 7.
- 8.RPT
- 9.AUX
- 10.USB
- 11.REL
- Touch Screen Calibration
- Function Operation
- Other Functions
- Navigation Path Setup
- Video setup
- 12.IR
- 13.OPEN
- /TFT-OFF
- ▲▼
- RESET
- 17.
- 18.SD
- 19.Disc Loading Slot
- 20.PIC
- Remote Controller Operation
- 1.PWR
- 2.MUTE
- 3.NAVI
- SEEK ▲▼ ◀◀ ▶◀
- 7.VOL
- 8.SEL---sound feature
- 9.LOUD/---equal loudness compensation/hang up
- 10.BAND/P/N
- LOC/RDM
- ▶---Play/pause
- GPS Navigation Function Operation
- Enter/exit
- Navigation PPT
- For example:
- Receiving signal error
- Receive a call
- Switch
- Hang up
- Phonebook
- Call records
- 14.ST/PROG---stereo/programmed playback
- 0-10+---number button
- 16.AMS/RPT
- TITLE
- AUDIO
- 19.GOTO---play time setup
- 20.SUB-T
- 21.PBC
- ▲▼◀▶ Enter
- 23.SLOW
- 24.ANGLE
- 25.SETUP
- 26.OSD
- 27.ZOOM
- 28.MENU
- Battery Change
- Basic Operation Function Operation Function Operation
- Turn the unit on/off
- On
- Off
- Enter into the Main Interface
- Radio Function Operation
- Bluetooth Function Operation
- Enter/exit
- Pair/link
- Dial/answer/switch/hang up Dial a call
- Function Operation Function Operation
- U Disc/SD Card function operation
- Insert/Eject USB storage device
- Insert/eject SD card
- Search/store/browse station
- Auto search and store station
- Manual search and store station
- Select station/band switch/switch between LOC/DX
- RDS function
- 1.AF
- Receive traffic information
- 2.PTY
- 4.REG
- Disc Function Operation
- Play disc
- Eject disc
- DVD/VCD disc playback
- MP3/WMA format disc playback
- Playback
- Calendar/time setup
- Setup method:
- AVIN1/AVIN2 external input
- Code setup
- CD Disc Playback
- Touch Menu Function Description
- Play/pause
- Stop
- →
- The previous/next song
- Numeric keypad
- Enter into DVD setup menu
- 1.Basic setup
- TV format
- Display language
- Audio setup
- Initial settings
Marke : Xomax
Modell : XM-DTSBN905
Kategorie : Gps