VOH1017 - Alarm ViewOnHome - Kostenlose Bedienungsanleitung
Finden Sie kostenlos die Bedienungsanleitung des Geräts VOH1017 ViewOnHome als PDF.


Benutzerfragen zu VOH1017 ViewOnHome
0 Frage zu diesem Gerät. Beantworten Sie die, die Sie kennen, oder stellen Sie Ihre eigene.
Eine neue Frage zu diesem Gerät stellen
Laden Sie die Anleitung für Ihr Alarm kostenlos im PDF-Format! Finden Sie Ihr Handbuch VOH1017 - ViewOnHome und nehmen Sie Ihr elektronisches Gerät wieder in die Hand. Auf dieser Seite sind alle Dokumente veröffentlicht, die für die Verwendung Ihres Geräts notwendig sind. VOH1017 von der Marke ViewOnHome.
BEDIENUNGSANLEITUNG VOH1017 ViewOnHome

VIEWONHOME
text_image
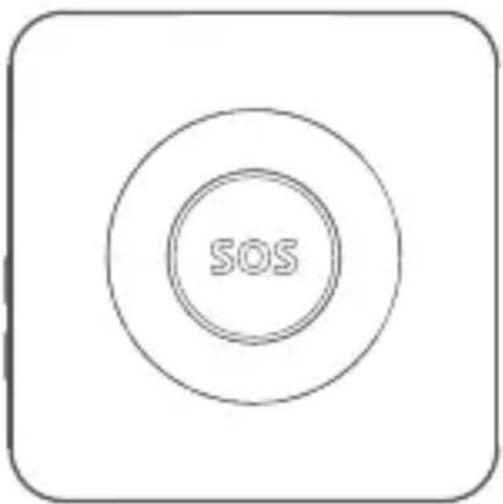
SOSVOH-1017
Indoor Siren
Features
VOH-1017 can be used either as an additional siren connected to your alarm system or as an independent siren connected to a remote control and/or wireless detectors.
- Wireless connection for an easy installation
- Radio-frequency security of the accessories: more than one million of codes combinations
- Simplified connection to accessories
- Can be connected to VIEWONHOME Security Kits
- Built-in 3.7V / 600 mAh lithium batteries: 8-hour battery life in standby mode
Box Content
1 x Indoor strobe siren
1 x User Manual
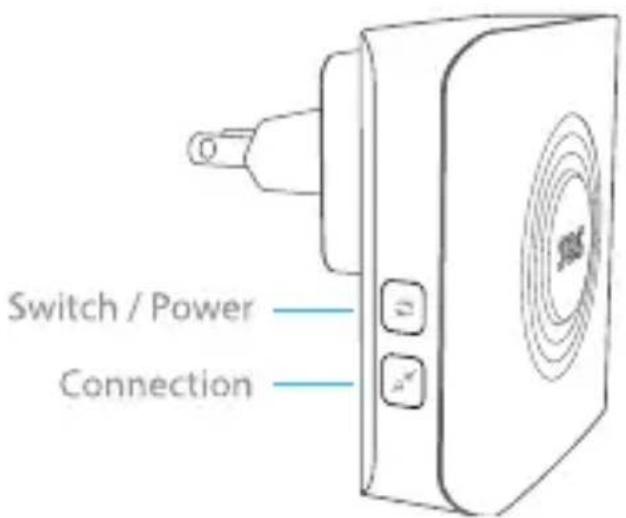
Layout
text_image
Switch / Power ConnectionGeneral information
The VOH-1017 is powered by its built-in AC 110-220V plug.
Several VOH-1017 can be installed throughout your home and connected to your alarm system. When the alarm of your system is triggered, the VOH-1017 rings out and its LEDs switch on.
The VOH-1017 can also be used as a standalone siren and can be connected to wireless sensors and/or to a remote control.
Power on / off
Power on
The siren is powered off as per default settings. Plug the siren to a 110-220V socket. You hear a long beep: the siren is on. You can also turn the siren on by long pressing (6 seconds) the Power button on the siren.
Enter Setup Mode / Power off
Enter Setup Mode by pressing the Power button once. Press again the Power button for 6 seconds to turn the siren off.
Siren and light indications
When arming the system
The siren beeps once, the LED lights blink once and switch on.
When disarming the system
The siren beeps twice, the LED lights blink twice and turn off.
When armed / disarmed in Mute Mode from the control panel
The siren does not beep, the LED lights do not blink.
Use as an additional siren
If the siren is used as an additional siren, it must be registered to your alarm's control panel. If the alarm is triggered, the VOH-1017 will ring out and its LED lights will turn on.
Register the VOH1017 in the control panel
Press the Connect button on the siren. The siren beeps once and the LEDs light up: the siren is now in Connection Mode.
Press the "SOS" or "Arm" button on the control panel of your alarm system. You hear one beep: the siren has been registered in the control panel successfully (if you hear 3 beeps, the siren has already been connected). Press the Connect button again on the siren to exit the Connection Mode.
Note
Do not trigger an alarm with a sensor when registering the siren in the control panel.
Test
press the "Arm" button on the control panel. Both the built-in siren of the control panel and the VOH-1017 beep: the connection is successful. If not, the connection has failed, try registering the siren again.
Use as a standalone alarm system
Before using the VOH-1017 as a standalone alarm system, it must be connected to a remote control or an accessory (e.g. motion detector, door / window contact).
When the system is armed, if a sensor is triggered, the siren will ring out and the LED lights will turn on.
Connect a remote control
Press the Connect button on the siren. The siren beeps once and the LEDs light up: the siren is now in Connection Mode.
Press any button on the remote control.
You hear one beep: the remote control has been connected to the siren successfully (if you hear 3 beeps, the remote control has already been connected).
Connect a wireless sensor
Press the Connect button on the siren. The siren beeps once and the LEDs light up: the siren is now in Connection Mode.
Trigger the sensor (e.g. walk in front of the sensor if you want to connect a motion detector)
You hear one beep: the accessory has been connected to the siren successfully (if you hear 3 beeps, the accessory has already been connected).
The siren supports up to 10 remote controls and 10 wireless detectors.
Test
a) Test the connection to a remote control
Press the "Arm" button on the remote control. The siren beeps once: the connection of the remote control is successful. If not, the connection has failed, try registering the remote control again.
b) Test the connection to a wireless sensor
Arm the system. Trigger the sensor (e.g. walk in front of the sensor if you have connected a motion detector). The siren rings out: the connection of the sensor is successful. If not, the connection has failed, try registering the sensor again.
Clear all accessories
Press the Connect button on the siren for 6 seconds until you hear two beeps. The LEDs blink twice: all the accessories and control panels connected to the siren have been cleared.
Entry / Exit Delay
A delay before activation can be set for the siren if the sensor is assigned to the Delay Zone*.
If the Entry / Exit Delay is activated, the siren beeps once every second until the system is armed, during the period of delay set. If one of your system's sensors triggers the alarm, the ringing out of the siren will be delayed accordingly.
* The name of the Delay Zone and the connection process may vary depending on models. Refer to the user manual of your alarm system for more information.
Set up the delay:
Enter Setup Mode by pressing the power button once. Press the power button again
- once to set the delay to 10 seconds
- twice to set the delay to 20 seconds
- three times to set the delay to 30 seconds
- four times to deactivate the delay
Default setting: no delay.
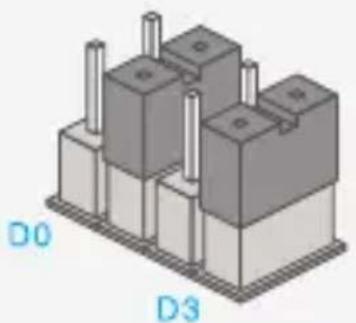
The delay will be effective only if the sensors have been assigned to the Delay Zone. To assign a sensor to the Delay Zone, open its cover and move the jumpers on the circuit board according to the opposite drawing. For more information, refer to the manual of your alarm system.
natural_image
3D diagram of a mechanical or electronic component with labeled sections D0 and D3, showing no readable text or symbols.Night Lamp mode
When used as a standalone alarm system, the VOH-1017 can also be used as an LED night lamp.
Press the "Home Mode" button on the remote control twice: the siren switches to Home Mode and the strobe light turns into a night lamp. Press the "Home Mode" button twice, then the "Arm" button once: the siren is in monitoring mode with night lamp on. Press the "Disarm" button: the siren is disarmed and the LED lights switch off.
Specifications
Power supply
110-220V
Volume
90dB
Backup battery
3.7V/600mA Lithium
Static current
< 13mA
Alarm current
< 300mA
Radio frequency
433MHz (±75KHz)
Housing material
ABS plastic
Operating conditions
Temperature: 14°F \~ +131°C
Relative Humidity: ≤80% (non-condensing)
Dimensions
3.19"×3.15"×2.99"
Standards

This product bears the selective sorting symbol for waste electrical and electronic equipment (WEEE). This means that this product must be handled pursuant to European Directive 2002/96/EC in order to be recycled or dismantled to minimize its impact on the environment. For further information, please contact your local or regional authorities. Electronic products not included in the selective sorting process are potentially dangerous for the environment and human health due to the presence of hazardous substances.
CE
In compliance with European laws. This product is in compliance with the essential requirements and other relevant provisions of Directive 1999/5/EC (R&TTE).
RoHS
This product was designed and manufactured in compliance with Directive 2002/95/EC of the European Parliament and of the Council on the restriction of use of certain hazardous substances in electrical and electronic equipment (RoHS Directive - RoHS) and is deemed to comply with the maximum concentration values set by the European Technical Adaptation Committee (TAC).
Manufactured in China.