RMR-D210 - Detektor Rocky Mountain - Kostenlose Bedienungsanleitung
Finden Sie kostenlos die Bedienungsanleitung des Geräts RMR-D210 Rocky Mountain als PDF.


Benutzerfragen zu RMR-D210 Rocky Mountain
0 Frage zu diesem Gerät. Beantworten Sie die, die Sie kennen, oder stellen Sie Ihre eigene.
Eine neue Frage zu diesem Gerät stellen
Laden Sie die Anleitung für Ihr Detektor kostenlos im PDF-Format! Finden Sie Ihr Handbuch RMR-D210 - Rocky Mountain und nehmen Sie Ihr elektronisches Gerät wieder in die Hand. Auf dieser Seite sind alle Dokumente veröffentlicht, die für die Verwendung Ihres Geräts notwendig sind. RMR-D210 von der Marke Rocky Mountain.
BEDIENUNGSANLEITUNG RMR-D210 Rocky Mountain
RMR-D210
Advanced Micro Technology Design 360 Degree / Safety / Radiator Detector
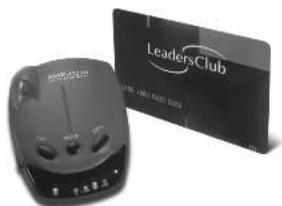
natural_image
Two electronic devices: a black speaker and a black credit card (no visible text or symbols on the devices themselves)Owner's Manual ROCKY MOUNTAIN RADAR
1. Introduction
Dear Rocky Mountain Radar Owner,
Congregulation on your purchase of one of the world's most Incorporated mechanizer devices. The ITM H200 is a completely integrated mechanizer device which responds not only to all the radar guns in use today. Including "Stalker", but also to the other baked cloud command in speed monitoring devices the laser gun.
This model provides distinct visual and logic aids to warn you of the presence of X, K and all kinds of Ke Band nader guns in the hard and rare of you. This model also provides the benefit of unobserved by asking you to the presence of VG 2 [The Radar Detector detector].
I see incorporate a new safety lecture - Safety Alert(SA) and Safety Warning System(SWSt). I's safety feature wants you of the presence of potential road hazards by detecting a grade from safety radar rendering devices.
Notes:
Important: The HAT-0210 is not designed to help you destroy the law. A defensive driver always obey the posted speed limit and legal driving methods.
Federal and Local Regulations
The FCC issued the Communications Act in 1904 to give all users the right to receive all types of radio transmits only. The same radio frequencies used by police radios are also used by other devices, such as automatic door owners, sung or alarms, and some amenable radio equipment. Since the RWR-DC10 is put a radio receiver based on a specific portion of the public radio spectrum, it is protected under this act.
Some local, state, and federal regulations may prohibit the use of this direction device. Please check with authorities regarding the use of this device below according to
1234
2. Control and Features
1) Included with your Radar Detector
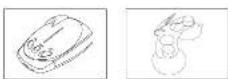
RMR 0210 Windshield Bracket with
Suction Caps
Hook and Loop Faster Tape
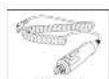
Power Cord
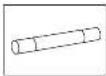
Spore Fuse
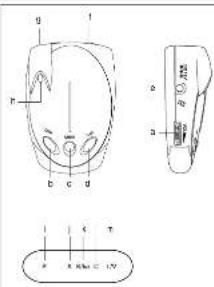
2| Controls and Functions
a. OvQf Volume Control
b. Dim Bullon
c. Muc Buton
c. City Button
e. DC 12V Power Input Jack
-
Radar Armonia
-
Front Laser Detection Lens
-
Rejection Detection
Revenue incoming laser signals from rear
i. Power-On Indicator
- X Band Helicator
k. KKa Band indicator
- City Indicators
m. Laser and V32
3. installation
1) Mounting Guidelines
For the best performance, set the proper location for the unit where it has a direct view of the road. The reader is also located behind the near point of the unit and the lower direction senses are bound behind the near point of the unit and the hard window. The sensors and sensors should not be obtained by metal or metallic surfaces and should be pointed at the horizon for accurate long range detection.
• Choose a location that does not break the driver's own
- Mo, at the detector in a level position
Do not mount the detector behind metal surfaces, wind-like
- Hosted with bidends currently available as an option on some Ford
(1) 2024 (2) or (3) 2025 (3) which is all as an impernable
barrier to radar signals
- DO NOT more of the detector where the driver or passenger might make in the case of an abstract bell.
Note: Whichever mounting method you choose, remember to place the radar detector out of view when you leave your vehicle.
This keeps the detector cut at sight from dishes and
presents exposure to severely high temperatures.
Note: I necessary, you may adjust the headed to the proper single by bending it. To remove your detector, pull up the detector from the front pulling it towards you.
Caution: On some nerve motor ears, a plastic safety coating has been applied to the wristboard. The suction caps may leave permanent menses on the windshield once they are removed. Check your vehicle owner's manual to see if your car has the plastic safety coating.
5875
2 Mounting Types
- On Whistfield
a. Natch brookel to wind sited.
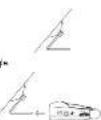
a. Band substrate for combined selection angles
c. Fug Power cord into detector.
d. March brackel to detector.
a. Plug power and into cigarettes lighter
E. On Dashboard
a. Proprotective response of one
sawal luck-tau
a Type of objects
(1) 本次股东大会的召集和召开程序

c. Feel the paper off.
d. Place selector on dashboard

a. Plug power and into detector and cigarette light.
31 Power Connection
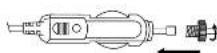
The called power cord provided with the unit has a digenera lighter socket plug at one and a small connector on the other.
- Add the small connection to the door on the side of the door.
- Insert the other and into the diganda lighter socket of your vehicles. If the director does not operate when you turn it on, remove the adapter from the diganda lighter socket and carried by check the socket for details. After, check the face in the editor and your vehicles have been.
4) Replacing Fuse
a. To replace the luge, anew the lso of the plug.
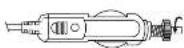
b. Remove and check the fuse to see if it has blown, if it has, replace it.
4. Operation
11 Power and Volume Control
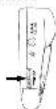
Note: In mind on the delay
Note: Turning on the seller with 50% the self-test mode.
2) Dim Mode
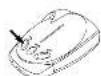
Press Dim Button.
→ An audible warning sound will also: you feel Um mode
has been activated.
Each time you press Dim button, display infoncity will change dim care, bright.
4. Operation
3) City - Highway Mode

Press the Button.
- City LED turns on or City Mode.
4) Mio Mio
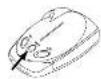
- Press Vute Rollar
•Blances the Audio.
Note: Press button again to restore audio alarm.
5) VG-2 Select

- Hole down the Mars button for three seconds.
The RWH D2:0 will disengage VC2 feature with beep sound.
Press Mute action again for three seconds.
The HM10210 will engage VG2 lesions with three lesions.
The litory default is "VG2 On".
8) Indicator and Visual
a. Power On
• "F" LED turns on.

b. X Band Detection
- "X" LED turns on with accessible tape.

109 11 12 13
c. K-Ka Band Detection
- "Ks" LED turns on with suitable lens

d Loeer Aetim
• "LV" LED and "X, K/Ka" LEDs have with audio icons.
If the unit detects the laser signal when the Qly mode is
engaged, AI, LEOs with flash with nucleotide bars.

- V32 Alarm
• "L/V LED flashes with audible tone.

71 Feature Memory
The BMR-D210 will automatically "Remember" your settings when the unit is Numed off or removed from the power. All features selected are retained in memory. DimDark, City-Highway, 902 and male
8) Feature Engage Confirmation
Each time a button is pressed by two buttons confirm features "On", one beep confirm feature "Off".
ACCESSORIES
Accessories are available as follows:
Nodshed no. 1 = 560
Power Cord 1500
Sodium capexel of two: \$2.00
2am01u###;7:00 98.]
Replacement owner's manual
Add \$ 10.00 shipping and handling per shipment
CAUTION
Tampering with unit
will result in a \$75.00 repair fee
WE DO NOT ACCEPT COD SHIPMENT
- Care and Maintenance
Your Hucky Mountain radar detector is an example of superior design and craftsmanship.
The following suggestions will help you care for your detector so you can enjoy it for years.
Never leave your detector on the windshield or dashboard when your vehicle is left parked. The temperature in the vehicle during the summer can reach levels above at all is considered to be safe for this detector.
- To make you less susceptible to break-in and then, removes the detector from your wind/bout or condensed when leaving your vehicle.
- Do not expose the detector to moisture, rain, dew, road splash, or other liquids that can damage the internal components and reduce the sensitivity of the detector.
- Troubleshooting
I the deletion does not just on
- Check the power cord. Be sure all power connections are proper
Install:
- Check the issue that controls the power to the cigarette higher seat/See your vehicle's owner's manual for salesmen:
- The cigarette lighter socket might be dirty. Clear it with a fine enemy cloth to ensure a good clean connection.
There might be a problem with the vehicles electricity.
- Make sure that the volume controls in the ON position.
Cution: Do not please any metal objects other than the cigarette lighter or a cigarette lighter plug in the cigarette lighter socket. Doing so could blow a fuse in your vehicle or cause the metal object to become very hot
If the deletion was a false alarm when the vehicle hits bumps
- Check the vehicle a electronics system, including main battery cable and elevator connections.
• Install a filter capacitor (470μF, 30vells) on the back of the cigarette lighter socket, switches the power connection.
If the resulting signal is weak
- Check the angle of the detector. (Place it on the point of horizon.)
- Fader elements/door sensor a clobulated.
(Felocise the detector clear of any obstruction outside the windfield such as a w per birda.)
- Polysate the detector clear of the window line.
- Specification
RADAR
Passive Type: Dual conversion Superthermody
Antenna Type: Linear polarized, Self-Contained Antenna
Detector Type: Scanning Frequency Desaminator
Frequency of Operation : 10.525GHz/± 50MHz/X-Band
24.100GHz+100MHz/K Bandi
34.700G±1.309H
(5a Super Wiesband)
LASER
Receiver Type: Pused Laser Signal Receiver
Detector Type: Digital Signal Processor Pulse
With Discriminator
Opto Sensor - Dual Carbox Container Lens and High Speed
Photo Place Detector
Spectral Response: 900 × 1,100nm
GENERAL
Temperature Range: 4 to 158 F (20 to 700)
Power Requirements: 12 - 15V DC 80mA nominal
(Negate Ground)
Dimension(HWD) 1.1" x 2.5" x 3.6"
Weight: 2.2oz
Specifications are typical: individual units might vary.
Specifications are subject to change without notice
Warranty
WARRANTY
This unit guaranteed against defects in workmanship and materials for one year. Should you experience any difficulty with the HMI, C21C during this time, the unit will be repaired or replaced at no charge. Should you desire to have your unit checked, there will be no additional charge other than postage and handling. After the warranty period expres, the unit may be returned for service and it will be reconditioned for \$25.00
FCC Information
This product has been designed and cortilice to comply with Part 15 of the FCC Rules. Operation is subject to the following two conditions: (1) this device may not cause harmful interference, and (2) this device must accept any interference received, including interference that may cause undesired operation.
Any changes or modifications not expressly approved by Rocky Mountain Radar may void your authority to use this product.