
Ultra - Camcorder FLIP - Kostenlose Bedienungsanleitung
Finden Sie kostenlos die Bedienungsanleitung des Geräts Ultra FLIP als PDF.


Benutzerfragen zu Ultra FLIP
0 Frage zu diesem Gerät. Beantworten Sie die, die Sie kennen, oder stellen Sie Ihre eigene.
Eine neue Frage zu diesem Gerät stellen
Laden Sie die Anleitung für Ihr Camcorder kostenlos im PDF-Format! Finden Sie Ihr Handbuch Ultra - FLIP und nehmen Sie Ihr elektronisches Gerät wieder in die Hand. Auf dieser Seite sind alle Dokumente veröffentlicht, die für die Verwendung Ihres Geräts notwendig sind. Ultra von der Marke FLIP.
BEDIENUNGSANLEITUNG Ultra FLIP
natural_image
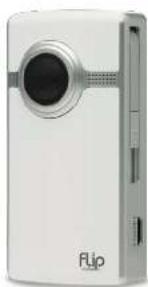
White flip phone with circular lens and external screen (no visible text or symbols)
Creek Safety Instructional Guide
Creek Safety Information Safety Ch
Creek Safety Information Safety Ch
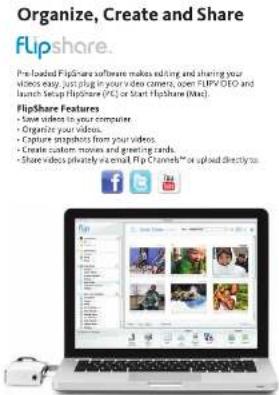
Pre-loaded FlipShare software makes editing and sharing your videos easy. Just plug in your video camera, open FLIPV/OEO and launch Setup FlipShare (PC) or Start FlipShare (Mac).
FlipShare Features
- Save video to your computer
- Organize your videos.
- Capture dispatches from your videos.
- Email custom messages and question
- Share videos privately via email Flip Channels™ or upload directly to
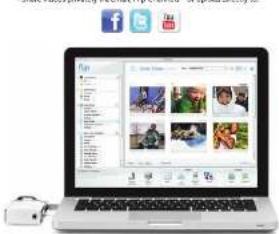
Visit the FlipShare software HELP section for detailed instructions on all features.
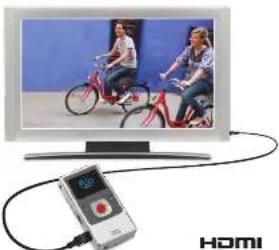
1. Power off video cameras and television
2. Connect video camera to television with optional HDMI Cable
(available at www.brefip.com/accessories)
3 Power on video camera and television.
- Video camera screen will be off when connected to television.
4. Switch your television to the appropriate VIDEO input
- See television manual for instructions
5 Press play button to start/pause playback.
600 0164 901/3200-1085
View On HD Television
natural_image
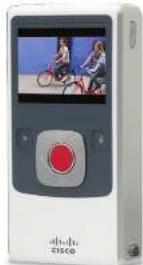
Digital recording device connected to a monitor displaying two people on bicycles (no visible text or symbols)Note: You can use any brand of HDMI Cable that has an HDMI Connector (for the HDTV) on one end and HDMI Mini Connector (for the video camera) on the other end.
1. Press power button to turn on. Video-camera setup appears automatically the first time you power on.
Set Language
- Use + and - to select your language.
Set Date
+ Use + and - to adjust current setting
• Use < 20
Set time
- Use < and > to select hour/minute/60/2W
Turn Off Tones
• Use < and > to turn the tones on and off.
Turn Off Recording Light
- Use < and > to turn the recording light on and off.
To Return to Video Camera Setup Later
3. First power button to turn on
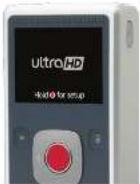
2 When Ultrand logo appears, press and mail record button until
SET LANGUAGE appears.
Get Started
Record and Play
Record Videos
1 Press to start/stop recording
2. Press and hard + and - to screen, you can during recording.
Play Videos
2. Press and hold + and - to increase/decrease volume
3 Press < and > to view previous/next video
Note: Press and hold < one> during playback to wind/fail-forward.
Delete Videos
■ These ■ button Select Yes to confirm
10.12. Deere, H.404, 1965, but just time you power on "to address, press and hold delete button."
text_image
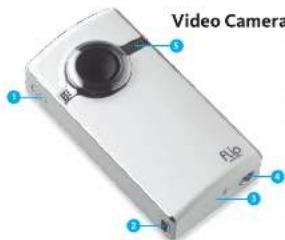
Video Camera Flip| 1 | Power Button | Press to form on/off. |
| 2 | Wrist Strip Head | Attach wrist strap. |
| 3 | Battery Lock | Slide to lock/lock. |
| 4 | Trip Mount | Attach to a top or other flip video accessory. |
| 5 | Recording Light | Read, left turns on during recording. Flush in three-microphone is also located here. |
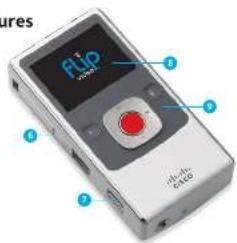
| 6 | USB Latch Arm | Slide down to release USB arm. Correct to a PC or Mac USB port. |
| 7 | HDMI® Mini Port | Connect HDMI® cable accessory to your HDTV. |
| 8 | Screen | Recording verification/playbox screens. |
| 9 | Recording Control | Press buttons to record and preview videos. |
| 10 | Record Button | Press to start/Skip scrolling. During power on. Hold to return to video camera setup. |
| Play Button | Press to play/pause playbox. Press and hold to play all videos. | |
| Delete Button | Press to delete. Press and hold to lock/lock the delete button. | |
| Up/down Buttons | While recording press and hold to zoom in/out. During playbox press and hold to increase/decrease volume. | |
| Left Right Buttons | While posted press to skip to previous/high video. During playbox press and hold to return/last- forwards. |
Extend the fun with Flip Video accessories. Learn more at www.theflip.com/accessories.
text_image
Flip 2422 Flip 2422Connect to Computer
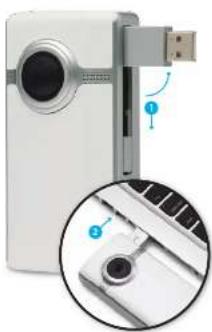
1. Slide USB latch down. USB arm flip up automatically
2. Connect USB arm to computer's USB port
3. You can install pre-loaded FlipShare® software or your co
If you are using the 14p it will begin recharging.
natural_image
White digital camera with USB port and a magnified inset showing internal components (no text or symbols visible)Included In This Box:
Flip UltraHD™ Video Camera, Two-AA Batteries. User Guide,
Sely, M. S. S. S. and W. M. S. S. S.
Flip video support
Declaration of Conformity:
Responsible Party:
Uco Consumer Products LLC, 85 Delby Street,
ECC Compliance Statement
This device complies with part 15 of the FCC Rules. Operation is subject to the following two conditions: (1) This device may not cause harmful interference, and (2) this device must accept any interference reason, including interference that may cause undetired operation.
This equipment has been rated and found to comply with the limits for a Class II digital device in accordance with the specifications in Part 1 of FCC rules. These specifications are designed to provide reasonable protection against harmful interference in a mechanical installation. This equipment generates, loans, and can radiate radio frequency energy, and, if not installed and used in accordance with the manufacturer's instructions, may cause harmful interference to radio communications. However, there is no guarantee that interference will not occur in a particular installation. If this equipment does cause harmful interference to radio or television receptor, which is considered by making the equipment off and on, the user is encouraged to try to correct the interference by one or more of the following measures:
- Increase the separation between the equipment and the receiver
- Connect the equipment into an outlet on a virtual delivered system that is
• Consult the desk or at experienced materials or technical for best
CAUTION Changes or modifications to the device not authorized by Coco
CANACH-CTS-COLATEMENT
The Class II digital empires complexes with Cimplex 1.15 expn
Operation is subject to the following two conditions:
1. This device may not cause interference and
2. This device must accept any interference, inducing interference that may cause interference creation of the device.
© 2007 Cisco Systems, LLC and/or its affiliated entities. OSCO, FLIP ULTRAND, FLIP VIDEO and the FLIP VIDEO LDOO are trademarks or registered trademarks of Cisco, and/or its affiliated entities. All other trademarks in this document or website are the property of their respective owners. Designed in the USA. Made in China. For more information visit www.theflip.com.
Facebook, Twitter, and YouTube are trademarks of their respective owners. We are a
The HONJLogo and High-Definitive Multimedia Interject are trademarks or registered
(https://doi.org/10.103456789.com)