
62325 - Animal de compagnie Trixie - Kostenlose Bedienungsanleitung
Finden Sie kostenlos die Bedienungsanleitung des Geräts 62325 Trixie als PDF.


Benutzerfragen zu 62325 Trixie
0 Frage zu diesem Gerät. Beantworten Sie die, die Sie kennen, oder stellen Sie Ihre eigene.
Eine neue Frage zu diesem Gerät stellen
Laden Sie die Anleitung für Ihr Animal de compagnie kostenlos im PDF-Format! Finden Sie Ihr Handbuch 62325 - Trixie und nehmen Sie Ihr elektronisches Gerät wieder in die Hand. Auf dieser Seite sind alle Dokumente veröffentlicht, die für die Verwendung Ihres Geräts notwendig sind. 62325 von der Marke Trixie.
BEDIENUNGSANLEITUNG 62325 Trixie
Aufbauanleitung / Assembling Instruction & Stückliste / Parts list
| Art No /Item No.62325 | "Natura" Kaninchenstall m.Freigehege | 124 x 102 x 78 cm | |||
| Pos. No /Pos. No. | Beschreibung / Description | Abmessung /Measurement | Anzahl /Quantity | Art. No /Item No. | |
| Pos. 1 | Vorderteil inkl. Tür. obeUpper front part, incl. d | 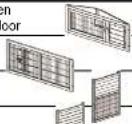 | 1110 x 470 x 25 mm 1 | 62325-10 | |
| Pos. 2 | Vorderteil, untenBottom front part | 1110 x 450 x 25 mm 1 | 62325-11 | ||
| Pos. 3 | Seiterteil, linksLeft side panel | 25 x 900 x 665 mm 1 | 32325-30 | ||
| Pos. 4 | Seitanteil, rechtsRight side panel | 25 x 900 x 665 mm 1 | 32325-31 | ||
| Pos. 5 | Rückwand, obenUpper back wall | 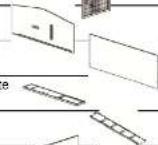 | 1160 x 620 x 12 mm 1 | 62325-20 | |
| Pos. 6 | Rückwand, untenBottom back wall | 1160 x 460 x 12 mm 1 | 62325-21 | ||
| Pos. 7 | Hintere BodenplatiMidfloor, back | 1105 x 25 x 180 mm 1 | 62325-42 | ||
| Pos. 8 | RampeRamp | 960 x 20 x 145 mm 1 | 32325-41 | ||
| Pos. 9 | TrennwandPartition | 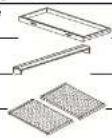 | 8 x 400 x 605 mm 1 | 62325-32 | |
| Pos. 10 | Ausziehbare BodenwanneDrawer with plastic inlay | 1105 x 55 x 480 mm 1 | 62325-40 | ||
| Pos. 11 | DachfirstRoof ridge | 90 x 60 x 790 mm 1 | 32325-52 | ||
| Pos. 12 | Dachteil, linksRoof, left | 620 x 50 x 755 mm 1 | 32325-50 | ||
| Pos. 13 | Dachteil, rechtsRoof, right | 620 x 50 x 755 mm 1 | 32325-51 | ||
| Kleinteileset / Small parts | |||||
| A | Senkkopfschraube Countersunk Screw |  | 13 | 62325-60 | |
| B | 9 | ||||
| C | 3 | ||||
| D | 5 | ||||
| Fangband für das Dach Check Strap for roof |  | 28 cm 2 | |||
| Verniegelungsherz Lock heart | ∅ 5,5 cm 1 6235 | 51 | |||
| weitere bereits vormontierte Telle (als Ersatzteile separat erhältlich) /other parts already assembled (spare parts separately available) | ||
| Scharnier, breit, für Klapptür / Hinge, wide, for flap door | 3,8 cm 2 6235-71 | |
| Scharnier, für Tür oder Dach / Hinge, for door or roof | 5 cm 10 6235-72 | |
| 3-Wege Verschlussriegel / 3-way locking bolt | 5,5 cm 1 6235-52 | |
text_image
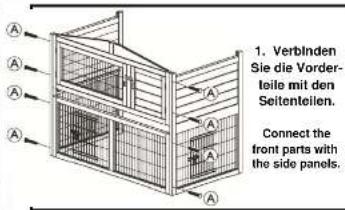
1. Verbinden Sie die Vorderleile mit den Seitenteilen. Connect the front parts with the side panels.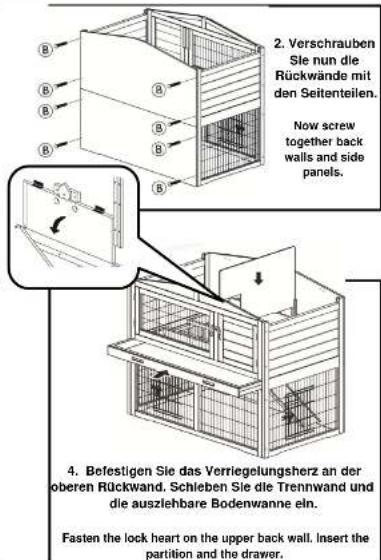
text_image
2. Verschrauben Sie nun die Rückwände mit den Seitenteilen. Now screw together back walls and side panels. 4. Befestigen Sie das Verriegelungsherz an der oberen Rückwand. Schleben Sie die Trennwand und die auszlehbare Bodenwanne ein. Fasten the lock heart on the upper back wall. Insert the partition and the drawer.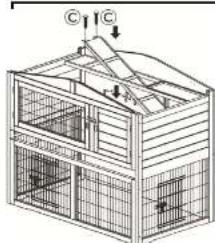
- Legen Sie die hintere Bodenplatte ein, schieben Sie die Rampe durch die kleine Öffnung des Bodens und schrauben Sie diese fest.
- Befestigen Sie den Dachfirst, sowie das Dach mit Hilfe der Scharniere.