
OH/DE91/GN - Fauteuil de gaming DXRacer - Kostenlose Bedienungsanleitung
Finden Sie kostenlos die Bedienungsanleitung des Geräts OH/DE91/GN DXRacer als PDF.


Benutzerfragen zu OH/DE91/GN DXRacer
0 Frage zu diesem Gerät. Beantworten Sie die, die Sie kennen, oder stellen Sie Ihre eigene.
Eine neue Frage zu diesem Gerät stellen
Laden Sie die Anleitung für Ihr Fauteuil de gaming kostenlos im PDF-Format! Finden Sie Ihr Handbuch OH/DE91/GN - DXRacer und nehmen Sie Ihr elektronisches Gerät wieder in die Hand. Auf dieser Seite sind alle Dokumente veröffentlicht, die für die Verwendung Ihres Geräts notwendig sind. OH/DE91/GN von der Marke DXRacer.
BEDIENUNGSANLEITUNG OH/DE91/GN DXRacer
01
Contents
| Contents: | 01 |
| English language contents | 01 |
| Further instructions | 11 |
| Instructions during use | 11 |

| Check Various Accessories | 02 |
| Chair accessories | 02 |
| Other accessories | 03 |
| Quick Reference Guide | 03 |
| Assembly Instructions | 04 |
| Chair assembly | 04 |
| Attach headrest cushion | 08 |
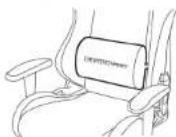
| Attach lumbar cushion | 09 |
| Product Specifications | 10 |
| Detailed specifications | 10 |
This manual will explain the basic installation and operation of DXRACER® D Series Chair Link for videos online: http://www.youtube.com/DXRacerEurope
Check Various Accessories
Chair accessories
Please check and ensure that the following things are in the package. Please call the local distributor for help if something is not included.
- Chair accessories
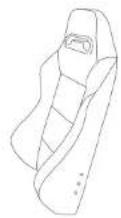
□1+Backrest
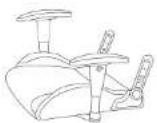
□ 1×Sett

□ I-Control unit
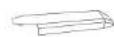
□ 1>Plastic cover left hand side

□ 1= Hydraulic unit


□ 5-Casteri

□ Plastic covers right hand side

□ 5-Base plastic cover

□ 1-M8 Allen Key
Check Various Accessories
Other accessories, Quick Reference Guide
English
- Other accessories
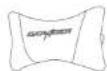
□ 1-Highest cushion
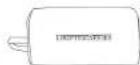
□ 1-Limbar cushion

□ Plastic butterfly clip
D series Chair Quick Reference Guide
Includes the following.
• Quick Reference
Please read before using
This file includes Christ Mauverazaje.
• After-sales Service Guide
Warranty card and filled in sample card included.
03
Assembly Instructions
Chair assembly

natural_image
Abstract red geometric pattern with overlapping triangular shapes (no text or symbols)64
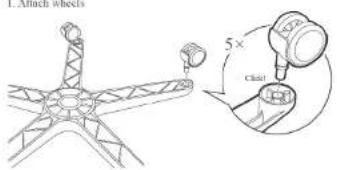
text_image
E-12000 WHEX 5× chid- Attach plastic covers on base
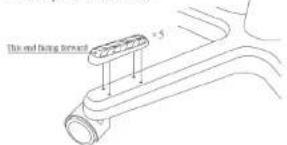
text_image
This end flaring forward = 5- Install the hydraulic unit and the plastic cover
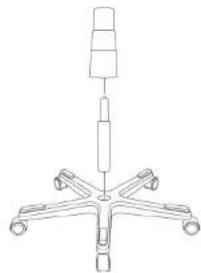
natural_image
Line drawing of a vertical cylindrical object mounted on a five-petal base (no text or symbols)Assembly Instructions
Chair assembly
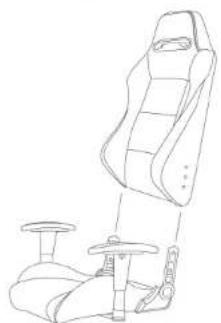
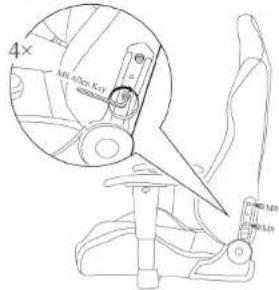
4. Attach the backrest to the seat
natural_image
Line drawing of a car seat with adjustable arm and seatbelt (no text or symbols)- Using the M8 Allen key remove the screws on the side of the backrest and use to attach the backrest to the seat. (Screws come already fixed to the sides of the backrest before delivery)
text_image
4× MR 400x KGV MR MR M1English
05
Assembly Instructions
Chair assembly
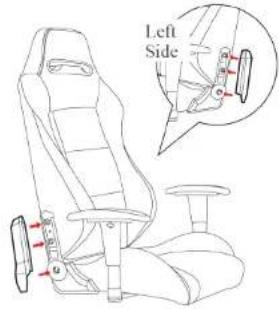
- Fix the plastic covers onto the sides of the backrest
text_image
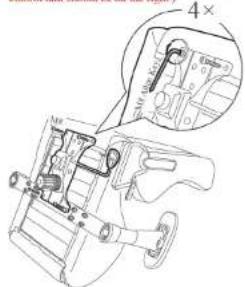
Left Side- Fix the control unit to the base of the seat (Screws have been fixed to the seat base at the factory prior to delivery. Please note the direction of the control unit should be on the right.)
text_image
Technical diagram of a mechanical assembly with labeled parts and a magnified inset showing a component detail.Assembly Instructions
Chair assembly
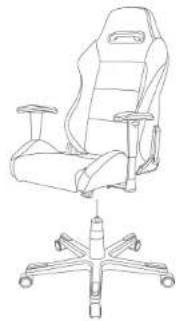
- Insert the hydraulic unit into the opening of the control unit
natural_image
Line drawing of an office chair with a five-pointed star base (no text or symbols)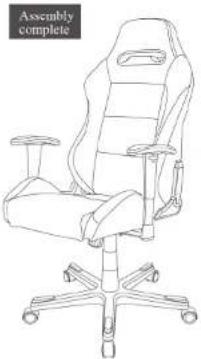
natural_image
Line drawing of an office chair with a full-lit backrest and adjustable arm (no text or symbols)English
03
Assembly Instructions
Attach headrest cushion
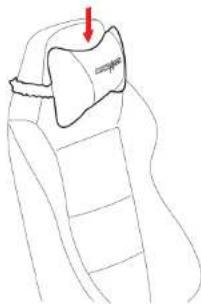
Attack Headrest cushion Method One
- Put headrest cushion on the backrest
natural_image
Line drawing of a chair seat with a red arrow pointing to the top panel (no text or symbols)Attach Headrest cushion Method Two
- Insert the elastic through the plastic hole
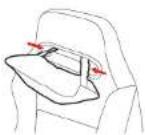
- Tighten the elastic using the butterfly clip
Assembly Instructions
Attach lumbar cushion
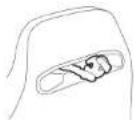
- Complete the assembly as shown
Attack lumbar cushion
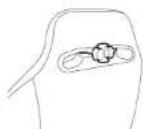
- Lead the elastic through the aperture as shown
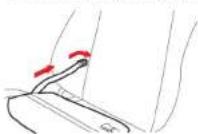
- Attach belt clips together
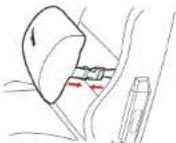
- Adjust cushion as desired
English
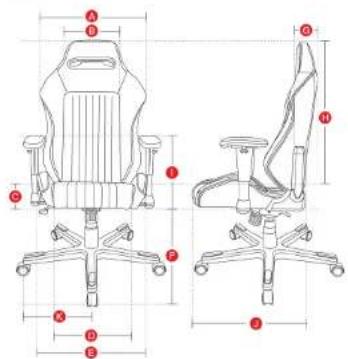
Product Specifications
Detailed specifications
text_image
Technical diagram of an office chair with labeled dimensions for two viewsA 545
B 270
70-100
D 320-370
E 525
F 370-450
G 90
790
1 270-350
J 550
K 350
size (mm)
Further instructions
Instructions during use
English
Instructions during use
-
Please move the product gently to avoid collision;
-
Please keep out of direct sunlight;
-
Please ensure the centre of gravity in on the hydraulic unit during use;
-
Please watch your fingers when adjusting the backrest angle.
-
Please toggle the handle under your seat when adjusting the chair height, do not to press it down roughly.
-
Please lift the lever gently to raise or lower the height of the chair. Do not pull it roughly;
-
Do not place any heavy objects on the chair or armrests;
-
Plastic parts will split if chair is exposed to direct sunlight.
-
Please do not use abrasive cleaners on the chair.
-
We recommend you use Pledge to clean the chair.