TN-600 - Musikinstrument J.Michael - Kostenlose Bedienungsanleitung
Finden Sie kostenlos die Bedienungsanleitung des Geräts TN-600 J.Michael als PDF.


Benutzerfragen zu TN-600 J.Michael
0 Frage zu diesem Gerät. Beantworten Sie die, die Sie kennen, oder stellen Sie Ihre eigene.
Eine neue Frage zu diesem Gerät stellen
Laden Sie die Anleitung für Ihr Musikinstrument kostenlos im PDF-Format! Finden Sie Ihr Handbuch TN-600 - J.Michael und nehmen Sie Ihr elektronisches Gerät wieder in die Hand. Auf dieser Seite sind alle Dokumente veröffentlicht, die für die Verwendung Ihres Geräts notwendig sind. TN-600 von der Marke J.Michael.
BEDIENUNGSANLEITUNG TN-600 J.Michael

J. Michael
Saxophone
text_image
honeOwner's Manual
輸入総発売元

マックコーポレーション株式会社
〒452-0821 名古屋市西区上小田井1-7
TEL.052-505-4680 FAX.052-505-4681
www.maccorp.co.jp
Precautions 2
Maintenance goods 2
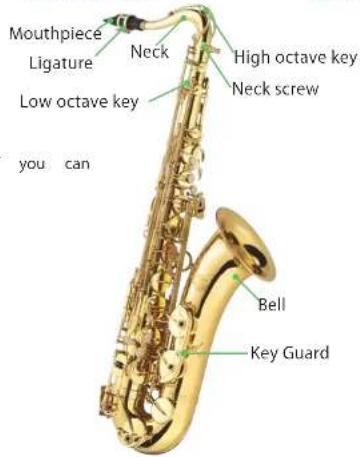
Nomenclature 3
Before playing 4\~9
-
Setting Mouthpiece 4\~5
-
Assembling the Instruments 5\~7
Placing the Instrument 7
-
Holding the Instrument 8\~9
-
Tuning 9
Caution for Strage 9
After Playing 10\~12
-
Maintenance for inside of the instrument 10
-
Maintenance for Pads 11
-
Cleaning the surface 12
-
Maintenance for Neck and Mouthpiece 12
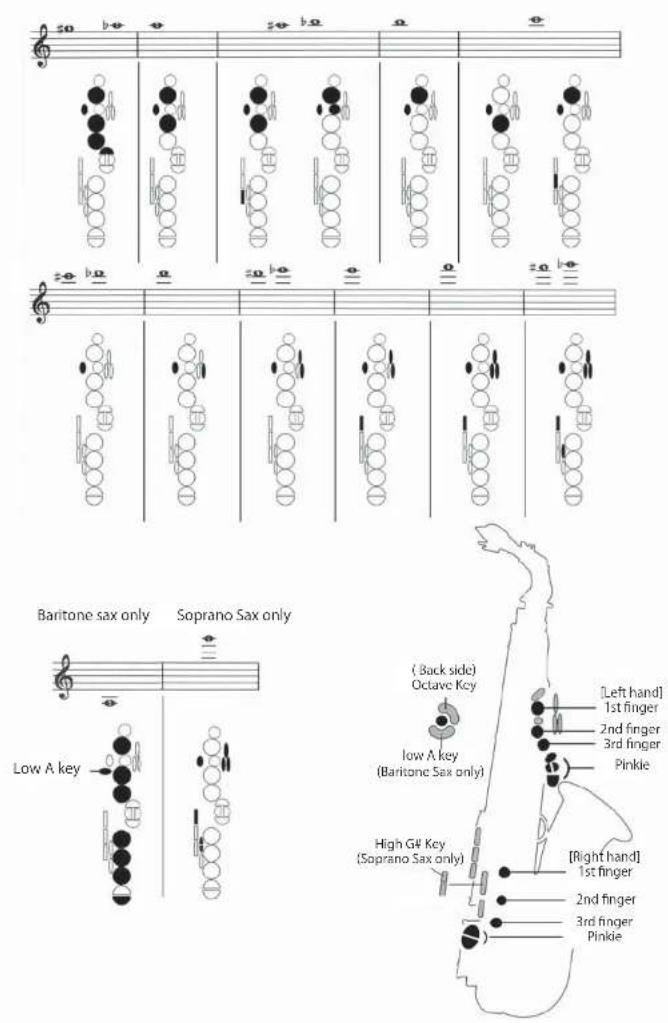
Fingering Chart 14\~15
Thank you for purchasing "J. Miachael" saxophone. For instructions on the proper assembly of the instruments, and how to keep the instruments in optimum condition for as long as possible, we urge you to read this Owner's manual thoroughly.
The precautions given below concern the proper and safe use of the instrument, and are to protect you and others from any damage or injuries. Please follow precautions.

Caution
- Keep the oil, polish, etc., out of mouths and do maintenance when children are not present.
children's throw or swing the instrument. The mouthpiece or other parts may fall off hitting other people.
Take care not to disfigure the i Placing the instrument where it is unstable may cause the instrument to fall resulting in disfigurement.
Instr. Do not modify the instrument. Besides voiding the warranty, modification of the or instrument may make repairs impossible.
- Keep the instrument away from sources such as heaters, etc. Also, use or store the instrument in any extreme conditions of temperature or humidity.
- Be careful not to touch the pin springs featuring maintenance, etc. The end of the dpin no Springs is sharpened to provide greater key action.
Maintenance goods
Essential
Cork grease
Swab
Claning cloth
Cleaning paper
Gauze
Put it on neck cork to make mouthpiece easy to insert or remove.
To clean the wet from inside of the tube. It is prepare Large swab for body and Small swab for neck.
Clean the surface.
To clean the wetness retained between pads and toneholes.
It is useful when you clean the grease and wetness.
Recommendable goods for maintenance
Reed case
Lacquer polish
Silver polish
Prevent deformation of reeds when you don't play the instruments.
Use it when you polish the surface of lacquer finished instruments.
Use it when you polish the surface of silver plated instruments.
京都の名称ure
Soprano Sax these
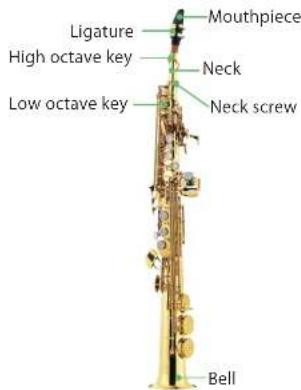
text_image
Ligature High octave key Low octave key Mouthpiece Neck Neck screw BellAlto Sax
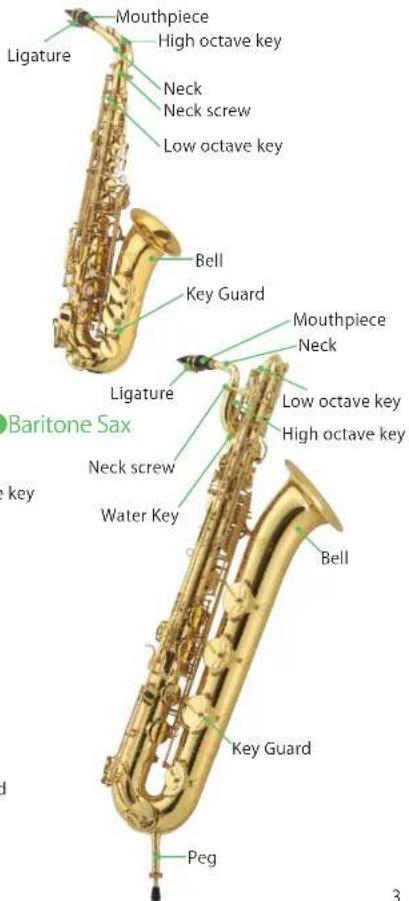
text_image
Mouthpiece High octave key Ligature Neck Neck screw Low octave key Bell Key Guard Ligature Neck screw Water Key Baritone Sax key Peg Mouthpiece Neck Low octave key High octave key Bell Key Guard 3Tenor Sax
text_image
Mouthpiece Ligature Low octave key you can Neck High octave key Neck screw Bell Key GuardBefore Playing

Setting Mouthpiece
1
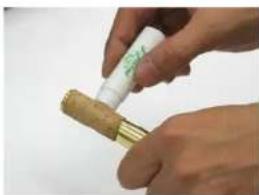
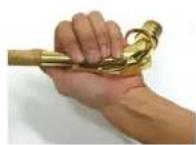
Take the mouthpiece and neck out from the case. Separate cap and ligature from mouthpiece set Apply a little cork grease on the neck cork as per right picture.
natural_image
Close-up of a hand holding a small cylindrical object with a white label, possibly a drug or tool (no visible text or symbols)2
Attach the mouthpiece to the neck.
Be careful not to use excessive force, which may damage the instrument.
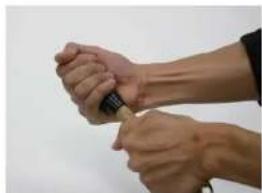
Blue colored points on the below photos are good for your holding the neck safely.
Holding the neck
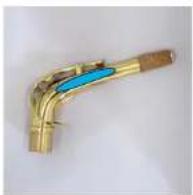
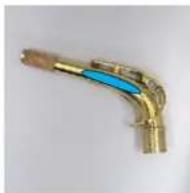
Hold the mouthpiece and push it to the position you can see 1/4 cork.
natural_image
Close-up of hands performing a wristwatch or acupressure technique (no text or symbols visible)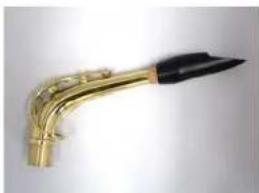
natural_image
Close-up of a brass saxophone with black tip and gold handle (no text or symbols visible)3
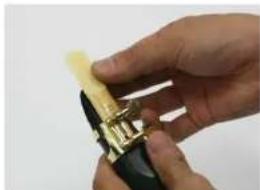
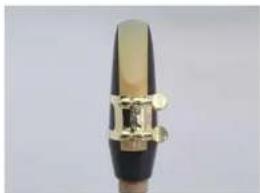
Moisten the reed in your mouth or in some water. Loosen the screw of ligature and attach the reed onto the mouthpiece. Line up the edges of reed and mouthpiece. Screw up the ligature and fix the reed.
natural_image
Close-up of a hand holding a small object with a golden handle, possibly a tool or device (no visible text or symbols)!
Caution!
The end of reed is very weak and easy to split, which may be cause of a noise or making hard to sound. Reed require careful handling.
natural_image
Close-up of a metallic saxophone with black body and gold ring (no text or symbols visible)4
Put the cap on the mouthpiece and keep it on flat and safe place.

Assembling the Instruments
!
Caution!
Be careful not to apply excessive force, which may damage the instrument.
1
Grip the bell and take the instrument out from the case.
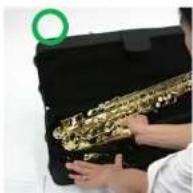
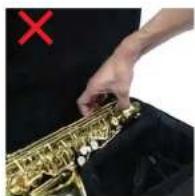
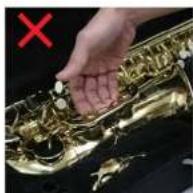
! Caution!
End plug (Black plastic plug in right photo) is useful to protect the octave shaft when the instrument is in the case.
Don't throw it away and put it on after playing.
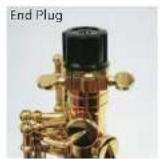
2 Loosen the neck screw and attach the neck to the body. Tighten the neck screw after identifying the position.

text_image
Neck Screw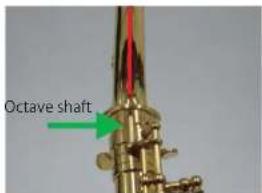
text_image
Octave shaftAlign the center of Neck with Octave shaft.
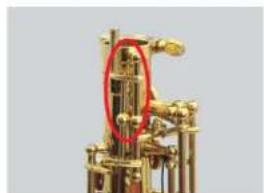
natural_image
Close-up of a metallic mechanical device with a red circle highlighting a component (no visible text or symbols)Do not put pressure on the shafts indicated by a red sphere on the above photo.
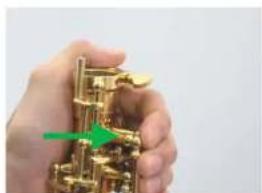
natural_image
Close-up of a hand holding a mechanical component with a green arrow pointing to a specific part (no text or symbols visible)When you hold the instrument, grip the above post, or put your fingers into the bell and grip it.
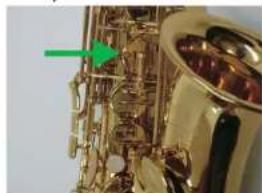
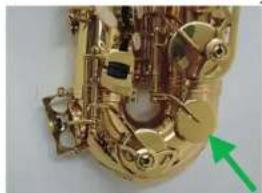
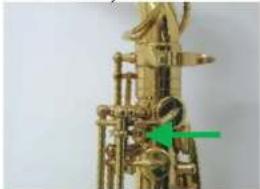
3 Check whether the keys function well. Low Octave Key, high Octave key, G# Key, Low C.# Key are easy to take hold.
G# Key
Low C # Key
natural_image
Close-up of a metallic saxophone with visible mechanical components and a green arrow pointing to a specific part (no text or symbols present)High Octave Key
natural_image
Close-up of a golden saxophone with mechanical components and a green arrow indicating motion (no text or symbols)Low Octave Key
natural_image
Close-up of a brass mechanical device with a green arrow pointing to a component (no visible text or symbols)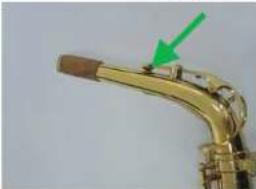
natural_image
Close-up of a golden saxophone tool with a green arrow pointing to the handle (no text or symbols visible)Placing instrument
Lay the instrument without burden of keys.
Soprano Sax
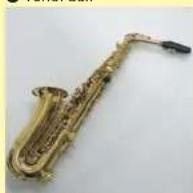
● Alto Sax
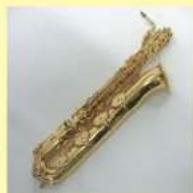
Baritone Sax
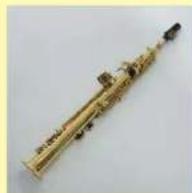
● Tenor Sax
3 Holding the instrument
● Putting strap and adjusting strap length
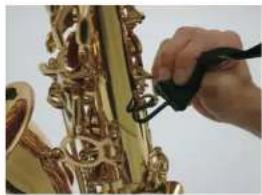
1 Wear the strap around your neck then hook the strap onto the strap ring on the instrument.
natural_image
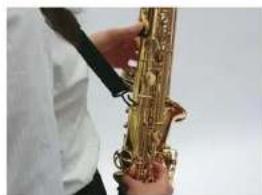
Close-up of a hand using scissors to cut the golden saxophone (no text or symbols visible)2 Adjust the strap length, so that Mouthpiece come to your mouth comfortably.

natural_image
Person playing saxophone with string, wearing white shirt (no visible text or symbols)Standing position

natural_image
Person playing a saxophone, wearing white top and black skirt (no visible text or symbols)- Sitting position

natural_image
Person playing a golden saxophone on a chair (no text or symbols visible)Left Hand
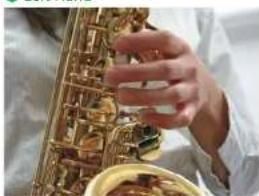
natural_image
Close-up of a hand playing the saxophone with a small bowl (no visible text or symbols)Right Hand
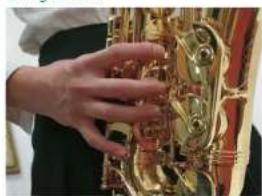
natural_image
Close-up of a hand operating a brass saxophone with visible mechanical components (no text or symbols)Put your left thumb on the thumb-rest (Round Black plastic), and put your right thumb under the thumb-hook.
natural_image
Person playing a saxophone, no visible text or symbols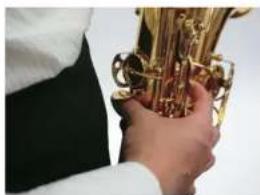
natural_image
Close-up of a person holding a golden saxophone (no visible text or symbols)Caution

When you stand up from a chair or when you move, carry the instrument by your hands, do not hold the instrument by only the strap. When you don't play the instrument, put the mouthpiece cap on the mouthpiece to protect the reed.
4 Tuning
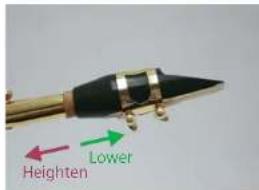
Tuning is accomplished by adjusting the position of the mouthpiece on the neck. Since air temperature or the temperature of the instrument will have an effect on tuning, the instrument should be warmed up beforehand by blowing into it.
text_image
Heighten LowerCautions for storage
- Put the instrument into the case when your store the instrument.
- Do not store the instrument in any extreme conditions of temperature or humidity such as in the car.
- Do not put too much pressure to the case.

natural_image
Open black saxophone in a black case (no text or symbols visible)After playing
After playing the instrument, remove moisture surely.
1 Maintenance for inside of the instrument
! Caution!
Do not put too much pressure to the keys. Placing the instrument where it is unstable may cause the instrument to fall or drop resulting in disfigurement.
1 Take off the strap from the instrument.
2 Loosen the neck screw and take off the neck from the instrument. Put mouthpiece cap on the mouthpiece and place it on safe place.
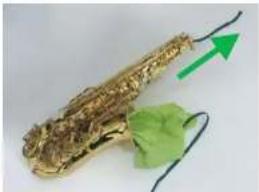
3 Put the cleaning swab into the bell and take it out from the other side. Remove moisture on the neck and joint parts by using gauze.


Spread the cleaning swab, before using. If you put bunched swab into the bell, it may lodge inside of the instrument and cannot be removed.
Baritone Sax
Remove water from the water key.
natural_image
Close-up of a golden saxophone with green leaf and green arrow indicator (no text or symbols)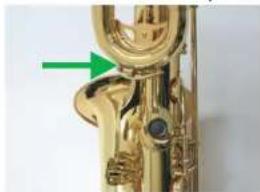
natural_image
Close-up of a golden saxophone horn with green arrow pointing to the blade (no text or symbols visible)4 Put the end plug on the instrument, but do not tighten the neck screw.
2 Maintenance for Pads
! Caution!
After playing the instrument, remove moisture between pads and tone-holes as many as possible.
1 Remove moisture between pads and tone-holes.
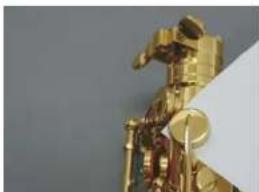
Open the key and place a cleaning paper between the pad and the tone-hole, then close the key. Open the key again, then take out the cleaning paper. If the pad is still wet, try the above method some times by using dried parts of cleaning paper.
natural_image
Close-up of a golden mechanical component with no visible text or symbolsCaution!
Do not pull the cleaning paper when the keys closed. It may hurt the pads.
The keys nearer to the neck are most likely wet, especially in closed keys.

text_image
G#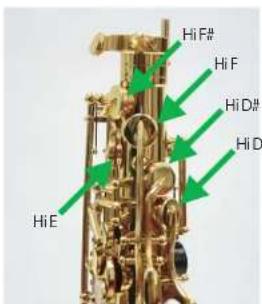
text_image
HiE# Hi F# Hi D# Hi D
Cleaning the surface
Wipe the surface of the instrument with cleaning cloth.
Caution!

The end of the pin springs are sharpened. Be careful no to touch.
Caution!

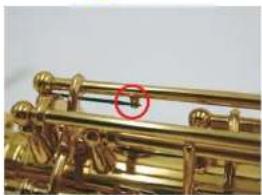
Pin springs and corks are easy to come off.
natural_image
Close-up of a brass mechanical component with a red circle highlighting a specific part (no visible text or symbols)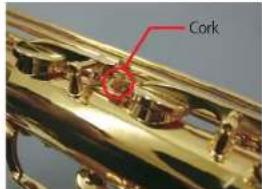
text_image
Cork
Maintenance for Nack and Mouthpiece
1
Take off the mouthpiece cap and loosen the screw of ligature, then remove the reed and the ligature.
Return the reed to the reed case after wiping up moisture.
2
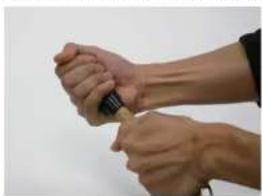
Remove the mouthpiece from the neck.
natural_image
Close-up of hands performing a medical or cosmetic procedure on a wrist (no visible text or symbols)Put the ligature and mouthpiece cap on the mouthpiece, then store the mouthpiece to the case.
CAUTION

Do not put too much pressure to the key on the neck.
CAUTION

Do not tighten the screw of ligature without the reed. Ligature may be disfigured.
3
The cleaning swab is used to clean the inside of mouthpiece. (Always keep the cleaning swab clean and dry.)
natural_image
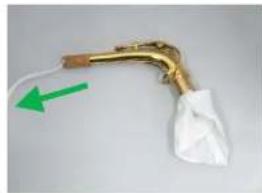
Close-up of a golden mechanical tool with a white cloth and green arrow indicator (no text or symbols)Wipe the joint-part to remove the moisture. Remove the grease on the neck cork with the gauze.
Store the neck to the case.
text_image
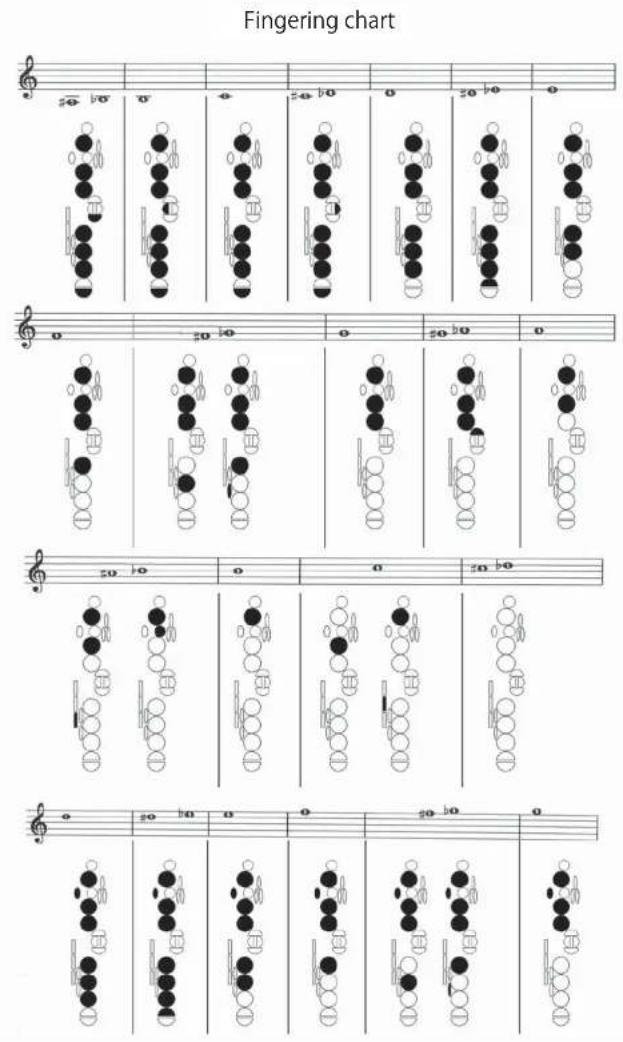
Fingering chart