Panoramic 11 - Aquarium Aqua One - Kostenlose Bedienungsanleitung
Finden Sie kostenlos die Bedienungsanleitung des Geräts Panoramic 11 Aqua One als PDF.


Benutzerfragen zu Panoramic 11 Aqua One
0 Frage zu diesem Gerät. Beantworten Sie die, die Sie kennen, oder stellen Sie Ihre eigene.
Eine neue Frage zu diesem Gerät stellen
Laden Sie die Anleitung für Ihr Aquarium kostenlos im PDF-Format! Finden Sie Ihr Handbuch Panoramic 11 - Aqua One und nehmen Sie Ihr elektronisches Gerät wieder in die Hand. Auf dieser Seite sind alle Dokumente veröffentlicht, die für die Verwendung Ihres Geräts notwendig sind. Panoramic 11 von der Marke Aqua One.
BEDIENUNGSANLEITUNG Panoramic 11 Aqua One
Panoramic
Aqua One®
Inspiring Excellence in Fish Keeping!
11/30
natural_image
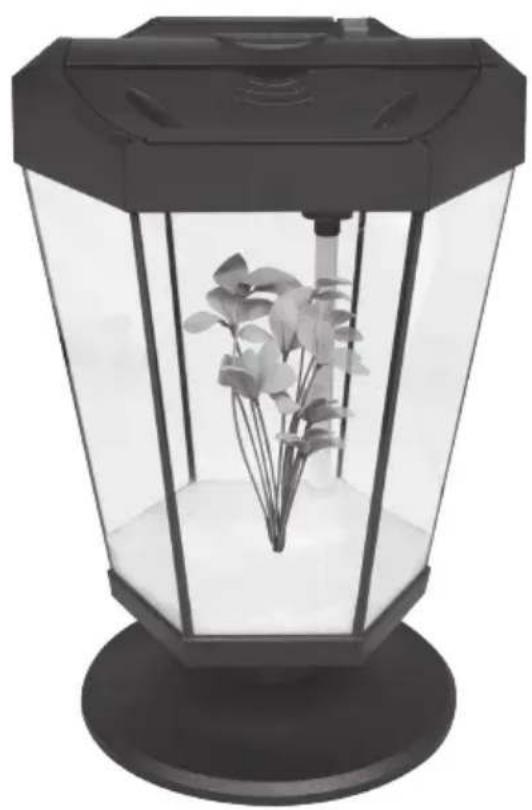
Black-and-white photo of a transparent hexagonal lamp with a small plant inside, mounted on a circular base (no text or symbols visible)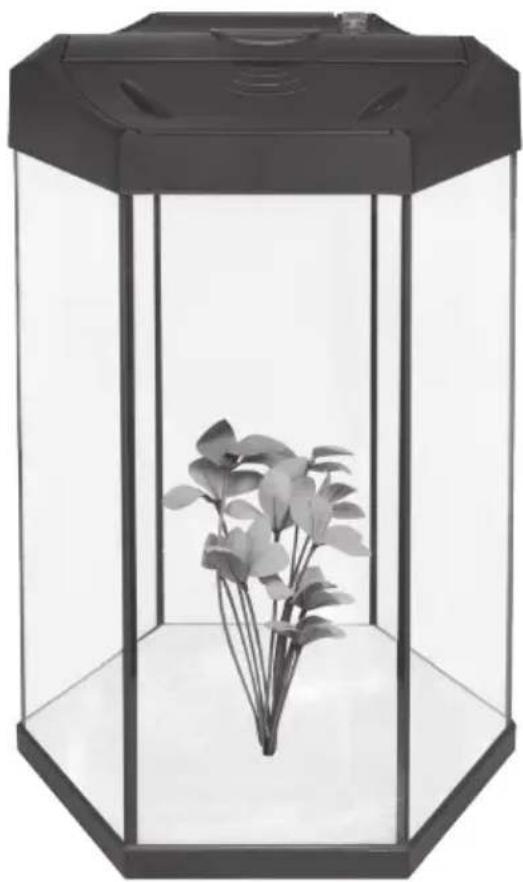
natural_image
Black-and-white photo of a hexagonal glass terrarium with a small plant inside, no text or symbols visible.Instruction version: 11/08/2011
Important Safeguards
To guard against injury, basic safety precautions should be observed, including the following:
-
Read and follow all safety instructions and important notices in these instructions as well as on the product itself.
-
This appliance is not intended for use by children or infirm persons without supervision. Young children should be supervised to ensure that they do not play with the appliance.
-
To avoid possible electric shocks, special care should be taken since water is employed in the use of aquarium equipment. For each of the following situations do not attempt repairs yourself. Return the appliance to an authorised service facility for service or discard the appliance.
a. If the appliance or any electrical component of the appliance (non-immersible equipment only) falls into the water or gets wet, do not reach for it. Unplug it and then retrieve it.
b. If the appliance shows any sign of abnormal water leakage, immediately unplug it from the power source.
c. Carefully examine the appliance after installation. It should not be plugged in if there is water on parts which are not intended to be wet.
d. Do not operate the appliance if it has a damaged cord or plug, or if it is malfunctioning, or dropped or damaged in any manner.
-
A "drip loop" (see graphic) should be arranged for each cable connecting an aquarium to a power supply. The drip loop is the part of the cable below the level of the power supply. It prevents water travelling down the cable and coming into contact with the power supply. If the plug or the socket does get wet, do not unplug the appliance. Disconnect the fuse or circuit breaker that supplies the power to the appliance, then unplug and examine for presence of water in the socket.
-
Always unplug the appliance from the electrical outlet when not in use, before putting on or taking off parts, before any type of maintenance or cleaning.
-
Never yank the cable to pull it from the socket. Pull the plug carefully to disconnect.
-
Do not use the appliance for reasons other than the intended use. The use of attachments that are not recommended or sold by the manufacturer may cause the product to be unsafe. This is not recommended.
-
Do not install or store the appliance where it will be exposed to weather or temperatures below freezing.
-
Make sure any component mounted on a tank is securely installed before operating it.
-
Ensure input voltage is the same voltage as your local power supply.
-
If an extension cable is used it should have the proper rating. Care should be taken to arrange the cord so that it will not be tripped or pulled.
-
A G.F.C.I (Ground fault circuit interrupter) & surge protector is recommended for all electrical appliances.
-
Ensure your hands are dry when turning the power switch on/off and when inserting/removing the power cable from the socket.
-
If you are in any doubt about the electrical installation or safety of this product you must consult a qualified electrician.
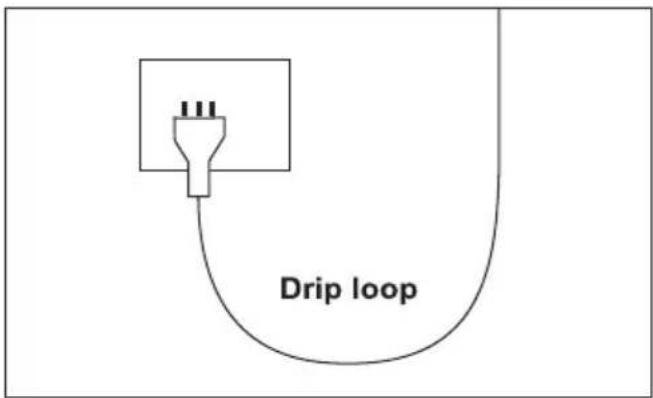
text_image
Drip loopFor Guarantee Conditions, please refer to the Guarantee form that is enclosed with this product.
All products are supplied with fitted plugs. This plug should not be tampered with in any way or removed. Removal or tampering with the plug invalidates our guarantee offered with this product.
For UK a 3 pin adaptor is supplied with the product and this must be used.
Panoramic 11
Panoramic 30
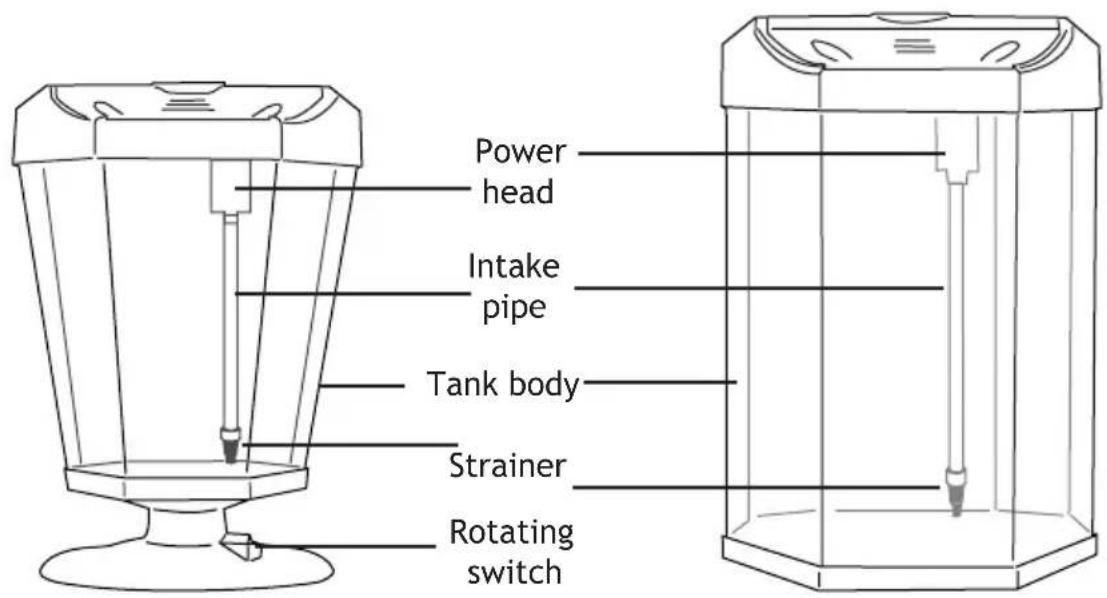
text_image
Power head Intake pipe Tank body Strainer Rotating switchFeeding lid
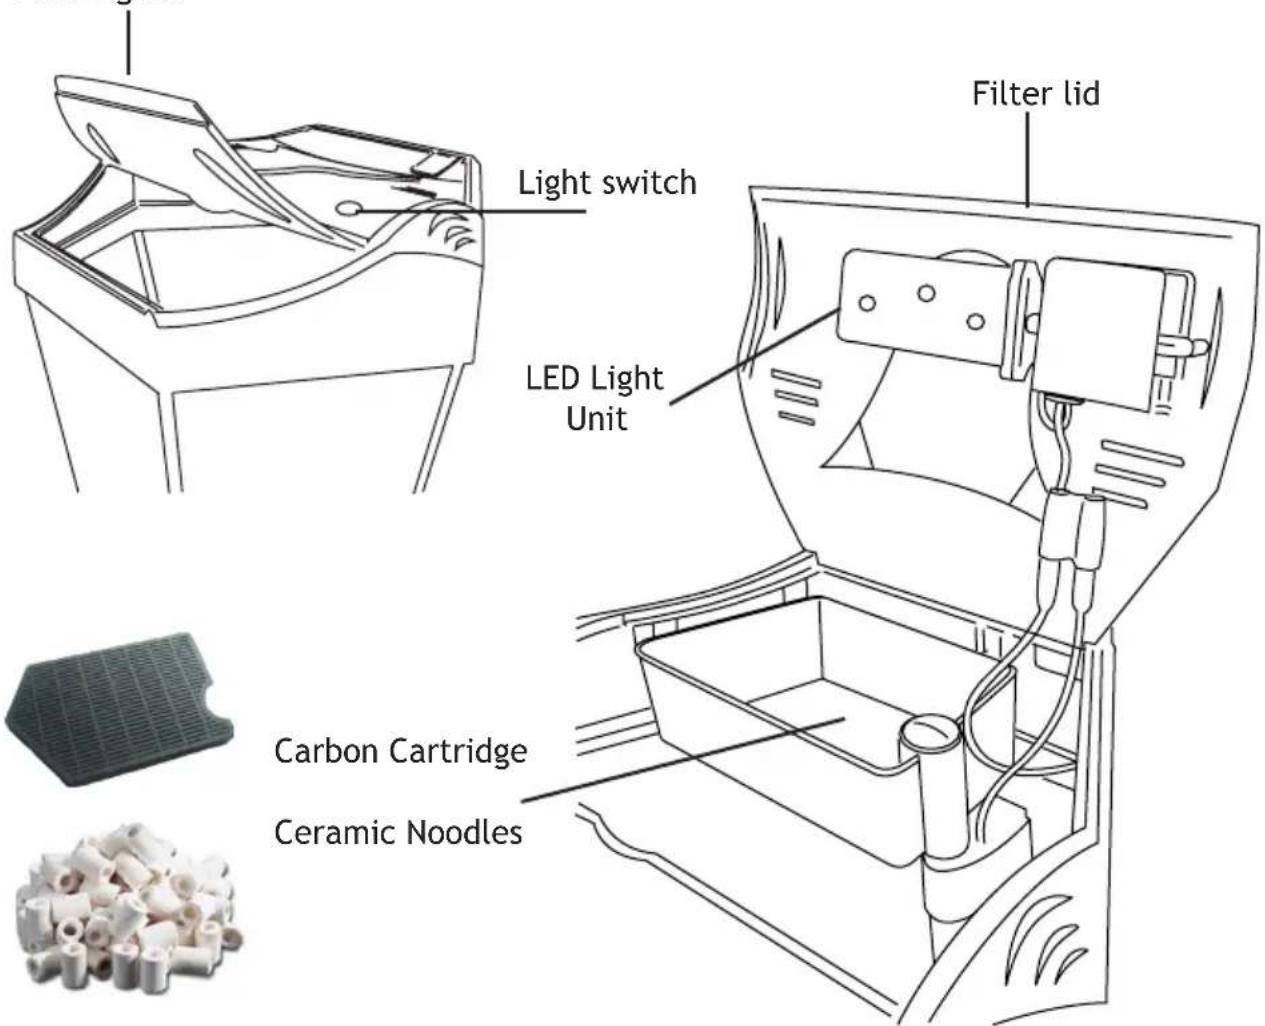
text_image
Light switch LED Light Unit Filter lid Carbon Cartridge Ceramic NoodlesBefore First Use/Preparation Setup Instructions
Read and follow all the instructions, even if you feel you are familiar with the product and find a place to keep the instructions handy for future reference. Your attention is drawn particularly to the sections concerning "IMPORTANT SAFEGUARDS" and the "GUARANTEE CONDITIONS". Please ensure you retain your original purchase receipt in the event that guarantee service is required.
Carefully unpack the aquarium making sure you keep all the packing material until all the parts of the product have been found and the product has been assembled.
This product is shipped to you in a factory sealed carton. Should the product malfunction in any way or if the unit is damaged and requires replacement, contact the retailer where the product was purchased for inspection.
Replacement Parts & Filter Media
Use Aqua One Genuine Spare Parts Only. See your local Aqua One Dealer and look for the spare part you require. Alternatively you will find these numbers on the silver label located on the product.
Impeller 981
Carbon Cartridge 98C
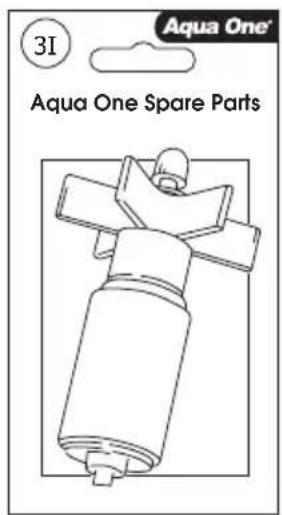
text_image
3I Aqua One® Aqua One Spare Parts-
Select the location for your aquarium. Avoid direct sunlight and areas where temperatures fluctuate greatly such as in front of heaters and air conditioners.
-
Place the aquarium on a flat, level surface. We recommend the use of an Aqua One aquarium cabinet.
-
Lift the filter lid of the aquarium, this will allow access to all parts of the aquarium including the light and filter.
-
The filter comes assembled and no setup is required. However, check all pipes are connected securely and the filter media is in the correct position as per the diagrams on the previous page.
-
Wash aquarium gravel. Place a portion of gravel in a bucket, run water through and churn the gravel until the water running out of the bucket is clear. Repeat this until all the gravel is washed.
-
Place the gravel into the bottom of the aquarium.
-
Place any rocks, ornaments or plants into the aquarium.
-
If the aquarium is to be used for tropical fish, place the heater in the aquarium. Follow the instructions provided with the heater to set up and install the heater. (model 30 only)
-
Fill the aquarium with water. The water level should be below the plastic frame on the inside of the aquarium but high enough that the water level is not visible when the aquarium is running.
-
Add water conditioner to the water, follow the directions on the label.
-
Close the filter lid.
-
Ensure your hands are dry and plug the power cords into a power outlet. Drip loops as described in the important safeguards section of this instruction booklet must be used.
-
Once the unit is turned on at the power outlet the filter should automatically start
-
To switch on the light unit use the switch located on top of the filter lid.
-
For (model 11) if desired the rotating switch can also be switched on.
Tips
It is recommended that for freshwater aquariums, the filter is run for at least 5-7 days before fish are added. This allows the filter to cycle and establish a population of beneficial bacteria which break down waste in the aquarium water.
Check the water parameters such as pH and kH. If you are unsure what the levels should be for your fish, seek advice from your aquarium retailer.
Allow at least a week between fish additions. This allows the biological filter to adjust to cope with the additional waste.
Remember, all fish will grow. When selecting fish, make judgements based on the maximum size the fish will grow, not simply based on the size the fish is at the store.
Consult your local aquarium retailer for advice on stocking your aquarium.
Maintenance
AQUARIUM MAINTENANCE
DAILY:
While feeding your fish, check that all equipment is operating correctly. Check that the filter is running and the strainer is not blocked. If a heater is being used, check the temperature of the aquarium and ensure the heater is functioning.
FORTNIGHTLY: 25% Water change
What you will need: A bucket, towel, gravel vacuum and water conditioner.
- Ensure your hands are dry.
- Switch off light unit and unplug power cable to turn off filter.
- Lift the filter lid in order to access both the aquarium and the filter.
-
Place the towel on the floor in front of the aquarium in case of water spillage.
-
Use an algae scraper or magnet cleaner to clean the glass.
-
Using the gravel cleaner, remove approximately 25% of the water from the aquarium. Discard the water. The water can be used to water your garden as the nutrients will be beneficial to plants and this prevents water from being wasted.
-
Fill the bucket with new water, add water conditioner as per the instructions on the bottle.
- Add the conditioned water to the aquarium. Repeat this until the aquarium is filled to the water level outlined on the previous page.
- Close the filter hood of the aquarium.
- Check for any water spillage on or around the aquarium and wipe with the towel.
- Plug the power cable in at the power outlet and switch it on. Switch the light back on also.
FILTER MAINTENANCE
MONTHLY:
NOTE: the carbon cartridge should be replaced every 4-6 weeks. Spare cartridges are available from your local aquarium retailer.
- Ensure your hands are dry.
- Switch off light unit and unplug power cable to turn off filter.
- Lift the filter lid in order to access both the aquarium and the filter.
- Place the towel on the floor in front of the aquarium in case of water spillage.
- Disconnect the intake pipe and strainer from the power head. Clean these parts with a pipe cleaner and rinse under tap water.
- Remove the power head from the filter. In order to do this, simply push the power head downwards.
- Pull the impeller cover off in order to access the impeller. (see next page for diagram)
- Grasp the impeller blades and remove the impeller from the power head.
- Clean the impeller chamber with a pipe cleaner.
- Reassemble the power head. Ensure the grommets are in place on both ends of the shaft. Missing grommets can cause the pump to be noisy as well as causing low flow and extra wear on the power head.
- Reassemble the filter and ensure the filter is securely connected to intake pipe.
- Ensure the power cables are not wet. Plug the power cables at the power outlet and switch on. Switch the light back on also.
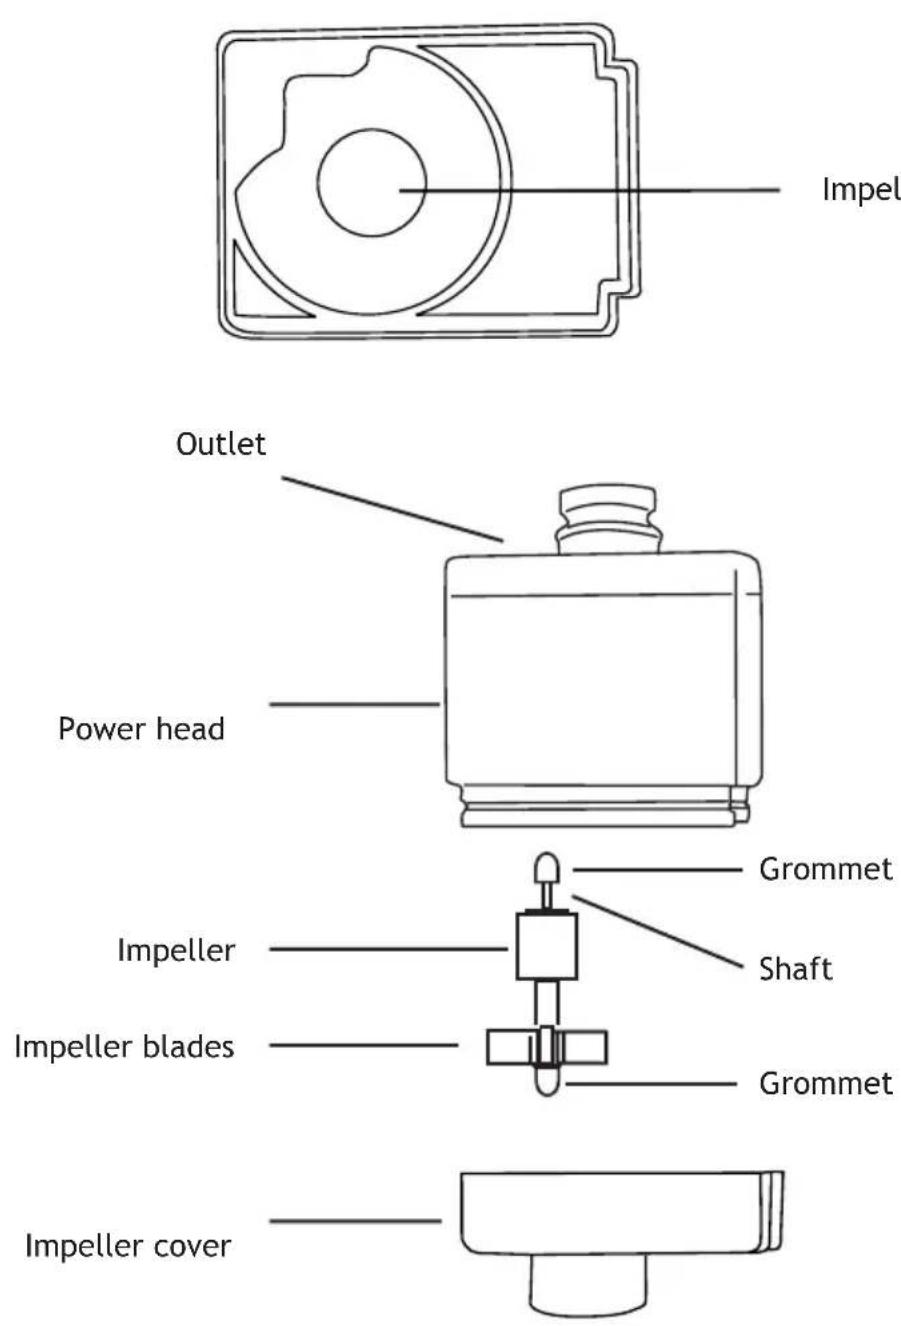
Impeller chamber
Troubleshooting
If you are in any doubt about the electrical installation or safety of this product you must consult a qualified electrician.
LIGHT UNIT DOES NOT WORK
- Ensure switch is in the on position on the top of the light unit.
- Check if its is plugged into the power supply and the switch is on.
POWER HEAD WORKING BUT NO / SLOW WATER FLOW
- Check impeller is in good condition and replace if needed.
- Make sure water level in aquarium is above the power head. Please note the power head is a water proof unit.
- Clean impeller, power head and all inlet and outlet pipes.
- Check power head is assembled correctly, check that both grommets are in place at the ends of the shaft.
AQUARIUM POSSIBLY LEAKING
- Replace carbon cartridge is blocked and dirty as this can create an overflow.
- Make sure water level is not to high. Refer to setup instructions.
- If an air stone is being used check it is not bubbling water over the rim of the aquarium if so turn the air pump down.
- Make sure the aquarium is sitting on a level surface.
5a. Remove the filter unit from the top of the aquarium. Mark the water level. Remove any excess water that may be sitting on the edge of the aquarium. Leave for an hour. If water level drops proceed to step 5b.
5b. Remove the fish, decorations and gravel. Empty the aquarium and clean the glass DO NOT WASH IN SOAP OR DETERGENT. Place a piece of newspaper on a flat level solid surface. Carefully fill the aquarium ensuring not to spill any water on to the newspaper. Leave the aquarium for several hours and then inspect the newspaper for wet patches.
Specifications
Aquarium Model: Panoramic 11
Dimensions: 34 x 34 x 48.5 cm
Aquarium Volume: 11L
Filter Flow Rate: 150L/Hr
Light Wattage: 3 x 1W LED
Power Requirements: 12V
Suitable: Coldwater
Aquarium Model: Panoramic 30
Dimensions:34 x 34 x 51.5cm
Aquarium Volume: 30L
Filter Flow Rate: 150L/Hr
Light Wattage: 3 x 1W LED
Power Requirements: 12V
Suitable: Coldwater, Tropical
Disposal of used Electrical & Electronic Equipment (Applicable in the European Union and other European countries with separate collection systems)
This symbol on the product or on its packaging indicates that the product must not be disposed of with normal household waste. Instead, it is your responsibility to dispose of your waste equipment by arranging to return it to a designated collection point for the recycling of waste electrical and electronic equipment. By separating and recycling your waste equipment at the time of disposal you will
help to conserve natural resources and ensure that the equipment is recycled in a manner that protects human health and the environment. For more information about recycling this product, please contact your local city office, your household waste disposal service or the shop where you have purchased the product.
Aqua One™
Inspirin g Excellence in Fish Care!
Manufactured in China.
Designed in Australia by Aqua One.
Aqua One and Aqua One Inspiring
Excellence in Fish Care! are registered trademarks or trademarks.
www.aquaone.com.au