ED-D6KG - Wäschetrockner Trieste - Kostenlose Bedienungsanleitung
Finden Sie kostenlos die Bedienungsanleitung des Geräts ED-D6KG Trieste als PDF.


Benutzerfragen zu ED-D6KG Trieste
0 Frage zu diesem Gerät. Beantworten Sie die, die Sie kennen, oder stellen Sie Ihre eigene.
Eine neue Frage zu diesem Gerät stellen
Laden Sie die Anleitung für Ihr Wäschetrockner kostenlos im PDF-Format! Finden Sie Ihr Handbuch ED-D6KG - Trieste und nehmen Sie Ihr elektronisches Gerät wieder in die Hand. Auf dieser Seite sind alle Dokumente veröffentlicht, die für die Verwendung Ihres Geräts notwendig sind. ED-D6KG von der Marke Trieste.
BEDIENUNGSANLEITUNG ED-D6KG Trieste
Specifications
| Dimension | 595×530×840(mm) | Weight of product | 32Kg |
| Rated input power | 1700W | Rated volume of dryer | 6.0Kg (Dry clothes) |
| Rated voltage | 220-240V~ | Rated frequency | 50Hz |
Please keep this manual in a safe place Thanks for buying this electronic clothes dryer

Electronic Clothes Dryer
text_image
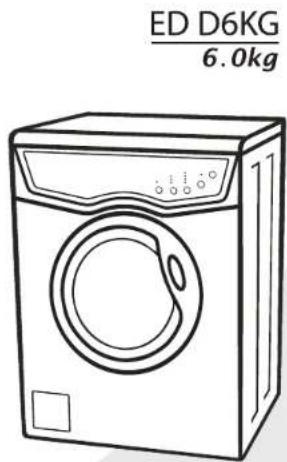
ED D6KG 6.0kgManual of Instruction
Please read this manual of instruction carefully before you use this product
Index

Features 2
Part Name 3
Installation before use 3
Simple Installation 6
Operation Explanation 11
1.Preparing before drying - - - - - - - - - - - - - - - 11
2.Check filter 11
3. Put clothes into the dryer - - - - - - - - - - - - - - - - - - 11
4.Close the door - - - - - - - - - - - - - - - - 12
5. Instruction on control panel - - - - - - - - - - - - 12
6.End of Program - - - - - - - - - - - - - - - - 14
7. Take out the Plug - - - - - - - - - - - - 14
8.Clear filter, cabinet and inner tub - - - - - - - - - - - -14
Other Functions Description - - - - - - - - - - - - - - - - 15
Trouble Solution - - - - - - - - - - - - - - - - - - 15
Notice 17
- Read before use 17
- When using - - - - - - - - - - - - - - - - - - - - - - - - - 18
Instruction of Upside Down - - - - - - - - - - - - - - - - - - - - - - 19
Specifications - - - - - - - - - - - - - - - - - back cover
Features

Features
- Luxurious unique design: Designed with a front load washing machine in mind.
- Back vent: This allows the humid air from the clothes to be vented directly out the back of the unit.
- Micro control: Simple and convenient operation with the help of electronics.
- Large door window: Allows you to see the drying progress.
- Wide opening angle: 150°.
- Long life construction: Suitable capacity with anti-dust, anti-humidity, anti-shake and low noise features.
7.Max. Rated volume of dryer: 6.0 kg (Dry clothes)
Part name·Installation before use

Part name
text_image
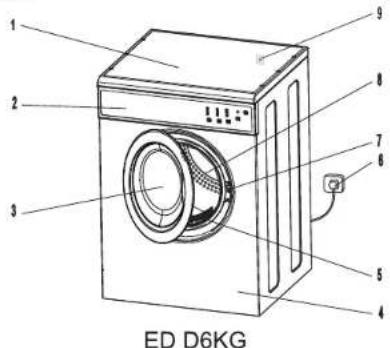
ED D6KG1.Topboard 2.Control panel 3.Door 4.Cabinet 5.Filter
6.Power lead 7. Door lock 8. Tumbling box 9. Reset button
Installation before use
Step1: Power source and grounding.
The dryer employs alternative current with the rated voltage and frequency. When the voltage fluctuates between 10% of rated voltage, the dryer can work normally. A special power socket for the dryer should be set aside the dryer for convenience and safety. The method of connection of the socket is as the figure below.

Notices:
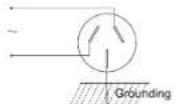
The socket and the grounding wire must be installed by an electrician to prevent incorrect installation or use of the socket and to guarantee the safety of use of electricity. The power wire of the dryer employs Y connection, if the supply cord is damaged, it must be replaced by the manufacturer, its service agent or similarly qualified persons in order to avoid a hazard. No connection of the grounding wire with the neutral wire, otherwise the cabinet will be charged, which is likely to cause the danger of electric shock.
Installation before use

Step2: Precautions
◆Do not store or install the dryer where it will be exposed to water or the weather. If unavoidable, please dry the dryer before each use.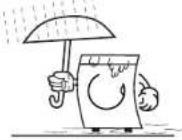 | ◆Please install dryer in a well ventilated area for better air circulation and to avoid obstructing air intake passage.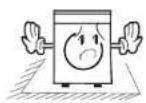 |
◆To aviod problems from wet clothes minimize risk, dehydrate items before placing inside the dryer.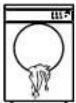 | ◆Do not spray combustible aerosols near the dryer during use. If accidental spray occurs do not touch the plug or start/pause butto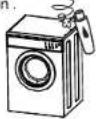 |
◆Do not dry any clothes that are contaminated with combustible materials: i.e. Gasoline, methylated spirits, etc.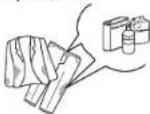 | ◆Dont operate this dryer if it is damaged, malfunctioning,partially disassembled or has missing or broken parts.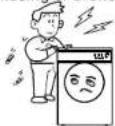 |
◆When the dryer is working, the back side will become hotter. In order to avoid such risk, The dryer is not intended for use by young children or infirm persons without supervision. | ◆Please do not use the machine if your feet or hands are wet.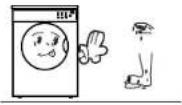 |
Installation before use

◆To avoid deformation of the control panel, do not place any heavy or hot articles on top of the dryer. 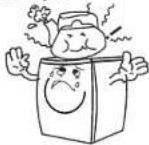 | ◆Do not try to dry raincoat or fluff clothes, or items containing rubber or elastic materials on any heat setting. 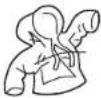 |
◆To avoid scalding, do not open the dryer door until the program has completed. 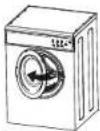 | |
| This product belongs to type I electronic products and please take note of safety problem accordingly: 1.It is rule to use power which is buried in the earth and will not touch any socialequipments such as gas pipe or water pipe etc. Make sure the difference of different lines and they are not connected. 2.Please use special socket which is according to National Standard and will endure 10A current. To be safe, please make improvements as soon as possible according to the rules and suggestions mentioned above. | |
| Clothes with the following markings shall not be dried in this dryer. | |
     Not used for dryer in the tub Hang for dry Drip dry Flat dry Dry automatically Not used for dryer in the tub Hang for dry Drip dry Flat dry Dry automatically | |
Not used for dryer in the tub
Hang for dry
Drip dry
Flat dry
Dry automatically
Simple installation

Simple Installation
Step 1:
Dryer should be placed in a ventilated area with no less than 10 cm distance from the wall. If placed in a room such as bath room, it is suggested there are no obstacles of 1.5m in front of dryer and it is kept ventilated.
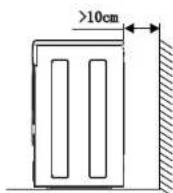
Step 2: The horizontal adjustment
Tie a heavy subject on the string on the front and two sides of the dryer. Please refer this to below figure, and if A=A, B=B, this means the dryer is placed horizontally. If the objects do not match up, something should be used to level the dryer.

Notice:
If the dryer is not placed horizontally (the lean angels is no more than 2^ ), the dryer will operate unbalanced and be more likely to fault.
Notice when installing:
- Do not install the dryer in the open air or place where easily damaged by water;
- Do not place the back of dryer near curtain or other obstacles;
- Do not place the dryer near gas or flammable materials.
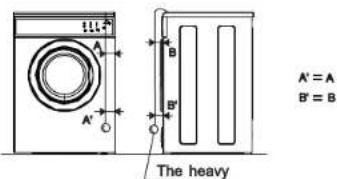
text_image
A' A' B B' The heavy A' = A B' = BSimple installation

- Keep this instruction booklet on hand in order to refer to it when necessary. Take it with you when you move, and, should you sell this appliance or pass it on to another party, make sure that this booklet is supplied along with the dryer so that the new owner may be informed about warnings and suggestions on how the dryer works.
- Read these instructions carefully; the following pages contain important information on installation and suggestions on how the appliance works.
Where to put your dryer
Place your dryer at a distance from gas ranges, stoves, heaters, or cook tops because flames can damage the appliance.
If you are going to install the appliance under a work counter, be sure to leave a 10mm space between the top and any other objects on or above the machine and a 15mm space between the sides and lateral furnishings or walls. This is to ensure proper air circulation. Make sure that the back vents are not obstructed.
Make sure you put your dryer in an environment that is not damp and has proper air circulation throughout.
Ventilation
The dryer dries your laundry by drawing in cool, clean and relatively dry air, heating it, and then distributing it through the clothes as they are gently tumbled. For optimum performance, the moist air is then blown out through a vent tube at the back of the dryer.
When the dryer is in use, there has to be adequate ventilation to avoid the back flow of gases into the room from appliances burning other fuels, including open fires.
Mobile venting
A vent tube must always be fitted when the dryer is used in conjunction with Mobile venting.
Simple installation

The tube must be fitted securely into the back of the dryer (see Dryer Description). If possible, it is always best to connect the tube to a permanent outlet close to the dryer. If permanent installation is not possible, the dryer will work just as well with the tube passing through a partly-opened window.
- Ensure that the end of the tube is not directed toward the air intake vent at the rear of the dryer.
- The vent tube should not exceed 1.8 meters in length and should be kept free of any possible accumulation of fluff, lint and water by shaking it out frequently. Always ensure that the tube is not squashed.
Permanent venting
In conjunction with the vent tube we recommend using a Wall/Window Vent Kit, available at a retail location or the nearest Spare Parts Dealer.
Wall mounting
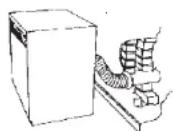
- Leave an opening in the wall to the left of the dryers proposed position.
- Keep the tube as short and straight as possible to prevent condensed moisture from backing up into the dryer.
- Similarly, the duct in the wall should slope downwards towards the outside.
Window mounting
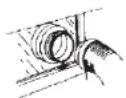
- With a stacked dryer the hole in the window should ideally be made below the vent.
- The tube should be kept as short as possible.
Depending on how often you use your dryer, it is essential that areas are checked periodically to remove lint or debris.
The vent tube adaptor must be fitted securely thus preventing any humid air from being emitted back into the room.
Simple installation

- The Dryer should not be pushed so far back that the tube adaptor is pulled out of position or the tube is squashed or bent.
- The tube should be kept clear of the air intake vent and kinks or "U" bends must be avoided as these will obstruct the tube or trap condensation.
Open window venting
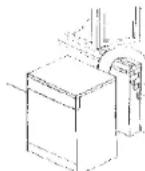
The end of the tube should be directed downwards, to prevent warm moist air from condensing in the room or in the dryer.
- Ensure that the dryer is adequately ventilated and that the end of the vent tube is not directed towards the air intake duct.
- The vent tube must always be fitted for optimum performance.
- Make sure that the vent tube and air intake vents are not obstructed or blocked.
- The dryer must not recycle exhaust air.
- Misusing a tumble dryer may create a fire hazard.
- Do not discharge exhaust air into a flue which is used for exhaust fumes from other appliances that burn gas or other fuels.
Electrical connections
Make sure of the following before you insert the plug into the electrical socket:
The socket must be grounded.
The socket must be able to sustain the machines maximum power, which is indicated on the rating label (see Dryer Description).
Power voltage must be within the values indicated on the rating label.(see Dryer Description)
The socket must be compatible with the dryers plug. Should this not be the case, replace the plug or the socket.
Simple installation

- The dryer must not be installed outdoors, even if the space is sheltered. It can be very dangerous if it is exposed to rain or storms.
- Once installed, the dryers electrical wire and plug must be within ease reach.
- Do not use extension cords.
- The power cord must not be bent or squashed.
- The power supply cord should be checked periodically and replaced by a cord specially prepared for this dryer and fitted only by authorised technicians (see Service). New or longer power cords are supplied at an extra charge by authorised dealers.
- The manufacture denies any responsibility should any of these rules not be followed.
If in doubt about any of the above consult a qualified electrician.
Before you start using your dryer
Once you have installed your dryer and before you use it, clean the inside of the drum to remove any dust that could have accumulated during transport.
Operation explanation

Operation explanation

Operation explanation
1. Preparing before drying
● Clothes have to be washed and dehydrated before putting in the dryer.
- Put same kind clothes to dry together.
- Sort your clothes into loads that take a similar time to dry e.g. Heavier items from light items.
- Make sure the decorations and buttons are safe for high temperature and will not damage the inner tube of the dryer. Make sure the clothes are well protected.
- It is suggested to turn the clothes inside-out.
- Please check the clothes after washing, if there is dirt on clothes, the drying process cannot be relied on to remove the remaining dirt.
- Please make sure the power plug is well connected and the supply cord is in good condition.
2. Check filter
- Make sure the filter is well cleaned and in the right position.
- Filter must be cleaned regularly.
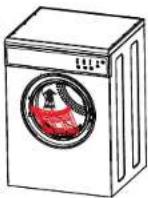
3. Put clothes into the dryer
- For faster results it is better put clothes with 1/2-2/3 the capacity of the inner tube for drying, because drying needs space to make clothes circulate evenly.
- When drying big clothes, it is better to include several small items to help balance the load.
- When drying expensive or little clothes (<1.5kg) it is better to add several towels whose fibers wont fall off easily, this will help dry the clothes more evenly.
● To avoid creased, rough or static electricity clothes, do not over dry.
The reference weight of dry clothing
| Mixed-fabric clothes (about 800g) | Jacket (about 800g cotton) | Jeans (about 800g) | Towel quilt (about 900g cotton) | ||||
 | Single bedsheet (about 600g cotton) | Work clothes (about 1120g) | Sleepwear (about 200g) | Long sleeve shirt (about 300g cotton) | |||
 | Short sleeve shirt (about 180g cotton) | Short pants (about 70g cotton) | Socks (about 50g mixed-weave) |
4. Close the door
5. Instruction on control panel
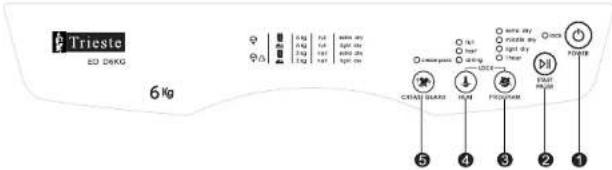
text_image
Trieste EQ DEKG 6kg 5 kg 1 kg 2 kg 3 kg 4 kg 5 kg 6 kg 7 kg 8 kg 9 kg 10 kg 11 kg 12 kg 13 kg 14 kg 15 kg 16 kg 17 kg 18 kg 19 kg 20 kg 21 kg 22 kg 23 kg 24 kg 25 kg 26 kg 27 kg 28 kg 29 kg 30 kg 31 kg 32 kg 33 kg 34 kg 35 kg 36 kg 37 kg 38 kg 39 kg 40 kg 41 kg 42 kg 43 kg 44 kg 45 kg 46 kg 47 kg 48 kg 49 kg 50 kg 51 kg 52 kg 53 kg 54 kg 55 kg 56 kg 57 kg 58 kg 59 kg 60 kg 61 kg 62 kg 63 kg 64 kg 65 kg 66 kg 67 kg 68 kg 69 kg 70 kg 71 kg 72 kg 73 kg 74 kg 75 kg 76 kg 77 kg 78 kg 79 kg 80 kg 81 kg 82 kg 83 kg 84 kg 85 kg 86 kg 87 kg 88 kg 89 kg 90 kg 91 kg 92 kg 93 kg 94 kg 95 kg 96 kg 97 kg 98 kg 99 kg CRAVE SHARP HUM PROGRAM EQUITY POWER ⑤④③②①POWER
START/PAUSE
③ PROGRAM (extra dry / middle dry / light dry / 1 hour)
④ HEAT (full / half / airing)
⑤ CREASE GUARD

Notice:
Push PROGRAM and HEAT at the same time, this will enable the lock function. This can help avoid children playing with the device.
Operation explanation

1) Push Power button.
2) Decide on a program according to the texture and capacity of the clothes. Select the program by pushing the "PROGRAM" button repetitively until the indicator light cycles to the desired program.
3) Decide on a temperature setting according to the texture and capacity of the clothes. Select the temperature setting by pushing the "HEAT" button repetitively until the indicator light cycles to the desired setting.
4) Press the "CREASE GUARD" button if expensive or easily creased clothes are being dried. Crease guard is indicated on/off via the "crease guard" light.
5) Push "START/PAUSE" button, this will start the program. If you wish to pause the program to add more clothes push the "START/PAUSE" button again. Be careful when opening dryer door, hot steam can release. To continue program, make sure the door is closed then push the "START/PAUSE" button once again. When the dryer is in pause mode it is possible to change or restart programs.
6) Control panel lock feature is initialized by pushing both "PROGRAM" and "HEAT" buttons at the same time. When the lock feature is enable it is indicated by a light, pushing the buttons again will disable this feature.
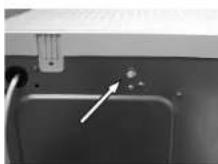
7) If the unit does not heat, push the reset button located at the back of the unit.

Notice: Push all buttons will cause a short buzzer with shining lights.
Program function setting
| Program | Max volume of dry clothings | Temperature | Clothings type | Air-cold | Antiorease | Child-lock | Max dry time |
| 1 hour dry | 4.0~6.0kg | full √ | Quick drying clothes | 10min | √ | √ | 70min |
| <4.0kg | half √ | ||||||
| 6.0kg | Air-dry √ | Fine fabric and clothing not requiring heat to dry | |||||
| Light dry | 4.0~6.0kg | full √ | Chemical fiber and small clothing | 10min | √ | √ | 100min |
| <4.0kg | half √ | ||||||
| Middle dry | 4.0~6.0kg | full √ | Cotton weaving and jeans | 10min | √ | √ | 120min |
| <4.0kg | half √ | ||||||
| Extra dry | 4.0~6.0kg | full √ | Cotton clothes, jeans and bedsheets | 10min | √ | √ | 150min |
| 2.0~4.0kg | half √ | ||||||
| <2.0kg | full √ | Cotton weaving and jeans | 10min | √ | √ | 80min |

Notice:
- Cold air function circulates cold air for 10 minutes at the end of program. This ensures that the items are left at a temperature, and that the items will not be damaged Crease Guard adds an extra 30s after the program to shake clothes in order to protect against creasing.
Operation explanation

- Crease Guard means after programming, it adds extra 30s' one way running to shake clothes in order to protection of creasing.
● The inside temperature and humidity will not affect drying time. - Check the label attached on clothes and choose the right temperature and time according to the explanation.
- The few clothes below 2.0kg shall be selected with "extra dry" program and "full" heat for drying.
6. End of Program
At the end of program, buzzer rings to remind take out clothes from dryer.
7. Take out the Plug
To be safe, please unplug the unit after each use.
8. Clear filter, cabinet and inner tub.
- Accumulated dust, fiber&debris will affect the air circulation inside the dryer this will cause longer drying times. It is advised to clean the filter and inner tube after each use.
- Make sure to cut off the power before clearing
Filter Clean
1)Remover filter
The lint filter is located in the door opening, remove the lint filter and open it out.
2) Clean filter
Wipe down with a damp cloth.
3) Re-fit filter
Once the filter is dry, re-fit into door opening.
4) Wipe the filter after using every time.
Cleaning cabinet and inner tube
Use a soft damp cloth to wipe
the cabinet and inner tube.
● do not rinse by water directly
• do not use scour wipes
● do not use gasoline and alcohol wipes
Make sure open to the front door for aeration after cleaning the inner tube

Other functions description

Other functions description
Step 1: Warning function
| Fault | Cause of fault | Fault indication (lights) | Fault indication (sound) | Solution of alarm |
| Exceeded temperature alarm | The inner tube temperature exceeds 63° | "middle dry", "extra dry" indicator flash | The buzzer sounds for 10 seconds.If the program is not solved, the buzzer sounds every 15 minutes | Turn off the dryer, Wait for the dryer to cool down |
| Open door alarm | The door has opened during the program | "light dry", "middle dry" indication flash | Close door | |
| Temperature sensor malfunction alarm | Program start sensor open | "1 hour", "light dry" indication flash | Reset the dryer. If the problem reoccurs return to manufacturer | |
| Program start sensor short | "1 hour", "middle dry" indication flash |
Step 2: Auto power-off function
- This machine will auto power-off after 10 minutes when you do not set any program.
- This machine will auto power-off after 6 time's buzzer on drying.
Trouble Solution
Trouble Solution

| Trouble | Cause | Solution |
| Dryer won't start | Power cutPower plug not correctly connectedDry clothes exceed maximum volumeTemperature fuse is cut | Wait for power to restoreCheck the power socket and make sure plug is connected tightRemove clothes and check dampness.Max volume of the dryer is 6kgPlease carserman exchange the temperature fuse |
| Dryer releasing extensive heat | Lint trap requires cleaningIntake or exhaust passage is obstructed | Clean lint trapClean air intake and exhaust and check for obstructions. (eg. Curtain) |
| Wet clothes | Dryer toofullClothes left in dryer too long after the end of the programClothes not assorted properlyWrong temperature for clothes | Make sure the dryer is not too fullImmediately remove clothes when program finishedSee page 7.Observe the maintenance label on clothes |
| Shrinks clothes | Clothes over dried | Observe the maintenance label on clothing. Remove clothes from dryer while still damp, finish drying process by hang drying. |
| Lint balls on clothing | Synthetic fibre rubbing with each other cause lint which attaches to clothes | Use fabric softener. Please spray settled glue on cuff and neckline when ironing. |
- If there is no heat from the dryer, please press the plastic push button at rear of dryer to activate the thermostat in order to reheat the element, please see illustration.
The sound of dryer when runs can cause
- Excessive noise of vibration: Due to heavy wet clothes turning and bumping.
- Air bumping: When drying, machine will generate steam which will come out from exhaust pipe. This will cause bumping with the bottom of the inner tub.
Notice

Notice
1. Read before use:
1) Oil-affected items can ignite spontaneously, especially when exposed to heat sources such as in a tumble dryer. The items become warm, causing an oxidation reaction in the oil. Oxidation creates heat. If the heat can not escape, the items can become hot enough to catch fire. Piling, stacking or storing oil affected items can prevent heat from escaping and so create a fire hazard.
2) If it is unavoidable that fabrics that contain vegetable or cooking oil or have been contaminated by hair care products be placed in a tumble dryer they should first be washed in hot water with extra detergent—this will reduce, but not eliminate, the hazard.
3) The final part of a tumble dryer cycle occurs without heat(cool down cycle) to ensure that the items are left at a temperature that ensures that the items will not be damaged.
Warning: Never stop a tumble dryer before the end of the drying cycle unless all items are quickly removed and spread out so that the heat is dissipated.
4) This dryer has ventilation openings in the base, carpet must not obstruct the openings.
5) The dryer must not be installed behind a lockable door, a sliding door or a door with a hinge on the opposite side to that of the tumble dryer in such a way that a full opening of the tumble dryer door is restricted.
6) This appliance is not intended for use by persons (including children) with reduced physical, sensory or mental capabilities, or lack of experience and knowledge, unless they have been given supervision
Notice

or instructions concerning use of the appliance by a person responsible for their safety.
7) Children should be supersived to ensure that they don't play with the appliance.
8) The lint trap has to be cleaned frequently, lint must not be allowed to accumulate around the tumble dryer.
9) The tumble dryer is not to be used if industrial chemicals have been used for cleaning.
10) Caution, risk of fire symbol—This appliance has a risk of fire, caution should be enforced while operating.
11) Items that have been soiled with substances such as cooking oil, acetone, alcohol, cortisol, kerosene, spot removers, turpentine, waxes and wax removers should be washed in hot water with an extra amount of detergent before being dried in the tumble dryer.
12) Items such as foam rubber (latex foam), shower caps, waterproof textiles, rubber backed articles and clothes or pillows fitted with foam rubber pads should not be dried in the tumble dryer.
13) Fabric softeners, or similar products, should be used as specified by the fabric softener instructions.
2. When using:
- If the drying process can operate while the door is open it should be sent to maintenance.
- If the drying process can operate without pushing the "START/PAUSE" button it should be sent to maintenance.
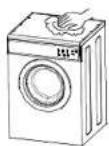
- This dryer is not intended to be placed on top of a washing machine.
Instruction of Upside Down

Instruction of Upside Down

Instruction of Upside Down
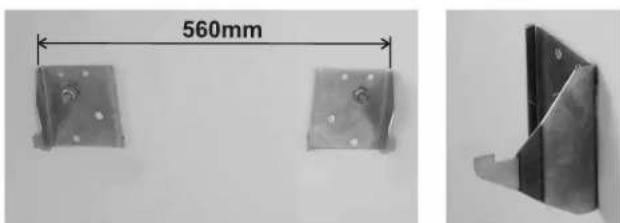
Step 1: Fix two metallic hooks onto wall which align with the mounting slots of the dryer.

Notice:
Make sure the mounting wall is of sufficient strength to support the dryer weight.
natural_image
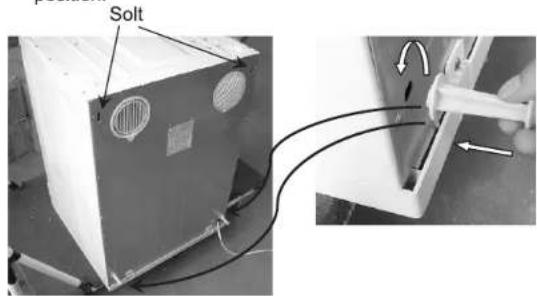
Two metal bracket components with 560mm dimension标注, shown from two different angles (no text or symbols on the brackets themselves)Step 2: To convert dryer turn anti clockwise 180^ . Then place the plastic supports into their slots and turn them 90^ to lock them into position.
text_image
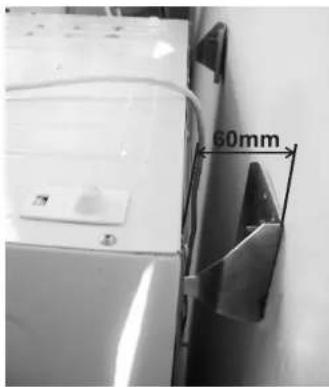
SoltStep 3: Carefully raise the dryer and hang it onto the metallic hooks. Slowly let the weight onto the hooks and let the plastic supports rest again the wall.
Warning: The dryer weight exceeds 35kg, please obtain assistance.
text_image
60mmStep 4: Replace the panel sticker with the supplied inverted sticker.
