Easydry 550 - Wäschetrockner IFB - Kostenlose Bedienungsanleitung
Finden Sie kostenlos die Bedienungsanleitung des Geräts Easydry 550 IFB als PDF.


Benutzerfragen zu Easydry 550 IFB
0 Frage zu diesem Gerät. Beantworten Sie die, die Sie kennen, oder stellen Sie Ihre eigene.
Eine neue Frage zu diesem Gerät stellen
Laden Sie die Anleitung für Ihr Wäschetrockner kostenlos im PDF-Format! Finden Sie Ihr Handbuch Easydry 550 - IFB und nehmen Sie Ihr elektronisches Gerät wieder in die Hand. Auf dieser Seite sind alle Dokumente veröffentlicht, die für die Verwendung Ihres Geräts notwendig sind. Easydry 550 von der Marke IFB.
BEDIENUNGSANLEITUNG Easydry 550 IFB
ALSO FROM IFB
natural_image
Exterior view of a modern microwave oven (no visible text or symbols)MICROWAVE OVEN CAPACITY - 17 to 30 LITERS
natural_image
Interior view of a stainless steel kitchen appliance showing front-mounted dish, wheels, and ceiling lights (no text or symbols visible)DISHWASHER CAPACITY - 12 PLACE SETTING
IFB
Customer Care
Dial
1860 425 5678 - BSNL & MTNL Callers
3900 4321 - Other Callers
IFB Industries Limited, Plot No. IND - 5, Sector - 1, East Calcutta Township, Kolkata - 700 078
Visit us at www.ifbappliances.com
11F3
Maxidry 550 / Easydry 550
OPERATING MANUAL
USE ONLY GENUINE IFB SPARES & ACCESSORIES
* Company shall not be responsible for defects arising due to usage of spurious parts and accessories
Dear Customer, Congregation, you are now the proud owner of international range of tumble dry clothes dryer from JFFB Your clothes dryer, is truly going to be your freedom machine. It requires just 30 seconds of your time in loading the fabrics and setting the time. Thereafter, you are totally free to do what you please. No more hassles of pin drying your clothes outside anymore. No more wet clothes nor the fear of your clothes being blown
away. This clothes dryer is modelled on the unique ' Tumble Dry' concept for superior fabric care and 100% clothes drying. What mere, its unique " reversible" tumble actions render your clothes totally wrinkle free. As you read this manual you will understand what this clothes dryer can do for you. For any father information, please contact your nearest dealers or JF.B service Centre.
text_image
Service Centre.Chief Executive
CONTENTS
KNOW YOUR MACHINE 6
INSTALLATIONS 7
□ Pre Installation
□ Unpacking
□ Installation Considerations
□ Options for Installation
Electrical Connection
USING YOUR DRYER 14
Controls
Safety Reset
□ Sorting the load
Loading
□ Drying Guide
□ Cleaning the lint filter
□ Instruction for use
I OWN THE FOLLOWING PRODUCTS: ( Please tick in the box )
COLOUR TV
□ REFRIGERATOR
□ AIR CONDITIONER
DISH WASHER
MICROWAVE OVEN
WASHING MACHINE
FRANCHISEE ATTACHED: ____
28
IFB
DRYER SAFETY 21
Safety Considerations
□ Fire Hazards
TROUBLESHOOTING 24
ACCESSORIES 25
5
IFB
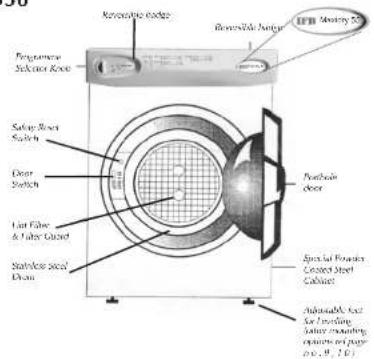
KNOW YOUR MACHINE
MAXIDRY 550
text_image
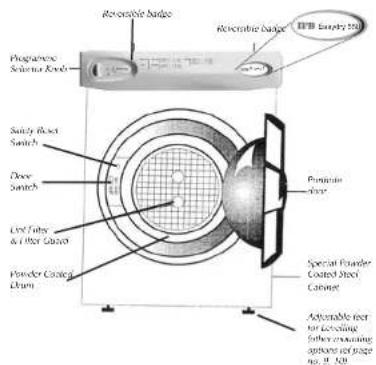
36 Pressure Sensor General Side Sensor Monitoring Solder Board Switch Door Switch Lip Fiber & Filter Board Satirical Seed/ Dias Pencilal door Special Panel Founding Coated Steel Cabinet Industrial Metal For Opening Battery mounting. Optioned or page (0.0, 1.0)EASYDRY 550
text_image
Reversible bladder Reversible bladder Programm Science Kit Supply Reset Switch Door Switch Cer Tube A (HR) Cabinet Powder Control Drain Pumpkin Shoe Special Heater Coated Steel Cabinet Accessible feed to cooling Safers creating sensors for stage no. B. NB6
IFB
CUSTOMER COPY
MODEL: MAXIDRY 550 / EASYDRY 550 SR. NO. CD 550A/CD550B
DEALER'S NAME : ____
CUSTOMER'S NAME:
ADDRESS :
PIN CODE : ____
TEL. NO. (Resi.) (Off.) ____ ____
E-MAIL :
MOTOR SR. NO.:
DATE OF PURCHASE : ____
SERVICE STATION COPY
MODEL: MAXIDRY 550 / EASYDRY 550 SR. NO. CD 550A/CD550B
DEALER'S NAME : ____
CUSTOMER'S NAME:
ADDRESS :
PIN CODE:
TEL. NO. (Resi.) (Off.) ____ ____
E-MAIL :
MOTOR SR. NO.:
DATE OF PURCHASE : ____
27
IFB
TECHNICAL DATA
| Dimensions | : 53 cm x 60 cm x 72 cm |
| Weight | : 26Kgs. |
| Maximum Capacity | : 5.5 Kg. of dry clothes |
| Economic Load | : 4.5 kg. of dry clothes |
| Timer type | : Electromechanical. |
| Auto cool down | : 13 mins |
| No. of Programmes | : Two-Regular & Delicate. |
| Maximun Cycle time | : 180 mins. (including cool down period) |
| Heater rating | : 1.8 kw. |
| Drum speed | : 55 rpm |
| No. of heat settings | : Two : Regular & Delicate |
| Thermal overload switch | : Manual reset type. |
| Exhaust flow rate volume | : 30 litres/sec. |
| Air outflow rate volume | : 2 way : top and side. |
| Safety door switch | : Single Pole microswitch. |
| Energy consumption | : 1.0 kwh to 4.8 kwh (depending upon weight of clothes, amo of moisture and atmospheric conditions.) |
| Power supply | : 220-240 V Single Phase, 50 Hz |
☐ Time durations mentioned above are approximate values, actual values may vary depending upon supply voltage.
☐ Specifications are subject to change without Prior notice.
INSTALLATION
PRE-INSTALLATION
- Remove Carton.
- Remove Polyethylene sheet and corrugated base sheet.
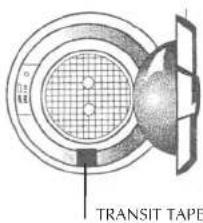
- Remove the packing tape that is on the door. Open door and remove transit tape and clip located at the bottom of panel opening.
text_image
TRANSIT TAPE- Keep the transit tape and clip carefully. This will be required in case you need to shift the machine again.
- For shifting and reinstallation at a new site, please get in touch with our service personnel.
- Keep packaging material carefully. It comes in handy while shifting residence.
NOTE: PLEASE DO NOT OPERATE THE DRYER TILL THE TRANSIT TAPE & CLIP HAVE BEEN REMOVED.
INSTALLATION CONSIDERATIONS:
Install in a position not exposed to weather, where the temperature is between 5°C and 35°C for satisfactory operation of the DRYER. If the free flow of air from the appliance is blocked by surrounding cupboards, walls or shelves, an exhaust kit should be fitted to maintain the dryer's efficiency. Venting the exhaust air from the dryer to outside (via a window) is recommended to minimize moisture being blown into the room. The air inlet and outlet at the rear of the dryer must be kept free of obstruction.
OPTIONS FOR INSTALLATION
Your dryer is quite versatile, it can be located on the floor, on a worktop, hung on a wall or you can have it as a mobile unit using castors which are available as an optional extra.
LOCATING THE DRYER ON FLOOR
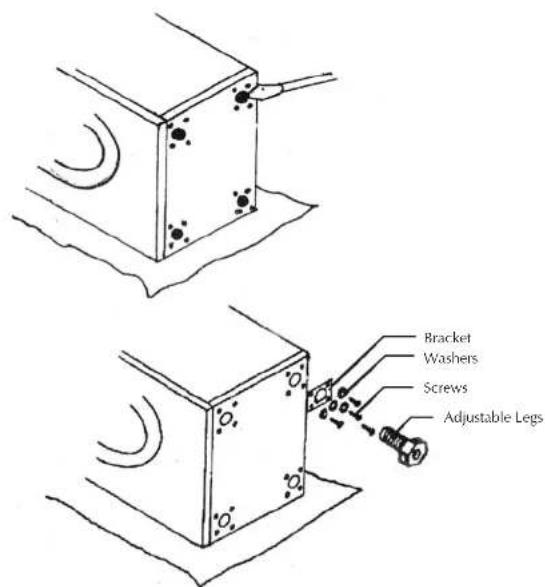
A leg levelling kit is supplied with your dryer for this purpose.
Place a piece of cardboard or towel etc. on the floor. Tip the dryer on its 'side'.
text_image
Bracket Washers Screws Adjustable Legs☐ Remove 4 plastic plugs with a screw driver, blunt knife or fingers.
☐ With the screws provided screw the brackets to the bottom of the dryer.
☐ Screw the 4 adjusting legs unto the brackets on equal distance.
☐ IF YOU DECIDE TO REMOVE ADJUSTING LEGS FOR ANY REASONS IT IS IMPORTANT TO REPLACE PLASTIC PLUGS IN BOTTOM OF DRYER.
ACCESSORIES FOR YOUR DRYER
These accessories may be purchased from your appliance retailer or from your local IFB Service Station.
□ Venting Kit
Clothes dryers remove a considerable amount of moisture from a full load of washing, which is carried by the warm air leaving the dryer.
If you wish, this moist air may be directed out-doors by using the venting kit designed for this purpose.
natural_image
Pure mechanical diagram showing a spring and curved component without any text or symbols□ Castors
Castors can be fitted if you wish your dryer to be mobile.
□ Wall Mounting Kit
Your dryer can be mounted on a wall with the help of this set. (For details see page no. 11)
□ Leveller Kit
Your dryer can be located on the floor by using this set. (For details see page no. 8).
☐ Your Dryer can be mounted on a worktop by using vaccum cups. (For details see page no 9.).
natural_image
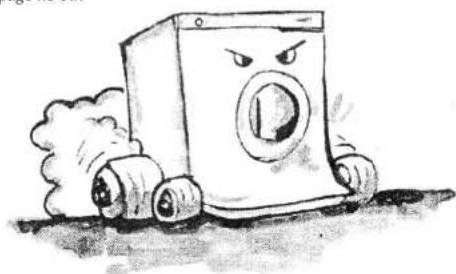
Cartoon illustration of a distressed washing machine with wheels and a sad face, emitting smoke (no text or symbols)TROUBLESHOOTING...
Make sure that you have installed your dryer in accordance with the Installation instructions.
- If the dryer won't start, check these probable causes:
The power cord is not plugged in firmly and turned on.
- This Safety cut-out has operated.
Check the filter for lint build-up, clean if necessary, also check exhaust (located at the back of the dryer) make sure the outlet is not obstructed.
If the safety device operates repeatedly, contact your nearest IFB service centre.
- The house fuse has blown - check the power point with another appliance, such as a radio.
- The dryer door is not properly closed.
- Drum securing tape not removed.
- The drying time knob is not turned to desired setting.
Note : If the power supply cord or plug is damaged, it MUST be replaced with Power Supply Cord available from your nearest IFB Service Station only. If the clothes are still wet
- You may not have dried the load for long enough.
- Turn the time control knob to a longer time. Drying time may need to be extended where air temperature is 5 degrees C or less.
- Check that the lint filter is not blocked.
- The safety cut-out device may have operated.
If the fault occurs periodically, contact nearest IFB Service Station.
Before telephoning, make note of the make, model and serial number of your dryer. The Service centre will require this information.
MOUNTING THE DRYER ON THE WALL
Your dryer may be hung on a wall using the wall mounting kit which is available as an optional extra.
MOUNTING CONSIDERATIONS
1) The wall or vertical surface to which the brackets are to be fixed should be strong enough to support the weight of a fully loaded dryer, approx. 45 kgs.
2) Leave a minimum of 15 mm clearance above the dryer to enable it to be lifted onto the brackets.
3) If mounting the dryer above a top loading washing machine, leave sufficient space below the dryer so that the washer lid can be opened.
4) If the dryer is to be enclosed inside a cupboard, care must be taken to ensure adequate inlet and exhaust ventilation. The moist exhaust air must be directed out of this space. A venting Kit is available for this purpose. (See page 10 &25)
Note: Be sure to leave space for the venting Kit if required.
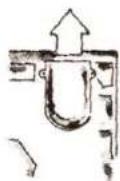
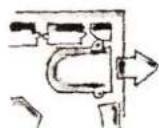
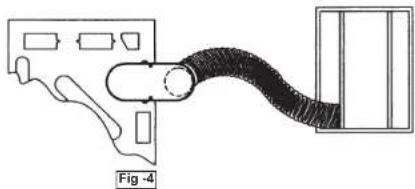
Note: The exhaust air deflector on the back of the dryer can be positioned as shown to exhaust upward or sideways.
Remove the two screws and reposition using holes provided.
MOUNTINGOFVENTKIT
natural_image
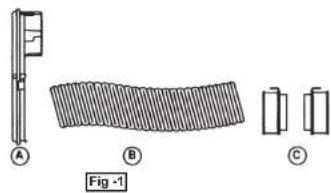
Diagram showing three labeled components: a vertical bar, a wavy striped pattern, and two rectangular blocks (no text or symbols)A vent kit is supplied along with accessories which consist of adapter - A, hose - B, and two connectors - C (Fig -1)
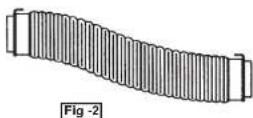
Assemble connectors on both ends of hose by rotating clockwise direction. (Fig. 2)
natural_image
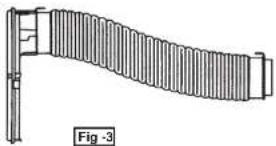
Diagram of a coiled spring or pipe structure with a vertical support (no text or symbols)Insert one end of hose assembly into the adapter slot and lock It (Fig. - 3)
natural_image
Diagram of a mechanical or electrical component with a curved pipe and rectangular block, labeled Fig. 4 (no text or symbols on the diagram itself)Replace the existing exhaust air director on the back of dryer with the adapter. Mount vent kit in sideways or upward position on the back of dryer using the same fasteners (Fig.-4). Direct other end of hose outside the window.
FIRE HAZARDS
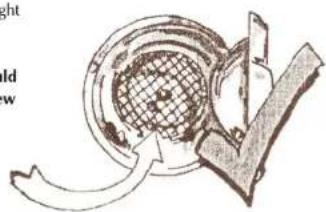
☐ Clean the lint filter after every load to reduce drying times, save energy and avoid over-heating which may become a fire hazard or result in damage to your clothes.
Lint build up is a fire hazard
Do not allow lint to accumulate around the dryer and have your dryer periodically cleaned internally by a serviceman. This must be done if the mounting changes from upright to inverted or vice-versa.
Torn or damaged lint filters should be replaced immediately by a new one.
text_image
Diagram illustrating a mechanical or electrical component with labeled parts and directional arrows indicating flow or movement.DO NOT operate this dryer without the lint Filter.
DO NOT overload the dryer.
Overloading the dryer can increase lint build up due to reduced air flow.
WARNING
FOR YOUR SAFETY and to reduce the risk of fire or an explosion, do not store or use petrol or other flammable vapours and liquids in the vicinity of this appliance.
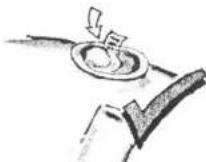
- Only garments washed in water should be placed in this dryer.
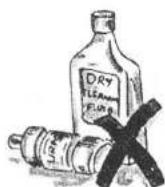
DO NOT dry items cleaned with flammable liquids. (e.g. Dry cleaning fluid).
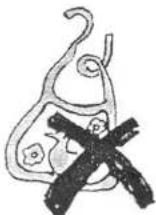
- Do not use this dryer when drying articles containing foam rubber or rubber-like materials.
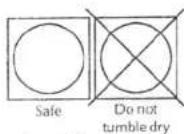
- Check the garment care label to make sure the item can be safely tumble dried.
- To prevent overheating, always keep airflow unobstructed at inlet and outlet.
Note: This diagram illustrates the air inlet and outlet points at the rear of your dryer. Failure to follow these safety instructions could result in damage to the dryer which may not be covered by warranty.
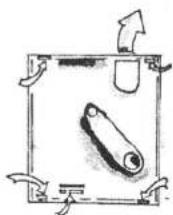
WALL MOUNTING
The mounting brackets included with your dryer may be fixed to any suitable vertical surface. The control panel trim is reversible to allow the dryer to be mounted upside - down, while placing the controls at a convenient height.
natural_image
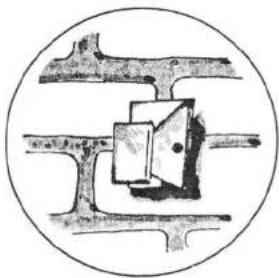
Abstract diagram with intersecting lines and geometric shapes, no visible text or symbolsSolid Brick Walls:
Using the template provided, mark and drill the mounting holes in the wall. Bolt the brackets directly to the wall using self locking masonry fasteners.
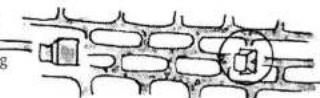
Note: When fixing the brackets to the wall, the mounting plate should be facing toward the other bracket.
Timber Framed Walls:
Wall brackets must be positioned so that fasteners attach to the wall studs behind the plaster or wall sheeting.
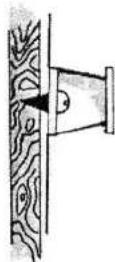
Timber Framed Walls continued ....
If it is not possible to screw the brackets directly into the wall because they are at inconvenient height or spacing.
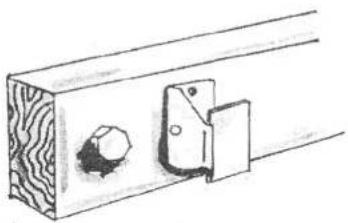
A timber batten (90 mm x 30 mm) of sufficient length should be fastened to the wall using 4 coach screws (6 mm dia. x 70 mm long). The wall brackets can then be attached to the batten using 4 coach screws (6 mm dia. x 30 mm long).
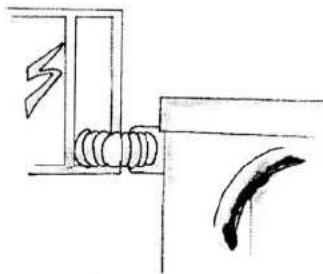
Before hanging the dryer on the wall please note that the plastic spacer should be located as illustrated.
natural_image
Technical line drawing of a wooden bracket with a gasket and clamping mechanism (no text or symbols)Note:
To maintain the same distance from the wall to the dryer, another timber batten of the same size may need to be fastened to the wall in line with the plastic spacer.
natural_image
Hand inserting a plug into a door handle, showing airflow direction (no text or symbols)12 21
IFB
DRYER SAFETY
SAFETY CONSIDERATIONS
☐This dryer has been designed for domestic use of drying clothes and garments. It should not be used for any other purpose.
This appliance is not intended for use by persons (Including children's) with reduced physical, sensory or mental capabilities or Lack of Experience and Knowledge, unless they have given supervision or instruction concerning use of the appliance by person responsible for their safety.
Items that have been soiled with substances such as cooking oil, acetone, alcohol, petrol, kerosene, spot removers, turpentine, waxes and wax removers should be washed in hot water with an extra amount of detergent before being dried in the tumble dryer.
Items such as foam rubber (latex foam), shower caps, waterproof textiles, rubber backed articles and cloths or pillows fitted with foam rubber pads should not be dried in the tumble dryer.
☐ Fabrics softness, or similar products, should be used as specified by the fabric softener instructions.
Warning: Never stop a tumble dryer before the end of the drying cycle unless all items are quickly removed and spread out so that the heat is dissipated.
☐ The appliance must not be installed behind a lockable door, a sliding door or a door with a hinge on the opposite side to that of the tumble dryer.
☐ "AIRING": The final part of the tumble dryer cycle occurs without heat (cool down) to ensure that the items are left at a temperature that ensures that the items will not be damaged.
Take these precautions for safe efficient operation of your dryer.
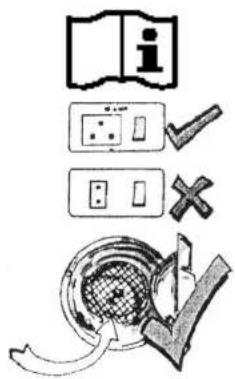
- "Read the Instructions"
- Check that electrical line can take the required load.
- Connect to a 220V, 50 Hz single phase AC supply.
- Appliance must be earthed properly before operation. This can be done by using a 3 pin plug and properly earthed socket of 15 amp. with a 12 amp. fuse.
- No double adaptors or extension cords to be used.
- Make sure the lint filter and filter guard are properly fitted. ( Refer page 19 )
text_image
Diagram illustrating information verification steps with icons for open, check, and checkmark symbolsIFB
INSTRUCTIONS FOR USE
☐ Divide the laundry by type or fabric fibre.
Fasten zippers and buttons and remember that pockets on clothing must be made empty.
Turn pullover inside out.
Wrap clothing which has not been spun dried.
Open the door.
☐ Load laundry into the drum remembering to load sheets from a corner.
☐ We suggest loading small and large clothing items together.
Close the door.
Dry your hands (never touch an electric appliance with wet hands).
☐ Check that ON/OFF push is switched 'OFF'.
☐ Put the plug into the 15 amp electricity socket.
☐ Select the drying cycle required (see the programme table).
☐ Set the timer dial on drying cycle required.
☐ Press the ON/OFF push button to start the machine.
☐ To stop the machine during the drying cycle merely open the door (the drum will stop rotating.)
☐ Close the door if it is required to continue the drying cycle.
☐ Lengthen or reduce the drying time during a drying cycle with the timer dial.
ALWAYS ROTATE THE KNOB IN CLOCKWISE DIRECTION. DAMAGE MAY OCCUR IF THE TIMER KNOB IS TURNED IN AN ANTICLOCKWISE DIRECTION.
After having removed the dry laundry clean the lint filter.
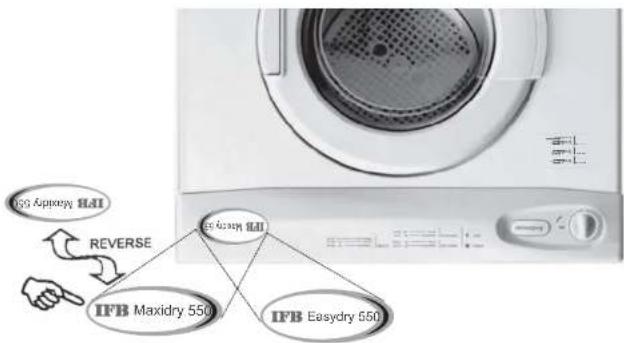
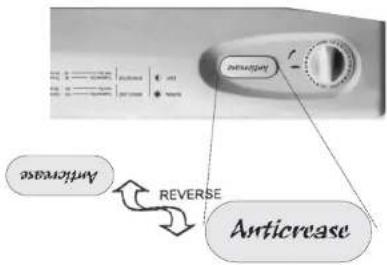
Name Badge Reversal
You can reverse the name badge when you want to mount your dryer upside down on the wall. (see diagrams below)
☐ Use a suitable tool (e.g. a thin bladed Knife) to unclip the name badge from the panel
Turn the name badge over.
□ Clip it back into the panel.
text_image
IFB Maxidry 550 IFB Easydry 550 REVERSE HAI HAI HAI HAISimilarly, the "anticrease" badge can be reversed.
flowchart
graph TD
    A["Reversal"] --> B["Anticrease"]
    B --> C["Reverse"]
    C --> D["Anticlease"]
USING YOUR DRYER ....
BEFORE YOU START
Remove any packing tape that may be on the door. Open door and remove transit tape and clip located at the bottom of panel opening. Wipe out the inside of the drum to remove any dust that may have accumulated during transport or storage. Make sure the lint filter and guard are properly fitted.
CYCLE SELECTION
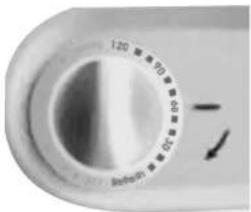
Your dryer has two (2) temperature settings:
1. Normal

(full sun)
Use this for heavy, durable garments such as towels and flannelette sheets, (These will also require longer drying times.)


natural_image
Close-up of a circular dial indicator with measurement markings (120, 90, 60) and an arrow pointing to it, no readable text or symbols beyond the dial.2. Easy

(half sun)
For delicate items prone to shrinking such as synthetics, undergarments etc.
Drying Time Selection
Turn the control knob clockwise to select the drying time you require. Times shown on the knob are approximate only, and will vary with voltage fluctuations.
Note: The timer will only operate when turned in a clockwise direction. Damage may occur if the timer is turned in an anti-clockwise direction.
Drying time will depend on fabric type, construction, load size and the wetness of the load. To reduce drying times you should spin your garments as dry as possible in your washing machine before using the dryer.
Note: Drying time will be also affected by room temperature and humidity. Clothes will dry more slowly on a cool or humid day.
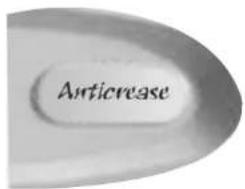
ANTICREASE
Your dryer has been designed so that the drying drum rotates for three minutes in one direction then three minutes in the other direction. This reduces tangling and gives a more even drying in a shorter time.
text_image
Anticrease14
IFB
DRYING GUIDE
Fibre or Leather Materials
Always refer to the manufacturer's instructions.
Baby Clothes and Night Gowns
If clothing or sleepwear is made of acrylic, dry only on 'delicate' setting. Check manufacturer's instructions.
Fibreglass
Do not dry fibreglass items in your dryer. Skin irritation could result from any glass particles that may be picked up by clothing during subsequent dryer use.
Rubber and Plastics
Any items made from or containing rubber or plastics, such as aprons, bibs, tablecloths, chair covers, curtains etc. should no the dried in tumble dryer.
CLEANING THE AIR FILTER
Inside your dryer, at the rear of the drum, is a high-efficiency micromesh lint filter.
The lint filter must be cleaned after every use.
To remove the Lint Filter
-
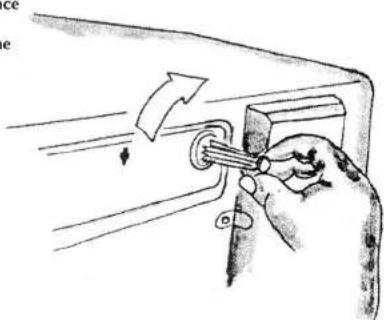
Pull out the plastic filter guard and filter from the back of the dryer drum. Finger holes are provided for this purpose.
-
Unsnap the Micromesh filter from the filter guard as shown below.
-
The lint may now be easily shaken or peeled off the lint filter.
To refit the Lint Filter
Ensure that the 'fingers' at the centre of the lint filter point towards the filter guard. Snap the lint filter to the guard. Make sure that the filter is pushed all the way.
Refit the guard (with the filter attached) to the back of the dryer drum. It will snap into place when correctly fitted.

natural_image
Diagram of a washing machine with a mesh grille and directional arrow indicating airflow (no text or symbols)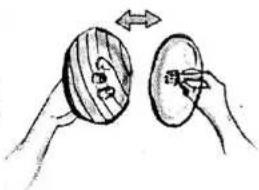
natural_image
Illustration of two hands holding circular objects with arrows indicating rotation (no text or symbols)19
IFB
DRY LOAD GUIDE
| SheetsCotton | (D)(S) | 1Kg500gms | Pajama/ KurtasShirtsCottonOthers | 400gms280gms200 gms | BedspreadBlanketsAcrylic | 3kg |
| Other than Cotton | (D)(S) | 650gms400gms | Blouses:cottonothersSarces:CottonSyntheticsPantiesSocks:long (2pairs)short (2pairs) | 650gms100gms140gms350 gms60 gms150 gms85 gms | SweatersCotton Vestslight weightCotton VestsUnderslipsSkirtsTrousersJeans | 400gms100gms150gms100gms100 gms200 gms250 gms400 gms |
| Pillow slips:Cottonothers | 110gms85gms | |||||
| Bath towelsHand towels | 600 gms260 gms | |||||
| Tablecloths:SmallLarge | 230 gms600 gms | Hankies (6)Napkins (1doz)Lungi/Dhoti | 85 gms1.1 kgs200 gms | |||
| Table Napkins | (4) | 150 gms |
D = Double, S = Single
The chart indicates the average weight of clothes.
The recommended weight of your clothes should not be exceeded to ensure that your machine gives your clothes an effective drying.
SAFETY RESET
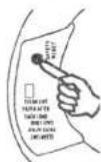
The dryer is equipped with a temperature activated safety cut out device. The safety reset button is near the door latch and is used to reset the safety device.
It will only be necessary to press the safety reset button if the dryer overheats, (see troubleshooting for the things to check before pressing the safety reset button.
SORTING THE LOAD
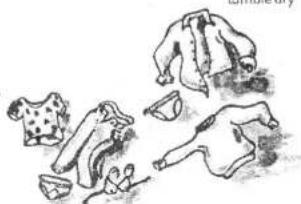
For best results, sort the load according to fabric types. Heavy garments like towels, flannelette sheets etc. that may take longer to dry should be sorted from garments that dry quickly such as terrycotton/polyester shirts and sheets.
Note: Some fabrics will attract lint given off by other clothes. This can be minimised by separating lint givers and lint collectors as follows:
Lint givers
Lint collectors
-Towels
-Corduroy
-Nappies
-Synthetics
-Chenille
-Perma Press Garments
Always check and follow the garment manufacture's drying instructions.
The International Care Labelling code now incorporates two drying symbols. You may find these on your garment label:
Check pockets and remove all loose items. Clips, nails and pins can damage both the dryer and your clothes load.
Close all hooks, eyes and zips that may snag.
For hints on drying various fabric types, consult drying guide.
natural_image
Sketch-style illustration of children playing with toys and a dog, no text or symbols presentLOADING
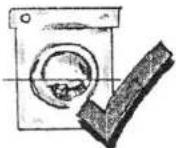
Loosely load th dryer until it is about half full. Clothes must tumble freely in the dryer. Don't cram them in.
Note: Save time and money by thoroughly spin-drying clothes before placing them in the dryer.
Clothes fluff up as they dry, so they should not be crammed in tightly when wet.
Don't overload. Overloading increases the risk of creasing, increases drying time and reduces efficiency.
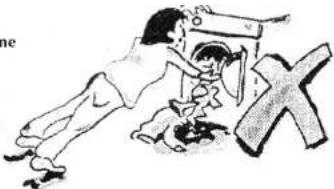
Clothes that are dripping wet should not be loaded into the dryer. Electrical shock or damage to electrical components may result.
natural_image
Illustration of a person assisting another with a large 'X' symbol (no text or symbols present)IMPORTANT:
IF YOU WISH TO ADD OR REMOVE ARTICLES OR CHECK THE DRYNESS OF THE LOAD DURING THE DRYING CYCLE, ADVANCE THE TIMER TO COOLDOWN FOR AT LEAST ONE MINUTE BEFORE OPENING THE DOOR. THIS IS TO PREVENT SCORCHING OR POSSIBLE SELF COMBUSTION.
DRYING GUIDE
Woollen Items should not be tumble dried, but pulled to their original shape, then dried flat. Clothes or towels containing sand or grit should be washed to remove particles before being placed in the dryer.

natural_image
Illustration of a sweater with a large 'X' symbol crossed out, no text or symbols presentWoven and Loopknit Materials
Some woven and loopknit materials tend to shrink by varying amounts depending on their quantity.
DO NOT use the 'regular' setting for these fabrics and always stretch them out immediately after drying.
Permanent Press and Synthetics:
Do not overload the dryer. To reduce wrinkles, remove permanent-press articles as soon as the dryer stops.
DRYING GUIDE
| FABRICS | WEIGHT OF DRY LAUNDRY (IN K.G.) | PROGRAMME SELECTION | TIME (In Minutes) for laundry spin dried at 700 rpm | |
| IRON DRY | CUPBOARD DRY | |||
| Cotton, linen | 2.5 | Normal | 30-50 | 40-70 |
| Cotton, linen | 3.5 | Normal | 50-80 | 60-90 |
| Cotton, linen | 4.5 | Normal | 70 | 80-110 |
| Cotton, linen | 5.0 | Normal | 80-100 | 90-120 |
| Cotton, linen | 5.5 | Normal | 120-140 | 140-160 |
| Synthetic fabrics | 2.5 | Easy | - | 30-60 |
| Synthetic fabrics | 3.5 | Easy | - | 60-80 |
| Synthetic fabrics | 4.5 | Easy | - | 80-100 |
| Synthetic fabrics | 5.0 | Easy | - | 100-120 |
| Synthetic fabrics | 5.5 | Easy | 80-100 | 120-140 |
| Mixed fibres | 3.5 | Easy | 60-80 | 70-100 |
| Mixed fibres | 5.5 | Easy | 110-130 | 130-160 |
| Refresh Cycle | 5.5 | REFRESH | 20 | |
NOTE: Timings mentioned above are only indicative. They may vary depending on the type of fabric, mix of garments, moisture content, atmospheric, humidity & temperature, power interruption during cycle etc.
The above indicated value are under standard test conditions only.