
TM-3150 - Satellitenempfänger TECHNOMATE - Kostenlose Bedienungsanleitung
Finden Sie kostenlos die Bedienungsanleitung des Geräts TM-3150 TECHNOMATE als PDF.


Benutzerfragen zu TM-3150 TECHNOMATE
0 Frage zu diesem Gerät. Beantworten Sie die, die Sie kennen, oder stellen Sie Ihre eigene.
Eine neue Frage zu diesem Gerät stellen
Laden Sie die Anleitung für Ihr Satellitenempfänger kostenlos im PDF-Format! Finden Sie Ihr Handbuch TM-3150 - TECHNOMATE und nehmen Sie Ihr elektronisches Gerät wieder in die Hand. Auf dieser Seite sind alle Dokumente veröffentlicht, die für die Verwendung Ihres Geräts notwendig sind. TM-3150 von der Marke TECHNOMATE.
BEDIENUNGSANLEITUNG TM-3150 TECHNOMATE
Technomate
TOUR DIGITAL PARTNER FOR LIFE
Unit 11 Nobel Road, Edmonton, London,
N18 3BH, United Kingdom
Tel: +44 (0)20 8884 0701
Fax: +44 (0)20 8884 0275
www.technomate.com
Info@technomate.com

Technomate
YOUR DIGITAL PARTNER FOR LIFE
User's Manual
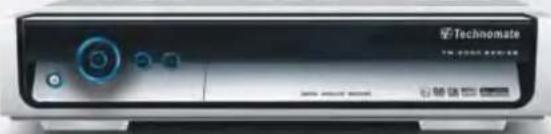
natural_image
Front view of a Technomate air conditioner unit (no visible text or symbols on body)
FREE-TO-AIR (FTA)
EMBEDDED SMART CARD READER (CA)
2 EMBEDDED SMART CARD READERS (20A)
DIMBEDDED SMART CARD READER (CA) & COMMON INTERFACE (CI)
FREE TO AIR (FTA) US\$
EMBEDDED SMART CARD READER & USB

Digital Satellite Receiver
TM-3000 SERIES
Technomata Tech 11 Habel Road, Wisconsin, London, KY 6 804, United Archives Tel: +44 (039) 8534-9791 Fax: +44 (0) 120 8534 9271 www.technomata.com info@technomata.com
HIGH DEFINITION SATELLITE RECEIVER
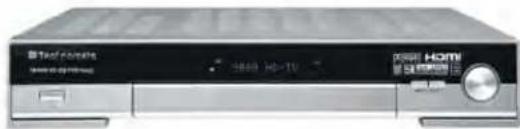
text_image
Techcorrela (3849 HD-10) POWER HOME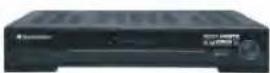
TM-6900 HD COMBO SUPER
TM-6800 HD SUPER
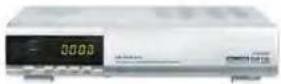
TM-7650 2 VA Viccess
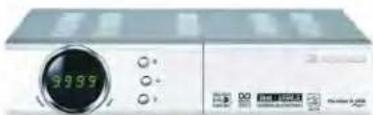
natural_image
Front view of a silver portable electronic device with a digital clock and control buttons (no visible text or symbols)TM-5000 SUPER SERIES USB PVER READY
TM-5200 D USB SUPER
FTA
TM-5300 D+USB SUPER
FTA with Smart Cart Reader
TM-5600 CI USB SUPER
1 Common Interface
TM-5400 CI+USB SUPER
1 Common Interface with Smart Card Reader

Disposal of Old Electrical & Electronic Equipment(Applicable in the European Union and other European countries with separate collection systems)
This symbol on the product or on its packaging indicates that this product shall not be treated as household waste. Instead it shall be handed over to the applicable collection point for the recycling of electrical and electronic equipment. By ensuring this product is disposed of correctly, you will help prevent potential negative consequences for the environment and human health, which could otherwise be caused by inappropriate waste handling of this product. The recycling of materials will help to conserve natural resources. For more detailed information about recycling of this product, please contact your local city office, your household waste disposal service or the shop where you purchased the product.


Table of Contents

1. INTRODUCTION 2
1.1 Main Features

2.Easy Installation Guide 3
2.1 Safety

3. Check Point before Use 8
3.1 Accessories

4. Controls/Functions 9
4.1 Front Panel
4.2 Rear Panel
4.3 Remote controller

5. Equipment Connection....13

6. Operation 14
6.1 Getting Started
6.2 System Setting
6.3 Channels
6.4 Guide
6.5 Games
6.6 System Information
6.7 Common Interface
6.8 USB
6.9 Record Channel

7. Trouble Shooting 34

8. Questions & Answers 35

9. How To Download Software From PC 36

11. Specifications 37

INTRODUCTION

Specification
▶ Fully MPEG-2 & DVB-S Compliant
- 6000 Channels, 4000 transponders & 100 Satellites Programmable
▶ PIP (Picture in Picture) and Short Time Record
▶ SCPC/MCPC Receivable from C/KU band Satellite
▶ DiSEqC 1.0, 1.2 & 1.3 (USALS) compatible with 22KHz Tone
▶ Auto DISEqC Detection
▶ Easy Installation Start Menu
▶ Automatic Search for Transponders and Channels
▶ Zoom Function
▶ 8 Favorite Groups Parental Lock Control
7 days Extended EPG (Electronic Program Guide) DVB Subtitle by OSD/VBI
▶ Multi Picture In Graphic (PIG) Display: 4, 9, 12 & 16
▶ 9 Languages Supported: English, German, French, Italian, Spanish, Arabic, Turkish, Persian, Russian
▶ Channel Sort & Find
▶ Color Control (Contrast, Brightness, Color)
▶ Multi Language Audio and Subtitle Support
PLL RF Modulator CH.21-69 with PAL, I, B/G, D/K & NTSC
▶ Supports Multi TV Standards: PAL G, I, K, M & NTSC
▶ 2 Scarts for TV & VCR (RGB/CVBS)
▶ Optical Digital Audio Output [S/PDIF] with Dolby Digital Bitstream Out
▶ RS232 Port for Software Upgrade Receiver to Receiver
▶ Automatic Network Search
▶ Timer Function
▶ SatcoDX compatible
▶ LNB Short Circuit Protection
▶ Options: USB 2.0 for Channel Recording, MP 3, JPEG, Stream, Playback USB PVR with Time Shift, CA, CI, DVB-T

EASY INSTALLATION GUIDE
PART1 Using the Preinstalled Satellite & Channel List
The receiver is preinstalled with 25 Satellites and over1500 default Channels and is fully configured. No settings need to be changed.
1-
Technomate
Technomate
▶ After turning ON the receiver, select a language. You will be taken to the Viewing mode. Press the SAT button on the Remote and select a Satellite. To bring up the Channel List, press the OK button on the remote.
▶ To delete unwanted Satellites- press the MENU button on the remote and go to Installation. Press OK and OK on Satellite Setup. Press OK again and a Satellite List will appear. To delete a Satellite, press the BLUE button on the remote.
How to Motorise 25 Satellites & Over 1500 Channels with USAUS in 60 years
The receiver is preinstalled with 25 Satellites and Over 1500 default Channels, and is also fully configured. No settings need to be changed.
▶ Press the MENU button on the remote. Press OK on Installation. Go to Motorised Setup and press OK. Go to the Third line (DiSEqC Motor) and use the Left/Right arrow buttons on the remote to select USALS. Then go to Position Setting and press OK. Then go to Longitude and Latitude and enter the coordinates of where you live (London's Longitude Is 000.1 West; South of UK's Latitude Is S1.5 North). Press the OK button on the remote. Go to COMMAND TYPE and press OK on GO TO POSITION. Wait until the Signal Quality is more than 40% in the progress bar. When a Satellite is found, then all the selected 25 Satellites are fully configured for a Motorised system.
If the Signal Quality is below 40%, then the settings are incorrect and the Longitude needs to be adjusted, for example: 000.2, 000.3, 000.4, 5/6/7/8/9 West or East. The Latitude may also need to be adjusted. If you still have not got a signal, then the external installation (dish, etc) needs to be adjusted.
How to Setup a DiSEqC 1.2 Motorised System
▶ Press the MENU button on the remote and go to installation and press OK. Go to Motorised Setup and press OK. Press OK again to open the satellite list. Select a satellite from the list and press OK. Go to the Third line (DISEqC Motor) and use the Left/Right buttons on the remote to select DISEqC 1.2. Go to Move and press and hold the Left/Right buttons on the remote until you get a Signal Quality of more than 40%. Go to COMMAND TYPE and use the Left/Right buttons to go to SAVE POSITION and press OK. Press the RED button on the remote to Search. To search extra satellites, repeat the above.
PART 2 New Installation from start (NO Satellites/Channels)
How to do a Factory Reset to Delete the Preinstalled Satellites and Channels
▶ If you want to start the receiver without the preinstalled Satellites and Channels, press the MENU button on the remote and go to System Settings and press the OK button. Go to Factory Reset, press OK and enter 0000. Then select Factory Reset. Press OK and select Yes.
-1
Technomate
How to Install a New Satellite (Fixed Non-Motorised System)
▶ Press the MENU button on the remote and press the OK button on installation. Press OK on Satellite Setup and OK again to display a Satellite List. To add a Satellite, press the ○ button on the remote. Press the OK button on the remote to exit the list.
When the Quality Bar is at its highest level, press the RED button on the remote to Search the Satellite. To view a channel, press the OK button in the Viewing Mode (clear screen) and select any channel. To view \$ (Scrambled) channels, a CAM (Decoder) and a viewing card are required.
How to Setup a Monoblock or DiSEqC Switch (up to 4 LNBs / DiBhls)
▶ Press the MENU button on the remote and press the OK button on installation. Press OK on Satellite Setup and OK again to display a Satellite List. Select a Satellite (e.g. Hotbird 13E and Astra 19.2E) and press the 📄 button on the remote for each Satellite to Save. Press the OK button on the remote to exit the list.
- Go to DISEqC 1.0 for either a Monoblock LNB or up to 4 LNBs / Dishes and select a Satellite (e.g. Hotbird 13E as Number 1 and Astra 19.2E as Number 2). When using 4–16 LNBs / Dishes, use DISEqC 1.1. When the Quality Bar is at its highest level for each Satellite, press the RED button on the remote to Scan. To view a channel, press the OK button in the Viewing Mode (clear screen) and select any channel. To view \$ (Scrambled) channels, a CAM (Decoder) and a viewing card are required.
▶ If the above installation was not successful, change the DISEqc Switching number, e.g. Hotbird 13E as Number 2 and Astra19E as Number 1.
How to Setup a DISEqC 1.2 Motorised System
▶ Press the MENU button on the remote and press the OK button on Installation. Press OK on Satellite Setup and OK again to display a Satellite List. Select a Satellite (e.g. Hotbird 13E and Astra 19.2E) and press the ○ button on the remote for each Satellite to Save. Press the OK button on the remote to exit the list.
- Press the EXIT button again. Press OK on Motorised Setup. Press OK again to display a Satellite List. Select a Satellite and press OK. Go to the Third line (DISEqC Motor) and use the Left/Right buttons on the remote to select DISEqC 1.2. Go to Move and press and hold the Left/Right buttons on the remote until you get a Signal Quality of more than 40%. Go to COMMAND TYPE and use the Left/Right buttons to go to SAVE POSITION and press OK. Press the RED button on the remote to Search the satellite. Repeat the above for more satellites.
How to Setup a USALS Motorised System
▶ Press the MENU button on the remote and press the OK button on installation. Press OK on Satellite Setup and OK again to display a Satellite List. Select a Satellite (e.g., Hotbird 13E and Astra 19.2E) and press the 📄 button on the remote for each Satellite to Save. Press the OK button on the remote to exit the list.
Technomate
▶ Press the EXIT button again. Go to Motorised Setting and press OK. Go to the Third line (DISEqC Motor) and use the Left/Right arrow buttons on the remote to select USALS. Then go to Position Setting and press OK. Then go to Longitude and Latitude and enter the coordinates of where you live (London's Longitude is 000.1 West; South of UK's Latitude is 51.5 North). Press the OK button on the remote. Go to COMMAND TYPE and use the Left/Right buttons to go to GO TO POSITION and press OK. Wait until the Signal Quality is more than 40% in the progress bar. Press the RED button on the remote to Scan.
▶ If the Signal Quality is below 40%, then the settings are Incorrect and the Longitude needs to be adjusted, for example: 000.2, 000.3, 000.4, 5/6/7/8/9 West or East. The Latitude may also need to be adjusted. If you still have not got a signal, then the external installation (dish. etc) needs to be adjusted.
ActiveTransponders
For Technomale Motorized Systems
| No. | Satellite Name | Degree | Frequency | Symbol Rate | Polarity |
| 1 | PAS 45 IR | 45.0°W | 11510 | 26694 | H |
| 2 | TELESTAR 11 | 37.5°W | 11494 | 19500 | H |
| 3 | HISPASAT | 30.0°W | 11811 | 27500 | H |
| 4 | NSS803-K | 21.5°W | 11605 | 40000 | H |
| 5 | INTEL 901 | 18.0°W | 11673 | 28571 | H |
| 6 | TELESTAR 12 | 15.0°W | 11124 | 18386 | H |
| 7 | ATLANTIC B1 | 12.5°W | 11132 | 03255 | H |
| 8 | EXPRESS 3A | 11.0°W | 11464 | 04340 | V |
| 9 | TELECOM 2D | 8.0°W | 12747 | 02894 | H |
| 10 | NILESAT 101 | 7.0°W | 11747 | 27500 | V |
| 11 | ATLANTICBIRD 3 | 5.0°W | 12543 | 27500 | H |
| 12 | THOR 707 -2/3 | 1.0°W | 11229 | 24500 | H |
| 13 | SIRIUS 2 | 5.0°E | 11766 | 27500 | H |
| 14 | EUTEL W3 | 7.0°E | 11263 | 27500 | H |
| 15 | EUTEL W1 | 10.0°E | 11526 | 30000 | V |
| 16 | HOTBIRD | 13.0°E | 10892 | 27500 | H |
| 17 | EUTEL W2 | 16.0°E | 11304 | 30000 | V |
| 18 | ASTRA 1 | 19.2°E | 12692 | 22000 | H |
| 19 | ASTRA 3A | 23.5°E | 11634 | 27500 | H |
| 20 | ARABSAT 2A | 26.0°E | 11958 | 27500 | H |
| 21 | ASTRA 2 | 28.2°E | 11469 | 27500 | H |
| 22 | EUTEL W4 | 36.0°E | 12698 | 04340 | H |
| 23 | HALLAS SAT | 39.0 E | 12524 | 29000 | H |
| 24 | TURKSAT 1C | 42.0°E | 12652 | 22500 | H |
| 25 | EUROSTAR 1 | 45.0°E | 11500 | 04340 | V |

SAFETY INFORMATION
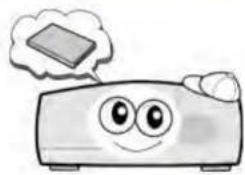
Be sure to read the user's manual before starting the operation of the unit.
natural_image
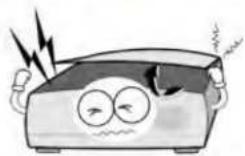
Cartoon illustration of a smiling computer with eyes and a thought bubble (no text or symbols)Never open the cover. It is very dangerous to touch the inside of the unit due to the possibility of an electric shock.
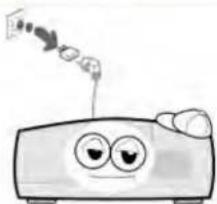
When you do not use this unit for a long time, make sure that the power cord is pulled out from the outlet. Also do not use a damaged power cord as it may cause fire or electric shock.
natural_image
Cartoon illustration of a smiling computer with eyes and a pointing hand (no text or symbols)Do not touch the power cord with wet hands as it may cause electric shock.
natural_image
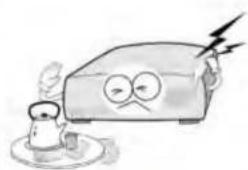
Cartoon illustration of a distressed car with a lightning bolt and steaming cup (no text or symbols)Place the unit in a well ventilated and no-heat environment.
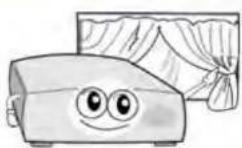
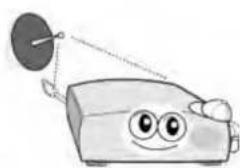
A professional installation is required. If reception is interrupted, contact your local service centre.
natural_image
Cartoon illustration of a smiling rectangular character with eyes and a flag, holding a circular object (no text or symbols)
Technomate
YONJIDITALFARTINDOPELIFE
Place the unit horizontally. An uneven placement may cause the unit to be damaged.
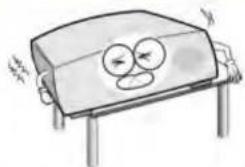
natural_image
Cartoon illustration of a smiling rectangular object with eyes and nose, mounted on a stand (no text or symbols)Do not leave the unit near water.

natural_image
Cartoon illustration of a character with large eyes and steam rising from its mouth (no text or symbols)Do not install the unit :
-Where it is subject to vibrations.
-Where It is exposed to direct sunlight.
-Where there is humidity.
-Where the temperature is too high or too low.
-Where there is no ventilation.
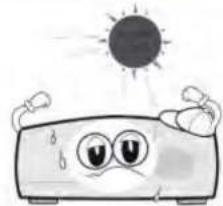
natural_image
Cartoon illustration of a smiling car with eyes and a sun above its head (no text or symbols)
Technomate
THE BIRMICAL PARTNERS PUBLIES
Do not put heavy items such as a TV on the unit. This may damage the unit.

Do not put water containing items such as vase on the unit.

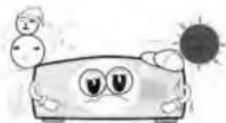
Moving the unit to a hot area from a cold one will cause condensation. Do not operate the unit for one or two hours or until it has dried completely.

CHECK POINTS BEFORE USE
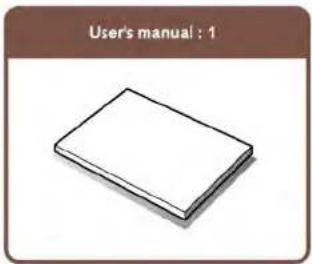
ACCESSORIES
text_image
User's manual : 1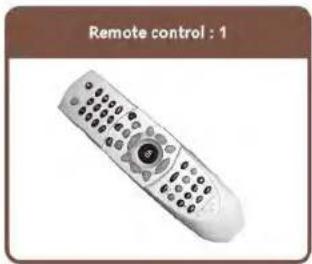
text_image
Remote control : 1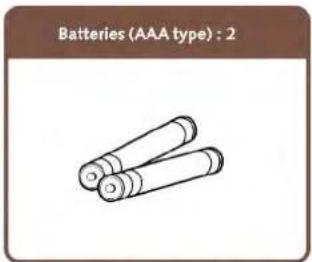
text_image
Batteries (AAA type) : 2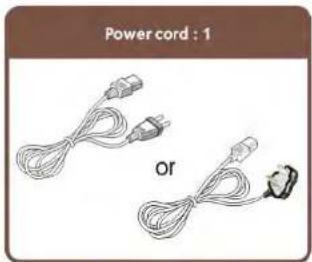
text_image
Power cord : 1 orHOW TO DOWNLOAD SOFTWARE
text_image
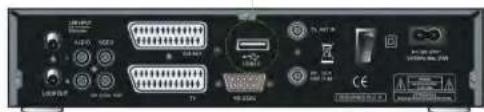
Back panel of a network equipment interface showing ports, connectors, and control buttons with labels like 'USB'.Download software and un zip it from www.technomate.com to a memory stick. Download it to TM-3150 or TM-3500 USB to update receiver
Technomate
Technomate

CONTROLS/ FUNCTIONS
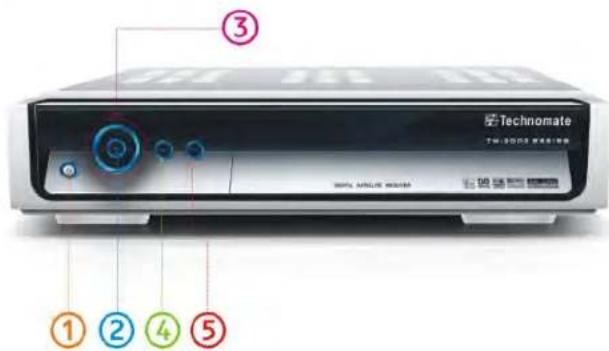
FRONT PANEL
text_image
③ Technomate 下部: 32000000000000000000000000000000000000000000000000000000000000000000000000000000 SINTEL AMPLIATE M658888 ① ② ④ ⑤①. Power : To switch the receiver in Stand-By mode or in Power-On mode.
②. OK: To confirm a selection and to open the Channel List
③. ▲/▼/◄/► : To change channel or cursor position on the application screen.
④. Menu: To go to the Main Menu (pressing again will exit the Menu)
⑤. Exit: To Exit a menu
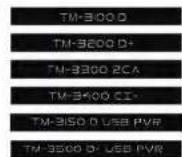
FREE-TO-AIR (FTA)
EMBEDDED SMART CARD READER (CA)
2 EMBEDDED SMART CARD READERS (2CA)
EMBEDDED SMART CARD READER (CA) & COMMON INTERFACE (CI)
FREE TC AIR (FTA) USB
EMBEDDED SMART CARD READER & USB
Technomate
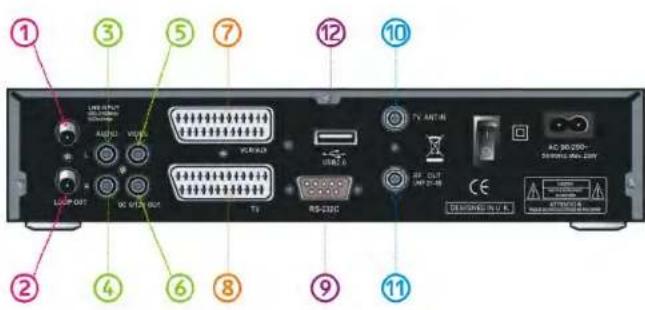
REAR PANEL
text_image
① ② ③ ④ ⑤ ⑥ ⑦ ⑧ ⑨ ⑩ ⑪ TV ANT-IN AC 30-200- SPRING ON OFF RS-232C LED INPUT VOUT USB/DC USB/DC USB/DC USB/DC USB/DC USB/DC USB/DC USB/DC USB/DC USB/DC USB/DC USB/DC USB/DC USB/DC USB/DC USB/DC USB/DC USB/DC USB/DC USB/DC| No. | Name | Connector | Function |
| 1. | LNB INPUT | IEC 169-24 female | IF input from LNB to digital tuner |
| 2. | LOOP OUT | IEC 169-24 female | IF loop-through output from digital tuner |
| 3. | AUDIO L | RCA cinch | Left audio output |
| 4. | AUDIO R | RCA cinch | Right audio output |
| 5. | VIDEO | RCA cinch | Composite video output |
| 6. | DC 0/12V OUT | RCA cinch | DC Output |
| 7. | VCR/AUX | SCART | SCARTCVBS Video OutputCVBS, RGB InputAudio Output |
| 8. | TV SCART | SCART | CVBS, RGB OutputAudio Output |
| 9. | RS-232C | DB-9 | Low speed serial port |
| 10. | TV ANT IN | IEC 169-2 female | Input from terrestrial antenna |
| 11. | RF OUT UHF 21-69 | IEC 169-2 male | Output to TV |
| 12. | USB | USB Cable | Update & Recording |
* Note : Some models are different and TV input could be on the top or bottom scart. Please look before connection.
-10-
REMOTE CONTROL
text_image
Technomale NO.170000000000000000000000000000000000000000000000000000000000000000000000000000000000000000000000000000 ① ② ③ ④ ⑤ ⑥ ⑦ ⑧ ⑨ ⑩ ⑪ ⑫ ⑬ ⑭ ⑮ ⑯ ⑰ ⑱ ⑲ ⑳ ⑮ ⑯ ⑰ ⑱ ⑲ ⑳ ⑮ ⑯ ⑰ ⑱ ⑲ ⑳ ⑮ ⑯ ⑰ ⑱ ⑲ ⑳ ⑮ ⑯ ⑰ ⑱ ⑲ ⑳ ⑮ ⑯ ⑰ ⑱ ⑲ ⑳ ⑮ ⑯ ⑰Technomate
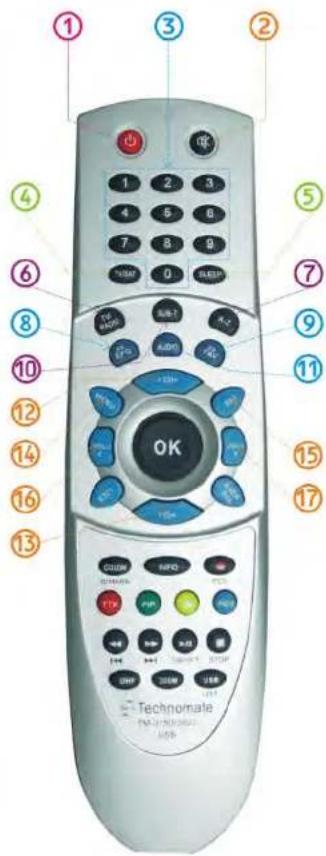
①. POWER: To turn the receiver On/Off
②. MUTE : To Turn the sound/audio On/Off
③ Numeric Keys (0-9): To control the numerical operation and channel numbers directly
6. TV/SAT: To switch between the satellite input and UHF/VHF antenna input
⑤.SLEEP:To adjust the sleep timer
⑥. TV/RADIO : To switch between TV and Radio modes
⑦.A-Z:To sort the Channel List by A-Z
⑧. EPG (Electronic Program Guide) : To show the TV/Radio program guide or to move to the previous page
⑨. FAV: To open the Favorite List or to move to the next page
⑩. SORT : To sort the Channel List
11. LANGUAGE: To open the Multilingual audio track list, Audio Mode/Level list and Auto Subtitle list
⑫. ⑬. CH+/CH-(^CH+/vCH-): To change channel up/down or to move up/down in the menus
14. MENU: To open the main menu
15. SAT: To open the satellite list
16.17. VOL-/VOL+ (VOL-/VOL+): To increase/decrease the channel's volume or to move left/right in the menus
-11
REMOTE CONTROL
text_image
1 2 3 4 5 6 7 8 9 TMEM Q KSB TV MDD SUB-1 4.2 KBR ZL OK 18 19 20 21 22 23 24 25 26 27 28 29 30 31 32 Technomate TM-DOM/HDU USBTechnomate
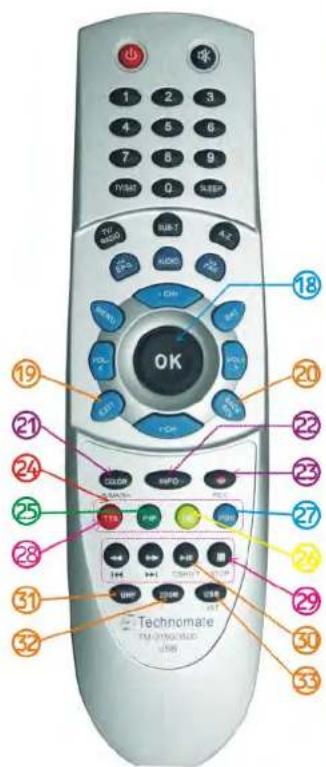
- OK(OK): To open the Channel List or to confirm a selection in the menus
- EXIT : To Exit from the present menu or to go to the previous menu
- BACK/RCL : To go to the previous channel/menu
- COLOR : To adjust the color settings
- INFO.: To display the Info-Banner (press twice to display EPG information of current channel)
- EDIT : To go to the Edit Channels menu
- TXT: To open the digital Teletext menu
- PIP : Opens Picture-In-Picture menu
ADD PIC : To open the multi picture menu
- POS: To open the DiSEqC 1.2 Motor View Control menu
- Color Buttons (Red, Green, Yellow, Blue): To use special functions in the menus
- PVR Buttons
(Rewind, Forward, Play, Pause, Record) :
Recording functions
ADD PIC: To pause live TV. Press this button again to return to live TV.
②. UHF : To adjust the UHF channel
Zoom: To magnify a picture/channel
USB: To open the multilingual subtitle menu
Technomate YOUR DIGITAL FAITHWEST FOR LIFE

EQUIPMENT CONNECTION
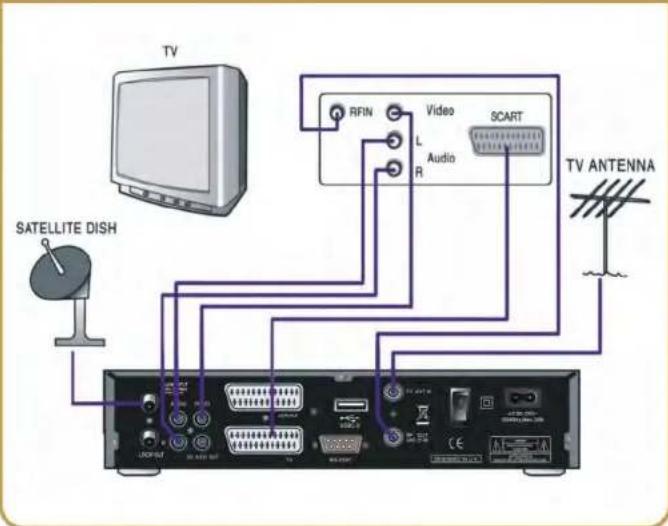
5.1 CONNECTION WITH ANTENNA/ TV SET/ A/V SYSTEM/ RF
- Connect the TV antenna to TV ANT IN
- Connect the RF-IN of the TV to RF-OUT
- Connect the Video and Audio of the TV to the Video and Audio of the receiver. Connect the Red and White connectors to Audio R and Audio L, and Yellow to Video
- Connect your satellite dish/antenna
text_image
TV RFIN Video L Audio R SCART TV ANTENNA SATELLITE DISH UQI-UT 30 MHz 500V 100 MHz 200 MHz CE 200 MHz 200 MHz 200 MHz 200 MHz 200 MHz 200 MHz 200 MHz 200 MHz 200 MHz 200 MHz 200 MHz 200 MHz 200 MHz 200 MHz 200 MHz 200 MHz 200 MHz 200 MHz 200 MHz 200 MHz 200MHz*Note: Some models differ from the above specification
Technomate

OPERATION

6.1 Getting Started
Turn your receiver's power on and proceed with the following instructions:

Menu Language Setting
- Turn on your TV and receiver.
- The language selection menu will appear. Select a language and press the ⏻ button to confirm language selection.

text_image
Scanned image of a software interface with a dialog box displaying 'Program' and a list of text, likely from an older application or system.
Satellite Setup
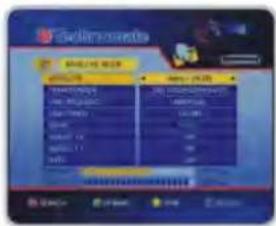
This menu is for setting up the satellites
- Press the OK button on the remote on INSTALLATION
- Press the OK button on the remote on SATELLITE SETUP
text_image
Delinquent OK Cancel Finish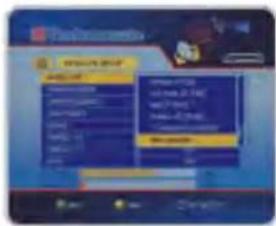
text_image
Scanned screenshot of a software interface with Chinese text and UI elements, showing a dialog box with file path and buttons.M-
Technomate
- To Add/Select a satellite, go to SATELLITE NAME
a. Use the ◀/▶ buttons on the remote or press the OK button on the remote to open the Satellite List
b.Save the satellite(s) you want by pressing the Yellow button
c.To De Select / Disable a satellite, press the Blue button on the selected satellite
d.To Add a satellite, press the Green button
- If you are using a DISEqC switch for multiple satellites on a fixed dish/antenna (non-motorised), please follow the instructions below, if not, please go to Step 5:
a. For up to 4 satellites, go to DiSEqC 1.0 Switching and select from DiSEqC type: 1, 2, 3, 4, Burst A, Burst B or Auto
b. For up to 16 satellites, go to DiSEqC 1.1 Switching and select from DiSEqC type 1-16
- Search: Press the Red button on the remote to start searching the satellite
- Rename: Press the Green button on the remote to rename the selected satellite
- Save: Press the Yellow button on the remote to save the selected satellite
- Delete: Press the Blue button on the remote to delete the selected satellite

Motorised Setup - DISEqC 1.2 Setup
- Before setting the motor, follow the instructions in the Satellite Setup section on the previous page (Steps 1–3 only)
-15
Technomate
- When you have completed Steps 1-3, press the EXIT button on the remote to go back to the main menu
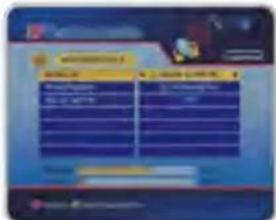
- Go to MOTORISED SETUP and press the OK button on the remote
- Select a satellite by using the ◀/▶ buttons or press the OK button to open the Satellite List (Press the OK button to confirm a satellite selection if you opened the satellite list)
- Go to DISEQC MOTOR and select DISEQC 1.2 by using the ◄/▶ buttons on the remote
a. Go to MOVE to move the dish's / antenna's position East/West by using the ◀/▶ buttons
b. To fine tune the signal, go to MOVE FINE to move the dish/antenna position a step by using the ◀/▶ buttons.
text_image
Scanned screenshot of a mobile app interface with Chinese text and UI elements- To Set a Limit, go to MOTOR CONTROL and press the OK button on the remote
a. Adjust the STEP SIZE of the motor if required
b. Go to MOVE STEPS to move the motor
c. Go to LIMIT SET and choose from:
East Limit, West Limit or Delete Limit
d. Press the OK button on the remote to confirm the Limit
- To Save a position, go to COMMAND TYPE
a. Use the ◀/▶ buttons to go to SAVE POSITION and press the OK button to Save
Technomate
- To move the dish/antenna to the 0 degree position, go to COMMAND TYPE
a. Use the ◀/▶ buttons to go to GO TO REFERENCE and press the OK button to move the dish/antenna to 0 degree - To go to a previously saved position, select the satellite from SATELLITE and then go to COMMAND TYPE
a. Use the ◀/▶ buttons to go to GO TO POSITION and press the OK button to move the dish/antenna to the saved position
10.To Search the satellite, press the ● Red button on the remote
④ Motorised Setup - USALS Setup
- Before setting the motor, follow the instructions in the Satellite Setup section on the previous page (Steps 1-3 only)
- When you have completed Steps 1-3, press the EXIT button on the remote to go back to the main menu
-
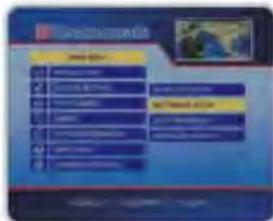
Go to MOTORISED SETUP and press the OK button on the remote
-
Select a satellite by using the ◀/▶ buttons or press the OK button to open the Satellite List (Press the OK button to confirm a satellite selection if you opened the satellite list)
- Go to DISEQC MOTOR and select USALS by using the ◀/▶ buttons on the remote
text_image
Scanned screenshot of a web interface with navigation menu and search bar, showing options like 'Search' and 'Search engine'.Technomate
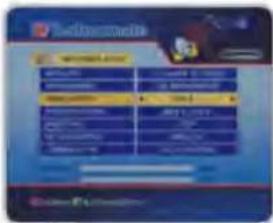
a. Go to POSITION SETTING and press the OK button to open the settings menu
b. Enter the Longitude and Latitude of your location
c. Press the OK button to confirm
text_image
Scanned screenshot of a mobile app interface with Chinese text and UI elements- To Set a Limit, go to MOTOR CONTROL and press the OK button on the remote
a. Adjust the STEP SIZE of the motor if required
b. Go to MOVE STEPS to move the motor
c. Go to LIMIT SET and choose from: East Limit, West Limit or Delete Limit
d. Press the OK button on the remote to confirm the Limit
7. To move the dish/antenna the selected satellite, go to COMMAND TYPE and press OK on GO TO POSITION
8. To move the dish/antenna to the 0 degree position, go to COMMAND TYPE
a. Use the ◀/▶ buttons to go to GO TO REFERENCE and press the OK button to move the dish/antenna to 0 degree
9. To Search the satellite, press the Red button on the remote
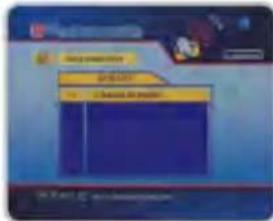
⑤ Auto Navigation
This menu will enable you to select as many satellites as you want to search consecutively:
- Press the MENU button on the remote to open the Main Menu
- Press the OK button on the remote on INSTALLATION
78-
- Go to AUTO NAVIGATION and press the OK button on the remote
- Select the satellites that you want to search by pressing the OK button on the remote
- Press the Blue button on the remote to select the type of search and then press the OK button to start searching all the selected satellites
text_image
Hi! you're doing 你're doing a little bit you're doing⑥ Advanced Search
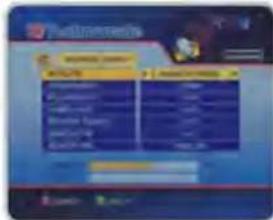
This menu allows you to Edit, Add and Search channels on newly launched satellites or satellites/channels not preprogrammed in the menus
- Press the MENU button on the remote to open the Main Menu
- Press the OK button on the remote on INSTALLATION
- Go to ADVANCED SEARCH and press the OK button on the remote
- Select a satellite by using the ◀/▶ buttons or press the OK button to open the Satellite List (Press the OK button to confirm a satellite selection if you opened the satellite list)
- To Add a Transponder, press the Green button on the remote, then enter the Frequency, Polarisation and Symbol Rate
- To Delete a Transponder, go to a
text_image
Scanned screenshot of a web browser interface showing a list of web pages with names and navigation buttons.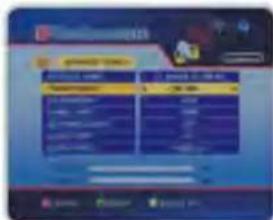
text_image
Screenshot of a mobile app interface showing a user profile and transaction data with color-coded sections.-29
Technomate
Transponder and press the Yellow button
-
Press the Red button to start searching the Transponder
-
To Add/Edit PIDs, go to ADD/EDIT PIDS and press the OK button. Enter the values and press OK to confirm.
⑦ Channel Selection
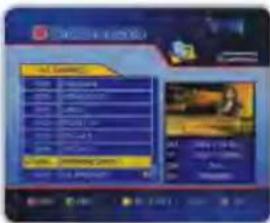
▶ If you know the channel number, enter the channel number by using the numeric buttons on the remote
▶ If you know he channel name, press the OK button on the remote, then the Channel List will appear. Select the channel you want by using the ▲/▼,◀/▶, OK buttons on the remote.
- On the right side of the screen, detailed information of the selected channel is displayed (Satellite Name, Transponder, Encryption and Provider).
-
You can navigate between channels using these shortcut buttons:
-
▲/▼ : Move up/down
- ◀/► or «/»: Page up/down
- RED : Sort by CAS
- GREEN : Find/Search for a channel
- YELLOW : Sort by: All, FTA or Scrambled
- BLUE : Sort by A-Z
-
INFO: Sort by Transponder
-
When the selection bar is positioned on the channel you want to view, press the OK button.
text_image
Screenshot of a web-based application interface with Chinese text, showing a dropdown menu and a preview window.Technomate
⑧ Other Functions of the Remote Control
Volume Control
-While you are watching a channel, press the VOL-/VOL+ (◄/►) buttons on the remote to control volume level
-To turn off the sound/audio, press the MUTE button on the remote (the mute icon will be displayed)
-Press the MUTE button again to turn the sound on
Info-Banner
Press the INFO button when watching a channel to display the information of the current channel
▶ TV / SAT switching
Changes the signal reception path to RF modulator:
- TV Mode: TV ANT INPUT signal is output (front will display "TV")
- VCR Mode : VCR SCART INPUT signal is output (front will display "VCR")
- SAT Mode : Satellite signal is output by RF (front will display channel number)
TV/RADIO switching
Switch a TV channel to Radio channel or vice versa
▶ BACK/RCL
Viewed Channel list of the previously watched channels will be displayed
SUBTITLE/AUDIO
You can adjust the subtitle and audio status of the current channel: Press LANGUAGE or SUBTITLE button on the remote. The subtitle and audio related menu will be displayed.
-Audio Mode: Stereo -> Mono-Left-> Mono-Right
- Audio Track: All tracks available in this program.
*Note: These subtitle and audio parameters are available only when the receiving channel supports these functions.
N一
一
Technomate
TELETEXT
Teletext Service is a text data service from Service Provider. It is available only if the broadcaster transmits the data.
SAT
Press the SAT button on the remote and select a satellite in the SATELLITE LIST:
FAV
Press the FAV button on the remote to open your Favorite Channel List:
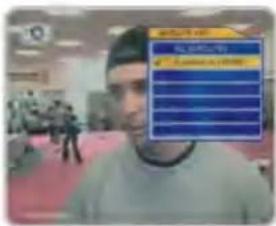
▶ Multi-Picture Display
Press the Yellow button on the remote to open the Multi-Picture menu
▶ COLOR Adjustment
Press the COLOR button on the remote to open the Color Adjustment menu. You can adjust the brightness, contrast, color, etc.
text_image
Street photo with visible store signboards and a person's face in the background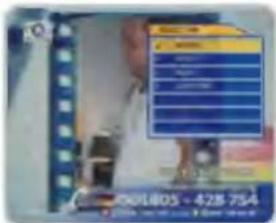
text_image
Scanned image showing a blue digital interface with a yellow screen displaying a list of items, alongside a filmstrip and a price tag.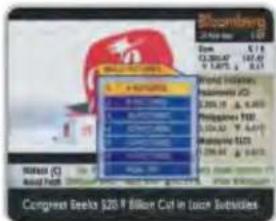
text_image
Bloomberg 24-Feb-08 - 1.00 Smt. £ 7 / A 13,300.47 167.40 9,1.875, 0.17 Fland India, Indonesia (D) 3,200.18, ₺ 6,480 Philippines (P) 3,034.50, ₺ 6,447 Mexico (MX) 2,398.42, ₺ 6,412 Total: 100 Market Value: (€ million) 100 A##d Price: (€ million) 100 Congress Bees' $259 ¥ Million Cct in Local Subsidiaries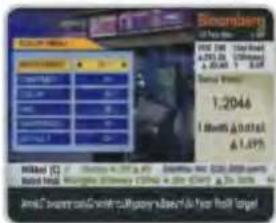
text_image
Sustainable 12 May 08 - 12 Feb PRICE: $35.00 - 12 May 08 A: $79.25 A: $54.48 A: $6.48 S&P 500 1,2046 1 Month: 0.0163 A: 1.475 Milo (C) 2024-08-08 Stock Price: $35.00 - 12 May 08 Market Value: $79.25 - 12 May 08 Market Value: $54.48 - 12 May 08 Market Value: $6.48 - 12 May 08 Market Value: $79.25 - 12 May 08 Market Value: $54.48 - 12 May 08 Market Value: $6.48 - 12 May 08 Market Value: $79.25 - 12 May 08 Market Value: $54.48 - 12 May 08 MarketValue: $79.25 - 12 May 08 MarketValue: $54.48 - 12 May 08 MarketValue: $6.48 - 12 May 08 MarketValue: $79.25 - 12 May 08 MarketValue: $54.48 - 12 May 08 MarketValue: $6.48 - 12 May 08 MarketValue: $79.25 - 12 May 08 MarketValue: $54.48 - 12 May 0Technomate
6.2 System Settings
① Time Setting
You can set the local time automatically or manually:
If you are using the automatic settings (determined by broadcasted signal), change the TIME MODE to AUTO by using the ◀/▶ buttons on the remote and adjust the TIME ZONE accordingly.
If you want to manually enter the time, change the TIME MODE to MANUAL by using the ◄/▶ buttons on the remote. Enter the CURRENT TIME and CURRENT DATE. Press the OK button to confirm.
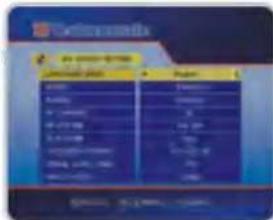
② A/V OUTPUT SETTING
This sub-menu allows you to set the audio/video output settings:
- Menu Language: Select the desired language of the menu
- Audio 1 & 2: Default audio language of all channels (if available)
- Subtitle Language: Default language of subtitles (if available)
- TV System: AUTO, PAL, NTSC or SECAM
- Output Select: TV SCART output format.(CVBS/RGB)
- TV Screen Format: TV aspect ratio (16:9 Wide, 16:9 Letter Box, 4:3 Full, 4:3 Letter-Box or 4:3 Pan Scan)
- RF Channel: Set the channel to display the audio and video signal on your TV (21\~69) If you select 40, the receiver's picture will be displayed on channel 40 on your TV
- RF System: PAL I, PAL B/G and PAL D/K are supported
- Video Output: TV Scart output format CVBS or RGB
text_image
Scanned screenshot of a Windows system interface showing two panels with Chinese text and keyboard shortcutsTechnomate
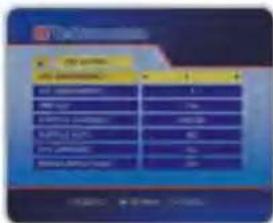
③ OSD Setting
This sub-menu allows you to set the OSD transparency, information and volume timeout.
- OSD Transparency: Adjust the OSD transparency of the menu (1% \~ 100%)
- Text Transparency: Adjust the Text transparency of the menu (1% \~ 100%)
- Info-Banner Timeout: Select the display duration of the Information banner (1 sec / 2 sec / 3 sec / 5 sec / 10 sec)
- Subtitle Language: Select the default Subtitle Language
- Auto Subtitle: Automatically display subtitle if broadcasted
- EPG Language: Select desired EPG Language
- Motor Moving Display: Turn the DISEqC moving display message on/ogg
text_image
Scanned screenshot of a software interface with Chinese text, showing menu options and buttons④ Password Setting
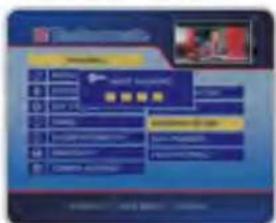
This sub-menu allows you to change the password option to access or lock menu entry and to change password:
- Password Lock: If you turn it ON, you will activate the password control
- Installation Lock: If you turn it ON, you will be asked to enter your PIN code when you go to an Installation Menu
- Edit Channel Lock: If you turn it ON, you will be asked to enter your PIN code when you go to an Edit Channels Menu
text_image
Scanned screenshot of a web interface with Chinese text, showing navigation menu and user interaction buttons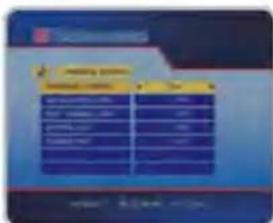
text_image
Scanned image of a document with Chinese text and blue background, showing two yellow rectangular panels.Technomate
- Change PIN: Change to ON to change the PIN
- New Password: Enter the new PIN that you want
- Verify PIN: Enter the new PIN again to confirm
* Note: The default password is '0000'.
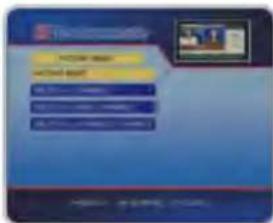
⑤ Factory Reset
This sub-menu allows you to delete the memory:
- All: Delete all channels and settings
- Channel List Only: Delete all channels but not settings
- Delete Radio Channels Only: Delete all radio channels
- Delete Scrambled Channels Only: Delete all scrambled channels
text_image
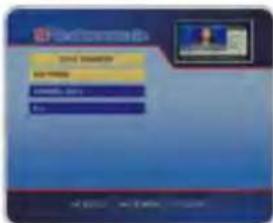
Scanned screenshot of a software interface with Chinese text and buttons, likely from an older application or system.⑥ Data Transfer
This sub-menu allows you to transfer the software of a receiver to another receiver:
-Firmware : Transfer the firmware of a receiver to another receiver.
-Channel Data: Transfer the channel date of a receiver to another receiver.
-Games: Transfer the games of a receiver to another receiver.
-All: Transfer all data (Firmware + Channel Data + Games0 to another receiver.
text_image
WINSTREAMS WINSTREAMS WINSTREAMS WINSTREAMS WINSTREAMS
6.3 EDIT CHANNELS

Technomate
VODEN DIGITAL FASTROSSEPHILIPS

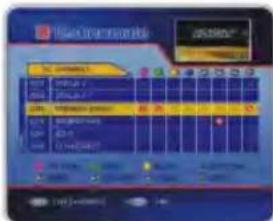
Set Favorites
This sub-menu allows you to set up favorite lists/groups of channels: You can switch between TV or Radio channels by pressing the TV/RADIO button. The receiver supports 16 favorite lists.
- Press the MENU button on the remote to open the Main Menu
- Go to EDIT CHANNELS and press the OK button on the remote
- Go to EDIT FAVORITES and press the OK button on the remote
- Press the colored buttons to add a favorite. Use the ◀/▶ buttons on the remote to change favorite groups
text_image
100% 100%
Rename CH/ Edit Pids
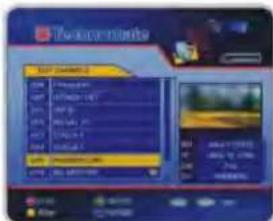
This sub-menu allows you to rename channels: You can switch between TV or Radio channels by pressing TV/RADIO button:
- Press the MENU button on the remote to open the Main Menu
- Go to EDIT CHANNELS and press the OK button on the remote
- Go to EDIT CHANNELS and press the OK button on the remote
- To Rename a channel, press the Blue button
-
To Move a channel, press the Yellow button
-
To Delete a channel, press the Green button
-
To Lock a channel, press the Red button
text_image
Temperature OK CHANGE OK Cancel OK OK Cancel OK OK Cancel OK OK Cancel OK OK

Technomate
THE BIDUAL PARTS OF PRLTD

6.4 EPG

EPG (Electronic Program Guide)
This sub-menu allows you to view the electronic program guide (if available):
- Press the EPG button on the remote. The EPG Menu will appearPress the ◀/▶ to see previous/next guide.
- Press the ◀/▶ buttons to go to the previous/next EPG
- Press the ▲/▼ to change the channel
- Press the OK button to watch and get the EPG data.

text_image
Scanned screenshot of a web interface with Chinese text, showing navigation menu and input fields for user actions.
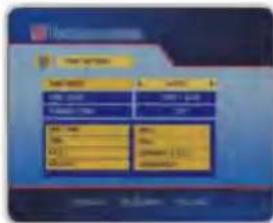
Timer
This sub-menu allows you to set the on/off time of your receiver.
- If you press RED button in guide menu, timer menu will be displayed.
- Press the ▲/▼ to move to other timer.
-
Press the ◀/▶ to change the parameter.
-
Timer No : Select the timer that you want to modify.(1\~8)
- State : Select the timer cycle of action.(off/once/daily/weekly)
-
Date: Select the date using OK. Calendar pop-up will be displayed.
-
Start Time: Input the time using NUMERIC button for your receiver power-on.
- End Time: Input the time using NUMERIC button for your receiver power-off.
- Channel: Select the channel using OK. Channel list pop-up will be displayed.
text_image
Scanned screenshot of a software interface with Chinese text labels and dropdown menus-21

6.5 Games
- Press the MENU button on the remote to open the Main Menu
2.Go to GAMES and press the OK button on the remote
3.Select a Game
① Tetris
- Press the OK button to rotate the block
- Press the ◀/▶ buttons to move the block
- Press the ▼ button to drop the block
- In the right window, you can see next block
- Press the EXIT button to exit the game

text_image
Instruments File Edit View Help View Help View Help View Help View Help View Help View Help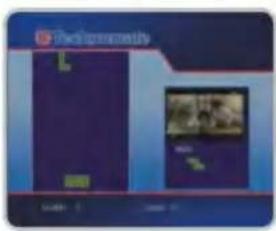
text_image
Photography
Snake
- Press the ▲/▼ or ◀/▶ buttons to move
- If the snake goes through the RED icon, the length will be increased
- If the snake goes through BLUE icon, the game will end
- Press EXIT button to exit the game

Technomate
YERS DIGITAL FASTROS PHILIPS

Technomate
THEO DIGITAL PARTIES PROBLIPS
text_image
Windows 5.0 Network Settings Network Settings TCP/IP ASP.NET ASP.NET ASP.NET ASP.NET ASP.NET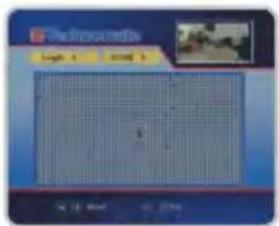
text_image
The Broadcast Image 1 2007
6.6 System Information
You can check the current information about your receiver such as receiver's model number, software version, boot version, etc.
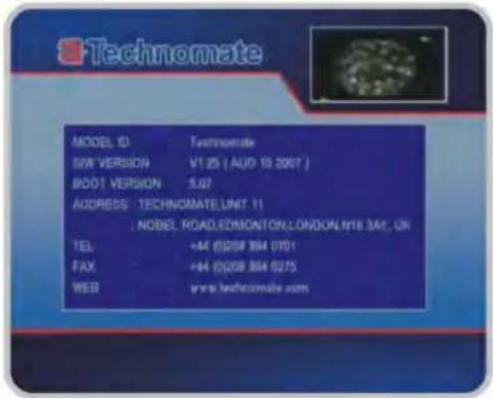
text_image
MODEL ID S2W VERSION BOOT VERSION ADDRESS: TECHNOMATE,UNIT 11 NOBEL ROAD,EDMONTON,LONDON,N18 3AF, UK TEL: FAX: WEB: +44 (0)208 394 (0)01 +44 (0)208 394 (0)75 www.technomate.com一

6.7 Common Interface

Technomate
DIGITALFASTEDSPHELIFE

CAM Initializing
To watch scrambled channels, you will need a Conditional Access Module (CAM) and a Smart Card which is specific to that CAM from the service provider (broadcaster).
*Note: Without a CAM and a smart card, you can only watch Free-to-Air programs
- Insert a CAM into a CAM slot in the receiver and a Smart card into the CAM
- The message: CAM Initializing will appear
- Once the message has disappeared. You can select the channel to want
natural_image
Person holding a blue sign with Chinese characters, standing near a table with yellow and red items (no readable text or symbols)
Status of the CAM
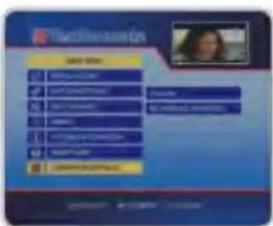
- Press the MENU button on the remote
- Go to COMMON INTERFACE
- Press the OK button on the CAM to see further information of the CAM
- Proceed with further instructions displayed on the screen, then you can check further details depending on the CAM in use
text_image
Scanned screenshot of a Chinese web form interface with input fields and a video player preview

Technomate
THE DIGITAL PARTNER FOLICE

6.8 USB

USB Initialization
To record a channel, listen to MP3, play pictures, download software, you will need a USB Flash Drive (Memory Stick) or an External Powered USB Hard Disc Drive.
- Connect the device
- Initializing USB message will appear
- You can access the device from the USB Menu
text_image
Scanned screenshot of a legacy computer interface with menu options and navigation buttons
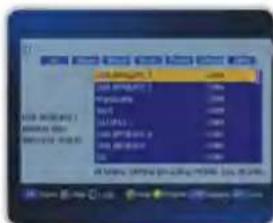
USB Menu
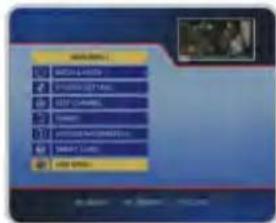
- Press the MENU button on the remote
- Go to USB MENU
- Press the OK button. The following menu will be displayed
- Press ◀/▶ button to select the submenu / mode
- Press ▲/▼ button to select the file that you want
- Press the OK button to confirm selection
- Press the EXIT button to return to the previous menu
text_image
GOSBIO USB NAME: 1 USB PRICE: 2 TCP NAME: 3 TCP ID: 4 DATA NAME: 5 USB PRICE: 6 TCP NAME: 7 TCP ID: 8 USB PRICE: 9 TCP NAME: 10 USB PRICE: 11 TCP NAME: 12 USB PRICE: 13 TCP NAME: 14 USB PRICE: 15 TCP NAME: 16 USB PRICE: 17 TCP NAME: 18 USB PRICE: 19 TCP NAME: 20 USB PRICE: 21 TCP NAME: 22 USB PRICE: 23 TCP NAME: 24 USB PRICE: 25 TCP NAME: 26 USB PRICE: 27 TCP NAME: 28 USB PRICE: 29 TCP NAME: 30 USB PRICE: 31 TCP NAME: 32 USB PRICE: 33 TCP NAME: 34 USB PRICE: 35 TCP NAME: 36 USB PRICE: 37 TCP NAME: 38 USB PRICE: 39 TCP NAME: 40 USB PRICE: 41 TCP NAME: 42 USB PRICE: 43 TCP NAME: 44 USB PRICE: 45 TCP NAME: 46 USB PRICE: 47 TCP NAME: 48 USB PRICE: 49 TCP NAME: 50 USB PRICE: 51 TCP NAME: 52 USB PRICE: 53 TCP NAME: 54 USB PRICE: 55 TCP NAME: 56 USB PRICE: 57 TCP NAME: 58 USB PRICE: 59 TCP NAME: 60 USB PRICE: 61 TCP NAME: 62 USB PRICE: 63 TCP NAME: 64 USB PRICE: 65 TCP NAME: 66 USB PRICE: 67 TCP NAME: 68 USB PRICE: 69 TCP NAME: 70 USB PRICE: 71 TCP NAME: 72 USB PRICE: 73 TCP NAME: 74 USB PRICE: 75 TCP NAME: 76 USB PRICE: 77 TCP NAME: 78 USB PRICE: 79 TCP NAME: 80 USB PRICE: 81 TCP NAME: 82 USB PRICE: 83 TCP NAME: 84 USB PRICE: 85 TCP NAME: 86 USB PRICE: 87 TCP NAME: 88 USB PRICE: 89 TCP NAME: 90 USB PRICE: 91 TCP NAME: 92 USB PRICE: 93 TCP NAME: 94 USB PRICE: 95 TCP NAME: 96 USB PRICE: 97 TCP NAME: 98 USB PRICE: 99 TCP NAME: 100-37
Technomate
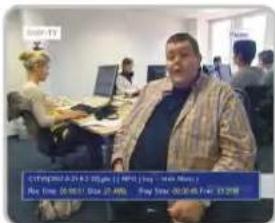
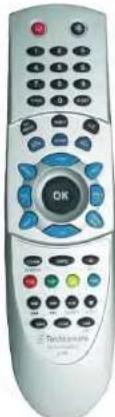
③ Remote Shortcuts of USB
- Press the BLUE button to play multimedia files in a loop
- Press the GREEN button to open the Help list
- Press the ☐ Record button to start recording a channel
text_image
C:\Program Files\2.3.10\game [ ] [MPV] [log - 1.5m Max] Run Day: 06:30:17, Sun 27, AM Play Time: 06:30:18, Fri 12:30:08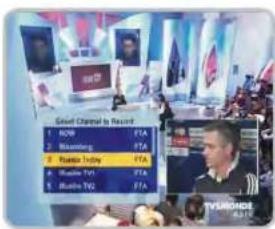
text_image
Broad Channel to Recent 1: BOW 2: MARRI 3: NEMA ZUCHY 4: BURGER TOL 5: BURGER TG TVBRANDS④ USB Feature List
- Compatible with: .DAT, .MPG & VOB Video Files, JPEG & BMP Picture Files and MP3 Music Files
- Download Software & Channel List and Upload Channel List
- SATCODX Compatible
- In Picture Mode, press the BLUE button to turn on/off the Slideshow
natural_image
Front view of a white remote control with blue and gray buttons (no readable text or symbols)32
Technomate
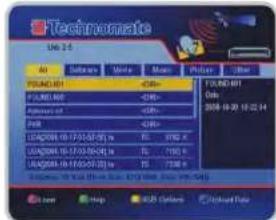
5 USB Menu
- Press USB key to enter USB menu.
- The current directory path display on the top part of the menu.
- The default file list is composed of all files and subfolders in the current path.
- All supported files can be opened, and these files such as *.mp3, *.jpg, *.bmp, *.dat, *.mpg, *.gts.
text_image
Technomate File 2.0 Air Subsea Vole Map Picture Item PUMC-100 400% PUMC-100 400% PUMC-100 400% PUMC-100 400% PUMC-100 400% PUMC-100 400% PUMC-100 400% PUMC-100 400% PUMC-100 400% PUMC 10/17/25/26/21 is PUMC 10/17/25/26/21 is PUMC 10/17/25/26/21 is PUMC 10/17/25/26/21 is PUMC 10/17/25/26/21 is PUMC 10/17/25/26/21 is6.9 Record Channel
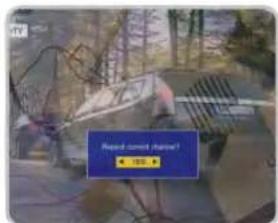
① Record Current Channel
Press this key will stop display picture for a moment and initialize record process. In recording mode, press INFO key to hide/display the time-shift information, or EXIT key stop recording.
text_image
Read content lesson? YES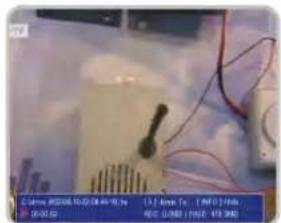
text_image
Cathode H2006 10:02 OK 49:15 00:00:00 13.2mm Tc. 1 MHz 1MHz 电容: 1000Ω (1MHz, 49.998)-33
Technomate

TROUBLE SHOOTING
There may be various reasons for the abnormal operation of a set-top box. If it does not work properly, check it according to the procedures shown in the table below.
| Problem | Possible Causes | Suggested Remedy |
| LED on front panel does not turn ON | A/C power cord disconnectedPower cord damaged | Connect power cord correctly into the power socketCheck the power cord for any signs of damage |
| No Picture or sound | Incorrect connection of the video/audio outputs to the TV's Input terminalIncorrect connection of satellite antenna cableSatellite dish/antenna is misalignedFaulty LNBIncorrect LNB Settings | Ensure all connections are correctEnsure all connections are correctEnsure that your dish/antenna accurately pointed at the satelliteEnsure that your LNB is working either by asking a dealer/installer to check or check on another dish/antennaEnsure that the LNB Settings in the Satellite Setup menu are correct |
| Black-and-white screen or V-Hold | Your TV mode is different from the broadcaster's | Use TV of the same modeUse a NTSC/PAL converter connected to the receiver and TV Replace the batteries |
| The remote control does not work | Batteries exhaustedFluorescent light interfering with the remote controlRemote controller is incorrectly aimed. | Turn off the lightAim the remote control at the IR Receiver of the receiver |
-34-
Technomate

Questions & Answers
The receiver is on but I cannot get any Menu on the screen?
1) Check if the scart or the RF lead is connected,
2) Check the A/V settings on your television is correct,
3) Scart cable or RF cable could be faulty therefore replace if in doubt.
The receiver is on but I cannot get any Menu on the screen?
1) Check if the scart or the RF lead is connected,
2) Check the A/V settings on your television is correct,
3) Scart cable or RF cable could be faulty therefore replace if in doubt.
How do I tune the RF output of the receiver to my television?
Your receiver's RF output has been Defaulted to PALI and channel frequency 40, Apply the tuning setup application of your television.
I get the message 'no signal' displayed?
1) Check if the LNB cable is inserted into the IF INPUT,
2) Check if the LNB setup menu is correctly set.
3)Your satellite Dish may be out of alignment or your LNB may be Is faulty.
4) Go to Easy installatin guide and start fresh,
5) contact your dealer / installer.
I cannot access a particular channel I require?
You need to check the following:
1) Check if you a correct transponder.
Go to advance search, Turn on the Network Search, press red button to tune.
2) Make sure you have correct PID numbers.
b) If above dose not help go to
www.lyngsat.com
www.kingofsat.net/en/prefs.php
Please contact your Supplier for further assistance.
How can I find out what software version I have?
Press Menu on the remote, Go to sytem information press ok, Full Information is displayed
I have lost my personal Lock Code setting, what do I do?
For security reason, please contact your dealer.
一
Technomate

HOW TO DOWNLOAD SOFTWARE FROM PC TO RECEIVER
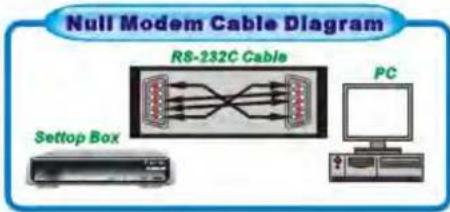
- Connect the null model cable to the RS-232C connection on the back of the receiver and to your PC
- Download the latest version of the TM Loader from the Technomate web site (www.technomate.com)
- Download the latest software (.STB) of your receiver Ensure that the model number of the software is the same as the receiver you have.
- Click on Browse in the TM Loader.
- Select the file from where you saved it when you downloaded it from the Technomate website.
- Turn ON the satellite receiver, make sure the receiver is in STANDBY mode before s/w download.
- Click on Connect on TM Loader and then click Start to begin the software download
- The downloading status is displayed.
- Once it displays 100% Finished (walt until it has completed erasing), the software download has finished.
- When it completes the writing of the new software, disconnect the cable between the receiver and the PC. A Factory Reset is required.
- Go to System Information on the main menu and make sure that you have correct software version.
text_image
Null Modem Cable Diagram RS-232C Cable Settop Box PC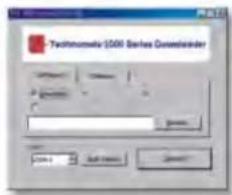
text_image
Technoforms 1500 Series Consensus Order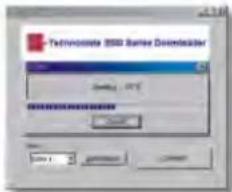
text_image
Technoforms 9500 Series Downloader OK Cancel
text_image
Technomedia 1000 Series Download Winning: -2.5% Download: 100%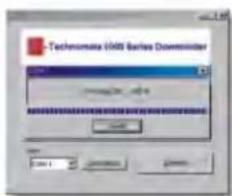
text_image
Technomata 1008 Series Downwriter DownloadTechnomate

SPECIFICATIONS
| System capabilities | FullyDVB compliant | |
| LNB/Tuner input | Connector | IEC169-24, female |
| Frequency range | 950MHz~2150MHz | |
| Signal level | -65dBm~-25dBm | |
| LNB supply | 14/15V, max 400mA | |
| LNB switch control | 22KHz | |
| DISEqC | Ver1.0/1.1/1.2/USALS Compatible | |
| Demodulator | Front end | GPSK |
| Symbol rate | 2Mps~45Msps | |
| SCPC and MCPC Capable | ||
| Spectral Inversion | Auto conversion | |
| System resource | Processor | 32bit processor(133MHz) |
| SDRAM | 8Mbyte | |
| FLASH | 2Mbyte | |
| EEPROM | 32kbyte | |
| Video decoder | MPEG2 | Main Profile@Main Level |
| Data Rate | Up to 15M bits/s | |
| Resolution | 720*576,720*480 | |
| Video format | NTSC,PAL | |
| Aspect Raffo | 4:3, 16:9 | |
| Teletext | DVB compliant | |
| MPEG Audio | MPEG 1 layer 1&2 | |
| Type | Mono, Dual mono, Stereo, Joint Stereo | |
| Sampling rates | 32, 44.1 and 48KHz | |
| Serial data interface | Connector | 9 pin D-sub male, Max116Kbps |
| Remote control | Code | NEC-IR |
| Operating condition | Up to 7 Meter | |
| Power supply | Power consumption | Max 30W |
| Supply voltage | 90V~250V | |
| Supply frequency | 50Hz~60Hz | |
| Rear panel connectors | TV SCART | Video out(CVBS,RGB)Audio out |
| VCR SCART | Video out(CVBS)Video in(CVBS,RGB)Audio out | |
| VIDEO | 1X RCA/Cinch | |
| AUDIO L/R | 2X RCA/Cinch | |
| 3/PDIF | 1X RCA/Cinch | |
| Serial data | 9Pin D-sub | |
| Digital tuner Input | IEC169-24 | |
| Loop-through Digital tuner | IEC169-24 | |
| Terrestrial anti input | IEC169-2 | |
| RF modulator output | IEC169-2 | |
| RF modulator PAL G/I/K TV Type | Connector | IEC 169-2, female/male |
| Frequency | 470~860MHz | |
| Output channel number | 21~69 | |
| Physical Specification | Size (W x H x D) | 280 x 55 x 245 mm |
| Weight (Net) | 2.0 Kgs | |