APC-990 - Pfanne Aroma - Kostenlose Bedienungsanleitung
Finden Sie kostenlos die Bedienungsanleitung des Geräts APC-990 Aroma als PDF.


Benutzerfragen zu APC-990 Aroma
0 Frage zu diesem Gerät. Beantworten Sie die, die Sie kennen, oder stellen Sie Ihre eigene.
Eine neue Frage zu diesem Gerät stellen
Laden Sie die Anleitung für Ihr Pfanne kostenlos im PDF-Format! Finden Sie Ihr Handbuch APC-990 - Aroma und nehmen Sie Ihr elektronisches Gerät wieder in die Hand. Auf dieser Seite sind alle Dokumente veröffentlicht, die für die Verwendung Ihres Geräts notwendig sind. APC-990 von der Marke Aroma.
BEDIENUNGSANLEITUNG APC-990 Aroma
AROMA®
Instruction Manual Digital Pressure Cooker
APC-990

Questions or concerns
about your Pressure
Cooker?
Before returning to the store..

Aroma's customer service
experts are happy to help. Call
us toll-free at 1-800-276-6286.

Answers to many common
questions and even replacement
parts can be found online. Visit
www.AromaCo.com/Support
natural_image
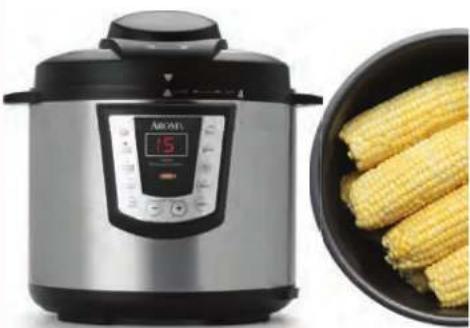
Exterior view of a modern electric rice cooker with digital display and corn cobs in a bowl (no text or symbols visible)
Congratulations on your purchase of the Aroma® 8-Quart Digital Pressure Cooker.
Your new Arour® Pressure Cooker is the perfect way to have delicious home-cooked treats in a fraction of the tirel. Pressure cooking produces tender, delicious cooked insults asthma strongly test. With more pressure level settings, your now digital pressure cooker is perfect for a wide variety of pressure cooking recipes. And with its pressure safety systems, you can rest easy while your pressure cooker handles the cooking.
And it's not just pressure cooking! Your new Ambient Pressure Checker also includes easy to use digital functions to brown, slimmer, slow cook, steam and warm. With these additional functions, the meal options are nearly enclosed!
This manual contains instructions for using your Aroma® Pressure Cooker and its convenient pre-programmed digital settings, as well as all of the accessories included. For more information on your Aroma® Pressure Cooker, or for replacement parts, product, service, recipes and other home software solutions, please exit us online at www.AromaCo.com.

Publishing by: Arima Housewares Co. 6400 Fenders Drive San Diego, CA 92121 U.S.A. 1-800-278-8256 www.ArimaCo.com ©2011 Arima Housewares Company All rights reserved

WARRANTY
LIMITED WARRANTY
Aroma Housewares Company warrants this product free from seeds in material and workmanship for one year from provable date of purchase in the United States.
Within this warranty period, Arona Housewares Company will repair or replace, at its option, detective parts at no charge, provided the product is returned. Freight prepaid with proof of purchase and U.S. \$22.00 for shipping and handling charges payable to Arona Housewares Company. Before returning an item, please call the toll-free number below for a return authorization number. Allow 2-4 weeks for return shipping.
This warranty does not cover improper installation, release, abuse or neglect on the part of the owner. Warranty is also involved in any case that the product is taken apart or serviced by an unauthorized service station.
This warranty gives you specific legal rights, which may vary from state to state, and does not cover areas outside the United States.
AROMA HOUSEWARES COMPANY
Office Fenders Drive
San Diego, California 9212
1-300-270-6280
M F, B3C AM 430 PM Pacific Time
Website: www.ironaCo.com
SERVICE & SUPPORT
In the event of a warranty claim, or if service is required for this product, please contact Aroma® customer service toll-free at:
-600-276-6285
M F, 2130AM 42CFM, Pach n ltrn
Or we can be reached online at Customer Service/ArmsCo.com.
For your records, we recommend stacking your sales receipt to the page along with a written record at the following:
Date of Purchase
Pare of Purchase

• Proof of purchase is required for all warranty claims.
[Non-Text]

IMPORTANT SAFEGUARDS
Basic safety precautions should always be followed when using electrical appliances, including the following:
-
Important: Read all instructions carefully before first use.
-
Do not touch box surfaces. Use the handles at keys
-
Use only on a level, dry and heat-resistant surface.
-
To protect against fire, electric shock and injury to persons, do not Immersive cord, plug or the appliance in water or any other liquid. See instructions for clearing.
-
Close supervision is necessary when the appliance is used by or near children.
-
Unplug from outlet when not in use and before cleaning. Allow unit to coal before removing or replacing parts and before cleaning the appliance.
-
Do not operate any appliance with a damaged cord or plug or after the appliance malfunctions or has been damaged in any market. Contact Aroma® customer service for examination, repair or adjustment.
-
The use of accessory attachments not recommended by Arcoma ^® Housewares, may result in fire, electricity shock or injury.
-
Do not use outdoors.
-
Do not let care touch hot surfaces or hang over the edge of a counter or table.
-
NEVER ATTEMPT TO OPEN LID WHILE THE UNIT IS PRESSURE COOKING. Do not open the pressure cooker until the unit has cooled and all internal pressure has been released. If it is difficult to turn, this indicates that the cooker is still pressurized. Do not force it to open. Any pressure in the cooker can be hazardous.
-
Do not close on or near a net bumper or in a sealed oven
-
Do not use the appliance for other than its intended use.
- Always check the pressure release device for clogging before use.
-
Do not touch, cover or obstruct the steam vent on the top of the pressure cooker as it is extremely hot and may cause scolding.
-
Use only with a 120V AG power outlet.
-
Always unplug from the base of the wall nulet. Never put on the cord.
- The pressure concer should be operated on a separate electrical circuit from other operating appliances. If the electrical circuit is overlaced with
other appliances, the pressure cooker may not operate properly. 19. Always make sure, he outside of the inner cooking pot is dry prior to use. If the inner pot is returned to the cooker when wet, it may damage or cause the product in malfunction.
-
Food should not be left in the inner cooking pot with the "Keep-Warm" function so far more than 12 hours.
-
To disconnect, turn any control to "OIT," then remove the plug from the wall cuttes.
-
To reduce the risk of electrical shock, cook only in the removable inner cooking pot provided.
-
Extreme caution must be used when moving a pressure cooker containing hot liquids.
-
This appliance cooks under pressure. Improper use may result in soaking injury. Make certain unit is properly closed before operating. Follow the instructions in "To Pressure Cook" or page 7.
-
Do not fill the unit over 2/3 full. When cooking foods that expand during cooking such as rice or dried vegetables, do not fill the unit over 1/2 full. Over filling may cause a risk of digging the vent pipe and developing
excess pressure. Follow the instructions in "to Pressure Cook" on page 7. 25. Be aware that certain foods, such as applesauce, cranberries, pearl barley, oatmeal or other cereals, split peas, noodles, macaron, rhubarb, or
spaghetti can foam, froth, and sputter, and clog the pressure release device (steam vent). These foods should not be cooked in the pressure cooker.
- Do not use this pressure cooker for pressure frying with oil.
SAVE THESE INSTRUCTIONS

IMPORTANT SAFEGUARDS
Short Cord Instructions
- A short power supply cord is provided to reduce the risks resulting from becoming entangled in or tripping over a longer cord.
- Longer extension cords are available and may be used if care is exercised in their use.
a. The marked electrical rating of the extension cord should be at least as great as the electrical rating of the appliance.
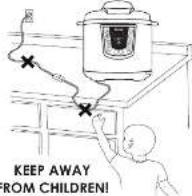
b. The longer cord should be arranged so that it will not drape over the counter top or tabletop where it can be pulled by children or tripped over unintentionally.
DO NOT DRAPE CORD!
Polarized Plug
This appliance has a polarized plug (one blade is wider than the other), follow the instructions below.
to reduce the risk of electric shock, this plug is intended to fit into a polarized outlet only one way. If the plug does not fit fully into the outlet, reverse the plug. If it still does not fit, contact a qualified electrician. Do not attempt to modify the plug in any way.
If the supply cord is damaged, it must be replaced by the manufacturer, its service agent or a similar qualified person in order to avoid a hazard.
THIS APPLIANCE IS FOR HOUSEHOLD USE ONLY.

RECIPES
Crimini Mushroom & White Wine Risotto
Ingredients
2th-century 1960
2 tabloons, shalons, peckl, choppce
Bry, airti in abar's apedberod
2 cups: Avocorico rice, uncooked
3.168
1 cup 4/5 white wine
2 cup 400 gm French cheese, fresh grated
Place the oil in the inner cooking pot and heat with the Brown setting until that. Add the snacks and sauce until tender. Add the mushrooms and rice and cook, stirring about 10 minutes. Add the broth and wine and salt again. Close the lid seriously wet on the stream went to "Closed." Due to High Pressure and cook for 20 to 25 minutes. Release the pressure and remove the lid. If the rice has not completely cleaned through a bed and two times on high Pressure was 5 to 10 minutes. Sir a twice before asking, adding the cheese to blend and hot. Serve right away. Stakes 4 to 8.
Golden Caramelized Onion Soup with Gruyere Cheese
Ingredients
2 white room turns
2 medium yellow onions, peelod, hilly lined
[Unreadable]
Ecaps Electron
1
1. 2017年1月
15.4 p.a. Quayw cheese, s####dled (or one Swiss cheese)
Flue the butter in the new cooking pot and hot with the Brown setting to melt. And the one and sauto oil golden brown and scamal end. And the energy, broth, bay test, salt and pepper. Once the lid security and set the steam and to the "Glaze" position. Set to high Pressure and volt for 4 minutes. Release the pressure and lead to the sous into bowls. Top each with a generous portion of cheese before morning. Serve 5.
for additional pressure cooker recipes, or ever to submit your own visit our website at www.AromaCo.com!

RECIPES
Chunky Beef Goulash with Sweet Hungarian Paprika
Ingredients
2 tabiospors olive oil
- Tablapaora 1ca
The caspocns salt
Missedoor buck pepper
-
- Be it was been a bull, road, cur, fire, and other scenes
2 ibespools ever
415.67 00+20kV/200mm (约1.00
2 days, 95%
linc yellow color, peaked, chopped
Tell us can now build
145 oz. can be a car desired
6 oz. wide egg noocks, drained
Place the oil in the inner cooking pot and heat with the Brown setting until hot, in a plastic bag, combine the four, act are necessary. Add several actions of heat to the bag and heat leaving the four mixture and heat. Remove and using tongs, place the best in the inner cooking pot to cold. Recover with the remaining best or less Brown the cool or more side.
Add the paples, they leaf, coincide with juice, garlic, onion and beef broth. Close the lid securely and set the amount of to "Gassel." Set to high pressure and more for 50 minutes. Remove the pressure remove the lid and add the corn and rice, filling to mix. Remove the bay and before starting.
Glazed Honey & Red Currant Chicken
Ingredients
by a.
- (a) white w/egps
1.0.1 (ref: cn, and a)
2 tablespoons by guide
- 陈家华先生
Tablesector: Lijen Industrie
2-3.15. Periodont, 2008, 30 Marche
In a soft-reading plastic bag, combine the wine, vinegar, preservatives, by sauce, candy and mustard. Add the shades of cheese and milk oil. Make in the refrigerator for 4 to 8 hours. Follow the shades and marbles in the inner opening pit. Close the air correctly and set the oven next to "Cleens." Hot to light pressure and cook for 10 to 12 minutes. Release the pressure and remove the lid. Serve while warm, according the sake over the chicken. Sense it.

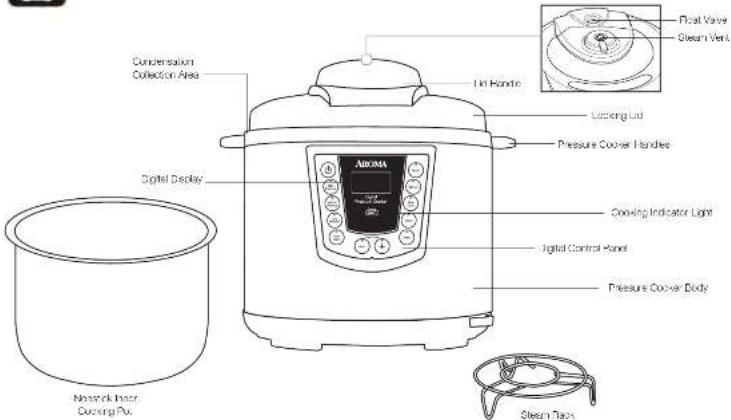
PARTS IDENTIFICATION
text_image
Condensation Collection Area Digital Display Newrock Inner Cooling Pit. Lin Kondre Cooling Lid Pressure Cooker Handles Alstom A Cooking Indicator Light Digital Control Panel Pressure Cooker Body Float Valve Steam Vent Steam Taps
PARTS IDENTIFICATION (CONT.)
Digital Controls

Power Button
The POWER button turns the pressure cooker on and off.

High Pressure Button
The HIGH PRESSURE button sets to the highest pressure level possible. This button is ideal for most pressure cooler recipes.

Medium Pressure Button
The MEDIUM PRESSURE button sets to a mid-level pressure for recipes that call for it.

Low Pressure Button
The LOW PRESSURE outlet sells to a lower pressure level and temperature for certain areas.

Keep-Warm Button
The KEEP WARM button keeps food warm and ready to serve. The pressure copper will automatically switch to its "Keep-Warm" mode once the selected cook time for any function places.

Brown Button
The BROWN button heats the pressure cooker to a high temperature perfect for browning and sauting.

Simmer Button
The SIMMER button is perfect for favorite soups and stoves. Add the called for ingredients and set the line from 1 minute to 5 hours.

Slow Cook Button
The Slow COOK button allows the pressure cooker to double as a programmable slow cooker, setting from 1 to 10 hours. Slow cooker a rear all day and have it ready when you come here at night!

Steam Button
The STEAM burrs, along with the included steam rack, allow the pressure cover to quickly steam delicious meats and vegetables. Advanced controls allow you to set the time food needs to steam.

Start Button
The START button begins any of the digital functions.

RECIPES
Fresh Brussels Sprouts with White Wine Vinaigrette
Ingredients
(2) 1996. Suckse, 1997
19 To: Food En, seesquins, chienin, tenued
4 cup 250 ml
3. It is necessary while we think
1
The copper black copper
3cap water debris, dry stock
2. 10. 10. 10.
Since become into the steps and space in the inner cooking pot. Set to Draw for 8 minutes and sale and crop. Demon to paper feed and double when not full side.
And the contents to the bacon crappings and set to Brown for 4 minutes, turning other. Record any excess dropings and add 1 cup water. Close the 10 security and set the steam vent to "Closed." Set for 1 light pressure and cook for 3 to 4 minutes. We see the pressure.
Space the sun into a saving head in a small bowl, which together take a roll of sugar, salt and pepper. Add the water above one and green onion and pure water the sprout. Top with become sure to use white cream or rose and call for 4 hours. Save it to 10.
Mediterranean Lamb Medallions with Couscous
Ingredients
-
2016年1月1日
-
2014年1月1日
-
Box: top of the top box
Low choice
a supercon diac thme
- Response group objectives
a x y p o c e n g o u n d s a g e
2 teaspoons fresh mint, shaped, divided
- (Green) 2023, 2024 and 2025 by chapter
2 cap: Plant couscous, uncoiled
Place the oil in the inner cooking pot and heat with the Brown coating until hot. Rub the vapor over the shelf and place the bed in the cooler. Ordering on all ice in the air. Add the kitchen broth, herbs and green vapor. I am the pressure cooker. Close the lid security and set the alarm vent to "Oceans." Get to high Pressure and cool for 55 to 40 minutes, or until the next neighbor is 150°F. Before the pressure. Remove the lid, remove arms and let stand for 10 minutes. Bits.
But water, it is done, to equal 2 cups of liquid in the one cooking pan. Bring to a ball on Steam. Add the aqueous Cover and turn off. Let stand about 5 minutes until the liquid has been absorbed. Given the first time now the container. Divided to 8
for additional pressure cooker recipes, or even to submit your own visit our website at www.AromaCo.com/

TO CLEAN
Always unplug the pressure cooker and allow it to cool completely before cleaning.
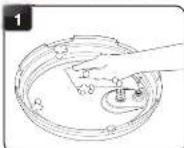
Remove the lid. Wash the lid top and underside in warm, soapy water using a sponge or dishcloth.
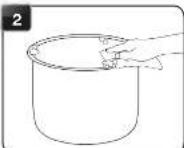
in warm, soapy water using a sponge or dishcloth.
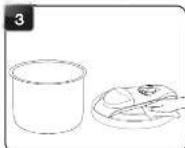
Rinse and dry thoroughly. Remove the InRequatoklogppotvWashoam rack, if used.
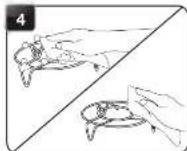
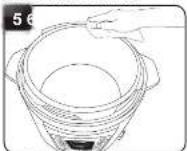
Condensation will build up on condensation collection area on the rear of the unit where the lid locks into place. Dry thoroughly after each use. 24
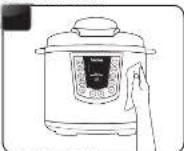
Wipe the body of the pressure cooker clean with a damp cloth.

- Do not use hairless abrasive cleaners, acquiring pads or products that are not considered safe to use or non-mark coatings. - Always make sure the outside of the inner pot is dry prior to use. In the inner cooking pot is returned to the pressure cooker when well, it may damage this product, causing it to malfunction. - Any other sourcing should be performed by Aramé Housewares Company. Contact Aramé customer service at 1-830-276-6286, Monday to Friday 8:30AM-15:00 PM-151

- For even faster cleanup, the inner cooking pot and steam rack can be washed in the dishwasher!

SAFETY SYSTEMS
The Aroma® Digital Pressure Cooker was built with safety in mind. Along with its convenient digital features, this pressure cooker also includes seven advanced safety systems.
①
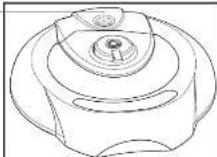
Safety System #1: Venti automatically releases pressure if it becomes too high.
Safety System #2: The pressure cooker will not cook with pressure if the lid is not securely locked and closed.
Safety System #3: Flexible gasket releases pressure; fit becomes too high.
Safety System 14: Built to withstand pressure up to six times higher than the coo-ear is intended to reach.
Safety System 45: Actually measures pressure to ensure 1 stage will in intended ranges.
Safety System 10: Digital thermal cuts heating off to present dry boiling.
Safety System 47: To prevent overhearing the power fuse will trip if the temperature rises too high.

BEFORE FIRST USE
- Read all instructions and important safeguards.
2 Remove all packaging materials and checks that all items have been received in good condition. - Tour up all plastic bags as they can pass a risk to children.
- Wash to end all accessless in warm, soapy water. Fine and dry thoroughly.
- Remove the inner cooking pot from pressure cooker and clear with warm, soapy water. Hours and dry thoroughly before returning to cooker.
- Wipe body clean with a damp cloth.

- Do not use active cleaners or scouring pads.
- Do not increase the rice cooker base, core or plug in water at any time.

STEAMING TABLES
When steaming, Aroma ^® recommends using 3 cups of water.
Meat Steaming Table
| MEAT STEAMING TIME | SAFE INTERNAL TEMPERATURE | |
| Fish 20 Min | 140° | |
| Chicken 30 Min | 160° | |
| Fish 30 Min | 160° | |
| Beef | Medium - 25 Min Medium-Wel = 30 Min. Well = 33 Min | 180° |

HELPPUL HINIS
- Since most vegetables only absorb a small amount of water; there is no need to increase the amount of water with a larger serving of vegetables.
- Clearing times may vary depending upon the out of time, being
- To ensure meat, tastes its pea, and to prevent possible illness. Check that meat is completely cooked prior to serving. Hit is not simply place more water in the inner cooking pan and repeats the cooking process until the meat is adequately cooked.

NOTE
Vegetable Steaming Table
| VEGETABLE STEAMING TIME | |
| Asparagus 8-11 Minutes | |
| Docosol 8-6 Minutes | |
| Cellobiopt 5-7 Minutes | |
| Cannus | 1-6 Minutes |
| Cauliflower | 7-9 Minutes |
| Corn on the Cuts | 12-16 Minutes |
| Green Beans | 9-11 Minutes |
| Pasta | 4-6 Minutes |
| Potatoes | 26-33 Minutes |
| Spinach | 9-11 Minutes |
| Squash | 2-4 Minutes |
| Zucchini | 8-11 Minutes |

TO STEAM (CONT.)
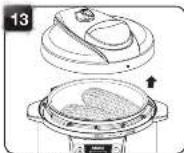
Open the lid by turning it counterclockwise to unlock it. Remove the lid.
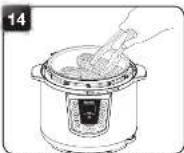
Check food for doneness. If cooking is complete, remove food immediately for serving.
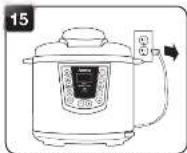
Press the POWER button to turn the pressure cooker off. Unplug from the power outlet when not in use.

NOTE
- It is possible that some pressure may build up in the pressure cooker while sbearing. If the lid does not open when the pressure cooker switches to "Keep-Warm," allow it to cool so that any bull up pressure may displace. If pressure is normal, the foot valve will be in its "down" cost on.

HELPFUL HINTS
- For best taste, it is recommended to serve food immediately, however if the rest of the meal is not yet ready. Food may be left on "Keep-Warm."

TO PRESSURE COOK
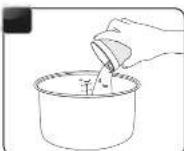
Add food to be pressure cooked to the inner cooking pot.
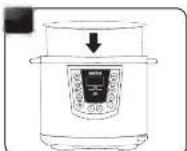
Place the inner cooking pot into the pressure cooker.
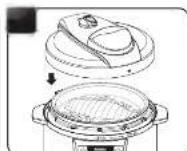
Close the lid securely onto the pressure cooker, turning it clockwise so that it locks into place. There will be an audible "click" when the lid locks closed.
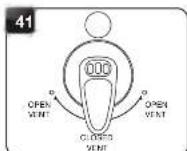
Move the steam vent to the "CLOSED VENT" position.

- Do not fill above the "MAX" line in the inner cooling pot.

TO PRESSURE COOK (CONT.)
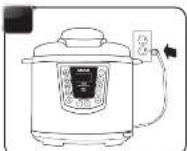
Plug the power cord into an available power outlet.
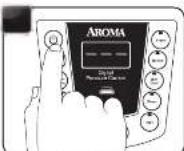
Press the POWER button to turn the pressure cooker on. Each button's indicator light will fl ash and the digital display will show three dashas.
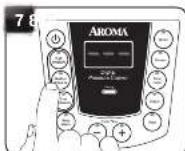
Press the HIGH PRESSURE, MEDIUM PRESSURE or LOW PRESSURE button, depending upon the pressure level called for in the recipe.
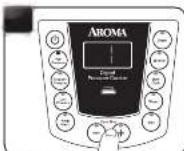
The digital display will begin with a "1" representing one minute of pressure cooking time. Press the COOK TIME - or COOK TIME + buttons to adjust the cooking time between 1 and 60 minutes.

TO STEAM (CONT.)
9
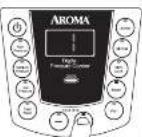
The digital display will begin with a "1" representing one minute of steaming time. Press the COOK TIME - or COOK TIME + buttons to adjust the steaming time between 1 and 40 minutes.
10
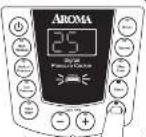
Once the needed time is selected, press the START button to begin steaming. The COOKING indicator light will illuminate and the pressure cooker will begin steaming.
11
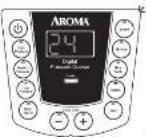
Once the water reaches a boil, the pressure cooker will "boep" and the digital display will begin counting down the selected cooking time in one minute increments.
12
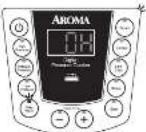
Once the selected time has elapsed, the pressure cooker will "beep" and automatically switch to "Keep-Warm" mode. The digital display will show the number of hours it has been on "Keep-Warm," beginning with "OH."

HOLPFUL HINTS
- Making the OCDK TIME curve down will increase time in 15 minute increments
- For more details on the pressure levels, see 'Pressure Levels' on page 11.
(1) 2017年1月1日,公司召开2017年第二次临时股东大会,并于2018年第一次临时股东大会审议通过了《关于使用部分闲置募集资金进行现金管理的议案》,同意公司使用不超过人民币5亿元的闲置募集资金进行现金管理。

- It may take several minutes for water to reach a coil - Do not alter it open the Id while slaining.
2、本次发行的种类和面值为人民币10,000万元,占公司总股本的5%。

HELP
HINT8
- Holding the BOOK TIME button down will increase time in 10 minute increments

TO STEAM (CONT.)

Close the lid securely onto the pressure cooker, turning it clockwise so that it locks into place. There will be an audible "click" when the lid locks closed.
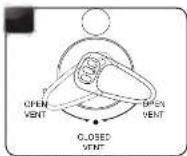
Move the steam vent to one of the "OPEN VENT" positions.
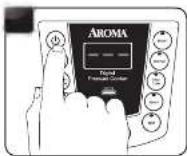
pressure cooker on. Each button's indicator light will flash and the digital display will show three dashes.
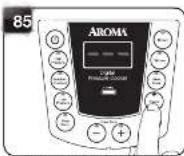
Press the STEAM button. Press the POWER

TO PRESSURE COOK (CONT.)
9
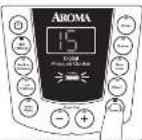
Once the needed time is selected, press the START button to begin cooking. The COOKING indicator light will illuminate and the pressure cooker will begin cooking.
10
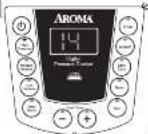
Once the selected pressure level is reached, the pressure cooker will "beep" and the digital display will begin counting down the selected cooking time in one minute increments.
11
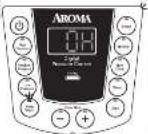
Once the selected time has elapsed, the pressure cooker will "beep" and automatically switch to "Keep-Warm" mode. The digital display will show the number of hours it has been on "Keep-Warm," beginning with "OH."
12
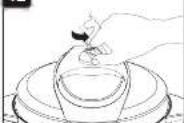
Allow the pressure cooker to cool and release all excess pressure before attempting to open the lid. To speed up this process, manually move the steam vent to the "OPEN VENT" position.

- Retire steaming, check that the steam vent is set to one of the two 'OPEN VENT' positions. If the steam vent is closed, the pressure recover will build up large amounts pressure and may affect steaming results.

- It may take several minutes for the selected pressure level to be reached.
- When cooking under pressure the lid will lock closed. Do not attempt to open the lid while pressure cooking. When pressured, the last valve or the lid will drop off.
- Steam and some water may escape from the float valve while cooling. This is normal. Do not abstust the foot valve.
- Exercise caution when moving the steam vent to the "OPEN" position. A large amount hot steam will quickly escape once the vent is opened.
- The safety locking mechanisms of this pressure cooker will not allow the lid to be opened while cooker is still pressured. It must lid does not open easily to allow the pressure cooker to continue to release steam. Do not force the lid open.

TO PRESSURE COOK (CONT.)
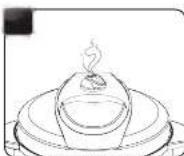
Allow all pressure to escape from the steam vent. Pressure should be released once steam is no longer escaping from the steam vent and the fl oat valve moves back down.
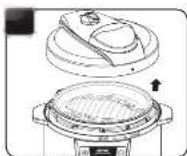
Open the lid by turning it counterclockwise to unlock it. Remove the lid.
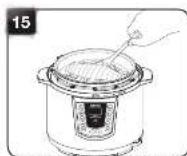
Check food for doneness. If cooking is complete, remove food for serving.
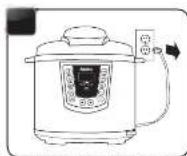
Once serving is complete, press the POWER button to turn the pressure cooker off. Unplug from the power outlet when not in use.

TO STEAM
The steam vent should be open when steaming.
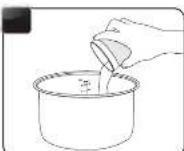
Pour 3 cups water into the inner cooking pot.
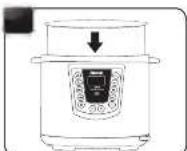
Place the inner cooking pot into the pressure cooker.
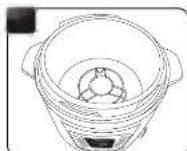
Place the steam rack into the center of the inner cooking pot.
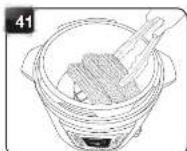
Place food to be steamed on top of the steam rack.

HELPFUL HINTU
- The "Keep Warm" selling is great for keeping food warm and delicious while serving. However, do not leave food on "Keep Warm" for longer than 12 hours

HELPFUL HINT8
- For similar foods, or to increase streaming space, a host-safe dish may be placed on top of the steam rack. The dish should be small enough that space remains between the edges of the dish and the inner covering pot to allow steam to reach food.

TO SLOW COOK (CONT.)
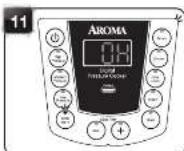
Once the selected time has elapsed, the pressure cooker will "beep" and automatically switch to "Keep-Warm" mode. The digital display will show the number of hours it has been on "Keep-Warm," beginning with "OH."
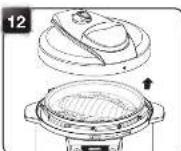
Open the lid by turning it counterclockwise to unlock it. Remove the lid.
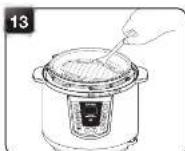
Check food for doneness. If cooking is complete, remove food for serving.
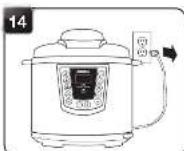
Once serving is complete, press the POWER button to turn the pressure cooker off. Unplug from the power outlet when not in use.

- It is possible that some pressure may build up to the pressure cooker while slow cooling. If the kD does not open when the pressure cooker switches to "Keep Warm," allow it to cool as that any built-up pressure may disappear. If pressure is normal the float area will be in its "down" position.

HINT8
- The "Keep Warm" sitting is great for keeping food warm and delicious while serving. However, do not leave food on "Keep-Warm" for longer than 12 hours.

PRESSURE LEVELS
The Aroma® Digital Pressure Cooker includes three pressure settings for a variety of cooking options. The table below gives an approximate pressure level that each pressure setting will reach.
| PRESSURE SETTING | APPROXIMATE PRESSURE LEVEL (pounds per square inch) | |
| High 9.5 to 10.5 psi | ||
| Medium 4.5 to 8.0 psi | ||
| Low Below 4.5 psi | ||

TO BROWN
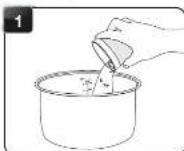
Add food to be browned/aautéed into the inner cooking pot.
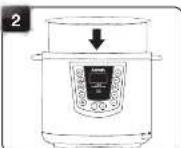
Place the inner cooking pot into the pressure cooker.
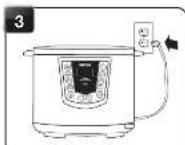
Plug the power cord into an available power outlet.
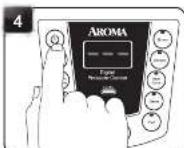
Press the POWER button to turn the pressure cooker on. Each button's indicator light will flash and the digital display will show three dashes.
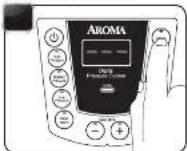
Press the BROWN button.
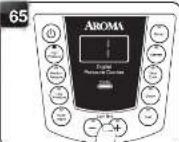
The digital display will begin with a "1" representing one minute of browning time. Press the COOK TIME - or COOK TIME + buttons to adjust the browning time between 1 and 40 minutes.

TO SLOW COOK
The steam vent should be open when slow cooking.
Begin slow cooking by following steps 1 to 6 of "To Simmer" beginning on page 14.
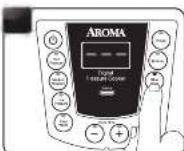
Press the SLOW COOK button. The di
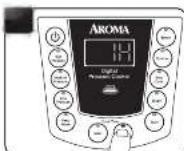
The digital did begill begin with a "1H" representing one hour of slow cooking time. Press the COOK TIME - or COOK TIME + buttons to adjust the cooking time between 1 hour and 10 hours.
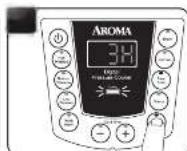
Once the needed time is selected, press the START button to begin simmering. The COOKING indicator light will illuminate and the pressure cooker will begin cooking.
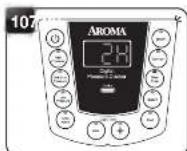
counting down from the selected cook time.

- Do not fill above the "MWC" line in the inner cooking pot. - Before slow cooking, check that the steam vent is set to one of the two "OPEN VENT" positions. If the steam vent is closed, the pressure cooker will built up large amounts pressure and may affect slow cooking results.

TO SIMMER (CONT.)
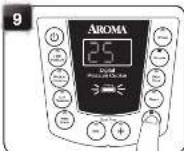
Once the needed time is selected, press the START button to begin simmering. The COOKING indicator light will illuminate and the pressure cooker will begin cooking.
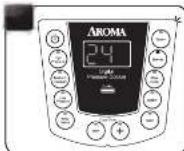
The digital display will begin counting down from the selected cook time.
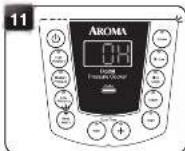
Once the selected time has elapsed, the pressure cooker will "beep" and automatically switch to "Keep-Warm" mode. The digital display will show the number of hours it has been on "Keep-Warm," beginning with "OH."
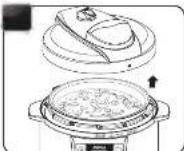
Open the lid by turning it counterclockwise to unlock it. Remove the lid.
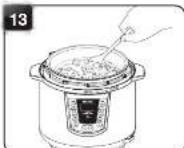
Check food for doneness. If cooking is complete, remove food for serving.
16
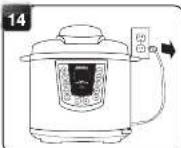
Once serving is complete, press the POWER button to turn the pressure cooker off. Unplug from the power outlet when not in use.


- It is possible that some pressure may build up in the pressure cooker while simmering. I need it does not open when the pressure cooker switches to "Keep Warm," allow it to cool so that any built up pressure may disappear. I pressure is normal, the foot velva will be in by "down" position.
- The "Keep-Warm" setting is great for keeping food warm and delicious while serving. However, do not have kind on "Keep-Warm" for longer than 12 hours.

TO BROWN (CONT.)
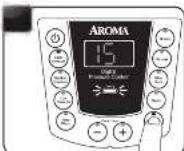
Once the needed time is selected, press the START button to begin browning. The COOKING indicator light will illuminate and the pressure cooker will begin hoating.
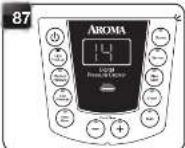
The digital display will begin counting down from the selected cook time in one minute increments
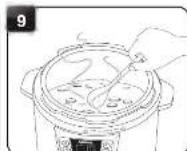
Using a long-handled wooden spoon, brown/sauté food as needed.
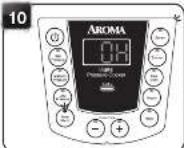
Once the selected time has elapsed, the pressure cooker will "beep" and automatically switch to "Keep-Warm" mode. The digital display will show the number of hours it has been on "Keep-Warm," beginning with "OH."
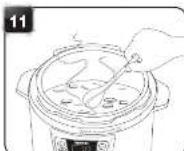
Check food for doneness. If cooking is complete, remove food.
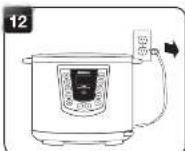
Press the POWER button to turn the
pressure cooker off. Unplug from
the power outlet when not in use.

CADITION
- Only use utensils safe for use on nonstick coatings. Metal utensils will damage the inner cooking pot's nonstick coating.

TO SIMMER
The steam vent should be open when simmering.
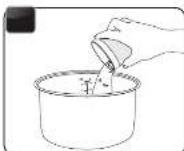
Add food to be simmered into the inner cooking pot.

Place the inner cooking pot into the pressure cooker.
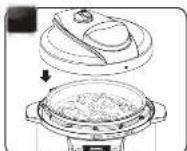
Close the lid securely onto the pressure cooker, turning it clockwise so that it locks into place. There will be an audible "click" when the lid locks closed.
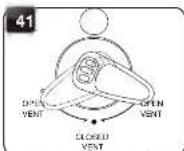
Move the steam vent to one of the "OPEN VENT" positions.

TO SIMMER (CONT.)
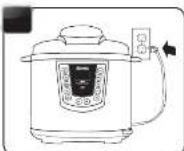
Plug the power cord into an available power outlet.
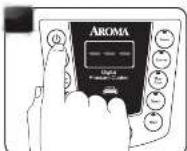
pressure cooker on. Each button's indicator light will flash and the digital display will show three dashes.
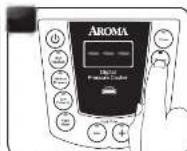
Press the SIMMER button. Press the P
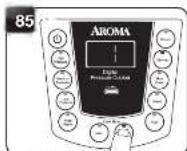
OTHER digital display will begin with a "1" representing one minute of simmering time. Press the COOK TIME - or COOK TIME + buttons to adjust the cooking time between 1 minute and 5 hours. Once the digital display passes 59 minutes, the digital display will move up in one hour increments, displayed as "1H," "2H," and so on.

- Do not ll above the "MAX" line in the inner cooking pot.
- Before simmering, check that the steam vent is set to one of the two "OPEN VENT" positions. The steam vent is
Close: The pressure cooker will build up large amounts pressure when simmering and affect simmering results.

- Loading the COOK TIME button down will increase time in 10 minute increments.