
LTV13HD - Fernseher VIVO - Kostenlose Bedienungsanleitung
Finden Sie kostenlos die Bedienungsanleitung des Geräts LTV13HD VIVO als PDF.


Benutzerfragen zu LTV13HD VIVO
0 Frage zu diesem Gerät. Beantworten Sie die, die Sie kennen, oder stellen Sie Ihre eigene.
Eine neue Frage zu diesem Gerät stellen
Laden Sie die Anleitung für Ihr Fernseher kostenlos im PDF-Format! Finden Sie Ihr Handbuch LTV13HD - VIVO und nehmen Sie Ihr elektronisches Gerät wieder in die Hand. Auf dieser Seite sind alle Dokumente veröffentlicht, die für die Verwendung Ihres Geräts notwendig sind. LTV13HD von der Marke VIVO.
BEDIENUNGSANLEITUNG LTV13HD VIVO
text_image
Vivo® ... Altiv and Viviad LTV13HD 13.3" LCD TV With HD Tuner Vivo® ... Altiv and Viviad Owner's Operation Manual * Design and specifications are subjected to change without prior notice www.vivotvs.comLCD TV
Warning
To prevent fire or shock hazard. Do not use this plug with an extension cord. Receptacle or other outlet unless the blades can be fully inserted to prevent blade exposure. Do not expose this appliance to rain or moisture.
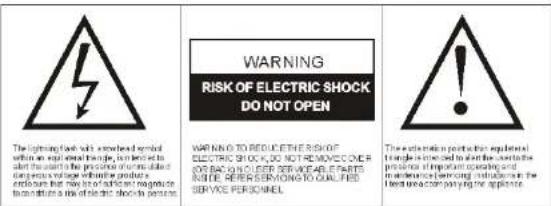
The lightning flash with a snowhead symbol within an equal spectral range, is intended to start the start to the presence of uncontrolled dangerous voltage within the product enclosure that may be of sufficient magnitude to constitute a risk of electric shock to persons.
WARNING TO REDUCETHE RISK OF ELECTRIC SHOCK, DO NOT REMOVE OVER FOR BACKNOUSER SERVICEABLE PARTS INSIDE, REFER SERVIONG TO QUALIFIED SERVICE PERSONNEL
The education point within equilateral triangle is intended to alert the user to the presence of important operating and maintenance (severing) instructions in the test use a companying the applicant.
Important Safety Precautions
- Read these instructions.
- Keep these instructions.
- Heed all warnings.
- Follow all instructions
- Do not use this apparatus near water.
- Clean only with dry cloth.
- Do not block any ventilation openings, Install in accordance with the manufacturer's instructions
- Do not install near any heatsources such as radiators, heat registers, stoves or other apparatus (including amplifiers) that produce heat.
- Do not defeat the safety purpose of the polarized or grounding-type plug. A polarized plug has two blades with one wider than the other. A grounding type plug has two blades and a third grounding prong. The wide blade or the third prong is provided for your safety. If the provided plug does not fit into your outlet, consult an electrician for replacement of the obsolete outlet.
- Protect the power cord from being damaged particularly at plugs, convenience receptacles, and the point where they exit from the product.
- Unplug this apparatus during lightening storms or when unused for long periods of time.
- Refer all servicing to qualified service personnel, Servicing is required when the product has been damaged in any way, such as power supply cord or plug is damaged. Liquid has been exposed to rain or moisture, does not operate normally or has been dropped.
LCD TV
Table of Contents
Warning....1
Table of Contents....2
Product Introduction....2
Safety Precaution....3
Safety....4
Control Panel....6
LCD TV Panel(continued)....7
Remote Control....8
Battery Replacement....9
Connecting To Satellite Receiver Decoder....10
Channel Selection....11
Channel Return....12
TV and DTV Searching....13
Video....14
Audio....17
TV....18
Setup....22
Parental....24
Mediaplayer....26
Connecting To Exterior Devices....28
Troubleshooting....29
Product Specification....30
Product introduction
- Production Introduction
Thank you for your purchasing the latest generation high definition LCD TV. Endowed with high display quality and light weight, it is power-saving and radiationless with high sensitivity television reception. This LCD TV will bring you safe & comfortable brand-new visual experience. Applying color active matrix TFT with brand-new technologies, the product can provide high quality display image, flicker free television, VCD & DVD programs. In addition, it can be used as definition digital television or computer display. We believe the product will surely make you satisfied.
LCD TV
Product Specification
Product name: LCD TV
◆ System: PAL/BG
◆ Power supply: DC 12V=3A
Power:<36W
(Note: Specifications to change without notice. Pictures for reference only, The picture is only for reference, the products are subject to material object, the power of interpretation belongs to our company)
LCD TV
Safety Precaution
◆Do not place the TV on unstable places, from which it may be fell off.
◆Do not expose the TV to extreme temperature and humid environment.
◆ Avoid subjecting the TV to direct sunlight and other heat sources.
◆Do not put the TV into any liquid.
◆Do not put anything inside the TV, or place water container on top of the TV.
◆ In thunder rainy days (especially with lightening), please plug out the power plug and antenna plug
Do not step on the power cable, or tangle them together.
◆ Avoid overload of the exterior electric outlet to prevent fire hazard of electric shock,
◆ Clean the TV with dry and soft cloth (without evaporative matter).
◆If your TV is broken, do not repair it by yourself, but contact the maintenance personnel.
◆If the remote control is left unused for a long time, please take the batteries out and store them in dry places.
◆Avoia dropping the remote control.
◆If the LCD TV is installed for exhibition purpose, please do not place the overheated part on the ground or
carpet to prevent accident.
◆Please install the TV at proper position, such as wall or ceiling. Please install it under the guidance of
Professional staff. (When used or exhibit, please do not place the TV horizontally or vertically on the ground.)
This device complies with Part 15 of the FCC Rules. Operation is subject to the following two
conditions:(1)this device may not cause harmful interference, and (2)this device must accept
any interference received, including interference that may cause undesired operation.
◆ This equipment should avoid from waterdrops "and" things that fill with liquid, such as vases,
cannot be placed on this equipment.
◆ This equipment is predetermined to work constantly (unless adding switch on this equipment)
◆ Please disconnect the power cord before long time unused.
If a television is not positioned in a sufficiently stable location, it can be potentially hazardous due to
falling. Many injuries, particularly to children, can be avoided by taking simple precautions such as:
Using cabinets or stands recommended by the manufacturer of the television,
Only using furniture that can safely support the television.
Ensuring the television is not overhanging the edge of the supporting furniture. Not placing the television on bell furniture (for example, such objects or backboard) without
Not placing the selection of laufarniture (or example, capsules to anchoring both the furniture and the television to a suitable support).
Not standing the televisions on cloth or other materials played between the television and
supporting furniture
Educating children about the dangers of climbing on furniture to reach the television or its
controls
Basic operations
Power on/off
- Use AC 100=240V power outlet for the TV power supply.
- If the screen of TV is not on, please press the power button on the remote control or on the TV.
- If you want to shut off the TV temporary, please press the power button on the remote control or on the TV.
- If you want to shut off the TV completely, please plug out the power plug.
Auto screen shut off function
- In TV/AV state, the TV will enter idle state if there is no signal input within 15 minutes.
2.In PC state, the TV will enter idle state if there is no signal input within 2 minutes.
Pre-shut off memory
- The setting and tuning of picture and sound will be saved when the TV is shut off, which will be working in the pre-shut off state when the TV is turn on again.
Precaution of signal source application
- If PC signal source is used, please first set the resolution of the PC display card as the following modes:
11280X800 50Hz, 1C24X768 60Hz, 800X600 60Hz, 640X480 60Hz - If there is line-by-line output of the signal used by the user, signal source with line-by-line output is recommended.
LCD TV
Safety
Please immediately pull out the AC power plug from adapter if there is an abnormal sound or smell or the LCD TV has sound but no picture, and the contact after sales support.


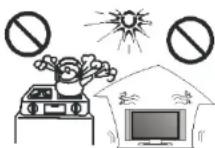
The LCD TV should be kept free from rain, damp and dust to prevent electrical shock and short circuits. Do not cover the ventilation openings with table clothes, curtains, newspapers etc.
The LCD TV should be kept away from high temperature objects or direct sunlight. It requires good ventilation. At least 10cm between the LCD TV and other appliances or built-in cabinet walls.
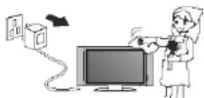
When you wipe the front cabinet, please make sure the power plug is pulled out and use a soft, dry, lint-free cloth and handle it with care. Do not repeatedly wipe the panel, nor scrape, tap or strike the panel with a hard object.
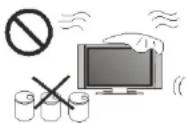
Do not wipe the LCD TV with any petrol, chemical or alcohol based solvents, it will damage of the product of the panel and cabinet.
LCD TV
Troubleshooting
No picture and No sound

[NO TEXT]
Possible causes:
*Check whether the product is turned on.
*Try another channel. The problem may be with the broadcast.
* Is the power cord inserted into wall power outlet?
*Check your antenna direction and/or location
Test the wall power outlet, plug another product's power cord
Into the outlet where the product's power cord was plugged in.
No audio

×
Possible causes:
*The volume is too low or muted.
*Incorrect sound system.
solutions:
*Press Volume key to turn up the volume;
*Press Mute key to cancel Mute mode.
*Change the sound system in the menu.
Snow and noises:

[Non-Text]
possible causes:
The cable is damaged or is loose;
Incorrect channel preset;
Improper antenna positioning.
solutions:
Check whether the connection of the antenna cable
and other cables are correct;
Reset channels or fine tune the channel;
Adjust the direction of the antenna.
No or poor color or poor picture

[Non-Text]
Possible causes:
Adjust Color in menu option.
'Keep a sufficient distance between the product and the VCR.
*Try another channel. The problem may be with the broadcast
"Are the video cables installed properly?"
'Activate any function to restore the brightness of the picture.
The remote control doesn't work

×
Possible causes:
*Check to see if there is any object between the product and the remote
control causing obstruction. Ensure you are pointing the remote control
directly at the TV.
'Ensure that the batteries are installed with correct polarity (+10 +, -10 -).
'Ensure that the correct remote operating mode is set: TV, VCR etc.
'Install new batteries
LCD TV
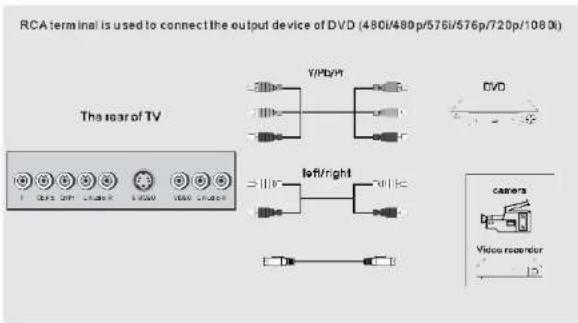
Connection To Exterior Devices
text_image
RCA terminal is used to connect the output device of DVD (480/480p/576i/576p/720p/1080i) The rear of TV V/MPa/H DVD left/right CAMERA Video receptor 12Notes:
- VIDEO/S-VIDEO use a common audio in.
- Y-Pb-Pr of DVD is corresponding to Y-Pb-Pr of LCD TV.
LCD TV
Safety
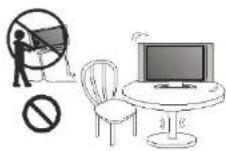
Do not place the LCD TV on an unstable surface.
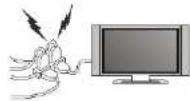
Do not place the power cord or other cables across a walkway in case II is trampled on. Do not overload any power cord or power socket.
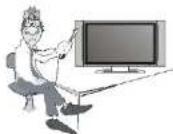
Do not disassemble the back cover as it contains high voltage parts inside and may cause electric shock. Internal adjustments and checks should only be conducted by a qualified technician.
Do not place naked flame sources, such as lit candles on or near the LCD TV.
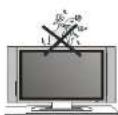
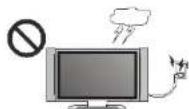
Pull out the power cord and antenna cable during electrical storms, keep LCD TV damage from possible electrical surge.
LCD TV
Control panel
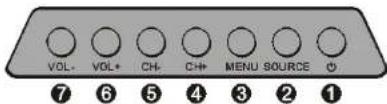
The control button for front panel is on the top of TV. Introduction for Each Key
text_image
VOL- VOL+ CH- CH+ MENU SOURCE ⑦ ⑥ ⑤ ④ ③ ② ①1
This button can be used to switch the set between ON and Standby.
② MENU
Press this button to display OSD menu.
③ SOURCE
Press this button to display the source list.
④ CH+
Channel increasing short cut key; increase the channel No. and select the next option in the menu.
⑤ CH-
Channel decreasing short cut key; decrease the channel No. and select the last option in the menu.
⑥ VOL+
Volume increasing short cut key; enter into the next menu and adjust OSD options(increasing).
⑦ VOL -
Volume decreasing short cut key; enter into the next menu and adjust OSD options (decreasing).
LCD TV
Media player
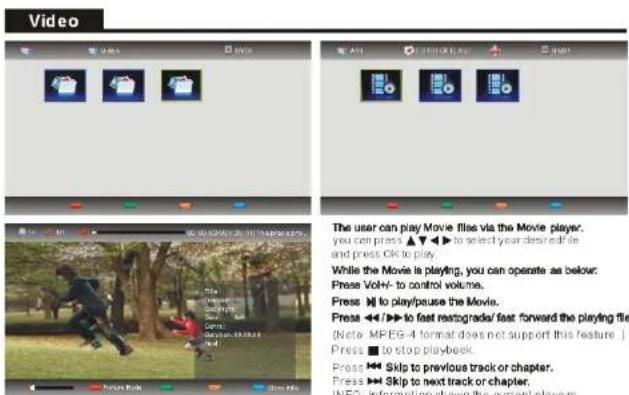
The user can play Movie files via the Movie player. you can press ▲▼▶ to select your desired file press OK to play. While the Movie is playing, you can operate as below: Press VoH- to control volume. Press ■ to play/pause the Movie. Press ◀◀/▶▶ to fast rest/grade/ fast forward the playing file. (Note: MPES-4 format does not support this feature.) Press ■ to stop playbook. Press ▶◀◀ Skip to previous track or chapter. Press ▶◀◀ Skip to next track or chapter. INFO. Information shows the current players
LCD TV
Media player
Below shortcut keys will be only available in Multimedia mode.
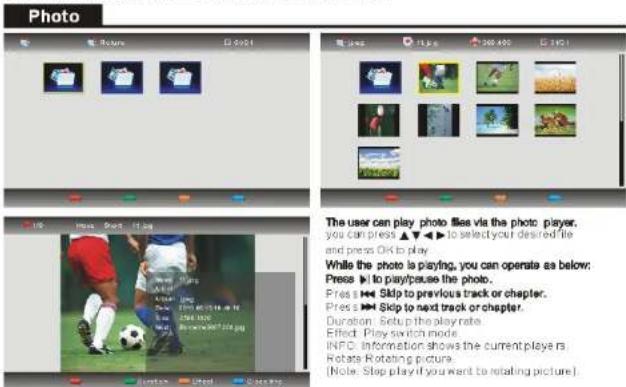
The user can play photo files via the photo player, you can press ▲▼◀▶ to select your desired file and press OK to play
While the photo is playing, you can operate as below:
Press ▶ to play/pause the photo. Pres ▶ Skip to previous track or chapter. Pres ▶ Skip to next track or chapter. Duration: Setup the play rate. Effect: Play switch mode. INFO: Information shows the current players Rotate Rotating picture. (Note: Stop play if you want to rotating picture)
text_image
Music None Project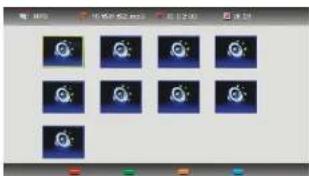
natural_image
Grid of nine square icons with circular and star-like patterns, no text or symbols present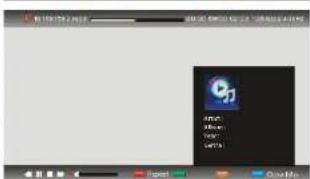
text_image
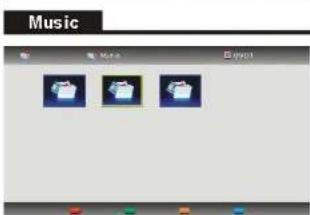
CD File Path C:\Users\1234\10000\1234\10000\1234\10000\1234\10000\1234\10000\1234The user can play Music Files via the Music player. you can press ▲▼▶ to select your desired drive and press OK to play. While the Music is playing, you can operate as below: Press Vol-/- to control volume. Press ■/□ play/please the music. Press ◀/▶ to fast reazgrade/ fast forward the playing files. Press ■ to stop playback. Press ✅ Skip to previous track or chapter. Press ✅ Skip to next track or chapter. Repeat: Single play play all. INFO: Information shows the current players
LCD TV
LCD TV Panel(continued)
text_image
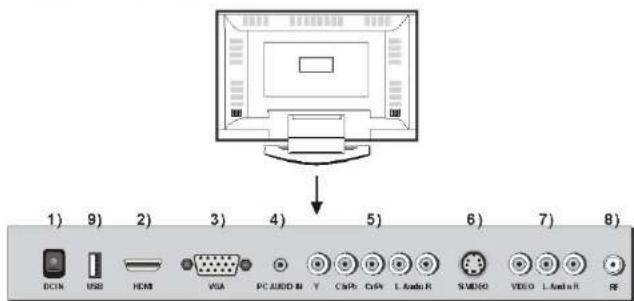
1) 9) 2) 3) 4) 5) 6) 7) 8) DCIN USB HDMI VGA PC AUDIO IN Y ChIP: ChIP L Audio R S VISO VIDEO L Audio R RF1)DC IN:
DC power input 12V.
2)HDMI
High-definition multimedia interface.
Note: Acceptable video signal 480p/576p/720p/1080i/1080p.
3)VGA:
Input terminal of simulation signal of PC.
4)PC AUDIO IN:
Sound Input terminal of VGA Input.
5)Y Cb/Pb Cr/Pr L-Audio-R
Component input terminal and audio left/right.
6)S-VIDEO:
Colour and brightness separation input terminal.
7)VIDEO L-Audio-R
This can be connected to the left/right RCA video out connection of any vide resource.
8)RF
Antenna/close circuit TV or Digital TV terminal.
9)USB:
It is used to updating the software of the DVB-T and ATV, and it should only be
operated by a qualified TV technician.
User can access multi-media files stored in the USB device.
The supported format includes :
*.dat, *.vob, *.mpg and *.avi video formats. Besides, *.jpg, *.bmp and *.mp3.
LCD TV
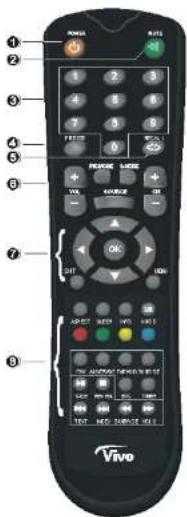
Descriptions of Television Remote Control
text_image
1 2 3 4 5 6 7 8 9 10 11 12 13 14 15 16 17 18 19 20 21 22 23 24 25 26 27 28 29 30 31 32 33 34 35 36 37 38 39 40 41 42 43 44 45 46 47 48 49 50 51 52 53 54 55 56 57 58 59 60 61 62 63 64 65 66 67 68 69 70 71 72 73 74 75 76 77 78 79 80 81 82 83 84 85 86 87 88 89 90 91 92 93 94 95 96 97 98 99 100POWER Switches the set between ON and STANDBY,
② MUTE Switchee the sound on or off.
③ 0—9 Figures 0-9 are used to directly input channel number.
④ FREEZE Freeze frame.
③ RECALL Returns to the channel selected last time.
③ VOL+/VOL- increase/decrease the sound level.
PIC.MODE Selects the different picture mode directly.
6.MODE Select the different sound mode directly.
SOURCE Displays the source list of input signal
CH+/CH- Select a program.
Decrease/increase the option value.
◀/▶ Selects the previous/next function option.
OK Accepts your selection or displays the current mode.
EXIT Returns to TV viewing from any menu.
MENU Selects a menu.
⑤ | ASPECT Selects the different image format.
SLEEP Sets the sleep timer.
INFO Shows the present screen information
AUDIO [1] Press AUDIO Chang audio mode left, right, mono, stereo.(Nicaam function.)
RED Uses in TXT, DTV and TV
GREEN Uses in TXT, DTV and TV.
YELLOW Uses In TXT, DTV and TV.
CYAN Uses in TXT, DTV and TV.
FAN Displays the selected favorite programs.
ADD/ERASE Presss to add or delete favorite channels.
TV/RADIO Changes audio mode:left, right, mono, stereo
SUBTITLE: Recalls your preferred subtitle in digital mode.
EPG To show the Electronic Program Guide during on-ment state only.
TIMER Displays timer.
SIZE Changes the size of current page.
REVEAL Displays the characters hided.
TEXT Teletexts switching.
INDEX Asks for the list of main TV letter broadcast page number.
SUBPAGE Displays the current sub-page.
HOLD Holds the current page and prevent against being updated.
▶ Plays or pause
■ Stops the disc.
Skips to previous track or chapter
Skips to next track or chapter.
Fasts reverse.
Fasts forward.
Handle the remote control with care. Avoid falling off or being trampled or splashed with liquids.
LCD TV
Parental
text_image
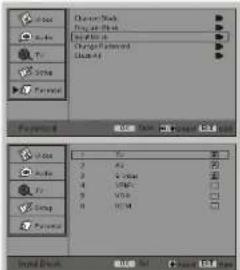
View Action Action Path Action Path Action Forward Action Path Preview Preview 1 Preview 2 Preview 3 Preview 4 Preview 5 Preview 6 Preview 7 Preview 8 Preview 9 Preview 10 Preview 11 Preview 12 Preview 13 Preview 14 Preview 15 Preview 16 Preview 17 Preview 18 Preview 19 Preview 20 Preview 21 Preview 22 Preview 23 Preview 24 Preview 25 Preview 26 Preview 27 Preview 28 Preview 29 Preview 30 Preview 31 Preview 32 Preview 33 Preview 34 Preview 35 Preview 36 Preview 37 Preview 38 Preview 39 Preview 40 Preview 41 Preview 42 Preview 43 Preview 44 Preview 45 Preview 46 Preview 47 Preview 48 Preview 49 Preview 50 Preview 51 Preview 52 Preview 53 Preview 54 Preview 55 Preview 56 Preview 57 Preview 58 Preview 59 Preview 60 Preview 61 Preview 62 Preview 63 Preview 64 Preview 65 Preview 66 Preview 67 Preview 68 Preview 69 Preview 70 Preview 71 Preview 72 Preview 73 Preview 74 Preview 75 Preview 76 Preview 77 Preview 78 Preview 79 Preview 80 Preview 81 Preview 82 Preview 83 Preview 84 Preview 85 Preview 86 Preview 87 Preview 88 Preview 89 Preview 90 Preview 91 Preview 92 Preview 93 Preview 94 Preview 95 Preview 96 Preview 97 Preview 98 Preview 99 Preview 100Input Block
Press the "▲/▼" button to select the "Input Block" item, and then use "▶" or "OK" buttons to enter input block sub-menu.
Press the "▲/▼" button to highlight your selection. Press "OK" button to lock (display "☐") or unlock (display "☐")
text_image
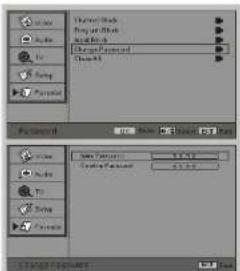
Change Mask Change Password Change Password Change Mask Paste Paste Paste Paste Paste Paste Paste Paste Paste Paste Paste Paste Paste Paste Paste Paste Paste Paste Paste Paste Paste Paste Paste Paste Paste Paste Paste Paste Paste Paste Paste Paste Paste Paste Paste Paste Paste Paste Paste Paste Paste Paste Paste Paste Paste Paste Paste Paste Paste Paste PasteChange Password
Press the "▲/▼" button to select the 'Change Password' item, and then use "▶" or "OK" buttons to enter change password sub-menu.
Press the "▲/▼" button to select ay "New Password" input your new password. "Confirm Password" confirm your password. Note: The initial password is 0000.
text_image
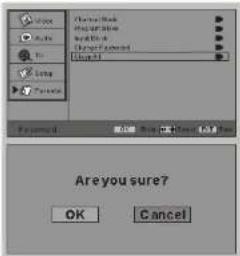
Name Name Name Name Name Name Name Name Name Selected Are you sure? OK CancelClean All
Press the "▲/▼" button to select the "Clean All" item, and then use "▶" or "OK" buttons to enter clean all.
Press the "◀/▶" button to select "OK" or "Cancel" item, and then use "OK" button to confirm your selection.
LCD TV
Parental
- Press the "MENU" button on the remote control to enter the OSD menu, then press "▲/▼" button to select the "Parental" menu.
- Press the "▶" or "OK" button to enter the "Parental" menu setting, use "▲/▼" to move the menu bar, and then press "◀/▶" button to adjust the value of selected item.
- Press "MENU" button to return to the main menu.
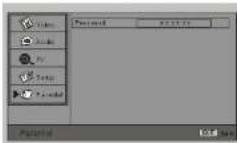
Password
Press the "▲/▼" button to select the "Password" item, and then use "▶" or "OK" to enter, then input password 0000 to enter password sub-menu.
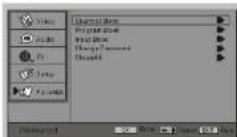
Channel Block
Press the *▲/▼" button to select the "Channel Block" item, and then use "▶" or "OK" buttons to enter channel block sub-menu.
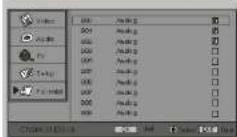
Press the "▲/▼" button to highlight your selection. Press "OK" button to lock (display "☐") or unlock (display "☐")
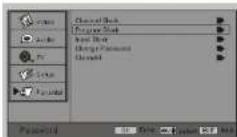
Program Block
Press the "▲/▼" button to select the "Program Block" item, and then use "▶" or "OK" buttons to enter program block sub-menu.
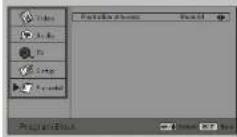
Press the "▲/▼" button to select the "Restriction of Access" item, and then use "◀/▶" buttons to select "Block All", "No Block", "Block R and above", "Block AV and above", "Block MA and above", "Block M and above", "Block PG and above", or "Block G and above" restriction of access.
LCD TV
Battery Replacement
text_image
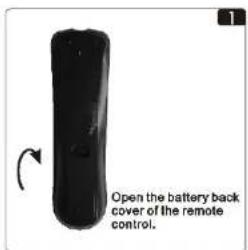
Open the battery back cover of the remote control.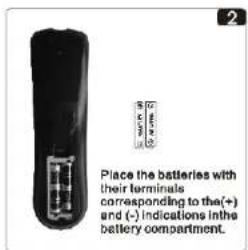
text_image
Place the batteries with their terminals corresponding to the(+) and (-) indications inthe battery compartment.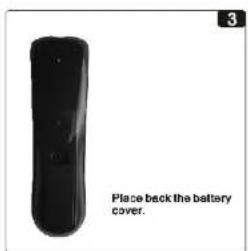
text_image
Place back the battery cover.Notes:
- If the remote control will not be used for a long time, please take out the batteries and place the remote control in a shady, cool and dry place.
- Be careful with handling damaged or leaking batteries wash your hands with soap and water after handling them.
- Do not throw away old batteries at will. Enquire your local government authority about recycling or the proper disposal system.
LCD TV
Connecting To Satellite Receiver Decoder
text_image
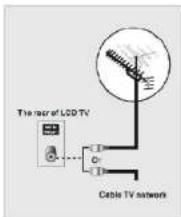
The rear of LCD TV Cable TV networkIn order to receive TV program, signal should be received from one of the following signal sources:
◆Outdoor antenna.
◆ Cable TV network
Satellite broadcast network
-
In these three cases, the input cable of antenna or TV network should be plugged in the 75 Ohm coaxial cable jack at the rear side of LCD TV.
-
If you are using indoor antenna and the effect of TV program is not satisfactory, you can adjust the position of the antenna until the picture is clear.
When installing LCD TV, please use special 75 Ohm coaxial Cable. If other coaxial cable is used, there may be noise and image disturbances.

Connecting to satellite receiver or decoder
text_image
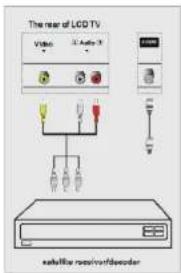
The rear of LCD TV Viper Audio 3 Satellite receiver/decoderIn order to receive TV programs emitted by satellite, a satellite receiver should be connected to the rear of the LCD TV. Mean while, in order to receive encoded emit signal, a decoder should be connected to the rear of LCD TV.
Using the coaxial cable
Connect the coaxial cable connectors to
◆The decoder output terminal.
◆The antenna input termina
If you want to connect the TV to satellite receiver (or decoder) and video recorder at the same time, the following operation should be followed:
◆Connect receiver (or decoder) to video recorder.
◆Connect video recorder to LCD TV, or connect receiver (or Decoder) directly to LCD TV.
LCD TV
Setup
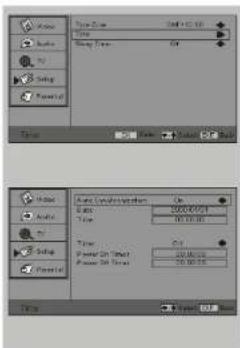
Time
Press the "▲/▼" button to select the "Time" item, and then use ►' or "OK" buttons to enter the time sub-menu.
Press the "▲/▼" button to highlight your selection, and then use *◄/►* buttons to select "Auto Synchronization" on or off. Press numbered buttons to set the "date", "time", "Power On Timer" or "Power Off Timer".
Note:
Pressing the button to turn off the TV, the setup time will be retained. If the unit is unplugged, or main power is otherwise disrupted, the memory for time will be lost. The following items are active only when you select "Off" of "Auto Synchronization" and select "On" of "Timer".
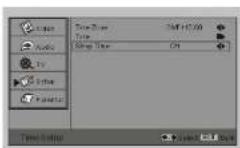
Sleep Timer
Press the "▲/▼" button to select the "Sleep Timer" item, and then use "◄/►" buttons to select 10 Minutes, 20 Minutes, 30 Minutes, 40 Minutes, 50 Minutes, 60 Minutes, 90 Minutes, 120 Minutes. Off sleep timer.
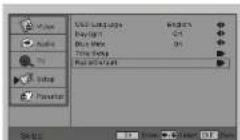
Res et Default
Press the "▲/▼" button to select the "Reset Default" item, and then use "▶" or 'OK' buttons to enter reset default sub-menu.
Press the "◀/▶" button to select "OK" or "Cancel" item, and then use "OK" button to confirm your selection. OK: To reset default. Cancel: To return last menu.
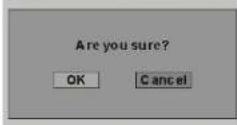
Note:
This will only reset the items in the setup menu, but the protected-items is not included (Must enter Pin code first.)
LCD TV
Setup
- Press the "MENU" button on the remote control to enter the OSD menu, then press "▲/▼" button to select the "Setup" menu.
- Press the "▶" or "OK" button to enter the "Setup" menu setting, use "▲/▼" to move the menu bar, and then press "◀/▶" button to adjust the value of selected item.
- Press "MENU" button to return to the main menu.
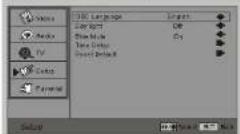
OSD Language
Press the '▲/▼' button to select the "OSD Language" item, and then use * ◀/▶ "button to select desired OSD Language.
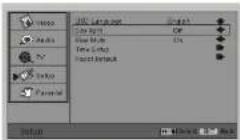
Day light
Press the *▲/▼* button to select the "Day light" item, and then use◄/► "button to turn the day light on/off.
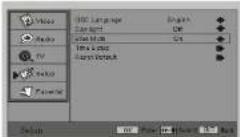
Blue Mute
Press the *▲/▼* button to select the "Blue Mute" item, and then use *◄/► *button to turn the blue mute on/off.
text_image
Audio Audio Audio Mask Audio Mask Audio Mask Audio Mask Audio Mask Audio Mask Audio Mask Audio Mask Audio Mask Audio Mask Audio Mask Audio Mask Audio Mask Audio Mask Audio Mask Audio Mask Audio Mask Audio Mask Audio Mask Audio Mask Audio Mask Audio Mask Audio Mask Audio Mask Audio Mask Audio Mask Audio Mask Audio Mask Audio Mask Audio Mask Audio Mask Audio Mask Audio Mask Audio MaskTime Setup
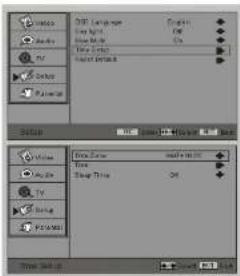
Press the "▲/▼" button to select the "Time Setup" item, and then use "▶" or "OK" buttons to enter the time setup sub-menu.
Time Zone
Press the "▲/▼" button to select the "Time Zone" item, it will display the time zone.
LCD TV
Watching Television Programs
Connect the power cord, press ⏻ button to power on the television, then press the SOURCE button to select TV channel mode to watch television programs.
TV → AV → S-VIDEO → YPBPR → VGA → HDMI → MULTIMEDIA
Select Channels Via Program No.
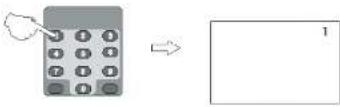
- If you want to select program no. from 0-9: directly press numeral key to input the program no., it will enter into the selected program, e.g. select program no. 1
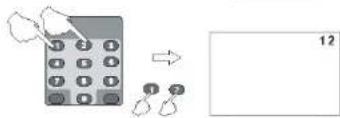
- If you want to select program number from 10-10+: Input the channel number you desired, e.g. select channel 12.
- If you want to select program number from 100-100+: Input the channel number you desired, e.g. select channel 100.
text_image
Diagram showing a calculator with icons and an arrow pointing to a blank page, labeled with number 12.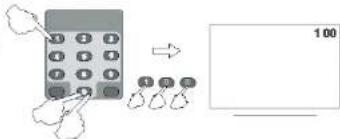
text_image
Diagram showing a calculator and a blank display with number 100, illustrating a calculation or counting process.Channel select
- Use the buttons on the television panel to conduct channel selection. First press "CH+/−" buttons on the front panel to enter into channel selection mode state, then press "CH+/−" buttons on front panel to select channel.
- "CH+/-" buttons of the remote control may also be applied to conduct channel selection.

LCD TV
Channel Return
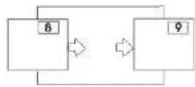
Return to previous channel
Press RECALL button on the remote control to return to previous channel.

Volume control
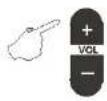
Use the button VOL+/VOL- of television panel to increase/decrease the volume.
VOL+/VOL- buttons on the remote control can also adjust the volume.

Sound elimination
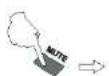
Press "MUTE" button to eliminate the sound. Press the button again for audio recovery.
System state display
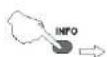
Press "INFO" button of the remote control, then it will display the current channel number, current input mode and relevant information.
LCD TV
TV
Channel Edit
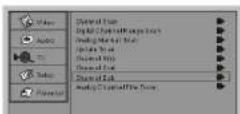
Press the "▲/▼" button to select the "Channel Edit" item, and then use "▶" or "OK" button to enter channel edit sub-menu.
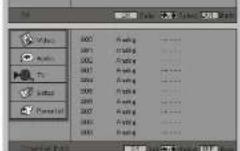
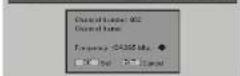
Press "▲/▼" button to select the channel in the list. Press "OK" button to display as follows:
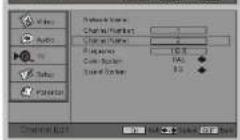
Channel Number
Select channel number and input a digital number you want.
Select channel number and then input digital number.
Frequency: Input the frequency number by directly pressing digital number.
Sound System:
It will display the local sound system.
It will display the local colour system
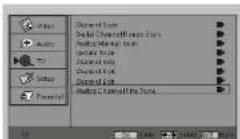
Analog Channel Fine Tune
Press the "▲/▼" button to select the "Channel
Edit Item, and then use "▶" or "OK" buttons to enter Analog Channel Fine Tune sub-menu
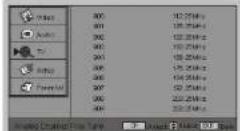
Then adjust the analog channel.
LCD TV
TV
text_image
Control Action Action Channel Range Bar Action Mode/Time Action Time Control Action Action Channel for Time Control Action Action Channel for Time Control Action Action Channel for Time Control Action Action Channel for Time Control Action Action Channel for Time Control Action Action Channel for Time Control Action Action Channel for Time Control Action Action Channel for Time Control Action Action Channel for Time Control Action Action Channel for Time Control Action Action Channel for TimeChannel Skip
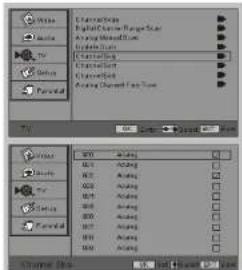
Press the "▲/▼" button to select the "Channel Skip" item, and then use "▶" or "OK" buttons to enter channel skip sub-menu.
Press the "▲/▼" button to choose an item, then press "OK" button to confirm or cancel your selection. When you select *☐*, it will skip channels.
text_image
charts Select Data Show Data Show Data Show Data Show Data Show Data Show Data Show Data Show Data Show Data Show Data Show Data Show Data Show Data Show Data Show Data Show Data Show Data Show Data Show Data Show Data Show Data Show Data Show Data Show Data Show Data Show Data Show Data Show Data Show Data Show Data Show Data Show Data Show Data Show Dots Show Data Show Data Show Data Show Data Show Data Show Data Show Data Show Data Show Data Show Data Show Data Show Data Show Data Show Data Show Data Show Data Show Data Show Data Show Data Show Data Show Data Show Data Show Data Show Data Show Data Show Data Show Data Show Data Show Data Show Data Show Data Show Data Show DataChannel Sort
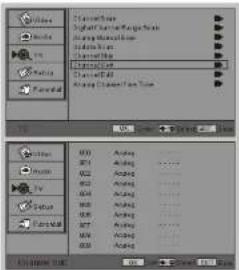
Press the "▲/▼" button to select the "Channel Sort" item, and then use "▶" or "OK" button to enter channel sort sub-menu.
Press "▲/▼" button to select the channel in the list. Press "OK" button to set.
LCD TV
TV AND DTV SEARCHING
Picture 1
Picture 2
Picture 3
Picture 4
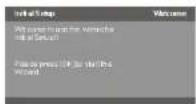
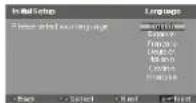
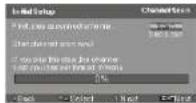
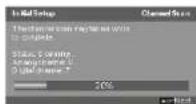
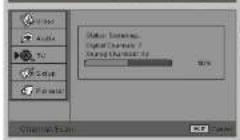
You will be prompted for initial setup when you turn on the TV for the first time after purchased. (as picture 1) First, you can use "UP ➕" or "DOWN ➕" button to select the Language (as picture 2). Second, please connect antenna correctly. Press "OK ➕" button on remote control to enter "Channel Scan" (as picture 3). Third, you can use "UP ➕" or "DOWN ➕" button to select the item "Scan" or "Skip Scan". If you choose "Scan" you should press "OK ➕" button to start auto searching (as picture 4).
LCD TV
Video
- Press the "MENU" button on the remote control to enter the OSD menu, then press "▲/▼" button to select the "Video" menu.
- Press the "▶" or "OK" button to enter the "Video" menu setting, use "▲/▼" to move the menu bar, and then press "◀/▶" button to adjust the value of selected item
- Press" MENU "button to return to the main menu.
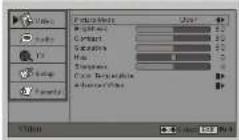
Picture Mode
Press the "▲/▼" button to select the "Picture Mode" item, and then use "◀/▶" button to select the Picture Mode.
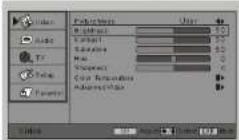
Brightness
Press the "▲/▼" button to select the "Brightness" item, and then use "◄/►" button to adjust the brightness.
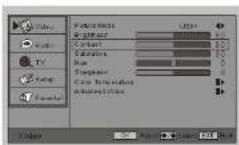
Contrast
Press the "▲/▼" button to select the "Contrast" item, and then use "◀/▶" button to adjust contrast ratio.
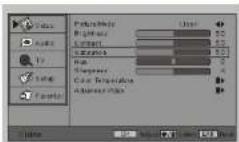
Saturation
Press the "▲/▼" button to select the "Saturation" item, and then use "◄/►" button to adjust saturation of the image.
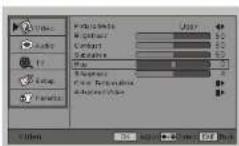
Hue
Press the "▲/▼" button to select the "Hue" item, and then use "◀/▶" button to adjust hue of the image.
Note: This function only works with NTSC input signal.
LCD TV
TV
text_image
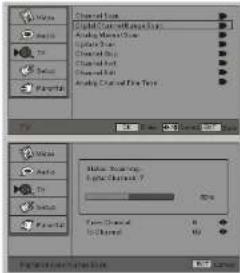
Audio Audio Mode Audio Mode (Inner/Outer) Audio Mode (Inner/Outer) Audio Mode (Inner/Outer) Audio Mode (Inner/Outer) Audio Mode (Inner/Outer) Audio Mode (Inner/Outer) Audio Mode (Inner/Outer) Audio Mode (Inner/Outer) Audio Mode (Inner/Outer) Audio Mode (Inner/Outer) Audio Mode (Inner/Outer) Audio Mode (Inner/Outer) Audio Mode (Inner/Outer) Audio Mode (Inner/Outer) Audio Mode (Inner/Outer) Audio (Inner/Outer) Audio Mode (Inner/Outer) Audio Mode (Inner/Outer) Audio Mode (Inner/Outer) Audio Mode (Inner/Outer) Audio Mode (Inner/Outer) Audio Mode (Inner/Outer) Audio Mode (Inner/Outer) Audio Mode (Inner/Outer) Audio Mode (Inner/Outer) Audio Mode (Inner/Outer) Audio Mode (Inner/Outer) Audio Mode (Inner/Outer) Audio Mode (Inner/Outer) Audio Mode (Interior) Audio Mode (Interior) Audio Mode (Interior) Audio Mode (Interior) Audio Mode (Interior) Audio Mode (Interior) Audio Mode (Interior) Audio Mode (Interior)Digital Channel Range Scan
Press the "▲/▼" button to select the "Digital Channel Range Scan" item, and then use "▶" or "OK" buttons to enter digital channel range scan sub-menu.
text_image
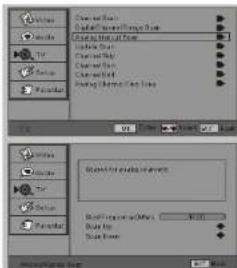
Close Image Close Image Close Image Close Image Close Image Close Image Close Image Close Image Close Image Close Image Close Image Close Image Close Image Close Image Close Image Close Image Close Image Close Image Close Image Close Image Close Image Close Image Close Image Close Image Close Image Close Image Close Image Close Image Close Image Close Image Close Image Close Image Close Image Close Image Open Text Text Name: Image Type: Image Color: Image Size: Image Color: Image Color: Image Color: Image Color: Image Color: Image Color: Image Color: Image Color: Image Color: Image Color: Image Color: Image Color: Image Color: Image Color: Image Color: Image Color: Image Color: Image Color: Image Color: Image Color: Image Color: Image Color: Image Color: Image Color: Image Color: Image Colors: Image Colors: Image Colors: Image Colors: Image Colors: Image Colors: Image Colors: Image Colors: Image Colors: Image Colors: Image Colors: Image Colors: Image Colors: Image Colors: Image Colors: Image Colors: Image Colors: Image Colors: Image Colors: Image Colors: Image Colors: Image Colors: Image Colors:Analog Manual Scan
Press the "▲/▼" button to select the "Analog Manual Scan" item, and then use "▶" or "OK" buttons to enter an analog manual scan su b-menu.
Use "▲/▼" button to select scan up/down and then press "▶" or "OK" to start up/down scan.
text_image
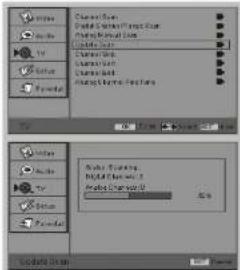
Classify Create New Object View Create New Object View Create New Object View Create New Object View Create New Object View Auto Channels NDA Channels 1 Auto Channels 2 Auto Channels 3 Auto Channels 4 Auto Channels 5Update Scan
Press the "▲/▼" button to select the "Update Scan" item, and then use "▶" or "OK" buttons to start searching. The channels you searched will be stored automatically.
Note:
- Locked channels will be skipped during the search.
- Selection of Tuner Modes Cable or Antenna Will affect the channel search.
When in Cable mode, the searched channels are "1\~135". When in Antenna mode, it will search "7\~69".
LCD TV
TV
- Press the "MENU" button on the remote control to enter the OSD menu, then press "▲/▼" button to select the "TV" menu.
- Press the "▶" or "OK" button to enter the "TV" menu setting, use "▲/▼" to move the menu bar, and then press "◀/▶" button to adjust the value of selected item.
- Press" MENU "button to return to the main menu.
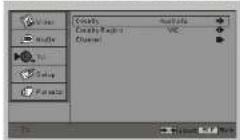
Country
It will display the country.
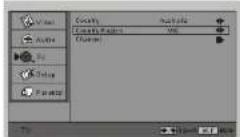
Country Region
Press the "▲/▼" button to select the "Country Region" item, and then use "◀/▶" buttons to select your location in Country Region.
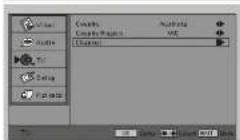
Channel
Press the "▲/▼" button to select the "Channel" item, and then use "▶" or 'OK' buttons to enter Channel sub-menu.
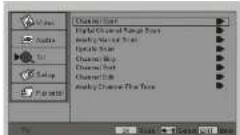
Channel Scan
Press the "▲/▼" button to select the "Channel Scan" item, and then use "▶" or "OK" buttons to start searching. The channels you searched will be stored automatically.
Note:
- Locked channels will be skipped during the search. - Selection of Tuner Modes Cable or Antenna Will affect the channel search. When in Cable mode, the searched channels are "1\~136". When in Antenna mode, it will search "7\~69".
LCD TV
Video
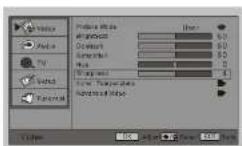
Sharpness
Press the "▲/▼" button to select the "Sharpness" item, and then use "◀/▶" button to adjust sharpness of the image.
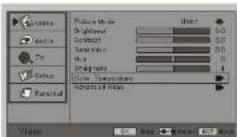
Color Temperature
Press the "▲/▼" button to select the "Color Temperature" item, and then use "▶" or "OK" buttons to enter the color temperature sub-menu.
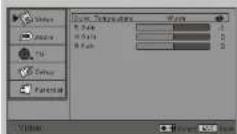
Press the "▲/▼" button to enter the sub menu, and then use "◀/▶" button to select the color temperature, such as Standard, Warm, Cool, User. When you choose "User", you can press *▲/▼" to move the menu bar, and then use *◀/▶" to adjust each value.
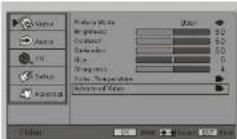
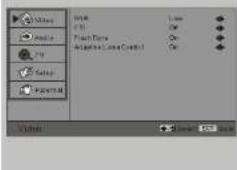
Advanced Video
Press the "▲/▼" button to select the "Advanced Video" item, and then use "▶" or "OK" buttons to enter the advanced video sub-menu.
text_image
OK Cancel Show Paste Save As Flash Style ActionScript Long Control On Windows Save... HelpYou can press "▲/▼" to move the menu bar, and then use "◀/▶" to adjust each item.
DNR(Off, Low, Medium, Strong): Selecting to control the sharpness and noise reduction. CTI(Off, Low, Medium, Strong): Select dynamic color improve level. Flesh Tone(On, Off): Selecting "On" to correct the flesh tone automatically. Adaptive Luma Control(On, Off): Selecting to control the luminance. This feature will set the contrast and brightness levels for optimum performance.
LCD TV
Video
text_image
Production Background Color Action Value Volume Volume Volume Volume Volume Volume Volume Volume Volume Volume Volume Volume Volume Volume Volume Volume Volume Volume Volume Volume Volume Volume Volume Volume Volume Volume Volume Volume Volume Volume Volume Volume Volume Volume Volume Volume Volume Volume Volume Volume Volume Volume Volume Volume Volume Volume Volume Volume Volume Volume volumesVGA
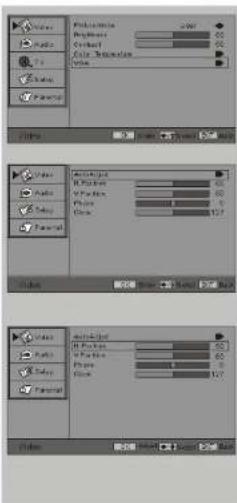
Press the "▲/▼" button to select the "VGA" item, and then use "▶" or "OK" buttons to enter the VGA sub-menu.
Note: This function only works with in VGA mode.
Auto Adjust
Press the "▲/▼" button to select the "Auto Adjust" item, and then use "▶" or "OK" buttons to adjust VGA mode automatically.
You can press "▲/▼" to move the menu bar, and then use "◀/▶" to adjust each value.
H.Position:
Adjust the Horizontal position of the PC Screen. V.Position:
Adjust the Vertical position of the PC Screen. Phase:
When necessary, adjust the pixel phase of the picture to avoid picture interface.
Clock:
Customize the time of any vertical bars or stripes visible on the screen background.
LCD TV
Audio
- Press the "MENU" button on the remote control to enter the OSD menu, then press "▲/▼" button to select the "Audio" menu.
- Press the "▶" or "OK" button to enter the "Audio" menu setting, use "▲/▼" to move the menu
bar, and then press " ▶" button to adjust the v. 3. Press "MENU" button to return to the main menu.
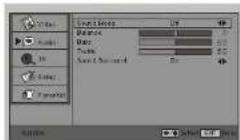
Sound Mode
Press the "▲/▼" button to select the "Sound Mode" item, and then use "◀/▶" button to select the sound mode.
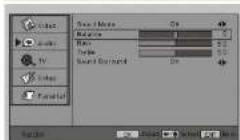
Balance
Press the "▲/▼" button to select the "Balance" item, and then use "◄/►" button to adjust the balance.
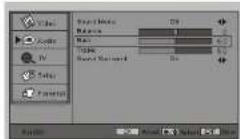
Bass
Press the "▲/▼" button to select the "Bass" item, and then use "◄/►" button to adjust the bass.
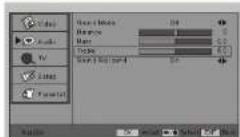
Treble
Press the "▲/▼" button to select the "Treble" item, and then use "◀/▶" button to adjust the treble.
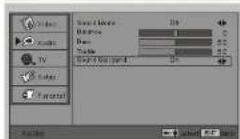
Sound Surround
Press the "▲/▼" button to select the "Sound Surround" item, and then use * ◀/▶ * button to turn on or turn off sounds surround.