
889D - Véhicule pour personnes handicapées Shoprider - Kostenlose Bedienungsanleitung
Finden Sie kostenlos die Bedienungsanleitung des Geräts 889D Shoprider als PDF.


Benutzerfragen zu 889D Shoprider
0 Frage zu diesem Gerät. Beantworten Sie die, die Sie kennen, oder stellen Sie Ihre eigene.
Eine neue Frage zu diesem Gerät stellen
Laden Sie die Anleitung für Ihr Véhicule pour personnes handicapées kostenlos im PDF-Format! Finden Sie Ihr Handbuch 889D - Shoprider und nehmen Sie Ihr elektronisches Gerät wieder in die Hand. Auf dieser Seite sind alle Dokumente veröffentlicht, die für die Verwendung Ihres Geräts notwendig sind. 889D von der Marke Shoprider.
BEDIENUNGSANLEITUNG 889D Shoprider
SHOPRIDER®
www.shoprider.com.au
mobility
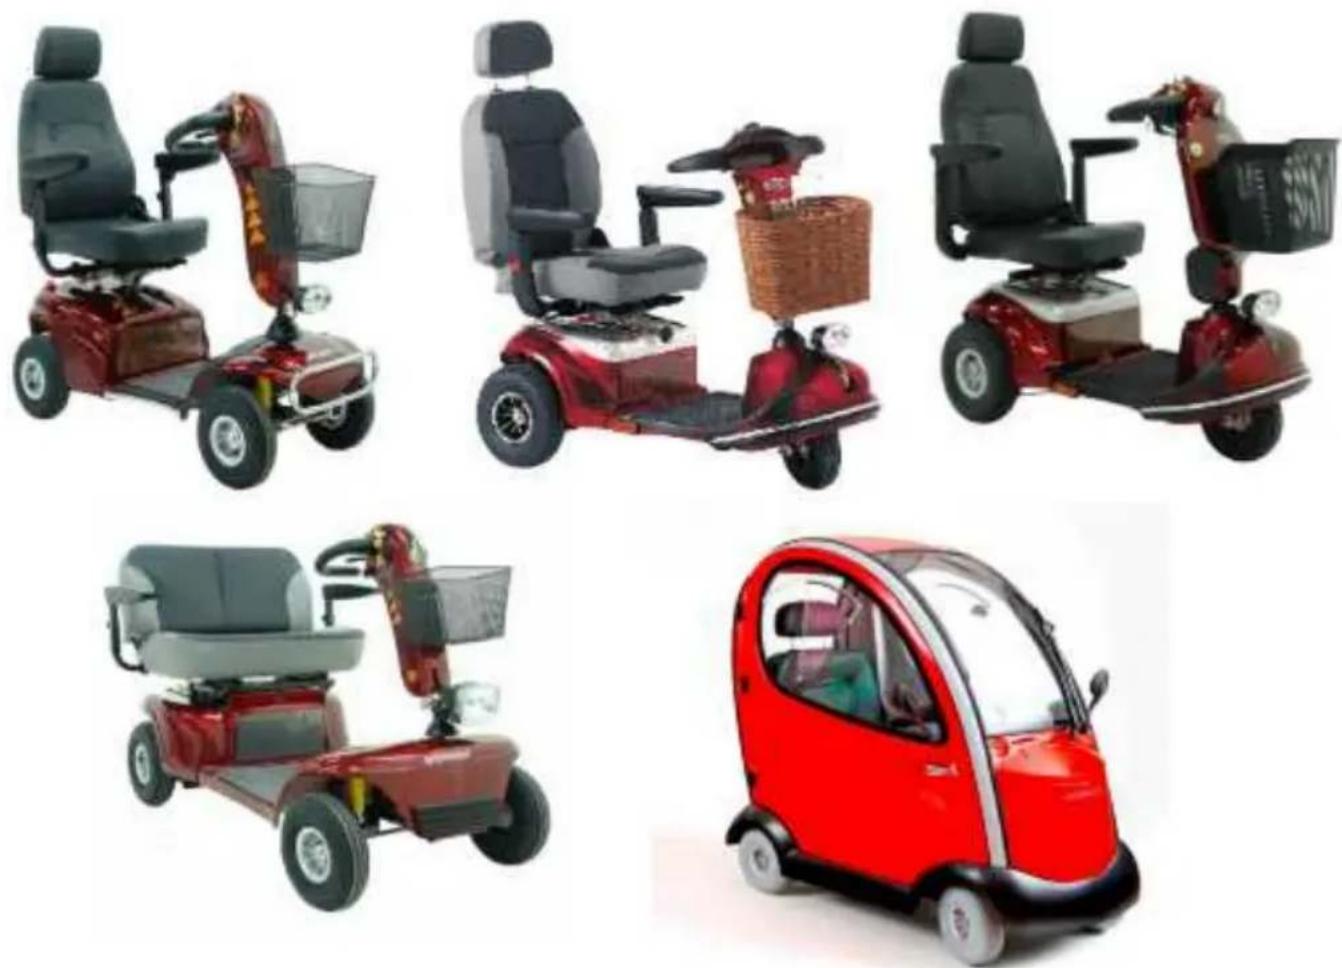
Scooter Owner's Manual
www.shoprider.com.au
User Manual Contents
INTRODUCTION 4
SCOOTER FEATURE GUIDE 5-7
SAFETY RULES 8
EMI WARNINGS 9
ADJUSTMENTS 10-11
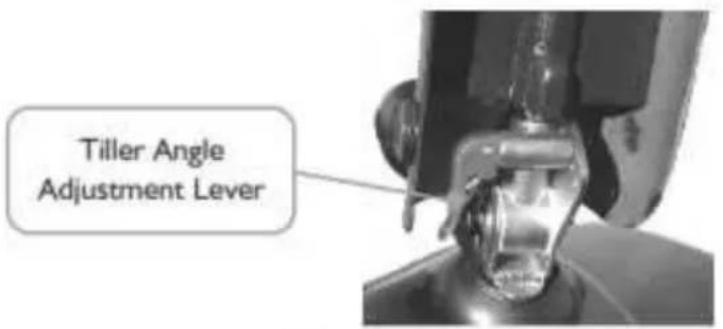
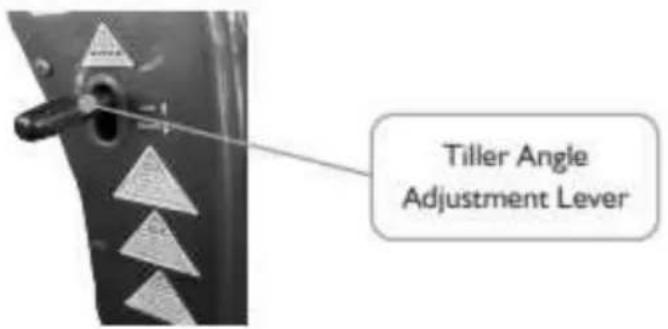
Tiller Angle Adjustment (Fig. 6A&B) 10
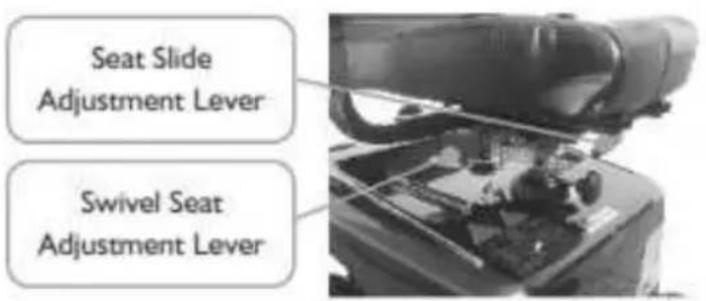
Seat Slide & Swivel Adjustment (Fig. 7) 10
Seat Removal (Fig. 7) 10
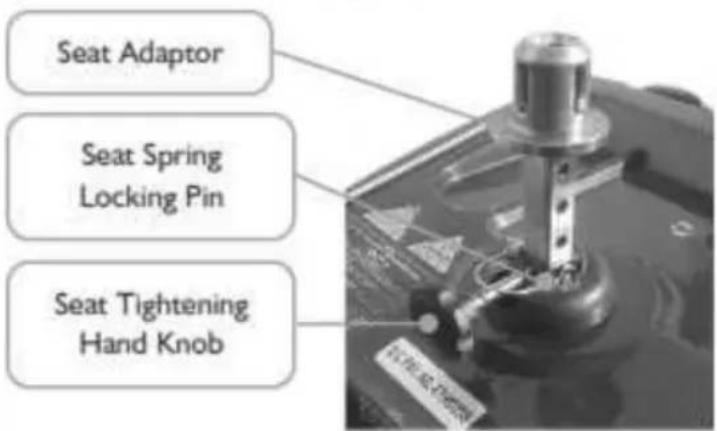
Seat Height Adjustment (Fig. 8) 10
Armrest Width Adjustments (Fig. 9) 11
Armrest Angle Adjustment (Fig. 11)
Seat Reclining Angle (Fig. 12) 11
Adjustable Rear Suspension (Fig. 13)
SCOOTER TILLER CONTROLS 12
Speed Controls 12
Battery Level Indicator Gauge 12
Lights 12
Horn 12
Thumb/Finger Lever Controls 12
On/Off Key Switch 12
Indicator Switch 12
Hazard Warning Switch 12
Electromagnetic Brake 12
888SE EXPLORER - RAINRIDER 13
778SL - 778HD 14
889D 15
FREE WHEEL OPERATION (FIG. 14) 16
Anti-Tip Wheels 16
User Manual Contents
continued
OPERATING YOUR SHOPRIDER® SCOOTER 17
Mounting the Scooter 17
Starting Scooter Movement 17
Steering 17
Reversing 17
Dismounting 17
Basic Driving 17
Grass and Gravel 18
Ramps 18
Curbs 18
Maximum User Weights 18
Ramp Angle (Appendix 1) 19
BATTERIES AND BATTERY CHARGER 20
Battery Charger 20
Charging 20
Periods of Storage 21
Airline Travel 21
CARE & MAINTENANCE 22
Wheels and Tyres 22
Cleaning 22
General Scooter Maintenance 22
Lubrication 22
Servicing 22
ADDITIONAL RAINRIDER INFO 23
TROUBLE SHOOTING GUIDE 24
Circuit Breaker 24
Check List 24
WARRANTY TERMS & CONDITIONS 24-25
TECHNICAL SPECIFICATIONS 26
DISCLAIMER 26
Introduction
Congratulations on the purchase of your SHOPRIDER® scooter!
SHOPRIDER® owners are a distinguished, growing group of people who care about quality, performance and craftsmanship. Because of the “Transaxle” engineering SHOPRIDER® scooters are able to navigate a multitude of terrains with comfort and stability other conventional scooters can not provide.
With careful reading of this manual and not exceeding the parameters set down in this manual you can ensure that your SHOPRIDER® scooter will give you years of trouble free service and enjoyment.
Please ensure that you read this manual carefully, it is important for your safety that you understand the guidelines and instructions given.
This User manual contains the operating instructions for a number of different SHOPRIDER® scooters "Please locate the scooter which represents the model purchased."
Please complete the information below for future reference:
SHOPRIDER Selling Dealer -
Scooter Model Number -
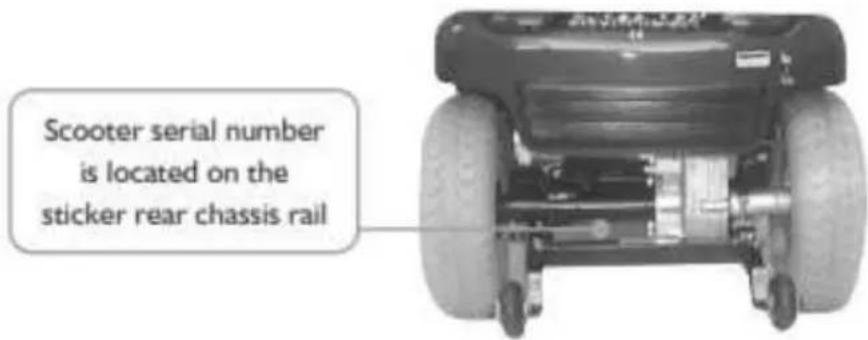
Scooter Serial Number -
Date of Purchase -
ATTENTION: This owner's manual is printed based on the latest specifications and product information available at the time of publication. SHOPRIDER® reserves the right to make changes as they become necessary. Any changes to the SHOPRIDER® range may cause slight variations between the illustrations and explanations in this manual and the scooter model that was purchased. Where possible a newer version of this manual may be available on our website. www.shoprider.com.au
text_image
Scooter serial number is located on the sticker rear chassis railScooter Feature Guide
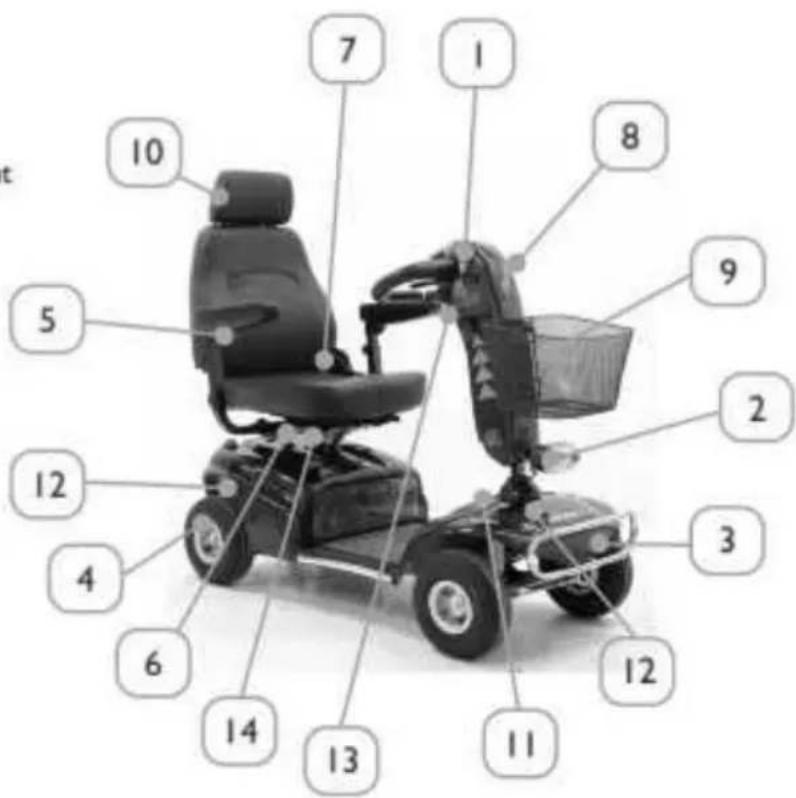
888SE EXPLORER
- Tiller Scooter Controls
- Front Head Light
- Chrome Front Bumper With Tie Down Point
- 260mm×85mm Pneumatic Tyres
- Adjustable Width & Height Armrest
- Seat Swivel Lever
- Seat Recline Adjustment Lever
- Easy Clean Multi Position Handle Bar
- Detachable Shopping Basket
- High Back Seat With Adjustable Headrest
- Infinite Angle Tiller Adjustment
- Suspension Front & Rear
- Battery Charger Inlet Port
- Seat Height Adjustment
text_image
t 1 2 3 4 5 6 7 8 9 10 11 12 13 14Figure 1
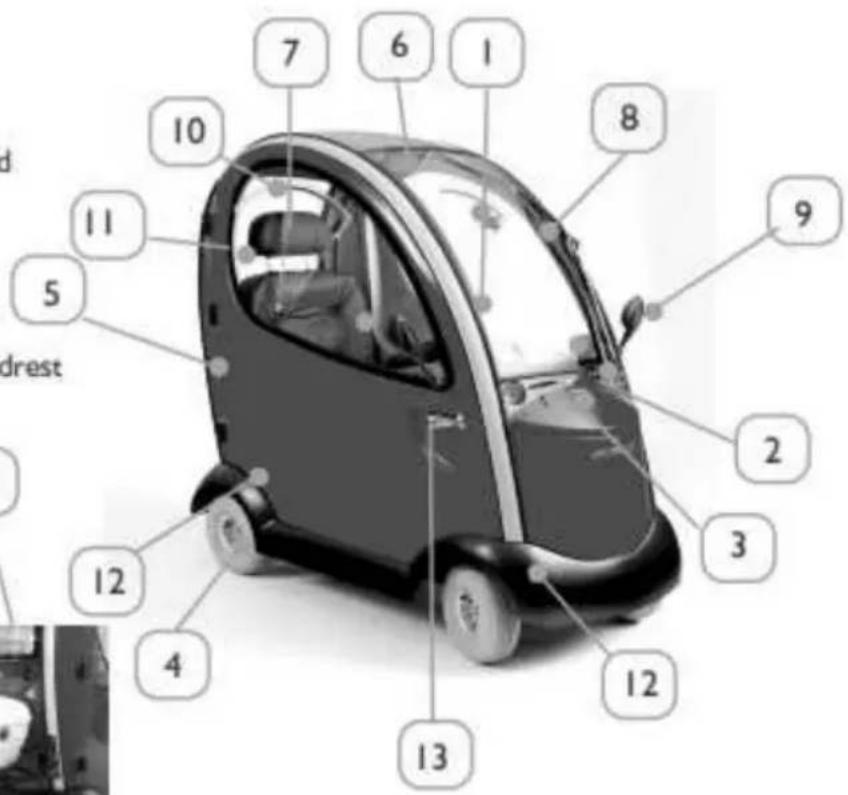
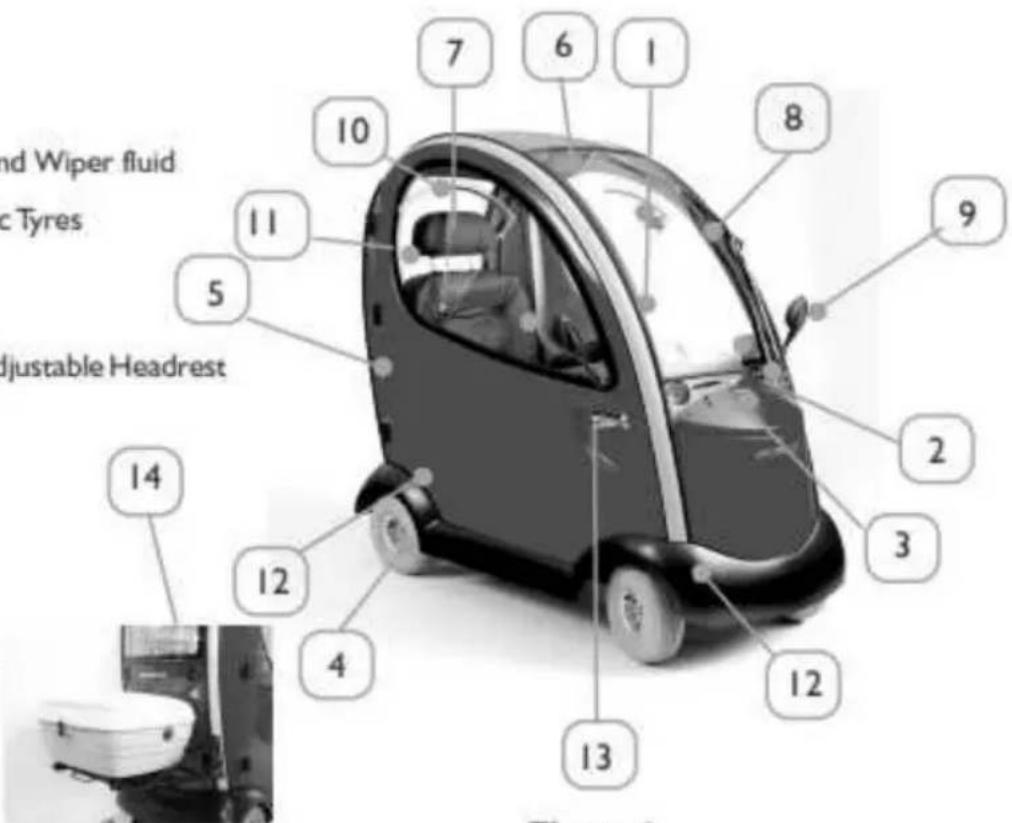
RAINRIDER
- Tiller Scooter Controls
- Front Head Lights
- Bonnet Access for Charge and Wiper fluid
- 330mm×100mm Pneumatic Tyres
- Removable Doors
- Interior Rear Vision Mirror
- Padded Captains Seat With Adjustable Headrest
- Grab Handles
- Rear Vision Mirrors
- Sliding Window
II. Eye Level Brake Light - Suspension Front & Rear
- Lockable Doors Both Sides
- Locking Storage Box
text_image
d drest 1 2 3 4 5 6 7 8 9 10 11 12 13Figure 2
text_image
and Wiper fluid Tyres Adjustable HeadrestScooter Feature Guide
continued
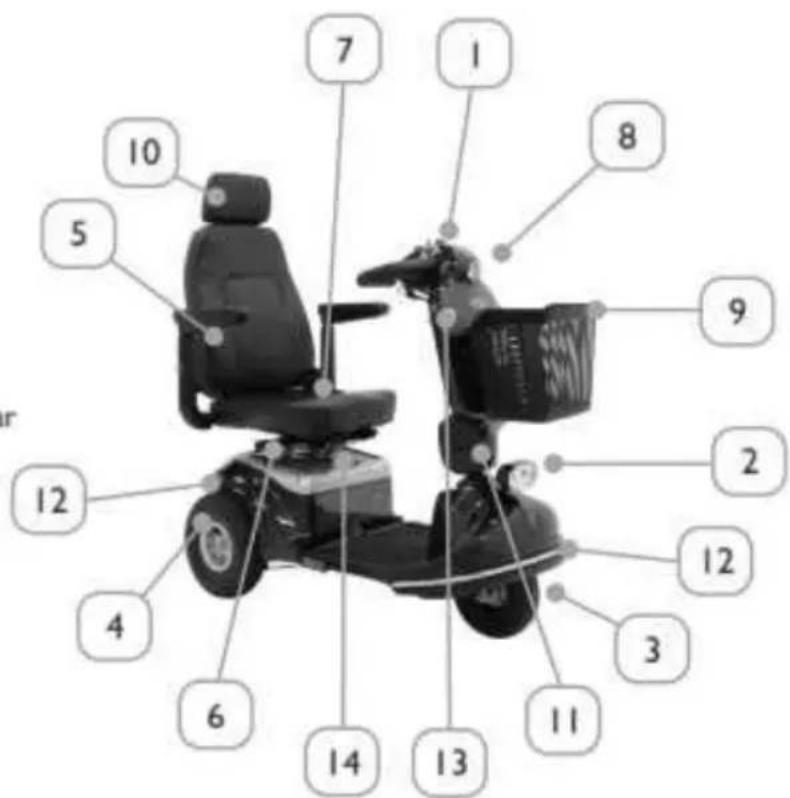
778SL
- Tiller Scooter Controls
- Front Head Light
- 260mm×85mm Pneumatic Tyre
- 300mm×100mm Pneumatic Tyres
- Adjustable Width & Lift Up Armrest
- Seat Swivel Lever
- Seat Recline Adjustment Lever
- Foam Padded Multi Hand Position Handle Bar
- Detachable Shopping Basket
- High Back Seat With Adjustable Headrest
- Tiller Angle Lever Lock
- Suspension Front & Rear
- Battery Charger Inlet Port
- Seat Height Adjustment
text_image
7 1 8 9 2 12 12 3 4 6 14 13 11Figure 3
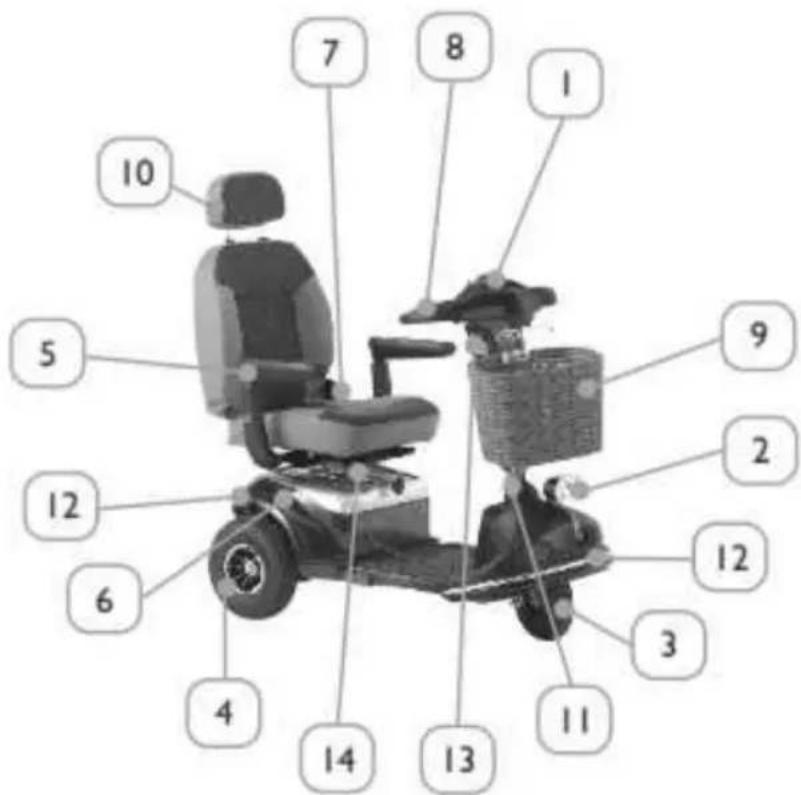
778HD
- Tiller Scooter Controls
- Front Head Light
- 260mm×85mm Solid Tyre
- 300mm×100mm Solid Tyres
- Adjustable Width & Lift Up Armrest
- Seat Swivel Lever
- Seat Recline Adjustment Lever
- Deluxe Multi Hand Position Handle Bar
- Detachable Shopping Basket
- High Back Seat With Adjustable Headrest
- Tiller Angle Lever Lock
- Suspension Front & Rear
- Battery Charger Inlet Port
- Seat Height Adjustment
text_image
Labeled diagram of a motor or electric scooter with numbered parts for identification.Figure 4
Scooter Feature Guide
continued
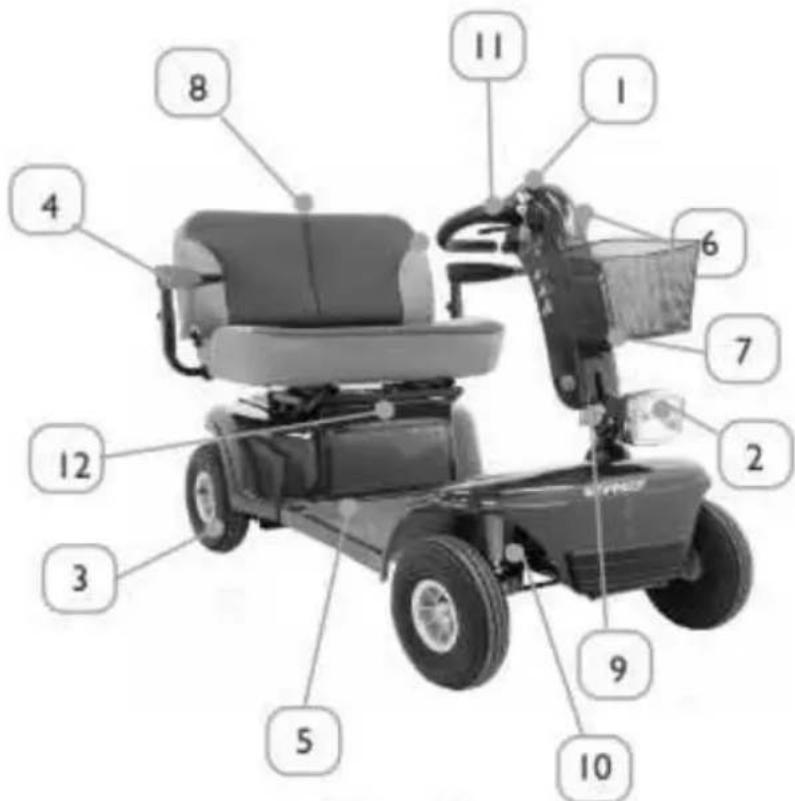
889D
- Tiller Scooter Controls
- Front Head Light
- 330mm×100mmTyres
- Adjustable Width & Lift Up Armrest
- Large Foot Platform
- Easy Clean Multi Position Handle Bar
- Detachable Shopping Basket
- One Metre Wide Seat
- Tiller Angle Lever Lock
- Suspension Front & Rear
- Battery Charger Inlet Port
- Battery Access Point
text_image
Labeled diagram of a smart electric scooter with numbered parts for identificationFigure 5
Safety Rules
Please use your SHOPRIDER® scooter often and let it expand your horizons. The more mobility your SHOPRIDER® brings the happier we will be! But as with all things, observing a few rules will ensure safe scootering. So please take the time to read and fully understand each rule below.
Do not ride the SHOPRIDER® scooter without reading this instruction manual thoroughly.
• Do not exceed the safe maximum climbing angle of the scooter. (Refer Appendix I)
- Do not exceed the maximum user weight at anytime. (Refer Appendix 1) Failure to observe these limits may cause personal injury and invalidate your scooter warranty.
• Do not mount or dismount the scooter when the key is turned on. Always ensure the key is switched to the off position.
• Do not operate or sit on the scooter if the unit is in Free wheel mode.
• Do not drive in reverse unless the speed governing dial is set to Low.
• Do not turn suddenly at full speed.
• Do not drive your scooter where you can not safely or legally walk.
• Do not drive your scooter unless the seat is locked in the driving position.
• Do not ride the scooter over deep, soft terrain. (e.g. soft dirt, deep grass, loose gravel)
• Never ride the scooter on ice or snow.
• Do not drink alcohol and then operate the scooter.
• Do not use a mobile phone when operating the scooter.
• Always keep you feet on the scooter platform when moving.
• Do not attempt to drive over curbs that exceed the safe climbing angle for your model of scooter.
• Always approach curbs at a 90 degree angle at a slow speed.
• Always stop fully before changing direction. (forward & reverse)
• Always proceed carefully while riding, especially as you approach the downgrade of a ramp or hill.
• Always proceed carefully while driving on rough or uneven surfaces.
• Always consult your physician if in any doubt about your ability to operate the scooter safely.
• If equipped Never remove the scooters Anti-Tip wheels.
• Do not use an escalator to move a scooter between floors – Serious injury could occur.
• Do not try to lift the scooter by its seat, tiller, rear chassis cover or any removable part. Any of these could cause serious injury to the user or damage the scooter.
• Do not use any parts or accessories that are not supplied by Shoprider®.
- SHOPRIDER® Doesn't recommend that the scooter users be transported in a vehicle WHILE they are on the scooter.
- Do not use the scooter in the rain. If caught out in a rain shower as soon as possible return the scooter to a dry area and wipe any excess moisture off the scooter.
• Do not drive the scooter through puddles.
• Do not wash the scooter with a hose if the scooter requires a clean use a damp soft cloth only.
• Always ensure the correct pressure is maintained in the tyres on the scooter. Failure to do so may result in unstable handling of the scooter and reduced driving distance.
DISCLAIMER
SHOPRIDER® is not responsible for any damage or injury incurred due to improper or unsafe use of the SHOPRIDER® scooter. Mechanical or electrical defects will be dealt with on a contingency liability basis. The parts will be replaced but no responsibility for any damage or injury can be implied to SHOPRIDER®.
EMI Warning
SHOPRIDER® scooters as with all electric braked scooters may be susceptible to electromagnetic interference (EMI), which is a kind of interfering electromagnetic energy (EM) emitted from sources such as radio stations, TV stations, amateur radio (HAM) transmitters, two-way radio, and cellular phones. The interference (from radio wave sources) can cause the scooter to release its brakes, move by itself, or move in unintended directions. (Forward or Reverse) It can also permanently damage the scooter's control system but this would likely be at levels exceeding the Australian standard.
The intensity of the interfering EMI energy can be measured in volts per meter (V/M). Each SHOPRIDER® scooter can resist up to a certain intensity. This is called "immunity level" the higher the immunity the greater the protection. At this time current technology is capable of achieving 20V/M immunity level which will provide useful protection from the more common sources of radiated EMI.
The sources of radiated EMI can be broadly classified into three types:
- Hand-held portable transceivers (transmitters-receivers) with the antenna mounted directly on the transmitting unit. Examples include: citizens band (CB) radios, "walkie talkie", security, fire and police transceivers, cellular telephones, and other personal communication devices.
NOTE! Some cellular telephones and similar devices transmit signals while they are ON, even when not being used.
-
Medium-range mobile transceivers, such as those used in police cars, fire trucks, ambulances, and taxis. These usually have the antenna mounted on the outside of the vehicle.
-
Long-range transmitters and transceivers, such as commercial broadcast transmitters (radio and TV broadcast antenna towers) and amateur (HAM) radios.
NOTE! Other types of hand-held devices, such as cordless phones, laptop computers, AM/FM radios, TV sets, CD players, and cassette players, and small appliances, such as electric shavers and hair dryers, so far as we know, are not likely to cause problems to the scooter.
Scooter Electromagnetic Interference (EMI)
Because EM energy rapidly becomes more intense as one moves closer to the transmitting antenna (source), the EM fields from hand-held radio sources (transceivers) are of special concern. It is possible to unintentionally bring high levels of EM energy very close to the scooter's control system while using these devices. This can affect scooter movement and braking. Therefore, the warnings listed below are recommended to prevent possible interference with the control system of the scooter.
WARNINGS
- Do not operate hand-held transceivers (transmitters-receivers), such as citizens band (CB) radios, or turn ON personal communication devices, such as cellular phones, while the scooter is turned ON.
- Be aware of nearby transmitters, such as radio or TV stations, and try to avoid coming close to them.
- If unintended movement or brake release occurs, turn the scooter OFF as soon as it is safe.
- Be aware that adding accessories or components, or modifying the scooter may make it more susceptible.
Report all incidents of unintended movement or braking to your Shoprider® provider, and note whether there are sources of EMI nearby. If your scooter does unexpectedly stop then turn the key off, Wait for a few seconds and turn the key back on.
WARNING: Shoprider® Mobility Products is not responsible for damage or injury incurred due to improper and unsafe use of our scooter.
Adjustments
Tiller Angle Adjustment (Fig. 6A)
On the left hand side at the base of the tiller is a red lever/black knob. Push/pull the lever to release the pin and select the required tiller angle. Refit the pin into one of the five location holes. Check the tiller is locked in place before driving the scooter. (Fig. 6B) Push the lever down & hold whilst moving the tiller to the desired angle. Letting go of the lever once at the desired angle.
Seat Slide & Swivel Adjustment (Fig. 7)
Pulling up on the seat slide lever allows the seat position to be adjusted forward or backward. Release the lever and the seat will lock in that position. Under the right side of the seat there is a spring loaded red lever. Pulling up on the lever allows the seat to swivel, when released the seat will lock into one of 4 positions. (Straight, 90', 180, 270)
Seat Removal (Fig. 7)
Fold down the back of the seat. Pull up the swivel seat adjustment lever (fig. 7) and lift seat off. Remove the hand-knob and locking pin that secures the seat adaptor. Lift the seat adaptor out of the seat post.
Seat Height Adjustment (Fig. 8)
Remove seat as described above. Loosen the seat tightening hand knob/Allen key head bolt. The seat height can be adjusted to 5 different settings by inserting the steel locking pin in the required hole. Retighten the hand knob/Allen key head bolt and replace the seat.
Do not use the scooter without the arms being fitted. Please note Rainrider must have Armres fitted if the doors are Removed
text_image
Tiller Angle Adjustment LeverFigure 6A
text_image
Tiller Angle Adjustment LeverFigure 6B
text_image
Seat Slide Adjustment Lever Swivel Seat Adjustment LeverFigure 7
text_image
Seat Adaptor Seat Spring Locking Pin Seat Tightening Hand KnobFigure 8
Adjustments
continued
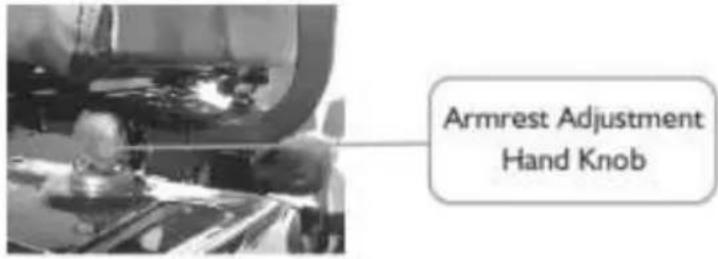
Armrest Width Adjustments (Fig. 9)
On the underside of the rear seat there are two hand knobs/Allen key head bolts, one either side. Loosening the hand knob or bolt allows the arm rest to be adjusted to the required width, or removed for transportation.
text_image
Armrest Adjustment Hand KnobFigure 9
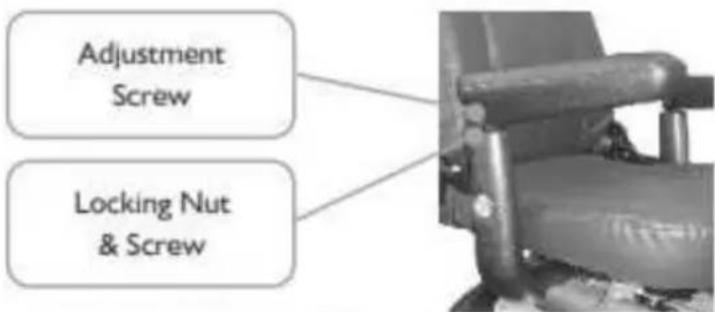
Armrest Angle Adjustment (Fig. 10)
To adjust the armrests angle on all models except 888SE Explorer. Flip up the armrests to allow access to the adjustment screw and lock nut, unscrew the lock nut and screw the bolt in or out to increase or decrease the angle. Re-tighten the lock-nut.
Your scooter is despatched from the factory with the armrests set parallel to the floor.
text_image
Adjustment Screw Locking Nut & ScrewFigure 10
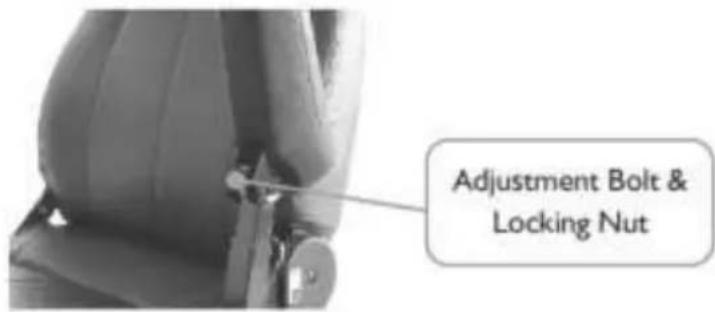
Armrest Angle Adjustment (Fig. 11)
To adjust the armrest angle on the 888SE explorer Flip up the armrest to allow access to the adjustment bolt. Turn the bolt either up or down to adjust the angle of the armrest. Ensure you tighten the locking nut at the base of the bolt.
text_image
Adjustment Bolt & Locking NutFigure 11
Seat Reclining Adjustment (Fig. 12)
Available on all models The reclining seat lever is located on the left side below the armrest. Simply pull the lever up to adjust. This feature also allows the seat to be folded down for storage and or transport.

text_image
Seat Reclining Adjustment Figure 12Adjustable Rear Suspension (Fig.13)
Available on the 888SE only. Use the appropriate tool to either soften (turn to the right) or stiffen (turn to the left) the suspension. Do not turn past the marking noted on the shock absorber otherwise service by a Shoprider dealer will be required.
Figure 13
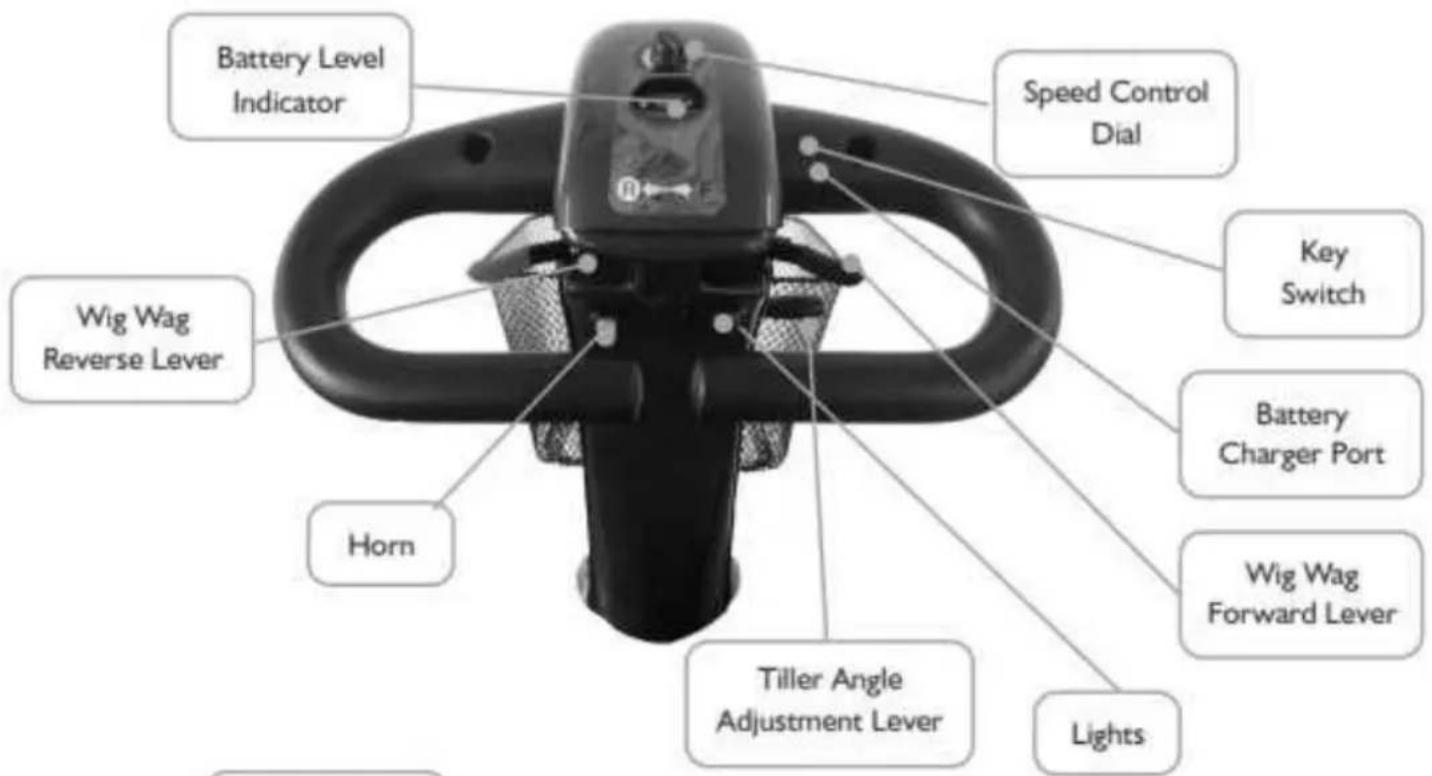
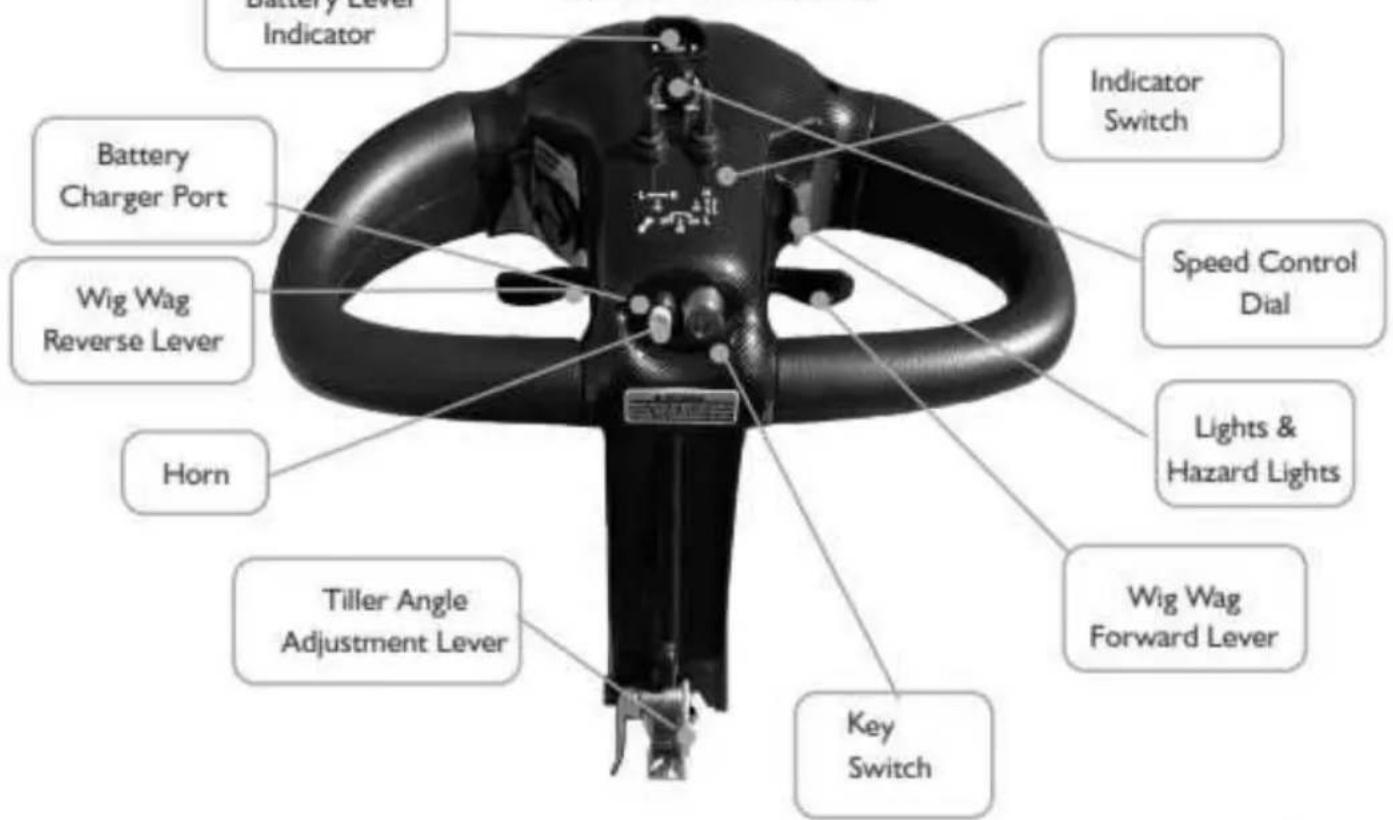
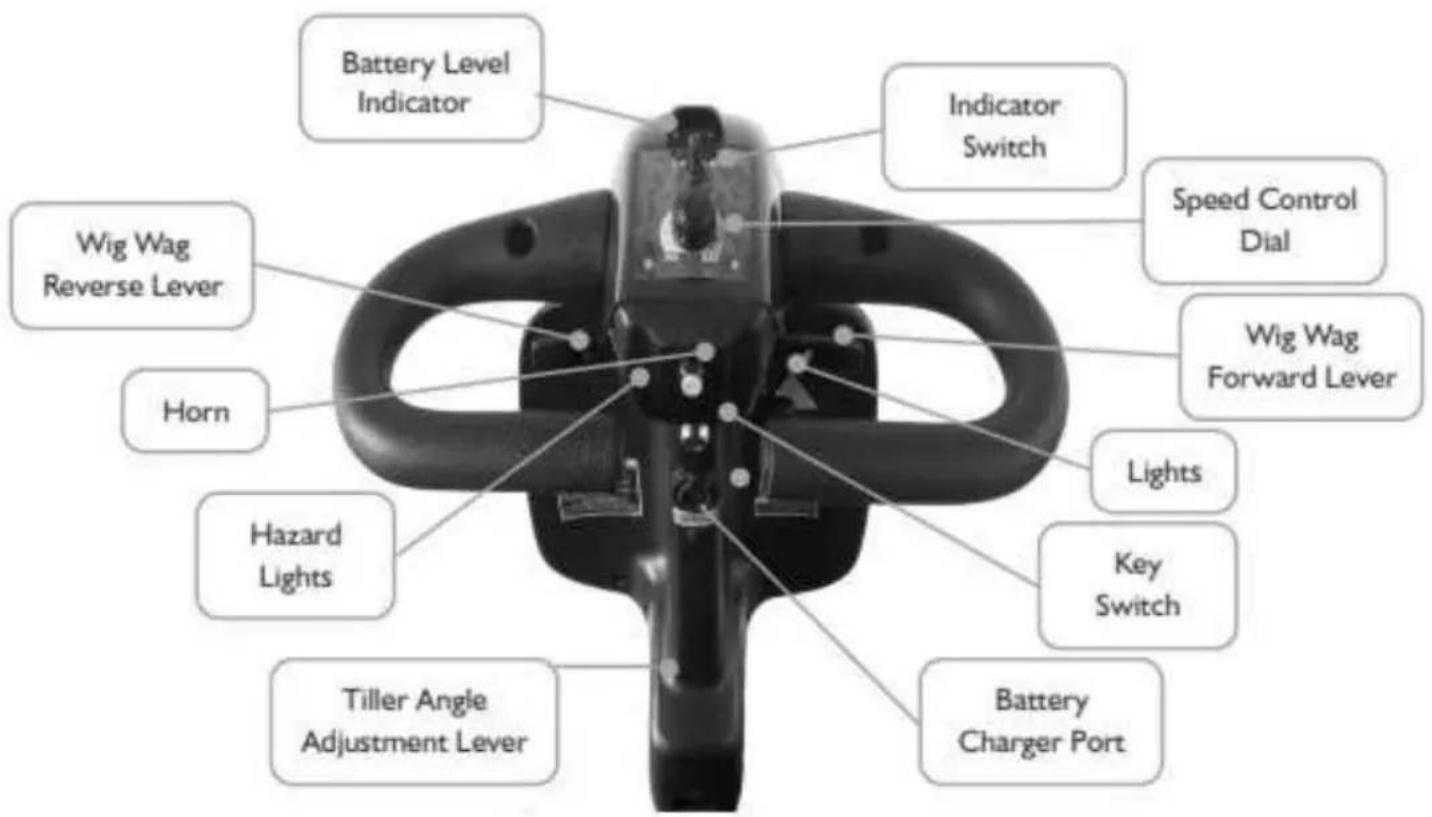
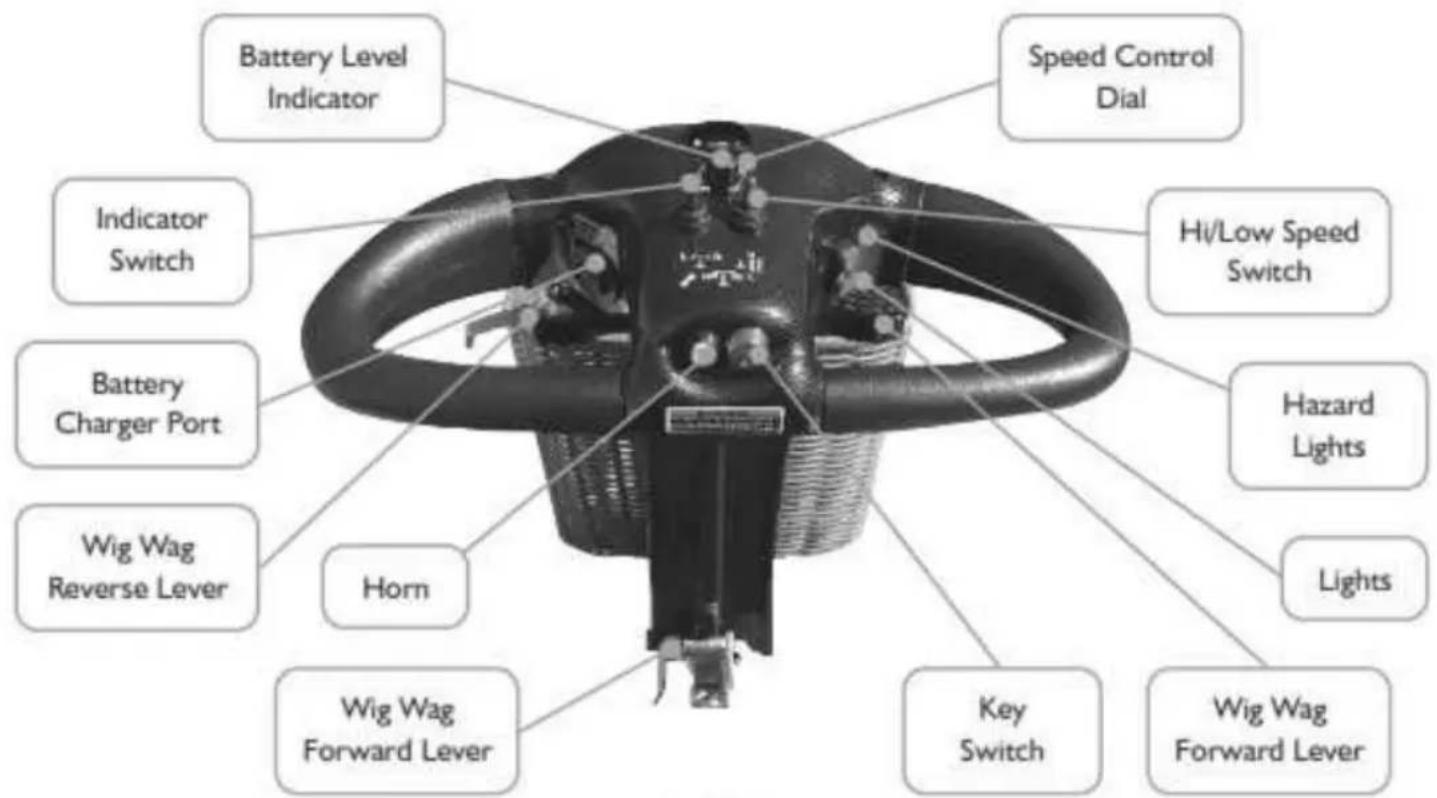
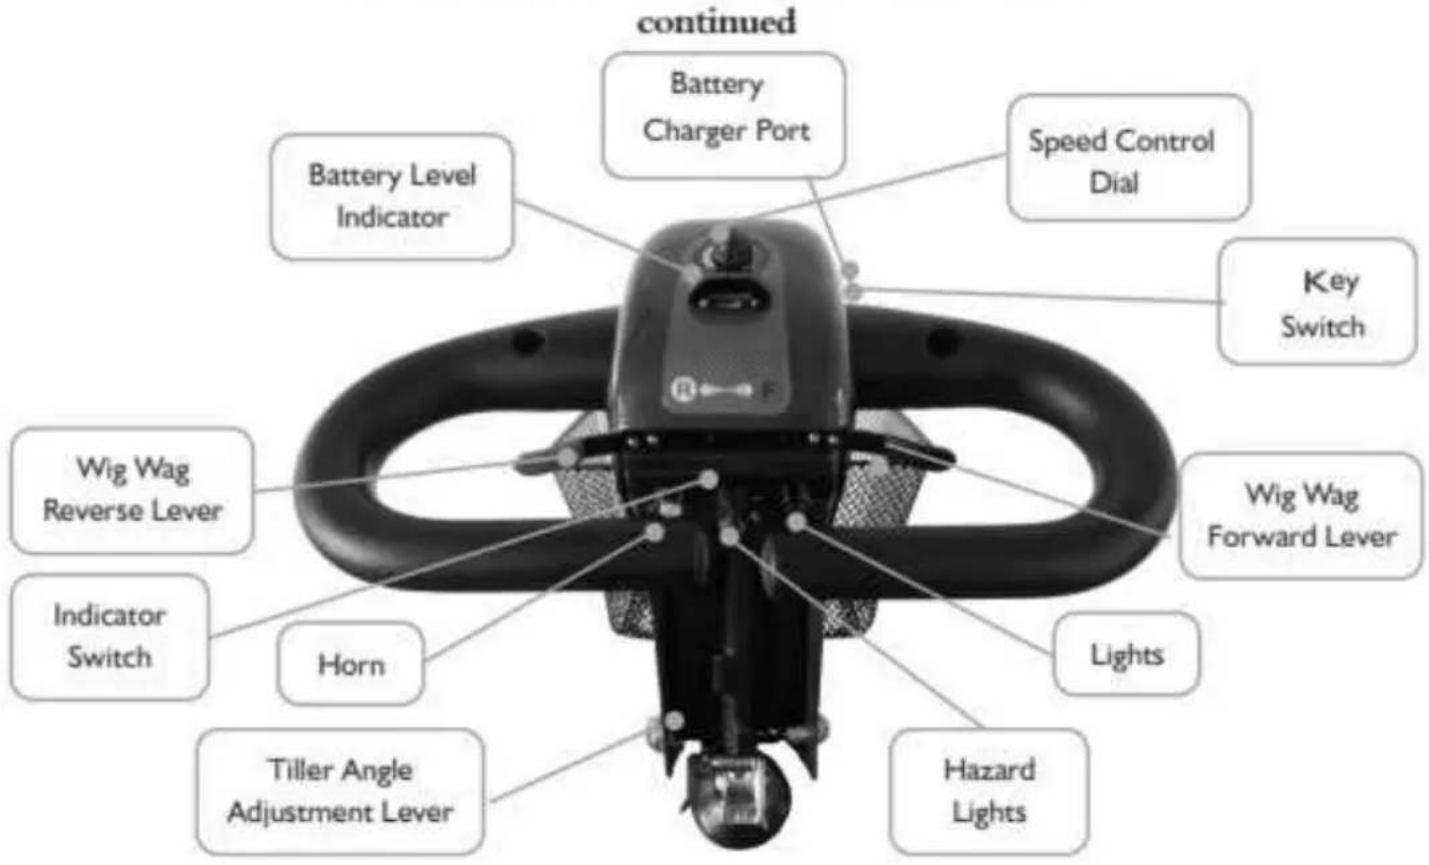
Scooter Tiller Controls
Speed Control Dial
The speed control dial will allow the scooter to set the speed between 1 (minimum) and 10 (maximum).
Please note - When driving your Shoprider up or down an incline it is important to ensure the speed control dial is at 7-10 when going up up the incline & 1-4 when going down the incline. Adhering to these settings will ensure you remain in full driving control of your Shoprider. These settings will also maximise the performance of your scooter.
Battery Level Indicator
There are 8 LED light bars which indicate the amount of charge remaining in the batteries for the scooter. As the charge diminishes the LED light will move to the next brightest LED light (from right to left). When the LED light bars move to the last light and start flashing the batteries are in critical need of charging.
Caution – Do Not Allow the LED bars to go out completely as complete discharge of the batteries could cause critical damage to the batteries and scooter electrics.
Lights
A blue coloured button on the tiller operates the lights on the scooter.
Horn
A yellow coloured button on the tiller operates the horn.
Thumb/Finger Lever Control (Wig Wag)
The thumb/finger lever control known as the Wig Wag controls the forward and reverse movement of the scooter. There is a sticker on the tiller to indicate the direction that scooter will travel when the Wig Wag is depressed or pulled. The amount of pressure applied to each lever will determine the speed the scooter will travel. Release the lever and the scooter will slowly come to a stop and the electromagnetic brake will be applied.
On/Off Key Switch
Insert the key in to the key barrel on the tiller. Turn the key and the Battery indicator gauge pointer will move to the green or LED light bars light up. There will be a short delay before the thumb/finger lever can be operated, while the controller is checking the circuits. WARNING Remove the key from the ignition when the scooter is not in use. Injury and or damage to the scooter or surrounding property may occur.
Indicator Switch (where fitted)
Operates the turn indicators on the scooter
Hazard Warning Switch (where fitted)
A red button operates all the indicators on the scooter at one time.
High / Low Speed Switch (where fitted)
Some Shoprider® scooters have High / Low speed settings, "WARNING: The legal speed limit in most states in public areas is 10Kph. The scooter is set up with a Hi/Lo switch which when set to low will not exceed 10Kph
Electromagnetic Brake
All Shoprider® scooters have Electromagnetic brakes fitted. The brake is automatically operated when the control levers (Wig Wag) are released. There is a very slight delay when the scooter decelerates – This allows the scooter to come to a smooth stop.
Scooter Tiller Controls
continued
text_image
Battery Level Indicator Wig Wag Reverse Lever Horn Speed Control Dial Key Switch Battery Charger Port Wig Wag Forward Lever Tiller Angle Adjustment Lever Lights888SE EXPLORER
text_image
Battery Lever Indicator Battery Charger Port Wig Wag Reverse Lever Horn Tiller Angle Adjustment Lever Indicator Switch Speed Control Dial Lights & Hazard Lights Wig Wag Forward Lever Key SwitchRAINRIDER
Scooter Tiller Controls
continued
text_image
Battery Level Indicator Indicator Switch Speed Control Dial Wig Wag Reverse Lever Wig Wag Forward Lever Horn Lights Key Switch Hazard Lights Battery Charger Port Tiller Angle Adjustment Lever778SL
text_image
Battery Level Indicator Speed Control Dial Indicator Switch Hi/Low Speed Switch Battery Charger Port Hazard Lights Wig Wag Reverse Lever Horn Lights Key Switch Wig Wag Forward Lever Wig Wag Forward Lever Wig Wag Forward Lever778HD
Scooter Tiller Control
text_image
continued Battery Charger Port Battery Level Indicator Speed Control Dial Key Switch Wig Wag Forward Lever Wig Wag Reverse Lever Indicator Switch Horn Lights Tiller Angle Adjustment Lever Hazard Lights889D
Free Wheel Operation
The free wheel release lever (this may be red or yellow depending on the model of the scooter) is located inside the Right or Left rear wheel. To disengage the motor, move the lever in the opposite direction – The scooter can now be pushed. To re-engage the motor return the lever to the original position – The scooter should now be unable to be pushed.
WARNING!
Always re-engage the Free Wheeling device after use.
Failure to do so may result in Injury.
Do not release the free wheel lever on any incline.
Anti-Tip Wheels
The anti-tip wheels are located at the rear of the scooter frame. The anti-tip wheels are removable on some models for easy transport. The scooter should not be used unless the ant-tips are fitted. Please note No anti-tip wheels are fitted to the 889D
Shoprider® is not responsible for the damage or injury due to improper or misuse of the scooter.

text_image
Circuit Breakers Rear Chassis Cover Free Wheel Release Lever Anti-Tip Wheels Anti-Tip WheelsFigure 14
Operating Your Shoprider® Scooter
Mounting the Scooter
- For your first lesson be sure you and your Shoprider® scooter are on a level surface with plenty of room to test drive the scooter.
- Mount the scooter, either by lifting the armrest and sliding on to the seat or rotate the seat by lifting the seat swivel lever and then rotate to face the tiller. Make sure the seat locks in place.
• Adjust the seat so you are comfortable and are able to easily reach the steering tiller.
• Adjust the tiller as described previously. - Ensure you have both hands free and any items such as walking canes are stored in the optional cane/crutch holder (see the dealer if you require one of these optional items).
Starting Scooter Movement
• Insert the Key in to the slot and turn it to the ON position
• The speed setting should be set to 1 or 2 setting.
• Pull the right hand finger lever (Wig Wag) the scooter will move slowly forward.
The further you pull/ push the faster the scooter goes but will only reach the speed level that has been selected.
• To STOP release the lever and the scooter will slowly come to a stop and the magnetic brake will be applied.
Steering
Steering the scooter is light and easy. Ensure when starting off you give a wide clearance when turning so that the rear wheels clear any obstacle that you are passing. When steering through limited spaces such as a doorway or when turning around, turn the tiller handles where you want to go and then apply power gently. The scooter will turn very tightly, but will still move with complete stability as long as the speed is not too high.
Do not turn sharply at high speed
Reversing
Before reversing ensure that the area behind is free from any hazards or obstructions. Adjust your speed setting to a low setting before you reverse. Pull/press the left thumb/finger lever (Wig Wag), and steer wide of all corners and obstacles. Remember that when reversing you have to steer in the opposite direction to the way you want to go. Take your time when reversing to ensure you do not run into any objects.
Please note your scooter will always travel slower in reverse and has a slight delay before moving, this is due to safety measures built into the scooters electric system.
Dismounting
Before dismounting always ensure that the "key is turned to the OFF position".
CAUTION: Please ensure that care is exercised when entering.
Or leaving the scooter and that the tiller is not used for support.
Basic Driving
Practice all the skills learned from the above sections. When you have gained experience and confidence with these basic skills then you are ready to start using your Shoprider® scooter to its full potential. Please note then when driving up or down a sloping ground that you set the speed dial 7-10 going up & 1-4 gong down. Failure to do this may cause loss of scooter control & potential damaged to the scooter motor.
Operating Your Shoprider® Scooter
continued
Grass and Gravel
Please follow the guidelines given previously and your scooter will perform admirably over many surfaces. Avoid long grass, loose gravel and sand.
NOTE: You should not operate your scooter in wet weather or on wet surfaces.
This may cause the motor to over load.
Ramps
The stability of your scooter is governed by several factors such as the seating position, the angle of the slope and your height and weight. When approaching an incline, do so directly and not at an angle and whenever possible avoid making turns. When going down a ramp or slope keep the speed settings at slow. This will ensure there is a safe controlled descent. When the thumb/finger levers are released the scooter will slowly stop.
Curbs
When approaching curbs and or any other stationary obstacle use extreme caution, slow down and evaluate whether you need to negotiate the obstacle. If you do have to traverse the obstacle then approach the obstacle front on only (both wheels meet the obstacle at the same time).
CAUTION: Never drive backwards over curbs or stationary obstacles. This may result in the scooter tipping over.
CAUTION: Do not drive on raised surfaces with unprotected edges – Do not drive off curbs, ledges or stairs.
Maximum User Weight and Incline Angle
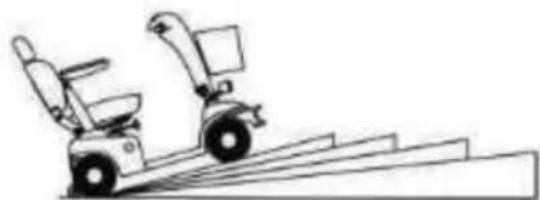
Each Shoprider® scooter has been manufactured to have safe working limits for maximum user weight and incline angle, please ensure you review the specifications for your model (Appendix 1) and never exceed these maximums at any time.
The maximum user weight is indicated at 0' degrees example 136kg @ 0'
WARNING: Exceeding user weight or incline specifications may damage your scooter & void your warranty.
WARNING: If fitted Never remove the anti-tip wheels from the scooter.
CAUTION: When on any incline or decline never place the scooter in free wheel mode.
CAUTION: When driving on an incline never Zigzag or drive at an angle up the incline. Always drive your scooter straight up the incline. This will reduce the possibility of the scooter tipping.
CAUTION: Do not drive your Shoprider® across the side of an incline Do not stop if possible while driving up or down an incline. Use 7-10 setting on your speed dial when going up an incline and 1-4 when going down the incline.
WARNING: You should not travel up or down a potentially hazardous incline (i.e., areas covered with snow, ice, cut grass, or wet leaves).
WARNING: Shoprider® scooters are capable of climbing slopes greater than those indicated below, do not, under any circumstances, exceed the incline guidelines or any other specifications presented in this manual. Doing so could cause instability in your scooter and or cause future problems with the electrical systems on the scooter.
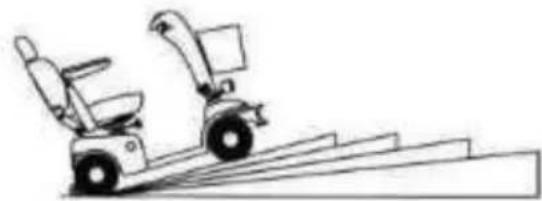
Appendix 1 \_\_\_\_
888SE EXPLORER
natural_image
Line drawing of two electric scooters on stairs, no text or symbols present9 (15%) 91kg
6' (10%) 113kg
0' (0%) 136kg
natural_image
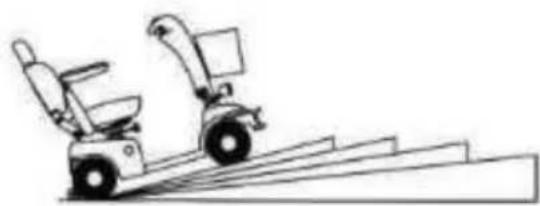
Line drawing of a two-seeled electric scooter on stairs (no text or symbols)RAINRIDER
12' (20%) 70kg
9' (15%) 90kg
6' (10%) 100kg
0' (0%) 160kg
natural_image
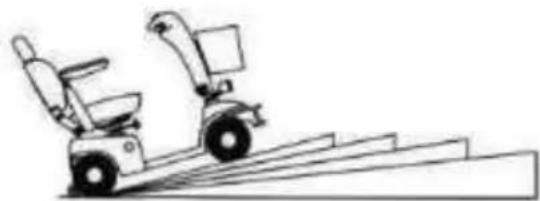
Line drawing of two electric scooters on a staircase (no text or symbols)778SL
9' (15%) 91kg
6' (10%) 113kg
0' (0%) 136kg
natural_image
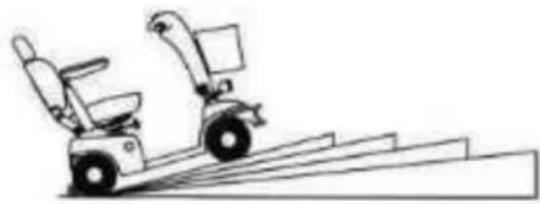
Line drawing of two electric scooters on a staircase (no text or symbols)778HD
9' (15%) 136kg
6' (10%) 159kg
0' (0%) 183kg
natural_image
Line drawing of a two-seeled electric scooter on stairs (no text or symbols)889D
12' (20%) 113kg
9' (15%) 136kg
6' (10%) 159kg
0' (0%) 225kg
Batteries & Battery Chargers
All Shoprider® scooters require two maintenance free, sealed lead acid batteries or gel batteries. Battery performance can be affected by temperature, terrain, condition of battery, the weight of the user, etc. The battery level indicator/gauge is only a guide and is most effective when the scooter is being driven, only then is the true battery discharge level displayed.
Battery life is not specific due to a number of reasons however Shoprider® encourages that the scooter be placed on charge every night. This should give optimum battery life and performance.
Battery Charger
Batteries required for your scooter are specially designed. All Shoprider® scooters require a Shoprider® automatic battery charger. These chargers have an electronic switch that will terminate the charge when the batteries are fully charged. It is very important that you do not run the batteries completely flat this will impact on the battery life, performance and may Damage the scooters electrics.
Shoprider® recommends that only Genuine Shoprider® Chargers be used to recharge the batteries in your scooter.
Please contact your authorised Shoprider® provider for assistance.
Charging
Charge the batteries completely (12 to 16 hours) prior to first time use.
• Prior to charging please ensure the key is turned off and removed from the scooter.
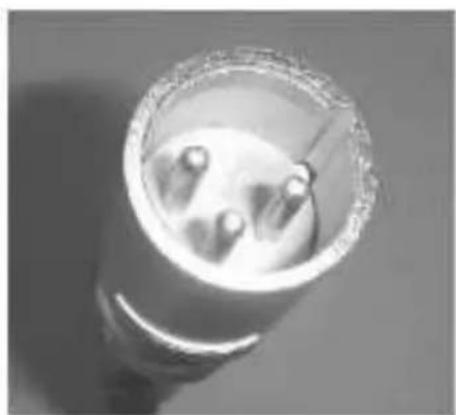
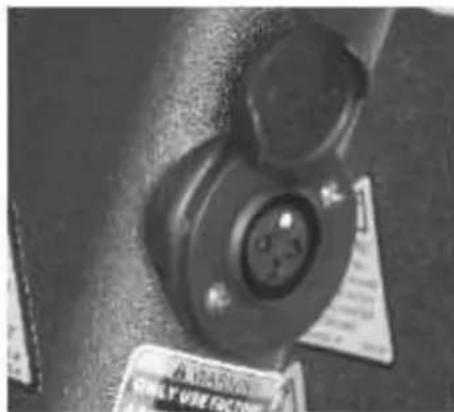
- Connect the plug lead (Refer FIGURE 15) into the battery-charging socket (Refer FIGURE 16) on the scooter tiller.
- Ensure the wall socket is turned off then insert the 3-prong A/C plug into the wall socket and switch "ON".
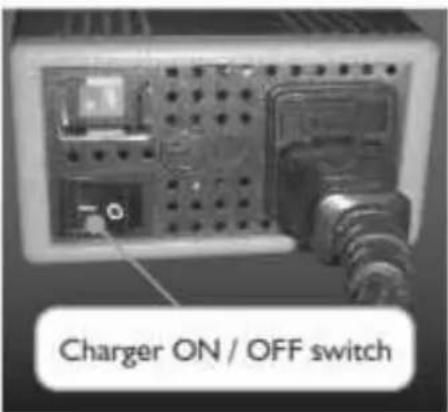
• Turn the charger on as shown on FIGURE 17 (Please ensure the voltage on the charger is set to 230volt not 120volt as this will destroy the charger).
Once the charger has been turned on the following lights will appear.
The charger has two lights. The red light when constant shows the battery charger is connected, if the red light flashes; there is a break in the connection. The second light will show a gold light while charging and a green light when the charging is complete. The charging time will vary on how long the scooter has been used for prior to charging however typically this should take 6-10 hours.
Your Shoprider® charger is fitted with "Standby Mode" which ensures that you can not over charge your batteries.
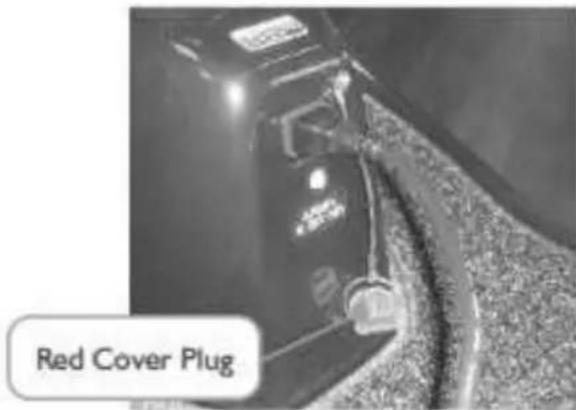
Please note that on the 778HD the scooter has an onboard charger and only requires the supplied cord be fitted in to the base of the tiller. Remove the red cover plug before charging – A gold light will show when charging is in progress and a green light when charging is complete. (Refer FIGURE 18)
Removing from Charge
• Turn the charger off as shown on FIGURE 17.
• Turn the wall socket off then remove the 3-prong A/C plug from the wall socket.
- Remove the plug lead from the battery-charging socket (Refer FIGURE 15) on the scooter tiller.
WARNING
DO NOT CHARGE THE SCOOTER IN ACLOSED IN AREA
ALWAYS TURN THE SCOOTER OFF AND REMOVE THE KEY BEFORE CHARGING
NEVER LEAVE YOUR KEY IN THE SCOOTER WHEN IT IS NOT BEING USED
Batteries & Battery Chargers
continued
natural_image
Close-up of a cylindrical electronic component with three metallic pins inserted (no visible text or symbols)Figure 15
natural_image
Close-up of a mechanical component with no visible text or symbolsFigure 16
text_image
Charger ON / OFF switchFigure 17
text_image
Red Cover PlugFigure 18
Periods of Storage
If the Shoprider® scooter is not going to be used for long periods of time then Shoprider® recommends that the scooter be charged every two weeks as a minimum. To optimise the life of the batteries it is also suggested that the scooter is driven for a minimum of 30 minutes then placed back on charge.
Airline travel
Your Shoprider® scooter uses either Gel or Sealed lead acid deep cycle batteries. They are maintenance free and transportable on Aeroplane, Train and Automobiles, as there is no danger of leakage.
Some Airline companies require documentation regarding the transporting of the batteries. Please check with your airline prior to travelling. Should you need this information please have your selling dealer contact Shoprider®.
CAUTION: Always ensure that the charging lead is in good condition and has not been damaged or stretched.
Note: Your Shoprider® charger is fitted with fuses and should your charger not operate please check with your selling Shoprider® dealer.
Care & Maintenance
Wheels and Tyres
The wheels of your Shoprider® scooter have split rims. This allows any punctures to be repaired easily.
To change the wheels remove the center 13 mm bolt and slide the wheel off its axle. Take care not to lose the drive key on the rear wheels. When changing a tyre you must deflate the tyre first. Remove the four bolts to split the rim if required. Ensure that when refitting the wheel the retaining bolt is fitted with a locking washer (with drive key for the rear wheel). Tyre pressure is recommended to be kept at 30 psi on the rear tyres and 25 psi on the front. Note when refitting the tube a small amount of air in the tube will prevent the tube from pinching when reassembling the split rim.
CAUTION: On the tyre it states maximum tyre pressure is 50psi. This is a maximum tyre pressure and the tyres should never be inflated to this pressure.
ATTENTION: Tyres should be maintained at the correct pressure noted above to ensure even wear and ride comfort.
Cleaning
Your Shoprider® scooter can be cleaned as required however as with all electrical equipment you must ensure that extreme care is used to not water damage any sensitive parts.
Please read the following warnings:
Only use a soft damp cloth.
NEVER use a hose to wash your scooter.
DO NOT use abrasive cleaning products – Mild detergent only should be used.
General Scooter Maintenance
Every six months check the tiller base bolts, wheel axle bolts, and arm rest angle adjustment bolts and tighten as necessary. Also check the seat and arm rest tightening knobs and tighten as needed. If your scooter is fitted with authorised Shoprider® accessories please check these to ensure the tightening knobs and bolts are secure.
Lubrication
Approximately every six months you should lubricate the following parts on your Shoprider®.
The lubrication points are as follows:
- Seat post only.
The suggested lubricants should be done with light grade of grease.
Please note: The breather hole on top of the Transaxle is NOT a grease nipple.
PLEASE NOTE ANY OTHER LUBRICATION MUST BE COMPLETED BY AN AUTHORSED SHOPRIDER® DEALER
Servicing
Shoprider® recommends that your scooter be serviced as a minimum every 12 months for average users and every 6 months for heavy users. This will ensure that your Shoprider® will continue to deliver the outstanding reliability they are known for: Please contact the selling Shoprider® dealer to arrange.
Additional RainRider Info
Driving
The RainRider Scooter is used in the same way as any other scooter however the size and shape of the RainRider should be taken in to account and care should be taken when driving. Seasonal conditions will require different types of care e.g. Very strong wind - assess the need to use the scooter in this conditions, please note the RainRider is very stable in most conditions however very strong may present a risk. Very heavy rain - although the scooter is very capable in the wet weather it is important slow your driving speed & not to drive through deep puddle It is recommended that when the RainRider is not being used it is stored in a dry & well ventilated area.
Cleaning
Your Shoprider® scooter can be cleaned as required however as with all electrical equipment you must ensure that extreme care is used to not water damage any sensitive parts.
Please read the following warnings:
Only use a soft damp cloth.
NEVER use a hose to wash your scooter.
DO NOT use abrasive cleaning products – Mild detergent only should be used.
Storage
To ensure your RainRider has a long life it is recommended that it be stored under cover e.g Garage or carport. It is important to ensure the battery charger is kept dry and free from dust. Ideally stored within easy reach of the power point and off the floor.
Door Removal
The doors of the RainRider are designed to be removed in summer as the cabin may become too hot & uncomfortable. To remove the doors firstly remove the straps from under the seat where they are clipped. Then with 2 people open the doors 100mm and lift up. The door will easily come away from the body of the RainRider. Store the doors in an upright position. Please ensure you never drive the scooter with out doors unless you have armrests fitted. Refitting the doors is a reverse process of removing the doors however it is important to ensure all three pins are lined up exactly, do not force the door as damage may result. ensure that the armrests are removed prior to refitting the door.
General
The RainRider has a windscreen wiper & washer which should be used driving to clear the windscreen of rain, the washer bottle for refilling point is located under the hood located at the front of the scooter. Only use clean water water to refill this container. Automotive windscreen cleaning fluid may be used. The Rainrider has two charging points one is located as per page 13 the other is located under the bonnet at the front of the scooter. Please ensure the charging point under the bonnet is clean and dry before charging.
Transport of the RainRider
If the RainRider needs to be transported via a vehicle please ensure both windows are fully open tp prevent air pressure build up. A covered vehicle is the preferred method of transport.
Trouble Shooting Information
Circuit Breaker
Your Shoprider® scooter is fitted with the latest in electronic controls that are programmed to protect the electrical system from abnormal overloads. Fitted for extra protection is a circuit breaker, should there be a situation that your scooter stops please check that the circuit breaker has not popped out or tripped. The circuit breaker can be found under the rear chassis cover accessible through a port hole under the seat. (Refer FIGURE 14)
Please note: Overloading your scooter can be a common reason for your circuit breaker switching. Any overloading must be removed to ensure continued reliable operation.
Check List
If your scooter fails to operate, please check the following:
• Is the key in the correct slot and Turned to the ON position?
• Does the battery level indicator gauge show the Battery level, is it fully charged?
Is the Freewheeling device in the drive position (can the scooter be pushed)? If it can then the Freewheeling device may be disengaged. Re-engage the Freewheeling device.
• Reset the circuit breaker:
PLEASE NOTE: If the free wheel device has been operated with the scooter switched on, then the scooter will not operate until the ignition key has been switched off and then on again in order to reset the circuits.
Please consult your selling Shoprider® provider if your scooter does not run after checking these points.
Warranty Terms & Conditions
The Warranty Terms and Conditions noted below provide your Shoprider® scooter with excellent coverage against possible defective parts or possible faulty workmanship. If at anytime you have a warranty issue YOU MUST contact the selling Shoprider® dealer as they are required to undertake the diagnosis and labour content of the warranty. Shoprider® will as noted below supply spare parts as required as part of this agreement.
Structural Frame – 3 Years
Shoprider Australia warrants that the frame will be free from defects under normal use, for a period of three (3) years from the date of purchase by the original customer.
Shoprider Australia will repair or replace, at our option free of charge any part found on examination
by Shoprider Australia to be defective in material and or workmanship within the warranty period.
All parts claimed under warrant must be returned to Shoprider Australia in their present condition. Only an authorised "Warranty Dealer" of Shoprider Australia can undertake warranty work.
Always contact the selling Shoprider® dealer to arrange all work and assess if warranty applies.
Structural Frame Components include
Welded Chassis only
Warranty Terms & Conditions
Drive Train Assembly - 18 months
Shoprider Australia warrants that the drive train Assembly will be free from defects under normal use, for a period of eighteen (18) months from the date of purchase by the original customer.
Shoprider Australia will repair or replace, at our option free of charge any part found on examination by Shoprider Australia to be defective in material and or workmanship within the warranty period.
All parts claimed under warrant must be returned to Shoprider Australia in their present condition. Only an authorised "Warranty Dealer" of Shoprider Australia can undertake warranty work.
Always contact the selling Shoprider® dealer to arrange all work and assess if warranty applies.
Drive Train Components include
Transaxle, Motor and Magnetic Brake only.
Other Parts - 12 months
Shoprider Australia warrants that the other parts will be free from defects under normal use, for a period of twelve (12) months from the date of purchase by the original customer.
All parts claimed under warrant must be returned to Shoprider Australia in their present condition. Only an authorised "Warranty Dealer" of Shoprider Australia can undertake warranty work.
Always contact the selling Shoprider® dealer to arrange all work and assess if warranty applies.
Exclusions
I. All transportation cost associated with the submission and return of the repair or replacement under warranty (as determined by Shoprider Australia) are the responsibility of the original customer.
2. Normal wear items are not covered under warranty. These items include such items as brushes, tyres, tubes, brake pads, upholstery, seating and armrests.
3. Damage caused by:
- Excessive, abusive, misuse, negligence, accident or water.
- Improper maintenance, maintenance carried out by a non approved "Warranty Dealer."
- Improper operation & storage.
-
Any commercial use what so ever.
-
Where an authorised dealer has not lodged all required documentation at the appropriate time, the warranty is Void.
- All warranties provided do not extend to purchasers of used or secondhand equipment.
(Warranty's are not transferable)
Please Note
Our goods come with guarantees that cannot be excluded under the Australian Consumer Law. You are entitled to a replacement part for a major failure and for compensation for any other reasonably foreseeable loss or damage. You are entitled to have the goods repaired or replaced if the goods fail to be of acceptable quality and failure does not amount to a major failure.
NOTE: In the event of a warranty issue, Always contact your selling Shoprider® dealer who will arrange any work and return any faulty parts.
Technical Specifications
| Unit Specifications | 888SE Explorer | RAINRIDER | 778SL | 778HD | 889D | |
| Overall Dimensions L x W x H (1) | MM | 1280 x 600 x 1070 | 2260 x 730 x 1640 | 1230 x 590 x 1070 | 1230 x 640 x 1250 | 1480 x 790 x 1050 |
| Number Size of Tyres (3) | Front | 2 / 260mm | 2 / 330mm | 1 / 260mm | 1 / 260mm | 2 / 330mm |
| Rear | 2 / 260mm | 2 / 330mm | 2 / 330mm | 2 / 300mm | 2 / 330mm | |
| Maximum User Weight (on flat level ground) | kg | 136 | 160 | 136 | 182 | 225 |
| Total Weight (with Batteries, Basket & Seat) | kg | 99 | 195 | 99 | 105 | 147 |
| Suggested Minimum Battery Capacity | amp | 36 | 75 | 50 | 50 | 75 |
| Charger | 8amp off board | 8amp off board | 5amp off board | 4amp on board | 8amp off board | |
| Output of Motor | W / Hp | 560 (0.75) | 1492 (2.0) | 890 (1.2) | 1492 (2) | 1492 (2.0) |
| Programable Speed (2) up to on level ground | kph | 8 | 10 | 10 | 10 | 10 |
| Maximum Climbing Angle @ Maximum weight shown | “% | 9, 15 (91kg) | 12, 20 (91kg) | 12, 20 (70kg) | 9, 15 (136kg) | 12, 20 (113kg) |
| Turning Radius | mm | 1500 | 1780 | 1250 | 1290 | 2550 |
| Suspension | Y | Y | Y | Y | Y |
All specifications are subject to change without notice
I. Includes Anti-tip wheels.
2. Driver weight may exceed weight of unit: speed must be reduced when turning.
DISCLAIMER
Congratulations on your purchase of the Shoprider® It is not intended to be used by individuals with physical limitations that could prevent the user from operating this unit safely. Shoprider® disclaims all responsibility for any personal injury or property damage, which may occur as a result of improper or unsafe use of its products. Mechanical or electrical defects will be dealt with on a contingency liability basis.
SHOPRIDER Australia Pty Ltd
I Business Way Malaga
Western Australia 6090
www.shoprider.com.au
You can rely on a Shoprider.

text_image
SHOPRIDER® www.shoprider.com.au mobilityAsk for the brand Shoprider!