
LTDN50K370WSGEU - Fernseher HISENSE - Kostenlose Bedienungsanleitung
Finden Sie kostenlos die Bedienungsanleitung des Geräts LTDN50K370WSGEU HISENSE als PDF.


Benutzerfragen zu LTDN50K370WSGEU HISENSE
0 Frage zu diesem Gerät. Beantworten Sie die, die Sie kennen, oder stellen Sie Ihre eigene.
Eine neue Frage zu diesem Gerät stellen
Laden Sie die Anleitung für Ihr Fernseher kostenlos im PDF-Format! Finden Sie Ihr Handbuch LTDN50K370WSGEU - HISENSE und nehmen Sie Ihr elektronisches Gerät wieder in die Hand. Auf dieser Seite sind alle Dokumente veröffentlicht, die für die Verwendung Ihres Geräts notwendig sind. LTDN50K370WSGEU von der Marke HISENSE.
BEDIENUNGSANLEITUNG LTDN50K370WSGEU HISENSE
Contents
Contents
Welcome....3
Important Notice....4
Safety Instructions 5
-
Watching TV.... 11
-
Select Input Source....12
-
3D Images....12
-
Aspect ratio....14
-
Menu operation....15
-
Setting Options: Picture 16
-
Setting Options: 3D....18
-
Setting Options: Sound 19
-
Setting Options: Channels 22
-
Setting Options: Network 25
-
Setting Options: System 28
-
Setting Options: About TV....32
-
HiSmart....33
-
HiMedia....33
-
HbbTV....37
-
Smart Remote 37
-
Software Update....38
-
Troubleshooting 39
-
Service contact....43
-
Recycling/Licenses 44
Welcome
Thank you for purchasing a Hisense TV.
This device lives up to the highest standards, innovative technology and high user comfort.
Hi-Smart
Using apps, chatting, surfing and enjoying videos have never been this easy. With this Hisense TV you can do it fast and simple, while lying on your couch.
Hi-Media
Media player – access your music, pictures and videos from your network or USB storage media and play them directly on your TV.
PVR/Time-shift
Connect a USB storage media to your TV and use the PVR function to record your favorite shows and movies. With the Timeshift function, you can watch a live broadcast while recording it, enabling you to pause the viewing at any time, skip commercials and replay important scenes.
Digital Tuner
Everything works with one remote control now. Connect your TV directly to your terrestrial, satellite antenna or cable and enjoy contents in high quality without loss.
Important Notice
Important Notice
This guide only contains detailed information about the menus and the explanation of different settings, how to use the functions of this TV, etc. For detailed instructions on how to install this TV, please refer to the quick setup guide.
Paragraphs beginning with the symbol ⚠ indicate important instructions, tips or conditions for the following settings.

For your own safety and the optimal performance of your TV, ensure to read the safety instructions before performing any installation.
Hisense does not guarantee operation and performance of peripheral devices made by other manufacturers. We disclaim any liability or damage that may arise from operation and/or performance from usage of such other maker's peripheral devices.
The recording and playback of content on this or any other device may require permission from the owner of the copyright or other such rights in that content. It is your responsibility to ensure that your use of this or any other device complies with applicable copyright legislation in your country. Please refer to that legislation for more information on the relevant laws and regulations involved or contact the owner of the rights of the content you wish to record or playback.
The Index/Glossary explains certain terms used in this user manual and in the TV menu.
Declaration of Conformity (DoC)
This TV is CE marked and complies with EU directives. The complete declaration of conformity is included in this manual, and can also be downloaded from the Hisense homepage.
Hisense declares that this TV is in compliance with the essential requirements and other relevant provisions of Directive 1999/5/EG. It may be operated in all countries in the EU and also Iceland, Norway and Switzerland. In France and Italy it may only be used indoors.
Read these instructions
Follow all instructions
Heed all warnings
Keep these instructions
Hisense Europe
Europe road 1234,
4321 Europe
www.hisense.com
All rights reserved.
text_image
CE!Safety Instructions
Safety Instructions
To ensure safe and correct use of this product, always comply with the following precautions to avoid dangerous situations and damage to your unit:
text_image
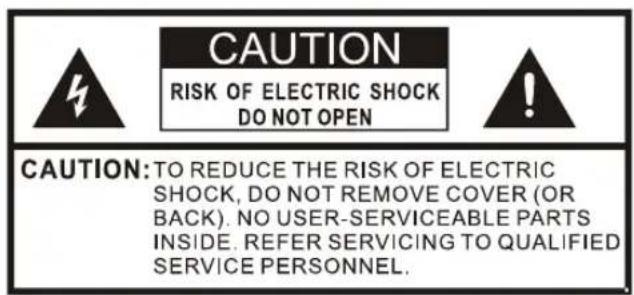
CAUTION RISK OF ELECTRIC SHOCK DO NOT OPEN CAUTION: TO REDUCE THE RISK OF ELECTRIC SHOCK, DO NOT REMOVE COVER (OR BACK). NO USER-SERVICEABLE PARTS INSIDE. REFER SERVICING TO QUALIFIED SERVICE PERSONNEL.The lightning flash with arrowhead symbol, within an equilateral triangle is intended to alert the user to the presence of uninsulated dangerous voltage within the product's enclosure that may be of sufficient magnitude to constitute a risk of electric shock.
The exclamation point within an equilateral triangle is intended to alert the user to the presence of important operating and maintenance (servicing) instructions in the literature accompanying the appliance.
The intended use and ambient conditions for this TV
This TV is intended for the rendering of video and audio signals, on a table-top or wall-mounted, in a home or office environment. It must not be used in rooms with a high level of humidity or dust concentration. The warranty is only valid if used as intended by the manufacturer.

WARNING
High humidity and dust concentration may lead to current leaks in the device. To reduce the risk of fire or electrical shock:
- Do not expose this unit to rain, moisture, dripping or splashing water, and do not place objects filled with liquids, such as vases, cups, etc. on or over the unit.
- Do not touch the TV with wet hands.
- Do not expose to direct air-conditioning and keep candles or other naked flames away from the TV at all times.
If the TV is moved from a cold environment to a hot environment, leave it switched of for at least an hour to avoid condensation. If used outside, make sure it is protected from moisture.
If you notice anything unusual, immediately turn off the main power supply switch and remove the power plug.
In case of fire, use preferably a CO2 gas or powder fire extinguisher. If such extinguishers are not accessible, try to isolate the electrical supply before using a water fire extinguisher.
■ Moving/Transportation
Before moving this TV, disconnect all cables and move in the vertical position only. Grasp the device on the upper and lower edges of the frame.
- Do not press or put stress on the front panel of the TV. It may take two or more people to carry larger TVs.
If you have to briefly lay down the TV, place the unit with its entire front surface lying flat on soft material.
The LCD screen is made of glass and can break if is not handled properly. Always wear rubber gloves to carry the unit. If the LCD screen is damaged, liquid crystal might leak out. In case of skin contact, immediately rinse thoroughly with water.
■ Power Supply
Incorrect voltages can damage the TV. Only connect this unit to a power supply with the correct voltage and frequency noted on the type plate, using the supplied power cable.
The power plug must be easily accessible so that the device can be disconnected at all time. The unit is live, even if the I/O button is switched off, as long as the unit is connected to a power outlet.
It is recommended that this unit is placed on a dedicated circuit.
- Do not overload the power outlets by connect too many appliances to the same outlet. Overloaded wall outlets, extension cords, etc. are dangerous and can result in electric shock and fire.
After power off, don't turn it on again in 5 seconds. Frequent switching power supply in a short period of time can cause abnormal TV.
■ Power plug and power cable
- Do not touch the power plug with wet hands.
- Do not place heavy objects on the power cable. Route the cable so that it is not kinked or laid over sharp edges, walked on or exposed to chemicals. A power cable with damaged insulation can cause electric shock and fire.
- Pull the power plug, NOT on the cable when disconnecting. The cable can become damaged and cause a short circuit if pulled on.
- Do not place the power cable near a high temperature object.
- Do not move the TV with the power cable plugged into a socket.
- Do not use a damaged or loose power cable, or a damaged socket outlet.
- Do not use any power cords other than the one supplied with this unit.
■ Set-up
Check that the location is suitable to bear the load of the TV. Place on a level, sturdy and horizontal base. Ensure that the unit does not hang over the edge of the base when placed in or on furniture. If placed on a cart, use caution when moving to avoid the unit from tipping over.
- Place the unit in a normal upright horizontal position. It must never be operated vertically, lying flat or hanging overhead from the ceiling.
- Place the unit where it is not exposed to direct sunlight or other sources of heat
When mounting the TV on a wall, follow the instructions supplied with the wall-mount, make sure not to install the TV by hanging the power and signal cables on the back of the TV.
■ Air ventilation and high temperatures
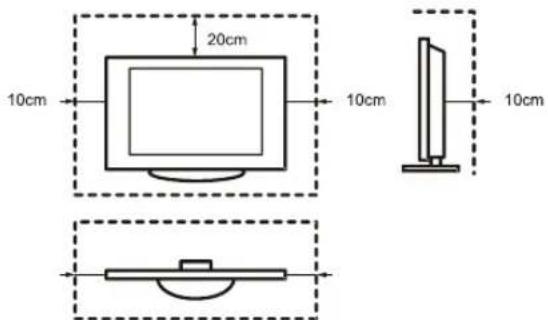
Install your TV only where there is proper ventilation, and ensure that there is at least 10 cm free space on the sides and 20 cm above the unit for air circulation. Excessive heat and obstruction of ventilation could lead to fire or early failure of some electric components.
- Do not block any ventilation openings with newspapers, tablecloths, curtains, etc.
- Do not dry clothing etc. on top of the unit.
- Take care not to touch the ventilation openings since they may become hot.
- Do not insert foreign objects into the TV through the vents.
■ The Stand
- Do not use any stand other than the one supplied with this unit.
- Do not modify or use the stand if it becomes warped of physically damaged.
- During setup, make sure that all the screws are securely tightened.
- Ensure that the TV does not suffer any impact during the attachment of the stand.
- Ensure that children do not climb onto the stand.
- Attach or remove the stand with at least two people.
- Install the TV following the specific procedure in the Quick Setup Guide.
text_image
20cm 10cm 10cm 10cmPrevent small items from getting into the interior of the device through the ventilation slots. Such objects may cause short circuits, which may cause fire.
If something should get inside the unit, immediately unplug the power plug of the device and contact service support.
■ The LCD screen
Despite thorough care when manufacturing this display, it cannot be 100% guaranteed that no sub-pixel defects will occur due to technical reasons. These cannot be considered as a device defect in terms of the guarantee. They will not affect the performance and reliability of the TV.
To prevent "image burn", avoid displaying still images for long periods of time, there is a possibility that a copy of the image may remain. If the aspect ratio is set to 4:3 for a long period of time, image burn may occur on the black areas. Image burn is not covered by the warranty.
- Do not apply strong force or impact on the display panel.
Avoid touching the LCD screen or touching it for long periods of time. Doing so may produce some temporary distortion effects on the screen.
■ Radio waves
- Do not use the TV in any medical institutions or locations with medical equipment. Radio waves may interfere with medical equipment and cause malfunction.
- Do not use the TV near any automatic control equipment such as automatic doors or fire alarms. Radio waves may interfere with automatic control equipment and cause malfunction.
If you have a cardiac pacemaker, keep a distance of at least 22 cm from the TV. Radio waves may interfere with the operation of a pacemaker.
■ Built-in wireless LAN
- Do not connect to wireless networks that you do not have the usage rights for. Data transmitted and received over radio waves may be intercepted and monitored.
The built-in wireless LAN uses 2.4 GHz and 5 GHz frequency bands. To avoid malfunctions or slow response caused by radio wave interference, keep the TV away from devices such as other wireless LAN devices, microwaves, mobile phones, and other devices that use 2.4 and 5 GHz signals.
■ Supervision
- Do not let children play unsupervised close to the TV. It could tip over, be pushed off or pulled down from the stand surface and injure someone.
- Do not allow a switched-on TV to run unattended.
Volume
Loud music and noises can lead to irreversible damage to your ears. Avoid extreme volume, especially over long periods and when using headphones.
If you hear a drumming noise in your ears, turn down the volume or temporarily stop using headphones.
■ Thunder Storms
Pull out the power plug and all connected antenna cables from the TV during a thunderstorm. Overvoltage caused by lightning strikes can damage the TV via the antenna system, as well as the wall socket.
■ Long periods of absence
As long as the power plug is connected to a live socket outlet, the TV will consume power even in "OFF"-mode. The power plug and all connected antenna cables should be disconnected out during long periods of absence.
■ Cleaning and care
CAUTION:
Unplug the power cord prior to cleaning the TV.
Clean the TV, the screen, and the remote control with a soft, moist, clean and color-natural cloth only. Do not use any chemicals.
- Do not subject the surfaces to insect repellent, solvent, thinner or other volatile substances. This may degrade the surface quality.
- Do not spray water or other liquids directly on the TV. Liquid inside the TV could lead to product failure.
- The surface of the display panel is treated and may be easily damaged. Take care not to scratch it with fingernails or other hard objects.
- Also wipe the power plug with a dry cloth at regular intervals
■ Service/Repair
Never remove the cover/back of the TV; there are no user serviceable parts inside. Refer all service to qualified service personnel.
■ Packaging
Keep the anti-moisture materials and plastic bags out of reach of children.
Plastic bags can cause suffocation and the anti-moisture material is harmful if swallowed. If swallowed by mistake, force the patient to vomit and visit the nearest hospital.
■ Modification
Do not attempt to modify this product in any way. Unauthorized modification could void the warranty of this unit, cause electric shock and fires.
■ Remote Control batteries
- Incorrect installation may cause battery leakage, corrosion and explosion.
- Replace only with the same or equivalent type.
- Do not mix old and new batteries.
- Do not mix different battery types
- Do no use rechargeable batteries
- Do not burn or break up batteries.
- Do not expose batteries to excessive heat
- Be sure to dispose of batteries correctly
■ Outdoor Antenna Grounding
If an outdoor antenna used, be sure the antenna system is protected against voltage surges and built-up static charges.
■ Disposal
Refer to the recycling section of this manual.
■ Using the 3D function
Read the following safety instructions before using the 3D function of your TV.
WARNING
People that have a visual disorder may not be able to perceive 3D effects or may only be able to perceive them to a limited extent.
Only watch 3D images after consulting your doctor if you have a history of oversensitivity to light/flickering images, heart problems, are pregnant and/or any other medical condition such as epilepsy, cardiac disorder, blood pressure disease, etc.
Do not watch 3D content if you feel nauseous, are fatigued from lack of sleep, overwork or intoxication.
3D content is not recommended for those who suffer from stereo blindness or stereo anomaly. Double images or viewing discomfort may be experienced.
If you are cross-eyed, weak sighted or have astigmatism, you may have trouble sensing depth and easily feel fatigue due to double images. It is advised to take more frequent breaks than the average adult.
If you experience any of these symptoms, stop using/watching 3D video immediately and get enough rest until the symptoms subsides: headache, eyeball pain, dizziness, nausea, palpitation, blurriness, discomfort, double image, visual inconvenience or fatigue. Consult your doctor if the symptoms persist.
CAUTION
Viewing Distance – Maintain a distance of at least twice the screens diagonal length when watching 3D content. If you feel discomfort in viewing 3D content, move further away from the TV.
Have longer pauses when watching 3D images then regular movies. Failure to do so can result in headaches, fatigue, dizziness, eye strain or discomfort.
Position yourself comfortably in front of the TV and ensure that you are seated firmly. When viewing 3D images your sense of distance may be fooled or go wrong. Be careful not to hit the TV screen or other people unintentionally. Ensure there are no breakable objects around you to avoid any accidental damage or injury.
Infants/Children
- Children under the age of 5 should not view 3D images, as a guideline.
- Children under the age of 10 may overreact and become overly excited because their vision is in development. All children must be fully supervised by parents or guardians to ensure their safety and health while they are watching 3D images.
- Children perceive more stereoscopic depth compared to adults because the distance between the eyes is shorter.
Teenagers
- Teenagers under the age of 19 may be stimulated to light coming from 3D images. Advise them not to watch 3D videos for a long time when they are tired.
Elderly
- The elderly may perceive less of a 3D effect than the youth. Do not sit closer to the TV than the recommended distance.
■ Cautions when using 3D glasses
- Only use the 3D glasses for the intended purpose and nothing else. Do not use 3D glasses instead of your normal glasses, sunglasses or protective goggles.
- Do not move around while wearing 3D glasses to avoid falling or accidental injury.
- Be careful of the tips of the frame in relation to your eyes when putting on the 3D glasses.
- Be careful not to trap your fingers in the hinge section of the 3D wear.
- Do not use 3D glasses if they are physically damaged.
- Using modified 3D glasses may cause eye strain or image distortion.
- Do not keep your 3D glasses in extremely high or low temperatures. It will cause deformation.
- The 3D glasses are fragile and are easy to scratch. Use a soft, clean piece of cloth when wiping the lenses. Do not scratch the lenses with sharp objects or clean/wipe them with chemicals.
- Do not drop, exert pressure, or step on the 3D glasses.
- If you suffer from eyesight problems (short-/farsighted, astigmatism, eyesight difference between left and right), ensure that you correct you vision before using the 3D glasses. The 3D glasses can be worn over vision correction glasses.
- Stop using the 3D glasses immediately if you experience any redness, pain or skin irritation around the nose or temples. In rare cases, the materials used in the 3D glasses may cause an allergic reaction.
Notes
- Use only approved 3D glasses. Otherwise, you may not be able to view 3D images properly.
- It may take some time for you to get used to the 3D glasses, and before you can perceive the 3D effects properly.
- Switch of any artificial light sources between the 3D TV set and the 3D glasses. These could interfere with the infrared reception or the TV picture may flicker as a result.
- To prevent interference with other TVs or wireless devices, the 3D glasses needs to be paired with the TV. Press the power key on the 3D glasses to start pairing, when the indicator light flashes, the pairing is complete.
- Certain functions like Zoom are not available when watching 3D images.
- This TV automatically identifies 3D formats when connected to a HDMI v1.4 compatible source. Other sources require manual setup.
Watching TV
1. Watching TV
After installing the TV, you can enjoy watching TV by the following steps.
Power on
- Switch on the power button of the TV.
Press the power button " 🔊 "on the remote control.
Setting the volume
● Sound off : Press the sound off button " 🔊".
● Sound on : Press the button again or use the " + VOL " button.
- Adjusting the volume: “ + VOL” Adjust the volume up/down.
Select channel
Go one channel up/down.
text_image
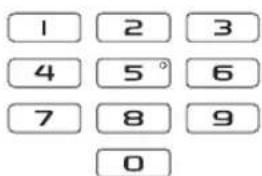
1 2 3 4 5° 6 7 8 9 0Select channel using the numerical keys.
Directly jump to channel [0\~9].
Press the 1-digit/2-digit/3-digit number of the channel you want to watch.
- CH.list Select channel using the channel list. Press the button to call the channel list.
natural_image
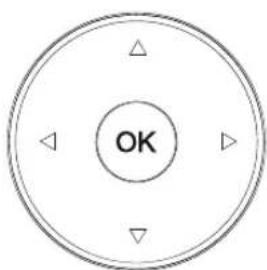
Circular diagram with central 'OK' and four directional arrows (no text or symbols beyond the 'OK')[▲/▼] Select channel. [OK] Watch the selected channel.
2. Select Input Source


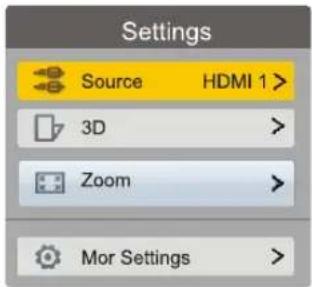
To change the input source on your TV, press the button on your remote.
text_image
Settings Source HDMI 1 > 3D > Zoom > Mor Settings >Press [OK] to select source "

Source
HDMI 1

text_image
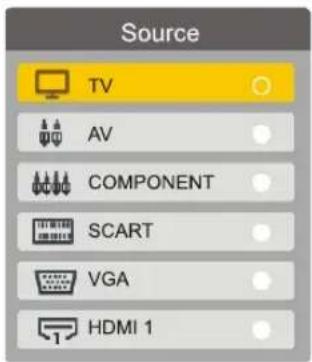
Source TV AV COMPONENT SCART VGA HDMI 1Press the [▲/▼] to select your desired input and then press [OK] to confirm.
⚠️ Note The SCART function is only applicable to the products which support it.
3. 3D Images
( The 3D function is only applicable to the products which support it )
Read the safety instructions regarding 3D images before watching any 3D content. 3D glasses must be worn to view 3D images.
● How to view 3D images:
- 3D-compatible Blu-ray disc
Connect a 3D-compatible Blu-ray player via a High Speed HDMI cable. If the input mode is not switched automatically, use the AV button to select the input that your player is connected to. - 3D-supported broadcast
Consult your contents supplier for the availability of this option. - 3D photos and 3D videos
2D images converted to 3D
Basic Settings
- Select 3D Mode

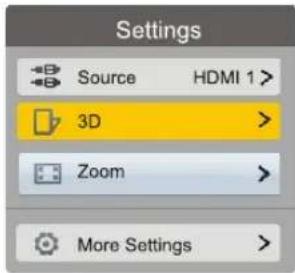
To change the setting for the 3D mode of your TV, press the button on your remote.
text_image
Settings Source HDMI 1 > 3D > Zoom > More Settings >Press the [▲/▼] to select 3D " 3D > " and then press [OK] to confirm.
text_image
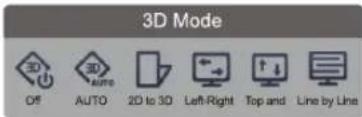
3D Mode Off AUTO 2D to 3D Left-Right Top and Line by LineSelect a preset 3D mode.

When viewing 2D video, this option must be selected.

Select 3D mode automatically.

Convert all ordinary 2D video to 3D video. You need to wear your 3D glasses to view this properly.

Display two images next to each other.

Display two images, one on top of the other.

Display the images for the left and right eye alternately.
Note
When the 3D signal is Frame Packing, the image will be displayed according to the resolution of the incoming signal. A 1280 x 720 input will be displayed in 720p; a 1920 x 1080 input will be displayed in 1080p. When the 3D signal format is Side by Side, Top and bottom, the image is displayed full screen in half resolution (960 x 1080 or 1920 x 540).
4. Aspect ratio
There are two input signals, one is 4:3 and the other is 16:9. The recommended format for 4:3 is 4:3 or Auto, and for 16:9 it is 16:9 or Auto.
You can set various display modes which are shown as follows.

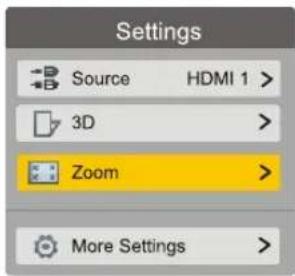
To switch between 4:3/16:9/Zoom 1/Zoom 2/Smart Zoom/Auto/1:1, press the button on your remote.
text_image
Settings Source HDMI 1 > 3D > Zoom > More Settings >Press the [▲/▼] to select Zoom " Zoom > " and then press [OK] to confirm.
| SIZE | Input Signal 4:3 | Input Signal 16:9 | ||
| 4:3 | This selection will allow you to view a picture with an original 4:3 aspect ratio. Black bars will appear on both the left and right of the screen. | 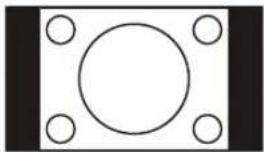 | This selection will allow you to adjust the picture horizontally, in linear proportion. Black bars will appear on both the left and right of the screen. | 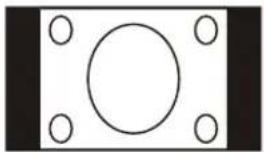 |
| 16:9 | This selection will allow you to adjust the picture horizontally, in linear proportion, to fill the entire screen. | 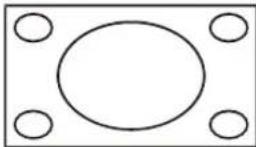 | This selection will allow you to view a picture with an original 16:9 aspect ratio | 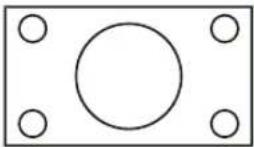 |
| Zoom 1 | This selection will allow you to zoom in the picture without any alteration.However,the top and bottom of the picture will be cropped.And it allow you to adjust the picture horizontally, in linear proportion. Black bars will appear on both the left and right of the screen. | 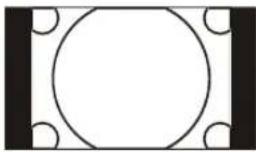 | This selection will allow you to zoom in the picture without any alteration.However,the top and bottom of the picture will be cropped.And it allow you to adjust the picture horizontally, in linear proportion. Black bars will appear on both the left and right of the screen. | 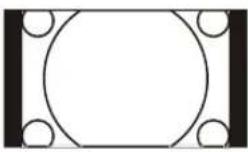 |
| Zoom 2 | This selection will allow you to zoom in the picture without any alteration, while filling the entire screen. However,the border of the picture will be cropped. | 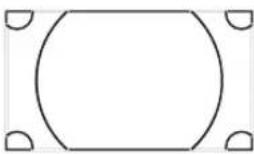 | This selection will allow you to zoom in the picture without any alteration, while filling the entire screen. However,the border of the picture will be cropped. | 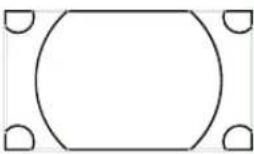 |
| Smart Zoom | This selection is similar to 16:9 mode, but the picture slightly stretches horizontally side and clips off a little from the top and bottom. | 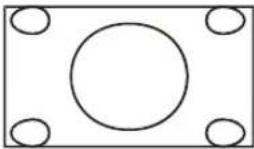 | This selection is similar to 16:9 mode, but the picture slightly stretches horizontally side and clips off a little from the top and bottom. | 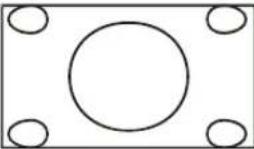 |
| Auto | This selection will display the picture according to the aspect ratio of the input source. | 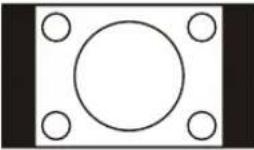 | This selection will display the picture according to the aspect ratio of the input source. | 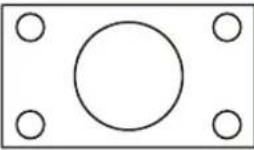 |
| 1:1 | This selection will detect the resolution of the signal and display an image with the same number of pixels.The signal is optional in some source. (eg the HDMI source) | |||
5. Menu operation

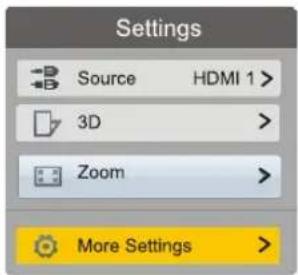
You can enter the settings menu by pressing the “💡” button on your remote control.
text_image
Settings Source HDMI 1 > 3D > Zoom > More Settings >Press the [▲/▼] to select More Settings " More Settings > " and then press [OK] to confirm.
text_image
"OK"The arrow keys in the middle of your remote control help you navigate in the menus and select menu items.
The [OK] button in the middle is used to confirm a selection.
Press the “☐” button on your remote to return to the previous menu.
More Settings
6. Setting Options: Picture
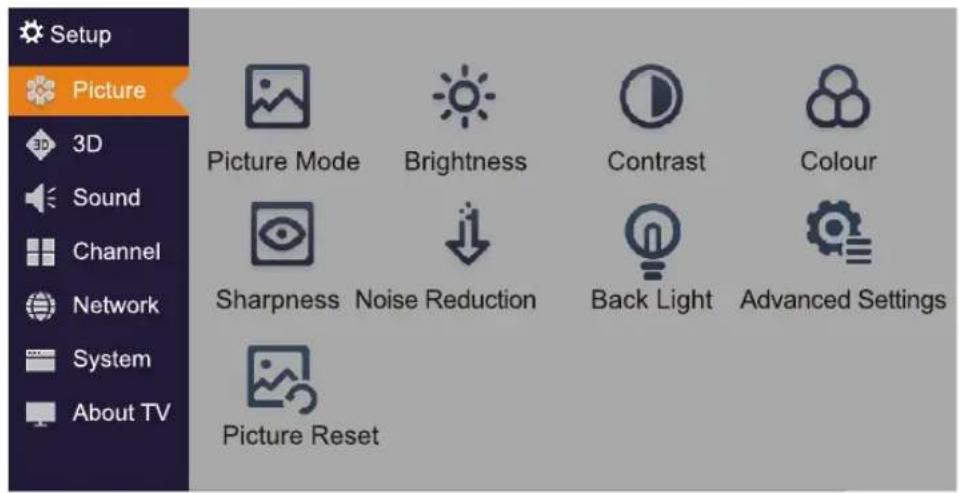
Here you can adjust the settings related to the picture output on your TV.
text_image
Setup Picture 3D Sound Channel Network System About TV Picture Mode Brightness Contrast Colour Sharpness Noise Reduction Back Light Advanced Settings Picture ResetExplanation of the picture settings:
 Picture Mode Picture Mode | ● Picture mode :Select your preferred picture mode from the following options: Standard, Cinema, Natural, Game, Dynamic, Custom. |
 Brightness Brightness | ● Brightness :Adjust the overall luminance of the picture. Set the brightness so that the black areas only just appear black. |
 Contrast Contrast | ● Contrast :Adjust the overall luminance ratio between black and white. The contrast setting depends on the brightness of the room. The brighter the surroundings the higher the contrast should be set. |
 Colour Colour | ● Colour :Adjust the colour saturation within the picture. Set the intensity to suit your personal taste. |
 Sharpness Sharpness | ● Sharpness :Adjust to achieve the optimum sharpness of edges and details within the picture |
| [YS26]Noise Reduction | ● Noise Reduction :Reduce or eliminate the picture noise from connected devices. Select between the following: off, low, medium, high and auto. |
 Back Light Back Light | ● Back Light :Adjust the backlight to suit lighting conditions of the environment. Not available in 3D mode.Back LightAdaptive Back Light OFF50Back Light:Adjust the backlight mode by selecting manual or adaptive backlight mode.Back Light:Only available when the Backlight Mode is set to manual. Adjust the backlight level bar to select the optimum level of illumination |
 Advanced Settings Advanced Settings | ● Advanced Settings :Specialized picture settings. |
| ● Colour Temperature:Colour Temperature StandardColour Temperature StandardDynamic Contrast MediumSkin Tone MediumWhite BalanceMotion smoothing | |
| ● Dynamic Contrast:Adjust the colour contrast to achieve the optimal contrast setting.Select one of the following options: Off, Low, Medium, and High.Skin Tone:Adjust the amount of red in skin-colour tones. Select one of the following options: Off, Low, Medium, and High.White Balance:Adjust the white balance by individually adjusting the brightness of the R Gain, G Gain and B Gain levelsMotion smoothing:Eliminate motion blur with clear detail and smooth motion.(Depends on your TV size and series) | |
 Picture Reset Picture Reset | ● Picture Reset :Reset all picture setting to factory defaults |
7. Setting Options: 3D
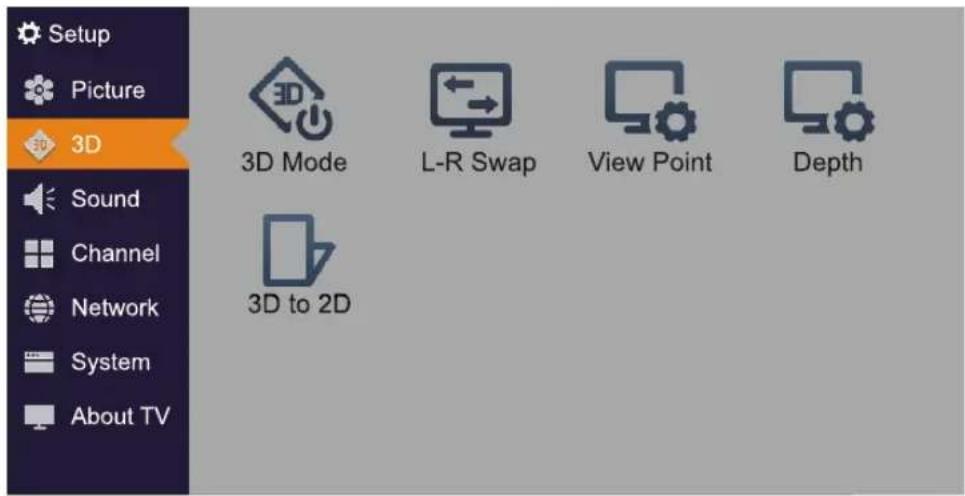
Here you can change the setting for the 3D mode of your TV.
( The 3D function is only applicable to the products which support it )
text_image
Setup Picture 3D Sound Channel Network System About TV 3D Mode L-R Swap View Point Depth 3D to 2DExplanation of the 3D settings:
 3D Mode 3D Mode | ● 3D mode :When viewing 2D video, this option must be selected. |
 L-R Swap L-R Swap | ● L-R Swap :Since there is no standard signal formatting. Mismatch, incorrect stereoscopic impressions and dizziness may occur when watching some 3D videos. This can be solved by switching on this function. For modulation, see the related content in this manual. Not available when 3D mode is 3D to 3D. |
 View Point View Point | ● View Ponit :Adjust the “out-of-screen”-effect that the 3D images have. Only available when 3D mode is 2D to 3D. |
 Depth Depth | ● Depth :Increase or decrease the stereoscopic effect. Not available when 3D mode is off. |
 3D to 2D 3D to 2D | ● 3D to 2D :All 3D video will be converted into 2D video. You will not have to wear 3D glasses to view it properly.Enables playing of 3D movies and TV shows by using the compatible 3D glasses. Please refer to the 3D section for more information. ( The 3D function is only applicable to the products which support it ) |
8. Setting Options: Sound
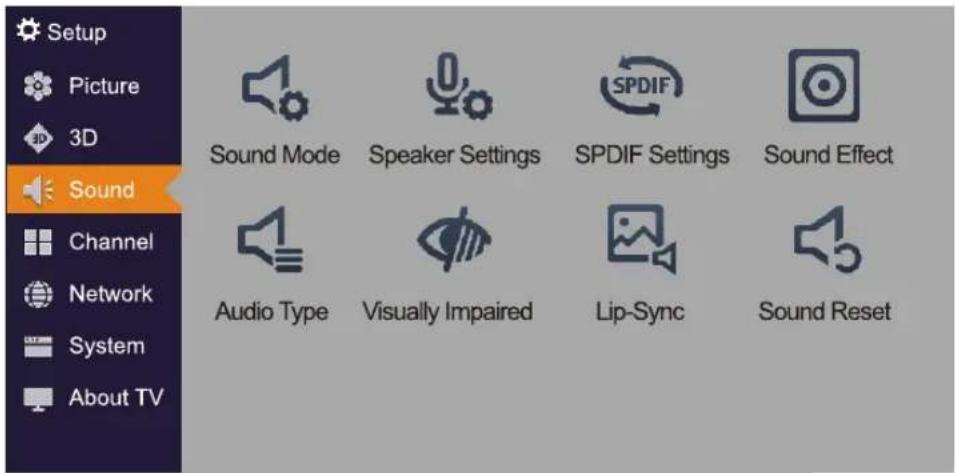
Here you can adjust the settings related to the sound output on your TV. For explanation of the setting in the Audio menu, see page.
text_image
Setup Picture 3D Sound Channel Network System About TV Sound Mode Speaker Settings SPDIF Settings Sound Effect Audio Type Visually Impaired Lip-Sync Sound ResetExplanation of the Sound settings:
| Sound Mode | ● Sound mode : Select the Sound Mode based on your personal preference: Standard, Music, Theater, Speech or Custom. |
| Speaker Settings | ● Speaker Settings : Speaker Settings Balance 0 Auto Volume OFF Speaker & ARC Speaker Balance : Adjust the relative volume between the left and right speakers. Auto Volume : Enable this setting to automatically adjust the volume to reach a consistent level. Speaker & ARC : *ARC: Connect to an external digital audio receiver through a HDMI cable and set this to "On" to activate ARC. |
 SPDIF Settings SPDIF Settings | ● SPDIF Settings :SPDIF SettingsSPDIF Output PCMSPDIF Delay 0 | ● SPDIF Output :Select the digital output format.-PCM:Outputs two channel audio, regardless of the input format.-RAW:If the audio stream carries a Dolby signal that will be outputted. If the audio stream carries no Dolby signal, PCM will be outputted.SPDIF Delay :Correct audio-video synchronization problems when watching TV, video, and when listening to digital audio using an external device such as an AV receiver. |
 Sound Effect Sound Effect | ● Sound Effect :Adjust the sound with a 5-band equalizer.Press the [▲/▼] to select the different audio frequency bands; 120 Hz, 500 Hz, 5 KHz, and 10 KHz. Press [◄/►] to adjust each frequency and individually. | |
 Audio Type Audio Type | ● Audio Type :Normal/Hearing Impaired/Visually Impaired.Hearing Impaired:Increases the overall intensity of high-frequency sounds for a better listening experience. Only available for DTV channels and if the service is broadcasted.Visually Impaired:Provides an additional description audio track for visually challenged people. Only available if sent along with the main audio from the broadcaster. | |
 Visually Impaired Visually Impaired | ● Visually Impaired :Select “Visually Impaired” in the Audio Type to activate the description sound track if available.Speaker/Headphone:Select the device which outputs sound.Volume:Adjust the volume of the description sound track. | |

Lip-Sync

Sound Reset
- Lip-Sync :
Adjust the picture and sound to play at the same time.
- Sound Reset :
Reset all sound setting to factory default.
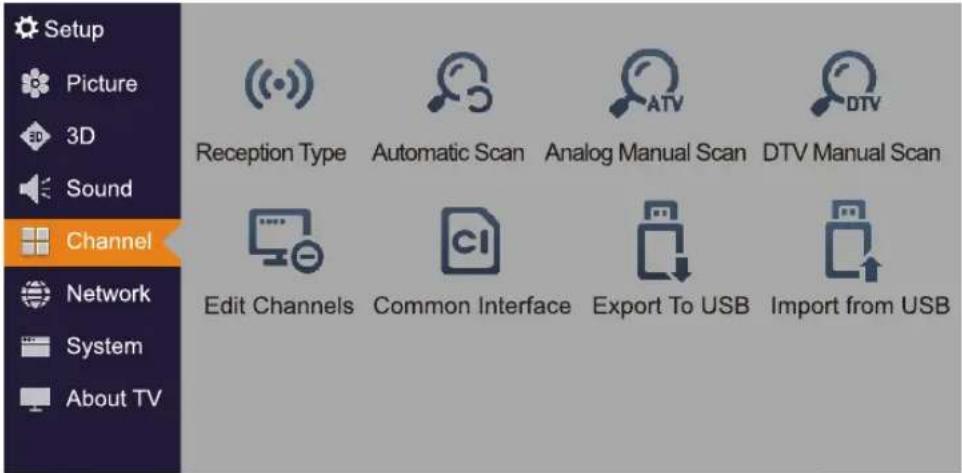
9. Setting Options: Channels
Here you can adjust the settings related to selecting reception type, perform channel scans and edit and sort channels, and make favorite lists. For explanation of the setting in the Channels menu, see page.
text_image
Setup Picture 3D Sound Channel Network System About TV Reception Type Automatic Scan Analog Manual Scan DTV Manual Scan Edit Channels Common Interface Export To USB Import from USBExplanation of the channels settings:

Reception Type
- Reception Type :
Select a preset reception type: Antenna, Cable or Satellite.

Note The Satellite function is only applicable to the products which support it.

Automatic Scan
- Automatic Scan :
Use this to automatically find and store all available channels.
Automatic Scan
Scan All Channels.
Scan Mode
DTV Scan
Scan
Scan mode: select DTV scan, ATV scan or DTV+ATV scan.
Press "Scan" to start searching for channels.

Analog Manual Scan
● Analog Manual Scan :
Allows you to make manual fine tuning of channels in ATV mode.
Analog Manual Scan
| Search for analog channels | |
| Start frequency | 42.00 |
| Colour System | NTSC |
| Sound System | B/G |
| Scan Up | |
| Scan Down | |
- Start frequency (MHz) :
Input the frequency using the numeric buttons.
• Colour System: Select the colour system from the following options: Auto, PAL, SECAM, and NTSC. - Sound System: Select the sound system from the following options: D/K, B/G, I, L, L'
- Scan Up: Scan for analog channels above the start frequency.
- Scan Down: Scan for analog channel below the start frequency.

DTV Manual Scan
- DTV Manual Scan :
Allows you to make manual fine tuning of channels in DTV mode.
DTV Manual Scan
| Search single RF channel. (Digital Only) | |
| 0% | |
| Channel Number | 28 |
| Bandwidth | 8 MHz |
| Scan | |
| Signal Level | 0% |
| Signal Quality | 0% |
- Channel Number :
Select the channel number. - Bandwidth :
Display the bandwidth of the selected channel. - Scan :
Select to start manual tuning. - Signal Level :
Displays the intensity of the current signal.
• Signal Quality :
Displays the quality of the current signal.