
37DM23FP - Fernseher SHARP - Kostenlose Bedienungsanleitung
Finden Sie kostenlos die Bedienungsanleitung des Geräts 37DM23FP SHARP als PDF.


Benutzerfragen zu 37DM23FP SHARP
0 Frage zu diesem Gerät. Beantworten Sie die, die Sie kennen, oder stellen Sie Ihre eigene.
Eine neue Frage zu diesem Gerät stellen
Laden Sie die Anleitung für Ihr Fernseher kostenlos im PDF-Format! Finden Sie Ihr Handbuch 37DM23FP - SHARP und nehmen Sie Ihr elektronisches Gerät wieder in die Hand. Auf dieser Seite sind alle Dokumente veröffentlicht, die für die Verwendung Ihres Geräts notwendig sind. 37DM23FP von der Marke SHARP.
BEDIENUNGSANLEITUNG 37DM23FP SHARP
SHARP
text_image
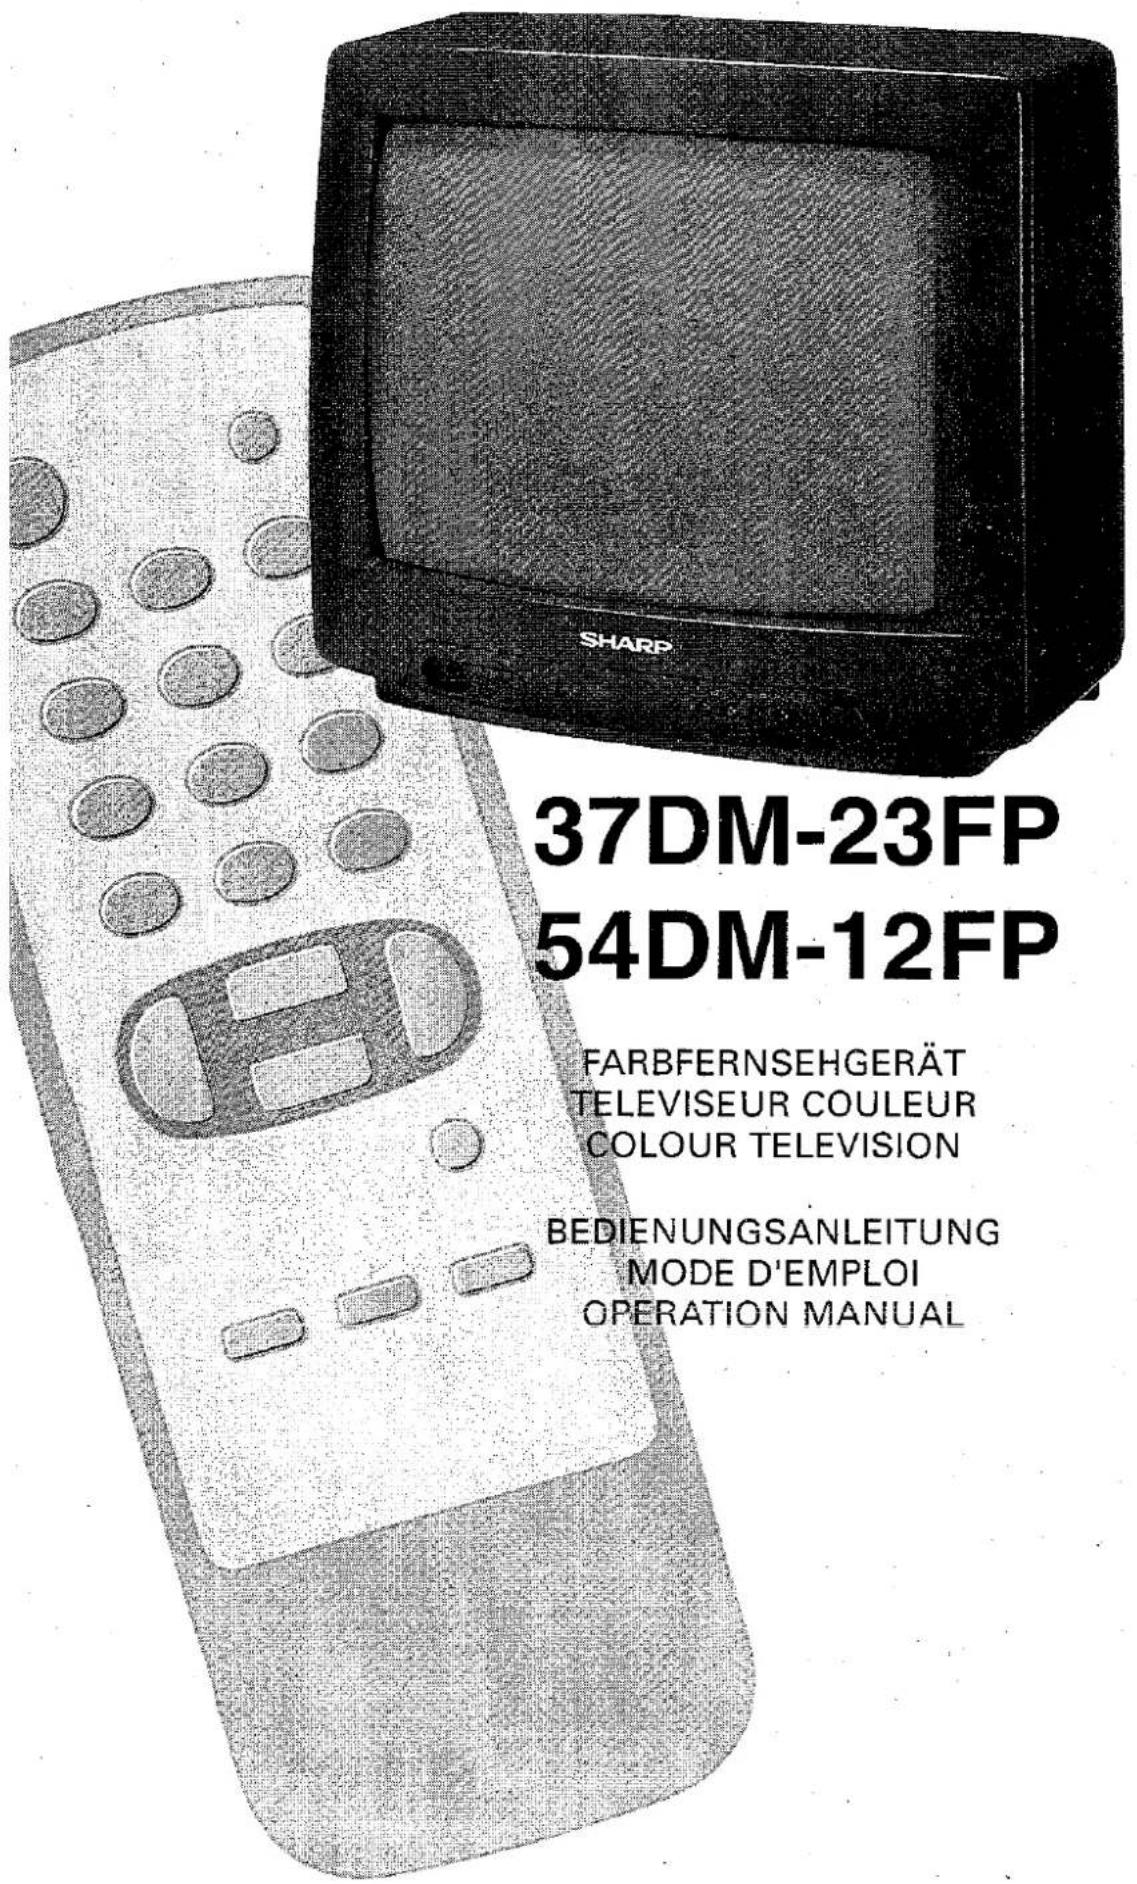
37DM-23FP 54DM-12FP FARBFERNSEHGERÄT TELEVISEUR COULEUR COLOUR TELEVISION BEDIENUNGSANLEITUNG MODE D'EMPLOI OPERATION MANUALContents
GENERAL INFORMATION
Safety Precaution 43
Feature List 43
Accessories 44
Remote Control Battery Installation 44
Antenna Connection 44
Remote Control 45
Controls & Terminals 46
■ SETTING UP
Basic Operation 47
Menu Structures 49
Auto Channel Preset 50
Manual Channel Preset 51
Fine Tuning 53
Skipping Channels 54
■ SPECIAL FUNCTIONS
Picture Adjustments 55
Timer Setting 56
Child Lock 57
Flashback 59
Sound Mute 59
TV/VIDEO 59
Call-ON 60
HELPFUL HINTS
21-Pin Euro-SCART 61
Typical Connections 61
Troubleshooting 62
General Specifications 63
Dear SHARP Customers
«SHARP» consumer electronic products have established a worldwide reputation for unsurpassed quality and precision manufacturing techniques since 1924, when the famous SHARP trademark first appears on a radio receiver.
Your new SHARP Colour TV uses the very latest electronic circuitry and engineering advancements for the best possible performance. Given proper care, your new TV will provide many years of entertaining for the entire family.
Please read the following instructions before operating this set.
Safety precaution
This equipment complies with the requirements of Directives 89/336/EEC and 73/23 EEC as amended by 93/68/EEC.

text_image
> 5 cmFeature list
Convenient Feature in a Beautiful Desing for Superb Entertainment
• 21-Pin Euro-SCART Terminal
- 99 Channel Programming System
- Cable and Hyperband
- ON Timer / OFF Timer
• Full Auto Search System
● Earphone jack (Except for 54DM-12FP)
● High-Contrast Picture Tube
- Infrared Remote Control
- Channel Skip Function
- Flashback Channel Changeover
- Child Lock System
Quick Reference Guide
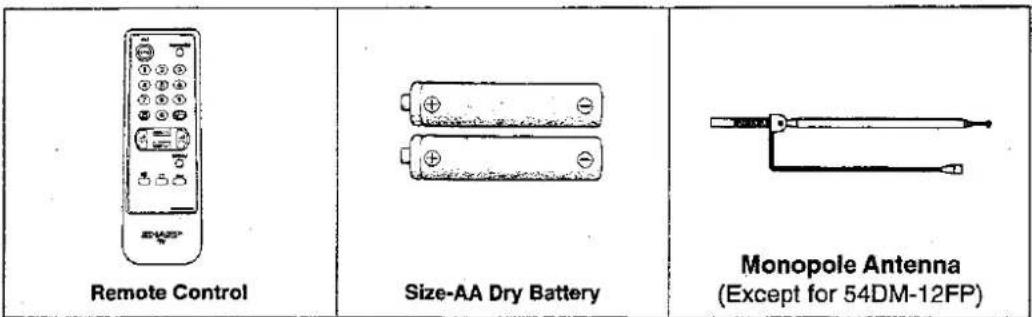
Accessories
text_image
Remote Control Size-AA Dry Battery Monopole Antenna (Except for 54DM-12FP)Remote Control Battery Installation
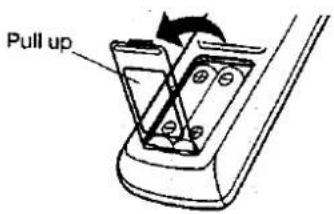
Before using the TV set for the first time, install the supplied dry batteries in the remote control.
Inserting batteries
text_image
Pull up① With your thumb nail, pull up the slit as indicated by the arrow to remove the back cover.
② Insert two batteries (size «AA»). Be sure to match the battery ⊕/⊖ terminals with the ⊕/⊖ marks inside the compartment.
③ Replace the battery cover.
NOTE
- Remove batteries if weak or if the unit is not in use for long periods.
- Do not mix old and new batteries.
- Incorrect installation of the batteries may damage the remote control.
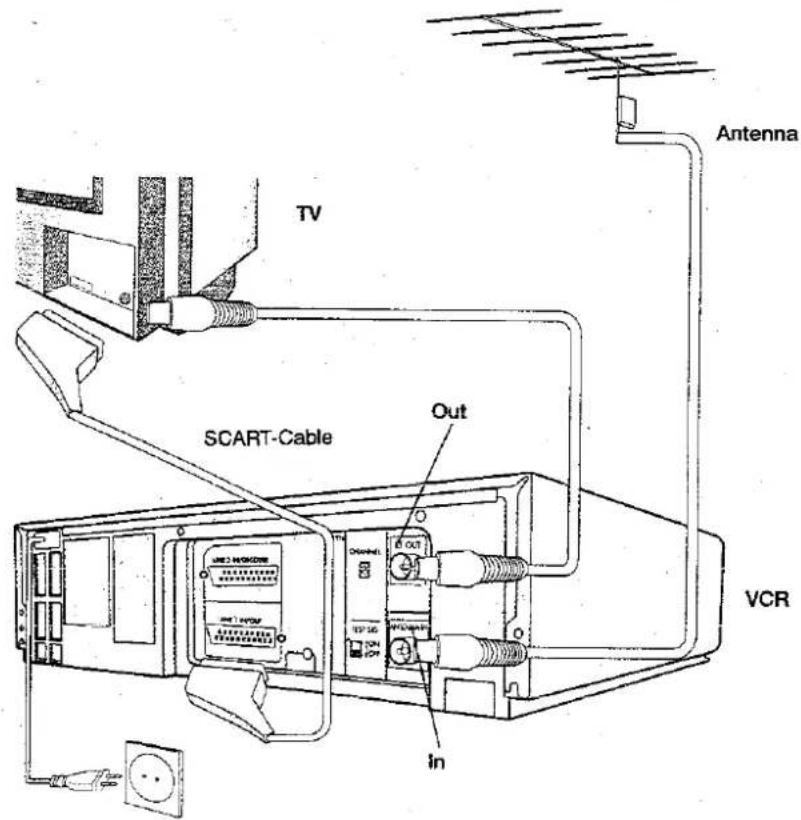
Antenna connections
text_image
TV SCART-Cable Out Antenna VCR In©
Controls & Terminals
FRONT
- Power button
- Power/On Timer indicator
- Channel Up/Down buttons
- Volume Up/Down buttons
- Remote Control Sensor
- Earphone jack (Except for 54DM-12FP)
37DM-23FP
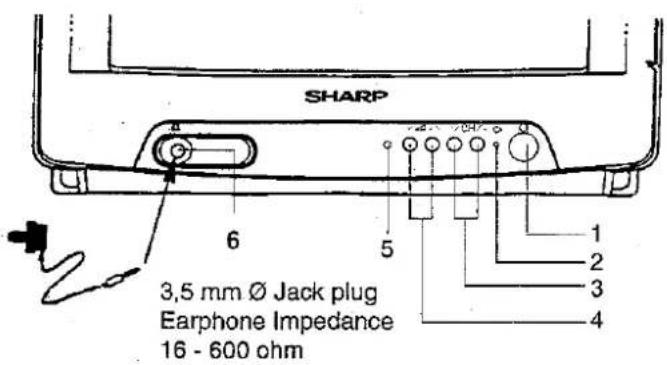
text_image
SHARP 6 5 3,5 mm Ø Jack plug Earphone Impedance 16 - 600 ohm 1 2 3 454DM-12FP
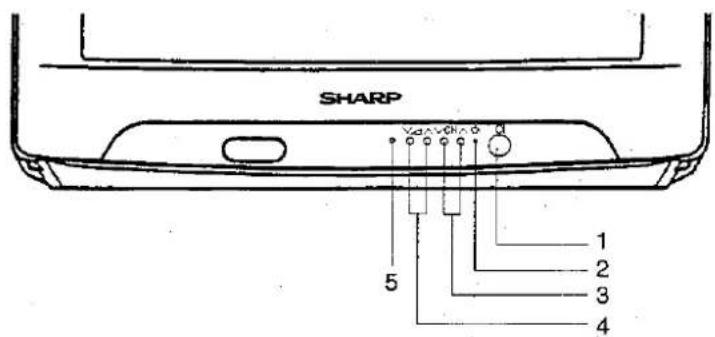
text_image
SHARP 5 1 2 3 4REAR
- Antenna terminal
- 21-Pin Euro-SCART
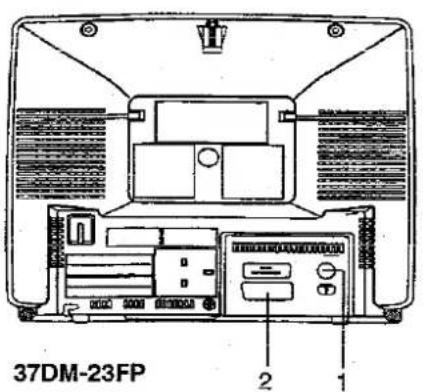
text_image
37DM-23FP 2 1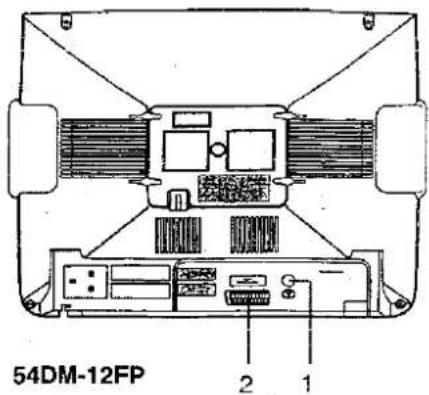
text_image
54DM-12FP 2 1MENU Structures
(Please master these basic operations, and the rest is simple)
■ Calling Up the Functions
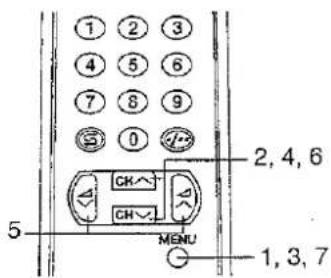
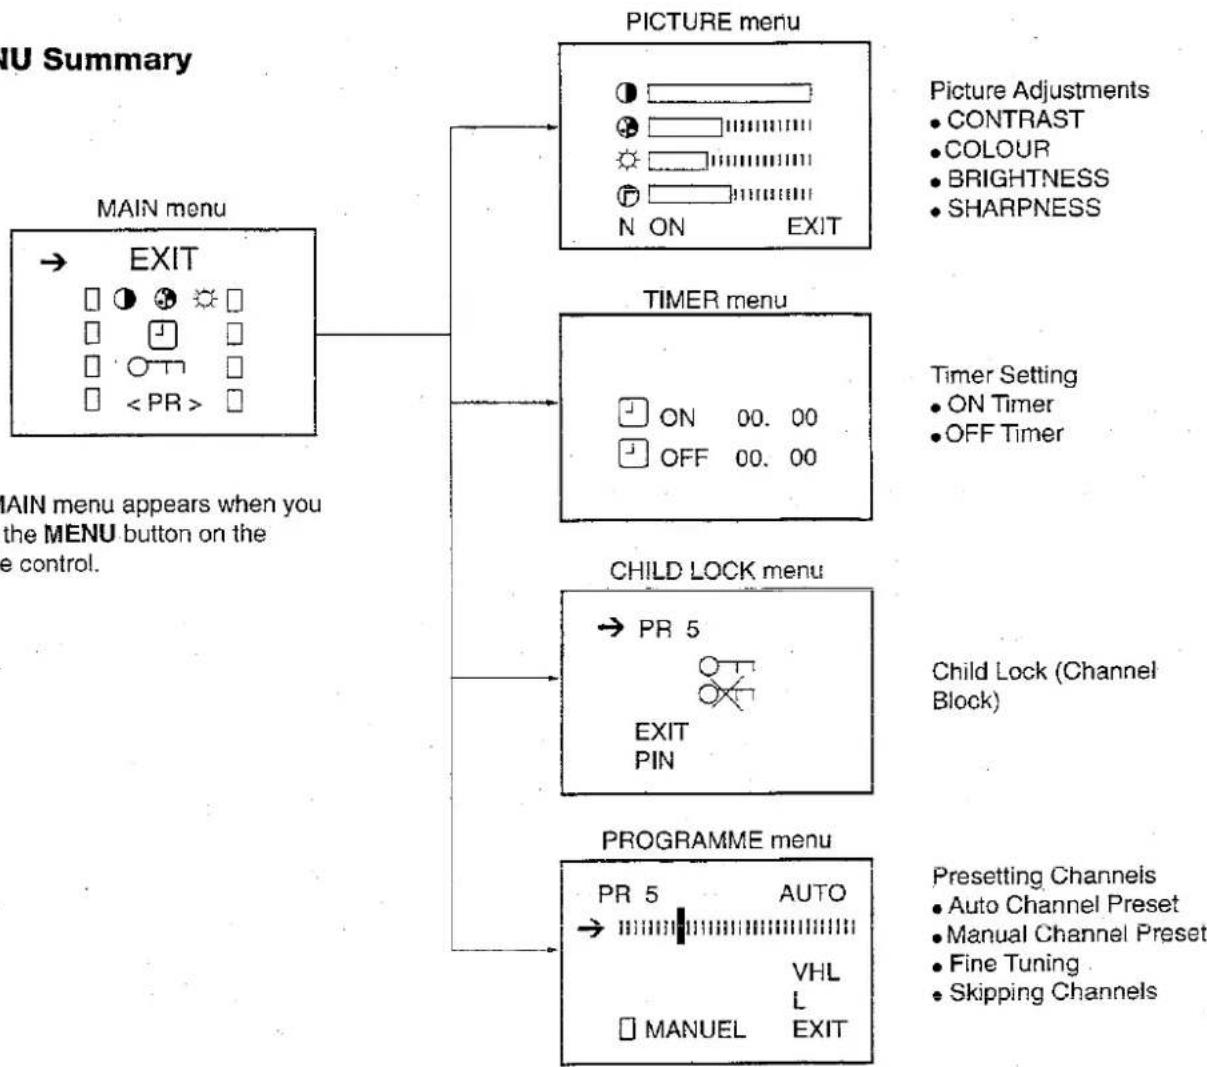
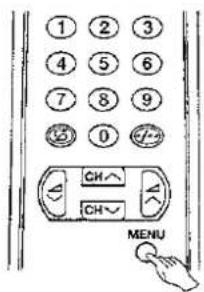
1 Press the MENU button on the remote control to call the MAIN menu screen.
2 Press the CHANNEL UP or DOWN button to select the desired function mode.
Each time you press the CHANNEL UP or DOWN button, the « → » mark moves up or down.
3 Press the MENU button.
4 Press the CHANNEL UP or DOWN button to access desired function mode.
5 Press the VOLUME UP or DOWN button to adjust the access mode.
6 To leave the Menu screen, press the CHANNEL UP or DOWN button to select «EXIT» mode.
7 Press the MENU button.
text_image
1 2 3 4 5 6 7 8 9 0 2, 4, 6 5 CH~ CH~ MENU 1, 3, 7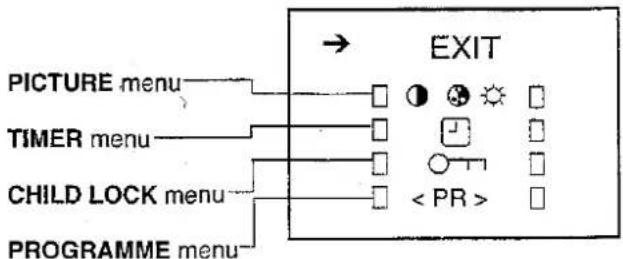
flowchart
graph TD
    A["PICTURE menu"] --> B["EXIT"]
    C["TIMER menu"] --> B
    D["CHELD LOCK menu"] --> B
    E["PROGRAMME menu"] --> B
    B --> F["●"]
    B --> G["○"]
    B --> H["★"]
    B --> I["□"]
    B --> J["○"]
    B --> K["□"]
    B --> L["< PR >"]
    B --> M["□"]
MENU Summary
flowchart
graph TD
    A["MAIN menu"] --> B["EXIT"]
    B --> C["MAIN menu appears when you the MENU button on the control."]
    A --> D["PICTURE menu"]
    D --> E["TIMER menu"]
    E --> F["ON 00.00 OFF 00.00"]
    A --> G["CHOOD LUX"]
    A --> H["PROGRAMME menu"]
    H --> I["PR 5 AUTO VHL MANUEL EXIT"]
    style A fill:#f9f,stroke:#333
    style B fill:#ccf,stroke:#333
    style D fill:#cfc,stroke:#333
    style E fill:#fcc,stroke:#333
    style F fill:#cff,stroke:#333
    style G fill:#ffc,stroke:#333
    style H fill:#cfc,stroke:#333
Channel Setting
This facility will automatically tune all local channel for you. The following steps are carried out using the remote control.
■ Auto Channel Preset
Automatically tunes in and presets receivable TV stations
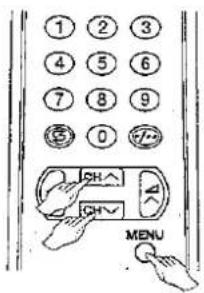
1 Press the MENU button to call the MAIN menu screen.
text_image
① ② ③ ④ ⑤ ⑥ ⑦ ⑧ ⑨ ⑩ ⑪ ⑫ CH~ CH~ MENU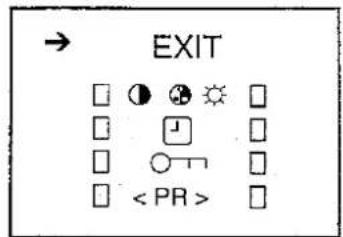
text_image
EXIT < PR >2 Press the CHANNEL UP or DOWN button to select « < PR >, and press the MENU button.
text_image
① ② ③ ④ ⑤ ⑥ ⑦ ⑧ ⑨ ⑩ ⑪ ⑫ CH CHV MENU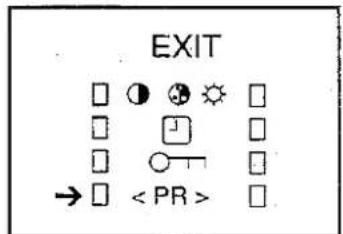
text_image
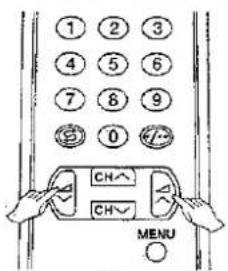
EXIT → < PR >3 Press the VOLUME UP or DOWN button on the remote control to start Auto Channel Preset.
All the TV stations in your area that can be received by the TV set are automatically preset between channels 1 to 99.
text_image
① ② ③ ④ ⑤ ⑥ ⑦ ⑧ ⑨ ⑨ ⑩ ⑪ CH CH MENU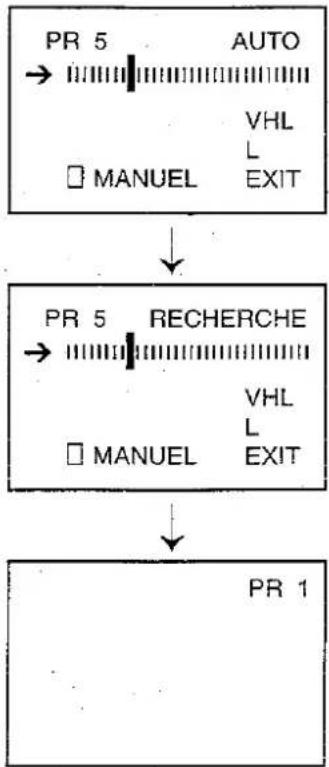
flowchart
graph TD
    A["PR 5"] --> B["→"]
    B --> C["MANUEL"]
    C --> D["AUTO"]
    D --> E["VHL L EXIT"]
    F["PR 5"] --> G["→"]
    G --> H["RECHERCHE"]
    H --> I["VHL L EXIT"]
    J["PR 1"] --> K["↓"]
The screen shows whatever is on channel 1 when full auto channel preset is finished.
NOTE:
- To stop Auto Channel Presset, press the MENU button on the remote control.
- Press the MENU button twice in searching the SYSTEM - L.
Channel Setting (Continued)
This section describes how to tune your TV manually and to store them in the order you prefer. The following steps are carried out using the remote control.
■ Manual Channel Preset
Setting a channel to a desired TV station
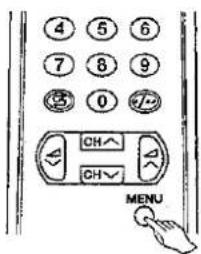
1 Press the MENU button to call the MAIN menu screen.
text_image
4 5 6 7 8 9 0 CH~ CH~ MENU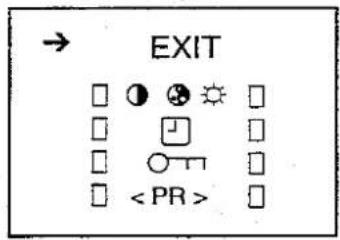
text_image
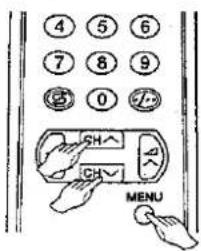
EXIT2 Press the CHANNEL UP or DOWN button to select PROGRAMME menu « < PR > », and press the MENU button.
text_image
4 5 6 7 8 9 0 1 CH CH MENU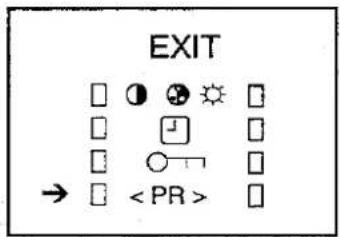
text_image
EXIT →3 Press the CHANNEL UP or DOWN button to select «MANUEL», and press the MENU button.

text_image
4 5 6 7 8 9 0 12 CH CH MENU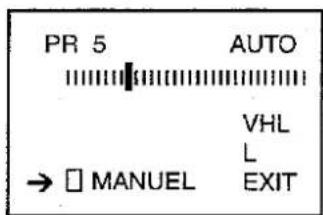
text_image
PR 5 AUTO VHL L → □ MANUEL EXIT4 Press the CHANNEL UP or DOWN button to select «
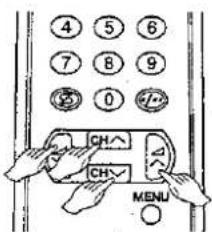
text_image
4 5 6 7 8 9 0 CH CH MENU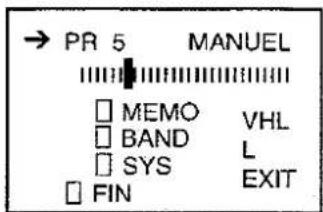
text_image
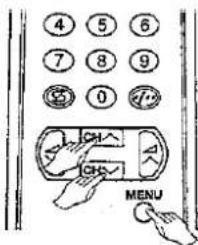
→ PR 5 MANUEL □ MEMO VH □ BAND L □ SYS EXIT □ FIN5 Press the CHANNEL UP or DOWN button to select «BAND», and press the MENU button to change the «BAND».
$$ (\mathrm{VHL} \rightarrow \mathrm{VHH} \rightarrow \mathrm{UHF}) $$
text_image
4 5 6 7 8 9 0 12 1 CH CH MENU
text_image
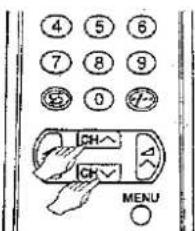
PR 5 MANUEL MEMO VHL BAND L SYS EXIT FIN6 Press the CHANNEL UP or DOWN button to select «SYS», and press the MENU button to change the SYSTEM.
The system switches between SECAM - L and PAL-B/G.
| System | On screen display |
| SECAM-L | L |
| PAL-B/G | No displayed |
text_image
4 5 6 7 8 9 0 7 CH CH MENU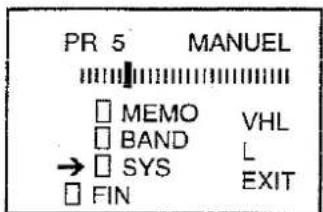
text_image
PR 5 MANUEL □ MEMO VHL □ BAND L → □ SYS EXIT □ FINChannel Setting (Continued)
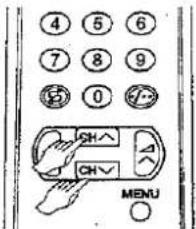
7 Press the CHANNEL UP or DOWN button to select «MANUEL» position (III)
text_image
4 5 6 7 8 9 0 CH CH MENU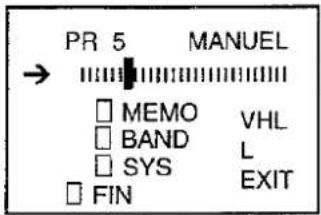
text_image
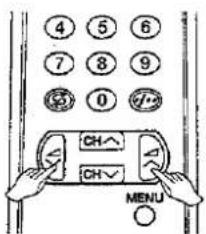
PR 5 MANUEL → MEMO VHL BAND L SYS EXIT FIN8 Press the VOLUME UP or DOWN button to start preset.
text_image
4 5 6 7 8 9 0 CH CH MENU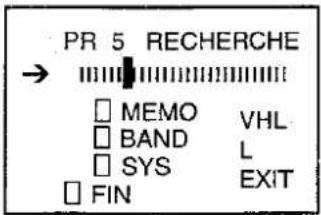
text_image
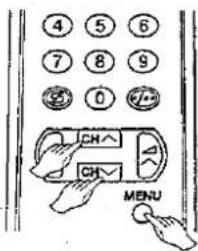
PR 5 RECHERCHE → MEMO VHL BAND L SYS EXIT FIN9 Press the CHANNEL UP or DOWN button to select «MEMO», and press the MENU button to memorize.
10 Repeat steps 4 to 9 if you wish to preset other channels.
text_image
4 5 6 7 8 9 0 12 CH CH MENU
text_image
PR 5 MANUEL → □ MEMO VHL □ BAND L □ SYS EXIT □ FIN11 Press the CHANNEL UP or DOWN button to select «EXIT», and press the MENU button to returns to normal screen.
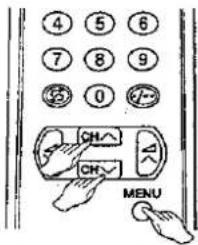
text_image
4 5 6 7 8 9 0 CH CH MENU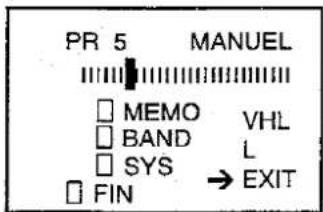
text_image
PR 5 MANUEL □ MEMO VHL □ BAND L □ SYS → EXIT □ FINChannel Setting (Continued)
■ Fine Tuning
This function lets you easily fine - tune the TV set to improve reception and picture quality
| 1 Press the MENU button to call the MAIN menu screen. | 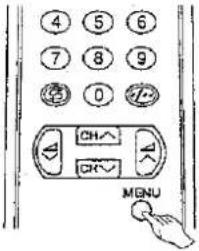 | 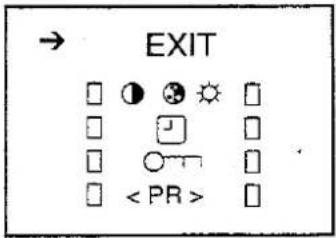 |
| 2 Press the CHANNEL UP or DOWN button to select «<PR>», and press the MENU button. | 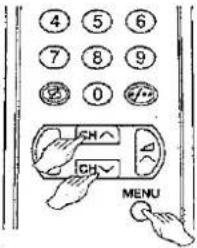 | 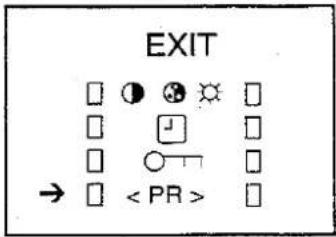 |
| 3 Press the CHANNEL UP or DOWN button to select «MANUEL», and press the MENU button. | 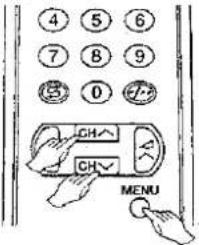 | 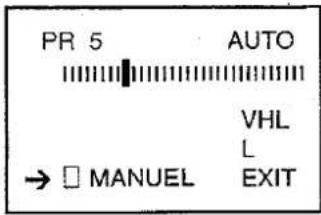 |
| 4 Press the CHANNEL UP or DOWN button to select «FIN», and press the MENU button. | 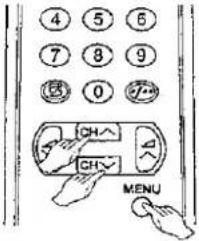 | 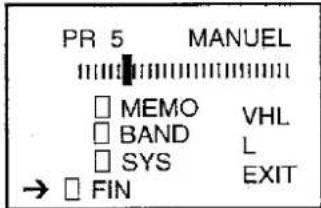 |
| 5 Press the VOLUME UP or DOWN button to start Fine tuning.When the Fine Tuning is completed, the channel number will turn from green to yellow. | 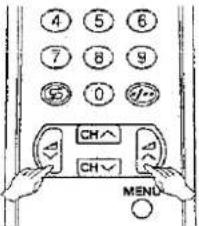 | 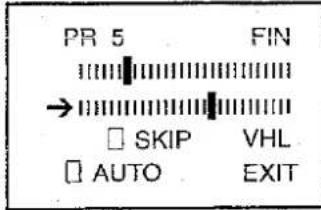 |
| 6 Press the CHANNEL UP or DOWN button to select «EXIT», and press the MENU button.The screen will turn to normal screen. | 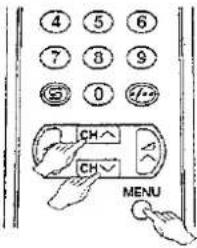 | 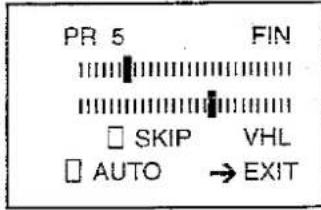 |
Channel Setting (Continued)
■ Skipping Channels
This function lets you skip vacant channels or channels that you neverwatch when you select channels with the CHANNEL UP or DOWN button
Setting Skip
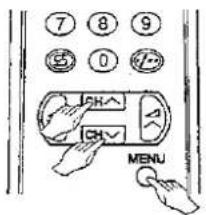
1 Press the MENU button to call the MAIN menu screen.
2 Press the CHANNEL UP or DOWN button to select «
text_image
7 8 9 5 0 12 CH CH MENU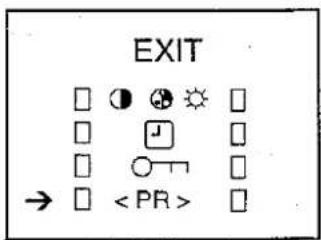
text_image
EXIT →3 Press the CHANNEL UP or DOWN button to select «MANUEL» mode, and press the MENU button.
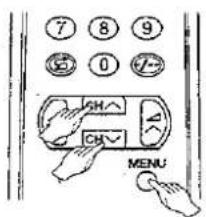
text_image
7 8 9 50 0 1/2 GH CH MENU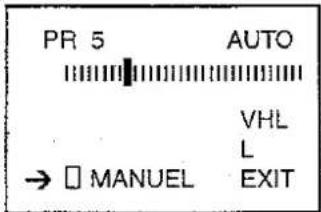
text_image
PR 5 AUTO VHL L → □ MANUEL EXIT4 Press the CHANNEL UP or DOWN button to select «FIN» mode, and presse the MENU button.
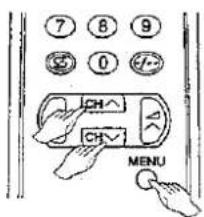
text_image
7 8 9 0 CH^ CHV MENU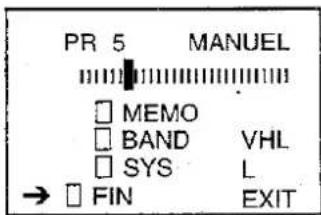
text_image
PR 5 MANUEL □ MEMO □ BAND VHL □ SYS L → □ FIN EXIT5 Select a channel number you wish to skip with the VOLUME UP or DOWN button.
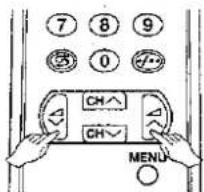
text_image
⑦ ⑧ ⑨ ⑤ ⑥ ⑦ CH^ CH~ MENU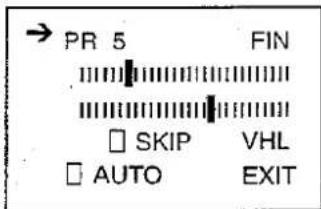
text_image
→ PR 5 FIN SKIP VHL AUTO EXIT6 Press the CHANNEL UP or DOWN button to select «SKIP» mode, and press the MENU button. The channel number will turn from green to red.
7 Repeat steps 5 to 6 if you wish to skip other channels.
8 Press the CHANNEL UP or DOWN button to select «EXIT», and press the MENU button.
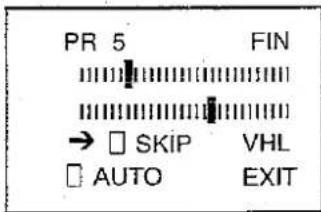
text_image
PR 5 FIN → □ SKIP VHL □ AUTO EXITCancelling Skip
1 Repeat steps above 1 to 4 if you wish to skip other channels.
2 Select a channel number you wish to cancel skip with the VOLUME UP or DOWN button. Select a skipped channel number displayed in red.
3 Press the CHANNEL UP or DOWN button to select «SKIP», and press the MENU button. The displayed channel number will turn from red to green.
4 Press the CHANNEL UP or DOWN button to select «EXIT», and press the MENU button.
Picture Adjustment
■ Adjusting the Picture
Picture quality (CONTRAST, COLOUR, BRIGHTNESS, SHARPNESS) are adjustable in this menu
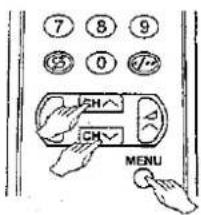
1 Press the MENU button to call the MAIN menu screen.
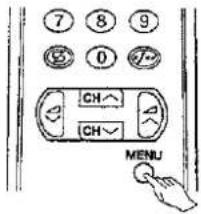
text_image
7 8 9 0 CH CH MENU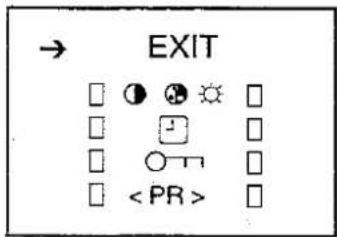
text_image
→ EXIT □ ● ⚙️ ⚡ □ □ ☐ □ ○— □ □2 Press the CHANNEL UP or DOWN button to select PICTURE menu « ⏻ ⚙ », and press the MENU button.
text_image
7 8 9 35 0 72 CH CH MENU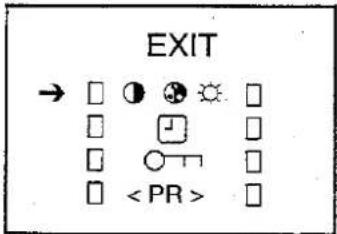
text_image
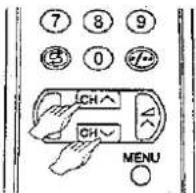
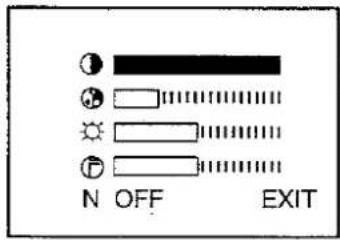
EXIT → □ ● ⬤ ⚙ □ □ □ □ □ ○─□ □ □3 Press the CHANNEL UP or DOWN button to select the adjustments items.
| Selected Item | |
| 1 | CONTRAST |
| 2 | COLOUR |
| 3 | BRIGHTNESS |
| 4 | SHARPNESS |
| N | NORMAL |
text_image
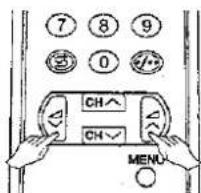
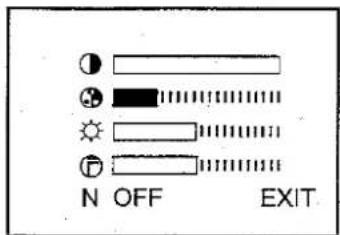
N OFF EXIT4 Adjust the picture quality to your liking with the VOLUME UP or DOWN button.
text_image
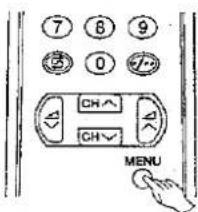
N OFF EXIT5 Repeat steps above 3 and 4 to adjust other items.
text_image
7 8 9 0 CH CH MENU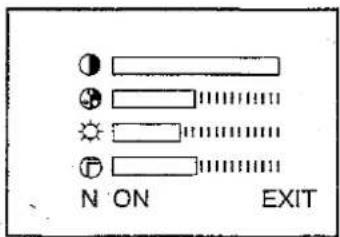
text_image
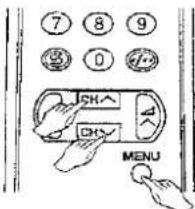
● ⊗ Sun ⊕ N ON EXIT6 Selecting «N» you can reset the picture parameters to the factory levels. Press the MENU button to restore the factory setting «N ON» mode.
text_image
7 8 9 0 CH CH MENU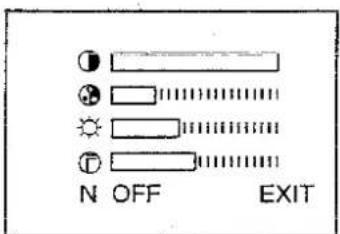
text_image
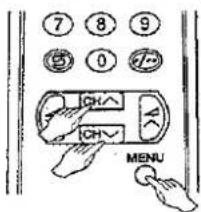
N OFF EXIT7 You can clear the on-screen display by selecting «EXIT» using CHANNEL UP or DOWN button, and press the MENU button.
Timer Setting
■ ON Timer
Automatically turns power ON after the set length of time has passed.
1 Press the MENU button to call the MAIN menu screen.
2 Press the CHANNEL UP or DOWN button to select TIMER menu « ☐ », and press the MENU button.
text_image
⑦ ⑧ ⑨ ⑤ 0 ④ CH CH MENU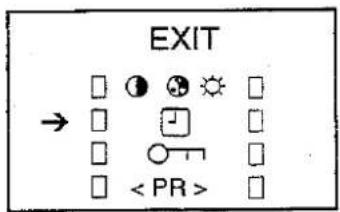
text_image
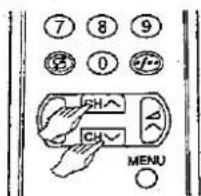
EXIT → < PR >3 Press the CHANNEL UP or DOWN button to select « ☐ ON» mode.
text_image
7 8 9 ③ 0 12 2H CH MENU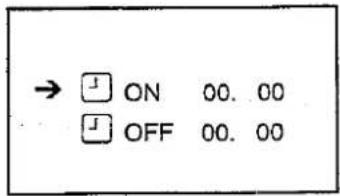
text_image
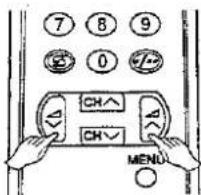
→ ⏚ ON 00. 00 OFF 00. 004 Press the VOLUME UP or DOWN button to set the time. (from 10 min. to 12 hour 50 min. every 10 min. interval).
5 Press the STANDBY/ON (☐) button to put the TV set into Standby mode. Power indicator turns flashing in red.
text_image
7 8 9 0 CH^ CH~ MENU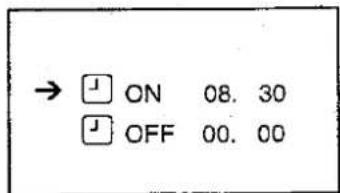
text_image
→ ON 08. 30 OFF 00. 00When the preset of time (in the above example,
8 hour and 30 minutes) has passed the power turns ON and a picture appears on the screen.
NOTE:
- In order to know when the ON Timer programme has been run properly, when the TV is in the standby mode, the ON Timer indicator remain flashing in red.
- As a safety precaution, in the case of nobody being home the television switches on automatically, the television will disconnect itself automatically within 120 minutes; if it is to continue to run, any button of the remote control functions should be pressed.
- In the event of a power cut, disconnection from the plug or television switch, all the data on the ON Timer will be cancelled.
■ OFF Timer
Automatically turns power OFF after the set length of time has passed.
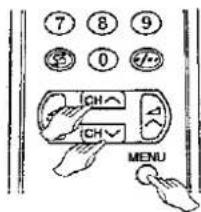
1 Press the MENU button to call the MAIN menu screen.
2 Press the CHANNEL UP or DOWN button to select TIMER menu "☐", and press the MENU button.
text_image
7 8 9 3 0 +/- CH CH MENU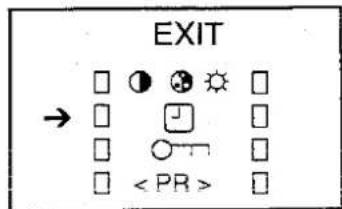
text_image
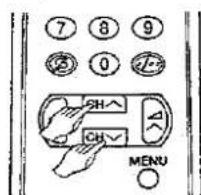
EXIT → < PR >3 Press the CHANNEL UP or DOWN button to select « ☐ OFF » mode.
text_image
7 8 9 0 1 SH CH MENU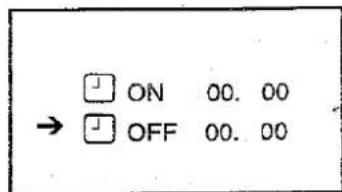
text_image
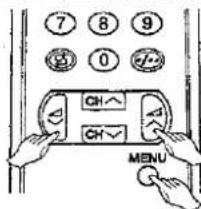
ON 00. 00 OFF 00. 004 Press the VOLUME UP or DOWN button to set the time. (from 10 min. to 12 hour 50 min. every 10 min. interval). The timer starts count down.
5 When you have finished setting the time, press the MENU button.
text_image
7 8 9 0 CH~ CH~ MENU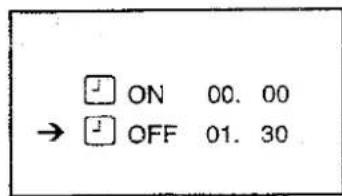
text_image
ON 00.00 OFF 01.30NOTE: In the event of a power cut, disconnection from the plug or television switch, all the data on the OFF Timer will be cancelled.
Child Lock (Channel Block)
■ < How to use this system >
You can protect some broadcast signal when you will put this TV in your children's room or when you will leave your children at your home. (Your children can not select the channel which you locked).
1 Press the MENU button to call the MAIN menu screen.
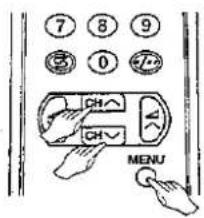
Press the CHANNEL UP or DOWN button to select CHILD LOCK menu ( ○—), and press the MENU button.
text_image
7 8 9 ③ 0 12 CH CH MENU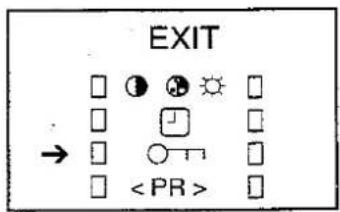
text_image
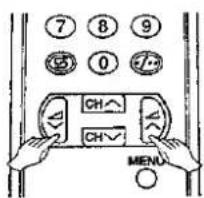
EXIT →2 To select the channel you want to lock with the VOLUME UP or DOWN button. (You can also select the channel using 0 - 9 digit button).
text_image
7 8 9 0 /2 CH~ CH~ MENU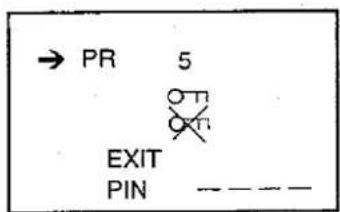
text_image
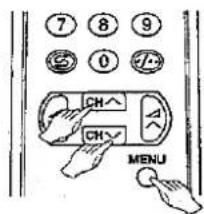
→ PR 5 EXIT PIN ----3 Press the CHANNEL UP or DOWN button to select CHILD LOCK ON mode (O ^TM ), and press the MENU button.
(« O T » mark will display on the right top)
4 Repeat steps 2 - 3 if you wish to lock other channels.
text_image
7 8 9 0 12 CH CH MENU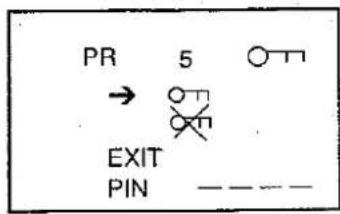
text_image
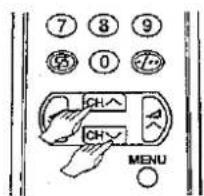
PR 5 → EXIT PIN ——5 If it is necessary, select the PIN input position with CHANNEL UP or DOWN button, and input PIN number whatever you want with 0 - 9 digit buttons.
PIN ---- means PIN number not input.
PIN XXXX means PIN number input.
text_image
⑦ ⑧ ⑨ ⑩ ① ② ③ ④ CH~ CH~ MENU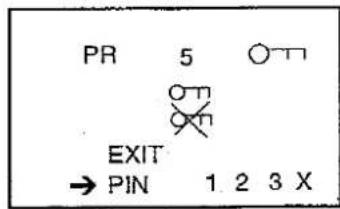
text_image
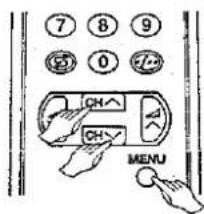
PR 5 ON ON EXIT → PIN 1 2 3 X6 Press the CHANNEL UP or DOWN button to select «EXIT», and press the MENU button.
NOTE: You can also protect the SCART connection.
text_image
7 8 9 0 12 CH CH MENU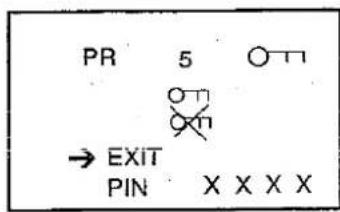
text_image
PR 5 → EXIT PIN X X X XNOTE:
- Auto channel preset, Manual channel preset and Fine tuning do not work when any channel is locked.
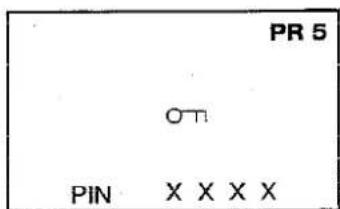
- When you select the channel which you locked, the TV picture will be blue and "OTI" mark displays on the screen.
If you did not input PIN number, only « O» will appear.
If you did input PIN number, « O—» mark and PIN message will appear on the screen.
- If you press the CHILD LOCK (O-T) button on the remote control when you select the channel which you locked with input PIN number, you can cancel the CHILD LOCK temporarily by input PIN number with 0 - 9 digit buttons.
NOTE:
Please do not forget your PIN number, otherwise please call service.
text_image
PR 5 OTT PIN X X X XChild Lock (Continued)
■ Cancelling Child Lock
1 Press the CHANNEL UP or DOWN button to select except for locked channel.
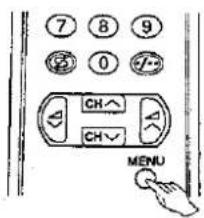
2 Press the MENU button to call the MAIN menu screen.
text_image
7 8 9 0 CH CH MENU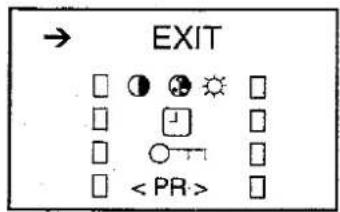
text_image
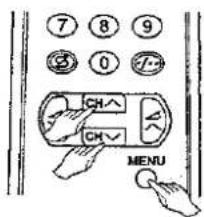
EXIT < PR >3 Press the CHANNEL UP or DOWN button to select «CHILD LOCK» mode (O-π), and press the MENU button.
text_image
7 8 9 ③ 0 CH CH MENU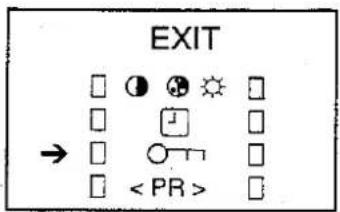
text_image
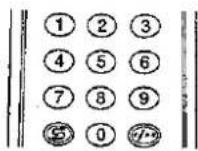
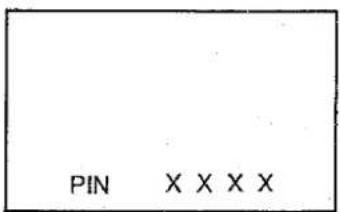
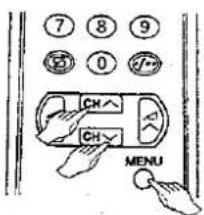
EXIT → < PR >4 If you did locked with PIN number, PIN number message will appear on the screen. Press the 0 - 9 digit buttons to input the PIN number If the PIN numbers are correct, «OK» will flash on the screen for 3 seconds. (If you put the wrong PIN number «NO OK» will appear on the screen).
text_image
PIN X X X X5 Press the VOLUME UP or DOWN button to select the channel you wish to cancel.
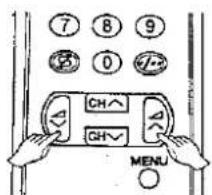
text_image
7 8 9 0 CH~ CH~ MENU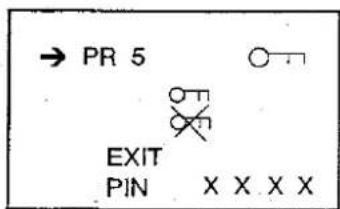
text_image
→ PR 5 EXIT PIN X X X X6 Press the CHANNEL UP or DOWN button to select «CHILD LOCK OFF» mode (○×1), and press the MENU button. « ○— » mark will disappear right top.
7 Repeat steps 5 - 6 if you wish to cancel other channels.
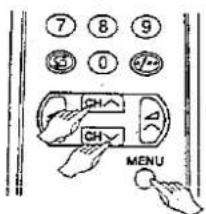
text_image
7 8 9 ③ 0 0/2 CH CH MENU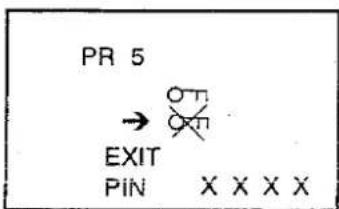
text_image
PR 5 → EXIT PIN X X X X8 Press the CHANNEL UP or DOWN button to select «EXIT», and press the MENU button.
text_image
7 8 9 ⑧ 0 CH CH MENU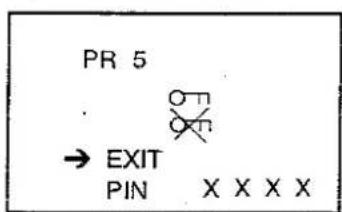
text_image
PR 5 → EXIT PIN X X X XOther Functions
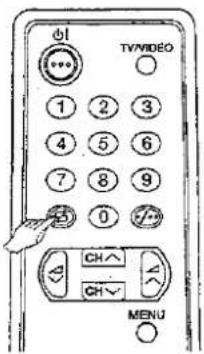
Flashback:
Switches back to the channel you were watching just before the current channel.
Press the FLASHBACK ( ≡ ) button.
The channel previously viewed returns to the screen.
Example;
If after switching from channel 5 to channel 7 the FLASHBACK ( S ) button is pressed, the channel will change to channel 5.
Press the FLASHBACK (S) button again to return to channel 7.
text_image
TVVIDEO 1 2 3 4 5 6 7 8 9 0 CH CH MENU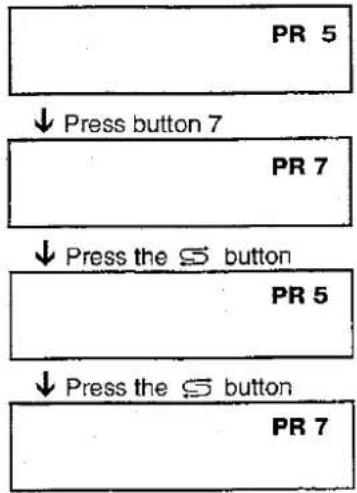
flowchart
graph TD
    A["PR 5"] --> B["Press button 7"]
    B --> C["PR 7"]
    C --> D["Press the S button"]
    D --> E["PR 5"]
    E --> F["Press the S button"]
    F --> G["PR 7"]
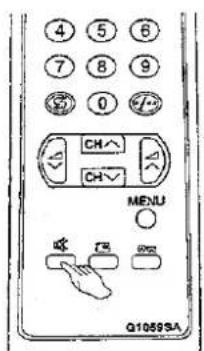
Sound Mute:
Silences the sound.
1 Press the SOUND MUTE (✗) button. This SOUND MUTE (✗) symbol appear on the screen, and the sound is silenced.
2 Press the SOUND MUTE ( ☑ ) button again or VOLUME UP or DOWN button, and the volume returns to its previous level.
text_image
4 5 6 7 8 9 0 CH~ CH~ MENU Q1069SA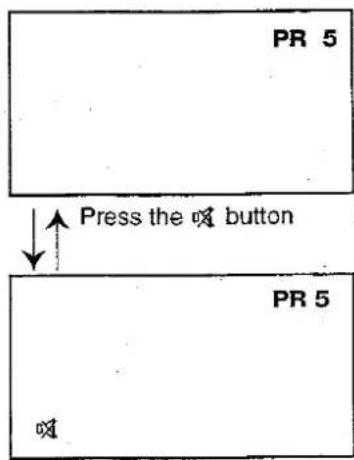
text_image
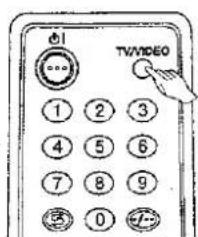
PR 5 Press the o button PR 5TV/VIDEO:
Switches between TV broadcasts and AV input programmes.
Each time you press the TV/VIDEO button, the input switches over between SCART and TV programmes.
text_image
TVVIDEO 1 2 3 4 5 6 7 8 9 0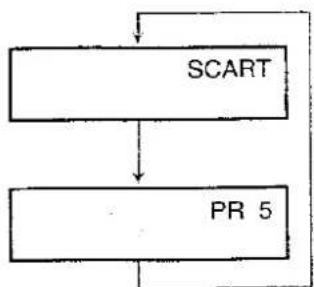
flowchart
graph TD
    A["SCART"] --> B["PR 5"]
    B --> A
Other Functions (Continued)
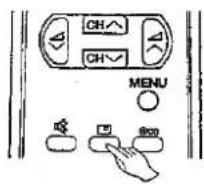
■ Call-ON (☐):
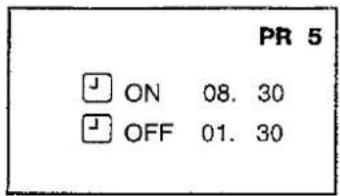
Displays the current channel number, the timer, and other setting on the screen.
1 Press the CALL (☐) button. The time remaining on the ON Timer, OFF Timer and Channel number appear on the screen. (When no Timer is set, nothing appears on the screen).
text_image
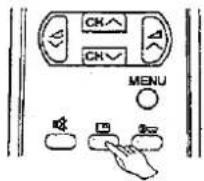
PR 5 ON 08. 30 OFF 01. 301 Press the CALL (☐) button once again. The channel number, ON Timer and OFF Timer display disappears on the screen. The screen returns to normal mode.
natural_image
Empty white rectangle with black border (no text or symbols)Euro-SCART 21-Pin Terminal
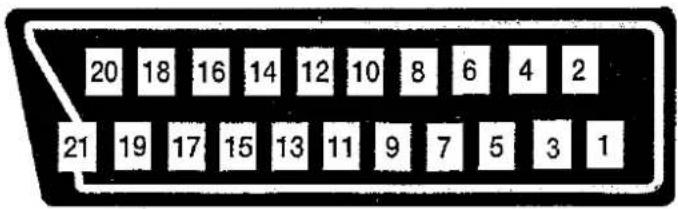
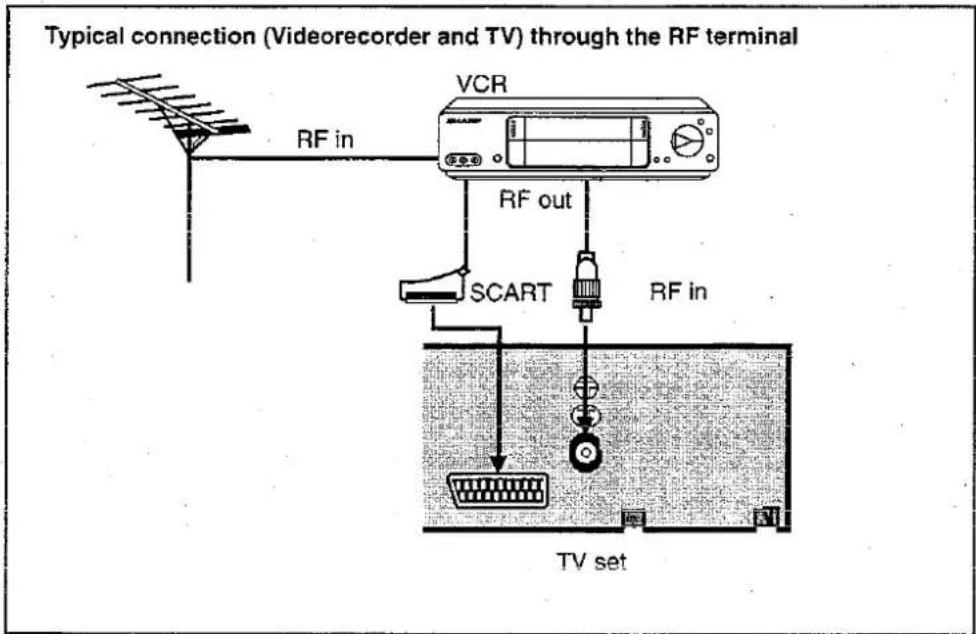
For greater A/V enjoyment, various audio and video devices may be connected via the Euro-Scart 21-Pin Terminal. For example, one can revel in the stunning visuals from a VCR and the dynamic sounds of and audio system. For your interest, here is just one example of an integrated A/V system.
21-Pin Euro-SCART
text_image
20 18 16 14 12 10 8 6 4 2 21 19 17 15 13 11 9 7 5 3 1- Audio right output
- Audio right input
- Audio left output
- Common earth for audio
- Earth for blue
- Audio left input
-
Blue input
-
Audio-video control
- Earth for green
- Not used
- Green input
- Not used
- Earth for red
-
Not used
-
Red input
- Red/Green/Blue control
- Earth for video
- Earth for Red/Green/Blue control
- Video output
- Video input
- Plug shield
NOTE: Audio: Mono Input/Output
Typical connections
Enjoy the stunning visuals of a VCR or DECODER by connecting them to this TV set through its Audio/Video in terminals.
Please refer to the operation manual of your VCR for details.
text_image
Typical connection (Videorecorder and TV) through the RF terminal RF in VCR RF out SCART RF in TV setTroubleshooting
The following conditions do not always denote trouble. Therefore, performs the checks described below before calling for service.
If the problem cannot be corrected by the use of this guide, pull the power plug out from the electrical outlet and call for service.
| Quick Service Check List | Possible Causes/Remedies | Try a new channel to check for possible station trouble | TV not plugged in Oullet power OFF | Main power button of TV not ON | Antenna not connected to terminal at the back of the TV set | If outside antenna is used, check for broken wires | Check for local interference | Turn OFF using the Main Power button, then turn ON again after a minute | Adjust COLOUR control | Check batteries in the Remote Control | Try fine tuning to correct | Check if the Brightness or Contrast setting in the picture setting mode might be all the way to the minus side | Increase the volume |
| Problems | |||||||||||||
| Remote control does not work | ● | ● | ● | ● | |||||||||
| Bars on screen | ● | ● | |||||||||||
| Picture distorted | ● | ● | ● | ||||||||||
| Picture rolls vertically | ● | ● | ● | ||||||||||
| No colour | ● | ● | ● | ● | ● | ||||||||
| Poor reception on some channels | ● | ● | ● | ● | |||||||||
| Picture weak | ● | ● | ● | ● | ● | ||||||||
| Picture lines or streaks | ● | ● | ● | ||||||||||
| Picture ghosting | ● | ● | ● | ● | |||||||||
| Picture blurred | ● | ● | ● | ||||||||||
| Sound OK, picture poor | ● | ● | ● | ● | ● | ● | ● | ||||||
| Picture OK, sound poor | ● | ● | ● | ||||||||||
| No picture or sound | ● | ● | ● | ● | ● | ● | ● | ● | |||||
General Specifications for Television Receiver
em: IC Solid State Colour TV Receiver
Iodels: 37DM-23FP, 54DM-12FP
hassis: CA-1 Chassis (IC & Transistorized Chassis)
-
Receiving Broadcast Standard CCIR TV Standard system PAL B/G, SECAM - L
-
Receiving Channel VHF: E 2 - E 12 CH
UHF: E 21 - E 69 CH
HYPERBAND: S1 - S41 CH
- Receiving System
Colour System:
Field Frequency:
-
Power Source 220V-240V AC 50 Hz
-
Power Consumption at 240V AC 50Hz 37DM-23FP 54DM-12FP
60 Wh 84 Wh
-
Audio Output (MPO) 2W 4W
-
Dimensions (Approx.) width: 366 mm 539 mm
height: 325 mm 468 mm
depth: 376 mm 484 mm
-
Viewing Area (diagonal measurement) 34 cm. (14") 54 cm (21")
-
Weight (Approx.) 8,5 Kg. 18,6 Kg.
).Internal speaker 8 cm 10 cm
.Antenna Input impedance VHF/UHF 75 ohm unbalanced
-
Safety EN60065, CE - MARK
-
EMC EN55013, EN55020, CE - MARK
-
Accessories & etc.
a) User Instruction YES
b) Remote Control YES
c) Dry Battery 2 pcs
d) Monopole Antenna YES (37DM-23FP only)
i. Other Features:
a) 21-Pin Euro-SCART Terminal
b) 99 Channel Programming System
c) Cable and Hyperband
d) 12-Hour 50-Minute Programmable ON Timer / OFF Timer
e) Full Auto Search System
f) Earphone Jack (3.5 mm ø impedance 16 - 600 ohm 37DM-23FP only)
g) High-Contrast Picture Tube
h) Infrared Remote Control
i) Channel Skip Function
j) Flashback Channel Changeover
k) Child Lock System
SHARP ELECTRÓNICA ESPAÑA, S.A.
Polígono Industrial Can Sant Joan Sant Cugat del Vallès (Barcelona), Spain