
Studio 210 - Lautsprecher JBL - Kostenlose Bedienungsanleitung
Finden Sie kostenlos die Bedienungsanleitung des Geräts Studio 210 JBL als PDF.

| Produkttyp | Regallautsprecher |
| Marke | JBL |
| Modell | Studio 210 |
| Serie | Studio 2 |
| Konfiguration | 2-Wege |
| Anschlüsse | Schraubklemmen (rot/schwarz), nur Einzeldraht |
| Bi-Wiring | Nicht unterstützt (nur für Studio 290/280/270) |
| Lieferumfang | 2 Lautsprecher, 2 Karten mit selbstklebenden Gummifüßen |
| Empfohlene Aufstellung (Front) | 1,8–3 m Abstand, 40–60° Winkel zum Hörplatz, Hochtöner auf Ohrhöhe, mind. 51 cm von Seitenwänden |
| Empfohlene Aufstellung (Surround 5.1) | Leicht hinter Hörplatz, 1,5–1,8 m Höhe, einander zugewandt |
| Empfohlene Aufstellung (Surround 7.1) | Seitlich des Hörplatzes, 1,5–1,8 m Höhe; hintere Surrounds an Rückwand, 0,9–1,8 m Abstand |
| Gehäuse | Hochglanz lackiert (Pflege mit trockenem Mikrofasertuch) |
| Pflege | Trockenes Mikrofasertuch; kein Wasser, Benzol, Alkohol; Staub auf Gitter mit Staubsauger bei niedriger Saugkraft |
| Sicherheitshinweis | Vor Anschluss alle Geräte ausschalten; Plus/Minus nicht vertauschen; Kabel nicht kurzschließen |
| Kompatibilität | Geeignet für Heimkinoverstärker und AV-Receiver |
| Gitter | Abnehmbar (nicht explizit erwähnt, aber typisch) |
Häufig gestellte Fragen - Studio 210 JBL
Benutzerfragen zu Studio 210 JBL
0 Frage zu diesem Gerät. Beantworten Sie die, die Sie kennen, oder stellen Sie Ihre eigene.
Eine neue Frage zu diesem Gerät stellen
Laden Sie die Anleitung für Ihr Lautsprecher kostenlos im PDF-Format! Finden Sie Ihr Handbuch Studio 210 - JBL und nehmen Sie Ihr elektronisches Gerät wieder in die Hand. Auf dieser Seite sind alle Dokumente veröffentlicht, die für die Verwendung Ihres Geräts notwendig sind. Studio 210 von der Marke JBL.
BEDIENUNGSANLEITUNG Studio 210 JBL
JBL® STUDIO 2 SERIES
loudspeakers
natural_image
Line drawing of a multi-level kitchen appliance setup with front panels and side shelves (no text or symbols)THANK YOU FOR CHOOSING THIS JBL® PRODUCT
For more than 67 years, JBL® engineers have been involved in every aspect of music and film recording and reproduction, from live performances to the recordings you play on-the-go and in your home, car or office.
We're confident that the JBL system you have chosen will provide every note of enjoyment you expect – and that when you think about purchasing additional audio equipment, you will once again choose JBL products.
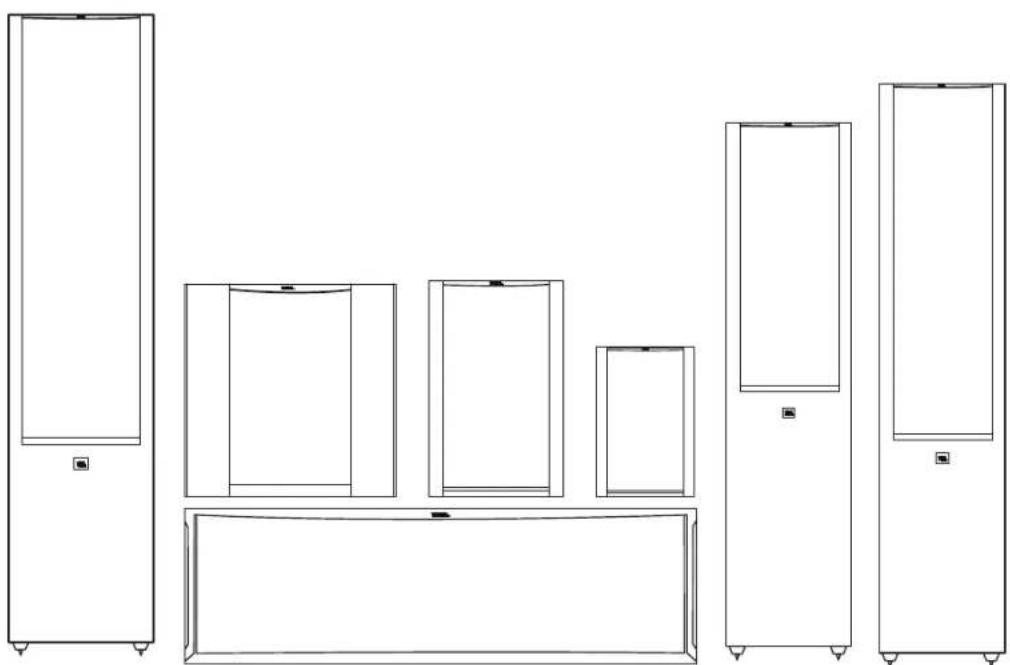
INCLUDED ITEMS
Each box contains one or two loudspeakers, depending on the model, as indicated below.
Studio 290
One Studio 290 speaker
natural_image
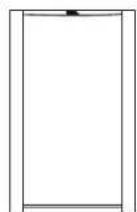
Simple line drawing of a vertical rectangular frame with a small square symbol at the bottom (no text or labels)Studio 280
One Studio 280 speaker
natural_image
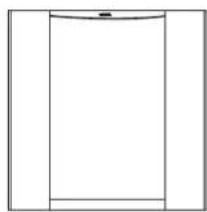
Simple line drawing of a vertical rectangular frame with rounded corners and a small square marker at the top (no text or symbols)Studio 270
One Studio 270 speaker
natural_image
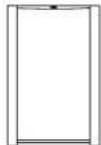
Simple line drawing of a vertical rectangular frame with a small square symbol on the side (no text or labels)Studio 230
Two Studio 230 speakers
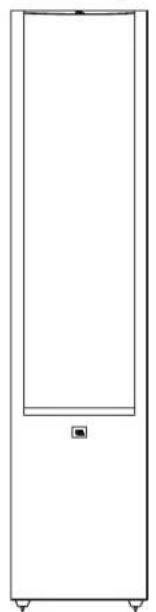
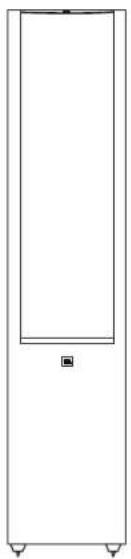
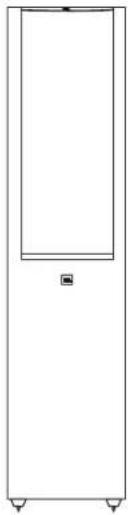
Studio 210
Two Studio 210 speakers
natural_image
Simple line drawing of a vertical rectangular frame with a small horizontal bar at the bottom (no text or symbols)Studio 220
Two Studio 220 speakers
Studio 235C
One Studio 235C speaker
natural_image
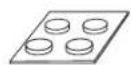
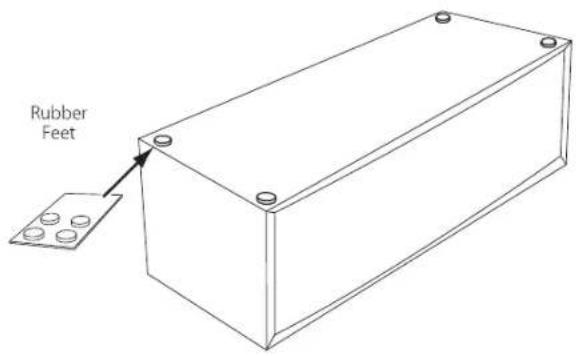
Empty rectangular frame with rounded corners and a small black mark at the top (no text or symbols)Card with adhesive rubber feet
(Studio 230/220/210 - two cards,
Studio 235/225C - only one card)
Studio 225C
One Studio 225C speaker
natural_image
Empty rectangular frame with rounded corners and a small arrow at the top (no text or symbols)
Carpet Spikes
(Studio 290/280/270)
PLACEMENT
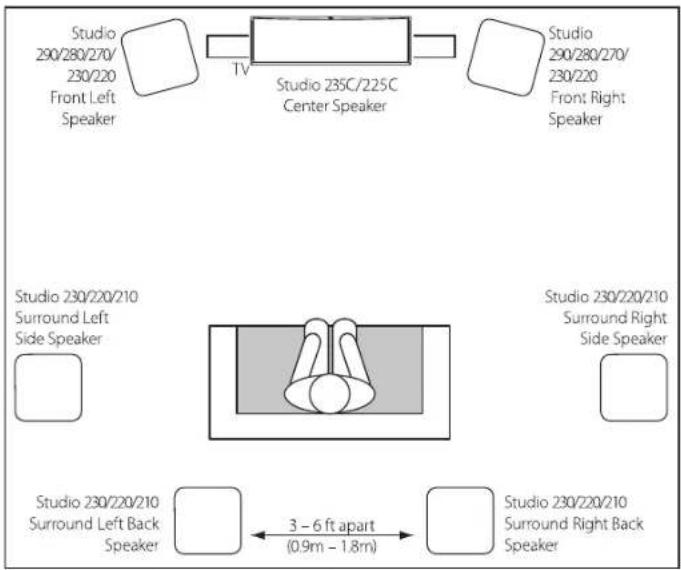
STUDIO 290/280/270/230/220 - LEFT AND RIGHT CHANNELS
For best results, place the speakers 6 – 10 feet (1.8m – 3m) apart. Angling the speakers toward the listening position can improve the stereo imaging. The speakers will produce the most accurate stereo soundstage when the angle between the listener and the speakers is between 40 and 60 degrees.
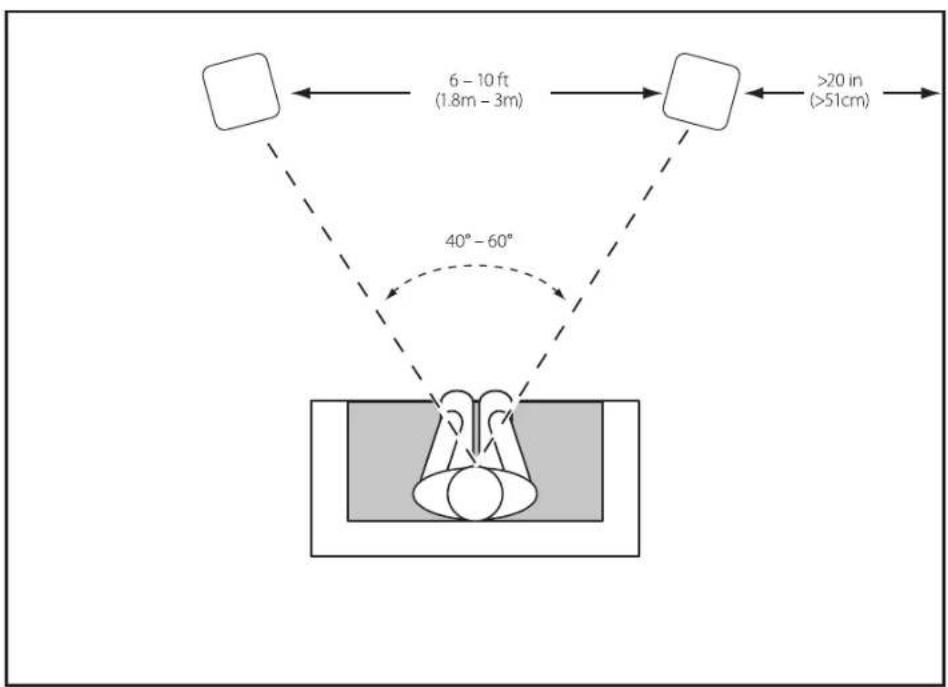
Generally, bass output will increase as the speaker is moved closer to a wall or corner.
For best performance, we recommend that you place the speakers at least 20 inches (51cm) away from the side walls.
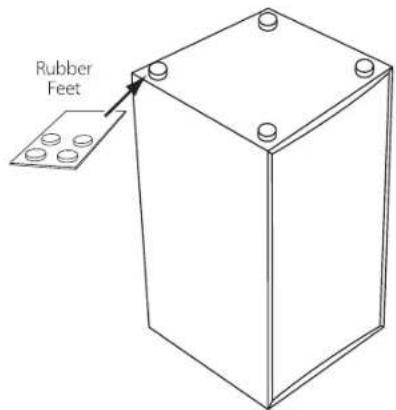
- Position Studio 230/220/210 shelf speakers so that their tweeters are approximately at ear level. Peel the adhesive rubber feet from the card and apply them to the bottoms of the speakers.
Studio 235C / Studio 225C
You should place the center speaker directly above or below the center of your TV screen. The speaker should be no more than 2 feet (61cm) above or below the tweeters of the front left and front right speakers. If your TV set is deep enough, you can set the center speaker on top of the TV, with the speaker's front edge even with the TV's front edge.
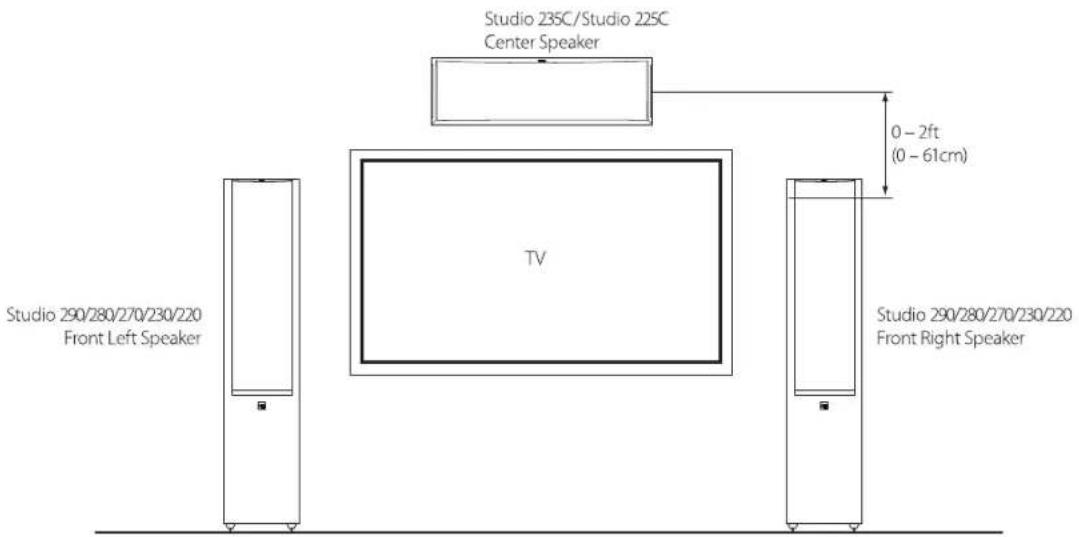
- Peel the adhesive rubber feet from the card and apply them to the bottom of the center channel speaker.
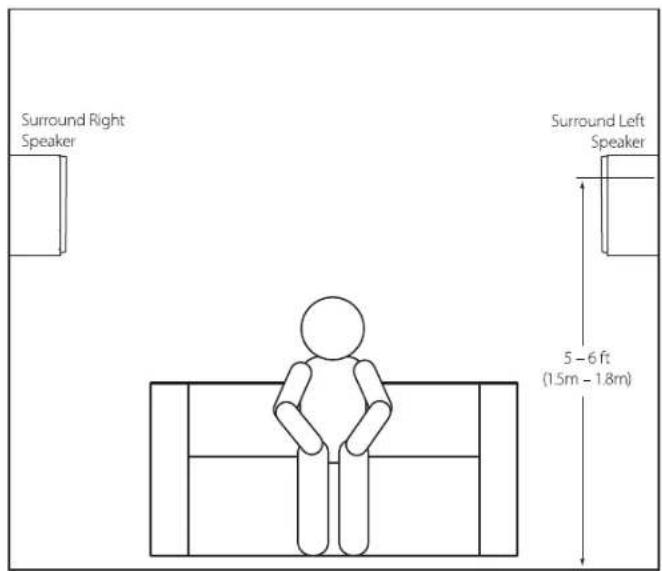
STUDIO 230/220/210 - SURROUND CHANNELS (5.1-CHANNEL SYSTEM)
When you use these speakers as surround-channel speakers in a 5.1-channel system, place them slightly behind the listening position, facing each other. Ideally, they should be 5 – 6 feet (1.5m – 1.8m) above the floor. An alternate location would be on a wall behind the listening position, facing forward. The surround speakers should not call attention to themselves while they're playing. Experiment with their placement until you hear a diffuse, ambient sound accompanying the sounds that you hear from the front left, front right and center speakers.

STUDIO 230/220/210 - SURROUND CHANNELS (7.1-CHANNEL SYSTEM)
When you use these speakers as surround-channel speakers in a 7.1-channel system, place the surround side speakers directly to the sides of the listening position, at least 5 – 6 feet (1.5m – 1.8m) above the floor. Place the surround back speakers on the wall behind the listening position, also at least 5 – 6 feet (1.5m – 1.8m) above the floor and 3 – 6 feet (0.9m – 1.8m) apart.
flowchart
graph TD
    A["Studio 230/220/210 Surround Left Side Speaker"] --> B["Studio 235C/225C Center Speaker"]
    B --> C["Studio 290/280/270/230/220 Front Right Speaker"]
    D["Studio 230/220/210 Surround Right Side Speaker"] --> E["Studio 230/220/210 Surround Left Back Speaker"]
    E --> F["Studio 230/220/210 Surround Right Back Speaker"]
    G["3 - 6 ft apart (0.9m - 1.8m)"] --> F
    style A fill:#f9f,stroke:#333
    style B fill:#ccf,stroke:#333
    style C fill:#cfc,stroke:#333
    style D fill:#fcc,stroke:#333
    style E fill:#cff,stroke:#333
    style F fill:#ffc,stroke:#333
CONNECTIONS
CAUTION: Make sure that all of the system's electrical components are turned OFF (and preferably unplugged from their AC outlets) before making any connections.
Speakers and amplifiers have corresponding positive and negative (+" and −") connection terminals. All Studio 2 series speakers have connection terminals that are marked "+" and "-" on the terminal-cup assembly. Additionally, the "+" terminals have red markings, while the "-" terminals have black markings.
To ensure proper polarity, connect each "+" terminal on the back of the amplifier or receiver to the respective "+" (red) terminal on each speaker. Connect the "-" terminals in a similar way. Do not reverse polarities (i.e., "+" to "-" or "-" to "+" when making connections. Doing so will cause poor stereo imaging and diminished bass performance.
IMPORTANT: Make sure the (+) and (−) wires or connectors do not touch each other or the other terminal. Touching wires can cause a short circuit that can damage your receiver or amplifier.
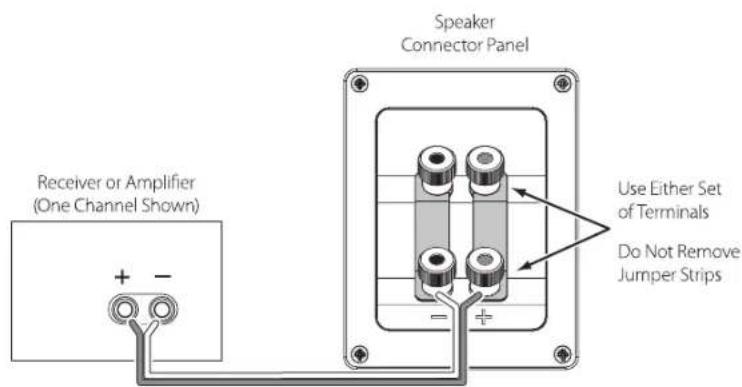
BASIC SINGLE-WIRE CONNECTION
Connect the amplifier to each speaker as shown in the illustration below.
BI-WIRE CONNECTION
For the Studio 290/280/270 speakers, you can use either set of terminals on the connector panel.
IMPORTANT: Do not remove the metal jumpers from between the two sets of terminals when connecting the speaker wires.
Studio 230/220/210/235C/225C

Studio 290/280/270
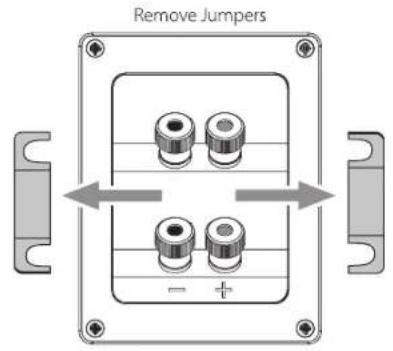
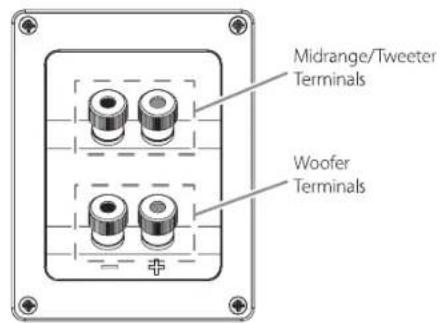
BI-WIRE CONNECTION (STUDIO 290/280/270)
The Studio 290/280/270 connection assemblies have two sets of input terminals that are connected by metal jumper bars. The upper set of terminals is for the midrange/tweeter, and the lower set of terminals is for the woofer(s). This arrangement allows you to bi-wire the speakers using a single stereo amplifier or using two stereo amplifiers. Bi-wiring can offer sonic advantages and more flexibility in power-amplifier selection over a conventional single-wire connection.
Before bi-wiring the speakers, remove the jumper bars.
SINGLE-AMPLIFIER BI-WIRING
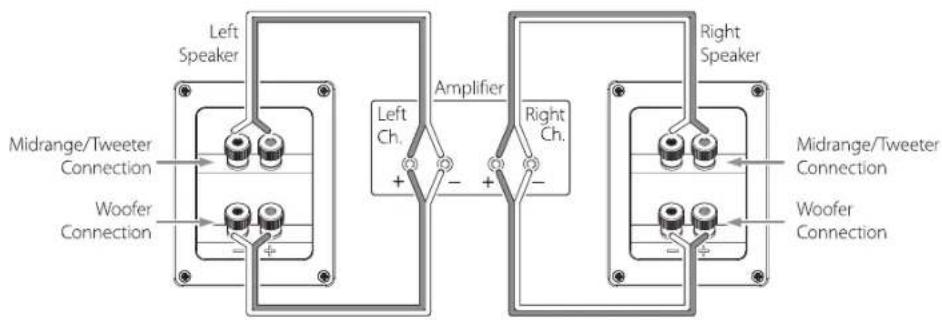
DUAL-AMPLIFIER BI-WIRING
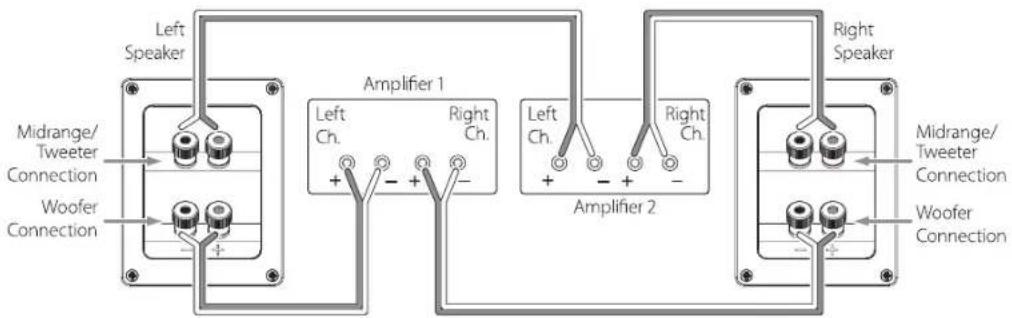
For more information about various speaker-wire and connection options, contact your local JBL dealer.
CARING FOR YOUR SPEAKERS
- Special care must be used with the gloss portion of the cabinet. Gently use a dry microfiber cloth to dust or remove fingerprints from this surface. Do not place objects on top of the speaker.
- Wipe the cabinet with a clean, dry cloth to remove dust. Damp cloths may dull the cabinet finish. Do not use volatile liquids such as benzene, paint thinner or alcohol on the cabinet.
• Do not spray chemicals near the cabinet.
• To remove dust from the grille fabric, use a vacuum cleaner set to "low" suction. - Do not wash the grilles in water, as it may fade the color or make them uneven.
- If the surfaces of the woofer and midrange cones become dusty, you can carefully sweep them clean with a soft, dry calligraphy brush or paint brush. Do not use a damp cloth.
• NEVER touch the tweeter dome or put anything against it.

HARMAN Harman International, Inc. 8500 Balboa Boulevard, Northridge, CA 91329 USA © 2013 Harman International Industries, Incorporated. All rights reserved. Features, specifications and appearance are subject to change without notice. www.jbl.com Part No. 950-0504-001


- JBL® STUDIO 2 SERIES
- THANK YOU FOR CHOOSING THIS JBL® PRODUCT
- INCLUDED ITEMS
- PLACEMENT
- STUDIO 290/280/270/230/220 - LEFT AND RIGHT CHANNELS
- Studio 235C / Studio 225C
- STUDIO 230/220/210 - SURROUND CHANNELS (5.1-CHANNEL SYSTEM)
- STUDIO 230/220/210 - SURROUND CHANNELS (7.1-CHANNEL SYSTEM)
- CONNECTIONS
- BASIC SINGLE-WIRE CONNECTION
- BI-WIRE CONNECTION
- BI-WIRE CONNECTION (STUDIO 290/280/270)
- CARING FOR YOUR SPEAKERS
Marke : JBL
Modell : Studio 210
Kategorie : Lautsprecher