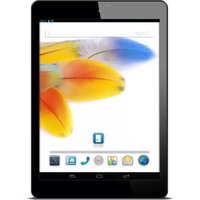
Connect 8+ - Tablet Odys - Kostenlose Bedienungsanleitung
Finden Sie kostenlos die Bedienungsanleitung des Geräts Connect 8+ Odys als PDF.


| Produkttyp | Tablet |
| Marke | Odys |
| Modell | Connect 8+ |
| Bildschirmdiagonale | 8 Zoll (ca. 20,3 cm) |
| Abmessungen (ca.) | 200 x 120 x 10 mm |
| Gewicht | ca. 350 g |
| Stromversorgung | Li-Ion-Akku, 5 V / 2 A Netzteil (USB) |
| WLAN | 802.11 b/g/n |
| Bluetooth | Ja, Bluetooth 4.0 |
| Kamera | Front- und Rückkamera (ca. 2 MP / 5 MP) |
| Betriebssystem | Android (Version variiert) |
| Speicher | 8 GB intern, erweiterbar per microSD-Karte |
| Anschlüsse | Micro-USB, 3,5 mm Kopfhöreranschluss |
| Sensoren | G-Sensor, Lichtsensor |
| Reinigung | Mit einem weichen, trockenen Tuch abwischen |
| Sicherheitshinweise | Nicht in Wasser eintauchen, vor starkem Druck schützen |
| Ersatzteile / Reparierbarkeit | Ersatzteile begrenzt verfügbar, Reparatur durch Fachbetrieb |
Häufig gestellte Fragen - Connect 8+ Odys
Benutzerfragen zu Connect 8+ Odys
0 Frage zu diesem Gerät. Beantworten Sie die, die Sie kennen, oder stellen Sie Ihre eigene.
Eine neue Frage zu diesem Gerät stellen
Laden Sie die Anleitung für Ihr Tablet kostenlos im PDF-Format! Finden Sie Ihr Handbuch Connect 8+ - Odys und nehmen Sie Ihr elektronisches Gerät wieder in die Hand. Auf dieser Seite sind alle Dokumente veröffentlicht, die für die Verwendung Ihres Geräts notwendig sind. Connect 8+ von der Marke Odys.
BEDIENUNGSANLEITUNG Connect 8+ Odys
v1.0
Introduction
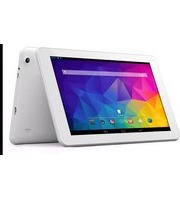
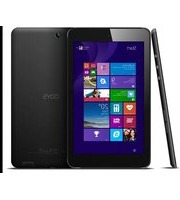
ODYS CONNECT 8+ is a MID with full color screen.
Although this product is safe, please observe the information and warnings from the user manual.
The user manual is installed at the devices internal memory and can be accessed over the main menu. Please refer to the user manual for detailed instructions, conformity and support information.
- To open the user's manual please tap on the manual icon you can see at the home screen to open the folder where the manuals are stored in.

Turning On/Off
To turn on the device, press and hold the Power button on the unit until you see the boot-up screen then release. It may take a few minutes to start up the system, please wait before you proceed.
To turn off the device, press and hold the Power button until you see the option "Power Off", tap on "Power Off" and then tap on "OK".
Tip: This device will sleep with the screen off if it stays inactive for a few seconds. You can briefly press the Power button to turn on the screen and wake it up.
Power On and Off the Display
- Shortly press the [Power] button to turn off the display.
- Press the [Power] button again shortly turn the display on again.
Language Setting
- Confirm the two requests at the beginning by taping at OK.
- Tap on [Settings] and select [Language & Input]
- Tap on [Language] and select your desired language on the right side.
Getting Started

1. Headphone jack
Audio output connection for head-phones
Note: Speaker output is automatically disabled when headphones are connected to the player.
2. Micro USB 2.0 Hi-speed
Connect to a computer to transfer data (e.g., music, videos, photos, files). Support USB stick, Surf stick, KeyBoard and Mouse.
Note: A OTG supporting adaptor cable is required (optional)
- Sim Card Slot
Accommodates any Sim Card.
- Micro SD Card Slot
Accommodates any standard SD/SDHC memory card.
-
Microphone
-
Power Button
Press and hold the power switch to turn on or off the device; Briefly press the switch to turn the screen on or off.
Press and hold for 10 Seconds to reset and restart the devise if it freezes or otherwise behaves abnormal.
7. Charge Indicator
- Front Camera
Front-facing camera for taking avatar pictures
- Volume key +
Shortly press to increase volume level.
- Volume key -
Shortly press to decrease volume level.
- Rear Camera
Rear-facing camera for taking pictures
12. Speaker
Charging Battery
The device has a built-in rechargeable battery. No extra battery installation is required. Just charge the device when it indicates low battery.
To charge the battery, connect the device to any standard wall outlet via the USB port using the power adaptor. It takes about 5 hours to fully charge the battery.
Note:
a. We advice to use only the delivered power adapter with this tablet.
b. You can operate the device even when it is being charged. But for extended battery life, it is suggested NOT to use the device when it is charging.
c. It is recommended to charge the battery before you use the device for the first time.
d. For maximum performance, lithium-ion batteries need to be used often. If you don't use the device often, be sure to recharge the battery at least once per month.
e. Should the rechargeable battery of the device discharge completely, connect the device (using the adapter) to the main power source for approximately 5-10 minutes before attempting normal operation.
f. In some cases, devices which have been charged for longer periods of time may not be able to be switched back on. Should this occur you have to make a Reset. Press and hold for 10 Seconds to reset and restart the device.
Touchscreen
The touchscreen is a capacitive display and designed for precision and responds best when touched with the smallest point possible. Use the flat pad of your finger to touch the screen.

Connect via USB
Please note: Only use connecting cable with a maximum length of 80cm. Please make sure when connecting the USB adopter or connector cables attention to the correct alignment of the connector before inserting it into the USB socket on the unit. Incorrect insertion may cause damage to plug and socket.
On the side of the plug there are usually small sizes of hooks that secure the fixation.
Pay special attention on the position of the hooks, they show upwards when connecting cables while the screen is above.


Installing Memory Card
This device can read files directly from memory card and USB memory.
To use a memory card, find the card slot at the side of the device and then insert the memory card into the slot in the correct orientation or Connect USB Memory using the provided USB adaptor cable. To access the files stored in the memory card, enter the Explorer mode by tapping the Explorer icon and select the "SD Card" directory.
- Check that the Micro SD card is in the correct position with the contact pin facing downwards as illustrated. You
may damage the card and the reader if Micro SD card is not inserted in correct position.
- Push the Micro SD card into the card slot until it clicks.
- To remove Micro SD card, push the card once again until it clicks.
Note: We recommend using only Micro SD or SDHC cards up to 32GB capacity.
- When a Micro SD cord is inserted in or ejected from the device, it may take few seconds for the device to update the content.
- Please avoid inserting or ejecting Micro SD card when other operation is running as this may cause the system hang.
- Do Not remove the card if the content inside the card is being played. This will halt the
operation of the device and might cause a system hang.
- Only use the provided USB adaptor cable to attach USB memory devices.
- Please use your fingernails to properly insert or remove the card.
Installing SIM card
To use a SIM card, find the card slot at the backside of the device and then insert the SIM card into the slot in the correct orientation
- Check that the SIM card is in the correct position with the contact pin facing downwards as illustrated. You may damage the card and the reader if SIM card is not inserted in correct position.
- Push the SIM card into the card slot until it clicks.
- To remove SIM card, push the SIM card once again until it clicks.
Note: The SIM Card can only be recognized if the device was turned off while inserting.
Micro SIM Cards are not supported.
Transferring Files
Before reading or playing files, you need to transfer media files from a computer to the device.
(1) Connect the device to a computer with the supplied USB cable.
(2) Once connected, one removable disk drive will show on your computer. It represents the internal memory of the device and the memory card inserted into the device. Now you can copy files from or to these disk drive just as you would on your hard drive.
3) Disconnect the device from the computer
Note: The pre-installed applications and Android OS occupy a considerable part of capacity – nearly more than 1GB, it is normal that you see huge difference between available memory space and total capacity.
Caution! The device supports Adobe DRM contents. Adobe Digital Editions (ADE) is required. Please refer to the user's manual for closer information's on how to use DRM protected files.
Screen lock
The screen automatically turns off and locks itself after a set period of time. When the screen turned off, press the Power button to light up the screen.

and drag it to the open lock at the right side to

Home Screen
a
b

| a. System Hints | Informs the user if attached memory or updates are available and other system status information's |
| b. System settings | |
| c. Google Search Bar | |
| d. Google Voice Search | |
| e. eManual | Manual in ebook format |
| f. Browser | Tap to launch the Browser to visit your favorite websites. |
| g. E-Mail | To open the mail client |
| h. Kingsoft Office | |
| i. Applications icon | Tap on this icon to reveal all applications installed on your Tablet- You can copy the applications onto the Home screen by pressing and holding on their icons.- You can delete the application from the Home Screen by dragging their icons to the Cross that appears at the top of the screen. |
| j. Telephone | |
| k. Contacts | |
| l. System Settings | |
| m. Back soft key | Tap to return to the previous screen. If the keyboard is on the screen, tap to close the keyboard. |
| n. Home soft key | Tap to return to the home screen. |
| o. Running apps | Show apps which are currently running in background. |
| p. Menu soft Key | Tap to view the option menuNote: When you Tap the Menu key from within an application, you will see the options for that application. But you will not see them on start screen.Caution! Some apps may show this icon at the top right corner. |
- INTRODUCTION
- ODYS CONNECT 8+ IS A MID WITH FULL COLOR SCREEN
- TURNING ON/OFF
- POWER ON AND OFF THE DISPLAY
- LANGUAGE SETTING
- GETTING STARTED
- HEADPHONE JACK
- MICRO USB 2.0 HI-SPEED
- CHARGE INDICATOR
- SPEAKER
- CHARGING BATTERY
- NOTE
- TOUCHSCREEN
- CONNECT VIA USB
- INSTALLING MEMORY CARD
- INSTALLING SIM CARD
- TRANSFERRING FILES
- SCREEN LOCK
- HOME SCREEN
Marke : Odys
Modell : Connect 8+
Kategorie : Tablet