Viva Collection HD3036 - Reiskocher PHILIPS - Kostenlose Bedienungsanleitung
Finden Sie kostenlos die Bedienungsanleitung des Geräts Viva Collection HD3036 PHILIPS als PDF.

| Produkttyp | Reiskocher |
| Marke | Philips |
| Modell | Viva Collection HD3036 |
| Fassungsvermögen | 2 Liter |
| Leistung | 500 Watt |
| Spannung | 220–240 Volt |
| Abmessungen (B x T x H) | ca. 25 x 25 x 25 cm |
| Gewicht | ca. 2,5 kg |
| Material Innentopf | Antihaftbeschichtung |
| Funktionen | Kochen, Warmhalten |
| Bedienung | Ein-/Ausschalter mit Kontrollleuchte |
| Sicherheit | Automatische Abschaltung bei Übertemperatur |
| Reinigung | Herausnehmbarer Innentopf und abnehmbarer Deckel für einfache Reinigung |
| Kabelaufbewahrung | Kabelaufwicklung an der Unterseite |
| Zubehör | Messbecher, Reislöffel |
| Ersatzteile | Innentopf und Deckel separat erhältlich |
| Reparaturfreundlichkeit | Modulare Bauweise, vom Kunden austauschbare Teile |
| Garantie | 2 Jahre |
Häufig gestellte Fragen - Viva Collection HD3036 PHILIPS
Benutzerfragen zu Viva Collection HD3036 PHILIPS
0 Frage zu diesem Gerät. Beantworten Sie die, die Sie kennen, oder stellen Sie Ihre eigene.
Eine neue Frage zu diesem Gerät stellen
Laden Sie die Anleitung für Ihr Reiskocher kostenlos im PDF-Format! Finden Sie Ihr Handbuch Viva Collection HD3036 - PHILIPS und nehmen Sie Ihr elektronisches Gerät wieder in die Hand. Auf dieser Seite sind alle Dokumente veröffentlicht, die für die Verwendung Ihres Geräts notwendig sind. Viva Collection HD3036 von der Marke PHILIPS.
BEDIENUNGSANLEITUNG Viva Collection HD3036 PHILIPS
Register your product and get support at
www.philips.com/welcome
HD3036
HD3037
natural_image
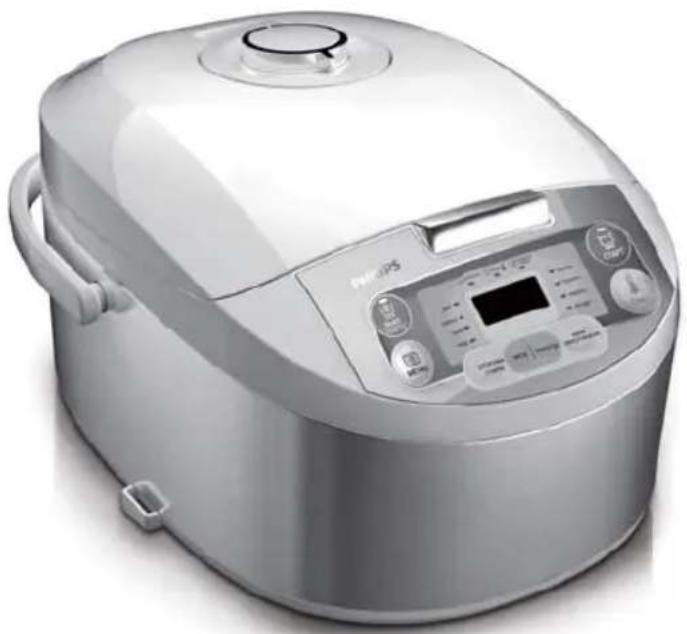
Exterior view of a modern rice cooker with digital display and control buttons (no visible text or symbols)Руководство пользователя
Посібник користувача
User Manual
PHILIPS
| Русский | 5 |
| Українська | 34 |
| English | 63 |
CONTENTS
1 Important 64
Do 64
Don't 64
Proceed with caution 64
Environment 65
Warranty and Sales Service Guarantee 65
2 Introduction 65
3 Overview 66
Accessories 66
4 Control Panel 67
5 Technical Specifications 67
6 Use 68
First time use 68
Preparation before use 68
7 Functions & Instructions 70
RICE 70
BUCKWHEAT RICE 70
PILAF 71
PORRIDGE 72
BOIL 73
STEW 75
FRY 76
YOGURT 78
REHEAT 79
BAKE 81
STEAM 83
8 Preset 84 Keep warm 85
9 Maintenance 84 Tips for Cleaning the Steam Valve 86 Tips for Cleaning the Cover (Seal) 87 Tips for Cleaning the Inner Pot 87 Tips for Cleaning the Sensor and Hotplate 88 Tips for Cleaning the Accessories 88
10 Troubleshooting 89
1 Important
Before using the product, please read the user manual carefully, and keep it with you for further reference later.
For safety reasons, this manual demonstrates several situations in which the safety guide has not been followed, resulting in a risk of accidents.
Do
• The product is only intended for indoor, non-commercial use.
- Insert the plug into the socket on the multi-function rice cooker. Before switching on, please make sure that the voltage marked on the multi-function rice cooker matches the power supply voltage.
- The product may only be connected to a grounded power outlet. Please make sure the plug is firmly attached to the power outlet.
- For the sake of safety, if the power cord becomes damaged please have it replaced by the manufacturer, maintenance department or qualified persons.
- In order to avoid tipping and possible bums, please make sure the multi-function rice cooker is placed out of the reach of children. During cooking, touching the function key may cause the multi-function rice cooker to stop operating.
• Unless there are people responsible for safety supervising or guiding the use of the product, it is not intended for use by those with physical disabilities, sensory or mental illness, or those with a lack of related experience and knowledge (including children). Please supervise children and make sure that they do not play with the product.
- Please place the multi-function rice cooker on a solid, flat surface. Do not place the rice cooker in water, in a high temperature or humid environment, or near other heat sources.
- Before plugging the product into the power outlet, please make sure that the heating components, temperature sensor and the outside of the inner pot are clean and dry. Dirt or objects may cause the multi-function rice cooker to malfunction.
- When removing the inner pot, please make sure the product is disconnected from the power outlet.
Don't
- Please do not unplug the power plug or touch any buttons on the control panel with wet hands.
- Please do not modify, disassemble or repair the multi-function rice cooker on your own.
- Please do not connect the product to an external timer.
- Please do not immerse the multi-function rice cooker in water or wash it in water.
- Please do not heat the inner pot directly on a fire.
- Please do not expose the product to high temperature; please do not place the multi-function rice cooker on a stove or cooker that is on or still hot.
- Please do not lift or move the multi-function rice cooker while cooking.
- Please do not put a deformed inner pot into the multi-function rice cooker.
- Please do not use any accessories or components manufactured by other manufacturers or not specifically recommended by Philips. The company takes no responsibility for adverse consequences caused by using such accessories or components.
⚠️ Proceed with caution
- Before plugging in and switching on, please ensure that the inner pot is placed in the product.
- Please be cautious of the steam discharged from the steam valve when cooking or opening the lid. Keep your hands and face away from the multi-function rice cooker to avoid being scalded by the steam.
- Please do not cover the lid with cloth, as this may deform or discolor the lid.
- When adding water, please do not exceed the maximum water level mark to prevent water from overflowing when cooking, which may be dangerous.
• Do not use the product near magnetic materials.
Environment

Please do not dispose of the product as general waste. Please recycle the product by taking it to a government-designated recycling center. This will help maintain our environment.
Warranty and After-Sales Service Guarantee
If you need service or detailed information, or have any question, please visit Philips' website at www.philips.com. You may also contact with your local Philips Customer Service Center (contact number is available on your warranty card). If there are no Philips Customer Service Centers in your country or area, please contact your local Philips dealer.
2 Introduction
The Philips Multi-Function Rice Cooker is a smart cooker developed using our innovative technologies. It has a user-friendly control panel, advanced construction and modem design – it is the ideal cookware for modem families.
Advanced technology, innovative concept
1
6 Special Features: Spill-proof, scorch-proof, stick-proof, wear-proof, leak-proof and cockroach-proof. All aspects, all the first.
2
Innovative design concept
Delicious: Micro-pressure cooking, reasonable temperature control, scientific cooking preserving the nutrition, as well as the original fragrance of the rice.
Healthy: Golden inner pot, high temperature boiling, clean and environmentally friendly keeping your family healthy.
Note: The content of this manual has been tested and verified. The company accepts no liability for typographical errors or misunderstanding of the contents. Product design and specifications are subject to change without notice; the Product purchased prevails in kind.
3 Overview
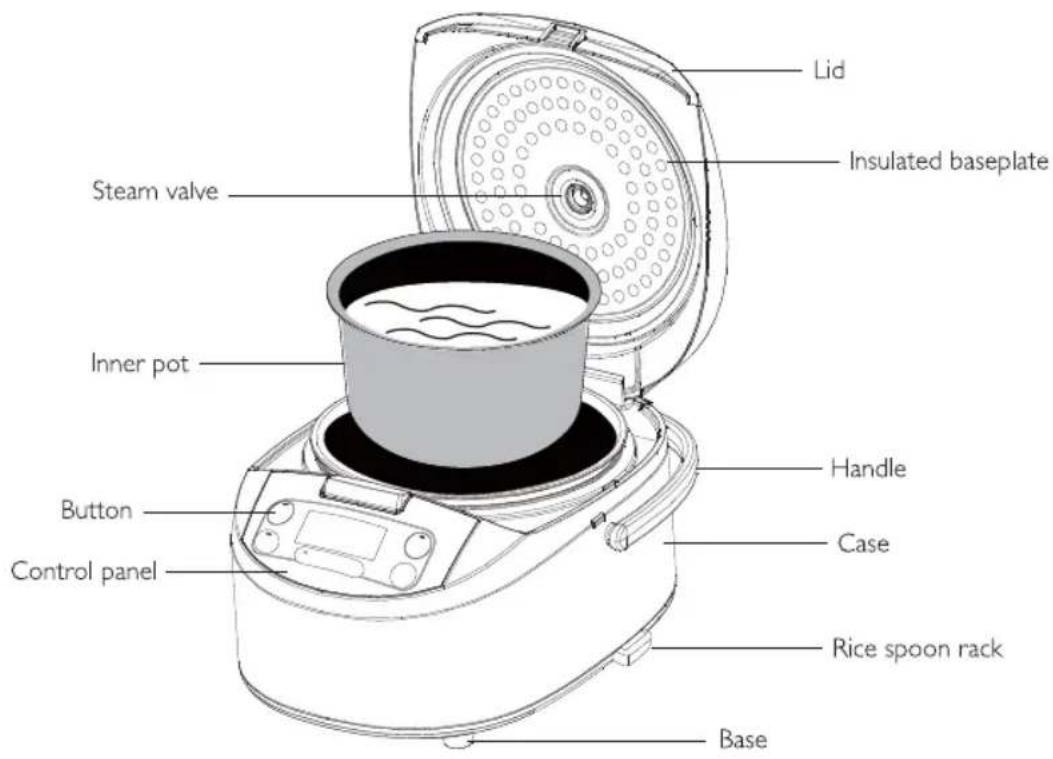
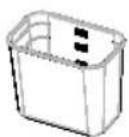
Accessories
Steamer—

natural_image
Simple line drawing of a cylindrical container (no text or symbols)Rice spoon —

Tablespoon—

Manual

Measuring cup ____


Warranty
Warranty
Recipes
Silicone potholders
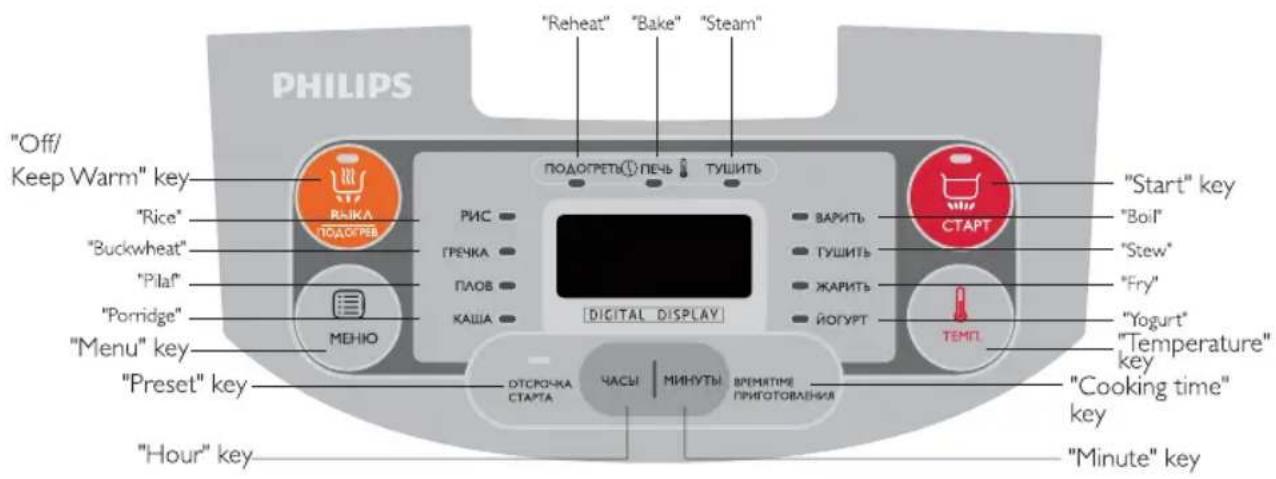
4 Control Panel
5 Technical Specifications
| Model | HD3036 | HD3037 |
| Rated power supply | 220Vac/50Hz | 220Vac/50Hz |
| Rated power | 980W | 980W |
| Volume | 4L | 5L |
| Rice (cup) | 1-8 | 1-10 |
| L × W × H (mm) | 395×300×245 | 395×300×265 |
| Weight (kg) | 3.8 | 4.0 |
6 Use
First time use
(1) Remove all accessories from the inner pot.
(2) Wipe the cooker with soft cloth.
(3) Use the "BOIL" function to remove the odor from the inner pot and inner lid.
- Add a half pot full of water in the inner pot, close the lid and plug in the power supply.
- Press the control key: the "BOIL" indicator lights up.
- After boiling for 5 minutes, press the "OFF/KEEP WARM" key.
- Disconnect the power supply, wait until the pot has cooled and pour out the water.
(4) Use a sponge and liquid detergent to wash all accessories, rinse thoroughly and dry with a soft cloth.
Preparation before use
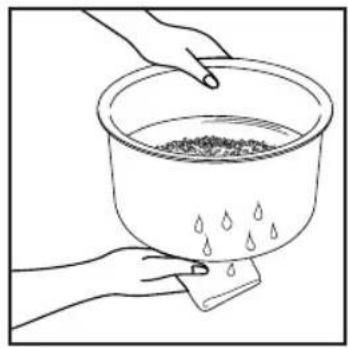
(1) Measure rice with the measuring cup as shown, and wash it in another container with water until clean.

(2) Place the clean rice into the inner pot, and add water according to the markings on the inner pot.
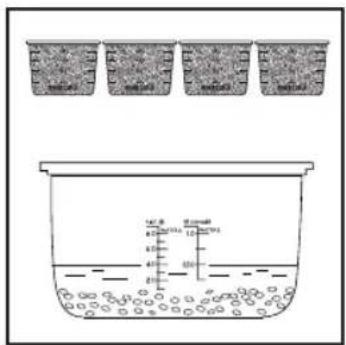
- Add water until the mark matching the amount of rice has been reached. For example: For 4 cups of rice, the water level should reach the "4" mark.
- You may adjust the amount of water based on the type of rice and your preference (harder or softer). (Note: The combined rice and water may not exceed the highest marking on the inner pot.)
(3) Dry the outside of the inner pot with dry cloth, place the pot into the cooker, gently spin the inner pot 2 to 3 times in the direction indicated by the arrow so the bottom of the pot is firmly attached to the hot plate.
natural_image
Line drawing of a hand pouring liquid into a bowl with droplets (no text or symbols)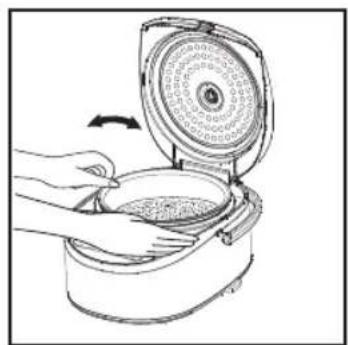
natural_image
Illustration of hands placing a food item into a cylindrical container with a lid (no text or symbols)- Please wipe dry both the inside and outside of the inner pot. If the outside and bottom of the inner pot is wet, you may hear some noise while cooking the rice and it may cause the rice cooker to malfunction.
(4) Close the lid until you hear a "click" sound, which indicates the lid is fully closed.
natural_image
Line drawing of a hand pressing down on a small appliance (no text or symbols)- Please do not open the lid or cover the steam valve with a towel or other object while cooking; it may deform the lid or cause a malfunction.
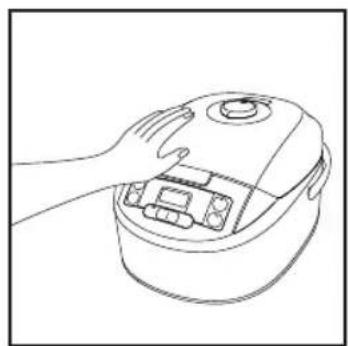
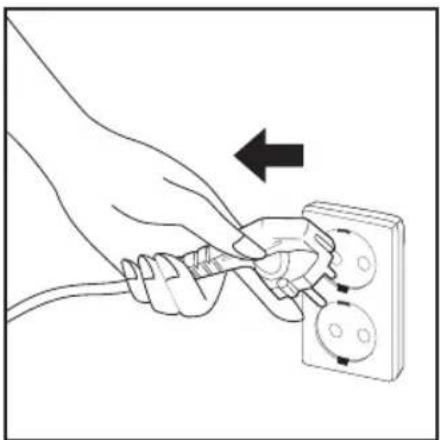
(5) Power on: Plug one end of the power cord to the multi-function rice cooker and the other end to the power outlet. The multi-function rice cooker then goes into stand-by mode.

natural_image
Line drawing of a rice cooker with control panel and attached cable (no text or symbols)
natural_image
Illustration of a hand using a power plug to adjust or install an electrical socket (no text or symbols present)- Please do not connect the cooker to the power supply before the preparation is completed.
7 Functions & Instructions
Rice/Buckwheat
(1) Press the MEHIO (Menu) key and select PUC (Rice)/ГРЕЧКА (Buckwheat). The indicator for PUC (Rice)/ГРЕЧКА (Buckwheat) lights up.

The indicator lights up


(2) Press "CTAPT" ("START") to begin cooking.

(3) When there are only 10 minutes left for the task, the display counts down the remaining time. When the task is done, the multi-function rice cooker automatically goes into ΠΟΔΟΓΡΕΒ (keep warm mode, now you may cancel insulation and unplug it.

natural_image
Line drawing of a hand using pliers to adjust or install an electrical outlet (no text or symbols)PILAF
(1) Press the MEHIO (Menu) key and select ΠΛΟΒ (Pilaf). The indicator for ΠΛΟΒ (Pilaf) lights up. Not available for preset; cooking time is not adjustable.

(2) Press the CTAPT (Start) key to start cooking. When cooking is complete, the multi-function rice cooker automatically goes into ΠΟΔΟΓΡΕΒ (keep warm) mode; you can now cancel ΠΟΔΟΓΡΕΒ (keep warm) mode and unplug it.


natural_image
Illustration of a hand using a power plug to adjust or install an electrical outlet socket (no text or symbols present)PORRIDGE
(1) Press the MEHIO (Menu) key and select KALWA (Porridge). The indicator for KALWA (Porridge) lights up.

(2) In cooking time set mode, press the ВРЕМЯ ПРИГОТОВЛЕНИЯ (cooking time) key to set the cooking time to between 1 and 4 hours; every press on the ЧАСЫ (HOUR) key adds 1 hour, and every press on the МИНУТЫ (MINUTE) key adds 1 minute. The default cooking time is 2 hours.


(3) Press "CTAPT" ("START") to begin cooking.

(4) When cooking is finished, the product goes into ΠΟΔΟΓΡΕΒ (keep warm) mode automatically. When the time for the task is displayed as a countdown, you can cancel the ΠΟΔΟΓΡΕΒ (keep warm) mode and unplug the product.

natural_image
Illustration of a hand using a power plug to adjust or install an electrical outlet (no text or symbols present)BOIL
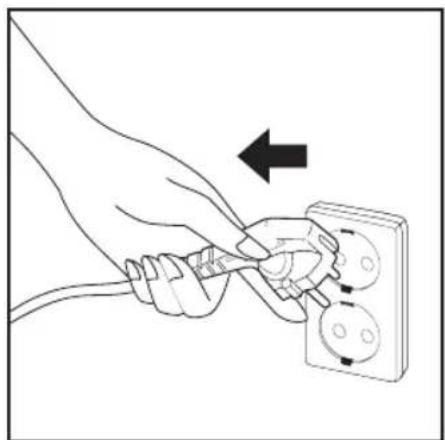
(1) Press the MEHЮ (Menu) key and select ВАРИТЬ (Boil). The indicator for ВАРИТЬ (Boil) lights up.


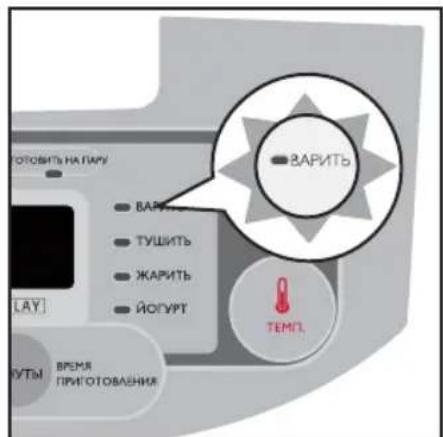
(2) In ВРЕМЯ ПРИГОТОВЛЕНИЯ (cooking time) set mode, press the cooking time key to set the cooking time to between 5 and 30 minutes; every press on the МИНУТЫ (MINUTE) key adds 1 minute, and you cannot adjust the hour. The default cooking time is 30 minutes. The cooking time begins once the water is boiling, and the time is displayed as a countdown. There are four alert tones; the product goes into ПОДОГРЕВ (keep warm) mode automatically after the cooking is finished.

![ПОДОПЕТЬ 1 SAHBOO TOTOBHY NA TAPY РИС 8:00 ГРЕЧКА ПЛОВ КАША [ DIGITAL DISPLAY ] ВАРИТЬ МИНУТЫ МИНУТЫ ОТСРОЧКА СТАРТА ЧАСЫ | МИНУТЫ ЗАБЕНИЯ](/content/2026/05/1024452/images/ef43b91aa94b5eb167883c11f55479bdba397aeda948781e6e9287de3752459b.jpg)

(3) Now you can cancel the ПОДОГРЕВ (keep warm) mode and unplug the product.


natural_image
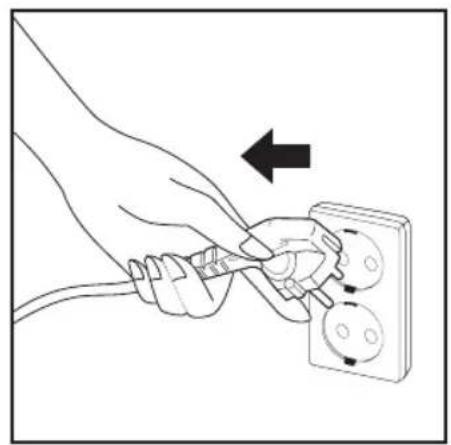
Line drawing of a hand connecting two electrical plugs to a wall socket, with an arrow indicating the process (no text or symbols present)STEW
(1) Press the MEHIO (Menu) key and select TYШИТЬ (Stew). The indicator for TYШИТЬ (Stew) lights up.

(2) In cooking time set mode, press the ВРЕМЯ ПРИГОТОВЛЕНИЯ (cooking time) key to set the cooking time to between 20 minutes and 10 hours; every press on the МИНУТЫ (MINUTE) key adds 1 minute, and every press on the ЧАСЫ (HOUR) key adds 1 hour. The default cooking time is 1 hours. When cooking is finished, the product goes into ПОДОГРЕВ (keep warm) mode automatically.


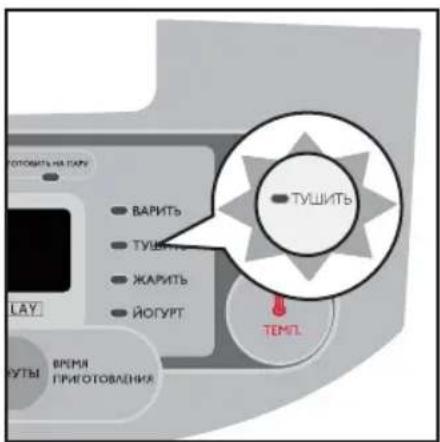

(3) Now you can cancel the ПОДОГРЕВ (keep warm) mode and unplug the product.

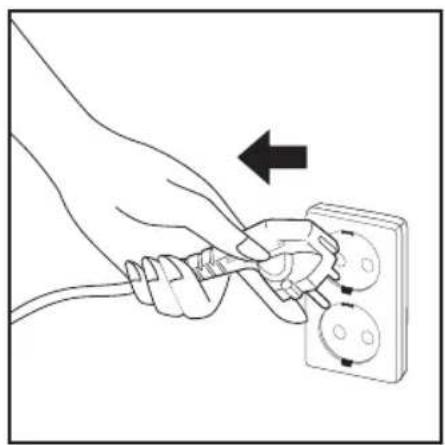
natural_image
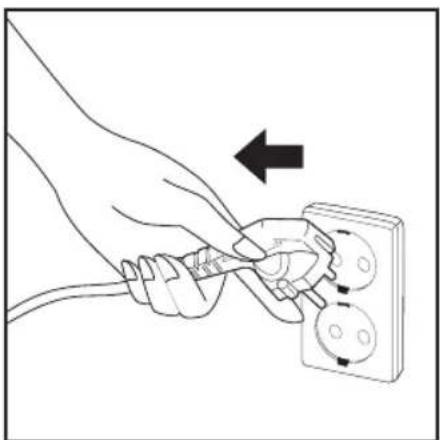
Illustration of a hand connecting two wires to an electrical outlet, with an arrow indicating direction (no text or symbols present)FRY
(1) Press the MEHIO (Menu) key and select ЖАРИТЬ (Fry). The indicator for ЖАРИТЬ (Fry) lights up.


(2) In cooking time set mode, press the ВРЕМЯ ПРИГОТОВЛЕНИЯ (cooking time key to set the cooking time to between 5 and 59 minutes; every press on the МИНУТЫ (MINUTE) key adds 1 minute, and you cannot adjust the hour. The default cooking time is 42 minutes. When cooking is finished, the product goes into ПОДОГРЕВ (keep warm) mode automatically.


(3) Now you can cancel the ΠΟΔΟΓΡΕΒ (keep warm) mode and unplug the product.


natural_image
Line drawing of a hand using pliers to adjust or install an electrical outlet (no text or symbols)- Note:
- This function must be operated with the lid opened.
- This function may not be used for DEEP FRY, and the amount of oil may not exceed marking "2".
YOGURT
(1) Press the MEHIO (Menu) key and select ЙОГУРТ (Yogurt).
The indicator for ЙОГУРТ (Yogurt) lights up.

(3) In cooking time set mode, press the ВРЕМЯ ПРИГОТОВЛЕНИЯ (cooking time) key to set the cooking time to between 6 and 12 hours; every press on the МИНУТЫ (MINUTE) key adds 10 minutes, and every press on the ЧАСЫ (HOUR) key adds 1 hour. The default cooking time is 8 hours. When cooking is finished, the product goes into standby mode automatically.


(4) You can unplug it immediately.
natural_image
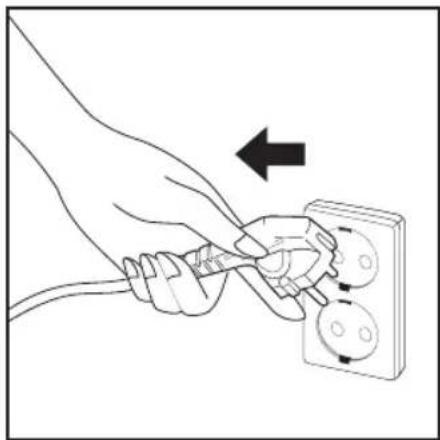
Line drawing of a hand using pliers to adjust or install an electrical socket (no text or symbols present)REHEAT
(1) Press the MEHIO (Menu) key and select ПОДОГРЕТЬ (Reheat). The indicator for ПОДОГРЕТЬ (Reheat) lights up.


(2) In cooking time set mode, press the ВРЕМЯ ПРИГОТОВЛЕНИЯ (cooking time) key to set the cooking time to between 8 and 25 minutes; every press on the МИНУТЫ (MINUTE) key adds 1 minute, and you cannot adjust the hour. The default cooking time is 25 minutes. When cooking is finished, the product goes into ПОДОГРЕВ (keep warm) mode automatically.


(4) Now you can cancel the ΠΟΔΟΓΡΕΒ (keep warm) mode and unplug the product.

natural_image
Illustration of a hand using a power plug to switch an electrical outlet (no text or symbols present)BAKE
(1) Press the MEHIO (Menu) key and select ПЕЧЬ (Bake).
The indicator for ΠΕΥb (Bake) lights up.


(2) Available temperature options: 40^ C, 60^ C, 80^ C, 100^ C, 120^ C, 150^ C, 180^ C and loop setting.


(3) Available cooking time settings are 20 minutes to 2 hours; every press on the ЧАСЫ (HOUR) key adds 1 hour, every press on the МИНУТЫ (MINUTE) key adds 10 minutes. The default cooking time is 45 minutes. When cooking is finished, the product goes into ПОДОГРЕВ (keep warm) mode automatically.


(4) Now you can cancel the ΠΟΔΟΓΡΕΒ (keep warm) mode and unplug the product.


natural_image
Line drawing of a hand using a power plug to switch an electrical outlet (no text or symbols)STEAM
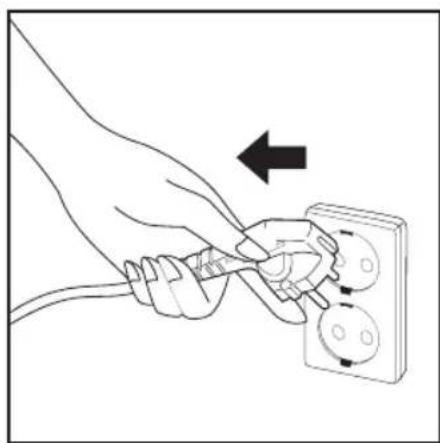
(1) Press the MEHIO (Menu) key and select ОТОВИТЬ НА ПАРУ (Steam). The indicator for ОТОВИТЬ НА ПАРУ (Steam) lights up.

![ГОТОВИТЬ НА ПАРУ ПОДОПТЬ УЗАВЕНО ГОТОВИТЬ НА ПАРУ ГРЕЧКА ПЛОВ КАША 88:00 [DIGITAL DISPLAY] РАС ВАРИТЬ ТУШИТИ ЖАРИТИ ЙОГУРТ ОТСРОЧКА СТАРТА ЧАСЫ | МИНУТЫ ВРЕНИ ПРИГОТОВЛЕНИЯ](/content/2026/05/1024452/images/a737d6c798d0376388d27ae2219add7a19c47bb3214773e1bdd1bcf60b59d478.jpg)

(3) In cooking time set mode, the ВРЕМЯ ПРИГОТОВЛЕНИЯ (cooking time) key to set the cooking time to between 5 minutes and 2 hours; every press on the МИНУТЫ (MINUTE) key adds 1 minute, and you cannot adjust the hour. The default cooking time is 30 minutes. The cooking time begins once the water is boiling, and the time is displayed as a countdown. There are four alert tones; the product goes into ПОДОГРЕВ (keep warm) mode automatically after the cooking is finished.


(4) Now you can cancel the ΠΟΔΟΓΡΕΒ (keep warm) mode and unplug the product.

natural_image
Line drawing of a hand connecting two electrical plugs to a wall socket, with an arrow indicating the direction (no text or symbols present)Preset
After selecting the function keys accordingly, press the ОТСРОЧКА СТАРТА (Preset) key. In preset mode, press "ЧАСЫ" ("HOUR") and "МИНУТЫ" ("MINUTE") according to the display to adjust the hour and minute of time; every press of the ЧАСЫ (HOUR) key adds 1 hour, and every press of the МИНУТЫ (MINUTE) key adds 10 minutes). You may delay cooking for up to 24 hours (10 minutes - 24 hours). The time delay function may not be used for pilaf, fry or bake.


Keep Warm
(1) Except for the yoghurt-making function, all cooking functions will allow the product to go into ПОДОГРЕВ (keep warm) mode automatically after the cooking is finished.
(2) For all functions, once ΠΟΔΟΓΡΕΒ (keep warm) mode has been activated, the pot will be ΠΟΔΟΓΡΕΒ (kept warm) for 24 hours before returning to standby mode.

8 Maintenance
Please make sure to disconnect the product from the power supply before performing maintenance, and wait until the hot plate has cooled down before cleaning. Do not clean with thinner, gasoline, cleanser, a hard brush, etc.

Tips for Cleaning the Steam Valve
(1) Remove the steam valve from the lid.
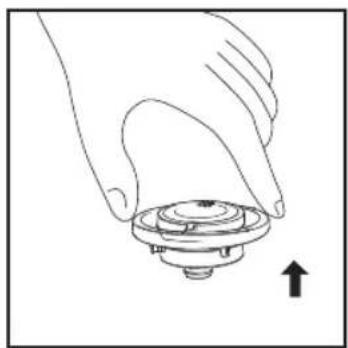
natural_image
Line drawing of a hand holding a circular mechanical component with an upward arrow (no text or symbols)(2) Remove the cover from the steam valve.
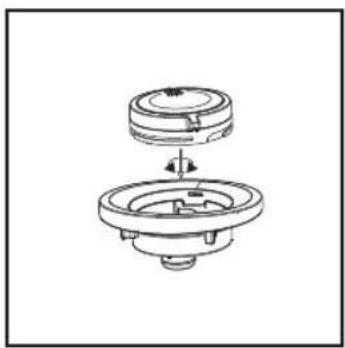
natural_image
Technical line drawing of a mechanical component with two views (top and side), no text or symbols present.(3) Rinse it with clean water, and wipe it with a dry cloth.

natural_image
Diagram of a spray gun spraying water onto two wheels (no text or symbols)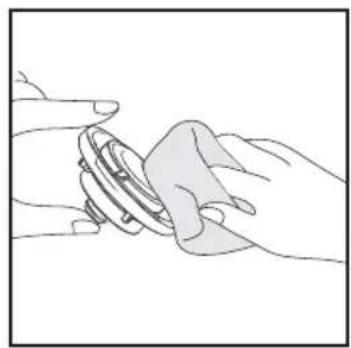
natural_image
Line drawing of two hands exchanging a circular object (no text or symbols)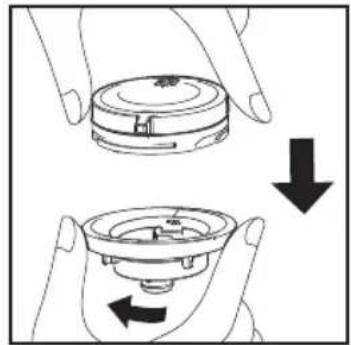
natural_image
Illustration of hands holding a circular device with a downward arrow indicating rotation (no text or symbols)- It is recommended that the steam valve be cleaned after each use. This can help prevent the valve from becoming clogged by spills.
- If anything is stuck to the valve, please clean it immediately or it may affect the cooking quality.
Tips for Cleaning the Cover (Seal)
(1) Please use dishwashing liquid to wipe clean the surface of the lid.
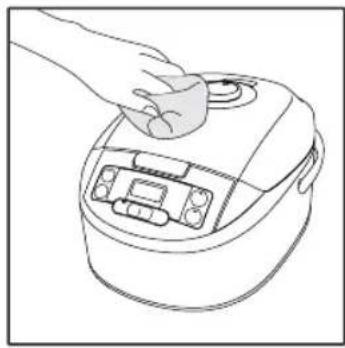
natural_image
Line drawing of a hand pressing down on a rice cooker (no text or symbols)(2) If you do not clean the inside of the lid in time, it will become stained and will then be difficult to clean. Therefore, please be sure to wipe it clean after every use.
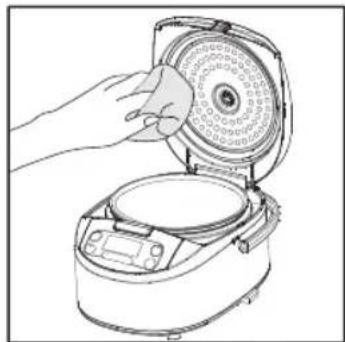
natural_image
Line drawing of a hand placing a circular component into a rice cooker (no text or symbols)- Please do not pull on the rubber sealing ring.
Tips for Cleaning the Inner Pot
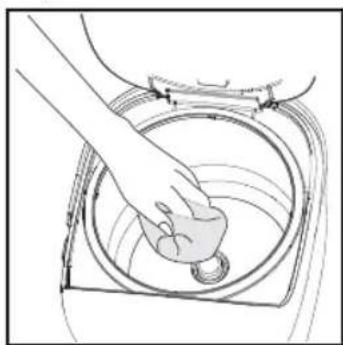
(1) Add water to the inner pot as appropriate, and place the pot in the cooker. Press the MEHIO (MENU) key, select BAPITb (BOIL) and press the CTAPT (START) key. When the "BAPITb" ("BOIL") indicator lights up, the multi-function rice cooker begins operation.
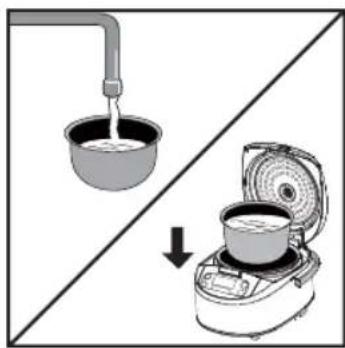
natural_image
Diagram showing a kitchen setup with a bowl and a rice cooker, no text or symbols present

(2) Have the cooker run for 10 minutes, press the "ВЫКА (OFF)/ПОДОГРЕВ (KEEP WARM)" key and unplug the cooker.

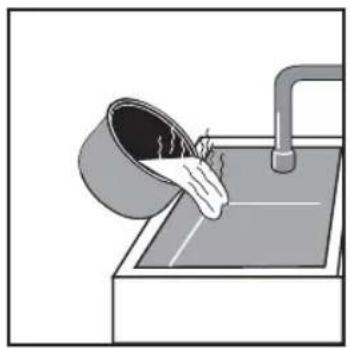
(3) After the cooker has cooled down, pour out the water in the inner pot, use dishwashing liquid and a sponge to wipe the inner pot gently and then rinse it off with clean water. Please wipe the outside of the inner pot dry. Do not use brushes with hard bristles or hard objects for cleaning, as this may damage the non-stick coating.
natural_image
Illustration of a bucket pouring liquid into a sink with a pipe (no text or symbols)
natural_image
Illustration of a bucket with a water tap and two slippers inside (no text or symbols)
natural_image
Illustration of hands cleaning a container with water droplets (no text or symbols)- The coating surface may discolor or become mottled; this has no effect on your health.
Tips for Cleaning the Sensor and Hotplate
- If something becomes stuck to the bottom sensor or hot plate, please gently wipe them clean them with fine sandpaper (no. 600) or a soft cloth to prevent the rice cooker from having poor contact, which would affect the cooking quality.
natural_image
Line drawing of a hand placing a small object into a circular container (no text or symbols)- Use a small pointed object to remove rice and other debris from the gaps.
- The surface of the hot plate and protection frame may discolor or dapple, this has no effect on your health.
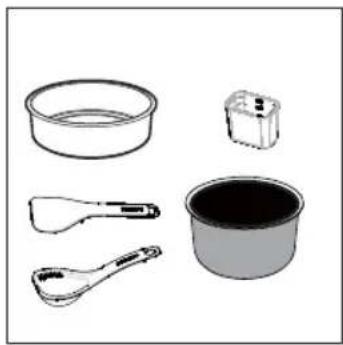
Tips for Cleaning the Accessories
Please use dishwashing liquid, a sponge and water for cleaning.
- Steamer, rice spoon, tablespoon, measuring cup and inner pot
natural_image
Illustration of kitchen utensils including a bowl, lid, spatula, and measuring cup (no text or labels)● After soaking in hot or cold water, clean them with a sponge.
9 Troubleshooting
If there are problems when using the rice cooker, please check the following before requesting service: If the problems remain unsolved, please contact our designated special maintenance department.
| When the following occurredPlease check | RICE | Rice crust overly browned | Rice is being kept warm | Switch does not respond when pressed during use | Following noise sounded | |||||
| Too hard | Not cooked | Too soft | Rice soup overflow | Emits odor | Discoloration | Too dry | ||||
| ★ The amount of rice and/or water is not correct | √ | √ | √ | √ | √ | ◆The plug is unplugged or not properly connected. | ◆If there is popping sound during cooking, it is bottom of the pot (outside). | |||
| ★ The rice is not properly cleaned | √ | √ | √ | |||||||
| ★ It is not flat on the bottom of the inner pot | √ | √ | √ | |||||||
| ★ Foreign object(s) is (are) stuck to the outside of the inner pot or pot sensor | √ | √ | √ | √ | √ | √ | √ | |||
| ★ Steam valve is not properly fitted | √ | √ | √ | √ | √ | √ | ||||
| ★ Oil was added to rice | √ | √ | √ | |||||||
| ★ The rice is not stirred after cooking | √ | √ | ||||||||
| ★ Insulation time exceeds 5 hours or there is too little rice to keep warm | √ | √ | √ | |||||||
| ★ The rice spoon is in the pot while keeping warm | √ | |||||||||
| ★ Insulating cold rice | √ | |||||||||
| ★ The lid is not properly closed or the inner pot is not properly cleaned | √ | √ | ||||||||
| ★ The plug is unplugged or the switch is turned off when cooking | √ | √ | ||||||||
| 1. The troubleshooting tips above all concern common problems. 2. To avoid potential damage, please do not disassemble in an attempt to repair the problem yourself. If you have not been able to solve the problem, please contact an authorized service center. | ||||||||||
| Serial number | Malfunction | Causes | Troubleshooting | |
| 1 | The indicator does not light up | Hot plate does not heat up | 1. Power is not connected to the circuit board2. Power supply circuit board failure3. Circuit board is disconnected4. Main circuit board failure | 1. Check whether the switches, plugs and sockets, fuses and power cord are intact and properly connected2. Send to an authorized service center for maintenance3. Send to an authorized service center for maintenance4. Send to an authorized service center for maintenance |
| Hot plate heats up | Main circuit board failure | Send to an authorized service center for maintenance | ||
| 2 | The indicator lights up | Hot plate does not heat up | 1. Bottom thermistor failure2. Hot plate components burned3. Circuit board is partially disconnected4. Power supply circuit board failure | Send to an authorized service center for maintenance |
| 3 | Display screen shows E1 | 1. Bottom sensor short circuit2. High temperature alarm | 1. Send to an authorized service center for maintenance2. Restore to normal temperature and reconnect | |
| 4 | Display screen shows E2 | 1. Bottom sensor is disconnected2. Low temperature alarm | 1. Send to an authorized service center for maintenance2. Restore to normal temperature and reconnect | |
| 5 | Display screen shows E3 | 1. Lid sensor short circuit2. High temperature alarm | 1. Send to an authorized service center for maintenance2. Restore to normal temperature and reconnect | |
| 6 | Display screen shows E4 | 1. Lid thermistor short circuit2. Low temperature alarm | 1. Send to an authorized service center for maintenance2. Restore to normal temperature and reconnect | |
| 7 | Rice is not cooked or takes too long to cook | 1. Hot plate is deformed2. Inner pot is tilted, one side is dangling3. Foreign object(s) between inner pot and hot plate4. Inner pot is deformed5. Main circuit board failure6. Main thermostat fault | 1. Send to an authorized service center for maintenance2. Turn the inner pot gently to restore it to normal state3. Clear away the foreign object(s)4. Send to an authorized service center for replacement of the inner pot5. Send to an authorized service center for maintenance6. Send to an authorized service center for maintenance | |
| 8 | Rice is burned, no auto keep warm or not keeping warm properly | 1. Main circuit board failure2. Bottom thermistor fault | Send to an authorized service center for maintenance | |
| 9 | Pomidge severely overflows | 1. Main circuit board failure2. Lid thermistor fault | Send to an authorized service center for maintenance | |
| 10 | It takes a long time for the water to boil when cooking rice and/or making pomidge | 1. Main circuit board failure2. Lid thermistor fault | Send to an authorized service center for maintenance | |