300N KR.5W - Router Kraun - Kostenlose Bedienungsanleitung
Finden Sie kostenlos die Bedienungsanleitung des Geräts 300N KR.5W Kraun als PDF.

| Produkttyp | Router |
| Marke | Kraun |
| Modell | 300N KR.5W |
| WLAN-Standard | 802.11n (bis zu 300 Mbit/s) |
| Frequenzband | 2,4 GHz |
| Antennen | 2 externe Antennen |
| Anschlüsse | 4x LAN 10/100, 1x WAN 10/100 |
| Ethernet-Standard | 10/100 Base-T |
| Betriebsmodi | Router, Access Point, Repeater |
| Sicherheit | WPA/WPA2, WEP, Firewall |
| Stromversorgung | 5V DC, 1A |
| Abmessungen (B x T x H) | ca. 150 x 120 x 30 mm |
| Gewicht | ca. 300 g |
| Betriebstemperatur | 0 °C bis 40 °C |
| Luftfeuchtigkeit | 10% – 90% (nicht kondensierend) |
| Zertifizierungen | CE, RoHS |
| Reinigung | Mit einem trockenen, fusselfreien Tuch abwischen |
| Entsorgung | Elektro- und Elektronik-Altgeräte getrennt entsorgen |
Häufig gestellte Fragen - 300N KR.5W Kraun
Benutzerfragen zu 300N KR.5W Kraun
0 Frage zu diesem Gerät. Beantworten Sie die, die Sie kennen, oder stellen Sie Ihre eigene.
Eine neue Frage zu diesem Gerät stellen
Laden Sie die Anleitung für Ihr Router kostenlos im PDF-Format! Finden Sie Ihr Handbuch 300N KR.5W - Kraun und nehmen Sie Ihr elektronisches Gerät wieder in die Hand. Auf dieser Seite sind alle Dokumente veröffentlicht, die für die Verwendung Ihres Geräts notwendig sind. 300N KR.5W von der Marke Kraun.
BEDIENUNGSANLEITUNG 300N KR.5W Kraun
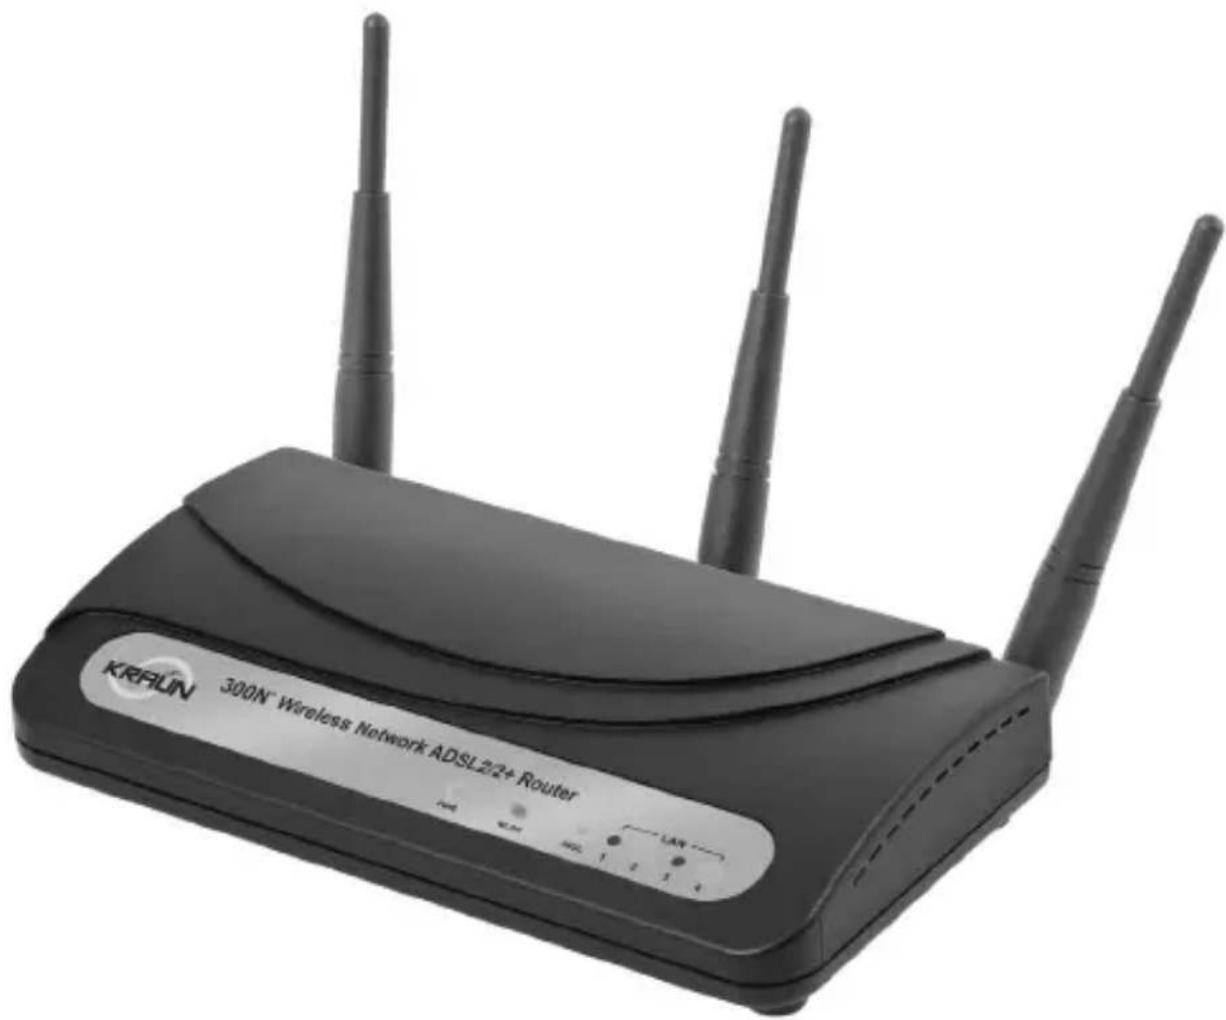
Wireless Network ADSL2/2+ 300N Router
natural_image
Exterior view of a 300N Wireless Network ADSL2/2+ Router device with two antennas and control buttons (no readable text beyond branding)Quick Guide pag. 2 Guida Rapida pag. 16
1. Product Introduction
Congratulations on purchasing this ADSL2/2+ Router. This router is a cost-effective ADSL2/2+ router, with the combination of an ADSL2/2+ modem, router, Ethernet network switch and wireless access point (for wireless model only), you can surf the Internet through your ADSL2/2+ broadband connection without investing other devices.
This router can support downstream transmission rates of up to 24Mbps and upstream transmission rates of up to 1Mbps. It supports PPPoA (RFC 2364 - PPP over ATM Adaptation Layer 5), RFC 1483/2684 encapsulation over ATM (bridged or routed) and PPP over Ethernet (RFC 2516), to establish a connection with ISP. The product also supports VC-based and LLC-based multiplexing.
With the web management interface, users can easily configure the various functions of the router including DHCP server, NAT, virtual server, DMZ, access control, IP/MAC/Application/URL filter, Firewall, PPTP/IPSec/L2TP pass-through, DDNS, UPnP, Wireless (for wireless model only) and etc.
This router is a high performance and high-speed device that provides a full rate of ADSL2/2+ standard with the superb reliability and a complete solution for home and office application.
2. Minimum Requirements
The following devices are necessary to configure and use the ADSL2/2+ Router:
- A PC with Pre-installed Ethernet Adapter (Required) and a Web-Browser (Internet Explorer 4.0 or higher)
- RJ-45 Ethernet crossover cable (Included in the package)
• RJ-11 (ADSL Ready) phone Line.
3. Product Package
This package contains the following components:
• ADSL2/2+ Router (Annex A or B)
• Three Detachable Dipole Antennas
- Power Adapter
• RJ-45 Ethernet Cable (100 cm)
• RJ-11 Telephone Line (180 cm)
- Quick Guide
• CD Drivers, Utility and Manual.
4. Install ADSL Router
Step 1. Connect the ADSL Line
Connect the router to your ADSL cable through the supplied RJ-11 telephone line.
Step 2. Connect the router to your LAN network
Connect the router to your PC, hub or switch by attached the Ethernet cable to the LAN port of the router.
Step 3. Connect the Power Adapter to the Router
Connect the power adapter to the power jack on the rear panel of router.
Step 4: Check the ADSL LED on the Router
The ADSL LED will be ON if the router is connected to the ADSL cable and receives the ADSL signals successfully. If the LED is blinking, please contact with your ISP (Internet Service Provider) to check the problem.
Note: You must use the power adapter shipped along with the router, do NOT use any other power adapter from other sources.
5. Setup Wizard
This router provides a Setup Wizard tool for user to configure the ADSL settings. This wizard collects some ISP's ADSL settings so that user can easy to configure the router's ADSL settings by only selecting the ISP vendor from the wizard.
If you cannot find your ISP from the list in the wizard, please manually set the ISP information through the wizard.
Getting Started
Before you start, please check the following items:
- Please make sure that you have connected the ADSL cable to the router correctly. When the ADSL cable is worked normally, the ADSL LED will be on.
- Uninstall all of dial up programs if you have installed previously for the USB modem or other dial up devices.
- It is recommended to configure the router through the Ethernet cable before you have set the wireless functions correctly.
This wizard can be run in Windows 2000/XP. The following procedures are operated in Windows XP. (Procedures are similar for Windows 2000).
- Insert the CD shipped along with the ADSL router into your CD-ROM drive. The Autorun.exe program should be executed automatically. If not, run Autorun.exe manually from "Autorun" folder in the CD.
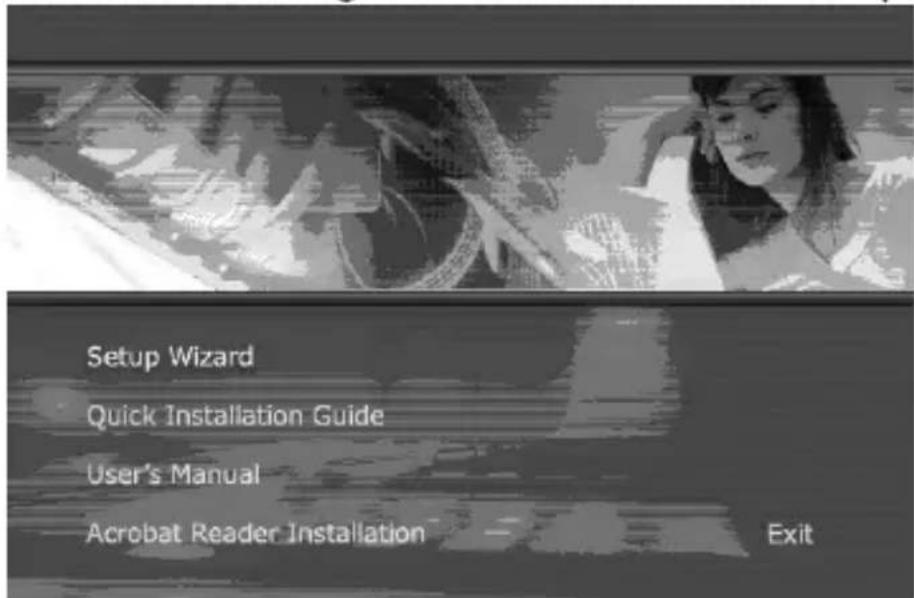
- The following screen will be displayed. Click "Setup Wizard".

natural_image
Black-and-white artistic composition featuring a woman in profile, abstract geometric shapes, and layered patterns (no text or symbols)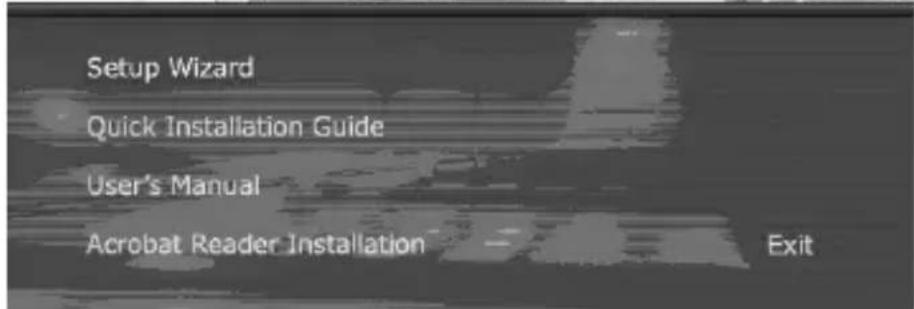
text_image
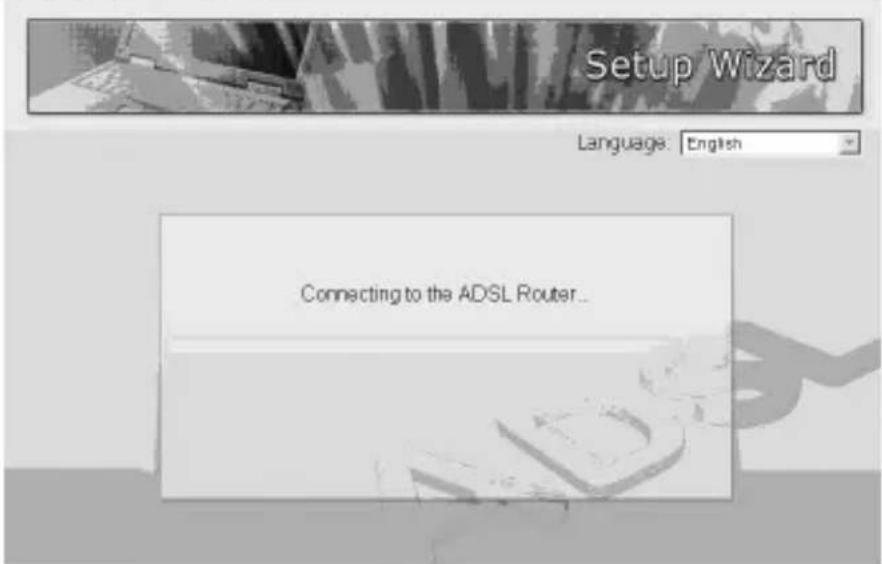
Setup Wizard Quick Installation Guide User's Manual Acrobat Reader Installation Exit- This wizard will be executed and try to search for the ADSL Router. If the ADSL Router can be searched successfully, the wizard will guide you to step 5.

text_image
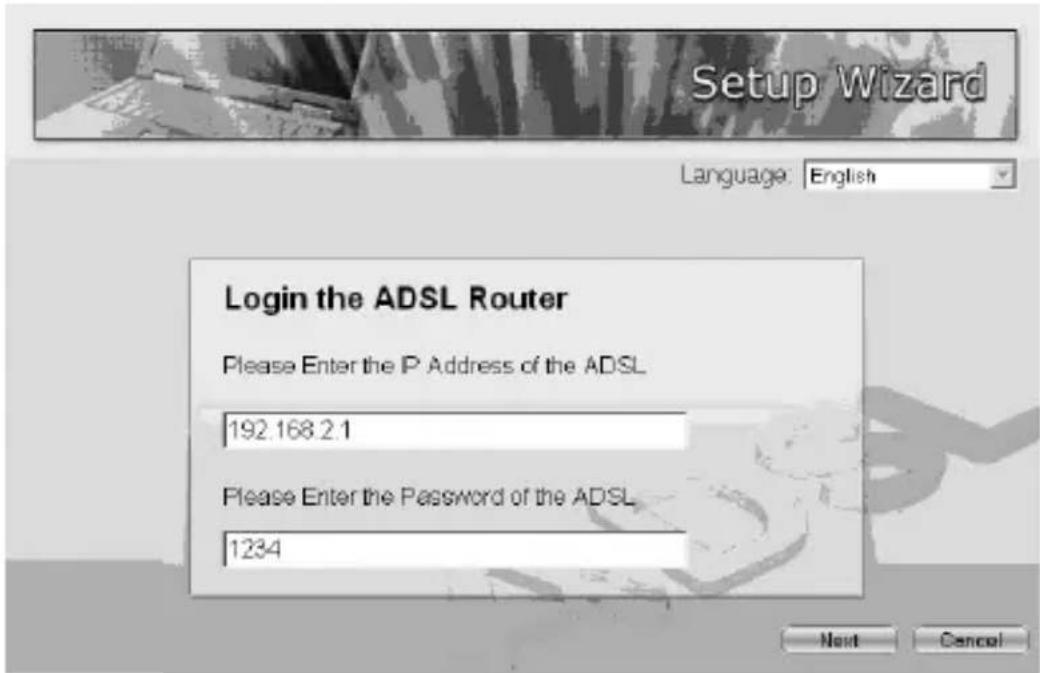
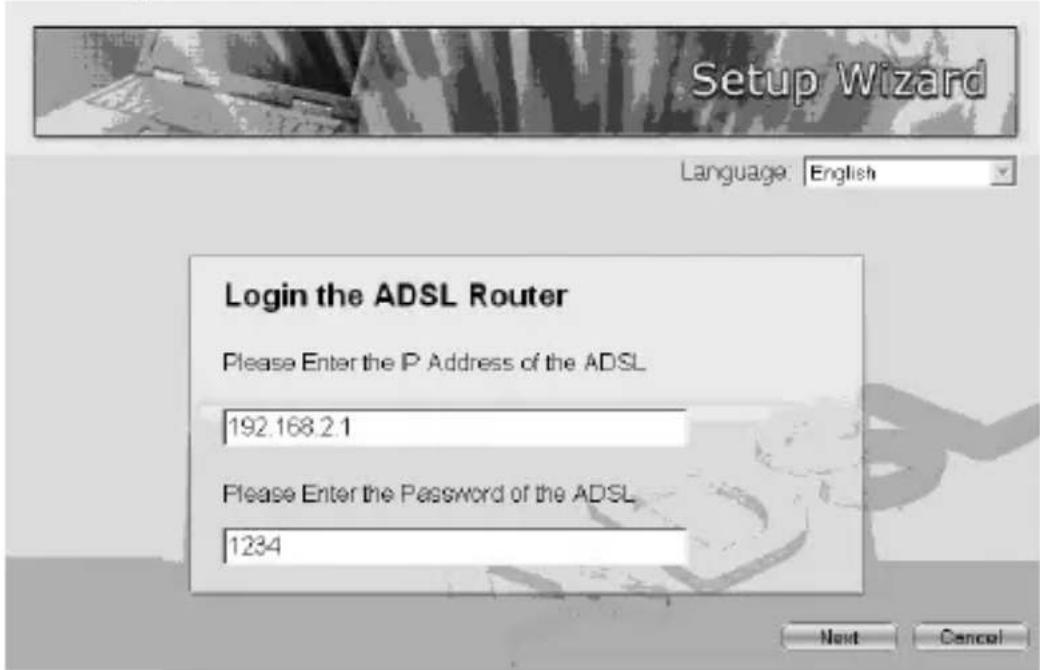
Setup Wizard Language: English Connecting to the ADSL Router...- If the router cannot be found, please enter the IP Address and the Password of the router to search again. Click "Next" to continue.
text_image
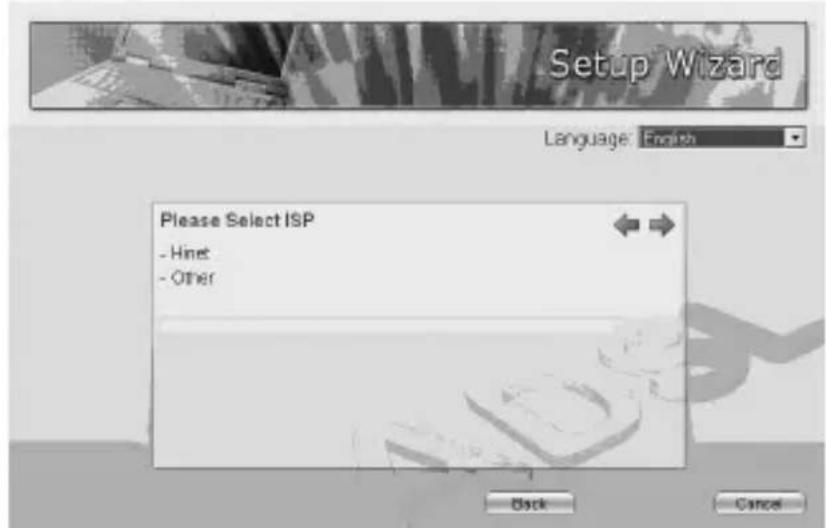
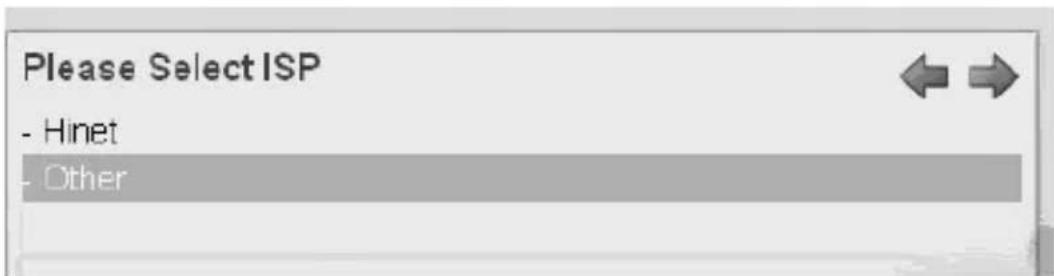
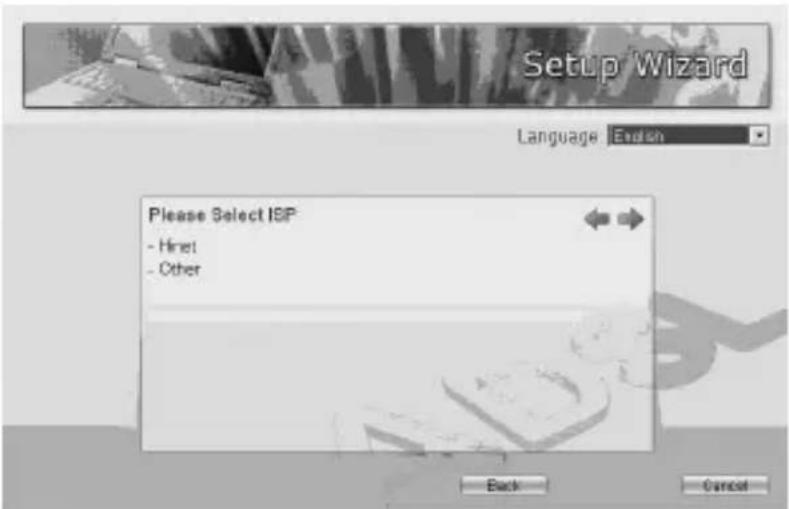
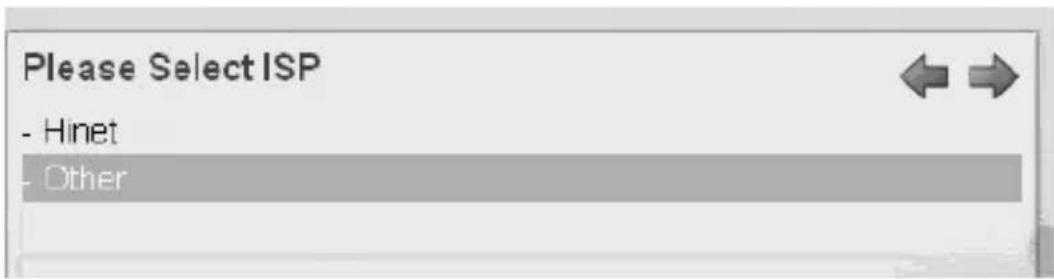
Setup Wizard Language: English Login the ADSL Router Please Enter the IP Address of the ADSL 192.168.2.1 Please Enter the Password of the ADSL 1234 Next Cancel- The wizard will automatically select the country where you are in by checking the language of the operating system in your computer and skip to the "Select ISP" page. Please select the ISP.
If you cannot find the ISP, please click "Other" to reselect the country or manual configure the I S P information.
text_image
Setup Wizard Language: English Please Select ISP - Hinet - Other Back Cancel5.1 Automatically Set ISP
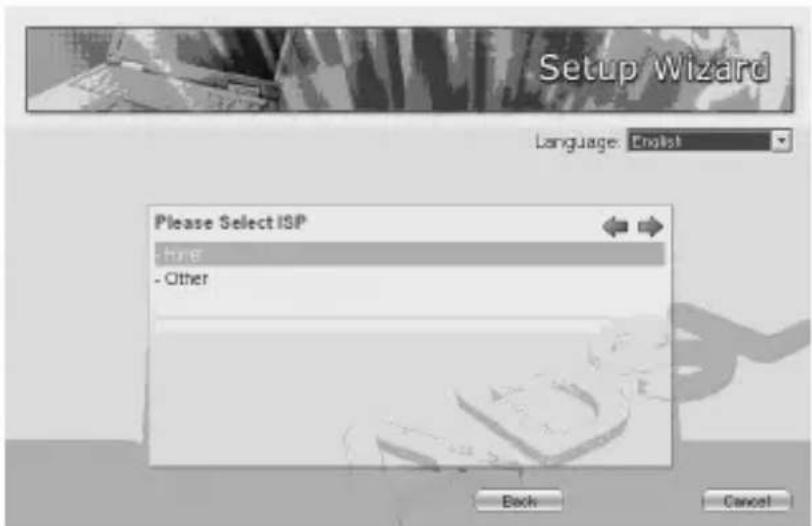
If you can find the ISP from the wizard, please follow the procedures below to let the wizard set the ISP settings automatically.
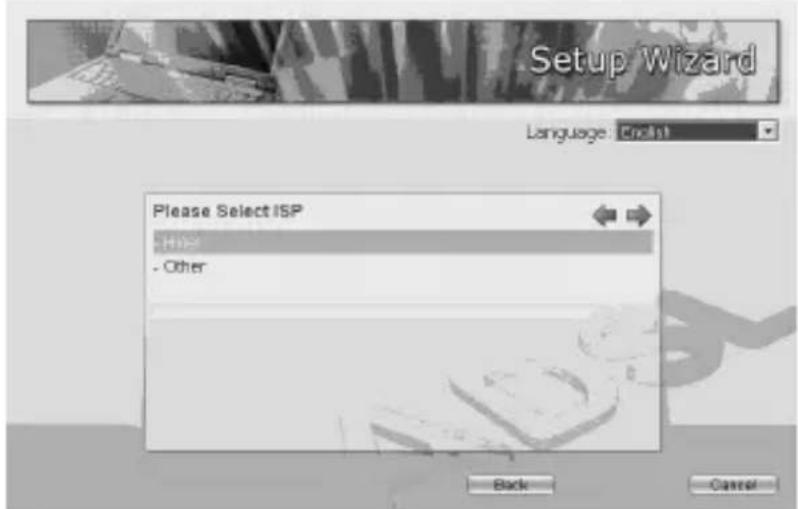
- Please select the ISP (Internet Service Provider) of your A D S L service.
text_image
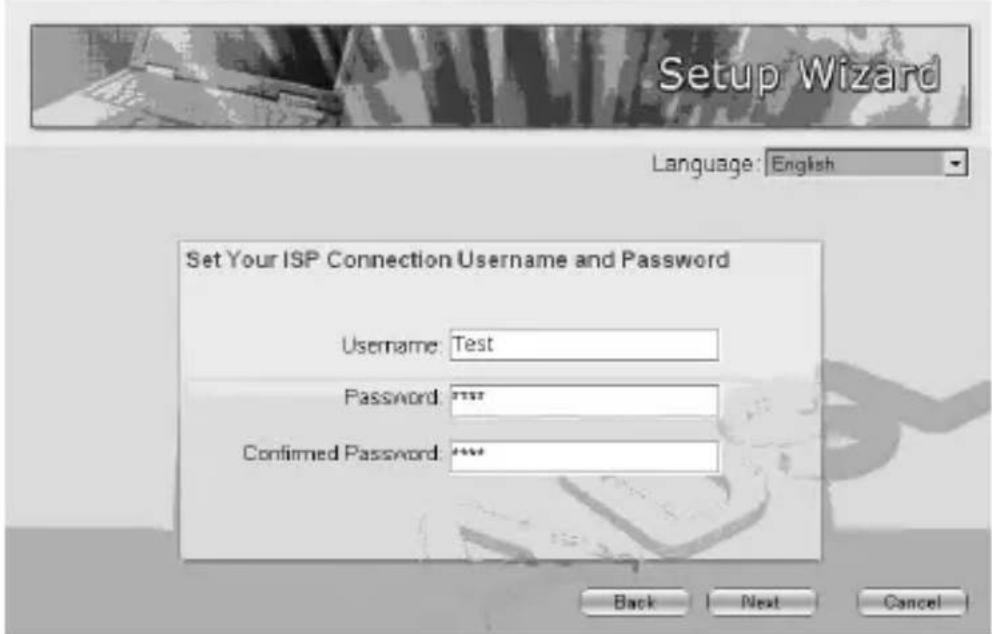
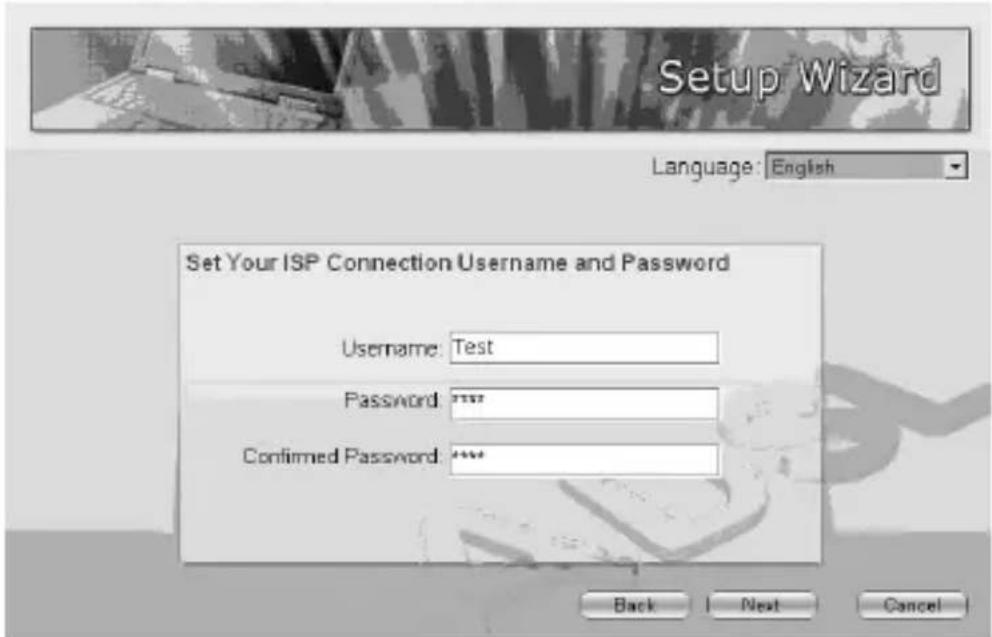
Setup Wizard Language: English Please Select ISP - hire - Other Back Cancel- Enter the Username and Password which your ISP has provided to you if it is needed. Click "Next".
text_image
Setup Wizard Language: English Set Your ISP Connection Username and Password Username: Test Password: ****** Confirmed Password: ****** Back Next Cancel- Click "Save" to save the settings and reboot the router.

text_image
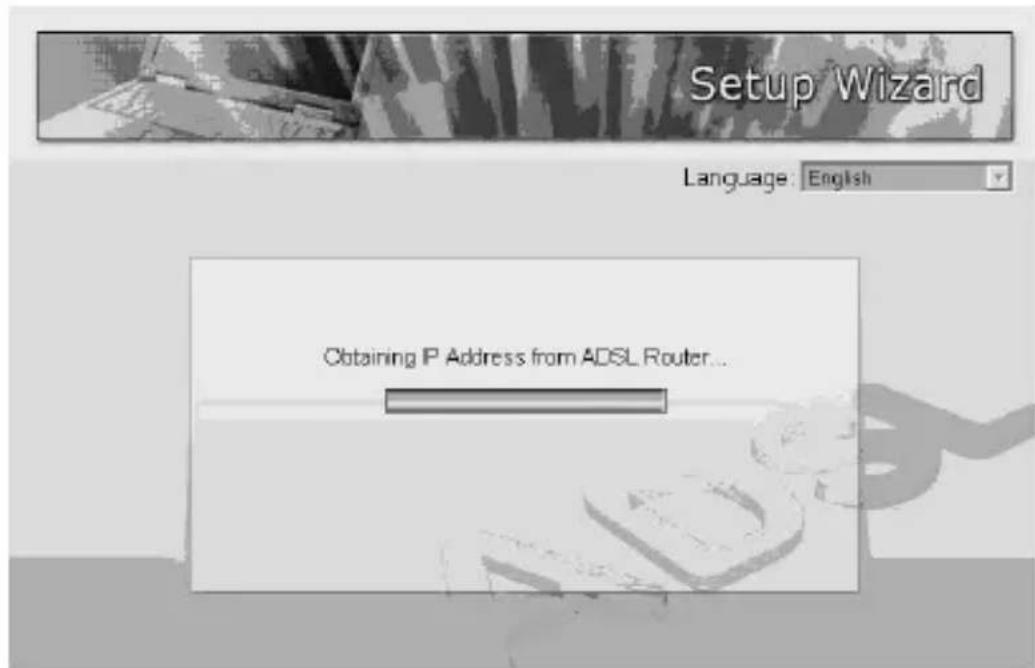
Setup Wizard Language: English Settings Overview Country: Taiwan ISP: Hinet VPI: 0 VCI: 33 Encapsulation: PPPoE LLC Username: Test Password: **** Back Save Cancel- After saving and rebooting the router, the ISP settings are all finished. This wizard will then help to set your computer to obtain IP Address from the router automatically.
Note 1: To use the router to get into the Internet, the IP Address of each PC has to be set in the same network segment as the router. This wizard will help to set the proper IP Address to your computer.
Note 2: By default, the router's DHCP Server is enabled. If it is disabled before running the wizard, the wizard will enable the DHCP Server of the router automatically.

text_image
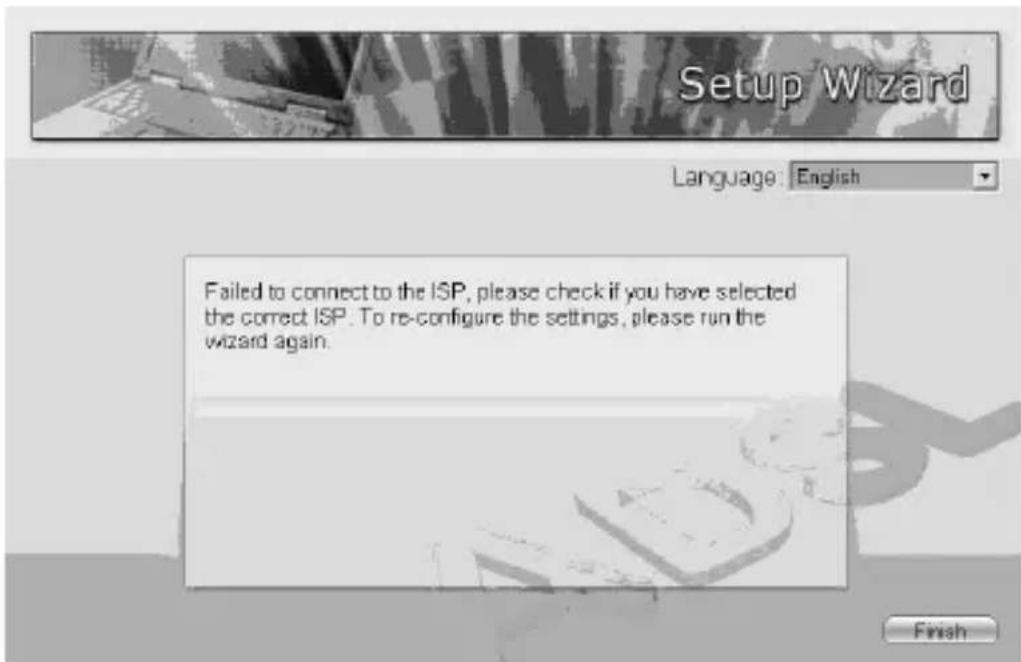
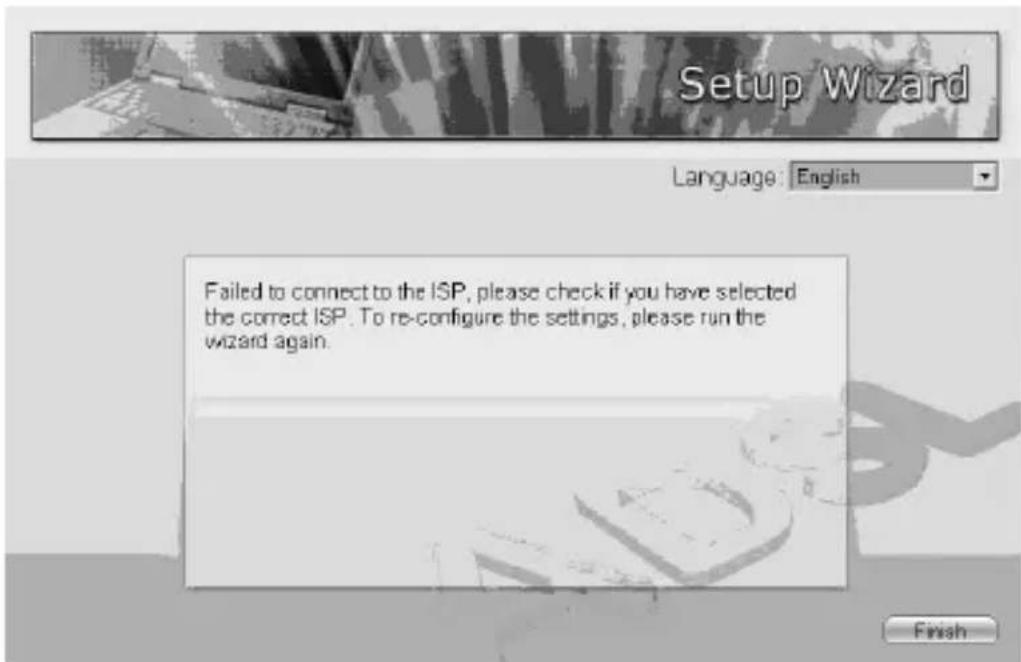
Setup Wizard Language: English Obtaining IP Address from ADSL Router...- The wizard will try to connect to the ISP you have selected. If the connection is failed, please run the wizard to select the ISP again.
text_image
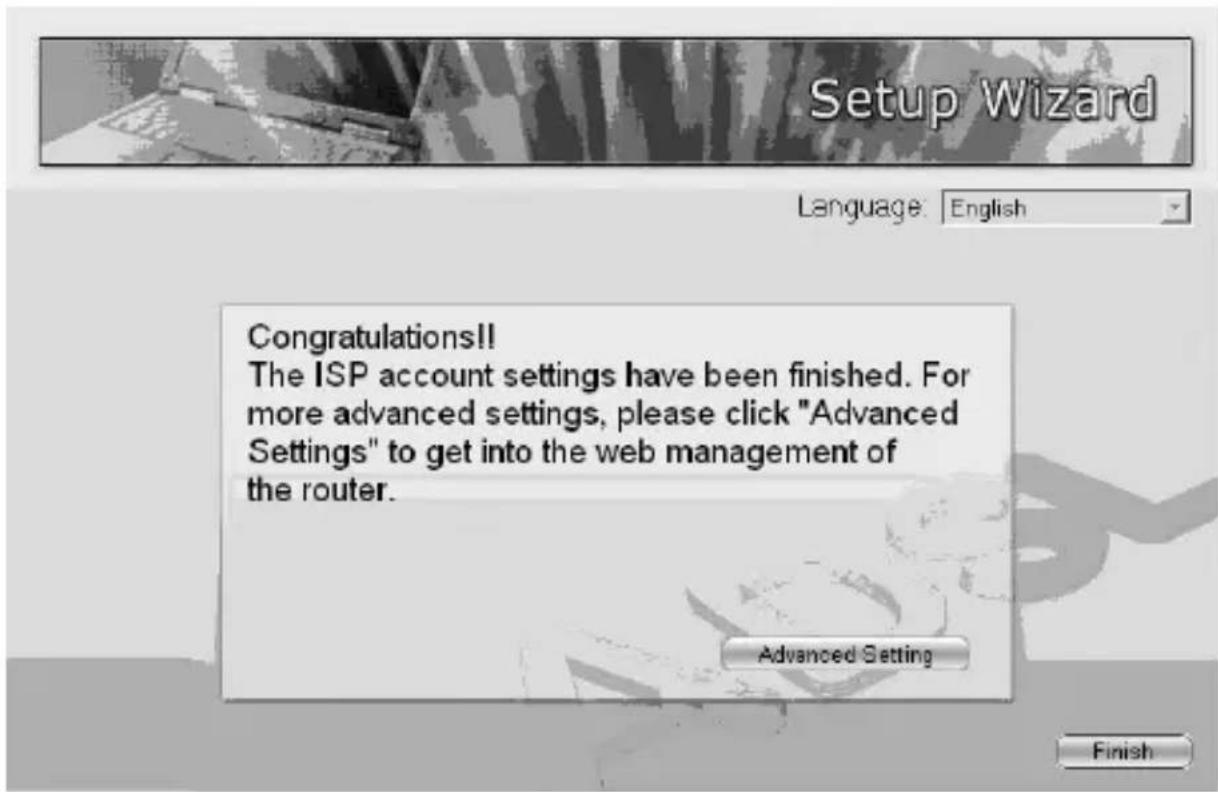
Setup Wizard Language: English Failed to connect to the ISP, please check if you have selected the correct ISP. To re-configure the settings, please run the wizard again. Finish- If you can successfully to connect to the ISP, you will see below page. If you want to configure more settings, please click "Advanced Settings" to get into the web management of the router or click "Finish" to close the wizard.

text_image
Setup Wizard Language: English Congratulations!! The ISP account settings have been finished. For more advanced settings, please click "Advanced Settings" to get into the web management of the router. Advanced Setting Finish5.2 Manually Set ISP
If you cannot find the ISP from the wizard, please follow the procedures below to set the ISP settings manually.
Before configuring the ISP manually, please check with your ISP (Internet Service Provider) what kind of the service is provided such as PPPoE, PPPoA or RFC1483/2684. Gather the information as illustrated in the following table and keep it for reference.
| PPPoE | VPI/VCI, VC-based/LLC-based multiplexing, Username, Password (and Service Name) |
| PPPoA | VPI/VCI, VC-based/LLC-based multiplexing, Username, Password |
| RFC1483 Bridged | VPI/VCI, VC-based/LLC-based multiplexing to use Bridged Mode |
| RFC1483 Routed | VPI/VCI, VC-based/LLC-based multiplexing, IP Address, Subnet Mask, Gateway Address, and Domain Name System (DNS) IP Address (It is a fixed IP Address) |
- Please select "Other".
text_image
Please Select ISP - Hinet - Other- Please check with your ISP the connection type of the ADSL line. Select the Connection Type and click "Next".
Note: The wizard will automatically select the country where you are in by checking the language of the operating system in your computer and skip to the "Select ISP" page. If you want to change the country, please click "Back" from this page.

text_image
Select the Internet Connection Type to Connect to Your ISP Dynamic IP Address Choose this option to obtain an IP address automatically from your ISP. Static IP Address Choose this option to set static IP information provided to you by your ISP PPPoE/PPPoA Choose this option if your ISP uses PPPoE/PPPoA. (For most DSL users) Bridge Mode Choose this option if your ISP uses Bridge Mode.- Input the VPI, VCI and Encapsulation data supplied by your ISP. If the Connection Type is "Static IP Address", you have to input the IP Address information supplied by your ISP. To know more about the explanation of each setting, please refer to Section 5.2 in the manual.
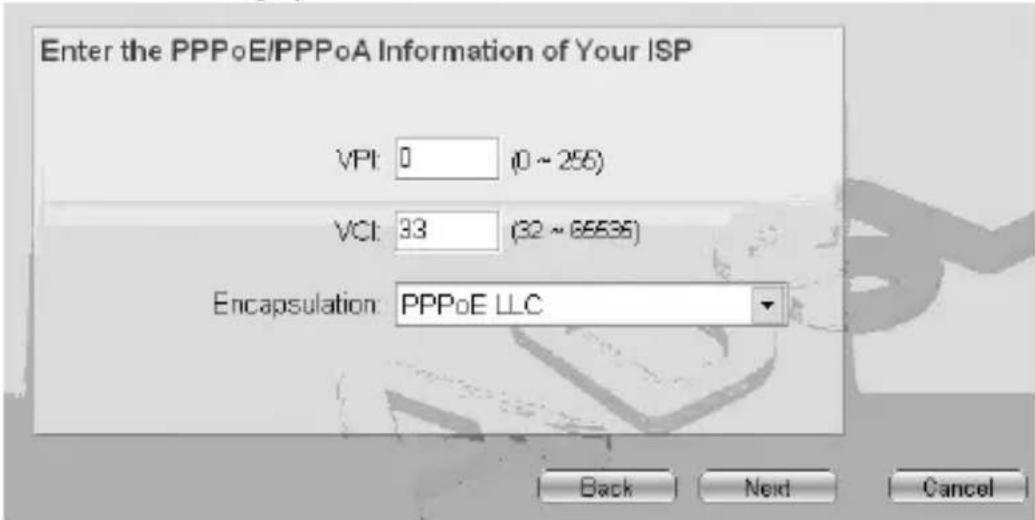
text_image
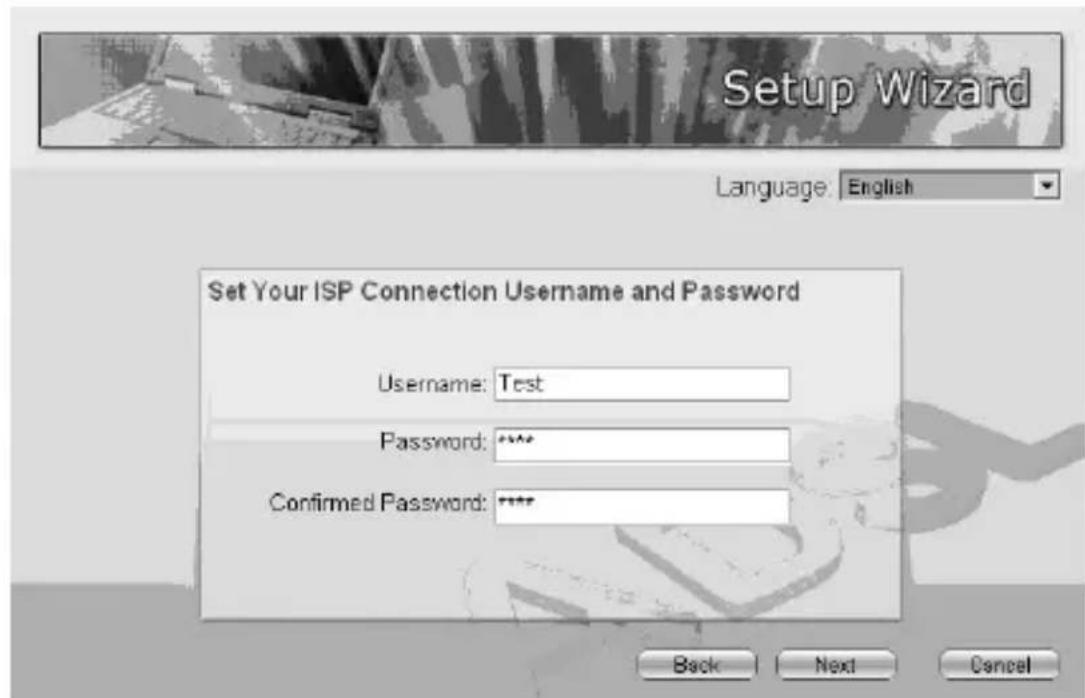
Enter the PPPoE/PPPoA Information of Your ISP VPI: 0 (0 ~ 255) VCI: 33 (32 ~ 65535) Encapsulation: PPPoE LLC Back Next Cancel- Enter the Username and Password which your ISP has provided to you if it is needed. Click "Next".
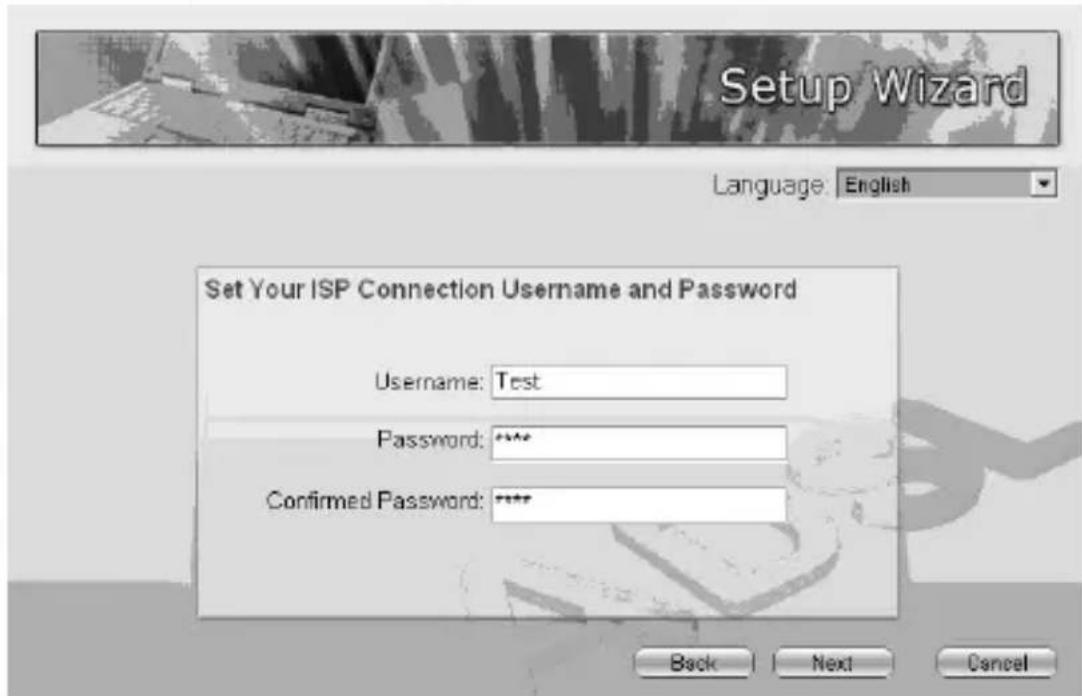
text_image
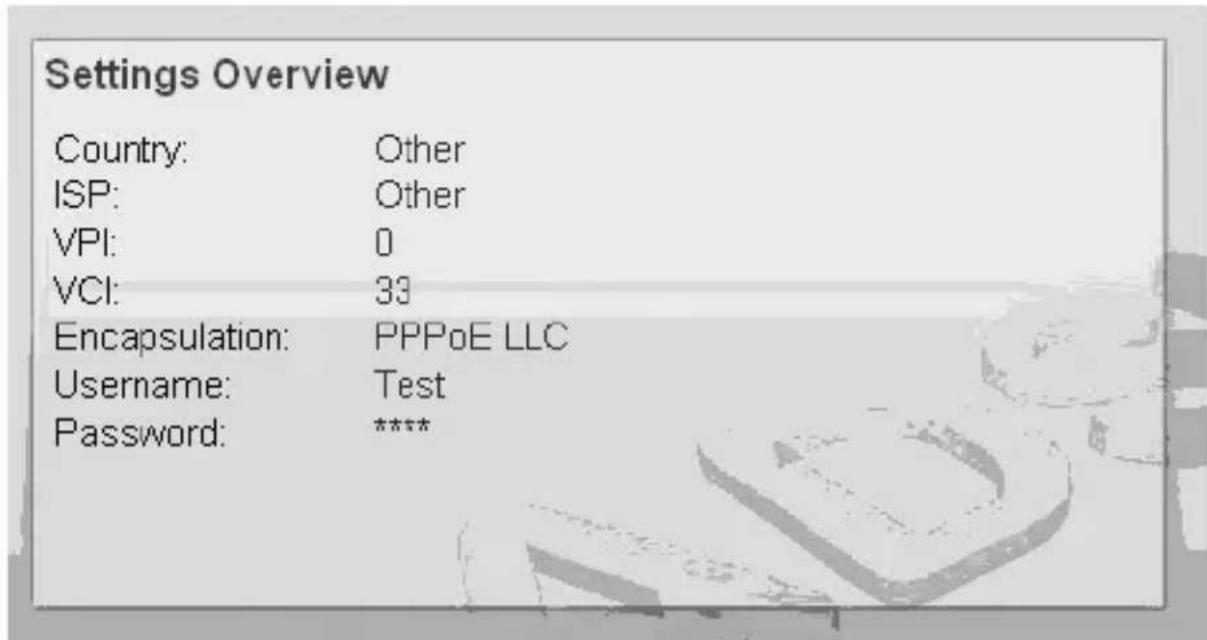
Setup Wizard Language: English Set Your ISP Connection Username and Password Username: Test Password: ***** Confirmed Password: ***** Back Next Cancel- Click "Save" to save the settings and reboot the router.
| Settings Overview | |
| Country: | Other |
| ISP: | Other |
| VPI: | 0 |
| VCI: | 33 |
| Encapsulation: | PPPoE LLC |
| Username: | Test |
| Password: | **** |
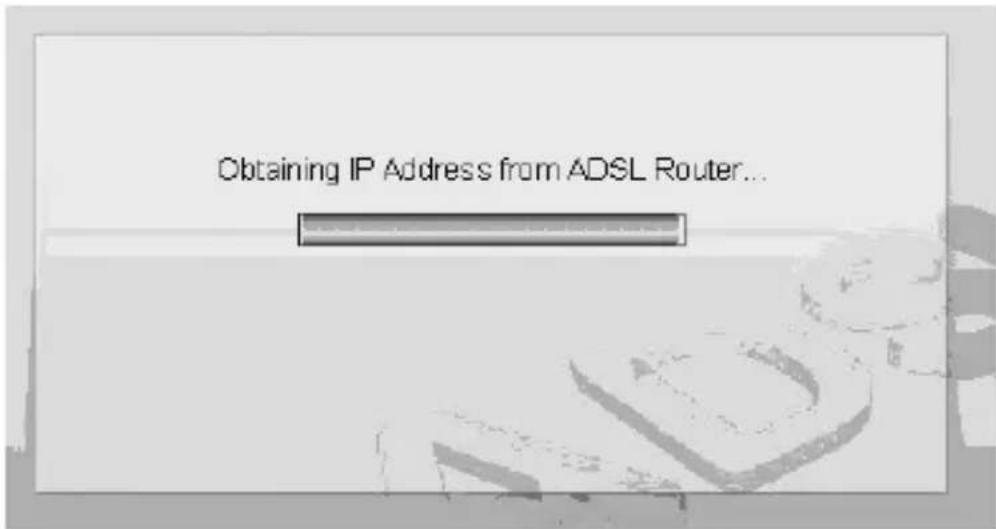
- After saving and rebooting the router, the ISP settings are all finished. This wizard will then help to set your computer to obtain IP Address from the router automatically.
Note 1: To use the router to get into the Internet, the IP Address of each PC has to be set in the same network segment as the router. This wizard will help to set the proper IP Address to your computer.
Note 2: By default, the router's DHCP Server is enabled. If it is disabled before running the wizard, the wizard will enable the DHCP Server of the router automatically.
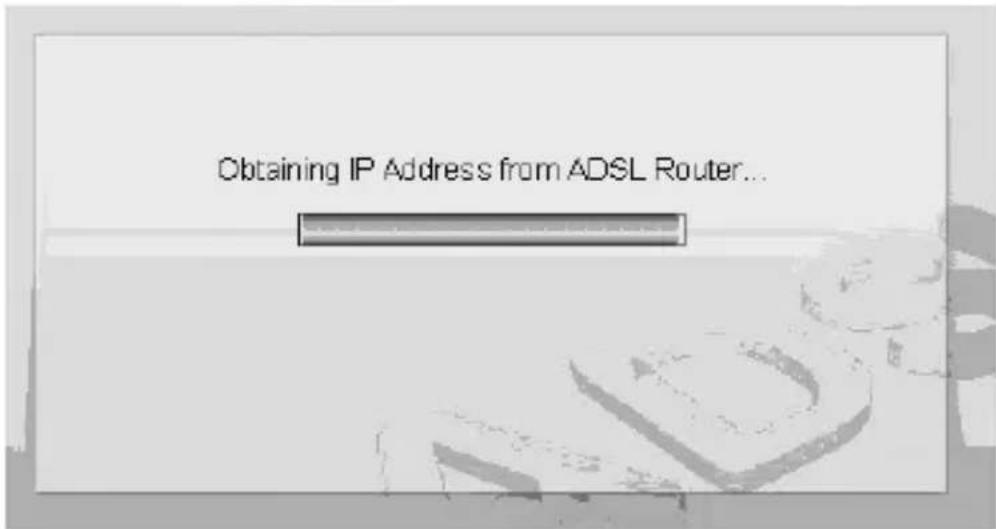
text_image
Obtaining IP Address from ADSL Router...- The wizard will try to connect to the ISP you have selected. If the connection is failed, please run the wizard to select the ISP again.
Failed to connect to the ISP, please check if you have selected the correct ISP. To re-configure the settings, please run the wizard again.
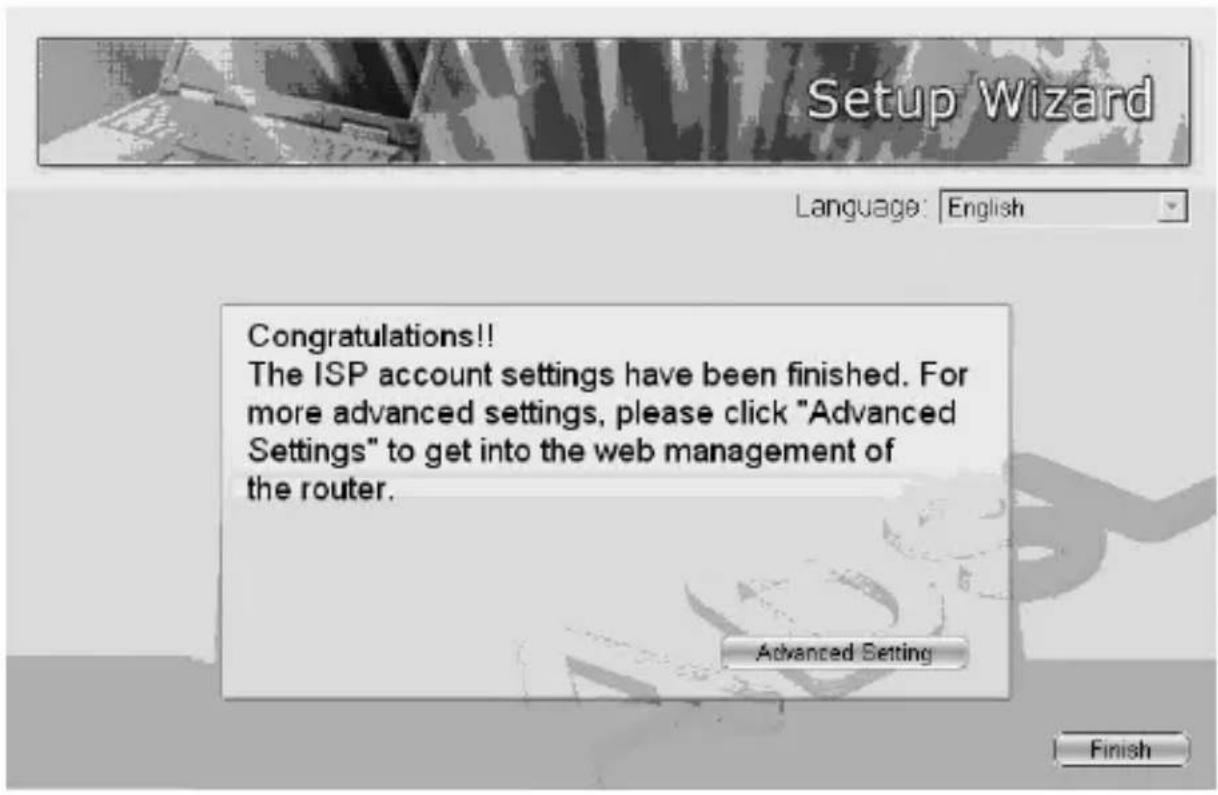
- If you can successfully to connect to the ISP, you will see below page. If you want to configure more settings, please click "Advanced Settings" to get into the web management of the router or click "Finish" to close the wizard.
text_image
Setup Wizard Language: English Congratulations!! The ISP account settings have been finished. For more advanced settings, please click "Advanced Settings" to get into the web management of the router. Advanced Setting Finish1. Introduzione
Congratulazioni, avete appena acquistato un Router ADSL2/2+. Questo dispositivo è molto produttivo rispetto al costo e combina modem ADSL2/2+, Router, Switch di rete e Access Point Wireless (solo per modelli wireless). Potete navigare in Internet attraverso la vostra connessione ADSL2/2+ a banda larga senza bisogno di ulteriori dispositivi.
Questo Router supporta una velocità in downstream fino a 24Mbps e in upstream fino a 1Mbps. Supporta PPPoA (RFC 2364 - PPP over ATM Adaptation Layer 5), Incapsulamento RFC 1483/2684 over ATM (con bridge o diretto) e PPP over Ethernet (RFC 2516), per stabilire una connessione con ISP. Il prodotto supporta inoltre multiplexing VC-based e LLC-based.
Con l'interfaccia di gestione web, gli utenti possono semplicemente configurare le varie funzioni del router, incluse DHCP server, NAT, virtual server, DMZ, controllo accesso, IP/MAC/Applicazione/filtro URL, Firewall, PPTP/IPSec/L2TP pass-through, DDNS, UPnP, Wireless (solo per modelli wireless), ecc.
Questo router è un dispositivo ad alte prestazioni e ad alta velocità che offre l'intera gamma di standard ADSL2/2+ con ottima adattabilità. E' la soluzione completa per l'uso in casa o in ufficio.
2. Requisiti Minimi
I seguenti dispositivi sono necessari per configurare e usare il Router ADSL2/2+:
- Un PC con Adattatore Ethernet preinstallato (Necessario) e un browser web (Internet Explorer 4.0 o superiore)
• Cavo RJ-45 Ethernet (Incluso nella confezione)
• Linea telefonica RJ-11 (Con ADSL)
3. Contenuto della confezione
Questa confezione contiene i seguenti componenti:
- Router ADSL2/2+ (Annex A o B)
• 3 Antenne rimovibili
- Alimentatore
• Cavo Ethernet RJ-45 (100 cm)
• Cavo Telefonico RJ-11 (180 cm)
- Guida Rapida
• CD Driver, Utilità e Manuale
4. Installare il Router ADSL
Passo 1. Collegare la linea ADSL
Collegare il router al cavo ADSL con il cavo RJ-11 fornito nella confezione.
Passo 2. Collegare il router alla rete LAN
Collegare il router al PC, hub o switch con il cavo Ethernet fornito nella confezione alla porta LAN del router.
Passo 3. Collegare l'Alimentatore al Router
Collegare l'alimentatore al cavo di alimentazione sulla parte posteriore del router.
Passo 4: Controllare il LED ADSL sul Router
Il LED ADSL LED è acceso se il router è connesso al cavo ADSL e riceve correttamente il segnale ADSL. Se il LED lampeggia, contattare l'ISP (Internet Service Provider) per controllare il problema.
Nota: E' necessario usare l'alimentatore fornito con router, NON usare altri alimentatori.
5. Wizard d'Installazione
Questo router fornisce un'utilità wizard d'installazione per permettere all'utente di configurare le impostazioni ADSL. Questo wizard raccoglie le impostazioni ADSL di alcuni ISP per permettere all'utente di configurare facilmente le impostazioni ADSL del router semplicemente selezionando il proprio ISP dal wizard.
Se non si trova il proprio ISP dalla lista nel wizard, impostare manualmente le informazioni ISP nel wizard.
Inizio
Prima di iniziare, controllare i seguenti punti:
- Assicurarsi di aver collegato il cavo ADSL al router correttamente. Quando il cavo ADSL funziona normalmente, il LED ADSL è acceso.
- Disinstallare tutti i programmi di composizione se ne sono stati precedentemente installati per modem USB o per altri dispositivi di composizione.
- Si raccomanda di configurare il router attraverso il cavo Ethernet prima di impostare correttamente le funzioni wireless.
Il wizard funziona con Windows 2000/XP. La seguente procedura si riferisce a Windows XP (La procedura è simile per Windows 2000).
-
Inserire il CD fornito con il router nell'unità CD-ROM. Il programma Autorun.exe sarà eseguito automaticamente. In caso contrario eseguire Autorun.exe manualmente dalla cartella "Autorun" nel CD.
-
Sarà visualizzata la seguente schermata. Cliccare "Setup Wizard".
text_image
Setup Wizard Quick Installation Guide User's Manual Acrobat Reader Installation Exit- Il wizard sarà eseguito e cercherà di trovare il Router ADSL. Se il Router ADSL viene trovato correttamente, il wizard vi guiderà al passo 5.
text_image
Setup Wizard Language: English Connecting to the ADSL Router...- Se il router non viene trovato, inserire l'indirizzo IP e la password del router per cercare nuovamente. Cliccare "Next" per continuare.
text_image
Setup Wizard Language: English Login the ADSL Router Please Enter the IP Address of the ADSL 192.168.2.1 Please Enter the Password of the ADSL 1234 Next Cancel- Il wizard selezionerà automaticamente il paese attraverso il controllo della lingua del sistema operativo del computer e salterà alla pagina "Select ISP". Selezionare l'ISP.
Se non trovate l'ISP, cliccate "Other" per selezionare nuovamente il paese o configurare manualmente l'ISP.
text_image
Setup Wizard Language: English Please Select ISP - Hiret - Other Back Cancel5.1 Impostazione Automatica ISP
Se trovate il vostro ISP nel wizard, seguite la procedura sotto per permettere al wizard di impostare l'ISP automaticamente.
- Selezionare l'ISP (Internet Service Provider) del vostro
servizio ADSL.
text_image
Setup Wizard Language: English Please Select ISP Help - Other Back Cancel- Inserire se necessario Username e Password forniti dall'ISP. Cliccare "Next".
text_image
Setup Wizard Language: English Set Your ISP Connection Username and Password Username: Test Password: ****** Confirmed Password: ****** Back Next Cancel- Cliccare "Save" per salvare le impostazioni e riavviare il router.

text_image
Setup Wizard Language: English Settings Overview Country: Taiwan ISP: Hinet VPI: 0 VCI: 33 Encapsulation: PPPoE LLC Username: Test Password: **** Back Save Cancel- Dopo aver salvato le impostazioni e riavviato il router, la configurazione ISP è terminata. Questo wizard vi aiuterà a impostare il computer in modo da ottenere Indirizzi IP dal router automaticamente.
Nota 1: Se si usa il router per accedere a Internet, l'indirizzo IP di ogni PC deve essere impostato nello stesso nodo di rete del router. Questo wizard vi aiuterà a impostare il corretto indirizzo IP del vostro computer.
Nota 2: Di default, il DHCP Server del router è abilitato. Se si disabilita prima di eseguire il wizard, il wizard abiliterà il DHCP Server del router automaticamente.
text_image
Setup Wizard Language: English Obtaining IP Address from ADSL Router...- Questo wizard cercherà di collegare all' ISP che è stato selezionato. Se la connessione non funziona, eseguire il wizard per selezionare nuovamente l'ISP.
text_image
Setup Wizard Language: English Failed to connect to the ISP, please check if you have selected the correct ISP. To re-configure the settings, please run the wizard again. Finish- Se è possibile collegarsi correttamente all'ISP, sarà visualizzata la pagina sotto. Per configurare altre impostazioni, cliccare "Advanced Settings" per entrare nella gestione web del router o cliccare "Finish" per chiudere il wizard.

text_image
Setup Wizard Language: English Congratulations!! The ISP account settings have been finished. For more advanced settings, please click "Advanced Settings" to get into the web management of the router. Advanced Setting Finish5.2 Impostazione Manuale ISP
Se non si trova il proprio ISP dal wizard, seguire la procedura sotto per impostare l'ISP manualmente.
Prima di configurare l'ISP manualmente, controllare con il proprio ISP (Internet Service Provider) che tipo di servizio è fornito tra PPPoE, PPPoA o RFC1483/2684. Raccogliere le informazioni come indicato nella seguente tabella e conservarle per consultazioni successive.
| PPPoE | VPI/VCI, VC-based/LLC-based multiplexing, Username, Password (e Nome Servizio). |
| PPPoA | VPI/VCI, VC-based/LLC-based multiplexing, Username, Password. |
| RFC1483 Bridged | VPI/VCI, VC-based/LLC-based multiplexing per usare Modalità Bridge. |
| RFC1483 Routed | VPI/VCI, VC-based/LLC-based multiplexing, Indirizzo IP, Subnet Mask, Indirizzo Gateway e Domain Name System (DNS) Indirizzo IP (E' un indirizzo IP fisso). |
1. Selezionare "Other".
text_image
Please Select ISP - Hinet - Other- Controllare con il vostro ISP il tipo di connessione della linea ADSL. Selezionare il tipo di connessione e cliccare "Next".
Nota: Il wizard selezionerà il paese automaticamente controllando la lingua del sistema operativo del computer e salterà alla pagina "Select ISP". Per cambiare il paese, cliccare "Back" da questa pagina.
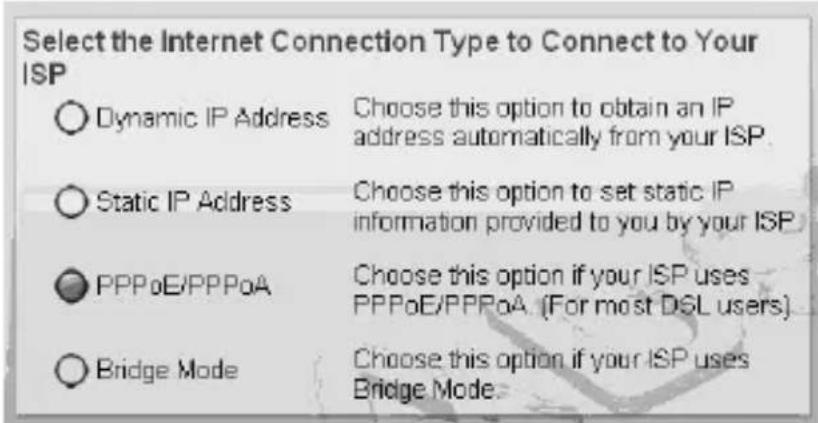
text_image
Select the Internet Connection Type to Connect to Your ISP Dynamic IP Address Choose this option to obtain an IP address automatically from your ISP. Static IP Address Choose this option to set static IP information provided to you by your ISP. PPPoE/PPPoA Choose this option if your ISP uses PPPoE/PPPoA. (For most DSL users) Bridge Mode Choose this option if your ISP uses Bridge Mode.- Inserire i dati VPI, VCI e Incapsulamento forniti dal vostro ISP. Se il tipo di connessione è "Indirizzo IP Statico", dovrete inserire l'indirizzo IP fornito dall'ISP. Per sapere di più sulla spiegazione di ogni impostazione, fare riferimento alla Sezione 5.2 del
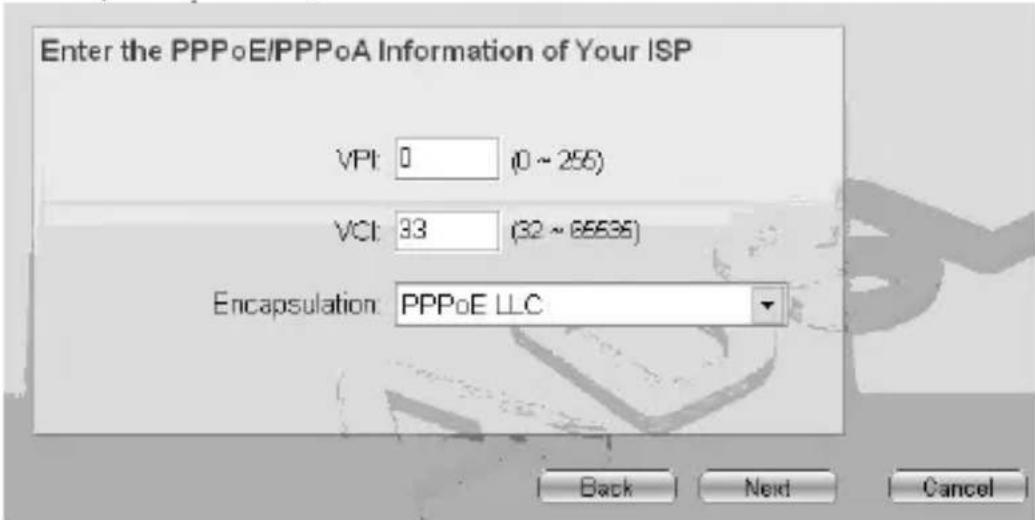
text_image
Enter the PPPoE/PPPoA Information of Your ISP VPI: 0 (0 ~ 256) VCI: 33 (32 ~ 65535) Encapsulation: PPPoE LLC Back Next Cancel- Inserire se necessario Username e Password fornite dal vostro ISP. Cliccare "Next".
text_image
Setup Wizard Language: English Set Your ISP Connection Username and Password Username: Test Password: ****** Confirmed Password: ****** Back Next Cancel- Cliccare "Save" per salvare le impostazioni e riavviare il router.
text_image
Settings Overview Country: Other ISP: Other VPI: 0 VCI: 33 Encapsulation: PPPoE LLC Username: Test Password: ****- Dopo aver salvato le impostazioni e riavviato il router, la configurazione ISP è terminata. Questo wizard vi aiuterà a impostare il computer per ottenere indirizzi IP dal router automaticamente.
Nota 1: Se si usa il router per accedere a Internet, l'indirizzo IP di ogni PC deve essere impostato nello stesso nodo di rete del router. Questo wizard vi aiuterà a impostare il corretto indirizzo IP del vostro computer.
Nota 2: Di default, il DHCP Server del router è abilitato. Se si disabilita prima di eseguire il wizard, il wizard abiliterà il DHCP Server del router automaticamente.
text_image
Obtaining IP Address from ADSL Router...- Il wizard cercherà di collegare all'ISP che è stato selezionato. Se la connessione non funziona, eseguire il wizard per selezionare l'ISP nuovamente.
Failed to connect to the ISP, please check if you have selected the correct ISP. To re-configure the settings, please run the wizard again.
- Se è possibile collegarsi correttamente all'ISP, sarà visualizzata la pagina sotto. Per configurare altre impostazioni, cliccare "Advanced Settings" per entrare nella gestione web del router o cliccare "Finish" per chiudere il wizard.
text_image
Setup Wizard Language: English Congratulations!! The ISP account settings have been finished. For more advanced settings, please click "Advanced Settings" to get into the web management of the router. Advanced Setting Finish
Avvertenza
Qualsiasi variazione fatta dall'utilizzatore o da altri non autorizzati può compromettere la conformità e la sicurezza del prodotto di cui il produttore non si ritiene responsabile.

Warning
The manufacturer is under no circumstances liable for any unauthorised modifications made to the product by the user or any other parties which may compromise its conformity and safety.
CE!
Fabbricante/Manufacturer:
CDC Point S.p.A.
Via Calabria, 1 - Località Gello
56025 Pontedera (Pi) Italia
Importatore/Importer:
CDC Point S.p.A.
Via Calabria, 1 - Località Gello
56025 Pontedera (Pi) Italia
• Prodotto conforme alla direttiva 99/05/CEE (R&TTE)
- Questo dispositivo deve essere usato in conformità con i regolamenti e le limitazioni del paese d'uso in tutti i paesi della Comunità Europea. L'utilizzo in Francia è permesso con la seguente restrizione: L'uso all'aperto è limitato a 10 mW e.i.r.p. nella banda 2454-2483.5 MHz
- Per ulteriori informazioni sulle restrizioni d'uso, contattare l'ente regolatore nel Paese di utilizzo del prodotto.
• Dichiarazione di conformità ed informazioni sono disponibili anche presso il sito www.kraun.it
• Product compliant to the directive 99/05/CEE (R&TTE)
- This device must be used in strict accordance with the regulations and constraints in the country of use in all Countries of European Community. Use in France is permitted with the following restriction: Outdoor use limited to 10 mW e.i.r.p. within the band 2454-2483.5 MHz
• For further informations on restriction of use, please contact local office in the Country of use of the product.
- Declaration of conformity and informations also availables at www.kraun.it

text_image
ECO DIGITALELA TECNOLOGIA CHE RISPETTA L'AMBIENTE
Aiutaci a proteggere l'ambiente, rispetta la normativa!
Apparecchiature Elettriche ed Elettroniche da Dismettere
Questo prodotto non deve essere smaltito come rifiuto urbano, ma deve essere oggetto di raccolta separata.
Tutti i prodotti oggetto di raccolta separata sono identificati con il seguente simbolo:


Se questo prodotto non è più utilizzato e se desiderate liberarvene, potete:
- Consegnare gratuitamente questa apparecchiatura ai centri di raccolta presso il Vs. comune di residenza.
- Consegnare gratuitamente questa apparecchiatura al Punto Vendita presso cui è stato effettuato l'acquisto in occasione dell'acquisto di una nuova apparecchiatura, a condizione che la stessa sia di tipo equivalente e con funzioni analoghe.
Una modalità diversa di trattamento di questo prodotto, quando diviene inutilizzabile, può provocare danni enormi sull'ambiente e sulla salute umana per effetto del suo contenuto in piombo, mercurio, cadmio, cromo esavalente, bifenili polibromurati (pbb) e etile di difenile polibromurato (pbde).
Sanzioni
Le sanzioni sono stabilite dalla normativa nazionale; nello specifico il Decreto Legislativo n. 22 del 5 febbraio 1997 e successive modifiche, stabilisce nell'Art 14 il "Divieto di Abbandono".
Le sanzioni previste dall'Art 50 prevedono: "[...] chiunque [...] abbandona o deposita rifiuti ovvero li immette nelle acque superficiali o sotterranee è punito con la sanzione amministrativa pecuniaria da lire duecentomila (Euro 103,29) a lire unmilioneduecentomila (Euro 619,75) [...].