HMT-1010 - Fitnessudstyr Attract - Gratis brugsanvisning og manual
Find enhedens vejledning gratis HMT-1010 Attract i PDF-format.

Brugerspørgsmål om HMT-1010 Attract
0 spørgsmål om dette apparat. Besvar dem du kender, eller stil dit eget.
Stil et nyt spørgsmål om dette apparat
Download vejledningen til din Fitnessudstyr i PDF-format gratis! Find din vejledning HMT-1010 - Attract og tag din elektroniske enhed tilbage i hånden. På denne side er alle dokumenter nødvendige for brugen af din enhed offentliggjort. HMT-1010 af mærket Attract.
BRUGSANVISNING HMT-1010 Attract
Attract
TREADMILL
HMT-1010
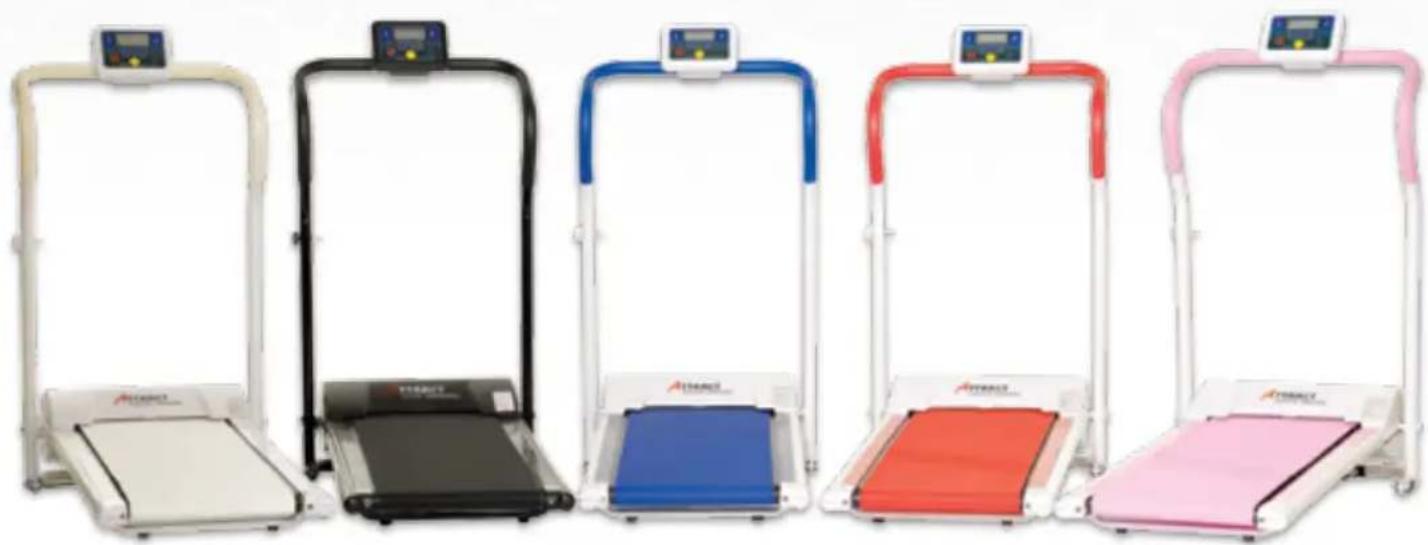
natural_image
Six different Attraction balance walkers with colored frames and control knobs, arranged in a row (no visible text or labels)Contents
Foreword 15
Assembly Instructions 16
Safety Information 17-18
Instructions for Use 19
Start the Treadmill 20
Preset programs 21
Periodic Maintenance 22
Product Specification 23
Terms of Warranty 24
Troubleshooting 25
Contact Information 26
Foreword
Thank you for choosing Attract!
Attract's treadmill has been tested and proven safe and effective for private use. Carefully read through this manual before using your treadmill for an optimal and correct usage. Keep this manual close at hand so that it is easy to consult as needed.
Attract's treadmill has a well thought-out engineering design and offers many benefits. Thanks to its convenient size, with a height of only 26 cm when folded, it is very easy to store between each use and at the same time is very convenient in transportation.
Health benefits
Low-intensity exercise allows you to counter heart and vascular diseases, maturity onset diabetes among other diseases and reduce your risk of suffering fractures due to osteoporoses – which in turn gives you a better physical condition for a good quality of life. The exercise treadmill has a long series of benefits and is excellent suited to those with little time to exercise at home. Walking is probably one of the world's most appreciated forms of exercise.
A brisk walk affects both the body and mind. You become more alert and less stressed. Furthermore, regular walks can provide you with a long series of physical health benefits:
• Stronger heart and improved condition.
- Reduced risk of suffering heart and vascular diseases, high blood pressure and diabetes.
• Stronger muscles and increased mobility in the joints.
- mproved balance and coordination.
- Reduced risk of osteoporosis.
• Lower blood cholesterol levels.
- Increased energy consumption and thereby reduced weight.
If you are completely out-of-shape, you are most receptive to the condition-enhancing effects of walking! After just a few weeks of exercise, you resting pulse will fall – proof that your condition has improved. Those of you who want to lose weight have a good chance of succeeding if you combine brisk walks with a sound diet.
Congratulations on your wise purchase; now you can finally take safe walks whenever you want!
Assembly Instructions
- Open the carton and take out the treadmill. N.B. Save the packaging for any future transporta-
The package shall contain the following parts:
- Exercise treadmill
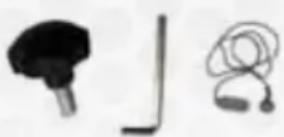
natural_image
Three abstract icons: a black plug, a black bracket with a vertical line, and a pair of earphones (no text or symbols)- • Safety screws (2 pc)
- Alan key (1 pc)
- Safety strap (1 pc)
How to assemble your treadmill step by step
-
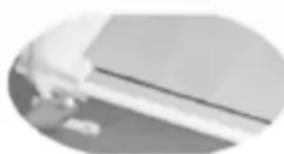
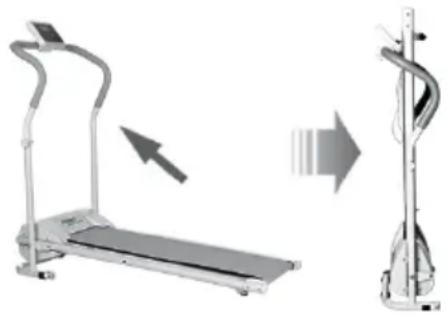
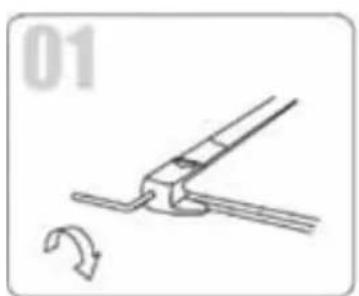
Place the treadmill in an upright position (as shown in the picture). Pull out the safety split pin located on the left side in the middle of the treadmill (which secures the treadmill in the folded state). The split pin is springy and releases the safety when you lift up a bit on the treadmill at the same time as you carefully pull it out against the suspension. Fold the walking surface down toward the floor.
-
Screw the larger screw in place (found in the accompanying bag) at the treadmill's front-left side immediately below the end of the handle in order to secure the treadmill in the upright position.
- Secure the control panel so that it is firmly in place, by spinning the control panel on the handle so that the hole on the handle matches the hole on the rear side of the control panel mount. Screw the other accompanying screws in place in the hole on the rear side of the control panel.
- Fasten in place the safety strap with the red magnet toward the yellow circle on the control panel. Now it's ready to use!
N.B. Check that the belt is centred; if not, adjust the belt so that it runs unobstructed; (see the Chapter on Periodic Maintenance page 22.
natural_image
Close-up of a hand holding a flat object against a plain background (no text or symbols visible)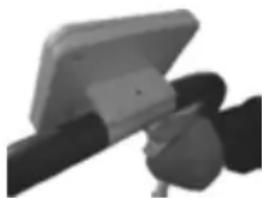
natural_image
Close-up of a mechanical device with a flat top and black handle (no visible text or symbols)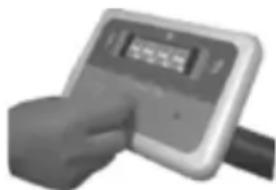
natural_image
Hand holding a digital pressure meter device (no visible text or symbols)Safety Information
Read all the instructions prior to use in order to minimise any risks.
(Note that this is important in order for the warranty to apply.)
The treadmill must be connected to an earthed electrical outlet!
When you use electrical products, especially if children are present, you should take the normal safety precautions which even include the following:
- This product should not be used by persons with physical ailments which limit the user's means to reach the control panel.
- This product is not to be used by children under 10 years of age.
- Handicapped persons should be supervised by a guardian.
- Pregnant women should contact a physician prior to using the treadmill.
- If the power cord is damaged, make sure that a qualified electrician/service centre repairs it.
- The treadmill must only be used indoors away from contract with moisture.
- Always unplug the treadmill from the electrical outlet after use and prior to cleaning it.
- Do not place the product in water or other liquid.
- Never use metal objects together with this treadmill, make sure that your pockets are empty before use in order to avoid accidents.
- Keep the product dry and do not use it in high air humidity.
Safety Information (cont'd)
All service and repair on this treadmill shall be carried out by authorised personnel.
- Do not carry or move the product with the power cord connected to the wall outlet.
• Always turn off the treadmill by the red button on the control panel and then unplug the cord. - This product is designed solely for private use, not for professional use.
Warning – in order to minimise the risk of burns, electrical shocks, fire or other personal injuries: Never leave a plugged-in treadmill unsupervised. Unplug the cable when the treadmill is not used in order inter alia to prevent children from starting the treadmill without adult supervision. Never unplug the cord with moist hands.
Pull on the plug, never on the cord. Make sure that the cord is never pinched.
SAVE THESE INSTRUCTIONS.
Instructions for Use
Keep in mind before use.
- Adjust the belt as needed with the included hex key; if the belt pulls at an angle or emits noise (see Chapter on Periodic Maintenance page 22).
- Before turning on the power, make sure that the treadmill is correctly assembled and placed on a smooth foundation.
- Do not place the treadmill on a carpet; air needs to be able to circulate underneath.
- Do not where excessively long clothing as this can get caught in the treadmill. Empty your trouser pockets before use.
- We recommend that you use walking shoes/gymnastics shoes, not shoes with heels as that can lead to personal injury and damage to the product.
• See to it that children and animals are not in the immediate vicinity in order to avoid accidents. - Always use “the safety strap” when you exercise with the treadmill. This is a safety measure which causes the treadmill to stop immediately if its magnets lose contact with each other. Fastening the safety belt to the lower part of your shirt is recommended.
- Start with the lowest speed and start walking; then increase the speed gradually until it feels comfortable and the desired speed has been reached. Never try to step onto the belt when it is in motion. Turn it off first, then step on and restart.
- In order to be able to step on and off more easily, a clear area of about 2 square metres behind the treadmill is recommended. This maximises safety during use.
Start the Treadmill
Activate the Treadmill
Plug the contact into an earthed electrical outlet and make sure the switch is turned on; it is located on the rear side of the treadmill. As soon as the treadmill gets current, 5 short signals will sound which indicate that everything is in order and the product is now in stand-by mode, ready to be used. (The treadmill will indicate "SAFE" if you do not connect the safety strap on the front side of the display). The control panel now shows horizontal lines.
Once you feel ready and have climbed up onto the treadmill:
- Start "On". Now the display counts down from 3...2...1... and the walking belt begins to roll at the lowest speed (1.0).
- Choose what is to be shown in the display. "MODE" Press in order to choose what is to be shown in the display - speed, time, distance travelled or calories consumed. When the green light during Scan lights, you get all four indications automatically, each one displaying for 5 seconds. The pre-installed time is 30 minutes.
- Choose Speed Finally, you select the speed and this is controlled easily by pressing "Speed" + or - until it feels comfortable. You can select speeds between 1.0 and 10.0 which correspond to km/h

text_image
Scan Speed Time Distance Calorie On/Off Speed- Speed+ Mode The emergency stop switchControl Panel
Select among the following indications to display:
Speed = Expressed in km/h.
Time = Time in minutes
Pace = Distance in km
Cal. = Calories consumed
Emergency stop switch= The safety strap must be located at this point in order to be able to be used.
Select "Scan" with the MODE button in order to show all 4 indications automatically, each for 5 seconds at a time.
natural_image
Two types of exercise machines: a standard treadmill and a vertical stand, shown with motion arrows indicating movement (no text or symbols present)After the exercise session ends. Turn off the treadmill, remove the plug, and loosen the lower safety screw. Fold up the treadmill surface toward the frame. At the same time, pull out safety screw two. Click safety screw two back in the treadmill. N.B. Keep the loose safety screw in a suitable location in your home so that it does not get lost.
Preset programs
It is possible to use preset programs;
P1, P2 and P3 respectively, to manage speed and time all by yourself.
N.B. It is important that you do not press the on-button when you work out with auto programs.
Only switch the main power switch, then follow the instructions below.
Auto program: When "-" is shown on the display, press the MODE-button, then the "+"-button, and then P1 will be shown on the display. If you wish to work out with the P1 program, confirm by pressing the "on/off"-button. If you would like P2 or P3, press the 2?2-button before confirming with the "on/off"-button.
The auto program has a preset time, 10 minutes. If you wish to change the preset time, you may do so by pressing "MODE" again and then the "+" -button, then press the "On/Off"-button. (You have the possibility of increasing the number of minutes training from 10 minutes up to max 30 minutes.)
When you use the auto program to work out the timer starts on the time you wish to work out for and then counts down to zero minutes left to work out.
Auto program P1
Varies the speed with 1 minute intervals according to:
1 km; 3 km; 5 km; 7 km (x4);
5 km; 3 km; 1 km (x1)
Auto program P2
Varies the speed with 30 sec intervals according to:
2 km; 3 km; 4 km; 5 km; 6 km (x2)
5 km; 4 km; 3 km; 2 km (x2)
3 km; 4 km; 5 km; 6 km (x2)
5 km; 4 km; 3 km; 2 km (x1)
Autoprogram P3
Varies the speed with 30 sec intervals according to:
3 km; 5 km; 8 km; 5 km; 8 km (x1)
5 km; 8 km; 5 km; 8 km; 5 km (x1)
8 km; 5 km; 8 km; 5 km; 8 km (x1)
5 km; 8 km; 5 km; 8 km; 5 km (x1)
Periodic Maintenance
Cleaning
Make sure that the treadmill is turned off completely and that the plug is disconnected from the wall outlet prior to cleaning. Periodically wipe off the product in order to protect the components from dust and in order to keep it clean. Wipe off the walking belt with a lightly moistened rag and a mild cleaning agent; do not forget the side which is currently underneath. Always wipe off the handles and walking belt immediately following use. When cleaning the control panel, always use a dry and soft rag.
Lubrication
The item comes from the factory lubricated with an anti-static lubricant. You the consumer should lubricate the running board (on the side of the belt) as well as the walking belt after approximately 100 hours of usage. The lubricant is available for sale at speciality shops.
Justering av gångbandet
In order for the treadmill to work best, you should adjust it at times. It may also be needed right at the beginning when it comes from the factory, (See image below).
Make sure that it is turned off prior to starting any adjustment. If the walking belt starts pulling at an angle to the right (as seen from behind), turn the screw back on the right side clockwise one half-turn and then back on the left side anti-clockwise one half turn. If the walking belt pulls at angle to the side, turn the screw on the right side anti-clockwise one half-turn and on the left side one turn each. Test and run the belt to see that it is pulling correctly. Repeat until you have a good position on the walking belt. If the walking belt starts to skid, adjust it by tightening the screws clockwise backward on both sides.
natural_image
Diagram of a mechanical clamp or tool with a curved arrow indicating motion (no text or symbols)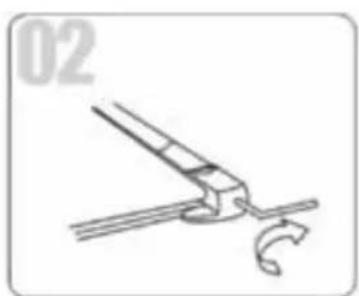
natural_image
Simple line drawing of a tool with a curved handle and a looped end, no text or symbols present.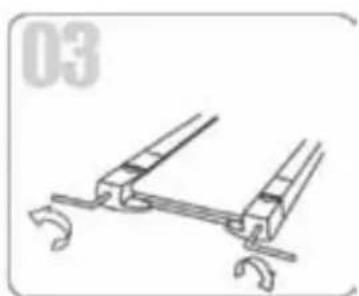
natural_image
Technical line drawing of a mechanical clamp or bracket assembly (no text or symbols)Storage
Store the treadmill simply and conveniently folded in your closet, under your bed or some other area that you normally do not use. Remember that it must be kept dry and do not strain the treadmill by pile things on top of it.
Product Specification
Attract Treadmill
Model name: Attract Treadmill, HMT-1010
Model no. / Item nr: 901-906
Voltage: 220-240 V
Motor force / power 500 W
Frequency: 50-60 Hz
Speed: 1-10 km/h
Weight: 25 kg
Dimensions unfolded (LxWxH): 122x62x108 cm
Dimensions folded (LxWxH): 124x62x26 cm
Dimensions walking belt (LxW): 98.5x36 cm
Carton size (LxWxH): 130x64.5x31.5 cm
Maximum load: 120 kg
Cable length: 185 cm
Terms of Warranty
Datura Trading AB Org. No. 556314-7627 (25 May 2009)
- DATURA TRADING AB provides for its Attract Treadmill the statutory warranty of 2 years.
- If material faults occur during the warranty period, Datura Trading AB's technical service will at no cost replace any parts exhibiting material or manufacturing faults according to the conditions indicated below:
a) The treadmill which is encompassed by the warranty shall be made available to Datura Trading AB's technical service for inspection and repair. Our support staff must always be contacted as soon as any faults are detected for further arrangements to be made.
b) Datura Trading AB's technical service is entitled to determine the most suitable method of repair.
c) The warranty is not extended as a result of service/repair/replacement of parts. - d) Datura Trading AB's warranty does not include more comprehensive entitlements, such as replacement, discount or compensation due to pain and suffering.
- Datura Trading AB's warranties are only applicable when presented together with the original invoice of purchase receipt (showing the date of sale and model) together with the faulty treadmill from Attract.
- Datura Trading AB's warranties do not cover and assume no responsibility for damages occurring due to modifications or adjustment made to the product without previous written authorisation by Datura Trading AB.
- Datura Trading AB's warranties are void if the product's serial number has been changed, erased, has disappeared or is shown to be invalid.
- This warranty pertains only to the end consumer and is non-transferrable.
- This warranty does not cover any of the following conditions:
a) Damages occurring due to:
-Improper use: (a) Wrong use of the product with intention that are not suitable or which contravene the instructions for use and maintenance and (b) installation or use of the product in a manner which does not respect the technical or safety norms, (c) outdoor use.
-Accidents, lightning strikes, water, fire, unsuitable ventilation or force majeure and other causes outside of the manufacturer's control. - Faults in the electrical system connected to this product. b) Datura Trading AB reserves the right to carry out any repairs in its own workshops for technical service.
Troubleshooting
| Fault | Possible cause | Solution |
| Treadmill does not function | The plug is not correctly inserted into the wall outlet. | Place the plug into the wall outlet. |
| Treadmill does not function | The switch is turned off. | Turn on the current to the product by pressing the button to the “l” position on the front of the treadmill. |
| The actual speed does not reach the set speed. | The current is too low. | Wait until the power supply is working optimally. |
| The walking belt pulls to the side. | The settings on the walking belt are affected by our weight, balance and how it is strained. This may need adjusting. | Adjust by turning the screws back on the treadmill. See Periodic Maintenance for more details. |
| The walking belt skids, is too loose. | With time and strain, the tension in the walking belt is affected. This may need adjusting. | Adjust by turning the screws back on the treadmill clockwise on both sides. |
Contact Information
Attract Treadmill, HMT-1010-
Marketed in the Nordic countries by
Datura Trading AB
Datura Trading AB
Visiting Address: Storgatan 15, 852 30 SUNDSVALL, SWEDEN
Postal Address: Box 63, 851 02 SUNDSVALL, SWEDEN
Telephone: +46(0)20-220 220 Fax: 060-12 50 40
E-mail: info@datura.se
Home page: www attract.nu