OS-2C-CTSX - Ukategoriseret PAC - Gratis brugsanvisning og manual
Find enhedens vejledning gratis OS-2C-CTSX PAC i PDF-format.


Brugerspørgsmål om OS-2C-CTSX PAC
0 spørgsmål om dette apparat. Besvar dem du kender, eller stil dit eget.
Stil et nyt spørgsmål om dette apparat
Download vejledningen til din Ukategoriseret i PDF-format gratis! Find din vejledning OS-2C-CTSX - PAC og tag din elektroniske enhed tilbage i hånden. På denne side er alle dokumenter nødvendige for brugen af din enhed offentliggjort. OS-2C-CTSX af mærket PAC.
BRUGSANVISNING OS-2C-CTSX PAC
Introduction & Features
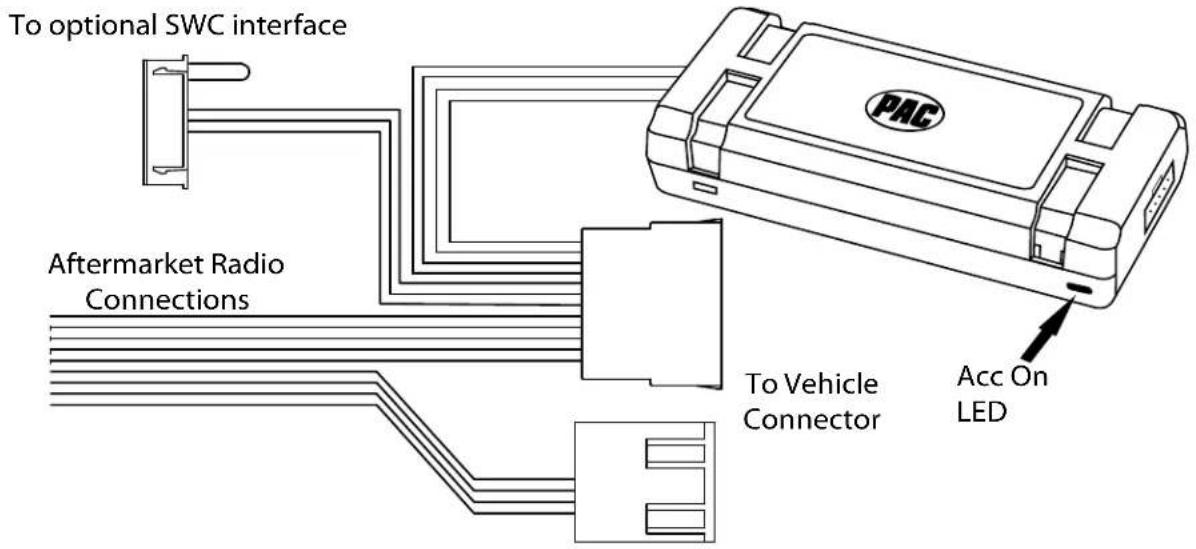
The OS-2C-CTSX interface allows the replacement of a factory radio in select General Motors vehicles with Class II radios. Using this interface will retain factory features such as Warning Chimes and factory amplifier (Standard or BOSE®) when the original radio is removed. The OS-2C-CTSX provides Data-Bus driven outputs such as retained accessory power (RAP), vehicle speed signal (VSS), illumination, reverse trigger and parking brake. The OS-2C-CTSX also provides a secondary output for adding an optional PAC Steering Wheel Control (SWC) retention interface (SWI-RC, SWI-CP2, SWI-X).
Important Notes
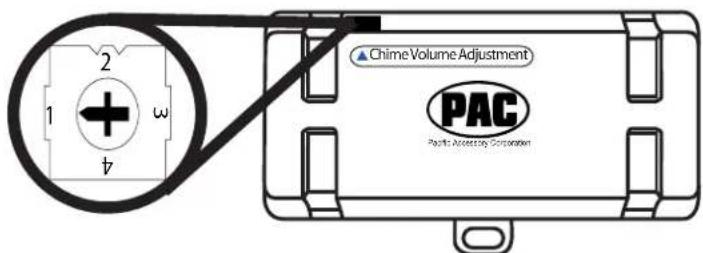
- Use the 4 position selector switch located on the side of the interface to select the best chime output volume for your specific installation. Setting 1 being loudest and 3 being softest. Setting 4 will turn the chimes off when chimes are still present through the factory speakers.
- In order for the Brown mute wire to output a signal, the Brown / White mute loop on the interface connector must be cut.
- The SWC will not control the aftermarket radio when OnStar is active.
- The voice button on the SWC will only control the aftermarket radio and cannot be used to control the OnStar.
- The OnStar volume can be adjusted using the volume SWC when OnStar is active.
- You can use either the analog VSS or the Data-Bus driven VSS.
Wiring Connection Chart
Interface Connector
| Green Parking Brake Output (-) | |
| Pink Vehicle Speed Signal(Data-Bus Driven) | |
| Red Accessory | Output(10 amp) |
| Orange / White Illumination Output (+) | |
| Violet / White Reverse Output (+) | |
| Brown Mute Output (-) | |
| Brown / White Loop Mute Loop | |
Vehicle Connector
| Yellow Battery +12v | |
| Black Ground | |
| White Front L + input | |
| White / Black Front L - input | |
| Gray Front R + input | |
| Gray / Black | Front R - input |
| Pink (x 2) | Vehicle Speed Signal(Analog)* |
* These wires may not be present in all vehicle harnesses.
Illustration / Schematic
text_image
To optional SWC interface Aftermarket Radio Connections To Vehicle Connector Acc On LEDInstallation Steps
- It is EXTREMELY important to make sure the ignition is off and the driver's door is open before connecting the interface to the vehicle.
- Make all connections as described in the chart on page 1.
- If you are using the Brown mute wire, the Brown / White mute loop must be cut in order for this wire to output a signal. PLEASE NOTE: If you cut the mute loop be sure to insulate these wires properly as they are part of a 12v circuit. Do not connect either side of this loop to your aftermarket radio.
- Connect the interface to the vehicle and the aftermarket radio.
- Follow the instructions below if you wish to add an optional SWC retention interface.
Steering Wheel Control Output Connector
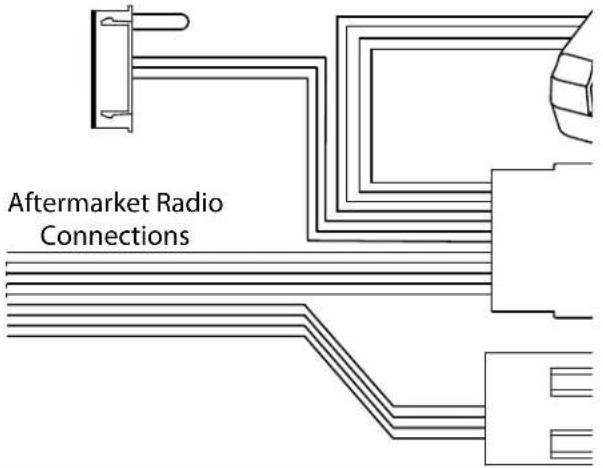
- The harness has a SWC output connector. For ease of installation, all necessary connections for an SWI have been made for you.
- When using this SWC output connector with the SWI-RC, the SWC interface must be programmed for version 2 (refer to SWC interface programming instructions for exact programming sequence and button assignment order).
- The Brown loops should remain in tact.
- When using this SWC output connector with an SWI-CP2, you can either program the SWC interface with a PC or set the DIP switches according to the PC app.
To optional SWC interface
text_image
Aftermarket Radio ConnectionsTesting and Verification
- Turn the ignition on. The LED on the interface will turn on and the +12v accessory wire will turn on.
- Turn on the radio and check balance. Note: Fade is not supported as neither the aftermarket radio or the RP interface have the ability to control the amplifier's fader.
- If an optional SWC retention interface was used, verify that all SWC are functioning properly.
- Turn off vehicle and remove key. RAP will be active and keep the radio on for 10 minutes or until the drivers door is opened.
- The LED and radio will turn off when RAP turns off or the drivers door is opened.
- Use the 4 position selector switch located on the side of the interface to select the best chime output volume for your specific installation. Setting 1 being loudest and 3 being softest. Setting 4 will turn the chimes off when chimes are still present through the factory speakers.
text_image
Chime Volume Adjustment PAC Pacific Accelerator Corporation| LED Legend | |
| Solid | Accessory On |
| Rapid Blink | OnStar Active |
| Slow Blink | SWC Button Pressed |
| Off | Accessory Off |
Product Updates (Firmware)
The OS-2C-CTSX can be updated with new firmware as it becomes available using the PAC-UP interface updater (sold separately). Please visit www.pac-audio.com/firmware for available updates.