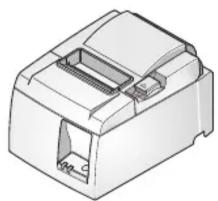
TSP100IIU+ - Printer Star Micronics - Gratis brugsanvisning og manual
Find enhedens vejledning gratis TSP100IIU+ Star Micronics i PDF-format.

Brugerspørgsmål om TSP100IIU+ Star Micronics
0 spørgsmål om dette apparat. Besvar dem du kender, eller stil dit eget.
Stil et nyt spørgsmål om dette apparat
Download vejledningen til din Printer i PDF-format gratis! Find din vejledning TSP100IIU+ - Star Micronics og tag din elektroniske enhed tilbage i hånden. På denne side er alle dokumenter nødvendige for brugen af din enhed offentliggjort. TSP100IIU+ af mærket Star Micronics.
BRUGSANVISNING TSP100IIU+ Star Micronics
Introduction
This document explains the setup procedure for the TSP100IIU+. For further instructions, please refer to the TSP100IIU+ online manual.
Please read the instructions before using the printer.
TSP100IIU+ online manual

TSP100IIU+ online manual

What's Included
If contents are missing or damaged, please contact the reseller that sold you the printer.
*accessories vary depending on the region where the printer was purchased.
natural_image
3D rendering of a white TP68 connector with visible internal slots and port (no text or symbols)TSP100IIU+

Paper Roll Guide

Easy Setup Guide
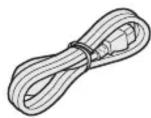
Safety InstructionsPower Cable
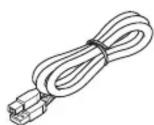
USB Cable


Rubber Feet Screws(2) Solider PCadeer

For customers using Windows Tablet · PC < What to Do First >
Installing the Windows driver
i Install it before connecting a USB cable.
① Download the TSP100 Windows Driver "futurePRNT".
② Extract the futurePRNT software and run "Autorun.exe".
③ Follow the wizard and install the software.
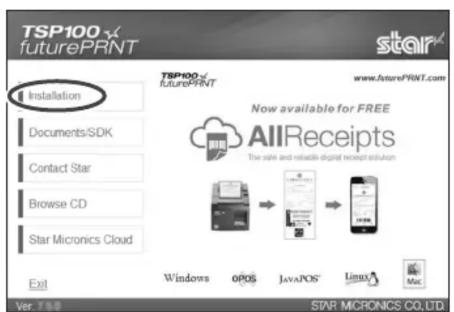
Download the TSP100 futurePRNT Driver
Please download the TSP100 futurePRNT Driver by the following QR code or searching the web site.

futurePRNT Driver

The Windows drivers are included in futurePRNT. When futurePRNT is used, the printer settings can be configured and an operation test can be performed.
Set Up the Printer
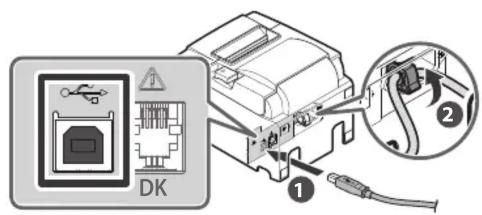
1 Connect a USB cable
Windows
You will need:
- USB cable included with the printer
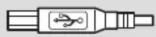
Plug for the printer (Type-B)
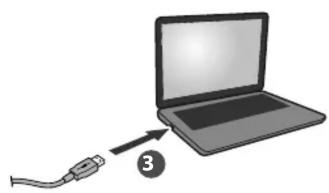
Using the supplied USB cable, connect it to the port (Type-B) ^① and secure it with the cable lock ^② . Connect the opposite end to the PC ^③ .
natural_image
Illustration of a laptop connected to a cable via an arrow labeled '3' (no text or symbols on the diagram itself)Android
You will need:
- USB cable (sold commercially or one that comes with a tablet)
● A specific USB On-the-Go adapter may be required for your Android product, please contact your tablet manufacturer.

Plug for the printer (Type-B)
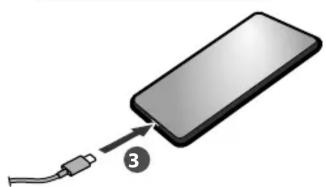
Using your USB to Type-B cable, connect it to the USB port (Type-B) ① and secure it with the cable lock ②. Connect the opposite end to your Android device ③.
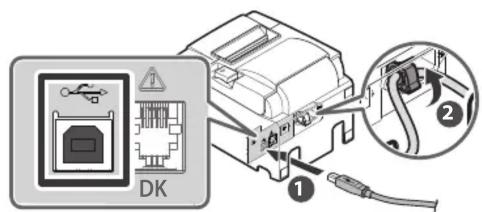
There are various plugs for Android devices
natural_image
Illustration of a smartphone with a cable inserted, showing the plug and number 3 pointing to it (no text or symbols on the device itself)2 Inserting a Paper Roll
Push the cover opening lever and then open the rear cover ②.
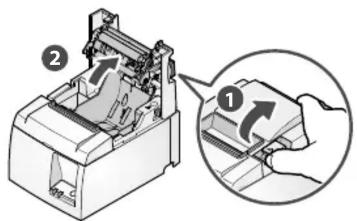
① Insert a paper roll in the direction shown in the illustration.
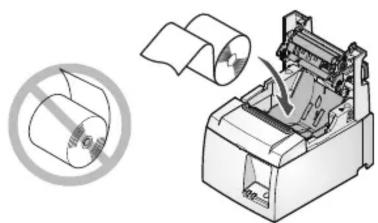
natural_image
Illustration of a printer with paper roll and a circular diagram showing a printer (no text or symbols present)When using a paper roll with 58 mm width, install the supplied paper guide into the printer.
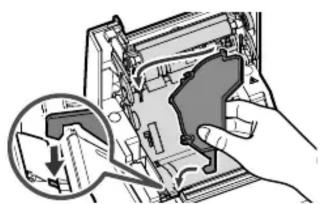
natural_image
Illustration of a hand using a tool to adjust or install electronic components, with a magnified inset showing a component detail (no text or symbols visible)To change the paper width, the memory switch must be set. Refer to the online manual for details.
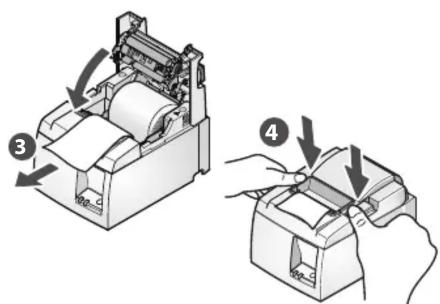
Pull the end of the paper out straight ③, and push down both sides of the printer cover to close ④.
3 Turn ON the Main Unit Power
Connect the included power cable to the inlet on the back side of the TSP100IIU+ ①. Connect the plug of the power cable to the outlet ②.
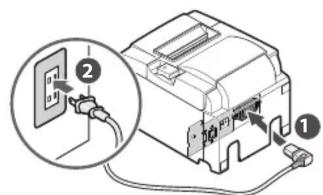
Turn on the power to the TSP100IIU+ ③, and check the blue LED lights up ④.
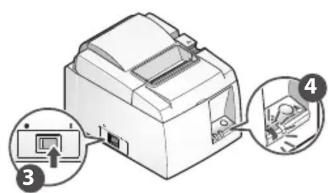
This completes printer setup.
On Windows, the device driver software will be installed automatically. Shortly thereafter, your device will be ready to use.