
BV860B - Bilradio BOSS - Gratis brugsanvisning og manual
Find enhedens vejledning gratis BV860B BOSS i PDF-format.


Brugerspørgsmål om BV860B BOSS
0 spørgsmål om dette apparat. Besvar dem du kender, eller stil dit eget.
Stil et nyt spørgsmål om dette apparat
Download vejledningen til din Bilradio i PDF-format gratis! Find din vejledning BV860B - BOSS og tag din elektroniske enhed tilbage i hånden. På denne side er alle dokumenter nødvendige for brugen af din enhed offentliggjort. BV860B af mærket BOSS.
BRUGSANVISNING BV860B BOSS
USER'S MANUAL
BV860B
BLUETOOTH® | DVD/MP3/CD
AM/FM RECEIVER
FEATURING MOTORIZED 7" (178mm) WIDESCREEN TOUCHSCREEN DIGITAL TFT LCD MONITOR
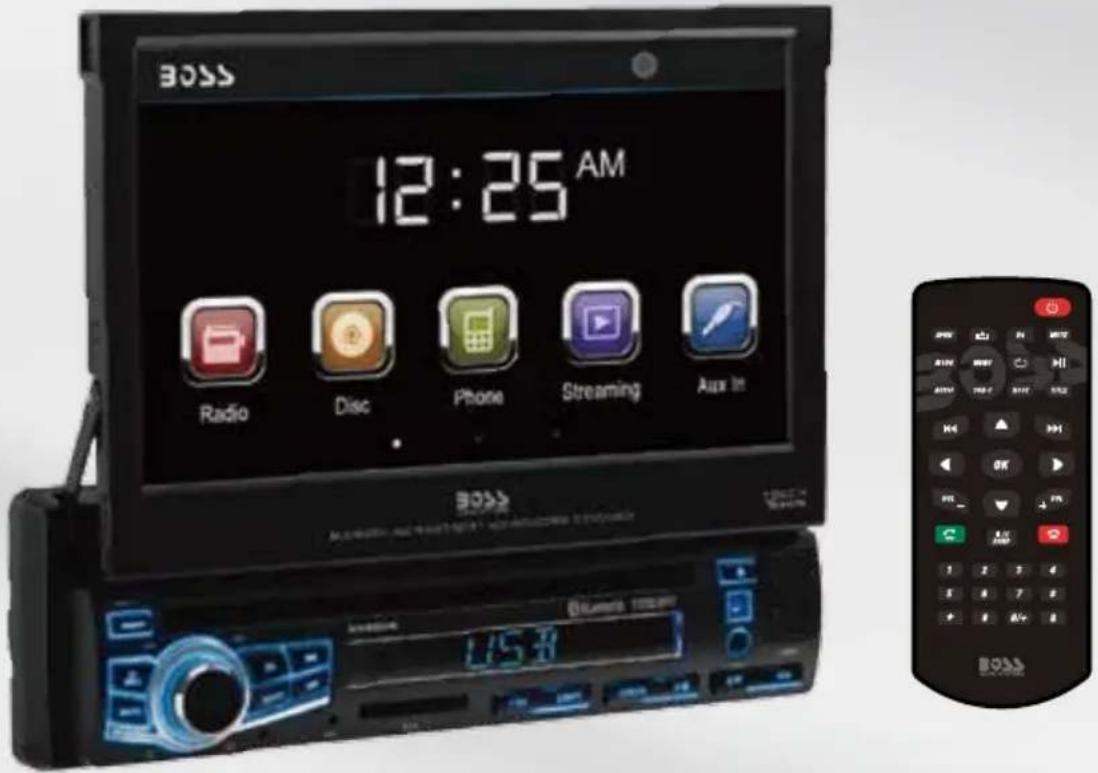
text_image
BOSS 12:25 AM Radio Disc Phone Streaming Audio in BOSS AUDIO NETTERM PROGRESSIVE STUDIO 1:57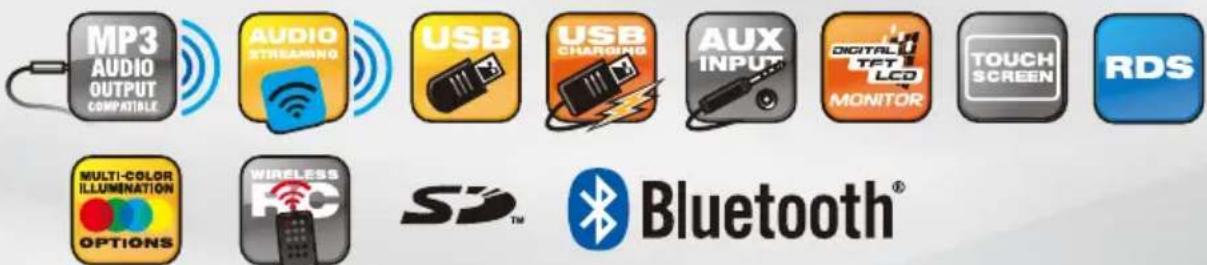
text_image
MP3 AUDIO OUTPUT COMPATIBLE AUDIO STREAMING USB USB CHARGING AUX INPUT DIGITAL LCD MONITOR TOUCH SCREEN RDS MULTI-COLOR ILLUMENATION OPTIONS WIRELESS FC SD™ Bluetooth®BOSS®
AUDIO SYSTEMS
ELITE
To ensure safety while driving
and to comply with laws,
drivers should not watch video or
operate the video device while driving.
Congratulations on your purchase of a Boss Audio Systems® Multimedia Receiver.
It has been designed, engineered and manufactured to bring you the highest level of performance and quality, and will offer you years of entertainment pleasure.
CONTENTS
General Information....1
Safety Notice 2
Accessories....3
Remote Control Operation....4
Unit Installation 6
Wires Connection Description 7
Panel Introduction......8
Main Menu Operation Instruction 9
Access Setup Interface 9
Clock Setup....11
General Setup....11
Audio Setup....12
Disc Setup....13
Other Setup....14
SWC-Steering Wheel Control Setting....14
Radio Operation....15
DISC/CD/USB/SD Playback 17
Media....18
USB/SD Menu....19
Bluetooth Operation....20
Bluetooth Operation Menu 20
Bluetooth Dialing 21
Bluetooth Call....21
Bluetooth Phone Book 22
Bluetooth Phone Call History 23
Bluetooth Music Streaming-A2DP 23
Photo 24
Camera/Aux/AV Menu 25
Troubleshooting....26
SPECIFICATIONS
| Model No. | BV860B | ||
| General features | Fixed front panel 7 inch TFT screenFM/AM RadioRDSDVD fully compatible withDVD/VCD/CD/MP3/MPEG4/JPEGFront USB & SD reader supportBuilt-in BluetoothAUX InputAV InputAV outputRear view cameraFront, Rear and Subwoofer Pre-Amp Output85W*4 AMP power output maximumSteering wheel control | ||
| TFT screen | 800*480pixel | ||
| SD | 32G | ||
| Working power | 12 V | ||
| Max Output | 85W*4 | ||
| Working Temperature | -20°C~70°C / -4°F~158°F | ||
| Size | 178*50*160mm | ||
| Weight | 1.92kg / 4.23lbs | ||
| Compatible Media | |||
| Picture | JPG/JPEG/BMP | ||
| Disc | CD/CD-R/CD-RW/DVD/DVD±R/DVD±RW | ||
| Audio file | MP3/AAC/WAV | ||
| Video file | .AVI | MP3 | MPEG-4 |
| MP4 | AAC | MPEG-4 Visual | |
| MPG | AC-3 | MPEG-1/2 | |
Please read and understand the following safety information before operating this unit.
The device is suitable for 12V power supply (requires grounding). Do not connect it to 24V power supply in trucks or buses, or else it will be damaged.
! Please use genuine discs, instead of incompatible and poor discs, or else it will damage the device or shorten the service life.
Without the guide of qualified personnel, do not replace the fuse, or else it may damage the device or cause fire.
⚠️ Please follow the traffic laws and regulations and do not watch program or operate the device when you are driving, to avoid accidents (excluding passengers watching through rear monitor).
To ensure safety and operate the device normally, please ask qualified personnel to install the device. do not disassemble or repair the device without authorization, to avoid damage and accidents. Please contact local car audio distributor for details.
Do not put the device in moist environment or water, to avoid electric shock, damage and fire due to short circuit.
The mechanical drive part of the monitor uses automatic precision transmission component. Do not pull, push or rotate the device by force or impact the TFT screen to avoid damaging the device.
Do not insert the audio plug of the vehicle into the master unit directly. please convert with the dedicated end cable provided by our company.
When install the unit, prevent metal objects falling into the master unit from the vents to avoid short circuit and damaging the device.
Safety Statement
For the safety of you and others, do not watch programs or operate the device when you are driving. It is prohibited by the laws and regulations.
The backing monitor function should be used as auxiliary means. we are not responsible for any accidents occurred during backing.
Below are the photos with the accessories included in the box.
Remote Control | Cable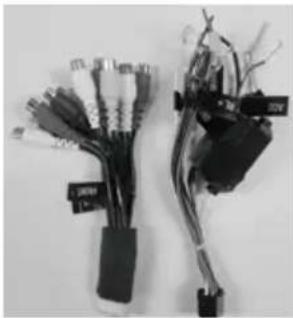 |
Mounting Strap/Release Key /Mounting Sleeve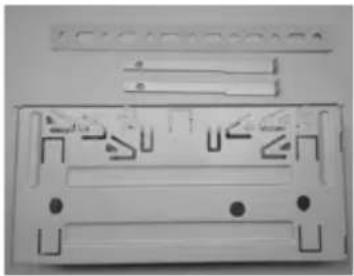 | Mounting Hardware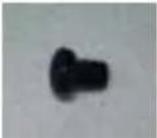 ScrewPM4*5mm 4pcs ScrewPM4*5mm 4pcs Flat gasketM5Φ10X1.0mm2pcs Flat gasketM5Φ10X1.0mm2pcs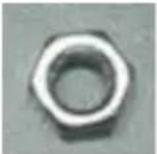 Hex nut8.0 mmΦ5.0X1.0mm1pc Hex nut8.0 mmΦ5.0X1.0mm1pc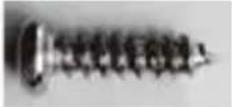 ScrewPA5*18mm 1pc ScrewPA5*18mm 1pc Spring Washer1pc Spring Washer1pc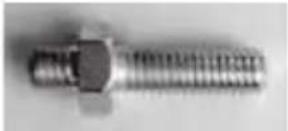 Rear ChassisSupport BoltM5x23mm 1pc Rear ChassisSupport BoltM5x23mm 1pc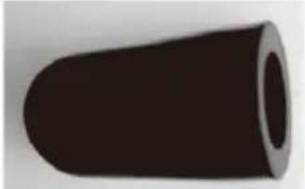 Rubber SupportBoot 1pc Rubber SupportBoot 1pc |
Trim Ring/Touch Pen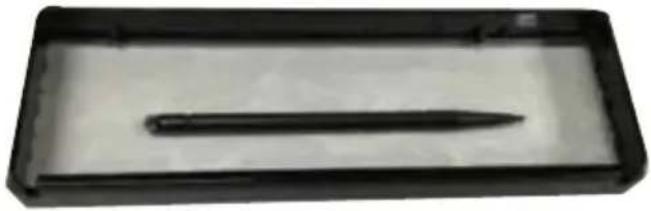 |
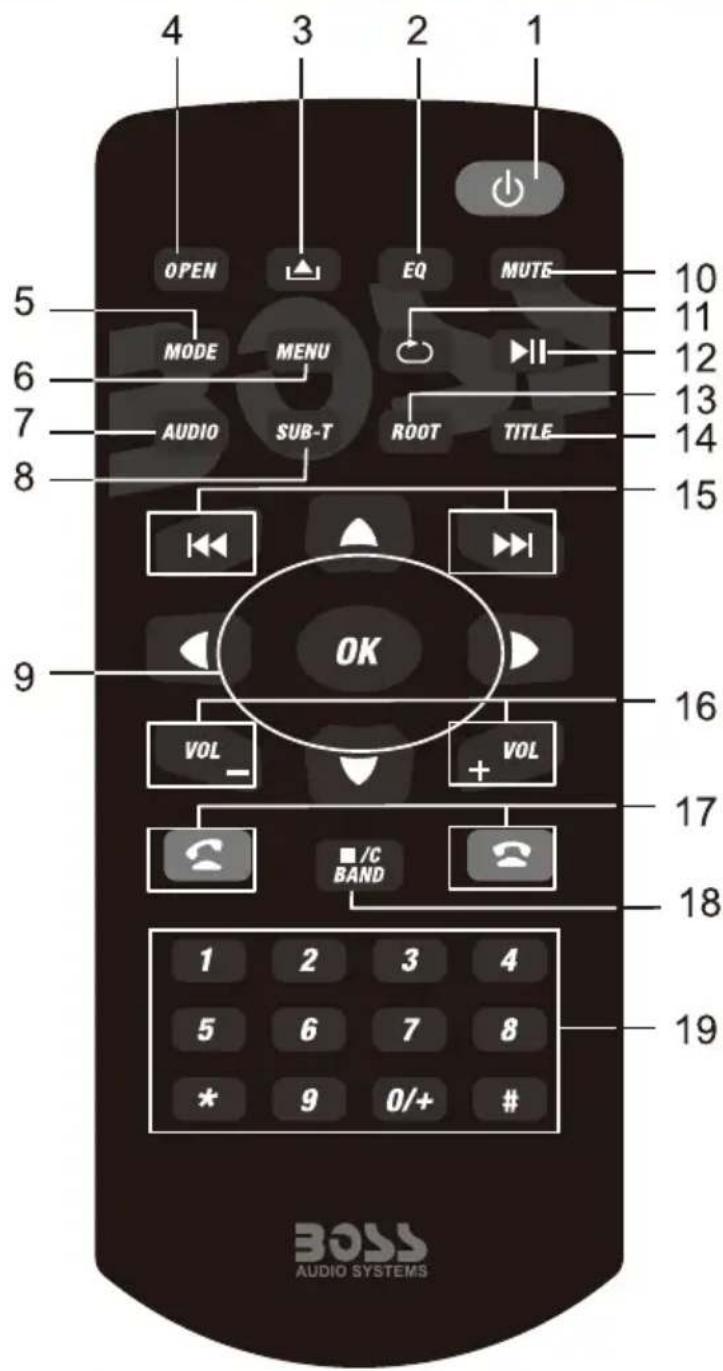
text_image
4 3 2 1 OPEN EQ MUTE 10 MODE MENU 11 12 13 AUDIO SUB-T ROOT TITLE 14 8 15 OK 16 VOL + VOL 17 C /C BAND 18 19 1 2 3 4 5 6 7 8 * 9 0/+ # BOSS AUDIO SYSTEMS1.TURN ON/OFF
Press to turn on or turn off the unit.
2.EQ mode
Press to set EQ mode.
3.EJECT Key
Press to eject the Disc in the unit. And press again to load the Disc if you do not take out it.
4. OPEN key
Press to make the screen stretching out or go back.
5.MODE key
Press to change mode of the unit.
6.MENU key
Press Menu to return to the home menu.
7.Audio KEY
Press to change switch language in DVD mode, and switch left, right or stereo in VCD mode.
8.SUBTITLE Changing Key
Switch the subtitle during playing if the Disc have multiple subtitle.
9.Direction and OK key
If there is a Disc with root list menu, press direction key to move up/down/left/right, and press OK to confirm.
10.MUTE key
Short press to mute the unit. Long press to make panel go dark, and press any empty place, will run the unit.
11.REPEAT key
Under DISC/SD/USB mode, press to set the repeat mode.
12.Play/Pause
Press to switch play pause.
13. ROOT key
DVD playing mode, press to go into root list menu; VCD playing mode, press to turn on/off PBC function.
14. TITLE key
Under DVD playing mode, press to enter into title list menu.
15.Under Disc/SD/USB mode, press to choose previous/next song.
Under music list menu, press to choose PRE/NEXT page. Under RADIO mode, press to search frequency forward/backward.
16.VOLUME UP/DOWN key
Press to adjust volume up and volume down.
17. Receiving calls/call out; hang up.
18.STOP/C/BAND
In disc playing mode, press to STOP, press "ok" to start; In radio mode press to change band between FM1/FM2/FM3/AM1/AM2; Press to enter RADIO mode, except DVD/USB/SD/PHONE/STREAMING mode. Delete wrong number when in phone mode.
19.Number key
Enter phone number in phone mode.
THE UNIT IS INSTALLED TO BE AN ANTI-THEFT ONE. THE CHASSIS OF THE UNIT WEARS A SLIDING METAL HOUSING. PLEASE DO THE CONNECTION OF THE POWER, SPEAKERS AND ANTENNA ACCORDING TO THE REQUIREMENT OF THE INSTRUCTION BOOK, THEN INSTALL THE SLIDING METAL HOUSING IN THE CAR AS FOLLOWS.
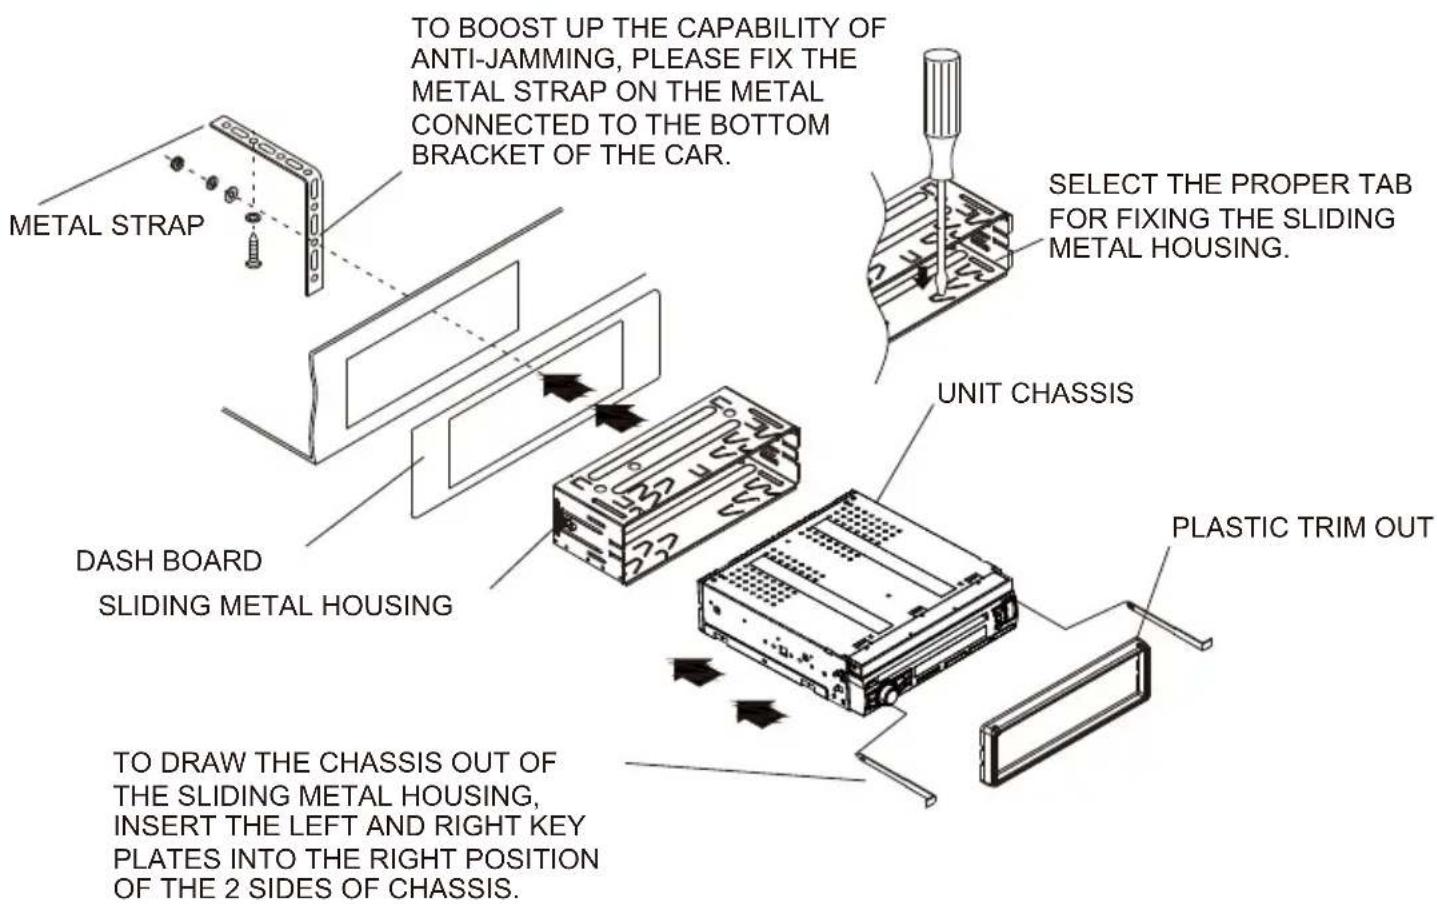
text_image
METAL STRAP TO BOOST UP THE CAPABILITY OF ANTI-JAMMING, PLEASE FIX THE METAL STRAP ON THE METAL CONNECTED TO THE BOTTOM BRACKET OF THE CAR. SELECT THE PROPER TAB FOR FIXING THE SLIDING METAL HOUSING. DASH BOARD SLIDING METAL HOUSING UNIT CHASSIS PLASTIC TRIM OUT TO DRAW THE CHASSIS OUT OF THE SLIDING METAL HOUSING, INSERT THE LEFT AND RIGHT KEY PLATES INTO THE RIGHT POSITION OF THE 2 SIDES OF CHASSIS.The Description of the Input/Output Interface of the Rear Cabinet
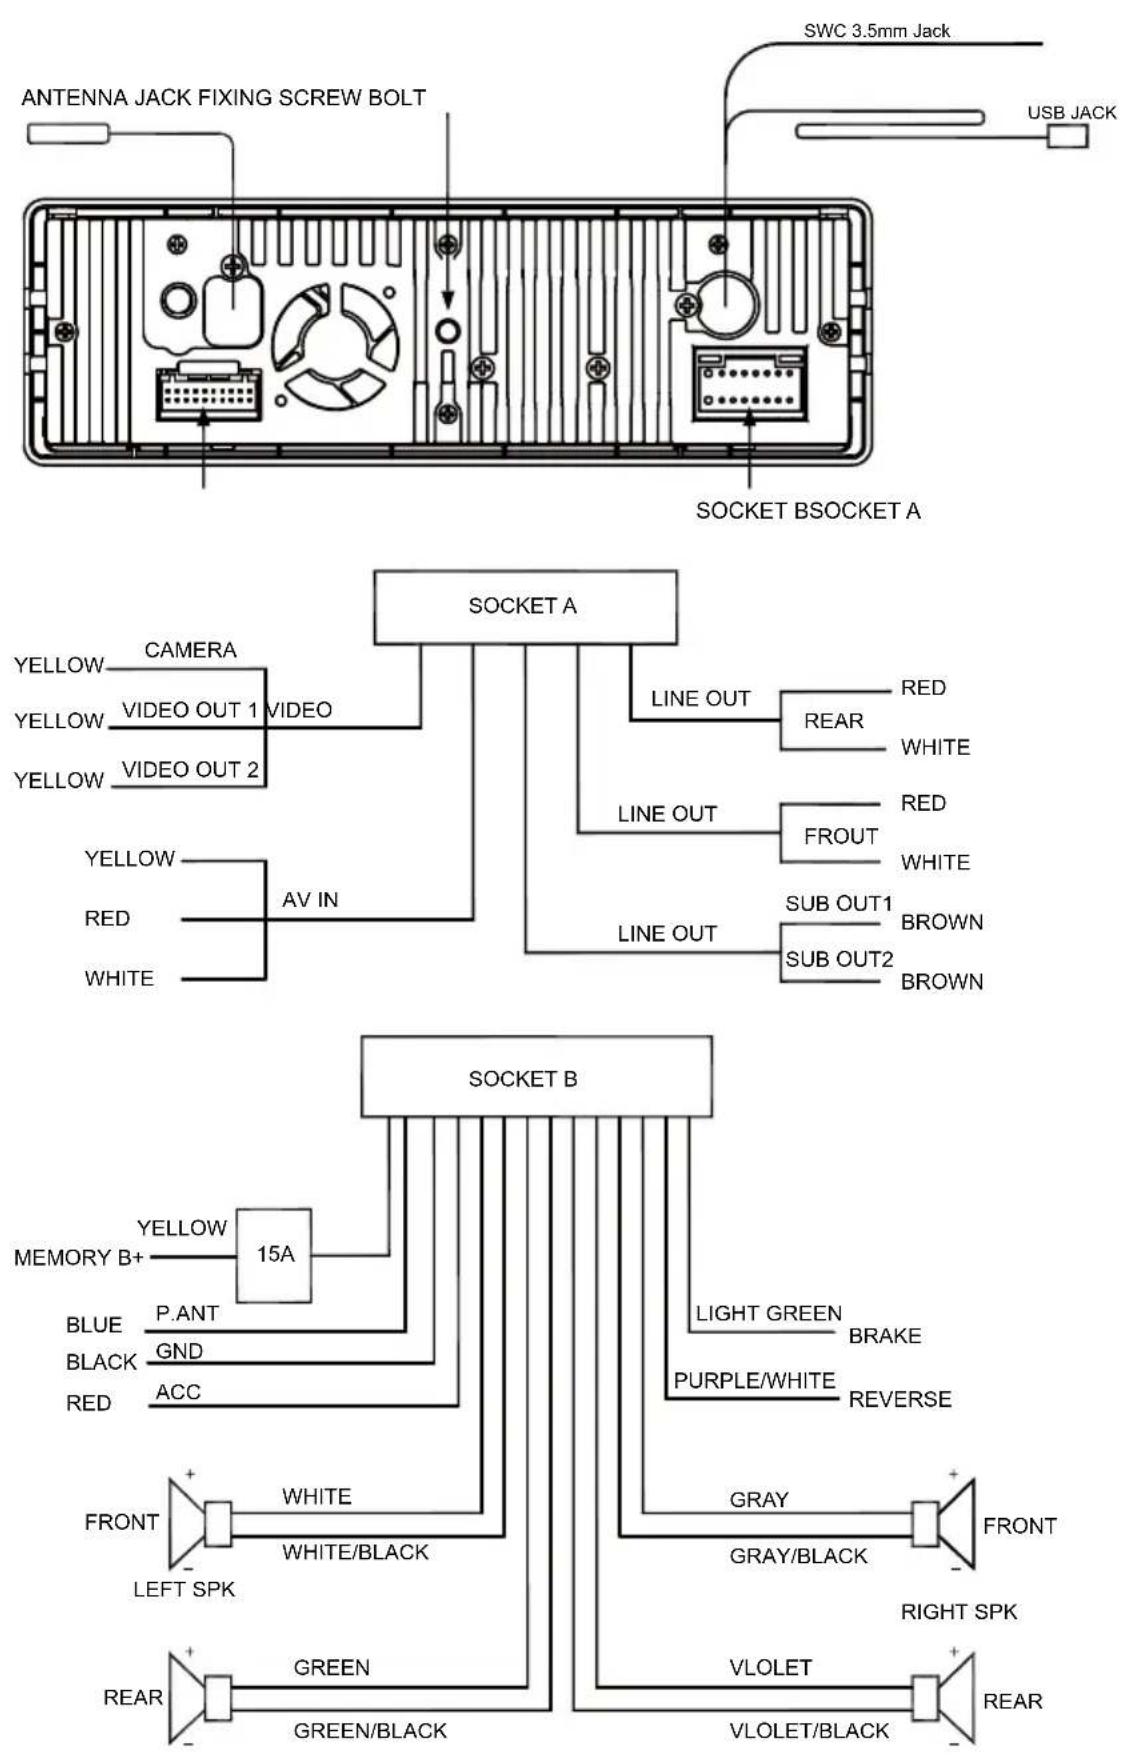
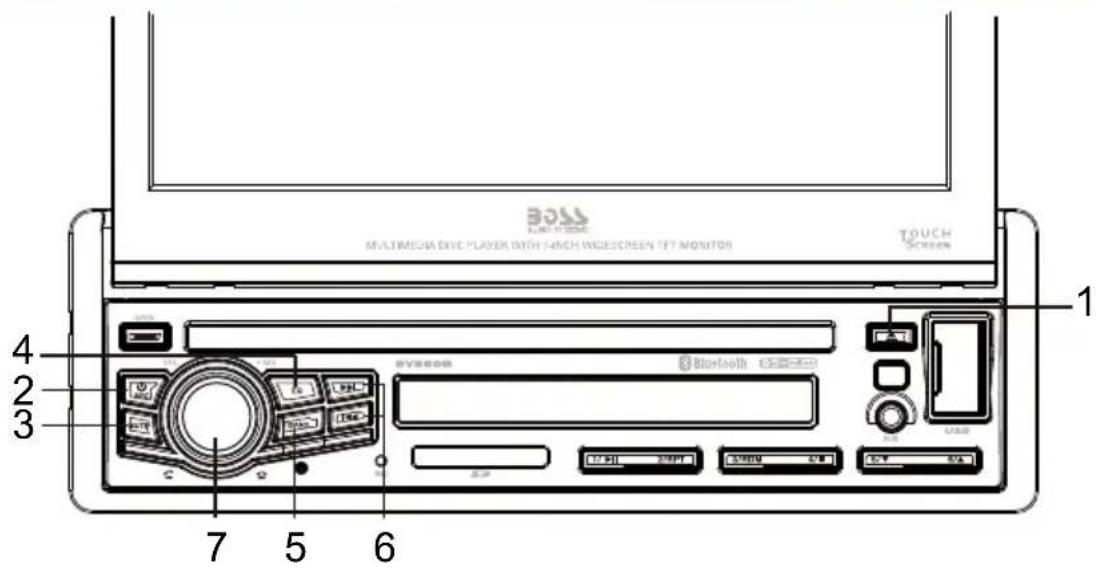
text_image
BOLL MULTIMEDIA DVC PLAYER WITH HANG WIDE SCREEN 1FT MONITOR TOUCH SCREEN 1 4 2 3 7 5 6 Bluetooth USB1.Eject key
When there is a Disc in the unit, press EJECT to remove the Disc. And press again to load the Disc if you do not take out it.
2. SOURCE key & TURN ON/OFF
Short press to select system mode(RADIO/DISC/PHONE/STREAM/AUX/USB-F/USB-R/SD/AV IN/CAMERA).Long press to turn ON/OFF the unit.
3.MUTE key
Press to activate the MUTE function and silence the audio output. Press again to restore sound. Long press to turn off the backlight; then press any place of the TFT LCD to restore the backlight.
4.EQ
Press to enter into EQ setup menu.
5. BAND
Under RADIO mode, press to change band between FM1/FM2/FM3/AM1/AM2.
6. & button
Press to choose previous/next song under Disc/SD/USB mode. Press to choose previous/next page under music list menu. Press to search frequency forward/backward under radio mode.
7.VOLUME UP/DOWN & Talking Calls & HANG UP
Rotate to adjust the output volume UP or DOWN.
Press the volume button to take incoming calls under Bluetooth mode; Press the volume button to hang up the phone calls during phone calls. Long press to reject incoming calls.
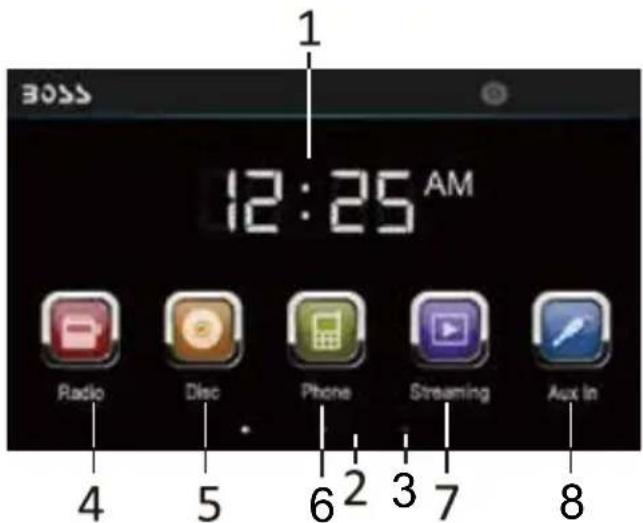
MAIN MENU 1
text_image
1 BOSS 12:25 AM Radio Disc Phone Streaming Aux In 4 5 6 2 3 7 8- Shows the present time of the unit.
- Press to go into main menu 2.
- Press to go into main menu 3.
- Radio Interface
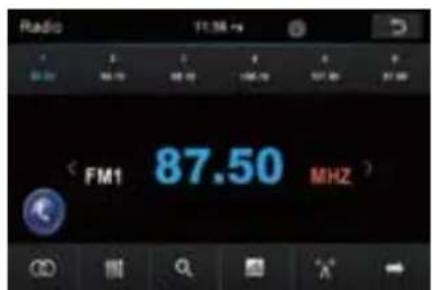
text_image
Radio 11:36 ms FM1 87.50 MHz- Phone setup Interface
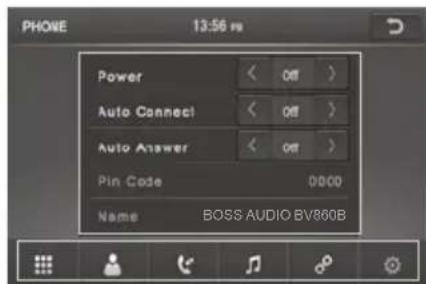
text_image
PHONE 13:56 Power < Off > Auto Connect < Off > Auto Answer < Off > Pin Code 0000 Name BOSS AUDIO BV860B8.AUX IN Interface
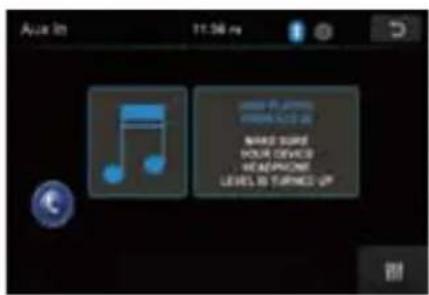
text_image
Audio In 11:36 pm MAKE PLAYERS FORMATIC PS MAKE START YOUR DEVICE RECEPIONS LEVEL TO TURNES UP- Disc Interface
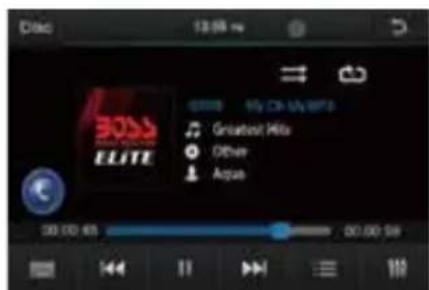
text_image
Disc 13:58 ms Grossbox Hits Other Argus 30.00 KB 00.00 KB7.Streaming Interface
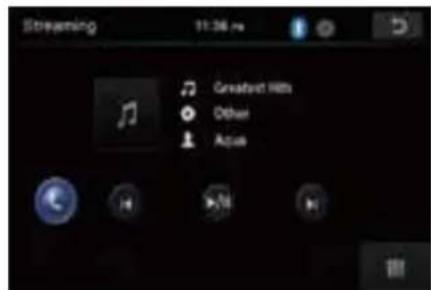
text_image
Streaming 11:36 ms Greatbird Hits Other ActionMAIN MENU 2
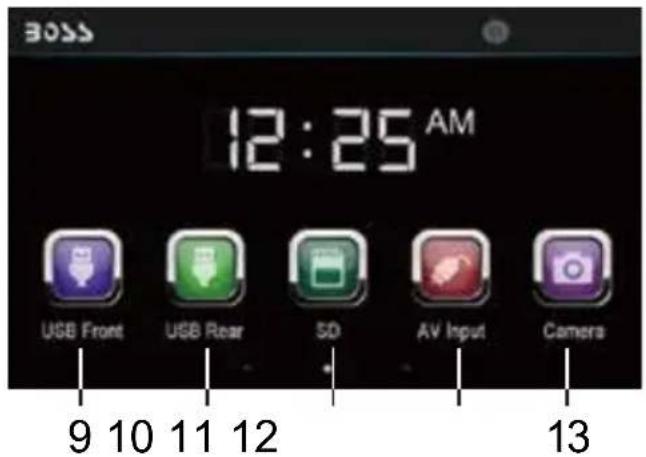
text_image
BOSS 12:25 AM USB Front USB Rear SD AV Input Camers 9 10 11 12 139. USB-F Interface
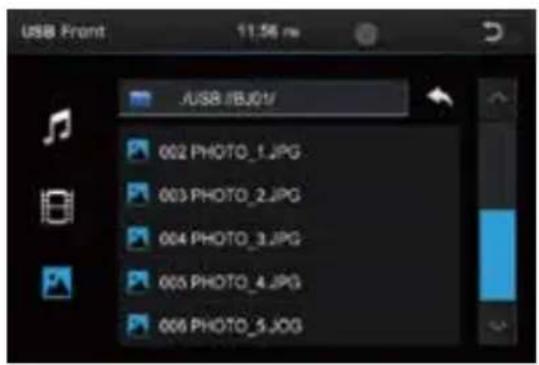
text_image
USB Front 11:56 ms JUSB /BJ01/ 002 PHOTO_1.JPG 003 PHOTO_2.JPG 004 PHOTO_3.JPG 005 PHOTO_4.JPG 006 PHOTO_5.JPG11.SD Interface
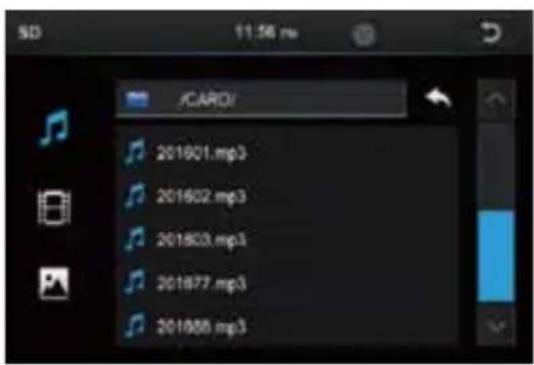
text_image
SD 11:56 ms /CARD/ 201601.mp3 201602.mp3 201603.mp3 201677.mp3 201688.mp313. CAMERA Interface
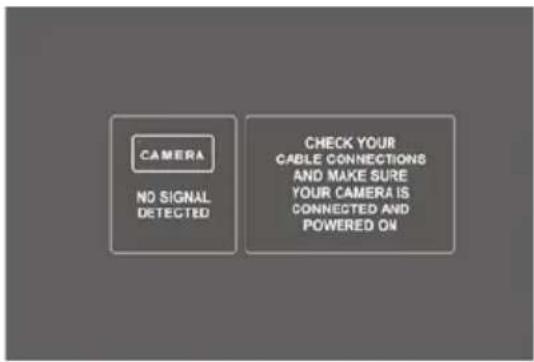
text_image
CAMERA NO SIGNAL DETECTED CHECK YOUR CABLE CONNECTIONS AND MAKE SURE YOUR CAMERA IS CONNECTED AND POWERED ON10.USB-R Interface
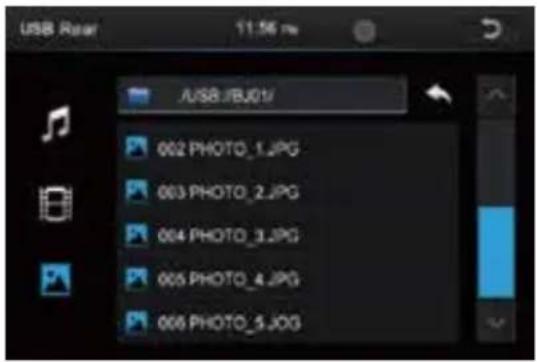
text_image
USB Rear 11:56 pm JUSB/JB01/ 002 PHOTO_1.JPG 003 PHOTO_2.JPG 004 PHOTO_3.JPG 005 PHOTO_4.JPG 006 PHOTO_5.JPG12. AV Interface
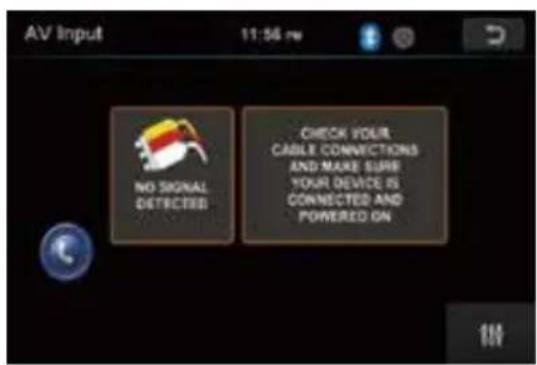
text_image
AV Input 11:56 pm NO SIGNAL DETECTED CHECK YOUR CABLE CONNECTIONS AND MAKE SURE YOUR DEVICE IS CONNECTED AND POWERED ONMAIN MENU 3
14.
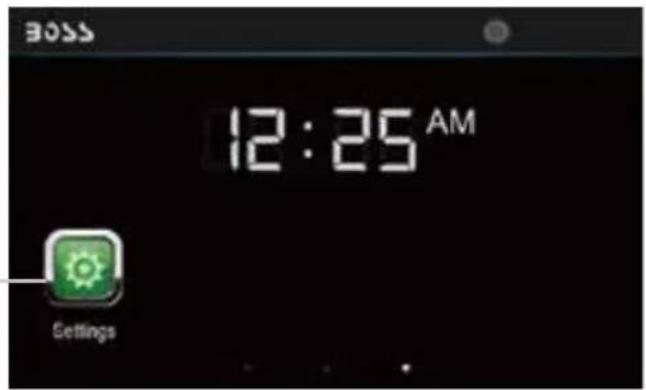
text_image
BOSS 12:25 AM Settings14.Settings Interface
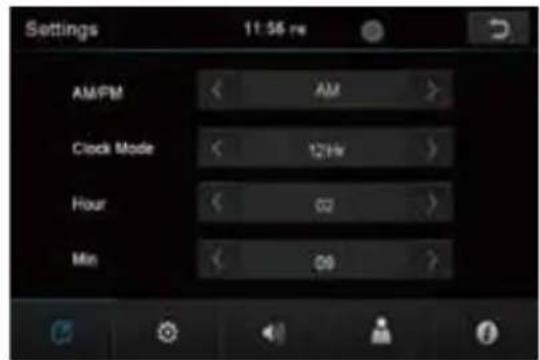
text_image
Settings 11:56 ms AM/FM < AM > Clock Mode < 12Hz > Hour < 02 > Min < 09 >There are five menu in setup:
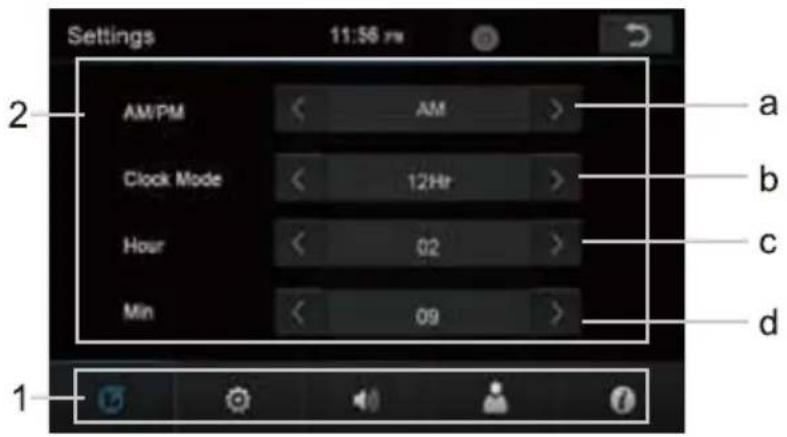
CLOCK SETUP-Menu 1
text_image
Settings 11:56 pm 2 AM PM < AM > Clock Mode < 12Hr > Hour < 02 > Min < 09 > 1 a b c d- Setup function area: Clock setup, General setup, Audio setup, Disc setup, Other setup.
- Subsidiary function area: Move up and down to see the general setup items.
a. Press to set AM/PM at 12hr mode.
b. Press to set clock mode: 24/12 hr.
c. Press to set hour.
d. Press to set minute.
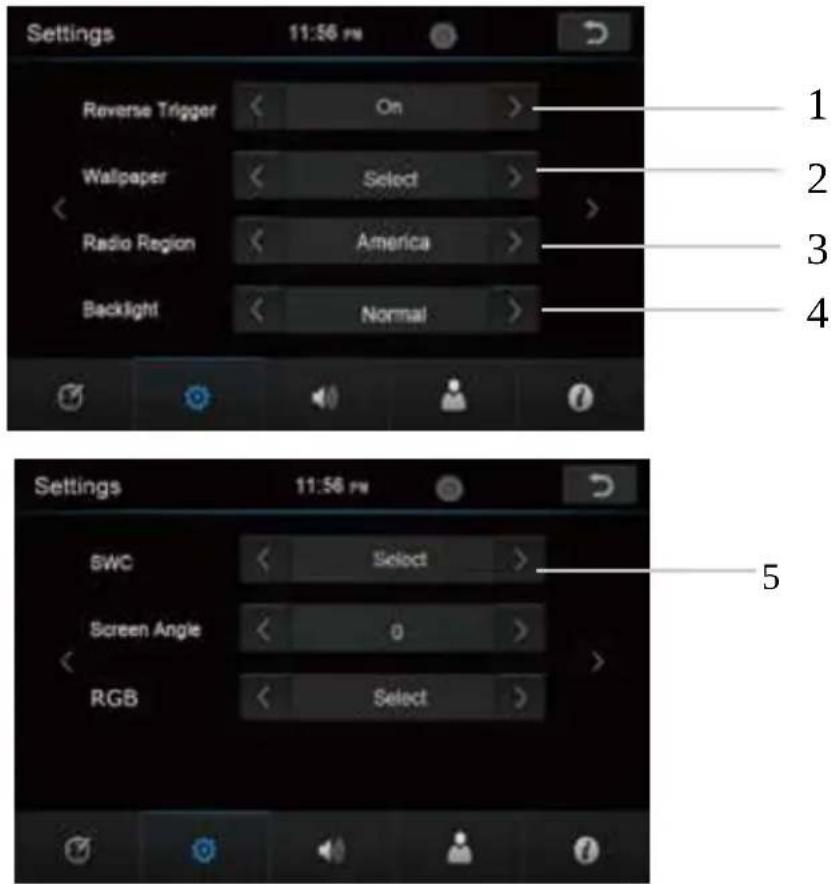
GENERAL SETUP-Menu 2
text_image
Settings 11:56 PM Reverse Trigger < On > Wallpaper < Select > Radio Region < America > Backlight < Normal > Settings 11:56 PM SWC < Select > Screen Angle < 0 > RGB < Select > 1 2 3 4 5- Reverse trigger: Turn on if you have a rear view camera. Turn off if you haven't.
- Touch to set wallpaper
- Touch to choose radio field between: America/EU/Latin.
- Backlight dimmer selection: Night /Dark /Normal/Bright.
- Touch to enter SWC menu.
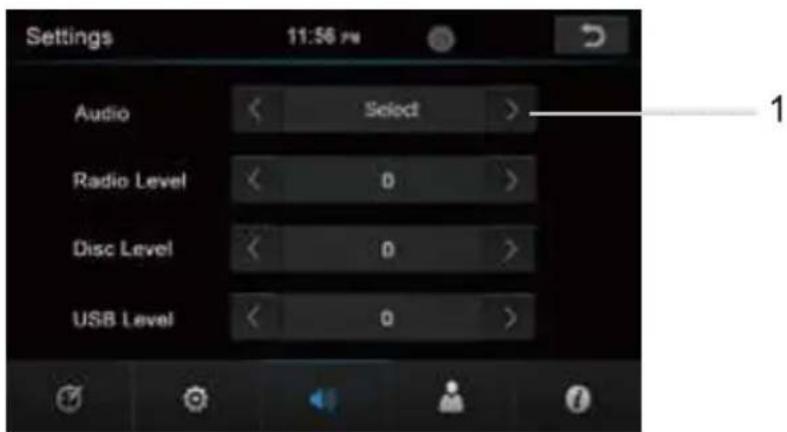
AUDIO SETUP-Menu 3
text_image
Settings 11:56 PM Audio < Select > Radio Level < 0 > Disc Level < 0 > USB Level < 0 >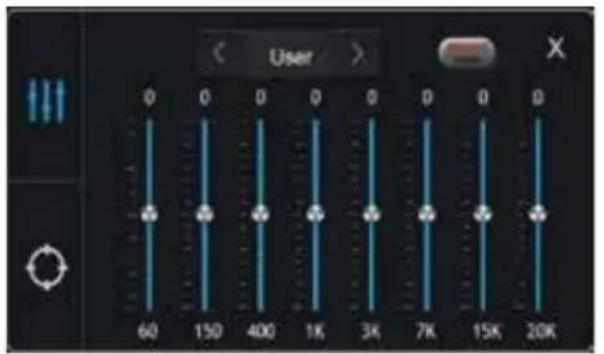
text_image
< User > 0 0 0 0 0 0 0 0 0 0 60 150 400 1K 3K 7K 15K 20K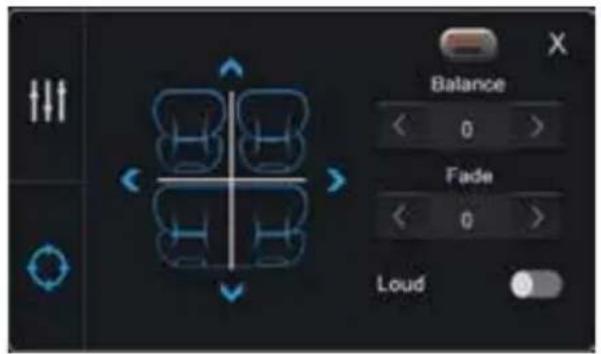
text_image
Balance < 0 > Fade < 0 > Loud- Press to enter into EQ set up menu.
DISC SETUP-Menu 4

text_image
Settings 11:54 w Parent Look Select- Touch to set up the level of the DVD. Default password is 0000
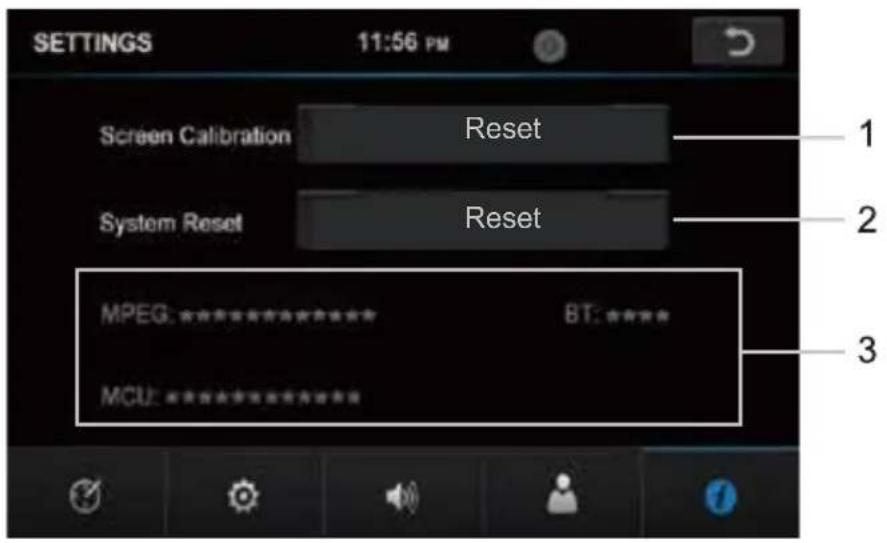
OTHER SETUP-Menu 5
text_image
SETTINGS 11:56 PM Screen Calibration Reset System Reset Reset MPEG: *************** BT: ***** MCU: ***************- Touch to enter calibrate menu.
- Load factory setting.
- Show the software version information.
SWC-STEERING WHEEL CONTROL SETTING
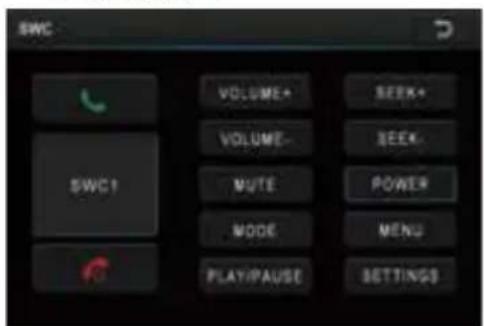
Touch SWC enter SWC setting menu:
Press"OK" to start SWC leaning.
Start learning:
Set the POWER button as an example.
- Press POWER button in the unit(Picture 1), then you will see reminder like picture 2, Press OK.
- Press POWER key in your steering wheel. Then you can see the reminder in the unit like Picture .Setting successfully. Will show like Picture 3.
- Click OK, and finished learning.
- Repeat 1-3 to learning other keys.
Picture 1
text_image
SWC VOLUME+ VOLUME- MUTE MODE PLAY/PAUSE SEEK+ SEEK+ POWER MENU SETTINGSPicture 2
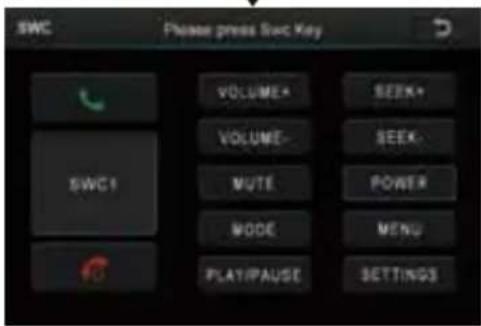
text_image
SWC Please press SWC Key VOLUME+ VOLUME- MUTE MODE PLAY/PAUSE SEEK+ SEEK- POWER MENU SETTINGS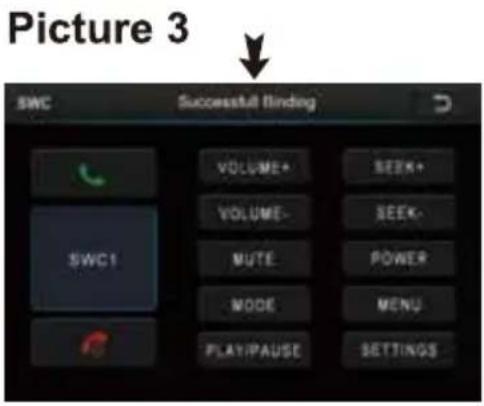
text_image
Picture 3 SWC Successful Binding VOLUME+ SEEK+ VOLUME- SEEK- MUTE POWER MODE MENU PLAY/PAUSE SETTINGSSWC1: Select different SWC resistance to meet different cars. If you cannot finish all key pairing, you can press to select SWC2 SWC3, until all keys can learn.
NOTE: Click SWC1 you will lost all KEY learning before.
RADIO OPERATION
text_image
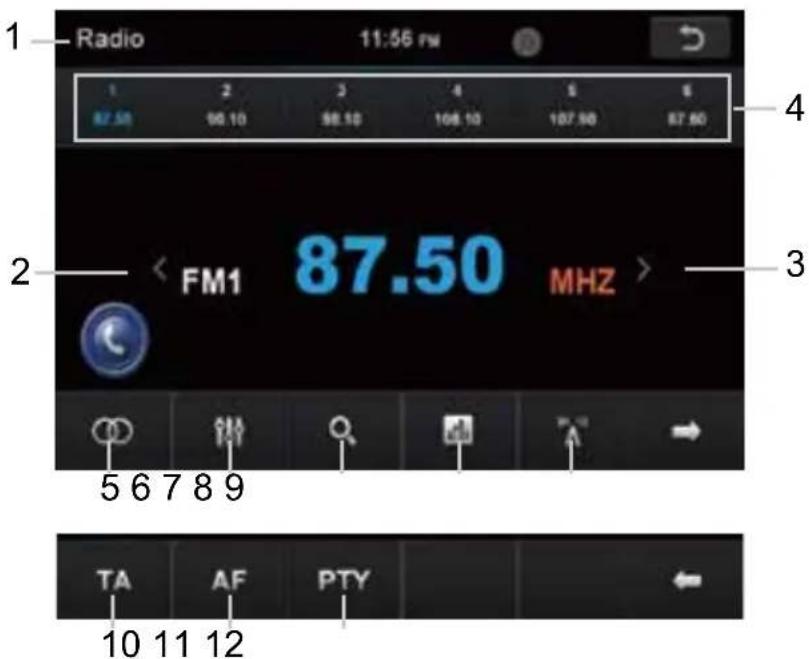
Radio 11:56 PM 1 2 3 4 5 6 87.50 98.10 98.10 108.10 107.90 87.60 2 < FM1 87.50 MHz > 3 5 6 7 8 9 TA AF PTY 10 11 121.Show the present mode. Touch 📋 to go back home.
2. Short press to seek backward. Long press to enter manual mode and backward in step.
3. Short press to seek forward. Long press to enter manual mode and forward in step.
4.Preset stations area, long press to save current station.
5. Stereo on/off: Click to turn on/off stereo when receiving a stereo signal.
6. Press to enter into EQ menu.
7. Short press for PS, long for AS.
8.Band changing:Click to change band between FM1/FM2/FM3/AM1/AM2.
9.LO/DX: Touch to select Local or Distant broadcasting stations.
10. TA(Traffic Announcement)
ON: When the traffic station is turned on, the radio will automatically search for traffic stations.
OFF: Repress [TA] button to close TA function. In other modes, traffic announcement will automatically switch to radio mode, after the traffic announcement is completed, it will automatically switch to the previous mode.
11. AF(Auto Frequency)
Touch the button to turn the AF function on/off. AF function is turned on, When the received station signals become weak, the radio will automatically fine-tune to other frequencies. When receiving an emergency announcing, the screen will display warning message.
12. PTY(Programming Type)
Touch the button the screen displays program types, users can search station according to program type.
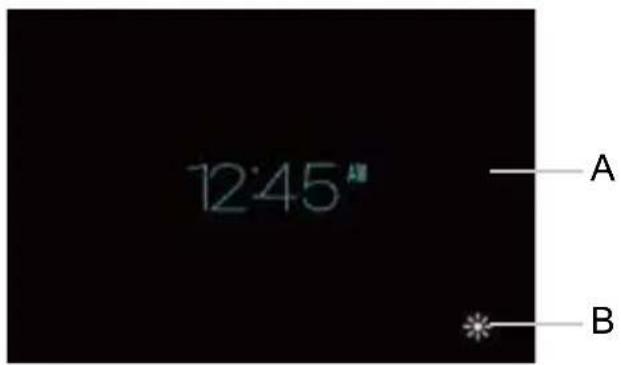
13 .Press this area in any interface, you will see below present time standby mode:
text_image
12:45" A BA. Press any empty area in this menu to go back to last source menu.
B. Press to dim the unit.
Note: If RDS is turned OFF, AF/TA/PTY will not function.
MEDIA PLAYING VIDEO FORM PLAYING
text_image
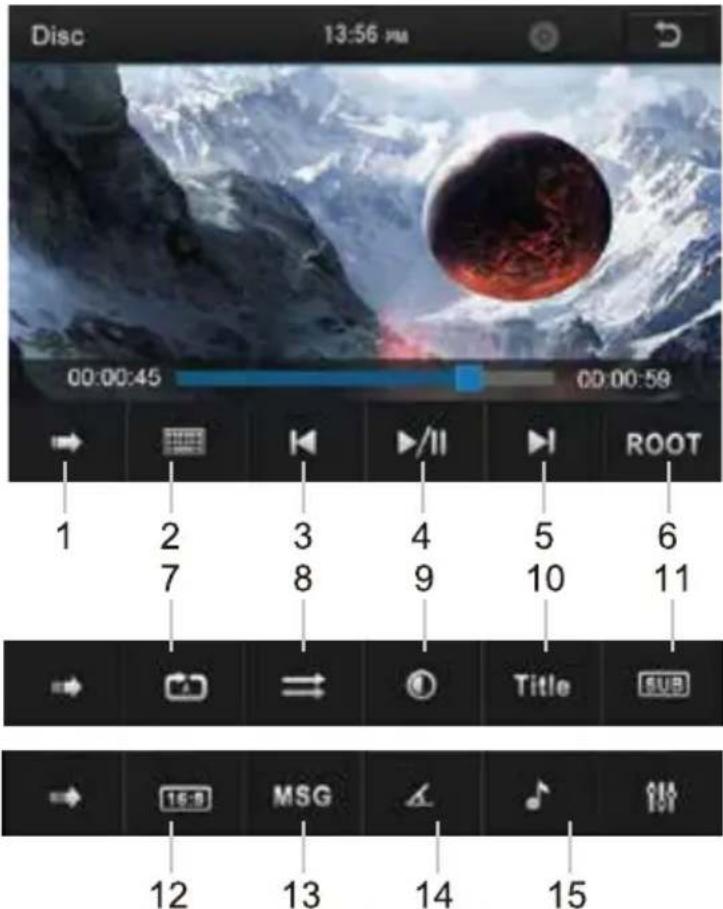
Disc 13:56 PM 00:00:45 00:00:59 1 2 3 4 5 6 7 8 9 10 11 → ↻ → ↻ ↑ ↓ 15-B MSG 14 15 12 13 14 15- Touch → to select one of the three Menu Control Bars:
- KEYPAD: Touch to select chapter of DVD.
- Short press to move to previous chapter, Long press to fast reverse.
4.PLAY/PAUSE: Touch to begin playback/pause. - Short press to move to next chapter, Long press to fast forward.
- Touch to enter DVD Menu.
- Touch to alter repeat mode in the following sequence:
• DVD: Repeat All, Repeat OFF, Repeat Chapter, Repeat Title.
• VCD: Repeat All, Repeat OFF, Repeat Single. - Random play.
- Touch to setting menu of brightness and contrast.
- Touch to enter DVD Title.
- Touch to select the subtitle language if the disc is recorded in multiple languages.
- Touch to switch video 4:3 and 16:9.
- Touch to show in for mation of the video.
- Touch to select DVD video angle.
- Touch to select the audio language.

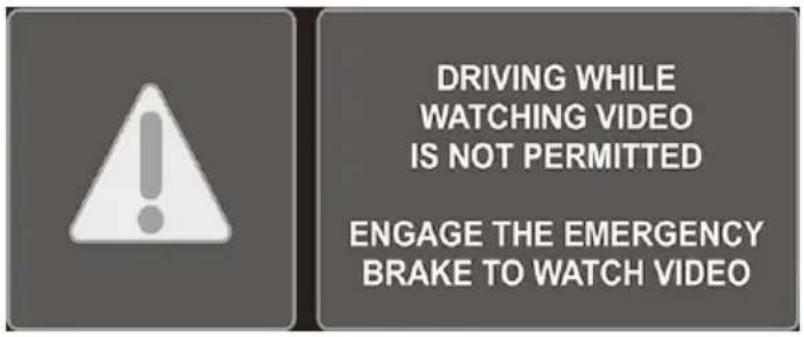
NOTE: When properly installed, a video cannot be displayed unless the parking brake is applied. If the parking brake wire is not installed correctly, the following message will appear.
text_image
DRIVING WHILE WATCHING VIDEO IS NOT PERMITTED ENGAGE THE EMERGENCY BRAKE TO WATCH VIDEOMEDIA PLAYING—CD AUDIO
text_image
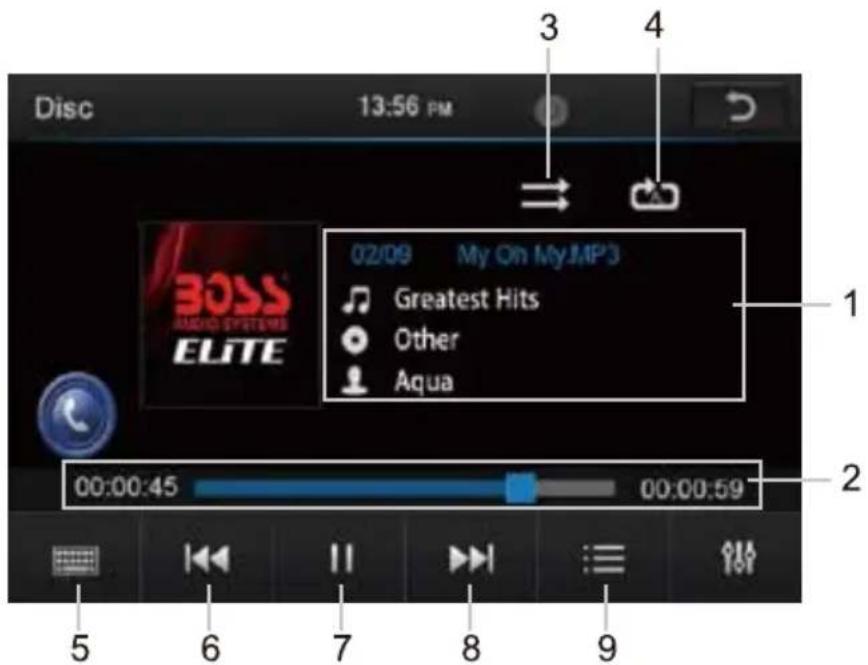
Disc 13:56 PM 02/09 My On My MP3 Greatest Hits Other Aqua 00:00:45 00:00:59 1 2 3 4 5 6 7 8 9- Track now playing、Playing status、The disc type.
2.Time bar shows total time and playing time of the present song. - Random play.
- Repeat mode: Repeat the song or Repeat the disc.
- KEYPAD: Touch to select chapter of CD.
- Touch to move to previous chapter.
7.PLAY/PAUSE: Touch to begin playback/pause. - Touch to move to next chapter.
- Touch to view the song list of the CD.
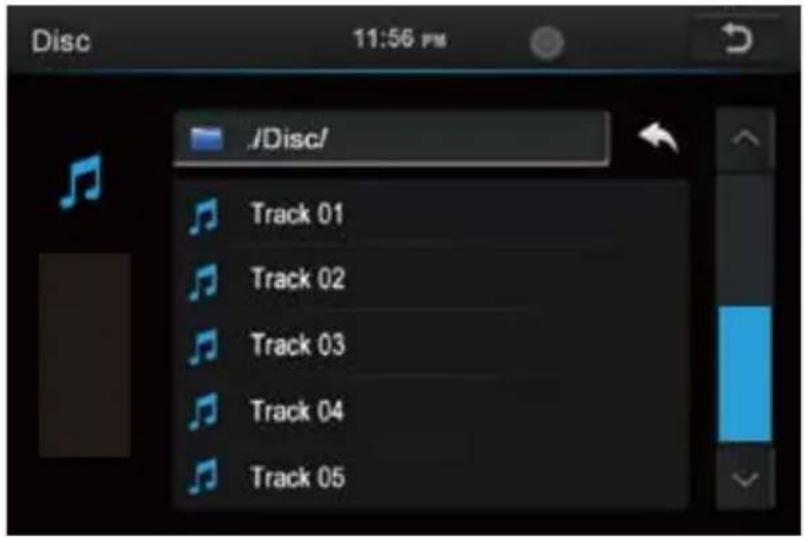
Source Menu of CD
Touch the SOURCE MENU(ICON 5) to access to the CD track menu to view or change tracks manually. Touch again to return to the playback of the current track.
text_image
Disc 11:56 PM /JDisc/ Track 01 Track 02 Track 03 Track 04 Track 05USB/SD MUSIC/VIDEO/PICTURE
Press USB/SD in the main menu, music menu is all same with the Disc music. There is only one different: it will show more ID3 information on it such as: song name, singer.
text_image
5D 12:50 me BOSS ELITE My info My GPS Greatest Hits Other Aqua 00:00:45 00:00:59 错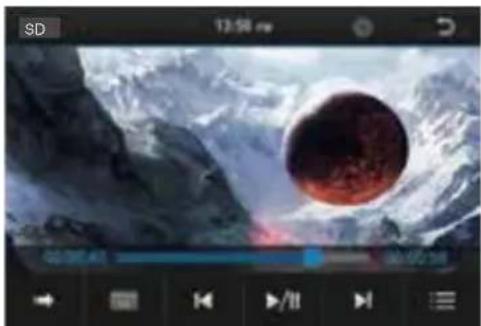
natural_image
Digital video player interface showing a planet with swirling clouds and a red sun, displayed in a media player window (no readable text or symbols on the planet itself)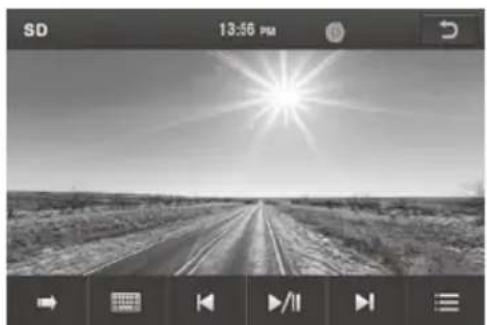
natural_image
Black-and-white photo of a sunlit rural road leading toward the horizon, with no visible text or symbols.BLUETOOTH OPERATION MENU
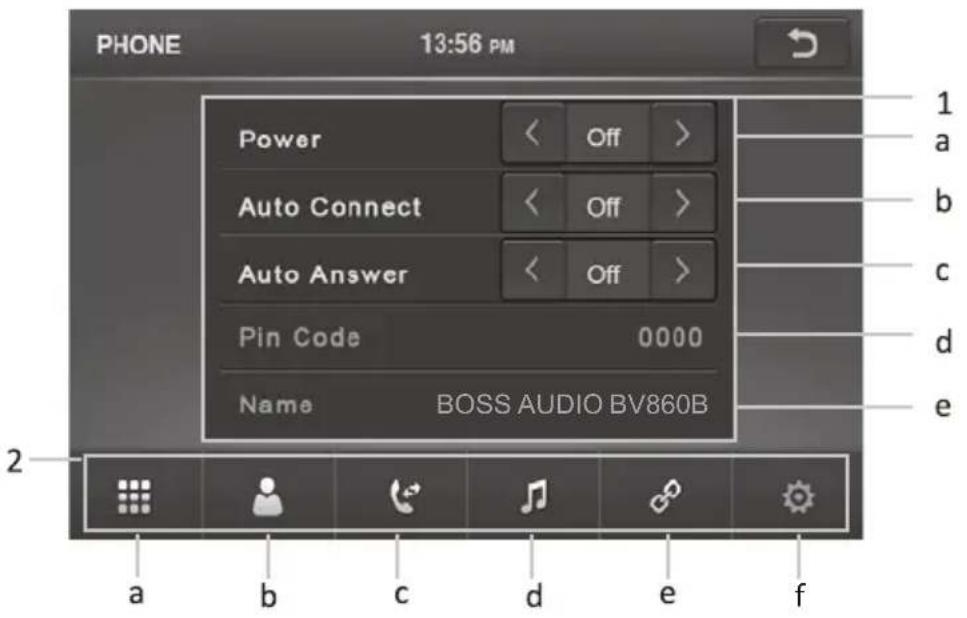
Click phone icon and will enter into Bluetooth function interface:
text_image
PHONE 13:56 PM Power < Off > Auto Connect < Off > Auto Answer < Off > Pin Code 0000 Name BOSS AUDIO BV860B a b c d e f 1 a b c d e1. Bluetooth setting menu:
a.ON/OFF: Turn on and turn off of Bluetooth.
Turn on:show gray BT ✦ . and the icon turn blue when paired phone.
b. Connect automatically: Can connect the devices automatically which have already been connected before.
c.Anser automatically: Can turn on or turn off the function of listen to calls automatically.
d.PIN code: Default password"0000", and can be change by yourself click"0000"
e.Default Bluetooth name for this unit: BOSS AUDIO BV860B.
2. Function area:
a. Click and see the dialing keypad, users can dial no. and make phone calls.
b.Click to see the Bluetooth phonebook menu.
c.Click to see the Bluetooth call history.
d. Bluetooth music
e. Bluetooth pairing interface as following.
f. Bluetooth setting menu.
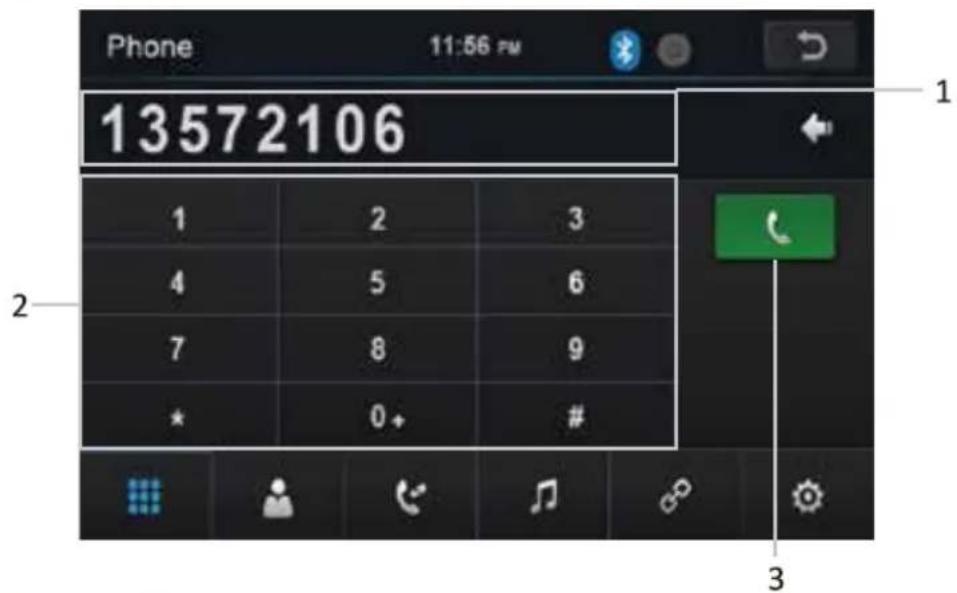
BLUETOOTH DIALING
text_image
Phone 11:56 PM 13572106 1 2 3 4 5 6 7 8 9 * 0+ # 3- Shows the number you press in, and press ← to delete wrong number.
2.Key area.
- Touch to call out.
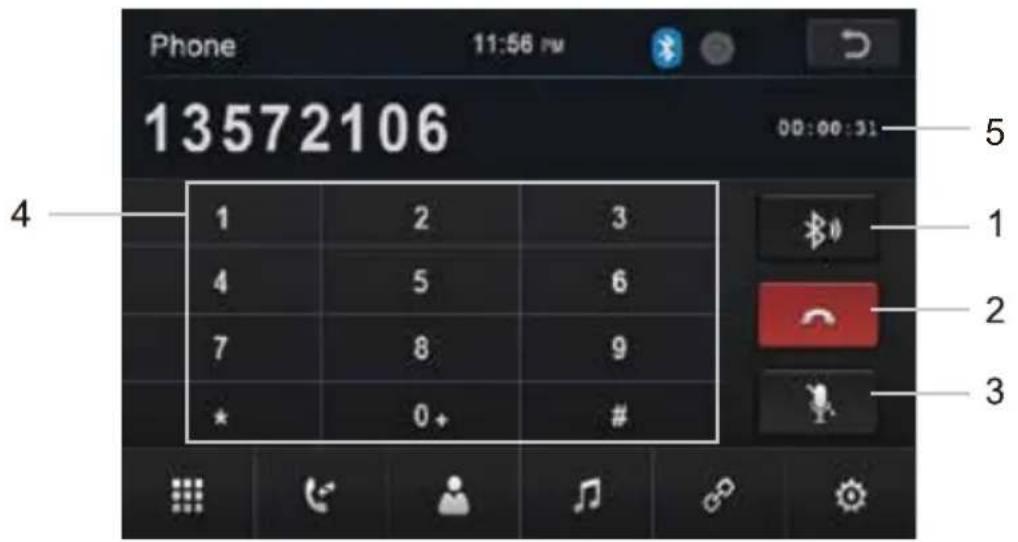
BLUETOOTH CALL
text_image
Phone 11:56 PM 13572106 00:00:31 4 1 2 3 4 5 6 7 8 9 * 0+ # 5 1 2 3-
Touch to select talk through phone or through Bluetooth.
-
Press to hang up the phone call.
-
Touch to mute or un-mute mic.
4.Keypad area.
5.Show talking time.
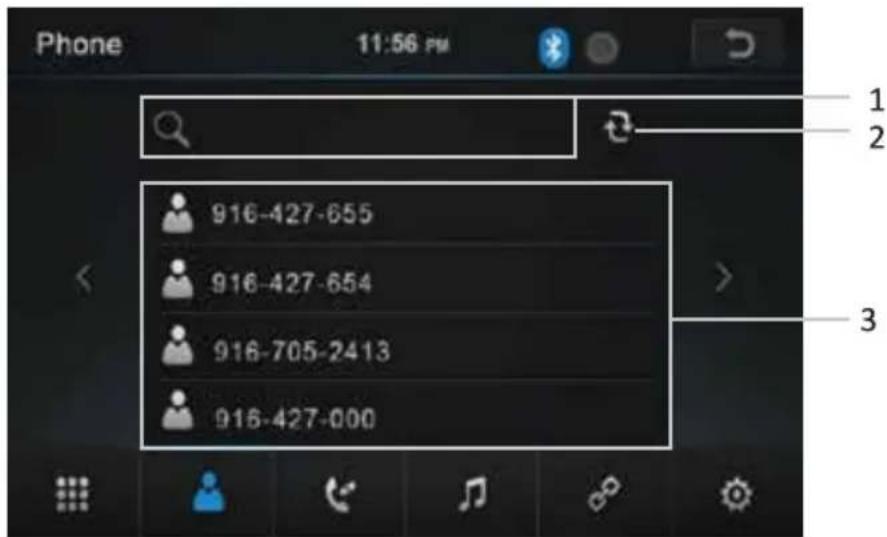
BLUETOOTH PHONE BOOK
text_image
Phone 11:56 PM 916-427-655 916-427-654 916-705-2413 916-427-000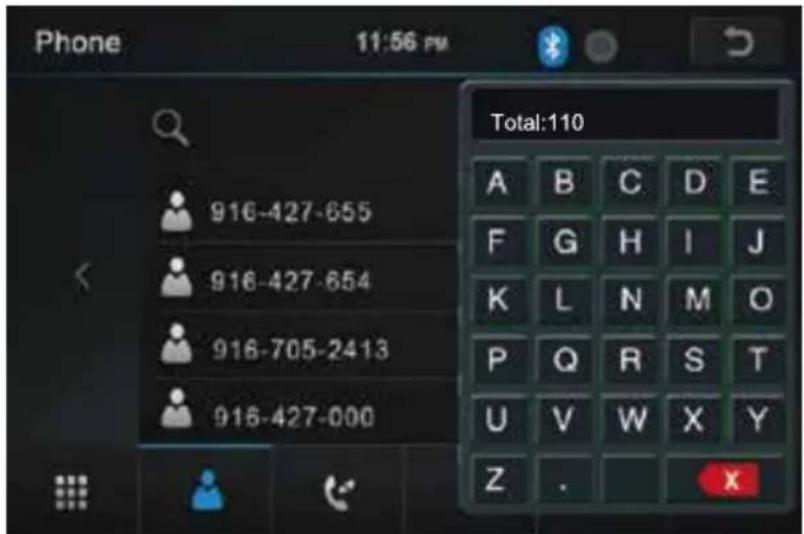
text_image
Phone 11:56 PM Total:110 A B C D E F G H I J K L N M O P Q R S T U V W X Y Z . X- Touch to enter name and search the wanted phone number.
- Click to sync phonebook.
- Contact list.
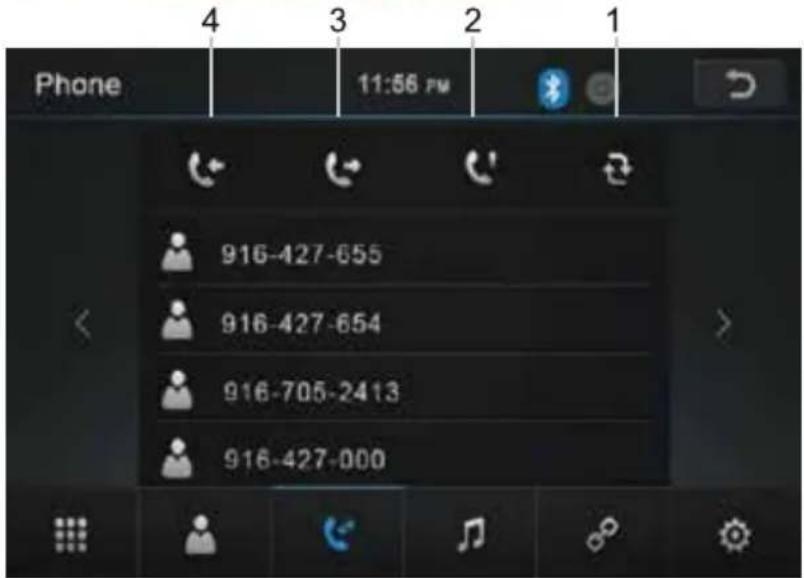
BLUETOOTH PHONE CALL HISTORY
text_image
Phone 11:56 PM 916-427-655 916-427-654 916-705-2413 916-427-000- Click to sync phonebook.
- Touch to show missed calls.
- Touch to show the dialed phone number.
- Touch to show the received phone number.
BLUETOOTH MUSIC-A2DP
1.Previous song
2.Play/pause.
3. Next sony
4.Enter EQ setting menu.
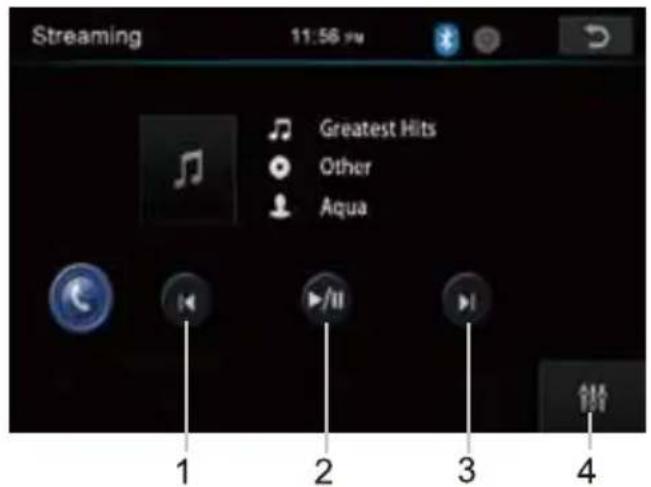
text_image
Streaming 11:56 PM Greatest Hits Other Aqua 1 2 3 4BLUETOOTH PAIR DEVICE
- Disconnect the phone.
2 Connect the phone.
3 Delete the phone.

text_image
Phone 13:56 u OPPO A31 M L 1 2 3PHOTO
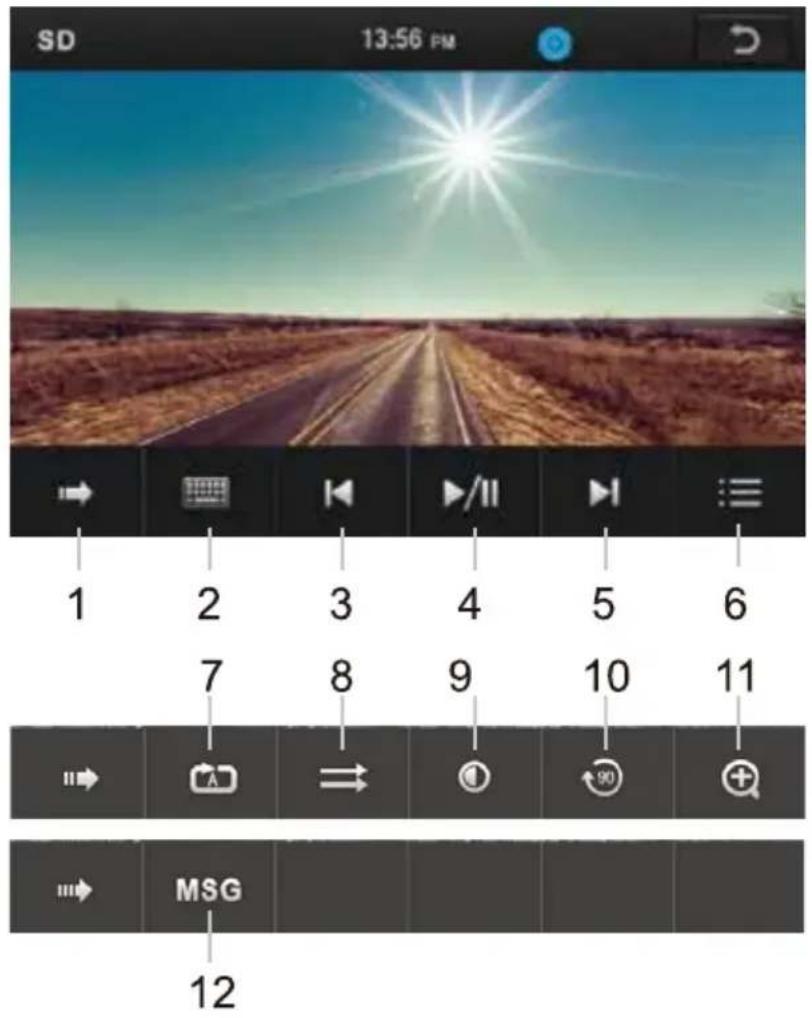
text_image
SD 13:56 PM 1 2 3 4 5 6 7 8 9 10 11 MSG 12- Touch to select one of the two Menu Control Bars: 1/3, 2/3, 3/3.
- Keypad: enter number to select file.
3.Previous one.
4.PLAY/PAUSE: touch to begin play. Press again the icon to pause. During picture playing mode, one picture will be played for 5s automatically and goes to the next if you do not press it. - Next one.
- List: Press to enter file list.
- Read mode select.
- Random play.
- Enter into setting menu for brightness, and contract.
- Turn right 90 degrees.
11 Zoom out/in the present picture.
12.Show the number of the picture files.
CAMERA: Rear view function, the rear view video signal can display automatically when you reversing the car, and back to the last sources after reversing the car.
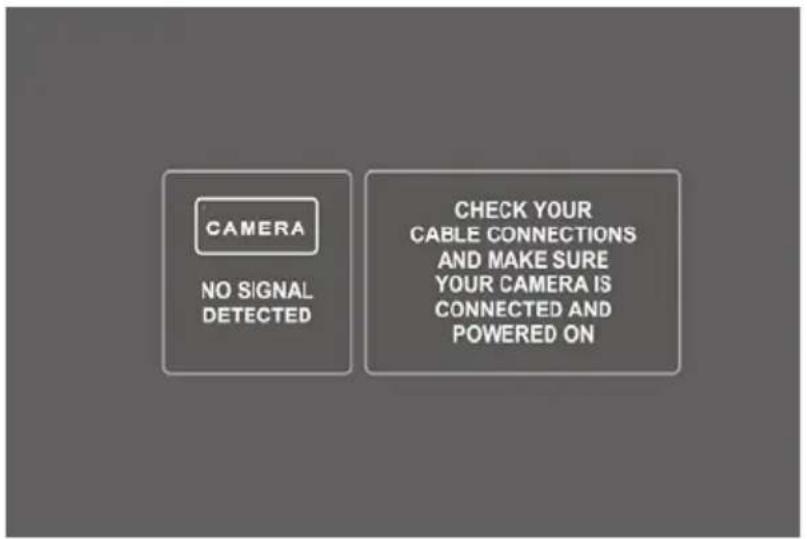
text_image
CAMERA NO SIGNAL DETECTED CHECK YOUR CABLE CONNECTIONS AND MAKE SURE YOUR CAMERA IS CONNECTED AND POWERED ONAUX IN: External audio input function
Connect the audio device to the unit by the 3.5mm jack in front of the panel and touch AUX INPUT icon.
AV INPUT: External video and audio input function
Connect the video and audio device to the unit by the RCA jacks and touch AV INPUT icon.
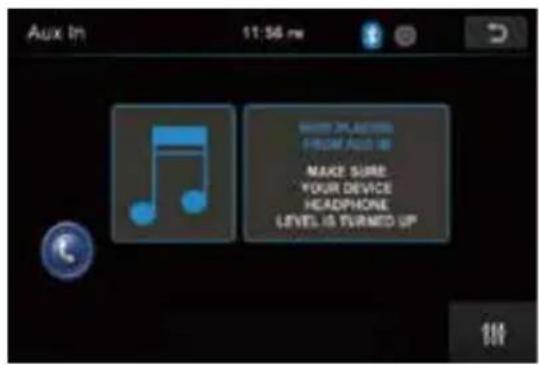
text_image
Aux In 11:56 ms MAKE PLAYERS FROM ADD UP MAKE SURE YOUR DEVICE HEADPHONE LEVEL IS TURNED UP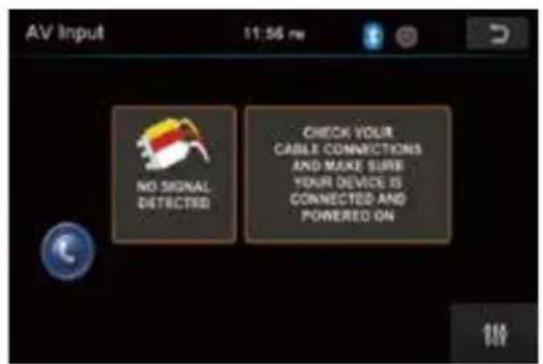
text_image
AV Input 11:56 ms NO SIGNAL DETECTED CHECK YOUR CABLE CONNECTIONS AND MAKE SURE YOUR DEVICE IS CONNECTED AND POWERED ONTable 1: Error message
| Media displayed | Cause | Corrective Action |
| Loading | Disc is being read | |
| No Disc/Bad Disc | Disc is dirty | Clean the disc |
| Disc is upside down | Insert Disc in right way | |
| Unknown Disc | Unsupported Disc type | Check the disc and change one |
| Error | Illegal mechanism operation | Press EJECT for 5s to reset loading mechanism |
Table 2: General problems
| Problem | Cause | Corrective Action |
| Unit will not power on | Radio fuse blown | Install new fuse with right rating |
| Car battery fuse blown | Install new fuse with right rating | |
| Illegal operation | Press the RESET button | |
| Screen touch is insensitive | Place of touch screen is offset | Go to setup menu and set the calibration |
| No audio output | Improper audio output connection | Check wiring and correct |
| VOLUME 0 | Turn up the volume | |
| Improper MUTE connection | Check wiring and TEL MUTE connection | |
| Speaker damaged | Change speakers | |
| Low audio output | Volume set too low | Increase the volume |
| Heavily biased volume balance | Check and adjust the channel balance to the center position | |
| Poor sound quality or distortion | Speaker power rating not compatible with unit | Connect proper speakers |
| Speaker is shorted | Check speaker contrast |
Table 3: TFT monitors
| Problem | Cause | Corrective Action |
| No image | Incorrect connection to parking wire | Check wiring and correct |
| Parking brake is not engaged | Stop vehicle in safe place and set parking brake ON | |
| Flashing image or interference appears on screen | DVD is not compatible with current TV system settings | Change setup to accommodate Disc |
| Improper video signal connections | Check wiring and correct | |
| Improper image, improper height/width ratio display | Improper aspect ratio setup | Use correct aspect ratio setting |
Table 4: Tuner
| Problem | Cause | Corrective Action |
| Weak station searching | Auto antenna is not fully extended | Connect the auto antenna properly |
| LOCAL function is activated | Turn LOCAL function OFF |
Table 5: Disc
| Problem | Cause | Corrective Action |
| Cannot insert Disc | Disc already inside unit | Eject the current Disc and insert the new one |
| Lots of noise during play, and stop then | Disc is scratched or warped | Use a new one in good condition |
| Disc is dirty or wet | Clean the Disc | |
| No repeat or searching while playing VCD | PBC is ON | Turn PBC OFF |
Table 6:
USB Auto reading function: 1) Auto reading function works only for Front USB when rear USB is off; 2) Need to click the Front USB icon on main menu to read the Front USB if rear USB is under working;
Mobile phone charging function: 1) Auto charging function works when you insert Android cellphone; 2) Connect Iphone in one USB slot, if can not charge automatically, will need to click USB mode by hand.
USER'S MANUAL
BV860B
BLUETOOTH® | DVD/MP3/CD AM/FM RECEIVER
BOSS®
AUDIO SYSTEMS
BOSS Audio Systems
3451 Lunar Court • Oxnard, CA 93030
www.bossaudio.com
800-999-1236 US Toll-free
805-751-4853 Customer Service
tech support: www.bossaudio.com/support/technical-support



0417