Douro - Hane Reginox - Gratis brugsanvisning og manual
Find enhedens vejledning gratis Douro Reginox i PDF-format.

Brugerspørgsmål om Douro Reginox
0 spørgsmål om dette apparat. Besvar dem du kender, eller stil dit eget.
Stil et nyt spørgsmål om dette apparat
Download vejledningen til din Hane i PDF-format gratis! Find din vejledning Douro - Reginox og tag din elektroniske enhed tilbage i hånden. På denne side er alle dokumenter nødvendige for brugen af din enhed offentliggjort. Douro af mærket Reginox.
BRUGSANVISNING Douro Reginox
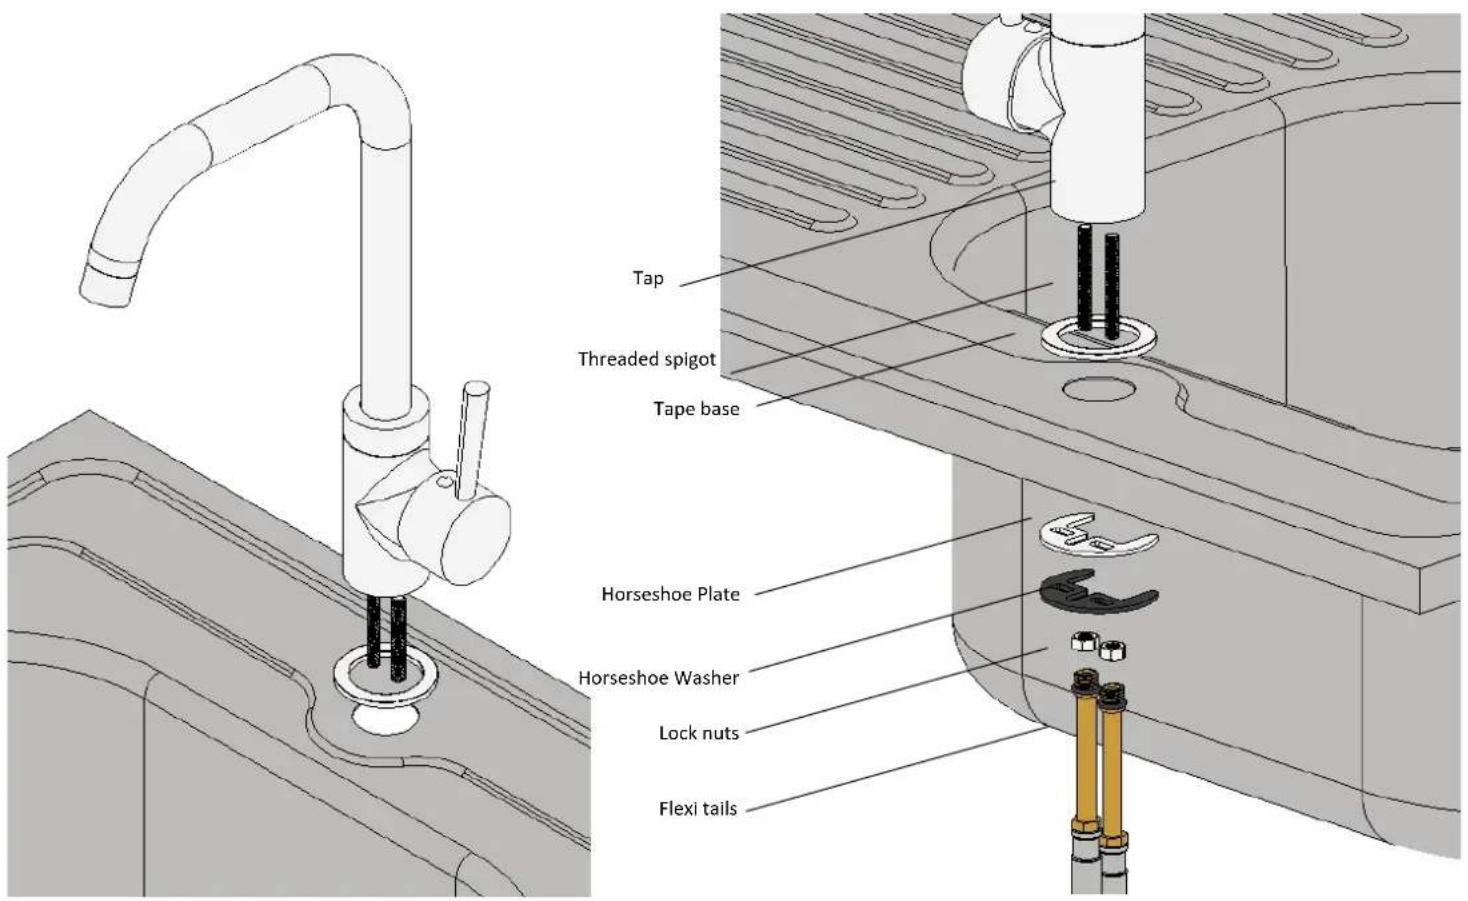
To ensure the correct installaon is executed it is recommended that you use a qualified competent installer to install this product.
Step 1 – Insert threaded spigots in to the tap
Step 2 – Insert exi tails into the tap. Only hand ghten. Do not let the exi tails coil. Do not loop them. Do not over ghten.
Step 3 – Place the tap on the sink. Make sure the baseplate and O-ring are situated to seal around the tap hole if applicable.
Step 4 – On the underside of the sink place the horseshoe plate, horseshoe washer and then the lock nuts onto the threaded spigots.
Step 5 – Tighten the nuts using an appropriate box spanner or adjustable spanner.
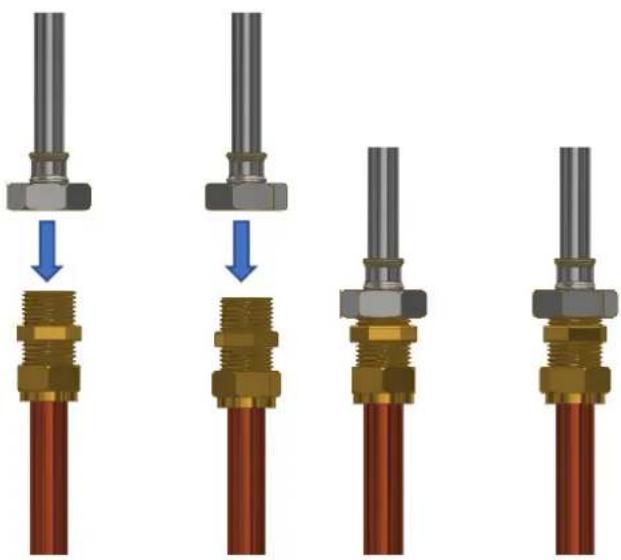
Step 6 – Connect hot feed to hot tail and ghten using spanners.
Step 7 - Do the same for the cold side (the tap from front on - cold is right, hot is le.)
Step 8 - Turn the water on to test for leaks.
text_image
Tap Threaded spigot Tape base Horseshoe Plate Horseshoe Washer Lock nuts Flexi tailsConnecng the exitails to the water supply
natural_image
Four-step diagram showing a mechanical assembly with threaded connectors and blue arrows indicating direction (no text or symbols)Customer Care Guide
To clean your tap use water or soapy water only. Do not use abrasive cleaners.
Do not allow limescale to build up in hard water areas
Do not use abrasive products on any surfaces
Bathroom products are vulnerable to acid aack and some household
consumables such hair dye, disinfectants, denture cleaners etc can contain such acids. Contact with these materials should be avoided.
This installaon guide is for illustraon purposes and may not be an exact representaon of the physical product.
This is a generic instrucon guide. There is likely to be a discrepancy between this guide and that of the actual product. The laer should be taken as standard.
For full terms and conditions, please refer to the manufacturer
If further assistance is required, please contact your retailer or alternatively call our customer services team on 01924 666590