
GS65SPP1 - Køleskab LG - Gratis brugsanvisning og manual
Find enhedens vejledning gratis GS65SPP1 LG i PDF-format.

Brugerspørgsmål om GS65SPP1 LG
0 spørgsmål om dette apparat. Besvar dem du kender, eller stil dit eget.
Stil et nyt spørgsmål om dette apparat
Download vejledningen til din Køleskab i PDF-format gratis! Find din vejledning GS65SPP1 - LG og tag din elektroniske enhed tilbage i hånden. På denne side er alle dokumenter nødvendige for brugen af din enhed offentliggjort. GS65SPP1 af mærket LG.
BRUGSANVISNING GS65SPP1 LG
OWNER'S MANUAL
SXS
REFRIGERATOR
Please read this guide thoroughly before operating and keep it handy for reference at all times.
| Introduction | Table of contents | |
| Entry | 4 | |
| Important safety instruction | 4 | |
| Important safety instruction | 5 | |
| Identification of parts | 13 | |
| Installation | Where to Install | 14 |
| How to exchange the water purifier(Only applies to internal type filter model) | 15 | |
| No Plumbing Ice & Water (Applicable to some models only) | 16 | |
| Door removal | 17 | |
| Door replacement | 18 | |
| Feed water pipe installation (Applicable to some models only) | 18 | |
| Height adjustment | 19 | |
| Door Alignment | 20 | |
| When the freezer door does not align with the height of the refrigerator door | 20 | |
| Operation | Starting | 21 |
| Adjusting the temperatures and functions | 21 | |
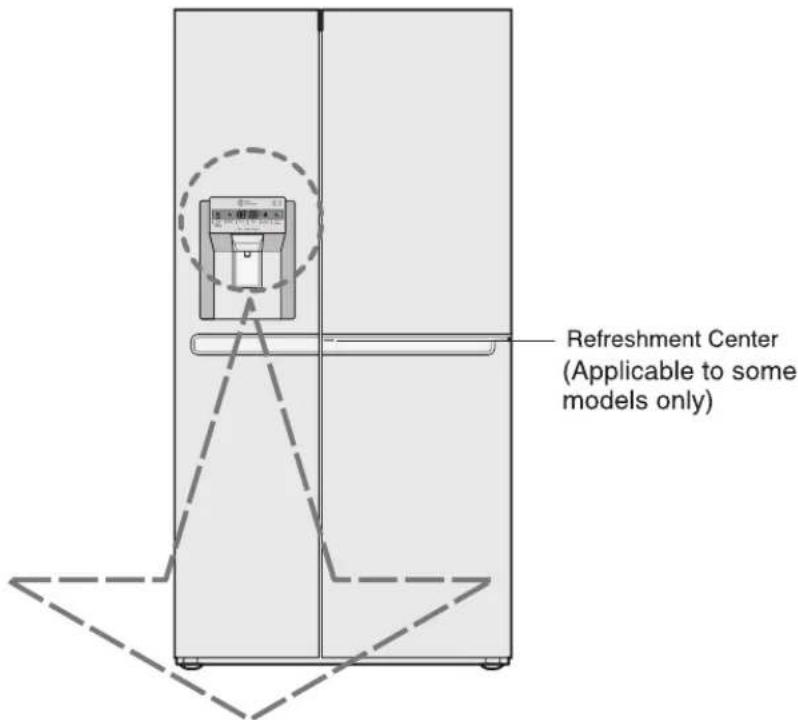
| Refreshment center (Applicable to some models only) | 28 | |
| Shelf | 29 | |
| Two stars section (Applicable to some models only) | 29 | |
| LED indicator (Freezer/Refrigerator) | 30 | |
| Hygiene fresh (Applicable to some models only) | 30 | |
| Wine holder (Applicable to some models only) | 30 | |
| Egg box (Applicable to some models only) | 31 | |
| Deodorizer (Applicable to some models only) | 31 | |
| Using the Fresh Vegetable Drawer(Applicable to some models only) | 31 | |
| Suggestion on food storage | Location of foods | 32 |
| Storing foods | 33 | |
| Care and maintenance | How to dismantle parts | 34 |
| General information | 35 | |
| Cleaning | 35 | |
| Trouble shooting | 36 | |
| It is normal... | 41 | |
| Smart funcltons | Using LG SmartThinQ Application | 42 |
| Using Smart DiagnosisTM | 43 | |
Entry
The model and serial numbers are found on the inner case or back of refrigerator compartment of this unit. These numbers are unique to this unit and not available to others. You should record requested information here and retain this guide as a permanent record of your purchase. Staple your receipt here.
| Date of purchase | : |
| Dealer purchased from | : |
| Dealer address | : |
| Dealer phone no. | : |
| Model no. | : |
| Serial no. | : |
▲ Important safety instruction
Before it is used, this refrigerator must be properly installed and located in accordance with the installation instructions in this document.
When moving your appliance away from the wall, be careful not to roll over the power cord or to damage it in any way.
After your refrigerator is in operation, do not touch the cold surfaces in the freezer compartment, particularly when your hands are damp or wet. Skin could adhere to these extremely cold surfaces.
Unplug the power cord from the power outlet for cleaning or other requirements. Never touch it with wet hands because you can get an electric shock or be hurt.
Never place glass products in the freezer because they may be broken due to expansion when their contents are frozen.
Never allow your hands within the ice storage bin of the automatic ice maker. You could be hurt by the operation of the automatic ice maker.
The appliance is not intended for use by young children or infirm persons without supervision.
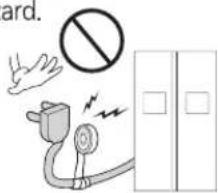
Don't use an extension cord
Accessibility of Supply Plug Supply Cord Replacement
If possible, connect the refrigerator to its own individual electrical outlet to prevent it and other appliances or household lights from causing an overload that could cause a power outage.
The refrigerator-freezer should be so positioned that the supply plug is accessible for quick disconnection when accident happens.
If the supply cord is damaged, it must be replaced by the manufacturer or its service agent or a similarly qualified person in order to avoid a hazard.
text_image
ard.⚠️ Important safety instruction
BASIC SAFETY PRECAUTIONS
This guide contains many important safety messages.
Always read and obey all safety messages.

This is the safety alert symbol. It alerts you to safety messages that inform your hazards that can kill or hurt you or others or cause damage to the product. All key messages will be preceded by the safety alert symbol and the hazard signal of DANGER, WARNING, or CAUTION. These words mean:

DANGER
You will be killed or seriously injured if you don't follow instructions.

WARNING
You can be killed or seriously injured if you don't follow instructions.

CAUTION
Indicates an imminently hazardous situation which, if not avoided, may result in minor or moderate injury, or product damage only.
All safety messages will identify the hazard, tell you how to reduce the chance of injury, and tell you what can happen if the instructions are not followed.

WARNING
To reduce the risk of fire, electric shock, or injury to persons when using your product, basic safety precautions should be followed, including the following.
Read all instructions before using this appliance.
1. When connecting the power
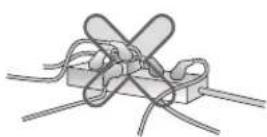
The dedicated outlet should be used.
• Using several devices at one outlet may cause fire.
Do not allow the power plug to face upward or to be squeezed at the back of the refrigerator.
Water may be flown into or the plug may be damaged, which causes fire or electric shock.
Do not allow the power cord bent or pressed by the heavy object to be damaged.
It may damage the power cord to cause fire or electric shock.
Do not extend or modify the length of the power plug. It causes electric shock or fire by the electric damage of the power cord or others.
Unplug the power plug when cleaning, handling or replacing the interior lamp of the refrigerator.
• It may cause electric shock or injury.
- When replacing the interior lamp of the refrigerator, make sure that the rubber ring for preventing the electric spark within the socket is not taken off.
natural_image
Cartoon illustration of a smiling cardboard box character with arms and legs, waving and reacting (no text or symbols)
Do not pull out the cord or touch the power plug with wet hands.
- It may cause electric shock or injury.
Remove water or dust from the power plug and insert it with the ends of the pins securely connected.
Dust, water or unstable connection may fire or electric shock.
Make sure of grounding.
Consult a qualified electrician or service person if the grounding instructions are not completely understood, or if you have doubts on whether the appliance is properly grounded.
The incorrect grounding may cause breakdown and electric shock.
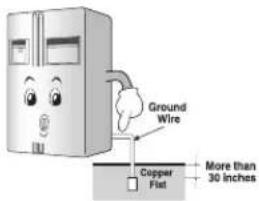
text_image
Ground Wire Copper Fiat More than 30 inchesWhen the power cord or the power plug is damaged or the holes of the outlet are loosed, donot use them.
It may cause electric shock or short circuit to make fire.

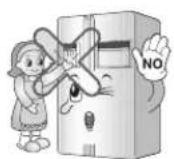
2. When using the refrigerator
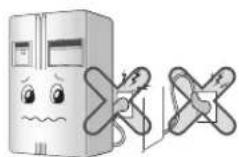
Do not place the heavy object or the dangerous object (container with liquid) on the refrigerator.
It may be dropped to cause injury, fire or electric shock when opening or closing the door.
Do not install the refrigerator in the wet place or the place which water or rain splashes.
Deterioration of insulation of electric parts may cause electric leakage.
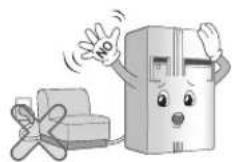
Do not cling to the door or the shelves of the door or the home bar of the freezer or the cool chamber.
It may make the refrigerator fallen down or damage the hands. Especially, do not allow the children to do the above.

natural_image
Illustration of a refrigerator and airplane with a crossed-out airplane, no text or symbols presentDo not use or store inflammable materials ether, benzene, alcohol, medicine, LP gas, spray or cosmetics near or in therefrigerator.
It may cause explosion or fire.
natural_image
Cartoon illustration of a smiling cardboard box character and a flying drone (no text or symbols)Do not use drier to dry the inside, nor light a candle to remove door.
It may cause explosion or fire.
Do not insert the hands into the ice bucket or the ice dispenser.
(only for the model with the dispenser).
Operating the ice maker may cause injury.
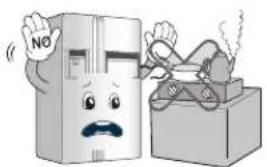
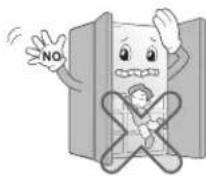
Do not store the medicine or the academic materials at the refrigerator.
When the material with the strict temperature control is stored, it may be deteriorated or it may make an unexpected reaction to cause any risk.

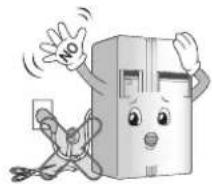
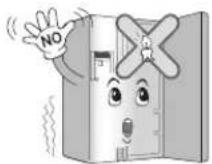
natural_image
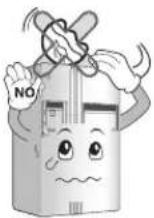
Cartoon illustration of a distressed refrigerator with a sad face and 'NO' sign, accompanied by a crossed-out box (no text or symbols on the refrigerator itself)Do not use the combustible spray near the refrigerator.
Do not store explosive substances such as aerosol cans with a flammable propellant in this appliance.
It may cause fire.
Install in places away from the fire such as the place where flammable gas is leaked.
It may cause fire.
natural_image
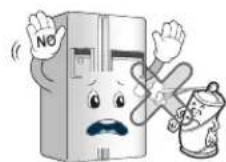
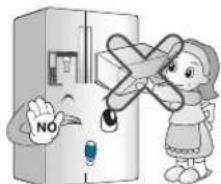
Cartoon illustration of a distressed refrigerator with a 'NO' sign and a gift box (no text or symbols on the main image)Supply the automatic ice maker with drinkable water only (only for the model with the dispenser).
Otherwise, it may cause any risk.
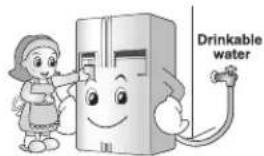
text_image
Drinkable waterDo not place flower vase, cup, cosmetics, medicine or any container with water on the refrigerator.
It may cause fire, electric shock or injury by dropping down.
Use the submerged refrigerator after checking it. It may cause electric shock or fire.
natural_image
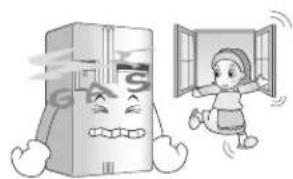
Cartoon illustration of a smiling refrigerator with a child walking nearby (no text or symbols)When gas is leaked, do not touch the refrigerator or the outlet and ventilate the room immediately.
• The explosion by spark may cause fire or burn.
- Because this refrigerator uses natural gas (R600a) as the environment-friendly refrigerant, even a small amount (80\~90g) is combustible. When the gas is leaked by the severe damage during delivering, installing or using the refrigerator, any spark may cause fire or burn. (Only for the model with the R600a.)
natural_image
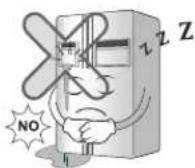
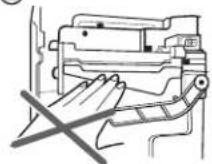
Cartoon illustration of a distressed refrigerator and a child running away from a window (no text or symbols)Do not move refrigerator while the compressor is operating.
Compressor may occur a temporary rattling noise. (This is normal and will not impact on the performance or the life of the compressor. The rattling will stop after the refrigerator comes to a rest.)
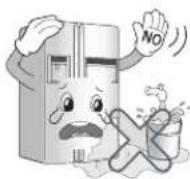
Do not spray water at the outside or the inside of the refrigerator or do not clean it with benzene or thinner.
Deterioration of insulation of electric parts may cause electric shock or fire.
natural_image
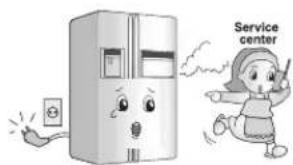
Cartoon illustration of a smiling book character and a girl holding a book, no text or symbols presentWhen any strange smell or smoke is detected from the refrigerator, disconnect the power plug immediately and contact to the service center. It may cause fire.
text_image
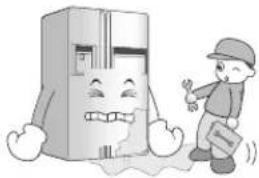
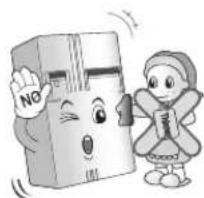
Service centerDo not allow any person except the qualified engineer to disassemble, repair or alter the refrigerator.
It may cause injury, electric shock or fire.
natural_image
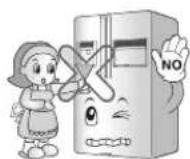
Cartoon illustration of a person running away from a refrigerator with a 'NO' sign, no text or symbols presentDo not use the refrigerator for non-domestic purpose (storing medicine or testing material, using at the ship, etc.).
It may cause an unexpected risk such as fire, electric shock, deterioration of stored material or chemical reaction.
natural_image
Cartoon illustration of a smiling book character with arms and legs crossed out, no text or symbols present.When disposing the refrigerator, remove the packing materials from the door or take off the doors but leave the shelves in place so that children may not easily climb inside.
It may cause to lock out the child.
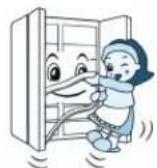
Install the refrigerator on the solid and level floor. Installing it on the unstable place may cause death by falling down the refrigerator when opening or closing the door.
Do not insert the hands or the metal stick into the exit of cool air, the cover, the bottom of the refrigerator, the heatproof grill (exhaust hole) at the backside.
It may cause electric shock or injury.
When you want to dispose the refrigerator, contact to the down-block office.
When you want to dispose the large living waste such as electric home appliance and furniture, you'd better contact the local down-block office.

natural_image
Cartoon illustration of a distressed cardboard box character with arms and legs crossed (no text or symbols)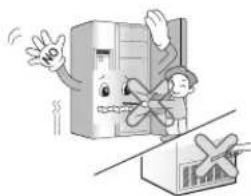
natural_image
Cartoon illustration of a person standing beside a large refrigerator and a cardboard box, with no visible text or symbols.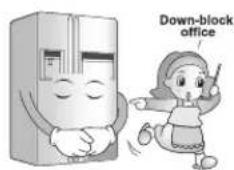
text_image
Down-block officeCAUTION
Violating this direction may cause injury or damage house or furniture. Always be careful, please.
Do not touch food or containers at the freezer with wet hands.
It may cause frostbite.
Do not put ice in thin crystal cup or ceramic ware.
It may break cup or ceramic ware to cause injury.
When the electricity is off, remove ice from the ice bucket (only for the model with the dispenser).
The long-time power failure may thaw ice to damage the floor. When the long-time power failure is expected, remove ice from the ice bucket.
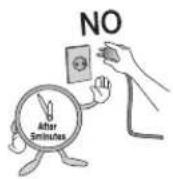
Wait for 5 minutes or longer when reconnecting the plug.
It may cause the operation of the freezer to fail.
Do not put bottle in the freezer.
It may freeze the contents to break the bottle to cause injury.
Do not place glass containers, bottles or cans (especially those containing carbonated drinks) in the freezer compartment, shelves or ice bin that will be exposed to temperatures below freezing.
Pull out the power plug not by grasping the cord but the plug of its end.
It may cause electric shock or short circuit to fire.
Do not install the refrigerator in the wet place or the place which water or rain splashes.
Deterioration of insulation of electric parts may cause electric leakage.
Do not insert the hands into the bottom of the refrigerator.
The iron plate of the bottom may cause injury.
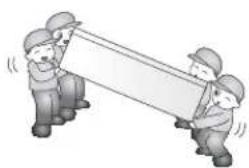
Carry the refrigerator with the handle bar at the bottom of the front and the top of the rear.
Otherwise, your hands may be slipped to cause injury. Because the product is heavy, carrying it alone may hurt people or accidents may occur.
Because opening or closing the door of the refrigerator may cause injury to the person around it, be careful, please.
Opening or closing the door may cause feet or hands to be caught in the chink in door or the child to be get hurt by the corner.
Do not put any living animal in the refrigerator.

natural_image
Illustration of three workers in hard hats pulling a large rectangular object (no text or symbols)
natural_image
Cartoon illustration of a refrigerator with a child reacting to its absence, showing no text or symbols on the refrigerator itself.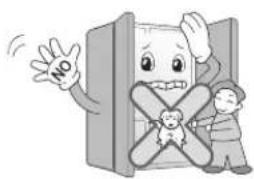
natural_image
Cartoon illustration of a smiling character with a crossed X shape and two children, no text or symbols present.WARNING
1. When connecting the power
Prevent the power cord from being squeezed or imprinted if the refrigerator is pushed in after the power plug is extracted during the installation.
When moving your appliance away from the wall, be careful not to roll over or damage the power cord.
It becomes the cause of fire or electric shock.
Be sure to use grounded exclusive proper voltage consent for the power plug.
It becomes the cause of fire.
If the supply cord is damaged, it must be replaced by the manufacturer or its service agent or a similarly qualified person in order to avoid any hazard.
2. When using the refrigerator
Prevent children from entering the product.
It may endanger the life of a child if the child enters the refrigerator.
Opening and closing the door of the refrigerator vigorously may cause the stored food in the refrigerator basket to fall by shock and hurt the foot, so take precautions.
Do not put heavy things on the Home Bar. (Only for the models with the Home Bar)
Falling objects may hurt people.
text_image
NOIn case of thunder and lightning, or not in use for a long period of time, detach the power plug.
There is a danger of electric shock or fire.
natural_image
Cartoon illustration of a smiling refrigerator with arms and legs, waving (no text or symbols)CAUTION
Do not insert the hands into the ice bucket or the ice dispenser.
Operating the ice maker may cause injury.
Do not remove the cover of the automatic ice maker. (Only for the models with automatic ice maker)
The operation mechanic parts of the ice maker may hurt people.
Do not place the food in disorder inside the refrigerator.
The food may fall during opening and closing the door of the refrigerator and hurt people.

CAUTION
This appliance is not intended for use by persons (including children) with reduced physical, sensory or mental capabilities, or lack of experience and knowledge, unless they have been given supervision or instruction concerning use of the appliance by a person responsible for their safety.

WARNING
Children should be supervised to ensure that they do not play with the appliance. If the appliance is equipped with a lock (some countries only), keep the key out of reach of children.
Keep ventilation openings, in the appliance enclosure or in the built-in structure, clear of obstruction.
Do not use mechanical devices or other means to accelerate the defrosting process, other than those recommended by the manufacturer.
Do not damage the refrigerant circuit.
Do not use electrical appliances inside the food storage compartments of the appliance, unless they are of the type recommended by the manufacturer.
The refrigerant and insulation blowing gas used in the appliance require special disposal procedures. When disposal, please consult with service agent or a similarly qualified person.

Ambient Temperature
This appliance contains a small amount of isobutane refrigerant (R600a), natural gas with high environmental compatibility, but it is also combustible. When transporting and installing the appliance, care should be taken to ensure that no parts of the refrigerating circuit are damaged. Refrigerant squirting out of the pipes could ignite or cause an eye injury. If a leak is detected, avoid any naked flames or potential sources of ignition and air the room in which the appliance is standing for several minutes.
In order to avoid the creation of a flammable gas air mixture if a leak in the refrigerating circuit occurs, the size of the room in which the appliance may be sited depends on the amount of refrigerant used. The room must be 1 m^2 in size for every 8g of R600a refrigerant inside the appliance. The amount of refrigerant in your particular appliance is shown on the identification plate inside the appliance. Never start up an appliance showing any signs of damage. If in doubt, consult your dealer.
The appliance is designed to operate within a limited range of ambient temperatures, depending on the climate zone. Do not use the appliance at a temperature exceeding the limit.
The internal temperatures could be affected by the location of the appliance, the ambient temperature, the frequency of door opening and so on.
The climate class can be found on the rating label.
| Climate Class | Ambient Temperature Range °C |
| SN (Extended Temperate) | +10 - +32 |
| N (Temperate) | +16 - +32 |
| ST (Subtropical) | +16 - +38 |
| T (Tropical) | +16 - +43 / +10 - +43* |
*Australia, India, Kenya
NOTE
- The appliances rated from SN to T are intended to be used at an ambient temperature between 10^ and 43^ .
Child entrapment warning
Don't store
Grounding (Earthing)
WARNING : Risk of child entrapment.
Before you throw away your old refrigerator or freezer:
Take off the doors but leave the shelves in place so that children may not easily climb inside.
The appliance is not intended for use by young children or infirm persons without supervision.
Young children should be supervised to ensure that they do not play with the appliance.
Don't store or use gasoline or other flammable vapor and liquids in the vicinity of this or any other appliance.
In the event of an electric short circuit, grounding (earthing) reduces the risk of electric shock by providing an escape wire for the electric current.
In order to prevent possible electric shock, this appliance must be grounded improper use of the grounding plug can result in an electric shock. Consult a qualified electrician or service person if the grounding instructions are not completely understood, or if you have doubts on whether the appliance is properly grounded.
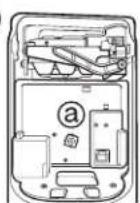
Identification of parts
text_image
Freezer Compartment Refrigerator Compartment Automatic Icemaker Lamp Shelf Process of freezing occurs the fastest on the marked shelf Shelf Shelf Shelf Drawer Door Rack Door Rack Drawer Refreshment Center (Optional) Lamp Shelf Wine Rack (Optional) Hygiene Fresh (Optional) Shelf Snack Drawer(Optional) Shelf Non Plumbing Ice & Water (Optional) Shelf (Optional) Fresh Vegetable Drawer/ Vegetable Drawer(Optional) Vegetable Drawer Door Rack
text_image
Type-1 Refreshment center (Optional) Type-2 Dairy corner Door rack Door rackNOTE
- Parts, features, and options vary by model. Your model may not include every option.
Select a good location
Where to Install
- Place your appliance where it is easy to use.
- Avoid placing the unit near heat sources, direct sunlight or moisture.
- To ensure proper air circulation around the fridge-freezer, please maintain sufficient space on both the sides as well as top and maintain at least 2 inches (5 cm) from the rear wall.
- To avoid vibrations, the appliance must be leveled.
- Don't install the appliance below 5°C. It may cause affect the performance.
- This appliance is intended to be used in household and similar applications such as staff kitchen areas in shops, offices and other working environments; farm houses and by clients in hotels, motels and other residential type environments; bed and breakfast type environments; catering and similar non-retail applications.
- After installing the appliance, connect the power plug into a socket outlet. Before moving and discarding the appliance, disconnect the plug from the socket outlet.
Disposal of the old appliance
This appliance contains fluid (refrigerant, lubricant) and is made of parts and materials which are reusable and/or recyclable.
All the important materials should be sent to the collection center of waste material and can be reused after rework (recycling). For take back, please contact with the local agency.
Dimensions and Clearances
Too small of a distance from adjacent items may result in degradation of freezing capability and increased electricity costs. Allow over 50mm clearance from each adjacent wall when installing the appliance.
text_image
A B C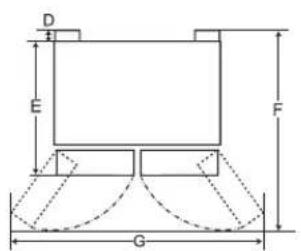
text_image
D E F G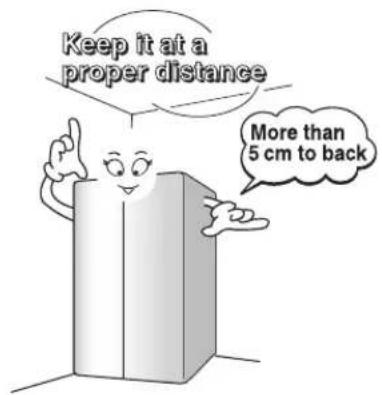
text_image
Keep it at a proper distance More than 5 cm to back| - Size | |
| A 912 mm | |
| B 1790 mm | |
| C 738 mm | |
| D 10 mm | |
| E 728 mm | |
| F | 1180 mm |
| G | 1750 mm |
How to disassemble the filter
How to exchange the water purifier filter (Only applies to internal type filter model)
It is recommended that you replace the water filter:
• Approximately every six months.
- When the water filter indicator turns on.
- When the water dispenser output decreases.
- When the ice cubes are smaller than normal.
natural_image
Pure technical line drawing of a mechanical component without any text, numbers, or symbolsHow to exchange
1 Remove the old water filter.
Lower or remove the top left shelf to allow the water filter to rotate all the way down.
natural_image
Illustration of a hand holding a cup with a bandage, no text or symbols presentPinch the sides to open the water filter cover.
NOTE: Replacing the water filter causes a small amount of water (around 1 oz. or 25 cc) to drain. Place a cup under the front end of the water filter cover to collect any leaking water. Hold the water filter upright, once it is removed, to prevent any remaining water from
spilling out of the water filter.
Pull the water filter downward and turn it counterclockwise to pull it out. Make sure to rotate the filter down completely before pulling it out of the manifold hole.
natural_image
Technical line drawing of a mechanical component or tool (no text or symbols visible)2 Replace with a new water filter.
Take the new water filter out of its packing and remove the protective cover from the orings. With water filter tabs in the horizontal position, push the new water filter into the manifold hole until it stops.
natural_image
Illustration of a medical device being inserted into a device, showing internal components and a close-up view (no text or symbols)Rotate the water filter up into position and close the cover. The cover will click when closed correctly.
natural_image
Technical line drawing of a mechanical device with two views (top and side), no text or symbols present.3 After the water filter is replaced, dispense 9.5 L of water (flush for approximately five minutes) to remove trapped air and contaminants from the system. Do not dispense the entire 9.5 L amount continuously. Depress and release the dispenser pad for cycles of 30 seconds ON and 60 seconds OFF.
CAUTION
• DO NOT operate refrigerator without water filter.
The other functions
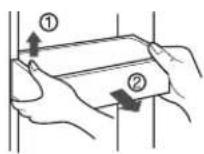
No Plumbing Ice & Water (Applicable to some models only)
You can use the Automatic ice maker and Water Dispenser function without having to connect an external water pipe to the refrigerator. The refrigerator uses an internal water tank located on the refrigerator inner case to supply water for these functions.
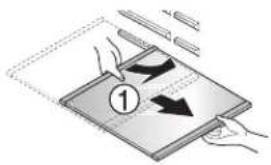
To remove the water tank:
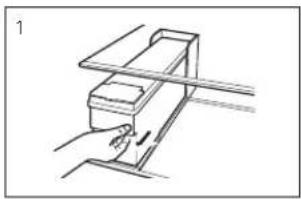
Please pull the water tank as shown in Figure (1). Please be careful when you move the water tank.
To fill the water tank:
Please open the cover of the water tank and then fill with water. Fill water up to the marked line (4 liters) as shown in Figure (2-a). Once water has been filled up, make sure to close the tank cover firmly. You can also pull out the water tank, open the cap and then fill with water as shown in Figure (2-b). (In case you use the cap to fill with water, make sure you pull out the water tank without fail as shown in Figure (2-b).)
To refit the water tank:
When you have to place the water tank in a refrigerator, please position and then push it as shown in Figure (3).
NOTE: If the tank is not inserted correctly, water will leak from the pick up nozzle onto the shelf. Always wait 15 seconds after dispensing water before attempting to remove the water bottle for filling or cleaning.
natural_image
Simple line drawing of a mechanical device with no text or symbols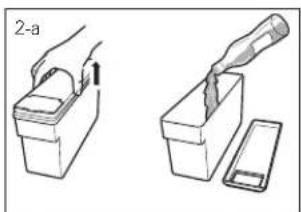
text_image
2-a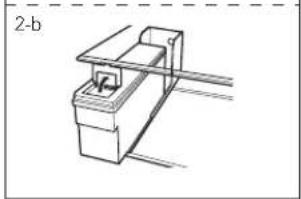
natural_image
Simple line drawing of a mechanical device with no text or symbols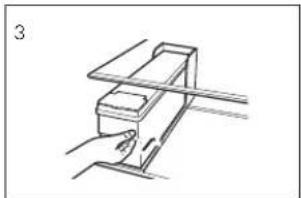
natural_image
Simple line drawing of a hand holding a rectangular object on a horizontal surface (no text or symbols)NOTE
- When assembling or disassembling the water tank, be careful not to apply excessive force as it can damage the water tank.
- If there is no water in the water tank, you will not be able to use the Auto Ice Maker function and Water Dispenser function.
- Using other liquid besides water can cause problems to the pump. When the water in the water tank is low, the size of the ice cubes may become smaller.
- It's a good idea to clean out the water initially before filling it with water and placing it into position.
- The method of using the Dispenser and Ice Maker is the same as other common Dispenser models.
- Because the water tank can get heavy, don't let children use or hold the water tank, especially with one hand.
- As the ice maker uses water from the water tank, you may hear the water pump operating 8\~10 times per day.
WARNING
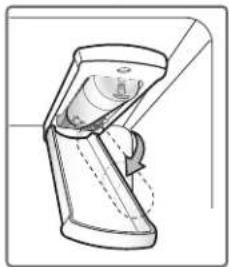
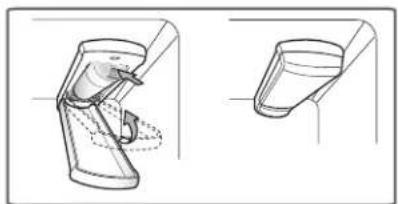
Door removal
If your entrance door is too narrow for the refrigerator to pass through, remove the refrigerator doors and move the refrigerator sideways through the doorway.
text_image
Diagram illustrating a mechanical assembly process with labeled steps and illustrations of tool positioning■ Electric Shock Hazard
Disconnect electrical supply to refrigerator before installing. Failure to do so could result in death or serious injury.
- Use two or more people to remove and install the refrigerator doors. Failure to do so can result in back or other injury.Disconnect the electrical supply to the refrigerator before installation. Failure to do so could result in serious injury or death.
- Do not put hands, feet or other objects into the air vents or bottom of the refrigerator. You may be injured or receive an electrical shock.
■ Be careful when handling the hinge and stopper. You may be injured
■ Remove food and bins before detaching the doors and drawers.
NOTE
If a tube end is deformed or abraded, cut the part away
Remove the freezer compartment door
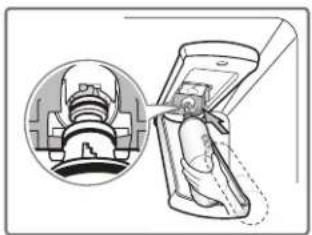
1) Removing the hinge cover, and Main PCB cover by loosening the screws. Separate all connection wires.
2) Remove the keeper by rotating it counter clockwise (①) and then lifting the upper hinge up (②).
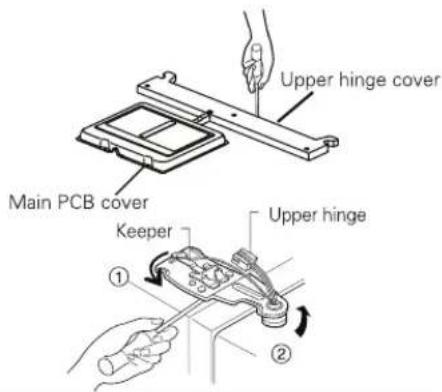
text_image
Upper hinge cover Main PCB cover Keeper Upper hinge ① ②CAUTION
When removing the upper hinge, be careful that the door does not fall forwards.
3) Remove the freezer compartment door by lifting it upward. This time, the door should be lifted enough for the feed water pipe tube to be completely pulled out.
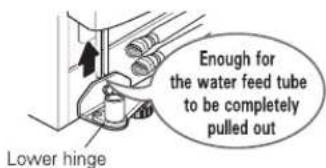
text_image
Lower hinge Enough for the water feed tube to be completely pulled outCAUTION
Move the refrigerator compartment door passing through the access door and lay it down, but be careful not to damage the feed water pipe tube.
Remove the refrigerator door
1) Removing the hinge cover, and Main PCB cover by loosening the screws. Separate all connection wires.
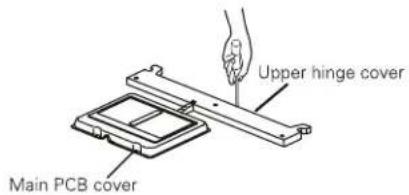
text_image
Upper hinge cover Main PCB cover2) Remove keeper by rotating it clockwise (①) and then remove the upper hinge by lifting it up (②).
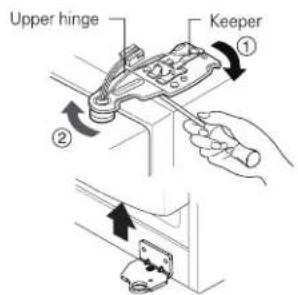
text_image
Upper hinge Keeper ① ②3) Remove the refrigerator compartment door by lifting it up.
Pass the refrigerator
Pass the refrigerator laterally through the access door as shown in the right figure.

natural_image
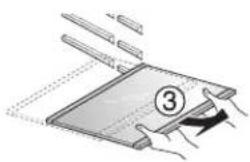
Illustration of a worker standing beside an open refrigerator in a tiled room (no text or symbols visible)Door replacement
Mount them in the reverse sequence of removal after they pass through the access door.
Feed water pipe installation (Applicable to some models only)
Before installation
- Automatic ice maker operation needs water pressure of 147\~834 kPa (1.5\~8.5 kgf/cm ^2 ) (That is, an instant paper cup (180 cc) will be fully filled within 3 sec.).
- If water pressure does not reach the rating 147 kPa (1.5 kgf/cm ^2 ) or below, it is necessary to purchase a separate pressure pump for normal automatic icing and cool water feed.
- Keep the total length of the feed water pipe tube within 8 m and be careful for the tube not be bent. If the tube is 8 m or longer it may cause trouble in water feed owing to the drain water pressure.
■ Install the feed water pipe tube at a place free from heat.
WARNING
CAUTION
If the height of freezer compartment door is different from the height of Refrigerator compartment door
- Open the door and turn the hose to inner side. Guide Line is completely inserted when only one guide line is showing out of two
- Must be cut vertically when cutting the tube. (Leak Otherwise).
■ Water hoses are should be behind the leg to prevent the damage.
CORRECT
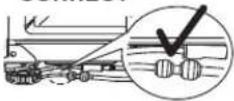


Not Straight
INCORRECT
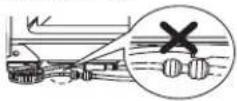

Damaged

Stretched
CORRECT
INCORRECT
■ Connect to potable water supply only. (for Plumbing Type)
■ Fill with potable water only. (for Non-Plumbing Type)
■ Refer to instructions with water filter kit for installation.
- The new hose-sets supplied with the appliance are to be used and that old hose-sets should not be reused.
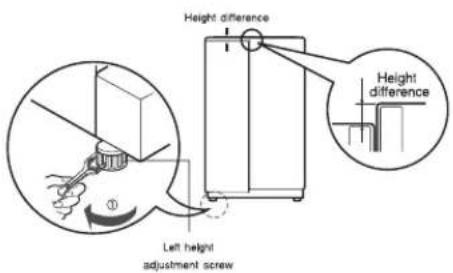
Height adjustment
If the freezer compartment door is lower than the refrigerator compartment door
Level the door by inserting flat (-type) driver into the groove of the left height adjusting screw and rotate it clockwise (①).
If the freezer compartment door is higher than the refrigerator compartment door
Level the door by inserting flat (-type) driver into the groove of the right height adjusting screw and rotate it clockwise (①).
text_image
Height difference Height difference Left height adjustment screw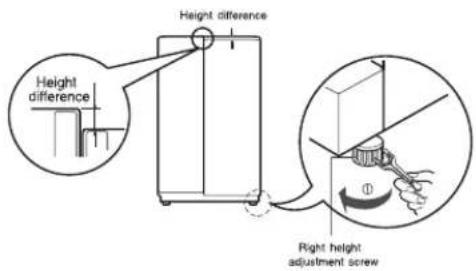
text_image
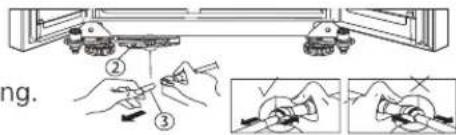
Height difference Height difference Right height adjustment screwDoor Alignment
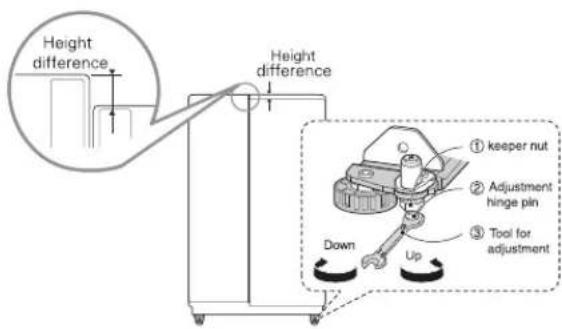
If the doors are still uneven after the refrigerator has been leveled, finish adjusting the doors by following the instructions below:
- Using a 19mm wrench, turn the keeper nut counterclockwise to loosen the keeper nut.
- Using a 8mm wrench, turn the adjustment hinge pin clockwise or counterclockwise to level the refrigerator door.
■After leveling the door, turn the keeper nut clockwise to tighten it.
text_image
Height difference Height difference ① keeper nut ② Adjustment hinge pin ③ Tool for adjustment Down UpCAUTION
Do not over tighten the door adjustment screw. The hinge pin can be pulled out (adjustable range of height is a maximum of 5 cm).
When the freezer door does not align with the height of the refrigerator door
Even if the height can not be aligned by using the height adjustment screw, insert the ring sheet supplied with the product.
- Open the door and lift it up with the lower height, use the (+) type screwdriver to unscrew the screw at the bottom hinge as shown at Figure ①, insert the ring sheet between the bottom hinge and the bottom bracket, and then fix it with the screw as shown at Figure ②.
- Insert more ring sheets enough to align the height. (4 sheets are supplied in total.)
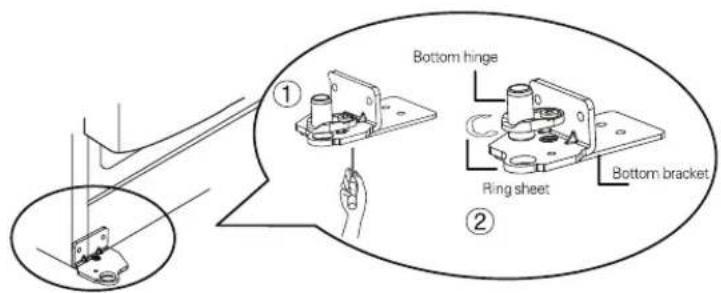
text_image
Bottom hinge Ring sheet Bottom bracket ① ②After leveling the door height
Next
The refrigerator doors will close smoothly by heightening the front side by adjusting the height adjusting screw. If the doors do not close correctly, performance may be affected.
- Wipe off all dust accumulated during shipping and clean your appliance thoroughly.
- Install accessories such as the ice cube box, cover evaporating tray, etc., in their proper places. They are packed together to prevent possible damage during shipping.
- Connect the power supply cord (or plug) to the outlet. Don't double up with other appliances on the same outlet.
Starting
When your refrigerator is first installed, allow it to stabilize at normal operating temperatures for 2-3 hours prior to filling it with fresh or frozen foods. If operation is interrupted, wait 5 minutes before restarting.
Adjusting the temperatures and functions
text_image
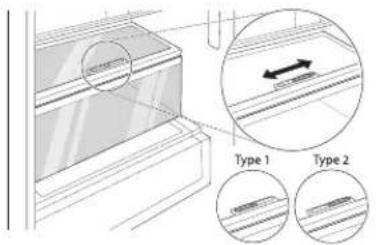
Refreshment Center (Applicable to some models only)| Optional | Function display board | Optional | Function display board |
| Type-1 | 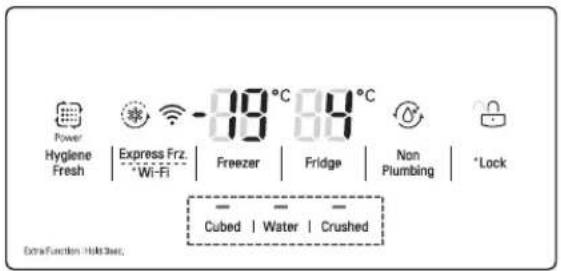 | Type-3 | 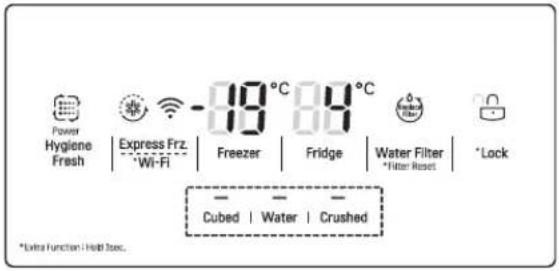 |
| Type-2 | 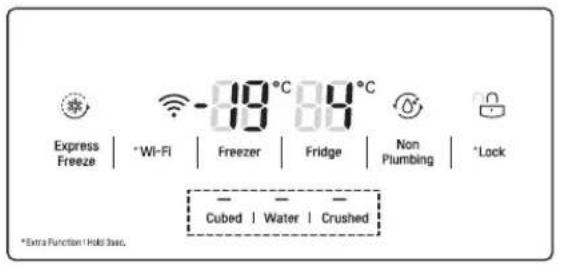 | Type-4 |  |
Note
How to adjust the temperature in the freezer compartment
How to adjust the temperature in the refrigerator compartment
Express freezer
Display Power Saving
The display will automatically turn off after 20 seconds for power saving.
You can adjust temperature of the freezer room and refrigerator room.
text_image
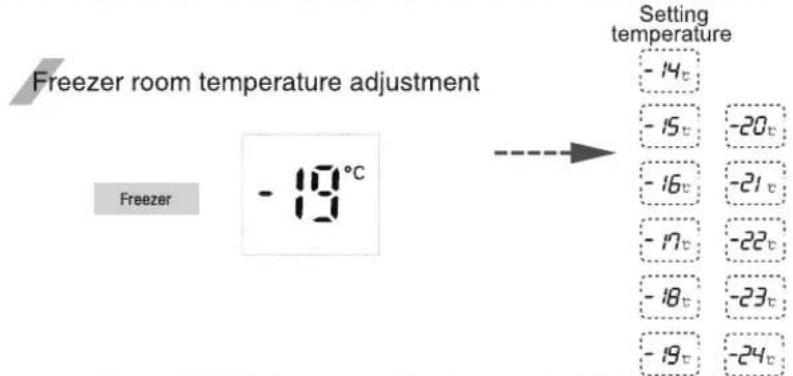
Freezer room temperature adjustment Freezer -18°C Setting temperature -14c -15c -20c -16c -21c -17c -22c -18c -23c -19c -24c※ Whenever pressing Freezer button, setting is repeated in the order of (-19^ -20^ ·s -24^ -14^ ·s -19^) . Setting

text_image
Refrigerator room temperature adjustment Fridge temperature 1 t 2 t 6 t 3 t 7 t 4 t 5 t※ Whenever pressing Fridge button, setting is repeated in the order of (4^ 3^ 2^ ·s 1^ 7^ 6^ ·s 4^) .
- The actual inner temperature varies depending on the food status, as the indicated seeing temperature is a target temperature, not actual temperature within refrigerator.
- Refrigeration function is weak in the initial time, Please adjust temperature as above after using refrigerator for minimum 2-3 days.
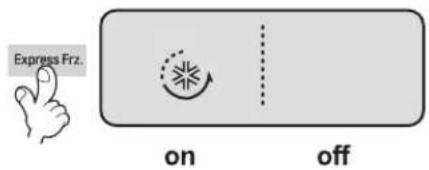
Please select this function for express freezer.
- "on" and "off" is repeated whenever pressing Express Frz. button.
- The arrow mark graphic remains at the "on" status when selecting Special Refrigeration "on".
- When Quick-freeze is "ON", press the button again to turn it off, or after a period of time the Quick-freeze function will turn off automatically after completion.
text_image
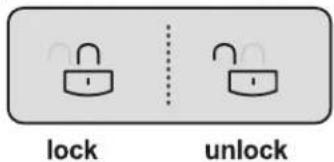
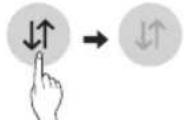
Express Frz. on offLock
This button stops operation of different button.
- Locking or Release is repeated whenever the button is pressed more than 3 seconds.
- When you use the Lock button, you can not use any other button, until you unlock the unit. When you press the other button when the unit is locked, the 🔔 will flash 3 times to
text_image
lock unlockNo Plumbing (Optional)
- When the water tank is installed correctly, the indicator light will turn on. Otherwise, the light will not turn on. - This button has no function.

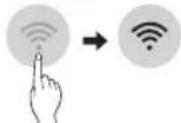
Setting Wi-Fi
The Wi-Fi button, when used with the LG Smart ThinQ application, allows the refrigerator to connect to a home Wi-Fi network.
- The Wi-Fi icon shows the status of the refrigerator's network connection. The icon illuminates when the refrigerator is connected to the Wi-Fi network. - Press and hold the Wi-Fi button for 3 seconds to connect to the network. The icon blinks while the connection is being made, then turns on once the connection is successfully made.
Setting Hygiene Fresh (Optional)
Bacteria and odor inside the appliance can be minimized with the Hygiene Fresh function. However, the function is only effective for bacteria floating in the appliance, not bacteria adsorbed onto food.
• Each time you press the Hygiene Fresh button, the Hygiene Fresh function mode will change to Auto → Power → Off → Auto alternatively.
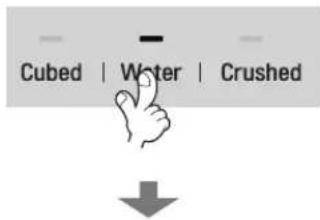
Dispenser use selection
You can select water or ice.
* Please select water, slice ice and square ice by pressing - button as you desire.
* Please press the push button lightly by catching and pushing in cup.
- The border line is indicated for the selected function,
- "Tak!" sounds if 5 seconds pass after ice comes out.
It is sound that the outlet of ice is closed.
■ Reference : Please wait for 2-3 seconds in order to take final ice slices or drops of water when taking out cup from the pressing switches after taking ice or water.
text_image
Cubed | Water | Crushed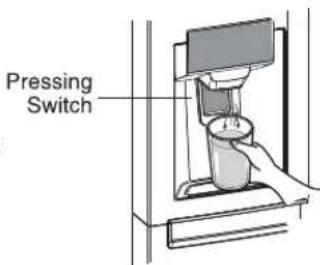
text_image
Pressing SwitchOperation
How ice/cold water is supplied
Water is cooled while stored in the water tank in the refrigerator compartment, and then sent to the dispenser.
Ice is made in the automatic ice maker and sent to the dispenser divided into crushed or cubed form ice.
NOTE
It is normal that the water is not very cold at first. If you want colder water, add ice into the glass.
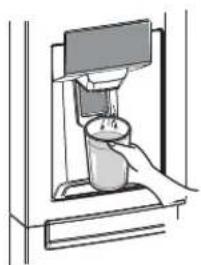
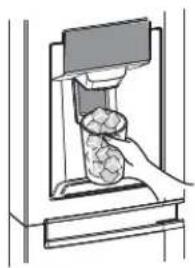
How to use dispenser
- Select one among crushed ice, water, and cubed ice and slightly press the push switch with a glass or other container.
Water
Light the water indicating lamp by pressing the selection button.
Water will be dispensed by pressing the push switch with a glass.
Cubed ice
Light the cubed ice indicating lamp by pressing the selection button.
Cubed ice will be dispensed by pressing the push switch with a glass.
Crushed ice
Light the crushed ice indicating lamp by pressing the selection button.
Crushed ice will be dispensed by pressing the push switch with a glass.
natural_image
Illustration of a hand pressing down a small object into a container (no text or symbols visible)
natural_image
Illustration of a hand pressing a textured object into a machine (no text or symbols visible)
natural_image
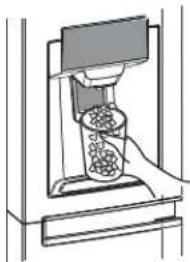
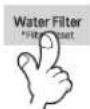
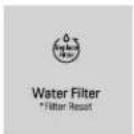
Diagram of a mechanical device with a handle and internal components (no text or symbols visible)Filter condition (filter replacement cycle) display function (Optional)
- There is a replacement indicator light for the water filter cartridge on the dispenser.
- The water filter should be replaced every six months.
■ The filter light comes on to let you know when to replace filter.
■ After replacing the filter, press and hold the filter button more than 3 seconds to reset the indicator. - Please contact with the local service center if you need to replace filter.
The other functions
Door open warning
- 3 times of warning sounds at the interval of 30 seconds if a minute passes with the door of refrigerator and the hombar door opened or completely closed.
- Please contact with the local service center if warning continue to sound even after closing the door.
When ice maker does not operate smoothly
Automatic icemaker
Diagnosis (failure detection) function
- Diagnosis function automatically detects failure when failure is found in product during the use of refrigerator.
- If failure occurs at product, it does not operate though pressing any button and normal indication is not done. In this case, do not turn power off but immediately contact with the local service center. A lot of time are need for service engineer to detect the failed part if turning it off.
Ice is lumped together
- When ice is lumped together, take the ice lumps out of the ice storage bin, break them into small pieces, and then place them into the ice storage bin again.
- When the ice maker produces too small or lumped together ice, the amount of water supplied to the ice maker need to adjusted. Contact the service center.
※ If ice is not used frequently, it may lump together.
Power failure
- The ice in ice storage bin may melt and the melt water may flow to the freezer compartment. Take the ice storage bin out and discard all the ice, dry it and the freezer compartment. Then replace back the ice storage bin.
The unit is newly installed
- It takes about 12 hours for a newly installed refrigerator to make ice in the freezer compartment.
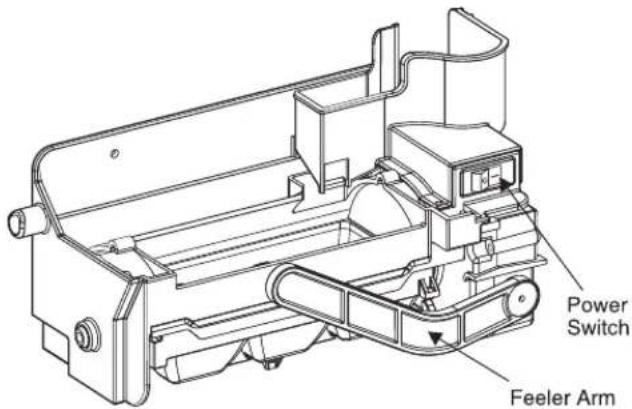
text_image
Power Switch Feeler Arm- The automatic icemaker can automatically make 6 cubes at a time, 50\~60 pieces per day. This quantity may vary by circumstance, including ambient temperature, door opening, freezer load, etc.
- Icemaking stops when the ice storage bin is full.
- If you don't want to use the automatic icemaker, turn the icemaker switch to OFF. If you want to use automatic icemaker again, change the switch to ON.
WARNING
- The sound produced when the ice drops into the ice storage bin is normal, and is not caused by a defect.
- Do not press the test button continuously when the tray is filled with ice or water – Water may overflow or ice jamming may occur.
- When the bucket is not installed, the ice maker does not work.
- Do not put your hands into the Ice maker during operation. You may injure yourself.
- Do not store ice (cubes) for longer than two weeks., they can cause the dispenser to malfunction as the ice cubes clump together.
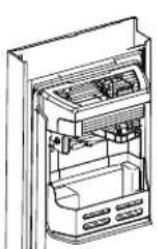
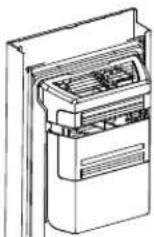
Freezer Compartment
If a large quantity of food is to be placed in the freezer compartment.
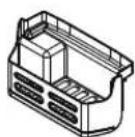
- The drawer of freezer compartment shall be taken out of the appliance and the food can be stacked directly on the drawer cover & bottom of freezer compartment.
- Freezer compartment provides drawer cover on default to maximize food storage capacity. And also the drawer is provided to convenient usage for watery meat or half-liquid state food.
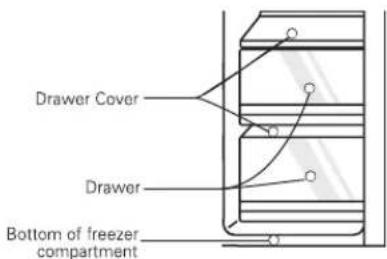
text_image
Drawer Cover Drawer Bottom of freezer compartmentIce maker basket
- When you don't use the ice maker, please put on the ice maker basket ① and turn off the ice maker by the swith, then remove all the ice in the bucket ice.
- When you use the ice maker, please remove the ice maker basket from door and keep it in the door basket or other place, and put on the ice maker ②.
①
②
For more space(Applicable to some models only)
For more space, you can store food with ice maker basket instead of the ice bucket, and remove the cover-ice maker.
A declared storage volume of freezer compartment is calculated with "ice maker basket" positioned and "cover-ice maker" removed.
Ice maker basket
Cover-ice maker
CAUTION
Throw away the ice (about 20 pieces) and water (about 7 glasses) first made after refrigerator installation.
The first ice and water may include particles or odor from the feed water pipe or feed water box. This is necessary in case that the refrigerator has not been used for a long time.
Keep children away from the dispenser.
Children may push switch incorrectly bad or damage lamps.
Be careful that food is not block the ice passage.
If foods are placed at the entrance of ice passage, ice may not be dispensed. The ice passage may also be covered with ice powder if splinter ice is used only. This time, remove the ice powder accumulated.
Never store beverage cans or other foods in ice storage bin for the purpose of rapid cooling.
Such actions may damage the automatic ice maker.
Never use thin crystal glass or crockery to collect ice.
Such glasses or containers may be broken.
Put ice first into a glass before filling water or other beverages.
Water may be splashed if ice is added to existing liquid in a glass.
Never touch a hand or other tools on ice outlet.
Touch may cause a part breakage or hand injury.
Sometimes level the surface so that the ice storage bin is fully filled with ice.
Ice is piled up just near the ice maker. So, such status may be considered, by the ice maker, that the ice storage bin is fully filled and ice making operation may stop.
If discolored ice is dispensed, immediately contact service center, stopping use.
Never use too narrow or deep glass.
Ice may be jammed in ice passage and, thus, the refrigerator may be failed.
Keep the glass at a proper distance from ice outlet.
A glass too close to the outlet may hinder ice from coming out.
If power is cut for long time, please remove the ice in ice storage bin.
When power is cut for long time, the ice in ice storage bin may melt and the melt water may flow out of the refrigeration. And then it may damage the floor. So please remove all the ice in ice storage bin before power is cut off or going out for long time.
Precautions when using the dispenser (on some model)
To get cold water
The dispensed water will not be icy cold, but just cool or cold. If you want colder water, dispense ice before dispensing water.
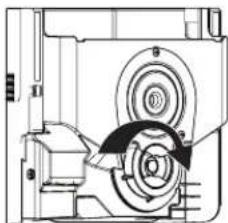
If you have difficulty in replacing the ice storage bin
Rotate the rotary gear in 1/4 cycle as shown in the illustration and then push it back.
natural_image
Technical line drawing of a mechanical assembly with no visible text or symbols
WARNING
How to use the Home Bar
When the ice dispenser will not operate properly
It is normal that the ice maker will not operate correctly when there is only a small amount of ice left in the storage bin. Allow approximately one day for the ice maker to restock.
If the ice forms into a solid lump and interrupts the operation of the automatic ice maker mechanism, remove the ice storage bin, separate the ice, discard the inseparable ice, and put the usable ice pieces back into the bin. The intermittent dispensing of ice is normal. However, since ice may get stuck and block the ice chute, regularly check the ice chute and clear any obstacles.
①
natural_image
Line drawing of a hand holding a device inside a car intake cabin (no text or symbols)②
natural_image
Line drawing of a hand pressing down on a mechanical component (no text or symbols)NOTE
• Figure depends on model.
- Never insert your hand or any other object into the ice chute as this may damage dispenser parts or cause injury to the hand.
- If ice is discoloured, stop using the dispenser and call the service centre.
- Do not touch the blade ① a as it may injure the hand.
- Never insert your hands into the ice maker during operation. It may cause injury②.
- Do not allow your children to hang off the ice dispenser or the ice storage bin. This could cause injury.
①
②
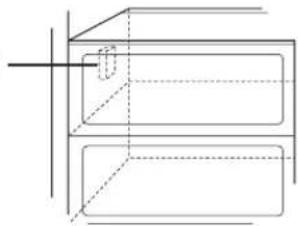
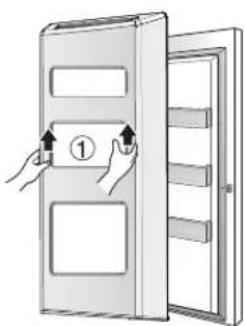
Refreshment center (Applicable to some models only)
- Press and hold the lever at the bottom left of the crisper until you hear a clicking sound.
- With more storage space you can store more food.
- With more storage space, you can store various types of food.

text_image
Diagram illustrating the step of installing a refrigerator door panel, showing hand positioning and open storage.How to use
How to disassemble
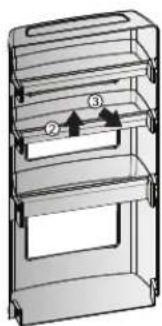
Shelf
You can store side dish or refrigerated food on the shelf with sufficient space in between the containers.
- Hold the rear part of the shelf slightly up and pull it forward.
- Lift the shelf slightly up after pulling it half way.
- While holding the shelf slightly, tilt the shelf to pull it out.
text_image
Diagram illustrating a device's rotation and movement process with labeled arrows and numbered step 1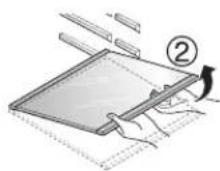
natural_image
Illustration of a person folding a flatboard with a numbered label (3), no text or symbols present.Two stars section (Applicable to some models only)
- Two stars section means the space stored at -12^ -18^ .
■ Freezer foods for short-terms storage.
How to use the Hygiene fresh
WARNING
Wine holder adjustment
LED indicator (Freezer/Refrigerator)
When the indicator is operating in refrigerator
- When the freezer/refrigerator door is opened, The built-in LED indicator will light up.
* This LED indicator will light up when the freezer/refrigerator or Home bar door is opened.
* This LED indicator can be used semi-permanently.
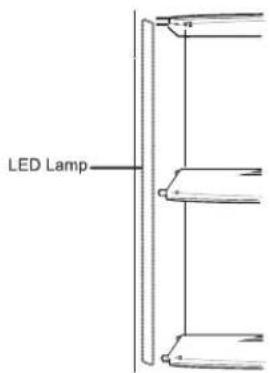
text_image
LED LampHygiene fresh (Applicable to some models only)
- Hygiene fresh is already installed on the refrigerator wall, so installation is not needed.
- Please use containers with tight lids to place spicy food. Otherwise the odor will be absorbed by other food.
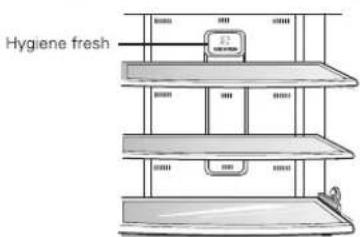
text_image
Hygiene fresh- Do not place your fingers or foreign objects into the fan of the filter to avoid injury or launch accidentally.
Wine holder (Applicable to some models only)
Bottles can be stored laterally with this wine rack.

Egg box (Applicable to some models only)
You can move the egg box to wherever you want.
Type-1
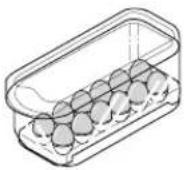
Type-2
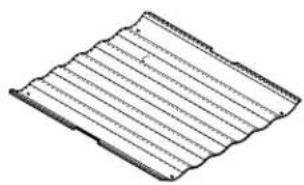
natural_image
Pure diagram of a corrugated metal sheet with no text or symbolsCAUTION
- Never use the egg box as an ice storage bin. It can be broken.
- Never store the egg box in the freezer compartment or fresh compartment.
Deodorizer (Applicable to some models only)
This system efficiently absorbs strong odors by using the optical catalyst. This system does hot have any affect on stored food.
Deodorizing system
natural_image
Pure technical line drawing of a 3D rectangular block with internal dashed lines and a central slot, no text or symbols present.Using the Fresh Vegetable Drawer (Applicable to some models only)
Vegetable compartment can adjust the humidity by moving the knob. If moved to the left side, cover and tray are opened, and if moved to the right side, cover and tray are closed therefore, it can maintain the humidity. Closed state is recommended for keeping vegetables, and open state is recommended for keeping fruits.
text_image
Type 1 Type 2Wine holder
Freezer compartment shelf
Freezer compartment door rack
Freezer compartment drawer
Milk product corner
Egg box
Refreshment center
Refrigerator compartment shelf
Refrigerator compartment door rack
Vegetable drawer
Location of foods
(Refer to identification of parts)
Store wine.
Store various frozen foods such as meat, fish, ice cream, frozen snacks, etc..
■ Store small packed frozen food.
■ Temperature is likely to increase as door opens. So, do not store long-term food such ice cream, etc..
■ Store meat, fish, chicken, etc.. after wrapping them with thin foil.
■ Store dry.
Store milk products such as butter, cheese, etc..
Place this egg box in the proper location.
Store foods of frequent use such as beverage, etc..
Store side dishes or other foods at a proper distance.
Store small packed food or beverages such as milk, juice, beer, etc..
Store vegetables or fruits.

text_image
Wine Fruit Seafood Cereal Food Dining Cock Meat Vegetables Milk Baked Goods Caterware Lack of Cakes Cultures Cultures Cultures Cultures CulturesFreezer compartment
Refrigerator compartment
Storing foods
- Store fresh food in the refrigerator compartment. How food is frozen and thawed is an important factor in maintaining its freshness and flavor.
- Do not store food which goes bad easily at low temperatures, such as bananas, and melons.
- Allow hot food to cool prior to storing, placing hot food in the refrigerator could spoil other food, and lead to higher energy consumption.
- When storing the food, cover it with vinyl wrap or store in a container with a lid. This prevents moisture from evaporating, and helps food to keep its taste and nutrients.
- Do not block air vents with food. Smooth circulation of chilled air keeps refrigerator temperatures even.
- Do not open the door frequently. Opening the door lets warm air enter the refrigerator, and cause temperatures to rise.
- Never keep too much food in door rack because they may push against by inner racks so that the door cannot be fully closed.
- Do not store bottles in the freezer compartment - they may break when frozen.
- Do not refreeze food that has been thawed. This causes loss of taste and nutrient.
- When storing frozen food like ice cream for a long period, place it on the freezer shelf, not in the door rack.
- Do not touch the cold foods or containers- especially made of metallic -, with wet hands and place glass products in the freezer compartment.
CAUTION
- That's why you may have chilblains and they may be broken when their inner matters are frozen, causing personal injury.
- Avoid placing moist food in top refrigerator shelves, it could freeze from direct contact with chilled air.
- Always clean food prior to refrigeration. Vegetables and fruits should be washed and wiped, and packed food should be wiped, to prevent adjacent food from spoiling.
- When storing eggs in their storage rack or box, ensure that they are fresh, and always store them in an upright position, which keeps them fresh longer.
NOTE
- If you keep the refrigerator in a hot and humid place, frequent opening of the door or storing a lot of vegetables in it may cause dew to form which has no effect on its performance. Remove the dew with dust cloth free from care.
- If there are chill compartments in the appliance, do not store vegetables and fruits with higher moisture content in the chill compartments as they may freeze due to the lower temperature.
- In the event of a blackout, call the electricity company and ask how long it is going to last.
-You should avoid door openings while the power is off.
-When the power supply gets back to normal, check the condition of the food.
How to dismantle parts
NOTE
- Dismantling is done in the reverse sequence of assembly. Be sure to unplug the power plug before dismantling and assembly. Never apply severe force to dismantle parts. Parts may be damaged.
Door rack and support
Lift the door rack holding both sides ① and pull it out to ② direction.
Ice storage bin
Hold the ice storage bin as shown in the right figure and pull it out ② while slightly lifting it ①.
- Do not dismantle the ice storage bin unless it is necessary.
■ Use both hands to remove the ice bin to avoid dropping it. (supporting it with left hand and holding it right hand).

text_image
Diagram showing a refrigerator interior with labeled parts and directional arrows indicating movement or change.After dispenser is used
The water collector has no self-draining function. It should be cleaned regularly.
natural_image
Technical line drawing of a mechanical assembly or housing component (no text or symbols)Disassembling the crisper (Optional)
text_image
Diagram showing hand positioning of a door with labeled component ①, indicating left-hand rule or assembly instructions.■ Lift the crisper ① and remove it from the door.
natural_image
3D diagram of a multi-tiered storage unit with labeled components (no text or symbols)■ After removal, raise the ② and pull out the ③ from the crisper.
Vacation time
Power failure
If you move
Anti condensation pipe
Exterior
Interior
After cleaning
WARNING
General information
During average length vacations, you will probably find it best to leave the refrigerator in operation. Place freezable items in freezer for longer life.
When you plan not to operate, remove all food, disconnect the power cord, clean the interior thoroughly, and leave each door OPEN to prevent odor formation.
Most power failures that are corrected in an hour or two will not affect your refrigerator temperatures.
However, you should minimize the number of door openings while the power is off. Remove or securely fasten down all loose items inside the refrigerator.
To avoid damaging the height adjusting screws, turn them all the way into the base.
The outside wall of the refrigerator cabinet may sometimes get warm, especially just after installation.
Don't be alarmed. This is due to the anti-condensation pipe, which pumps hot refrigerator to prevent "sweating" on the outer cabinet wall.
Cleaning
It is important that your refrigerator be kept clean to prevent undesirable odors. Spilled food should be wiped up immediately, since it may acidify and stain plastic surfaces if allowed to settle.
Use a lukewarm solution of mild soap or detergent to clean the durable finish of your refrigerator.
Wipe with a clean damp cloth and then dry.
For products with a stainless steel exterior, use a clean sponge or soft cloth and a mild Detergent in warm water. Do not use abrasive or harsh cleaners. Dry thoroughly with a Soft cloth. Do not use appliance wax, bleach, or other products containing chlorine on stainless steel.
Regular cleaning is recommended. Wash all compartments a baking soda solution or a mild detergent and warm water. Rinse and dry.
Please verify that the power cord is not damaged, power plug is not overheated, or power plug is well inserted into the power consent.
Always remove power cord from the wall outlet prior to cleaning in the vicinity of electrical parts (lamps, switches, controls, etc.).
Wipe up excess moisture with a sponge or cloth to prevent water or liquid from getting into any electrical part and causing an electric shock.
Never use metallic scouring pads, brushes, coarse abrasive cleaners, strong alkaline solutions, flammable or toxic cleaning liquids on any surface.
Do not touch frozen surfaces with wet or damp hands, because damp object will stick or adhere to extremely cold surfaces.
Notes for Operation
- If you are leaving the appliance turned off for an extended period of time, remove all food and unplug the power cord. Clean the interior, and leave the doors slightly ajar to prevent mold from growing in the appliance.
Suggestion for Energy Saving
- The automatic defrosting system in the appliance ensures that the compartment remains free of ice buildup under normal operating conditions.
Trouble shooting
Before calling for service, review this list. It may save you both time and expense. This list includes common occurrences that are not the result of defective workmanship or materials in this appliance.
| Occurrence | Possible cause | Solution |
| Running of refrigerator | ||
| Refrigerator compressor does not run. | Refrigerator control is off. | Set refrigerator control. See setting the controls. |
| Refrigerator is in defrost cycle. | This is normal for a fully automatic defrosting refrigerator. The defrost cycle occurs periodically. | |
| Plug at wall outlet is disconnected. | Make sure plug is tightly pushed into outlet. | |
| Power outage. Check house lights. | Call local electric company. | |
| Refrigerator runs too much or too long | Refrigerator is larger than the previous one you owned. | This is normal. Larger, more efficient units run longer in these conditions. |
| Room or outside weather is hot. | It is normal for the refrigerator to work longer under these conditions. | |
| Refrigerator has recently been disconnected for a period of time. | It takes some hours for the refrigerator to cool down completely. | |
| Large amounts of warm or hot food may have been stored recently. | Warm food will cause the refrigerator to run longer until the desired temperature is reached. | |
| Doors are opened too frequently or too long. | Warm air entering the refrigerator causes it to run longer. Open the door less often. | |
| Refrigerator or freezer door may be slightly open. | Make sure the refrigerator is level. Keep food and containers from blocking door. See problem section. OPENING/CLOSING of doors. | |
| Refrigerator control is set too cold. | Set the refrigerator control to a warmer setting until the refrigerator temperature is satisfactory. | |
| Refrigerator or freezer gasket is dirty, worn, cracked, or poorly fitted. | Clean or change gasket. Leaks in the door seal will cause refrigerator to run longer in order to maintain desired temperatures. | |
| Thermostat is keeping the refrigerator at a constant temperature. | This is normal. Refrigerator goes on and off to keep the temperature constant. | |
| Refrigerator compressor does not run. | Thermostat is keeping the refrigerator at a constant temperature. | This is normal. The refrigerator goes on and off to keep the temperature constant. |
| Temperatures are too cold | ||
| Temperature in the freezer is too cold but the refrigerator temperature is satisfactory. | Freezer control is set too cold | Set the freezer control to a warmer setting until the freezer temperature is satisfactory. |
| Temperature in the refrigerator is too cold and the freezer temperature is satisfactory. | Refrigerator control is set too cold. | Set the refrigerator control to a warmer setting |
| Food stored in drawers freezes. | Refrigerator control is set too cold. | See above solution. |
| Meat stored in fresh meat drawer freezes. | Meat should be stored at a temperature just below the freezing point of water (32°F, 0°C) for maximum fresh storage time. | It is normal for ice crystals to form due to the moisture content of meat. |
| Temperatures are too warm | ||
| Temperatures in the refrigerator or freezer are too warm. | Freezer control is set too warm. | Set the freezer or refrigerator control to a colder setting until the freezer or refrigerator temperature is satisfactory. |
| Refrigerator control is set too warm. Refrigerator control has some effect on freezer temperature. | Set the freezer or refrigerator control to a colder setting until the freezer or refrigerator temperature is satisfactory. | |
| Doors are opened too frequently or too long. | Warm air enters the refrigerator/ freezer whenever the door is opened. Open the door less often. | |
| Door is slightly open. | Close the door completely. | |
| Large amounts of warm or hot food may have been stored recently. | Wait until the refrigerator or freezer has a chance to reach its selected temperature. | |
| Refrigerator has recently been disconnected for a period of time. | A refrigerator requires some hours to cool down completely. | |
| Temperature in the refrigerator is too warm but the freezer temperature is satisfactory. | Refrigerator control is set too warm. | Set the refrigerator control to a colder setting. |
| Sound and noise | ||
| Louder sound levels when refrigerator is on. | Today's refrigerators have increased storage capacity and maintain more even temperatures. | It is normal for sound levels to be higher. |
| Louder sound levels when compressor comes on. | Refrigerator operates at higher pressures during the start of the ON cycle. | This is normal. The sound will level off as the refrigerator continues to run. |
| Vibrating or rattling noise. | Floor is uneven or weak. Refrigerator rocks on the floor when it is moved slightly. | Be sure floor is level and solid and can adequately support refrigerator. |
| Items placed on the top of the refrigerator are vibrating. | Remove items. | |
| Dishes are vibrating on the shelves in the refrigerator. | It is normal for dishes to vibrate slightly. Move dishes slightly. Make sure refrigerator is level and firmly set on floor. | |
| Refrigerator is touching wall or cabinets. | Move refrigerator so that it does not touch the wall or refrigerator. | |
| Water/Moisture /Ice inside refrigerator | ||
| Moisture collects on the inside walls of the refrigerator. | The weather is hot and humid which increases the rate of frost buildup and internal sweating. | This is normal. |
| Door is slightly open. | See problem section opening/closing of doors. | |
| Door is opened too often or too long. | Open the door less often. | |
| Water/Moisture /Ice outside refrigerator | ||
| Moisture forms on the outside of the refrigerator or between doors. | Weather is humid. | This is normal in humid weather. When humidity is lower, the moisture should disappear. |
| Door is slightly open, causing cold air from the inside the refrigerator to meet warm air from the outside. | This time, close the door completely. | |
| Odors in refrigerator | ||
| Interior needs to be cleaned. | Clean interior with sponge, warm water and baking soda. | |
| Food with strong odor is in the refrigerator. | Cover food completely. | |
| Some containers and wrapping materials produce odors. | Use a different container or brand of wrapping materials. | |
| Opening/Closing of doors/Drawers | ||
| Door(s) will not close. | Food package is keeping door open. | Move packages that keep door from closing. |
| Door(s) will not close. | Door was closed too hard, causing other door to open slightly. | Close both doors gently. |
| Refrigerator is not level. It rocks on the floor when it is moved slightly. | Adjust the height adjusting screw. | |
| Floor is uneven or weak. Refrigerator rocks on the floor when it is moved slightly. | Be sure floor is level and can adequately support refrigerator. Contact carpenter to correct sagging or sloping floor. | |
| Refrigerator is touching wall or cabinets. | Move refrigerator.. | |
| Drawers are difficult to move. | Food is touching shelf on top of the drawer | Keep less food in drawer. |
| Track that drawer slides on is dirty. | Clean drawer and track. | |
| Dispenser | ||
| Dispenser will not dispense ice | Ice storage bin is empty. | When the first supply of ice is dropped into the bin, the dispenser should operate. |
| Freezer temperature is set too warm. | Turn the freezer control to a higher setting so that ice cubes will be made. When the first supply of ice is made, the dispenser should operate. | |
| Household water line valve is not open. | Open household water line valve and allow sufficient time for ice to be made. When ice is made, dispenser should operate. | |
| Refrigerator or freezer door is not closed. | Be sure both doors are closed. | |
| Dispenser will not dispense ice. | Ice has melted and frozen around auger due to infrequent use, temperature fluctuations and/or power outrages. | Remove ice storage bin, and thaw and the contents. Clean bin, wipe dry and replace in proper position.When new ice is made, dispenser should operate. |
| Ice dispenser is jammed. | Ice cubes are jammed between the ice maker arm and back of the bin. | Remove the ice cubes that are jamming the dispenser. |
| Ice cubes are frozen together. | Use the dispenser often so that cubes do not freeze together. | |
| Ice cubes that have been purchased or made in some other way have been used in the dispenser. | Only the ice cubes made by the ice maker should be used with the dispenser. | |
| Dispenser will not dispense water. | Household water line valve is not open.See problem "Ice maker is not making any ice." | Open household water line valve. |
| Refrigerator or freezer door is not closed. | Be sure both doors are closed. | |
| Water has an odd taste and/or odor. | Water has been in the tank for too long. | Draw and discard 7 glasses of water to freshen the supply. Draw and discard an additional 7 glasses to completely rinse out tank. |
| Unit not properly connected to cold water line. | Connect unit to cold water line which supplies water to kitchen faucet. | |
| Sound of ice dropping | This sound is normally made when automatically made ice is dropped into ice storage bin. Volume may vary according to refrigerator's location. | |
| Sound of water supply | This sound is normally made when ice maker is supplied with water after dropping the automatically made ice. | |
| Other | Please thoroughly read 'Automatic ice maker and dispenser' in this manual. | |
| Your home appliance and smartphone is not connected to the Wi-Fi network. | The password for the Wi-Fi that you are trying to connect to is incorrect. | Find the Wi-Fi network connected to your smartphone and remove it, then register your appliance on LG SmartThinQ |
| Mobile data for your smartphone is turned on. | Turn off the Mobile data of your smartphone and register the appliance using the Wi-Fi network. | |
| The wireless network name (SSID) is set incorrectly. | The wireless network name (SSID) should be a combination of English letters and numbers. (Do not use special characters.) | |
| The router frequency is not 2.4 GHz. | Only a 2.4 GHz router frequency is supported. Set the wireless router to 2.4 GHz and connect the appliance to the wireless router. To check the router frequency, check with your Internet service provider or the router manufacturer. | |
| The distance between the appliance and the router is too far. | If the distance between the appliance and the router is too far, the signal may be weak and the connection may not be configured correctly. Move the location of the router so that it is closer to the appliance. | |
It is Normal...
The following occurrences are normal.
| Occurrence | Solution | |
| Noise | When you hear "Tak" or "Took" sound | This is the sound of various parts expanding/contracting or various control devices operating depending on the temperature change within the refrigerator. |
| When you hear "Deureureuk~", "Dulkuk" or "Woong" sound | This is the count of compressor or fan operating when the operation of the refrigerator is starting or ending. This is the same phenomenon of the sound generated when starting or turning off the engine of a car. | |
| When you hear "Kureureuk" sound of water flowing | This is the sound of refrigerant changing the condition in the freezer/fridge. When the liquid changes to gas, you will hear the sound of water flowing and when gas changes to liquid, you will hear the "Kureureuk" sound. | |
| When you hear the sound of wind such as "Shoo~" or "Shik" right after you close the door | This is the sound generated when the internal pressure is temporarily lowered when the warm air entered through the fridge or freezer is cooled fast. | |
| When you hear the vibrating sound | If the refrigerator is installed on wooden floor or wooden wall, or if the refrigerator is not leveled properly, the sound can be loud from the vibration. | |
| When you hear a loud sound after installing the product for the first time | When you operate the refrigerator for the first time, the refrigerator will operate at high speed to cool fast and the sound can seem louder. When the internal temperature falls below a certain level, the noise will subside. | |
| Door open | When the door is slightly opened after closing the door | Depending on the fore or speed of closing the fridge or freezer door, the door can open slightly and then get closed.Be careful not to close the door to hard. |
| Icing/Dew drops | When there is icing or dew drops formed on the inner or outer side of the refrigerator | When external air flows into the cool inner surface of the refrigerator, icing/dew drops can be formed.Especially, this will happen more easily when you open and close the refrigerator door more frequently.Also if the humidity of the installed location is high or during the rainy season or on a rainy day, dew drops can form on the outer side of the refrigerator. This is a natural phenomenon that occurs during the humid weather. Wipe the water drops with a dry cloth. |
| Temperature | When the front side of the refrigerator is warm | Heat pipes are installed around the front part of the refrigerator and on the divider of the freezer and fridge to prevent the dew drops from forming. The refrigerator may feel warmer after the installation or during the hot summer, but this is not a problem and you can be rest assured. |
Using LG SmartThinQ Application Things to check before using LG SmartThinQ
• For appliances with the 📋 or 📋 logo
1 Check the distance between the appliance and the wireless router (Wi-Fi network). If the distance between the appliance and the wireless router is too far, the signal strength becomes weak. It may take a long time to register or installation may fail.
2 Turn off the Mobile data or Cellular Data on your smartphone. • For iPhones, turn data off by going to Settings → Cellular → Cellular Data.
3 Connect your smartphone to the wireless router.
NOTE
- To verify the Wi-Fi connection, check that Wi-Fi 📋 icon on the control panel is lit.
- The appliance supports 2.4 GHz Wi-Fi networks only. To check your network frequency, contact your Internet service provider or refer to your wireless router manual.
- LG SmartThinQ is not responsible for any network connection problems or any faults, malfunctions, or errors caused by network connection.
- If the appliance is having trouble connecting to the Wi-Fi network, it may be too far from the router. Purchase a Wi-Fi repeater (range extender) to improve the Wi-Fi signal strength.
- The Wi-Fi connection may not connect or may be interrupted because of the home network environment.
- The network connection may not work properly depending on the Internet service provider.
- The surrounding wireless environment can make the wireless network service run slowly.
- The appliance cannot be registered due to problems with the wireless signal transmission. Unplug the appliance and wait about a minute before trying again.
- If the firewall on your wireless router is enabled, disable the firewall or add an exception to it.
- The wireless network name (SSID) should be a combination of English letters and numbers. (Do not use special characters.)
- Smartphone user interface (UI) may vary depending on the mobile operating system (OS) and the manufacturer.
- If the security protocol of the router is set to WEP, you may fail to set up the network. Please change it to other security protocols (WPA2 is recommended) and register the product again.
Installing LG SmartThinQ
Search for the LG SmartThinQ application from the Google Play Store or Apple App Store on a smart phone. Follow instructions to download and install the application.
NOTE
- If you choose the simple login to access the LG SmartThinQ application, you must go through the appliance registration process each time you change your smartphone or reinstall the application.
Wi-Fi Function
- For appliances with the 📄 or 📄 logo Communicate with the appliance from a smart phone using the convenient smart features.
Firmware Update
Keep the appliance performance updated.
Smart Diagnosis™
If you use the Smart Diagnosis function, you will be provided with the useful information such as a correct way of using the appliance based on the pattern of use.
Settings
Allows you to set various options on the refrigerator and in the application.
NOTE
- If you change your wireless router, your Internet service provider or your password after registering the appliance, please delete it from the LG SmartThinQ Settings → Edit Product and register again.
- The application is subject to change for appliance improvement purposes without notice to users.
• Functions may vary by model.
Connecting to Wi-Fi
The Wi-Fi button, when used with the LG SmartThinQ application, allows the refrigerator to connect to a home Wi-Fi network. The Wi-Fi icon shows the status of the refrigerator's network connection. The icon illuminates when the refrigerator is connected to the Wi-Fi network.
Initial Appliance Registration
Run the LG SmartThinQ application and follow the instructions in the application to register the appliance.
Re-registering the Appliance or Registering Another User
Press and hold the Wi-Fi button for 3 seconds to temporarily turn it off. Run the LG SmartThinQ application and follow the instructions in the application to register the appliance.
NOTE
- To disable the Wi-Fi function, press and hold the Wi-Fi button for 3 seconds. Wi-Fi icon will be turned off.
Open Source Software Notice Information
To obtain the source code under GPL, LGPL, MPL, and other open source licenses, that is contained in this product, please visit http://opensource.lge.com.
In addition to the source code, all referred license terms, warranty disclaimers and copyright notices are available for download.
LG Electronics will also provide open source code to you on CD-ROM for a charge covering the cost of performing such distribution (such as the cost of media, shipping, and handling) upon email request to opensource@lge.com. This offer is valid for a period of three years after our last shipment of this product. This offer is valid to anyone in receipt of this information.
Smart Diagnosis™ Using a Smart Phone
- For appliances with the 🎨 or 🎩 logo
Use this function if you need an accurate diagnosis by an LG Electronics customer information centre when the appliance malfunctions or fails.
Smart Diagnosis™ can not be activated unless the appliance is connected to power. If the appliance is unable to turn on, then troubleshooting must be done without using Smart Diagnosis™.
Using Smart Diagnosis™
Smart Diagnosis™ Through the Customer Information Center
Use this function if you need an accurate diagnosis by an LG Electronics customer information center when the appliance malfunctions or fails. Use this function only to contact the service representative, not during normal operation.
- Lock the display. To lock the display, press and hold the Lock button for three seconds. (If the display has been locked for over five minutes, you must deactivate the lock and then reactivate it.)
-
Open the right refrigerator door.
-
Hold the mouthpiece of your phone in front of the speaker that is located on the right hinge of the refrigerator door, when instructed to do so by the call center.
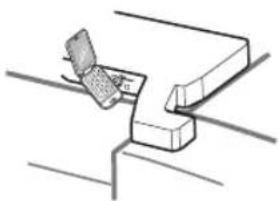
natural_image
Simple line drawing of a mechanical assembly or clamp mechanism (no text or symbols)- Press and hold the Freezer Temperature button for three seconds while continuing to hold your phone to the speaker.

-
After you hear three beeps, release the Freezer Temperature button
-
Keep the phone in place until the tone transmission has finished. This takes about 3 seconds, and the display will count down the time. Once the countdown is over and the tones have stopped, resume your conversation with the specialist, who will then be able to assist you in using the information transmitted for analysis.
NOTE
- For best results, do not move the phone while the tones are being transmitted.
- If the call center agent is not able to get an accurate recording of the data, you may be asked to try again.
- Call quality differences by region may affect the function.
- Use the home telephone for better communication performance, resulting in better service.
- Bad call quality may result in poor data transmission from your phone to the machine, which could cause Smart Diagnosis to not work properly.