
MC8084AB - Mikroovne LG - Gratis brugsanvisning og manual
Find enhedens vejledning gratis MC8084AB LG i PDF-format.


Brugerspørgsmål om MC8084AB LG
0 spørgsmål om dette apparat. Besvar dem du kender, eller stil dit eget.
Stil et nyt spørgsmål om dette apparat
Download vejledningen til din Mikroovne i PDF-format gratis! Find din vejledning MC8084AB - LG og tag din elektroniske enhed tilbage i hånden. På denne side er alle dokumenter nødvendige for brugen af din enhed offentliggjort. MC8084AB af mærket LG.
BRUGSANVISNING MC8084AB LG


natural_image
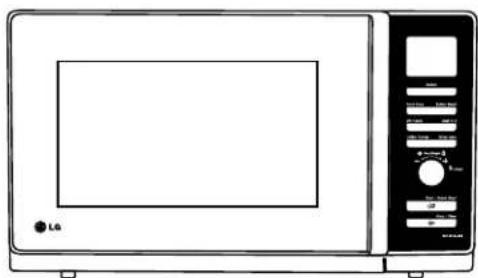
Line drawing of a microwave oven with control panel and indicator lights (no text or symbols)Owner's Manual
Please read this manual carefully and thoroughly before operating this unit.
MC8084AB
text_image
LG 24 x 7 CALL CENTER 1800-180-9999 (Toll Free) 5757554 (Send SMS) www.lg.com serviceindia@lge.com f | www.facebook.com/lgindiapage www.twitter.com/LGIndiaTweetsContents / विषय सूची
Contents / विषय सूची 3
Precautions / सावधानियाँ 4-5
Safety Precautions / सुरक्षा सावधानियाँ 6
Unpacking & Installing / खोलना और स्थापित करना 7-8
Child Lock / चाइल्ड लॉक 9
Quick Start / किवक स्टार्ट 10
Micro Power Cooking / माइक्रो पावर कुकिंग 11
Micro Power Level / माइको पावर स्तर 12
Grill Cooking / ग्रिल कुकिंग 13
Grill Combination Cooking / ग्रिल कॉम्बीनेशन कुकिंग 14
EZ Clean / एज़ क्लीन 15
Speed Hot Air Preheat / स्पीड हॉंट एअर प्रीहीट 16
Speed Hot Air Cooking / रपीड हॉट एअर कुकिंग 17
Convection Combination Cooking / कन्चैकशन कॉम्बीनेशन कुकिंग ____ 18
Convection Preheat / कन्चैकशन प्रीहीट 19
Convection Cooking / कन्चैक्शन कुकिंग 20
Various Cook Functions / विभिन्न कुक कार्यप्रणालियां 21
Nutri Care (Steam Cook, Health Plus, Soups, Continental) / 22-33
न्यूट्री केअर (स्टीम कुक, हैल्थ प्लस, सूप, कोन्टीनेन्टल)
Inidan Rasoi (Indian Cuisine, Tandoor Se, Sweet Corner, Chatpat Corner) / 34-44
इडियन रसोई (भारतीय व्यजन, तन्दूर से, स्वीट कौनर, चटपट कौनर)
24 Hours (Breakfast, Snacks, Child Favourite, Bakery) 45-57
24 आवर्स (ब्रेकफास्ट, स्नैकस, बच्चों की पसन्द, बेकरी)
Just 4 U (Baby Food, Cake, Sea Food) / जस्ट फॉर यू (बेबी फूड, केक, सी फूड) 58-65
Utility Corner (Utility Corner, Fermentation) / यूटीलिटी कॉर्नर (सुविधा कॉर्नर, फरमेन्टेशन) 66-69
Body Care / बॉँडी केअर 70-72
Important Safety Instructions / महत्वपूर्ण सुरक्षा निर्देश 73-74
Technical Specifications / Two recipes for starter / टैकिकल स्पेसिफिकेशन / नवसिखुए के लिए दो व्यंजन _ 75
Precautions सावधानियाँ
Precautions to avoid possible exposure to excessive microwave energy. सावधानी अत्याधिक सृक्ष्म तरंग ऊर्जा की सम्भावित नष्ट से बचाने के लिए ।
You cannot operate your oven with the door open due to the safety interlocks built into the door mechanism. These safety interlocks automatically switch off any cooking activity when the door is opened; which in the case of a microwave oven could result in harmful exposure to microwave energy. It is important not to tamper with the safety interlocks.
डोअर प्रणाली में इंटरलॉंक होने की वजह से आप दस्वाजा खुला रख के नही चला सकते । ये सेफ्टी इंटरलॉंक जब दस्वाजा खुला होता हैं तब स्वयं अपने आप पकने की प्रक्रिया बन्द करते हैं । नही तो इससे मायक्रोवेव का अधिक स्पर्श मे आ सकते हैं । इसलिए आप सेफ्टी इंटरलॉंक के साथ छेडखानी ना करे ।
Do not place any object between the oven front face and the door or allow food or cleaner residue to accumulate on sealing surfaces. अवन के प्रंट सतह और डोर के बीच कोई वस्तु न रखे और न ही मैल या सफाई करने का कोई भी बची हुई वस्तु न जमने दे ।
Do not operate your oven if it is damaged. It is particularly important that the oven door closes properly and that there is no damage to the: (1) door(bent), (2) hinges and latches (broken or loosened), (3) door seals and sealing surfaces. अवन का प्रयोग न करे यदि (1) दस्वाजा मुड़ा हो (2) हिज या लैच ढीला हो (3) डोर के बद होने वाले सतह क्षितप्रस्त हो।
Your oven should not be adjusted or repaired by anyone except qualified service personnel. अवन की एडजस्टमेंट या मरम्मत कुशल सर्विस व्यक्ति से ही कराए ।
⚠ WARNING/चेतावनी
Please ensure cooking times are correctly set as over cooking may result in the FOOD catching fire and subsequent damage to your oven. यह ध्यान रखे की पकाने का समय सही से निर्धारित किया जाए । जैसा कि ज्यादा पकाना आहार का आग पकड़ सकता है और साथ ही साथ आपके अवन को नष्ट कर सकता है ।
When heating liquids, e.g. soups, sauces and beverages in your microwave oven, overheating the liquid beyond boiling point can occur without evidence of bubbling. This could result in a sudden boil over of the hot liquid. To prevent this possibility the following steps should be taken:
जब आपके अवन में तरल पदार्थ जैरो सूप, शॉरा और अन्य पेय गर्ग करते सागय यदि उबलनोंक से अधिक गर्ग हो जाते हैं तो बूलबुले नहीं दिखाई देते। इससे तरल पदार्थ जर्फरत से ज्यादा गर्ग हो जाते हैं। इस संभावना से बचने के लिए निम्नलिखित कदम उठाने चाहिए।
1 Avoid using straight sided containers with narrow necks./पतले गले वाले और सरल बाज वाले बर्तनोंका प्रयोग ना करे ।
2 Do not overheat./ज्यादा गरम नही करे ।
3 Stir the liquid before placing the container in the oven and again halfway through the heating time./बतन रखने से पहले उसमे तरल पदार्थ को घुमाईए और आधा पकने का समय होने के बाद फिर उसे घुमाए ।
4 After heating, allow to stand in the oven for a short time, stir or shake them again carefully and check the temperature of them before consumption to avoid burns (especially, contents of feeding bottles and baby food jars). Be careful when handling the container. / गर्म करने के बाद थोडे समय के लिए वैसे हीं रखे, उसे घुमाए या हिलाए और उस्का तपमान खाने से पहले देख ले ।
5 Clean the oven interior with a damp cloth after use./प्रयोग के बाद अवन की अन्दरोनी सतह साफ करे ।
6 Never operate the oven without Glass Tray & Roller rest / metal container as it may cause sparking./अवन का ग्लास ट्रे और रोलर सेस्ट के बिना प्रयोग ना करे जिससे स्पार्किंग हो सकती है।
⚠ WARNING/चेतावनी
Always allow food to stand after being cooked by microwaves and check the temperature of them before consumption. Especially contents of feeding bottles and baby food jars.
सूक्ष्म तरंगों द्वारा भोजन पकाये जाने के बाद कुछ समय के लिए ढककर अवश्य छोड़ दें । भोजन खाने से पहले उसके तापमान की जाँच आवश्य करलें । वच्चों के भोजन व दूध में विशेष सावधानी बरतें ।
How the Microwave Oven Works / मायक्रोवेव अवन कैसे काम करता है ।
Microwaves are a form of energy similar to radio and television waves and ordinary daylight. Normally, microwaves spread outwards as they travel through the atmosphere and disappear without effect. Microwave ovens, however, have a magnetron which is designed to make use of the energy in microwaves. Electricity, supplied to the magnetron tube, is used to created microwave energy. सूक्ष्म तरंगे एक प्रकार की ऊर्जा हैं जो रेडियो तरंगों और सामान्य प्रकार तरंगों के समान गती होती है । सामान्यत: ये सूक्ष्म तरंगे वायुमण्डल में चालीत होते समय बाहरी ओर फैलती है और बिना कोई प्रभाव डाले स्वत: ही समात्त हो जाती है । परन्तु माइक्रोवेव अवनों में मैनेट्रोन इसप्रकार लगाया गया है कि वह सूक्ष्म तरंगों की ऊर्जा का प्रयोग कर सके । मैनेट्रोन को दी गई विघुत जब मैनेट्रोन नली में दी जाती हैं तो वे सूक्ष्म तरंगे ऊर्जा को पैदा करती है ।
These microwaves enter the cooking area through openings inside the oven. A turntable or tray is located at the bottom of the oven. Microwaves cannot pass through metal walls of the oven, but they can penetrate such materials as glass, porcelain and paper, the materials out of which microwave-safe cooking dishes are constructed. यह सूक्ष्मतरंगे पकाने के क्षेत्र में अवन के अंदरूनी छुते हुए हिस्से से प्रवेश करती हैं । एक घृमती हुई तशतरी अवन के नीचे के हिस्से पर स्तीथ रहती है । सूक्ष्म तरंगे अवन की धातु दिवारों से बाहर नही आती, लेकीन वह घुस जाती है । शिशे, चिनी मिड्री के पात्र और कागज़ जैसे पदाथों में; और वह पदाथ सूक्ष्मतरंग सुरक्षित पकानेव ली व्यंजन के लिए बनते हैं ।
Microwaves do not heat cookware, though cooking vessels will eventually get hot from the heat generated by the food.
सूक्ष्मतरंगे उन गृहउपयोगी बरतनों को गरम नहीं करती है, जो पकाने वाले पात्र कभी कभी गरम होते हैं । जो की आहार द्वारा गरम हो जाते हैं ।
A very safe appliance एक बहुत सुरक्षित उपकरण
Your microwave oven is one of the safest of all home appliances. When the door is opened, the oven automatically stops producing microwaves. Microwave energy is converted completely to heat when it enters food, leaving no "left over" energy to harm you when you eat your food. आपका सूक्ष्म तरंग अवन सबसे ज्यादा सुरक्षित है आपके सब गृह उपकरण की अपेक्षा । जब दरवाजा खुला है अवन अपने आप सूक्ष्म तरंग बनाना बंद कर देगा । सूक्ष्म तरंग ऊर्जा पूरी तरह से गर्माहट में बदल जाती है जब आहार से जाती है, और नही छोडती कोई भी ऊर्जा हानी के लिए जब आप आहार खायें ।
Safety Precautions सुरक्षा सावधानियाँ
Either use earth or use exclusive 230V socket with earth.
अर्थ का इस्तोमाल करें या अर्थ के साथ विशिप्त 230V का सॉकेट इस्तोमाल करें।
+Do not bend power cord forcefully or break.
पावर कोर्ड को बलपूर्वक न मोड़े और न ही तोड़े।
Do not pull out power cord.
पावर कोर्ड को खीचे नहीं।
+Do not use several power plug in one socket at the same time.
एक समय में बहुत सारे पावर प्लग एक सॉकेट में एक साथ इस्तेमाल न करें।
+Do not plug in or pull out power cord with wet hand.
भीगे हुए हाथों से प्लग न ही लगाएं और न ही निकालें।
+Do not spray water inside and outside of microwave oven.
माइक्रोवेव ओवन के अन्दर और बाहर की ओर पानी न छिडकें।
♦Plug out power cord during cleaning or maintenance of set.
ओवन की सफाई या मरम्मत के दौरान पावर कोर्ड को बाहर निकाल लें।
+Do not heat up the food more than necessary.
खाने को आवश्यकता से अधिक गर्म न करें।
Do not use microwave oven other than cooking or sterilization such as cloth drying etc.
माइक्रोवेव ओर्वन का स्वाना पकाने या स्टेशिलाइजेशन के अतिरिक्त इस्तेमाल न करें जैसे कपड़ों को सुखाना इत्यादि।
Do not insert pin or steel wire etc. into inside/out side of case.
केस के अन्दर या बाहर पिन अथवा स्टील की तार न डालें।
+Please be careful during taking the food since high temp. water or soup may be overflow to cause burn.
खाना निकालते समय सावधानी बरते क्योंकि उत्व्य ताप का पानी या सूप छलक कर जल सकता है।
Do not plug in power cord when socket hole is loose or plug is damaged.
सॉकेट होल ढीला होने या प्लग विक्षित होने पर पावर कोर्ड न लगाएं।
Do not use oven while some foreign material is attached on the door.
जब दरवाजे पर कोई बाह्म पदार्थ लगा हो तो ओवन को इस्तेमाल न करें।
Do not place the water container on the set.
ओवन कै ऊपर पानी का बर्तन न रखें।
Do not place heavy things on the set & do not cover the set with cloth while using.
सैट के ऊपर भारी चीज न रखें और इस्तेमाल करते समय सैट को कपड़े से न ढकें।
Do not install the set in the damp space or water sputtering area.
सैट को गीले स्थान पर या जहां पानी के छीटे पड रहे हों, न लगाए।
Do not let children hang onto oven door.
बच्चों को ओवन के दस्वाजे पर न लटकने दें।
Do not heat the unpeeled fruit or bottle with lid.
बिना छिले हुए फल या ढक्वकन लगी हुई बोतल गर्म न करें।
Do not hold food or accessories as soon as cooking is over.
खाना पकने के तुरन्त बाद खाने या सहायक उपकरणों को न पकड़े।
♦ Plug out oven if it is not used for long duration.
यदि ओवन लम्बी अवधि के लिए इस्तेमाल नहीं होना है तो प्लग बाहर निकाल दें।
Install microwave oven in the well ventilated, flat place.
माइक्रोवेव ओवन को हवादार और समतल स्थान पर ही लगाएं।
There is danger of blast if covered bottle, sealed food, egg, and chestnut etc. are cooked inside oven.
बन्द बोतल, सील्ड खाना, अण्डे या काजू इत्यादि को ओवन में पकाने पर फटने का खतरा है।
By following the basic steps on these two pages you will be able to quickly check that your oven is operating correctly. Please pay particular attention to the guidance on where to install your oven. When unpacking your oven make sure you remove all accessories and packing. Check to make sure that your oven has not been damaged during delivery.
निचे दिए हुए दो पन्नो से आप निर्धारीत कर सकते है की आपका अवन सही चल रहा है या नही। आपका अवन आप कहा स्थापित कर रहे है इसके उपर आप ध्यान दे। आपका अवन अवरण से खोलते समय आप सभी असेसरीज और पैर्कींग निकाले। ये आप निर्धारीत करे की आपका अवन डिलिवरी में क्षतिग्रस्त नही हुआ है।
Unpacking & Installing खोलना और स्थापित करना

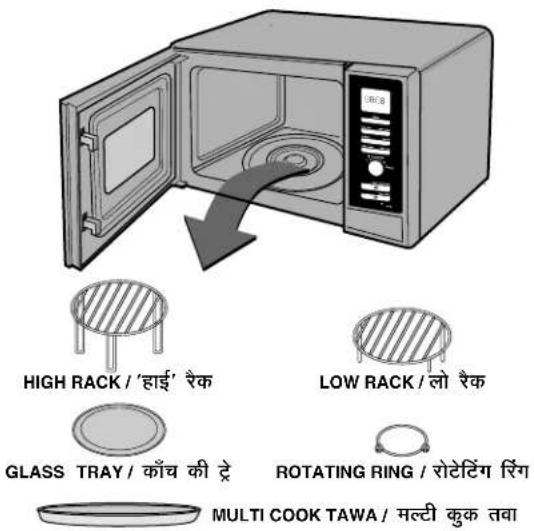
Unpack your oven and place it on a flat level surface. अपना अवन खोलकर एक समतल स्थान पर रख ले ।
text_image
HIGH RACK / 'हाई' रैक GLASS TRAY / काँच की ट्रें MULTI COOK TAWA / मल्टी कुक तवा LOW RACK / लो रैक ROTATING RING / रोटेटिंग रिंगNote : Accessories shown above are as per model specific. टिप्पणी : ऊपर दशई गई एसेसरीज विशिष्ट मॉडल के अनुरूप हैं।

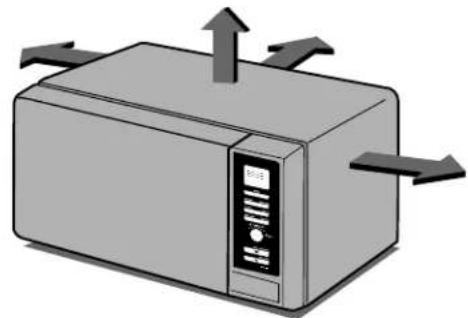
Place the oven in the level location of your choice with more than 85cm height but make sure there is at least 30cm of space on the top and 0cm at the rear for proper ventilation. The front of the oven should be at om the edge of the surface to prevent tipping.
An exhaust outlet is located on top or side of the oven. Blocking the outlet can damage the oven.
अवन को अपने मनपसन्द्र स्थान पर 85 सेमी. की ऊँचाई पर रखे लेकिन यह ध्यान रखे कि कम से कम 30 सेमी. का स्थान ऊपर से और 10 सेमी. का स्थान पीछे से टूटना ..... के लिए आवश्यक हैं। अवन का आगे का हिस्सा कम से कम 8 सेमी. समतल के किनारे से दूर होना चाहिए ताकि वह टकराने से बच संके।
एक बाहरी वायु शून्य के लिए ऊपर और किनारे पर अवन से हैं बाहरी वायु शून्य को रोकना अवन को नष्ट कर सकता है।
natural_image
Illustration of a microwave oven with airflow arrows indicating direction (no text or symbols)THIS OVEN SHOULD NOT BE USED FOR COMMERCIAL CATERING PURPOSES यह तंदूर व्यवसायिक उद्देश्य के लिए नहीं हैं ।

Plug your oven into a standard household socket. Make sure your oven is the only appliance connected to the socket. If your oven does not operate properly, unplug it from the electrical socket and then plug it back in.
अपने तंदूर को मानक गृह गती से जोड दे। इस बात का ध्यान रखे कि आपका तंदूर ही केवल वह उपकरण है जो गति से जुडा हुआ है। अगर आपका तंदूर सही डंग से काम नही कर रहा हैं तो पहले विद्यृत गती के निकाल ले और फिर वापस उसे उसमे लगाये।

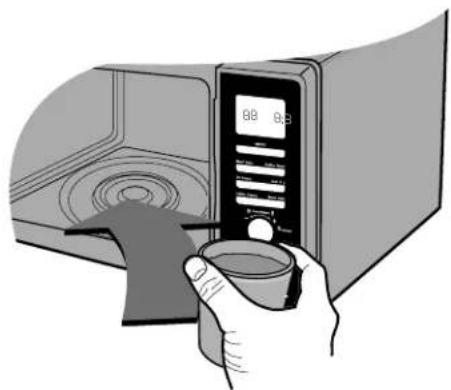
Open your oven door by pulling the DOOR HANDLE Place the ROTATING RING inside the oven and place the GLASS TRAY on top.
अपने तंदूर के दरवाजे को दरवाजे पर लगे हुए हत्थे के द्वारा खीचे । घूमनेवाले वलय को तंदूर के भीतर रखे और काँच की तस्तरी को ऊपर रखे ।

Fill a microwave safe container with 300 ml (1/2 pint) of water. Place on the GLASS TRAY and close the oven door. If you have any doubts about what type of container to use please refer to page 26.
सूक्ष्म तरंग सुरक्षित पात्र के ३०० मिली. पानी भर ले उसे काँच की तसतरी पर बरते पर तंदूर की दसवाजा बन्द कर । अगर आपको कोई शंका है पात्र के प्रकार मेतो कृपया पृष्ठ २६ पर देखे ।
natural_image
Illustration of a hand holding a microwave oven with a digital display showing 8:30 (no text or symbols on the device itself)
Fill a microwave safe container with
Press the START
button one time to set 30 seconds of cooking time.
When you press the button, you will hear a BEEP and your oven will start automatically.
शुरुआत बताये की को एक बार दवा दे और ३० सेकन्ड के लिए निर्घारित करें जब आप बताये की दबायेंगे तो एक आवाज सुनेगे और आपका तंदूर अपने आप काम करना शुरु कर देगा ।

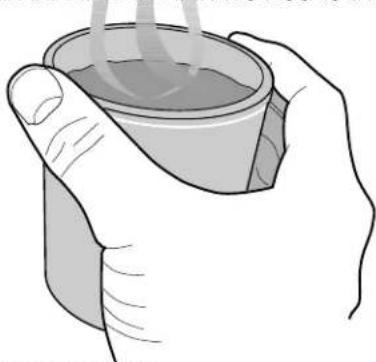
The DISPLAY will count down from 30 seconds. When it reaches 0 it will sound BEEPS. Open the oven door and test the temperature of the water. If your oven is the water should be warm. Be careful when removing the may be hot.
प्रदर्शनिं में ३० सेकन्ड गिनने शुरू हो जायंगे जब यह ० तक पढुँवेगा तो एक ध्वनि आयेणि । तंदूर का दस्वाजा खोले और पानी का तापमान जाँचे ले । अगर आपका तंदूर काम कर रहा हैं तो पानी गर्म होगा । सावधानी बरते जब आप उस पात्र को हटा रहे हो यह शायद गर्म हो सकता है ।
natural_image
Illustration of two hands holding a cup with steam rising from the cup (no text or symbols)YOUR OVEN IS NOW INSTALLED आपका तंदूर अब स्थापित हो गया है ।
Child Lock
चाइल्ड लॉक

Your oven has a safety feature that prevents accidental running of the oven. Once the child lock is set, you will be unable to use any functions and no cooking can take place. However your child can still open the oven door.
आपके अवन में विशेष सुरक्षा व्यवस्था है जो अवन को अनजाने में चलने नहीं देती। 'चाइल्ड लॉक' लगाने पर अवन चालू ही नहीं होगा। परन्तु बच्चा बाहरी द्वार अवस्थ खोल पायेगा।
Press STOP/CLEAR. STOP/CLEAR द्वायें।
Press and hold STOP/CLEAR until "L" appears on the display and BEEP sounds. / STOP/CLEAR बटन ताब ताक दबा कर स्थें जब ताक डिस्ते पैनल पर "L" न आ जाये और 'बीप' न सुनाई दे। The CHILD LOCK is now set. / अब 'घाइल्ड लॉक' लग गया है।
To cancel CHILD LOCK press and hold STOP/CLEARuntil "L" disappears. You will hear BEEP when it's released. / यदि घड़ी की 'रौटिंग' की हुई है तो पैनल' पर समय अदृष्य हो जायेगा।
text_image
Stop / Clear
text_image
Stop / Clear
text_image
Stop / ClearQuick Start किचक स्टार्ट
In the following example I will show you how to set 2 minutes of cooking on high power.
निम्नलिखित उदाहरण में दर्शाया गया है कि उच्च पावर स्तर पर खाना बनाने के लिए 2 मिनट कैसे सैट करते हैं।

The QUICK START feature allows you to set 30 seconds intervals of HIGH power cooking with a touch of the QUICK START button.
किवक स्टार्ट बटन दबा कर 30 सैकेण्ड के अन्तराल में हाई पावर पर भोजन पका सकते हैं।

Press QUICK START four times to select 2 minutes on HIGH power. Your oven will start before you have finished the fourth press. उच्च पावर स्तर पर 2 QUICK-START लिए चार बार दबाएं। चौथी दाव पूरा होने से पहले आपका ओवन चालू हो जायेगा।

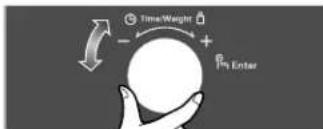
During QUICK START cooking, you can extend the cooking time up to 99 minutes 59 seconds by repeatedly pressing the QUICK START button or by using DIAL.
QUICK START कु QUICK START आ DIAE न को बारम्बार दबाकर या का इस्तेमाल करके पकाने का समय १५ मिंट सैकेंड तक बढ़ा सकते हैं
In the following example I will show you how to cook some food on 720W(80%) power for 5 minutes and 30 seconds.
निम्न उदाहरण में दर्शाया गया है कि 5 मिनट और 30 सैकेंड के लिए 720W(80%) पावर स्तर पर खाना कैसे पकाते हैं।
Micro Power Cooking माइक्रो पावर कुकिंग

Your oven has five microwave Power settings.
आपके अवन में 5 पावर स्तर हैं।
| Power Levelपावर स्तर | % | Power Outputपावर मात्रा |
| HIGHउच्चतम | 100% | 900W(max.) |
| MEDIUM HIGHमध्यम उच्च | 80% | 720W |
| MEDIUMमध्यम | 60% | 540W |
| DEFROST(MEDIUM LOW)मध्यम न्यून | 40% | 360W( *** ) |
| LOWन्यूनतम | 20% | 180W |
Make sure that you have correctly installed your oven as described earlier in this book. निश्चित कर लें कि आपने अपना ओवन इस पुस्तिका में बताये अनुसार लगाया हैं। Press STOP/CLEAR. / STOP/CLEAR दबाएं।
Press MODE.
MODE द्वारी
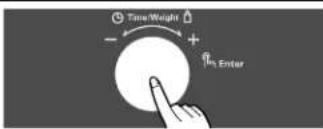
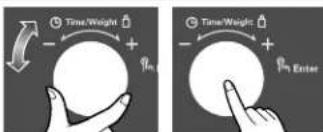
Press DIAL for micro mode confirmation.
माइक्रो मोड निश्चित करने के लिए दबाएं | DIAL
(MICRO mode (☐) is automatically available when MODE button is selected) / मोड बटन चुनने पर माइक्रो मोड ☐ स्वतः ही उपलब्ध हो जाता है।
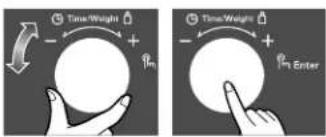
Turn DIALuntil display shows "720W"
DIAL तब तक घुमाएं जब तक डिस्प्ले "720W" न दर्शाए।
Press DIAL for power confirmation.
पावर निश्चितता के लिए दबाएं |DIAL
Turn DIALuntil display shows "5:30".
DIAL तब तक घुमाएं जब तक डिस्प्ले "5:30" न दर्शाए।
Press START. / START दबाएं।
When cooking you can increase or decrease cooking time by turning DIAL.
खाना पकाते समय घुमाकर आप खाना पकाने का समय बढ़ा या घटा सकते हैंDIAL


text_image
TimeWeight + - No Enter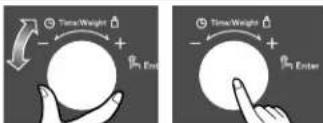
text_image
Time/Weight + - Enter Time/Weight + - Enter
text_image
Time/Weight + Enter
Micro Power Level माइक्रो पावर स्तर
Your microwave oven is equipped with 5 power levels to give you maximum flexibility and control over cooking. The table below shows the examples of food and their recommended cooking power levels for use with this microwave oven.
आपका माइक्रोवेव अवन 5 पावर स्तराँं से लैस है ताकि भोजन आपके अनुकूल व इच्छानुसार पक सके। नीचे दी गई सारणी में खाद्य पदाथाँं के नाम व भोजन पकाने के उपयुक्त पावर स्तर दिये जा रहे हैं।
| POWER LEVELपावर सतर | USEप्रयोग पावर सतर (%) पावर मात्रा | POWER LEVEL (%) | POWER OUTPUT |
| HIGH * Boil Water /उच्चतम | पानी उबालना�* Cook poultry pieces, fish, vegetables / मुर्गा, मछली वराबिजियो पकाना�* Cook tender cuts of meat / मॉस के नर्मे टुकड़े पकाना | 100% | 900W(max) |
| MEDIUM * Reheating(High * Roast meat andmध्यम उच्च) | (Liquid) / भोजन दोबारा गर्म करना (तरल)and poultry / मॉस व मुर्गा भूनना�* Cook mushrooms and shellfish / मशरूम व खोल वालीमछली पकाना�* Cook foods containing cheese and eggs / गोजनजिसमें अण्डे व चौज़ डाली गई हों | 80% | 720W |
| MEDIUM * Reheating(Mध्यम) | (Mashed potato, Plated meal, Ready meal)मोजन दोबारा गर्म करना (मराले हुए आलू प्लेट में रखा हुआखाना, तैयार खाना)* Prepare eggs / अण्डे पकाना�* Cook custard / कस्टर्ड़ पकाना�* Prepare rice, soup / चावल व सूप पकाना | 60% | 540W |
| DEFROST(MEDIUM LOW)डिक्रॉस्ट (मध्यम न्यून) | * All thawing / सभी खाथ पदार्थाँ को सामान्य तापमान पर लाना�* Melt butter and chocolate / चॉकलेट व मकखन पिघलना�* Cook less tender cuts of meat / मॉस के कन नरम टुकड़े पकाना | 40% | 360W( ** ) |
| LOW * Soften butterन्यूनतम | & cheese / मकखन व चौज को नरम करना�* Soften ice cream / आइसक्रीम को नरम करना�* Raise yeast dough / आटे में खमीर उठाना | 20% | 180W |

In the following example I will show you how to use the grill to cook some food for 12 minutes and 30 seconds.
निम्न उदाहरण में दर्शाया गया है कि 12 मिनट और 30 सैकेंड के लिए खाना पकाने में ग्रिल का इस्तोमाल कैसे किया जाता है।
Grill Cooking ग्रिल कुकिंग

This feature will allow you to brown and crisp food quickly.
यह सुविधा खाने को शीघता से भूरा और कुरकुरा करने में मदद करता है।
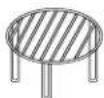
The rack must be used during grill cooking.
प्रिल कुकिंग के दौरान रैक का प्रयोग अवश्य करना चाहिए।
Press STOP/CLEAR. / STOP/CLEAR द्वाएं।

Press MODE. / MODE दबाएं।

Turn DIAL to select GRILL. / GRILL चुनने के लिए DIAL घुमाएं।
The following indication is displayed: "☐"
डिसाप्ले पर निम्न संकेत दिखता है : "म"।
Press DIAL for mode conformation. /मोड निश्चितता के लिए DIAL दबाएं।
Turn DIALuntil display shows "12:30".
DIAL "12:30"को जब तक घुमाएं जब तक डिस्प्ले न दर्शाए।
text_image
Stop / Clear
text_image
MODE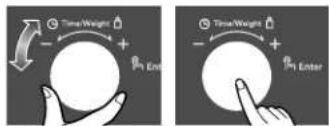
text_image
Time Weight + - Enter Time Weight + - Enter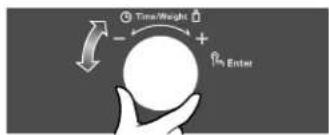
text_image
Time/Weight + EnterPress START. / START द्वाएँ
When cooking you can increase or decrease cooking time by turning DIAL.
खाना पकाते समय घुमाकर आप खाना पकाने का समय बढ़ा या घटा सकते हैंDIAL
text_image
Start / Quick StartGrill Combination Cooking ग्रिल कॉम्बीनेशन कुकिंग
In the following example I will show you how to programme your oven with micro power 180W(20%) and grill for a cooking time of 25 minutes.
निन्न उदाहरण में दर्शाया गया है कि 25मिक्ष्ट्रीय(20%) खाना पकाने में माइक्रो पावर और ग्रिल से अपने ओवन को कौसे सैट करें।

Your oven has a combination cooking feature which allows you to cook food with heater and microwave at the same time or alternately. This generally means it takes less time to cook your food. आपके अवन में यह सुकिधा इस लिये प्रदान की गई है ताकि आप इराके प्रयोग से भोजन को हीटर व माइक्रोयेव द्वारा एक ही समय में बारी बारी से पका सरके। सामान्तत: इसका अर्थ होता है कि भोजन पकने में लगने वाले समय की बचत।
You can set three kinds of micro power level (20%, 40% and 60%) in combi mode. आप कॉम्बी मोड में तीन प्रकार के माइक्रो पावर स्तर (20%, 40% और 60%) चुन सकते हैं।
Press STOP/CLEAR. / STOP/CLEAR द्वाएं।
Press MODE. / MODE दबाएं।
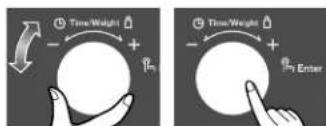
Turn DIAL to select GRILL COMBI until display shows "540W". The following indications are displayed: "☐", "☐".
GRILL COMBI DHALके लिए तब तक घुमाए जब तक डिसल्ते "540W" न दर्शाए।
डिसले पर निम्न संकेत दिखता है : " ≡", " △" । Press DIAL for mode conformation. / मोड निश्चितता के लिएDIAL दबाएं।
Turn DIAL until display shows "180W". DIAL "180W" तब तक घुमाएं जब तक डिस्प्ले न दर्शाए।
Press DIAL for power confirmation. / पावर निश्चितता के लिए DIAL दबाएं।
Turn DIAL until display shows "25:00".
DIAL "25:00" तब तक घुमाएं जब तक डिस्प्ले न दर्शाए।

text_image
Time Weight + - + Time Weight + - + Enter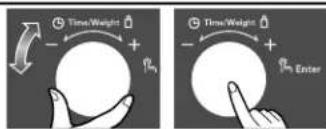
text_image
Time/Weight + - + Time/Weight + - Enter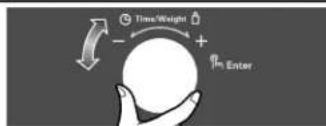
text_image
Time/Weight + EnterPress START. / START दर्षाएं।
When cooking you can increase or decrease cooking time by turning DIAL. खाना पकाते समय चुमाकर आप खाना पकाने का समय बढ़ा या घटा सकते हैंDIAL Be careful when removing your food because the container will be hot! खाना निकालते समय सावधानी रखें क्योकि उस समय बर्तन गर्म होगा।
In the following example I will show you how to remove smell in the oven.
निम्न उदाहरण में दर्शाया गया है कि ओवन की गन्ध को कैसे हटाया जाए।
EZ Clean
एज़ कलीन

The oven has a special function to remove the smell in the oven with one touch.
एक टच में ओवन की गन्ध दूर करने के ओवन में एक विशेष क्रिया होती है।
You can use the EZ Clean function without food in the oven.
ओवन में बिना खाने रखे आप एज्ज क्लीन क्रिया का इस्तेमाल कर सकते हैं।
Please remove tray and other accessory during EZ-Cleaning operation and then relocate ones after finishing EZ-Cleaning operation.
कृपया एज- क्लीन ऑपरेशन के दौरान ट्रे और अन्य उपकरणों को हटा दें और एज- क्लीन ऑपरेशन पूरा होने पर फिर से रख दें।
Press STOP/CLEAR. / STOP/CLEAR दबाएं।

text_image
Stop / ClearPress MODE. / MODE दबाएं।


text_image
MODETurn DIAL to select EZ CLEAN until display shows "220°C". The following indications are displayed: " ", " " .
EZ CLEAN चुहालके लिए तब तक घुमाएं जब तक डिसप्ले "250°C" न दर्शाए।
डिसाप्ले पर निम्न संकेत दिखता है : " ✝", " ✝"।
Press DIAL for mode confirmation. / मोड निश्चितता के लिए DIAL दबाएं।
Press START. / START दबाएं |
(Time counts down automatically)
(समय स्वतः ही कम होता जाता है)
text_image
TimeWeight + - Enter
text_image
Start / Quick StartSpeed Hot Air Preheat स्पीड हॉंट एअर प्रीहीट
In the following example I will show you how to preheat the oven at a temperature of 230°C.
निम्न उदाहरण में दर्शाया गया है कि ओवन को 230°C तापमान पर कैसे प्रीहीट करते हैं।

The oven has a temperature range of 100°C \~ 250°C. (180°C is automatically available when speed hot air mode is selected.)
ओवन में 100°C \~ 250°C तक तापमान सीना होती है। स्पीड हॉंट एअर मोड चुनने पर 180भीन स्वतः ही उपलब्ध हो जाता है।
Press STOP/CLEAR. / STOP/CLEAR द्वाएं।


text_image
Stop / ClearPress MODE. / MODE दबाएं।


text_image
MODETurn DIAL to select SPEED HOT AIR / SPEED HOT AIR चुनने के लिए DIAL चुमाएं।
The following indications are displayed: "\~\~", "♣".
डिस्प्ले पर निम्न संकेत दिखता है : "\~\~\~\~", "◆"
Press DIAL for mode confirmation. / मोड निश्चितता के लिए DIAL दबाएं।
text_image
Time/Weight + - + Time/Weight + - + EnterTurn DIAL until display shows "230°C".
DIAL तब तक घुमाएं जब तक डिस्प्ले "230°C" न दर्शाए।
Press DIAL for temperature confirmation.
तापमान की निश्चितता के लिए DIAL दबाएं।
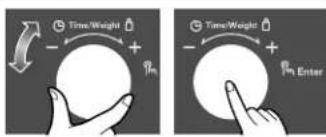
text_image
Time/Weight + - + Time/Weight + - + EnterPress START. / START दबाएं।
Preheating will be started with displaying "Pr-H".
"Pr-H" दर्शनि पर प्रीहीटिंग आरम्भ हो जायेगी।
text_image
Start / Quick StartIn the following example I will show you how to programme your oven with speed hot air cooking at 230 °C for 20 minutes.
निम्न उदाहरण में दर्शाया गया है कि ओवन को 2010-120र मिनट के लिए स्पीड हॉट एअर कुकिंग से साथ कैसे रौट करते है।
Speed Hot Air Cooking स्पीड हॉट एअर कुकिंग

The oven has a temperature range of 100^ C \~ 250^ C. ( 180^ C is automatically available when speed hot air mode is selected.)
ओवन में 100°C ताम्ब 250°C सीमा होती है। स्पीड हॉट एअर मोड चुनगे पर 180भान स्वतः ही उपलब्ध हो जाता है।
This function allows you to combine convection operation with the grill. यह क्रिया कन्चैक्शन ऑपरेशन को ग्रिल के साथ जोड़ने में मदद करती है।
It will reduce your cooking time. यह खाना पकाने के समय को कम करेगी।
Press STOP/CLEAR. / STOP/CLEAR दबाएं।
Press MODE. / MODE दबाएं।
Turn DIAL to select SPEED HOT AIR /SPEED HOT AIR चुन्ने के लिए DIAL चूमाएं।
The following indications are displayed: "☐", "☐".
डिसप्ले पर निम्न संकेत दिखता है : " 🔘", " ✝".
Press DIAL for mode confirmation. / मोड निश्चितता के लिए DIAL दबाएं।
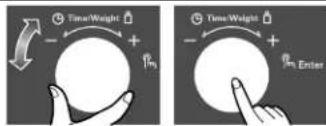
Turn DIAL until display shows "230°C". DIAL तब तक घुमाए जब तक डिस्प्ले "230°C" न दर्शाए।
Press DIAL for temperature confirmation. तापमान की निश्चितता के लिए DIAL दबाएं।
Turn DIALuntil display shows "20:00". DIAL तब तक घुमाएं जब तक डिस्प्ले "20:00" न दर्शाए।
Press START. / START दबाएं।
When cooking you can increase or decrease cooking time by turning DIAL. खाना पकाते समय DIAL घुमाकर आप खाना पकाने का समय बढ़ा या घटा सकते हैं


text_image
Time/Weight + - + Time/Weight + - + Enter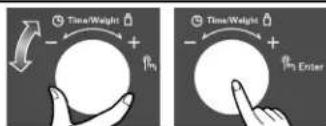
text_image
Time/Weight + - + Time/Weight - + - Enter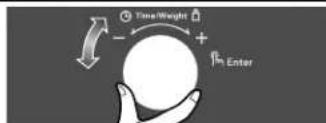
text_image
Free Weight + Enter
Convection Combination Cooking कन्चैक्शान कॉम्बीनेशान कुकिंग
In the following example I will show you how to programme your oven with micro power 540W (60%) and at a convection temperature 200 °C for a cooking time of 25 m. inutes.
निन्न उदाहरण में दर्शाया गया है कि ओवन को 28मिन्ट के कुकिंग समय के लिए माइक्रो पावर 540W (कैक्षेक्त) तापमान 200°C के साथ कैसे सैट करें।

The oven has a temperature range of 100^ C \~ 250^ C. ( 180^ C is automatically available when convection combination mode is selected.)
ओवन में 100°C ताप्प 260°C
सीमा होती है। कन्वैकशन कॉम्बिनेशन मोड चुनने पर 1800000000 स्वतः ही उपलब्ध हो जाता है।
You can set three kinds of micro power level (20%, 40% and 60%) in combi mode. आप कॉँन्बी मोड में तीन प्रकार के माइक्रो पावर स्तर (20%, 40% और 60%) चुन सकते हैं।
Press STOP/CLEAR. / STOP/CLEAR दवाएं।
Press MODE. / MODE दबाएं।
Turn DIAL to select CONV. COMBI until display shows "540W". / CONV. COMBI चुनों के लिए DIAL तब तक घुमाएं जब तक डिस्पले "540W" न दर्शाए The following indications are displayed: "", "".
डिसाले पर निम्न संकेत दिखता है : " 🔘", " 🔘". Press DIAL for mode confirmation. / मोड निश्चितता के लिए DIAL दबाएं।
Press DIAL for power confirmation./पावर की निशिकताता के लिए DIAL दबाएं। (540W is automatically available when CONV. COMBI mode is s elected.) कर्वैक्ष्ना कॉँबी चुनगे पर 540W स्वत: ही उपलब्ध होता है।
Turn DIAL until display shows "200°C". DIAL ताब ताक घुमाए जंब ताक डिस्प्ले "200°C" न दर्शाए। Press DIAL for temperature confirmation. तापमान की निश्चितता के लिए DIAL दबाएं।
Turn DIAL until display shows "25:00". DIAL तब तक धुमाएँ जब तक डिस्प्ले "25:00" न दर्शाए।
Press START. / START दबाए। When cooking you can increase or decrease cooking time by turning DIAL. खाना पकाते समय DIAL घुमाकर आप खाना पकाने का समय बढ़ा या घटा संकते हैं. Be careful when removing your food because the container will be hot! खाना निकालते समय सावधानी रखें क्योंकि उस समय बतन गर्म होगा।
text_image
Stop / Clear MODE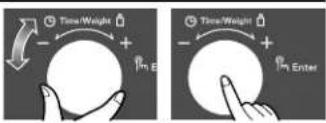
text_image
Time/Weight + Pn B Time/Weight + Pn Enter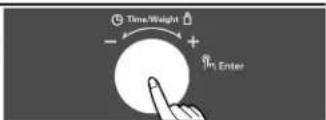
text_image
Time/Weight + - Enter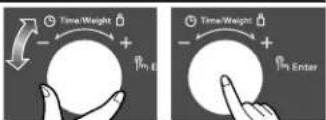
text_image
Time/Weight + Pm Time/Weight + Pm Enter
In the following example I will show you how to preheat the oven at a temperature of 230^ C.
निम्न उदाहरण में दर्शाया गया है कि ओवन को 230°C के तापमान पर कैसे प्रीहीट करें।
Convection Prehat
कन्चैक्शन प्रीहीट

The convection oven has a temperature range of 40°C and 100°C\~250°C (180°C is automatically available when convection mode is selected).
ओवन में 40ैर तक100मान 290°Cहोती
है। कन्वैक्शान मोड चुनने पर 180श्रमान स्वतः ही उपलब्ध हो जाता है।
* The oven has a ferment function at the oven temperature of 40°C. When you use this function, if the oven temperature is over 70°C, then the display shows 'F-14' error code. You may wait until the oven is cool.
ओवन में 40°C पर दही जमाने की सुविधा है। यदि ओवन का तापमान 70°C से ऊपर है तो "F-14" error code दर्शत्ता है। आप ओवन के ठंडा होने की प्रतीक्षा कर सकते हैं।
Your oven will take a few minutes to reach the selected temperature.
आपका ओवन चुने हुए ताप्मान तक पहुँचने में कुछ मिनटों का रामय लेगा।
Once it has reached correct temperature, y our oven will BEEP to let you know that it h as reached the correct temperature. Then place your food in your oven: then t ell your oven to start cooking.
एक बार स्ती तापमान पर पहैचने पर आपका ओवन यह वताने के लिए बीप करेगा कि ओवन सही तापमान पर पहैच गया है ताब आप ओवन में अपना खाना रखें और पकाने के लिए रटाटं दबाएं।
Press STOP/CLEAR. / STOP/CLEAR दबाएं।
Press MODE. / MODE दबाएं |

Turn DIAL to select CONV. / CONV चुनाने के लिए DIAL घुमाएं।
The following indication is displayed: " ✝"
डिसप्ले पर निम्न संकेत दिखता है : " ✝ "
Press DIAL for mode confirmation. / मोड निश्चितता के लिए DIAL दबाएं।
text_image
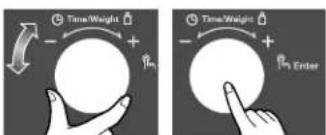
Time/Weight + Pm Time/Weight + Pm EnterTurn DIAL until display shows "230°C".
DIAL तब तक घुमाएं जब तक डिस्प्ले "230°C" न दर्शाए।
Press DIAL for temperature confirmation.
तापमान की निश्चितता के लिए DIAL दबाएं।
text_image
Time/Weight + P1 Time/Weight + P1 EnterPress START. / START दबाएं।
Preheating will be started with displaying "Pr-H".
"Pr-H" दर्शने पर प्रीहीटिंग आरभ हो जायेगी।
text_image
Start / Quick StartConvection Cooking कन्चैक्शन कुकिंग
In the following example I will show you how to preheat the oven first, then cook some food at a temperature of 230^ C for 50 minutes.
निम्न उदाहरणे दर्शाया गया है कि ओवन को पहले कैसे प्रीहीट करें, तब 50 मिनट के लिए 230°C तापमान पर कुछ खाना पकाएं।

The convection oven has a temperature range of 40^ C and 100^ C \~ 250^ C ( 180^ C is automatically available when convection mode is selected).
ओवन में 40ौर्ण तक बिद्यमान 250°C सीमा होती है। कन्वैवशन मोड चुनने पर 180°C तापमान स्वतः ही उपलब्ध हो जाता है।
If you do not set a temperature your oven will automatically select 180°C, the cooking temperature can be changed by turning DIAL.
यदि आप तापमान सैट नहीं करते हैं तो आपका ओवन स्वतः ही 180°C लेगा, कुरिंग तापमान DIAL घुमाकर बदला जा सकता है।
The rack must be used during convection cooking.
ग्रिल कुकिंग के दौरान रैक का प्रयोग अवश्य करना चाहिए।
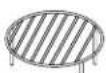
Press STOP/CLEAR. / STOP/CLEAR दबाएं।
Press MODE. / MODE दबाएं

Turn DIAL to select CONV. / CONV चुनने के लिए DIAL घुमाएं। The following indication is displayed: " ✉"
डिस्फ्ले पर निम्न संकेत दिखता है : " ✝ "
Press DIAL for mode confirmation. / मोड निश्चितता के लिए DIAL दबाएं।

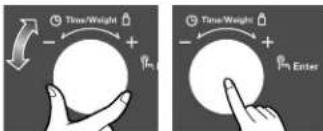
Turn DIAL until display shows "230°C". DIAL तब तक घुमाए जब तक डिस्प्ले "230°C" न दर्शाए।
Press DIAL for temperature confirmation. तापमान की निश्चितता के लिए DIAL दबाएं।
text_image
Time/Weight + - Time/Weight + - Time/Weight + - Pn EnterTurn DIAL until display shows "50:00". DIAL "50:00" तब तक घुमाएं जब तक डिस्प्ले न दर्शाए।
text_image
Time/Weight + Pn Time/Weight + Pn EnterPress START. / START दबाएं।
When cooking you can increase or decrease cooking time by turning DIAL. खाना पकाते समय घुमाकर आप खाना पकाने का समय बढ़ा या घटा लकते हैंDIAL
text_image
Time/Weight + - Enter
Various Cook Functions विभिन्न कुक कार्यप्रणालियां
Please follow the given steps to operate cook functions (Nutri Care, Indian Rasoi, 24 Hrs, Just 4 U, Utility Corner & Fast) in your Microwave.
कृपया अपने माइक्रोवेव की विभिन्न कार्यप्रणालियां (Nutri Care, Indian Rasoi, 24 Hrs, Just 4 U, Utility Corner & Fast) को चलाने के लिए नीचे दिये गये चरणों का अनुसरण करें।
| COOK MODE | Nutri Care Indian Rasoi | 24 Hrs Just 4 U | Utility Corner | Body Care | ||
| STEP-1 | Press Stop/Clear | Press Stop/Clear | Press Stop/Clear | Press Stop/Clear | Press Stop/Clear Press Stop/Clear | |
| STEP-2 | Press Nutri Care | Press Indian Rasoi | Press 24 Hrs | Press Just 4 U | Press Utility Corner Press Body Care | |
| STEP-3 | Turn DIAL to select any of St(1 to 6), HP(1 to 6), So (1 to 6), Co(1 to 6) food category. | Turn DIAL to select any of IC(1 to 6), tS(1 to 6), SC(1 to 6), CC(1 to 6) food category. | Turn DIAL to select any of bF(1 to 6), Sn(1 to 6), CF(1 to 6), bA(1 to 6) food category. | Turn DIAL to select any of bb(1 to 5), CA(1 to 5), SF(1 to 5) food category. | Turn DIAL to select any of UC (1~5), FE (1~4) food category. | Turn DIAL to select bC (1~5) category. |
| STEP-4 | Press Enter | Press Enter | Press Enter | Press Enter | Press Enter Press Enter | |
| STEP-5 | Turn Dial to set Weight | Turn Dial to set Weight | Turn Dial to set Weight | Turn Dial to set Weight | Turn Dial to set Weight Turn Dial to set Weight | |
| STEP-6 | Press Start | Press Start | Press Start | Press Start | Press Start Press Start |
| COOK MODE | Nutri Care Indian Rasoi | 24 Hrs Just 4 U | Utility Corner Body Care | |||
| STEP-1 | Stop/Clear दबाएं | Stop/Clear दबाएं | Stop/Clear दबाएं | Stop/Clear दबाएं | Stop/Clear दबाएं Stop/Clear दबाएं | |
| STEP-2 | Nutri Care दबाएं | Indian Rasoi दबाएं | 24 Hrs दबाएं | Just 4 U दबाएं | Utility Corner दबाएं Body Care दबाएं | |
| STEP-3 | St(1 to 6) , HP( 1 to 6) , So (1 to 6), Co(1 to 6) श्रेणी में ते कोई भी व्यंजन चुनने के लिए डायल घुमाएं। | IC(1 to 6) , tS( 1 to 6) , SC(1 to 6) , CC(1 to 6) श्रेणी में रे कोई भी व्यंजन चुनने के लिए डायल घुमाएं। | bF(1 to 6) , Sn( 1 to 6) , CF (1 to 6) , bA(1 to 6) श्रेणी में रे कोई भी व्यंजन चुनने के लिए डायल घुमाएं। | bb(1 to 5) , CA( 1 to 5) , SF(1 to 5) श्रेणी में रे कोई भी व्यंजन चुनने के लिए डायल घुमाएं। | UC (1~5) , FE (1~4) , bC (1~5) श्रेणी में से कोई भी व्यंजन चुनने के लिए डायल घुमाएं। | bC (1~5) श्रेणी चुनने के लिए डायल घुमाएं। |
| STEP-4 | Enter दबाएं | Enter दबाएं | Enter दबाएं | Enter दबाएं | Enter दबाएं | Enter दबाएं |
| STEP-5 | वजन सैट करने के लिए डायल घुमाएं | वजन सैट करने के लिए डायल घुमाएं | वजन सैट करने के लिए डायल घुमाएं | वजन सैट करने के लिए डायल घुमाएं | वजन सैट क्रने के लिए डायल घुमाएं | वजन सैट क्रने के लिए डायल घुमाएं |
| STEP-6 | Start दबाएं | Start दबाएं | Start दबाएं | Start दबाएं | Start दबाएं | Start दबाएं |
Note / टिप्पणी :
While cooking you can extend the cooking time at any point by rotating knob left/right. There is no need to stop the cooking process.
जब आप भोजन पका रहे हौं, तो केवल नाँब को बाई या दाई तरफ घुमाकर ही समय में परिवर्तन किया जा सकता हैं। भोजन पकाने की प्रक्रिया को रोकने की कोई आवश्यकता नहीं है।
NUTRI CARE
न्यूट्री केअर
- Steam Cook (St)
- Health Plus (HP)
- Soups (So)
- Continental (Co)
Steam Cook स्टीम कुक
| Category Weight Limit Utensil Instructions | ||||||
| St1 | Keema Balls | 0.1~0.3kg | Microwave safe flat glass dish & Microwave safe idli steamer* | For | 0.1 kg | 0.2 kg |
| Chicken Keema | 75 gms | 125 gms | ||||
| Boiled & Mashed Potato | ||||||
| Ginger, Garlic Paste, Salt, Garam Masala, Hara Dhania Lemon Juice | As per your taste | |||||
| Besan | 1 tsp | 2 tsp | ||||
| Method: 1. Mix all the ingredients together. Make balls from it.Place the balls in greased MWS flat dish. Keep in Idli Steamer. Select Menu and weight and press start. | ||||||
| St2 | Gajar Ka Haiwa | 0.3kg Microwave SafeGlass Bowl& Microwave Safe Idli Steamer* | For | 0.3 kg | ||
| Grated Gajar | 300 gms | |||||
| Ghee | 2 tbsp | |||||
| Milk Powder | 4 tbsp | |||||
| Khoya | 5 tbsp | |||||
| Sugar | 4 tbsp | |||||
| Elaichi Powder and Dry Fruits | As per your taste | |||||
| Method: 1. In a MWS glass bowl take all the ingredients & mix well.2. Add some water to the MWS idli steamer.3. Keep the MWS glass bowl in the steamer & press start. | ||||||
| St3 | Shakarkandi | 0.2~0.5kg | Microwave safe flat glass dish & Microwave safe idli steamer* | Shakarkandi | 0.2 kg 0.3 kg 0.4 kg 0.5 kg | |
| Salt & Chat Masala As per your taste | ||||||
| Method: 1. In MWS idli steamer add water, keep the peeled off shakarkandi in MWS flat glass dish & keep in the Idli steamer. Select menu & weight & press start.2. After steaming sprinkle some salt & chat masala & serve. | ||||||
* Provided in Starter Kit.
Steam Cook स्टीम कुक
| Category Weight Limit Utensil Instructions | ||||||
| St4 | Methi Muthiya | 0.1 - 0.3 kg | Microwave Safe Idli Steamer* | For | 0.1 kg | 0.2 kg |
| Melhi Leaves | 1/2 cup | 3/4 cup | ||||
| Atta | 1/4 cup | 1/2 cup | ||||
| Besan | 2 tbsp | 3 tbsp | ||||
| Suji | 1 tbsp | 1 12 tbsp | ||||
| Soda Bicarb | 1/4 tsp | 1/2 tsp | ||||
| Ginger garlic chilli paste, Dhaniya Powder, Haldi, Salt, Sugar | As per your taste | |||||
| Method:1. Mix all the ingredients. Add some water and make a soft dough. Make small rolls from this mixture.Place rolls in Idli steamer. Select menu and weight.Press start. | ||||||
| St5 | Rajmah | 0.1 - 0.3 kg MicrowaveSafe Glass Bowl &Microwave Safe Idli Steamer* | For | 0.1 kg | 0.2 kg | |
| Soaked Rajmah (overnight) | 100 gms | 200 gms | ||||
| Finely chopped onion | 3/4 cup | 1 cup | ||||
| Tomato Puree | 1/2 cup | 3/4 cup | ||||
| Oil | 1 tbsp | 1 tbsp | ||||
| Dhaniya, Jeera Powder, Garama Masala, Kasuri Methi, Salt, Red Chilli power | As per your taste | |||||
| Method:1. In MWS glass bowl take all the ingredients. Add the water as well in the glass bowl. Mix well, add water to the steamer. Keep the MWS glass bowl in the steamer. Select menu & weight & press start. | ||||||
| St6 | Momos | 0.1 - 0.3 kg | Microwave Safe Idli Steamer* | For | 0.1 kg 0.2 kg 0.3 kg | |
| Maida | 100 g | 200 g | ||||
| Salt | As per taste | |||||
| Water | For making dough | |||||
| Baking powder | 14 tsp | 12 tsp | ||||
| For filling | ||||||
| Boiled mix veg (carrot, peas, capsicum, potato) | 1 cup | 1 12 cup | ||||
| Soya sauce, chilli sauce, salt, pepper, garam masala | As per taste | |||||
| Method:1. In a bowl take maia, add salt, baking powder and water, prepare a soft dough. Keep it for 15 minutes.2. Roll out the dough into thin chapattis and add the filling in the centre and wrap it like a bag. Prepare all the momos in the same way.3. Add water to the idli steamer, place the momos in the idli stand and cover.4. Select menu and weight & press start. | ||||||
* Provided in Starter Kit.
| Category Weight Limit Utensil Instructions | ||||||
| HP1 | Kala Chana | 0.1~0.3kg Microwave safe bowl | Kala Chana (soaked overnight) | 0.1 kg | 0.2 kg | |
| Water | 200 ml | 400 ml | ||||
| Oil | 1 tbsp | 2 tbsp | ||||
| Onion Chopped | 1/2 cup | 1 cup | ||||
| Salt, Chat Masala, Red Chilli Powder, Hara Dhania | As per your taste | |||||
| Method: 1. Soak chana overnight, in a MWS bowl put soaked chanas with water & cover. Select menu and weight and press start.2. When beeps, remove & drain the water.3. In a *MWS bowl add oil, chopped onion,salt, chaat masala, red chilli powder and hara dhania and press start. Mix well. Press start.4. When beeps, add chanas to the bowl along with little hot water and press start. Mix well. Give standing time of 3 minutes. Serve hot. | ||||||
| HP2 | Karela Subzi | 0.3kg | Microwave safe bowl | For | 0.3 kg | |
| Chopped karela | 300 g | |||||
| Oil | 2 tbsp | |||||
| Water | As required | |||||
| Chopped onion | 1⁄2 cup | |||||
| Rai, jeera, hing & haldi | For tempering | |||||
| Salt, sugar, garam masala, dhania powder, jeera powder | As per taste | |||||
| Grated coconut | For garnishing | |||||
| Method: 1. In a MWS bowl add oil, rai, jeera, hing, haldi, chopped onion. Select menu and press start.2. When beeps, add the chopped karela & cover. Press start.3. When beeps, add some water, salt, sugar, garam masala, dhania powder, jeera powder and cover. Press start.Allow it to stand for 5 mins. Garnish with grated coconut and serve. | ||||||
Health Plus
हैल्थ प्लस
| Category Weight Limit Utensil Instructions | ||||||
| HP3 | Moong Dal | 0.2 kg | Microwave safe bowl | Moong Dal soaked in water (for 1 hour) | 0.2 kg | |
| Water | 400 ml | |||||
| Oil | 2 tbsp | |||||
| Jeera | 1 tsp | |||||
| Hari Mirch | 2-3 nos. | |||||
| Curry Leaves | 5-6 nos. | |||||
| Salt, Dhania-Jeera Powder, Haldi, Hing, Kasuri Methi, Lemon Juice, Hara Dhania | As per your taste | |||||
| Method: 1. Take 200 gms dal in Microwave Safe bowl, add Water, Haldi & Hing.2. Select menu press start to cook.3. When beep take another bowl add oil, jeera, hari mirch, curry leaves & press start.4. When beep add dal, salt, dhania jeera powder, hara dhania, kasuri methi (optional) lemon juice & press start to cook. | ###: 1. माइकोरेव रोफ बाउल मे 200 ग्राम दाल ले और पानी, हल्दी तथा हींग झाले।2. मीनू चुणकर मकाने के लिए स्टार्ट दबाएं।3. 'बीप' सुनाई देने पर दूलरा बाउल लें और तोल, जीरा, हरी मिर्च, करी पता झाले तथा स्टार्ट दबाएं।4. 'बीप' सुनाई देने पर दाल, नगक, बनिया जीरा पाउळर, हरा बनिया, करूची मेथी (ैकलिफक) तथा नीबू रस आले और पकाने के लिए स्टार्ट दबाएं। | |||||
| HP4 | Lemon Chicken | 0.1~0.3 kg Microwave safe bowl | For | 0.1 kg | 0.2 kg | |
| Boneless Chicken | 100 g | 200 g | ||||
| Soya sauce | 12 tbsp | 1 tbsp | ||||
| Com flour | 12 tbsp | 1 tbsp | ||||
| Water | 12 cup | 12 cup | ||||
| Salt, pepper & sugar | As per taste | |||||
| Garlic paste | 1 tbsp | As per lasle | ||||
| Lemon juice | 2 tsp | 3 tsp | ||||
| Oil | 12 tbsp | 1 tbsp | ||||
| Method: 1. Mix boneless chicken, soysauce, salt & pepper, garlic paste & lemon juice in a bowl. Refrigerate for 12 hour.2. In a MWS bowl add oil, marinated chicken pieces, sugar, com flour mixed with water. Cover. Select menu & weight & press start.3. When beeps, mix well. Cover & press start.Allow to stand for 3 minutes. | ###: 1. बोनतैरा चिकन, सोया तौरा, नमक, मिर्च, लहसान पेस्ट तथा नीबू रस एक बाउल में लेकर अच्ची तरह मिला लें।2. माइकोरेव तेफ बाउल में तेल, नसाला लगे हुए चिकन के टुकडे, चौनी. पानी के राथ गीगा हुआ मवका का आटा खले।3. बीप' सुनाई देने पर अख्छी तरह मिलाए और ढककर स्टार्ट दबाएं।3 मिनट तक स्खा स्टाने दें। | |||||
Health Plus
हैल्थ प्लस
| Category Weight Limit Utensil Instructions | ||||||
| HP5 | Machi Kali Mirch | 0.1 - 0.3 kg Microwave safe bowl | Pomfret (fish category) | 0.3 kg0.2 kg0.1 kg | ||
| Salt, Lemon Juice & Kali Mirch Powder | To marinate as per your taste | |||||
| Oil, Chopped Onion, Chopped Tomatoes, Chopped Garlic | As required | |||||
| Method: 1. Take Pomfret Slices as per weight either of (0.1 Kg/ 0.2 Kg/ 0.3Kg) and marinate with salt, lemon juice, and kali mirch powder (as per taste) for one hour.2. Select menu, weight and in Microwave Safe bowl put oil, chopped onion, chopped tomatoes, chopped garlic, press start.3. When beep, open door and add marinated fish, salt to taste, some water & cover.4. Press Start and after cooking, give stand time for five minutes. | ||||||
| Ghiya Raita | 0.1 ~ 0.3 kgHP6 | Grated Ghiya | 0.1 kg | 0.2 kg | 0.3 kg | |
| Water | 50 ml | 75 ml | 100 ml | |||
| Salt | To taste | |||||
| Curd | 2 tbsp | 3 tbsp | 4 tbsp | |||
| Salt, Sugar, Mustard Powder & Green Chilli | As per your taste | |||||
| Method: 1. In a Microwave Safe bowl add grated ghiya, water and salt. Select menu and press start to cook.2. Strain ghiya and take it in Microwave Safe bowl and add curd, mustard powder, Salt, Sugar, Green Chilli to taste. Served Chilled. | ||||||
Soup सूप
| Category Weight Limit Utensil Instructions | ||||
| So1 | Sweet Corn Soup | 0.3 kg Microwave SafeGlass Bowl | ||
| For 1 Sweet Corn Soup | ||||
| Sweet Corn0.2 kg | ||||
| Water1 cup | ||||
| Oil1 tbsp | ||||
| Com flour1 tbsp | ||||
| Salt, Sugar and Kali Mirch, Chopped Onion and Green ChilliAs per your taste | ||||
| Method:1.Grind sweet corn with some water and put in MWS Glass Bowl.Select menu & weight.Press start.In another bowl put oil, green chilli and onion & press start.Add corn mixture in it.Mix cornflour with 1/2 cup water and mix with it.Add some water,salt,sugar,kali mirch and press start. | ||||
| Vitibi:1.स्वीट कोर्ने को कृष्ण पानी के साथ पीतें और माइक्रोवेव तोक ग्लास बाउल में रखें। मौनू और वजन निभारित करके रट्याट दबाए।एक दूरे बाउल में तेल, हरी गिर्च और प्यज झाले और स्टाट दबाए।फिर इसमें स्वीट कोर्ने के पिसे हुए मिश्रण को झालें। आधा लप गानी झालकर अच्छो तरह मिला लें। थोड़ा पानी, नामक, चौनी तथा काली गिर्च झालकर स्टाट दबाए। | ||||
| So2 | Mushroom Soup | 0.2 kg Microwave SafeGlass Bowl | ||
| For 2 Mushroom Soup | ||||
| Mushroom100 gms | ||||
| Potato1 No. | ||||
| Cabbage50 gms | ||||
| Onion1 small | ||||
| Tomato2 tbsp | ||||
| Salt, Sugar, Pepper (Black)As per your taste | ||||
| Oil2 tbsp | ||||
| Method:From Stock (Boiled Vegetables)Vitibi:स्टोक(उबली हुई संब्जियों) से1. In MWS glass bowl put potato in small pieces,chopped cabbage and onion and put it in Microwave with addition of 2 cup of water. Then select menu and press start.When beep, take the bowl out and grind the stock. After grinding the stock,strain the whole stock and add water as per your requirement.Now,put the bowl with this Stock, at a side.Now, take another bowl, add oil,chopped mushroom and put in Microwave and press start.When beep, add stock(from the above said bowl)into this Bowl then add salt, black pepper and sugar as per as your taste.And 2 tbsp tomato sauce and press start.Serve hot garnish with grated cheese. | ||||
| 1. माइक्रोवेव रोक रतास बाउल में आलू के छोटे-गोटे टुकडे, कर्टी हुई बन्दगोभी और प्याज झालकर पो कप पानी के साथ ओचन में रख दें।2. बौप आने पर, बाउल को बहर निकाले और स्टोंक को पीस लें। फिर पूरे स्टोक को निवोडे और अपनी आवशकतानुसार पानी झाले और बाउल को स्ट्रेक संहित अलग रख दें।3. अब एक्क दूरसे बाउल में तेल, कटे हुए महरूम ढालें और ओचन में रखकर स्टाट दबाए।4. बौग आने पर, उपरोक्त बाउल से रटौंक को इरा बाउल में झाले और किर नमक, काली मिर्व और स्वादानुसार वीनी और टमाटर की सौंस झालकर स्टाट दबाए। गर्म-गर्म परोसं और कसे हुए चीजु से जनाएं। | ||||
| Category Weight Limit Utensil Instructions | |||
| So3 | Tomato Soup | 0.2 kg Microwave SafeGlass Bowl | For 2 Tomato Soup |
| Chopped Tomato100 gms | |||
| Chopped Carrot25 gms | |||
| Chopped Onion1 small | |||
| Chopped Ginger1 tsp | |||
| Chopped Garlic1 tsp | |||
| Salt, Sugar, PepperAs per your taste | |||
| Comflour2 tbsp | |||
| Water2 cup | |||
| Oil / Butter2 tbsp | |||
| Method: From Stock (Boiled Vegetables)1. In MWS glass bowl add chopped tomato, chopped onion, ginger, garlic and carrot with 2 cup of water. After that put the MWS bowl in Microwave. Select the menu and then press start.When, beep, grind and strain the whole and add water as per your requirement.In another bowl add oil/butter and stock and then put the bowl in Microwave and press start. When beep, add sugar, salt, black pepper as per your taste and cornflour paste which is made up by mixing the half cup of cold water and add the grinded stock.Serve hot and garnish with bread croutons, coriander (green dhania) and fresh cream. | |||
| Vitibi: S'to'ak (Uwbl### Huy# r###j###) S###1. Ma###ve### ### ####### ####### ####### ####### ####### ####### ####### ####### ####### ####### ####### ####### ####### ####### ####### ####### ####### ####### ####### ####### ####### ####### ####### ####### ####### ####### ####### ####### ####### ####### ####### ####### ####### ####### ####### ####### ####### ####### ####### ####### ####### ####### ####### ####### ####### ####### ####### ####### ####### ####### ###### ####### ####### ####### ####### ####### ####### ####### ####### ####### ####### ####### ####### ####### ####### ####### ####### ####### ####### ####### ####### ####### ####### ####### ####### ####### ####### ####### ####### ####### ####### ####### ####### ####### ####### ####### ####### ####### ####### ####### ####### ####### ####### ####### ####### ####### ####### ####### ####### ####### ########## ####### ####### ####### ####### ####### ####### ####### ####### ####### ####### ####### ####### ####### ####### ####### ####### ####### ####### ####### ####### ####### ####### ####### ####### ####### ####### ####### ####### ####### ####### ####### ####### ####### ####### ####### ####### ####### ####### ####### ####### ####### ####### ####### ####### ####### ####### ####### ####### ####### ####... | |||
| So4 | Chicken Soup | 0.3 kg Microwave SafeGlass Bowl | For 2 Chicken Soup |
| Boneless Chicken300 gms | |||
| Ginger Paste1 tsp | |||
| Garlic Paste1 tsp | |||
| Salt & Pepper PowderAs per your taste | |||
| Comflour Paste2 tbsp + 1/2 cup of water | |||
| Oil2 tbsp | |||
| Water2 cup | |||
| Method: In MWS glass bowl add oil, chicken in small pieces, giner paste, garlic paste and water. Put the glass bowl in microwave. Select the menu and press start.Vitibi: Ma###ve### ####### ####### ####### ####### ####### ####### ####### ####### ####### ####### ####### ####### ####### ####### ####### ####### ####### ####### ####### ####### ####### ####### ####### ####### ####### ####### ####### ####### ####### ####### ####### ####### ####### ####### ####### ####### ####### ####### ####### ####### ####### ####### ####### ####### ####### ####### ####### ####### ####### ## | |||
Soup सूप
| Category Weight Limit Utensil Instructions | ||||
| So5 | Chicken Tortilla Soup | 0.2 kg Microwave SafeGlass Bowl | Chicken pieces (Boneless)200 gmsGinger Garlic paste1 tspWater4 cupsSalt, Pepper Powder, Green ChilliesAs per your tasteOil2 tbspTortilla pieces10-15 Nos.Method:1. In MWO bowl put water and chicken pieces. Cover and keep it in Microwave. Select menu and press start to cook. When it gives a beep, remove. In another bowl add oil and ginger garlic paste. Press start. When it gives a beep add Chicken stalk, salt, pepper powder, green chilli and 1 cup water. Press start. Serve with tortilla pieces. | |
| Method:1. In MWO bowl put water and chicken pieces. Cover and keep it in Microwave. Select menu and press start to cook. When it gives a beep, remove. In another bowl add oil and ginger garlic paste. Press start. When it gives a beep add Chicken stalk, salt, pepper powder, green chilli and 1 cup water. Press start. Serve with tortilla pieces. | ||||
| So6 | Wonton Soup | 0.3 kg Microwave SafeGlass Bowl | Chopped cabbage, carrot, capsicum, french beans100 gms eachGinger paste1 tspGarlic paste1 tspSpinach in pieces10 leavesOil2 tbspSall, Sugar, Pepper PowderAs per your tasteWater2 cupReady Wonton6-7 pcsMethod:1. In MWS glass bowl add oil and vegetables, ginger, garlic paste. Select menu & press start. When beep, add salt, pepper, sugar & water as per your requirement and put in Microwave and press start.How to make Wonton:Maida - 1 cup, Salt - 1 pinch, Oil - 1 tbspMethod:Mix all the ingredients in the bowl and make dough with too warm water. After that cover the bowl and leave the mixture for 10-15 minutes.For StuffingCabbage, carrot, capsicum which is cut in long pieces.Method:Mix all the ingredients for stuffing. Make a small puree of wonton and put the small quantity of stuffing in between them and then cover the puree and press it. | |
| Method:1. In MWS glass bowl add oil and vegetables, ginger, garlic paste. Select menu & press start. When beep, add salt, pepper, sugar & water as per your requirement and put in Microwave and press start.How to make Wonton:Maida - 1 cup, Salt - 1 pinch, Oil - 1 tbspMethod:Mix all the ingredients in the bowl and make dough with too warm water. After that cover the bowl and leave the mixture for 9-15 minutes.For StuffingCabbage, carrot, capsicum which is cut in long pieces.Method:Mix all the ingredients for stuffing. Make a small puree of wonton and put the small quantity of stuffing in between them and then cover the puree and press it. | ||||
Continental Menu कॉन्टीनेन्टल मीनू
| Category Weight Limit Utensil Instructions | ||||||
| Co1 | Pasta | 0.1~0.3kg | Microwave safe bowl & Microwave safe flat glass dish & High rack | For | 0.1 kg | 0.2 kg |
| Penne pasta | 100 g | 200 g | ||||
| Butter | 1 tbsp | 2 tbsp | ||||
| Chopped onion | 1/2 cup | 1 cup | ||||
| Chopped garlic | 1 tbsp | 11⁄2 tbsp | ||||
| Chopped palak leaves | 50 g | 75 g | ||||
| Hot water | 400 ml | 800 ml | ||||
| Cream | 1/1 cup | 1 cup | ||||
| Grated cheese | 2 tbsp | 3 tbsp | ||||
| Nutmeg powder, oregano, salt & pepper | As per taste | |||||
| Method: 1. In a MWS safe bowl take pasta, add water (sufficient to boil the pasta) & few drops of oil. Select menu and weight and press start.2. When beeps, drain water from the pasta, wash & separate under running water. In a MWS flat glass dish add butter, onion, garlic and palak. Mix well and press start.3. When beeps, add cream, nutmeg powder, oregano, salt, pepper, boiled pasta, some hot water. Mix well and sprinkle grated cheese. Keep the vessel on high rack and press start. | ||||||
| Co2 O | 3/kgAu Gratin | Microwave safe flat glass dish & High rack | Mix Vegetables - Gajar, Cauliflower, French Beans (cut into small pieces), Sweet Coms, Green peas etc. | 0.3 kg | ||
| Maida | 2 tbsp | |||||
| Butter | 2 tsp | |||||
| Milk | 1 cup | |||||
| Hot Water | 1⁄2 cup | |||||
| Grated Cheese | 4 tbsp | |||||
| Salt, Sugar & Pepper | As per your taste | |||||
| Method: 1. In MWS bowl take butter, vegetable & maida, mix well, select menu & weight press start.2. When beep add milk, hot water, salt, sugar & pepper, mix well & press start.3. When beep mix well and spread grated cheese on it, place the dish on high rack & press start. | ||||||
Continental Menu कॉन्टीनेन्टल मीनू
| Category Weight Limit Utensil Instructions | |||||||
| Co3 | Macaroni | 0.1~0.3kg | Microwave safe bowl | ||||
| For | 0.1kg | 0.2kg | 0.3kg | ||||
| Macaroni | 100g | 200g | 300g | ||||
| Hot water | 400ml | 800ml | 1200ml | ||||
| Butter | 1tbsp | 2tbsp | 3tbsp | ||||
| Spring onion chopped | 1tbsp | 2tbsp | 3tbsp | ||||
| Garlic chopped | 1tsp | 2tsp | 3tsp | ||||
| Mushroom chopped | 3nos. | 4nos. | 5nos. | ||||
| Tomato sauce | 1tbsp | 2tbsp | 3tbsp | ||||
| Chilli sauce | 1tsp | 2tsp | 3tsp | ||||
| Salt, sugar, pepper & oregano | As per taste | ||||||
| Method: 1.In MWS bowl take Macaroni with hot water. Select menu & weight & press start. When beeps, drain water from it. In MWS bowl add all the ingredients with boiled Macaroni, mix well and press start. | |||||||
| Co4 | 0.1~Balacki Mushrooms | Microwave safe flat glass dish & High Rack | |||||
| For | 0.1kg | 0.2kg | 0.3kg | ||||
| Mushrooms | 150gm100 gm50 gm | ||||||
| White Sauce | 50gm | 100gm | 150gm | ||||
| Cheese (grated), Salt, Kali Mirch | As required | ||||||
| Butter | 1tbsp | 11⁄2tbsp | 2tbsp | ||||
| Method: 1.In MWS glass flat dish put all the ingredients except cheese, mix well. Select menu & weight, press start. When beep keep high rack in the oven. Spread grated cheese on the top of the mixture. Place the dish on the rack. Press Start. | |||||||
Continental Menu कॉन्टीनेन्टल मीनू
| Category Weight Limit Utensil Instructions | ||||
| Co5 | 0.3 kg | Lgasaneyah | Microwave safe flat glass dish & Low Rack | |
| Lasaney Sheets (cooked) | ||||
| White Sauce | ||||
| Pizza Sauce | ||||
| Mix Vegetables (boiled) - Egg plant, Zukini, Brocolli, Mushrooms, Sweet Corns etc. | ||||
| Oil | ||||
| Oregano, Salt & Black Pepper | ||||
| Grated Cheese | ||||
| Method:1. Except Lasagne sheets and cheese mix all the ingredients in MWS glass bowl. Select menu & press start.2. When beep, in MWS flat glass dish arrange lasagna sheet in the bottom. Then spread vegetable mixture on it again keep another lasagna sheet on it and make layers of sheets and vegetable mixture. Spread grated cheese on the top and press start.3. When beep, keep low rack in the oven and place the dish on the rack and press start. | ||||
| Co6 | 0.3 kg | Potatodumpling | Microwave safe idli steamer & Microwave safe flat glass dish | |
| Maida | ||||
| Boiled and grated potato | ||||
| Grated paneer | ||||
| Salt, Pepper, Nutmeg powder | ||||
| Finely chopped spinach | ||||
| Butter & finely chopped garlic | ||||
| Pizza sauce | ||||
| Method:1. Mix all the ingredients for dumpling together and make a dough. Make 10-12 balls.2. In the idli steamer, add water, place the dumplings in the idli stand & cover. Select menu & press start.3. When beeps, take out the dumplings from the steamer.4. Allow them to cool. In MWS flat glass dish add butter and put the dumplings in it and press start. | ||||
INDIAN RASOI
इंडियन रसोई
- Indian Cuisine (IC)
- Tandoor se.. (tS)
- Sweet Corner (SC)
- Chatpat Corner (CC)
Indian Cuisine भारतीय व्यंजन
| Category Weight Limit Utensil Instructions | ||||||
| IC1 | Mix Veg | 0.1~0.3kg Microwave safe bowl | Oil | 1 tbsp | 11⁄4tbsp | 2tbsp |
| Onion, Garlic, Carrot, Capsicum, Cabbage | 100 gm | 200 gm | 300 gm | |||
| Salt, Red Chilli Powder | To taste | |||||
| Corn Flour | 1 tsp | 2 tsp | 4 tsp | |||
| Water | 3/4 cup | 1 cup | 11⁄2 cup | |||
| Soya Sauce | 1 tsp | 2 tsp | 3 tsp | |||
| Tomato Sauce | 1 tsp | 2 tsp | 3 tsp | |||
| Vinegar | 1/2 tsp | 1/2 tsp | 3/4 tsp | |||
| Brown Sugar | 1/2 tsp | 1/2 tsp | 1/2 tsp | |||
| Ajinomoto | 1 pinch | |||||
| Method: 1.In a MWS bowl mix all the vegetables and keep aside.2.In another bowl add oil, all other ingredients. Mix it well and press Start by selecting the desired weight. When beep sounds, stir the bowl.3.Now add vegetables to the gravy and continue cooking it again. | viti: 1. mādākṛṇeṇ vārāf bāuāl tān e rāmāi sākājīyō kō miṭla lāe ār ār ānakōa alalāg rāxā dāe 1. euk dūrārā bāuāl tān e tāl tān jālte ār ār ār tārāmāi sāmāi chājārā kō ārālakār ārākārī tārāh rāe miṭla tān tāthā ārākārā kāzān chūnakār rāstārī dābārā 1. bēiṣp suuānāi dānē pār bāuāl kāo hīlālae 1. ār ār kūkīng cāwālū rāxā 1 | |||||
| IC2 | Veg Biryani | 0.1~0.3kg Microwave safe bowl | For | 0.1 kg | 0.2 kg | 0.3 kg |
| Basmati Rice (soaked for 1 hour) | 100 g | 200 g | 300 g | |||
| Water | 200 ml | 400 ml | 600 ml | |||
| Ghee | 1 tbsp | 2 tbsp | 3 tbsp | |||
| Laung, Elaichi, Dalchini, Black Pepper, Tej Patta, Salt & Sugar | As per taste | |||||
| Mix Vegetables - (Gobhi, Mutter, Gajar, French Beans) | 1⁄2 Cup | 1 Cup | 11⁄2 Cup | |||
| Method: 1.In a MWS bowl add oil, laung, dalchini, elaichi, tej patta, pepper, corns, mix vegetables. Select menu & weighl & press start.2.When beeps, add water, soaked rice & salt. Mix well & cover. Press start.3.Allow to stand for 5 minutes when cooking ends. Serve hot with raita or salad. | viti: 1. mādākṛṇeṇ vārāf bāuāl tān e rāmāi lāe ār ār ār ār ār ār ār ār ār ār ār ār ār ār ār ār ār ār ār ār ār ār ār ār ār ār ār ār ār ār ār ār ār ār 1. bēiṣp duuārā dān e pār paṇa, bēiṣgā ārār ār ār ār ār ār ār ār ār ār ār ār ār ār ār ār ār ār ār ār ār ār ār ār ār ār ār ār ār ār ār ār ār āl | 1. mādākṛṇeṇ vārāf bāuāl tān e rāmāi lāe ār ār ār ār ār ār ār ār ār ār ār ār ār ār ār ār ār ār ār ār ār ār 1. bēiṣp duuārā dān e pār paṇa, bēiṣgā ārū ār ār ār ār ār ār ār ār ār ār ār ār ār ār ār ār ār ār ār ār ār ār ār ār ār ār ār ār ār ār ār ār ār | ||||
Indian Cuisine भारतीय व्यंजन
| Category Weight Limit Utensil Instructions | ||||||
| IC3 | Kadhal Paneer | 0.1 - 0.3 kg Microwave safe bowl | ||||
| Paneer | 0.1 kg | 0.2 kg | 0.3 kg | |||
| Onion Paste | 3 tbsp | 4 tbsp | 5 tbsp | |||
| Tomato Puree | 11⁄2 tbsp | 2 tbsp | 3 tbsp | |||
| Ginger-Garlic Paste, Salt & Sugar | To taste | |||||
| Red Chilli Powder, Halid Kasuri Methi, Garam Masala | To taste | |||||
| Butter | 11⁄2 tbsp | 2 tbsp | 3 tbsp | |||
| Fresh Cream | 1 tbsp | 11⁄2 tbsp | 2 tbsp | |||
| Method: 1. In Microwave Safe Bowl take oil, onion paste, ginger garlic paste, mix well and press start. When beep, add tomato puree, butter, fresh cream, haldi, red chilli powder, garam masala, kasuri methi, salt, sugar and paneer cubes, mix well and press start, garnish with hara dhania and serve hot. | ||||||
| IC4 | Dal Tadka | 0.2 kg | Microwave safe bowl | |||
| Dal (soaked for 1 hour) | 0.2 kg | |||||
| Water | 300 ml | |||||
| Oil | 2 tbsp | |||||
| Rai, Jeera, Kasuri Methi, Hara Dhania, Hing, Haldi Geen Chilli | To taste | |||||
| Salt | To taste | |||||
| Method I 1. Take 200 gms dal in Microwave Safe bowl, add Water, Haldi & Hing. Select menu press start to cook. When beep take another bowl add oil, jeera, hari mirch, curry leaves, select menu & start. When beep add dal, salt, dhania jeera powder, hara dhania, kasuri methi (optional) lemon juice select menu & press start to cook. | ||||||
Indian Cuisine भारतीय व्यंजन
| Category Weight Limit Utensil Instructions | ||||||
| IC5 | Sambhar | 0.2 kg | Microwave safe bowl | Arhar Dal (Soaked for 2 hrs) | 200 g | |
| Oil | 2 tbsp | |||||
| Onion chopped | 1 medium | |||||
| Tomato chopped | 1 medium | |||||
| Mixed Vegetables chopped - Drumsticks, ghiya, Brinjals, Red Pumpkin | 1 cup | |||||
| Boiled Water | 400 ml | |||||
| Imli pulp, Green Chilli, Sambhar Masala, Salt, Gud | As per your taste | |||||
| Method: 1. Soak dal for 2 hours, In Microwave Safe Bowl take dal, haldi, onion, green chilli, tomato, mix vegetables and boiled water. Select menu and press start.2. When beeps, in another Microwave Safe Bowl take oil, add rai, hing, curry leaves, dhania, red chilli. Press start.3. When beeps, mash dal very well and add to tadka.Add imli pulp sambhar masala, gud and some water (if required). Press start. Stand for 5 mins. Garnish with coconut and hara dhania and serve with Idli. | ||||||
| Chilli Chicken | 0.1~0.3 kgIC6 | Microwave safe bowl | Boneless Chicken | 0.1 kg | 0.2 kg | |
| Oil | 1 tbsp | 11⁄2 tbsp | ||||
| Shimla Mirch | 1⁄2 no. | 1 no. | ||||
| Chilli Sauce | 1⁄2 tbsp | 1⁄2 tbsp | ||||
| Soya Sauce | 1⁄2 tbsp | 1⁄2 tbsp | ||||
| Vinegar | 1⁄2 tbsp | 1⁄2 tbsp | ||||
| Salt, Sugar & Kali Mirch | As per your taste | |||||
| Method I 1. In Microwave Safe Bowl take oil, bone less chicken pieces, chopped ginger garlic, soya sauce & cover il, select menu and press start.2. When beeps add chopped onion, chopped capsicum, chopped green chilli, vinegar, salt, sugar, kali mirch and 2 tsp comflour dissolved with 1/4 cup cold water place it in Microwave without cover and press start. | ||||||
Tandoor Se तन्दूर से
| Category Weight Limit Utensil Instructions | ||||||
| Malai Tikka | 0.3 kgtS1 | Metal tray & Low rack | For | 0.3 kg | ||
| Boneless Chicken (11⁄2" pieces) | 300 g | |||||
| Oil | For basting | |||||
| For Marinade | ||||||
| Thick cream | 1⁄4 cup | |||||
| Green cardamom powder | 1⁄4 tsp | |||||
| Pepper powder | As per taste | |||||
| Garlic paste | 1⁄2 tsp | |||||
| Ginger paste | 1 tsp | |||||
| Melted butter | 1⁄4 tbsp | |||||
| Garam masala, amchoor, jeera powder, salt | As per taste | |||||
| Green chillies | 1 no. | |||||
| Method: 1. Mix all the ingredients of the marinade in a bowl. Marinate Chicken & keep in refrigerator for 1 hour.2. Grease the metal tray with some oil, keep the marinated chicken pieces on tray.3. Keep the tray on low rack.4. Select menu & press start.5. After 15 minutes of cooking, add 1 tsp oil & turn over. Press start. | Vitghi: 1. Matsalte KI Sarni Sana#p# EPK S### T## M#lal# Ie I M#k#n P#r M#s#l# L#ngak#r E#h# #### #e ##le## #### #### #### ## ## ## ## ## ## ## ## ## ## ## ## ## ## ## ## ## ## ## ## ## ## ## ## ## ## ## ## ## ## ## ## ## ## ## ## ## ## ## ## ## ## ## ## ## ## ## ## ## ## ## ## ## ## ## ## ## ## ## ## ## ## ## ## ## ## ## ## ## ## ## ## ## ## ## ## ## ## ## ## ## ## ## ## ## ## ## ## ## ## ## ## ## ## ## ## ## ## ## ## # ## ## ## ## ## ## ## ## ## ## ## ## ## ## ## ## ## ## ## ## ## ## ## ## ## ## ## ## ## ## ## ## ## ## ## ## ## ## ## ## ## ## ## ## ## ## ## ## ## ## ## ## ## ## ## ## ## ## ## ## ## ## ## ## ## ## ## ## ## ## ## ## ## ## ## ## ## ## ## ## ## ## ## ## ## ## ## ## ## ## ## ## ## ## ## ## ## ## ## ### | |||||
| 2. #### ## ## ## ## ## ## ## ## ## ## ## ## ## ## ## ## ## ## ## ## ## ## ## ## ## ## ## ## ## ## ## ## ## ## ## ## ## ## ## ## ## ## ## ## ## ## ## ## ## ## ## ## ## ## ## ## ## ## ## ## ## ## ## ## ## ## ## ## ## ## ## ## ## ## ## ## ## ## ## ## ## ## ## ## ## ## ## ## ## ## ## ## ## ## ## ## ## # ## ###### ## ## ## ## ## ## ## ## ## ## ## ## ## ## ## ## ## ## ## ## ## ## ## ## ## ## ## ## ## ## ## ## ## ## ## ## ## ## ## ## ## ## ## ## ## ## ## ## ## ## ## ## ## ## ## ## ## ## ## ## ## ## ## ## ## ## ## ## ## ## ## ## ## ## ## ## ## ## ## ## ## ## ## ## ## ## ## ## ## ## ## ## ## ## ## ## ## ## # ### ###### ###### ###### ###### ###### ###### ###### ###### ###### ###### ###### ###### ###### ###### ###### ###### ###### ###### ###### ###### ###### ###### ###### ###### ###### ###### ###### ###### ###### ###### ###### ###### ###### ###### ###### ###### ###### ###### ###### ###### ###### ###### ###### ###### ###### ###### ###### ###### ###### ###### ####### ###### ###### ###### ###### ###### ###### ###### ###### ###### ###### ###### ###### ###### ###### ###### ###### ###### ###### ###### ###### ###### ###### ###### ###### ###### ###### ###### ###### ###### ###### ###### ###### ###### ###### ###### ###### ###### ###### ###### ###### ###### ###### ###### ###### ###### ###### ###### ###### ###### ##### | ||||||
| 3. #### ## ## ## ## ## ## ## ## ## ## ## ## ## ## ## ## ## ## ## ## ## ## ## ## ## ## ## ## ## ## ## ## ## ## ## ## ## ## ## ## ## ## ## ## ## ## ## ## ## ## ## ## ## ## ## ## ## ## ## ## ## ## ## ## ## ## ## ## ## ## ## ## ## ## ## ## ## ## ## ## ## ## ## ## ## ## ## ## ## ## ## ## ## ## ## ## # ### ####### ###### ###### ###### ###### ###### ###### ###### ###### ###### ###### ###### ###### ###### ###### ###### ###### ###### ###### ###### ###### ###### ###### ###### ###### ###### ###### ###### ###### ###### ###### ###### ###### ###### ###### ###### ###### ###### ###### ###### ###### ###### ###### ###### ###### ###### ###### ###### ###### ##### | ||||||
Tandoor Se तन्दूर से
| Category Weight Limit Utensil Instructions | ||||||
| Murg Tandoori | 0.1 - 0.3 kgtS3 | High Rack & Metal Tray | Chicken pieces (boneless) | 0.1 kg | 0.2 kg | |
| For marinate hung curd | 2 tbsp | 3 tbsp | ||||
| Ginger Garlic Paste | 1 tsp | 112 tsp | ||||
| Salt, Red Chilli Powder,Garam Masala &Chat Masala | As per your taste | |||||
| Oil | 1 tbsp | 1 tbsp | ||||
| Lemon Juice | 1 tbsp | 112 tbsp | ||||
| Eatable Red Colour | Pinch | |||||
| Method:1.Wash chicken pieces & mix with all the ingredients ofmarinate. Keep for one hour in refrigerator.2.Arrange chicken pieces on greased metal tray apply littleoil on each piece. Keep the metal tray on high rack selectmenu & press start.3.When beep turn the piece, press start. | विबि : 1.चिक्न के टुकडों को धोएं और मैरीनेट समी तत्यों के साथ मिलाएं।एक घण्टे के लिए रेफ्रिजटर के अन्दर रखे।2.चिक्न के टुकडों को तेल लगे मैटल ट्रें पर व्यास्थित करे। हर एक टुकड़े पर धोड़ा तेल लगा ले। अष मैटल ट्रें को हाई रैक पर रखे,मीनू चुने और स्टार्ट दबाए।3.‘भीप’ सुनाई देने पर टुकड़ों को पलरें, स्टार्ट दबाएं। | |||||
| Fish Tandoori | 0.1 - 0.3 kgtS4 | High Rack & Metal Tray | Fish Fillets | 0.1 kg | 0.2 kg | |
| For marinate hung curd | 1 tbsp | 112 tbsp | ||||
| Lemon juice | 1 tsp | 112 tsp | ||||
| Ginger Garlic Paste | 1 tsp | 112 tsp | ||||
| Salt, Red Chilli Powder,Haldi, Garam Masala &Chat Masala | As per your taste | |||||
| Eatable Red Colour | A pinch | |||||
| Method:1.Wash the fish fillets, mix all the ingredients of marinateand coat this mixture to fish filets evenly keep for onehour in refrigerator.2.Arrange the fish fillets on greased metal tray. Apply littleoil on each piece. Keep the metal tray on high rack.Select menu and press start.3.When beep turn the pieces and press start. | विबि : 1.मळली के टुकडों को धोएं, मैरीनेट के समी तत्यों को आत्मी तत्ह निलाएं और मळली टुकडों पर समान रूप से लपेट दें तथा एक घण्टे के लिए रेफ्रिजटर के अन्दर रखे।2.मळली के टुकडों को तेल लगे मैटल ट्रें पर व्यास्थित करे। प्रशेक टुकडे पर शोड़ा-शोड़ा तेल लगा ले। मैटल ट्रें को हाई रैक पर रख दें। गौनू तुने और स्टार्ट दबाए।3.‘भीप’ सुनाई देने पर टुकडों को पलरें और स्टार्ट दबाएं। | |||||
Tandoor Se तन्दूर से
| Category Weight Limit Utensil Instructions | |||||
| Mutton Tikka | 0.3 kgtS5 | Metal tray & Low rack | For | 0.3 kg | |
| Multon boneless pieces | 300 kg | ||||
| For marinade | |||||
| Hung curd | 1 12 tbsp | ||||
| Ginger Garlic Paste | 2 tbsp | ||||
| Salt, Red Chilli Powder, Haldi, Garam Masala & Chat Masala | As per taste | ||||
| Oil | For basting | ||||
| Lemon juice | 2 tsp | ||||
| Ealable Red Colour | 1 pinch | ||||
| Method: 1. Wash the mutton pieces & mix with ginger garlic paste, curd,salt, lemon juice, garam masala, chaat masala, red chilli powder. Refrigerate for 1 hour.2. In a MWS bowl take this mixture. Select menu & press start.3. When beeps, transfer the mutton pieces on metal tray. Baste with oil. Keep the tray on low rack & press start.4. After 15 minutes of cooking, turn over the mutton pieces.Press start.Serve with nan or roti | 1. मटन के टुकड़ों को पोए और अरदक-लहसुन पेस्ट. दही. नमक, गीबू रचे, परभ मसाला, वाट मभाला, लात गिर्च पाउडर मै मिला ले। 1 घण्टे के लिए रेफिक्रेटर में रख दें।2. इरा मिश्रण की माइलोवेव सेंक बाजल में लेकर मीनु चृनों और स्टाट दबाएं।3. बीप सुनाई देने पर मटन के टुकड़ो को मैटल ट्रे पर विस्थापित करे। तेल लगाकर लो रैक पर रखें और स्टाट दबाएं।4. पकने के 15 मिनट बाद मटन के टुकड़ों को मलटकर स्टाट दबाएं। नान या सोटी के साथ परोसें। | ||||
| TS6 | Tandoori Sabzi | 0.2 kg Microwavesafe glass bowl+High rack+Metal tray | Mix Vegetables - Bhindi, Cauliflower, Brinjals, Mushrooms, Potato, Paneer cubes | 0.2 kg (cut into medium size pieces) | |
| Onion Paste | 1 cup | ||||
| Ginger-Garlic Paste | 1 tsp | ||||
| Tomato Puree | 1/2 cup | ||||
| Red Chilli powder, Haldi, Garam Masala, Salt | As per your taste | ||||
| Oil | 3~4 tbsp | ||||
| Hara Dhania | For gamishing | ||||
| Method: 1. In Microwave Safe Glass Bowl take oil, onion paste & ginger garlic paste select menu and press start.2. When beep add vegetables, red chili powder, haldi, garam masala, chat masala salt, and Tamoto puree, mix well & press start.3. When beep, transfer this mixture to metal tray, spread evenly on tawa. keep tawa on high rack & press start serve hot with tandoori nan. | 1. माइक्रोवेव सेंक ग्लास बाउल में तेल, प्याज और अदरक-लहसुन की पेस्ट ते. मीनु चुनाकर स्टाट दबाएं।2. बीप सुनाई देने पर साज्याया, लात मिर्च पाउडर, हत्दी, रग्म मसाला, वाट मसाला, नमक और टोगेटो पूरी डाले, अखी तरह मिलाए और स्टाट दबाएं।3. बीप सुनाई देने पर इरा मिश्रण को मैटल ट्रे पर विस्थापित कर दें, तते पर समान रूप से कैला दें। तते को हाई रैक पर रखें और स्टाट दबाए। ततूरी नान के साथ गर्म-गर्म परोसें। | ||||
Sweets Corner स्वीट कॉर्नर
| Category Weight Limit Utensil Instructions | |||||||
| SC1 | Suji Halwa | 0.1~0.3kg | Microwave safe glass bowl | ||||
| For | 01 kg | 0.2 kg | 0.3 kg | ||||
| Suji | 100 g | 200 g | 300 g | ||||
| Ghee (melted) | 2 tbsp | 3 tbsp | 4 tbsp | ||||
| Water | 300 ml | 600 ml | 900 ml | ||||
| Sugar | 100 gms | 200 gms | 300 gms | ||||
| Cashewnuts, kishmish, kesar, elaichi powder | As per taste | ||||||
| Method: 1. In a MWS glass bowl add ghee & suji, mix well. Select menu & weight & press start.2. When beeps, stir well & press start.3. Add water, sugar, cashwnuts, kishmish, kesar, elaichi powder & press start. Mix well & serve. | Vitibi: 1. মাইক্রোয়ে সেক বাউল মে ঘী ওর তুজী লেকর অন্ধমী তরহ মিলাএ। মৌনু ওর বজন চুনকর রস্টার্ট দবাএ।2. বীপ সুনাঈ দেনে পর ইসকো অন্ধী তরহ হিলাএং ওর রস্টার্ট দবাএ।3. পানী, চীনী, কাপু, কিশমিষা, কেসর ইলায়ী পাউডর ডালকর অচ্চী তরহ মিলাএ ওর রস্টার্ট দবাএ। | ||||||
| SC2 | BesanLadoo | 0.1~0.3kg | Microwave safe glass bowl | Besan | 0.1 kg | 0.2 kg | 0.3 kg |
| Ghee | 3 tbsp | 5 tbsp | 7 tbsp | ||||
| Powder Sugar | 50 gm | 100 gm | 150 gm | ||||
| Elaichi Powder | 12 tsp | 1 tsp | 1 tsp | ||||
| Method: 1. In MWS glass bowl add ghee & besan, mix well. Select menu & weight & press start.2. When beeps, stir it & press start.3. When beeps, stir it & press start.4. Allow it to cool. Add powdered sugar & elaichi powder. Make ladoos out of it. | Vitibi: 1. মাইক্রোয়ে সেক র্জাস বাউল মে ঘী ওর বেসন লেকর অন্ধী তরহ মিলাএ। মৌনু ওর বজন চুনকর রস্টার্ট দবাএ।2. বীপ সুনাঈ দেনে পর ইসে হিলাএ ওর রস্টার্ট দবাএ।3. বীপ সুনাঈ দেনে পর ইসে হিলাএ ওর রস্টার্ট দবাএ।4. রংখা হোনে দে। বৃরা ওর ইলায়ী পাউডর ঢালে। অচ্চী তরহ মিলাকর লক্তু বন্গার। | ||||||
| Kalakand | 0.1~0.3kgSC3 | Microwave safe glass bowl | Grated Paneer | 0.1 kg | 0.2 kg | 0.3 kg | |
| Milkmaid | 50 gms | 100 gms | 200 gms | ||||
| Milk Powder | 1 tbsp | 2 tbsp | 3 tbsp | ||||
| Cornflour | 1/2 tsp | 1 tsp | 1 tsp | ||||
| Elaichi Powder | 1/2 tsp | 1 tsp | 1 tsp | ||||
| Method: 1. In Microwave Safe Bowl take grated paneer, milkmaid.milk powder, cornfloor, Elaichi powder, kesar. Mix well select menu and press start.2. When beep. Mix it again and press start.3. Garnish with dry fruits when set cut into pieces. | Vitibi: 1. মাইক্রোয়ে সেক বাউল মে কর্সা হুআ পানীর, মিলকমেড, মিলক পাউডর, মককা কা আটা ওর ইলায়ী পাউডর ওর কেসর লে। অচ্চী তরহ মিলাএং, মৌনু চুনের ওর স্টার্ট দবাএ।2. বৌপ সুনাঈ দেনে পর ইসে চুনারা নিলাএং ওর রস্টার্ট দবাএ।3. এুবে নরোঃ কে সাথ সাগাএ ওর পান জানে কে বাদ ইরী টুকর্ডাঁ মে কাটে। | ||||||
Sweets Corner स्वीट कॉर्नर
| Category Weight Limit Utensil Instructions | ||||||
| SC4 | ShahiTukda | 0.1~0.3kg | Microwave safe glass bowl& High Rack | |||
| Bread Slices | 1 slice | 2 slices | ||||
| Milkmaid | 50 ml | 100 ml | ||||
| Milk | 25 ml | 50 ml | ||||
| Sugar | 1 tbsp | 2 tbsp | ||||
| Badam, Pista Pieces | 2 tbsp | 3 tbsp | ||||
| Kesar-Elaichi Powder | As per your taste | |||||
| Method: 1. Arrange bread slices on high rack. Select menu & press start.2. When beep turn slices press start.3. Mix Milkmaid, milk, sugar, dry fruits and kesar elaichi powder in Microwave Safe Flat Dish. Pour the mixture on slices and press start. Serve hot. | ||||||
| SC5 | Kheer | 0.1~0.3kg | Microwave safe bowl | For | 0.1 kg | 0.2 kg |
| Milk | 100 ml | 200 ml | ||||
| Seviyan (roasted) | 10 g | 20 g | ||||
| Sugar | 50 g | 100 g | ||||
| Badam paste | 1 tbsp | 1 12 Ibsp | ||||
| Kesar & elaichi powder | As per taste | |||||
| Method: 1. In a MWS bowl take milk & select menu & weight & press start.2. When beeps, add seviyan to the bowl & press start.3. When beeps, add almond paste, sugar, kesar & elaichi powder & press start. Garnish with dry fruits & serve hot or chilled. | ||||||
| SC6 | Payasum | 0.1~0.3kg | Microwave safe bowl | Rice (soaked for 1 hour) | 0.1 kg | 0.2 kg |
| Milk + Water | 100 ml | 200 ml | ||||
| Sugar | 75 gm | 150 gm | ||||
| Elaichi Powder, Kesar, Dry fruits | As per your taste | |||||
| Method: 1. In Microwave Safe Bowl take ghee, soaked rice, milk, water and cover it. Select menu and press start.2. When beep add more milk, sugar, dry fruits, kesar, elaichi powder. Mix well and press start. Stand for 5 mins. sprinkle kewada jal on it. Serve hot or chilled. | ||||||
Chatpat Corner
चटपट कॉनेर
| Category Weight Limit Utensil Instructions | ||||
| CC1 | Apple Tomato Chutney | 0.3 kg | Microwave Safe Glass Bowl | |
| Apple pieces 100 gms | ||||
| Tomato pieces 100 gms | ||||
| Green chillies, Salt, Sugar As per your taste | ||||
| Oil 2 tbsp | ||||
| For Tempering : Rai, Jeera, Hing etc. | ||||
| Method: 1. In a MWS bowl put apple, tomato and keep it in Microwave. Select menu and press start to cook. When it gives a beep, remove and grind it in a mixer. In another bowl add oil and tempering and press start. When it gives a beep, add ground mixture and press start. Gamish with chopped coriander. | ||||
| CC2 | Lemon Pickle | 0.3 kg | Microwave Safe Glass Bowl | |
| Lemon pieces 150 gms | ||||
| Sugar 150 gms | ||||
| Chilli powder, Salt As per your taste | ||||
| For Tempering : Rai, Jeera, Hing etc. | ||||
| Method: 1. Cut lemon and remove seeds. In MWS bowl add lemon pieces, sugar, salt and chilli powder. Select menu and press start. Store it in a bottle after it cools. | ||||
| Method: 1. Gaiabouk kou ke kaatckur unkanke bajunjok kou nikakal de l m aadkaow leu m aadkaow leu m aadkaow leu m aadkaow leu m aadkaow leu m aadkaow leu m aadkaow leu m aadkaow leu m aadkaow leu m aadkaow leu m aadkaow leu m aadkaow leu m aadkaow leu m aadkaow leu m aadkaow leu m uadkaow leu m aadkaow leu m aadkaow leu m aadkaow leu m aadkaow leu m aadkaow leu m aadkaow leu m aadkaow leu m aadkaow leu m aadkaow leu m aadkaow leu m aadkaow leu m aadkaow leu m aadkaow leu m aad kaow leu m aadkaow leu m aadkaow leu m aadkaow leu m aadkaow leu m aadkaow leu m aadkaow leu m aadkaow leu m aadkaow leu m aadkaow leu m aadkaow leu m aadkaow leu m aadkaow leu m aadkaow leu m aadkaow l uadkaow leu m aadkaow leu m aadkaow leu m aadkaow leu m aadkaow leu m aadkaow leu m aadkaow leu m aadkaow leu m aadkaow leu m aadkaow leu m aadkaow leu m aadkaow leu m aadkaow leu m aadkaow leu m aodkaow leu m aadkaow leu m aadkaow leu m aadkaow leu m aadkaow leu m aadkaow leu m aadkaow leu m aadkaow leu m aadkaow leu m aadkaow leu m aadkaow leu m aadkaow leu m aadkaow leu m aadkaow leu m aadkaew leu m aadkaow leu m aadkaow leu m aadkaow leu m aadkaow leu m aadkaow leu m aadkaow leu m aadkaow leu m aadkaow leu m aadkaow leu m aadkaow leu m aadkaow leu m aadkaow leu m aadkaow leu m aadkaow leul m aadkaow leu m aadkaow leu m aadkaow leu m aadkaow leu m aadkaow leu m aadkaow leu m aadkaow leu m aadkaow leu m aadkaow leu m aadkaow leu m aadkaow leu m aadkaow leu m aadkaow leu m aadkaow leu m amadkaow leu m aadkaow leu m aadkaow leu m aadkaow leu m aadkaow leu m aadkaow leu m aadkaow leu m aadkaow leu m aadkaow leu m aadkaow leu m aadkaow leu m aadkaow leu m aadkaow leu m aadkaow leu m aadkawl wahanwahanwahanwahanwahanwahanwahanwahanwahanwahanwahanwahanwahanwahanwahanwahanwahanwahanwahanwahanwahanwahanwahanwahanwahanwahanwahanwahanwahanwahanwahanwahanwahanwahanwuhahanwahanwahanwahanwahanwahanwahanwahanwahanwahanwahanwahanwahanwahanwahanwahanwahanwahanwahanwahanwahanwahanwahanwahanwahanwahanwahanwahanwahanwahanwahanwahanwahanwanhahanwahanwahanwahanwahanwahanwahanwahanwahanwahanwahanwahanwahanwahanwahanwahanwahanwahanwahanwahanwahanwahanwahanwahanwahanwahanwahanwahanwahanwahanwahanwahanwahanwohahanwahanwahanwahanwahanwahanwahanwahanwahanwahanwahanwahanwahanwahanwahanwahanwahanwahanwahanwahanwahanwahanwahanwahanwahanwahanwahanwahanwahanwahanwahanwahanwahanwihahanwahanwahanwahanwahanwahanwahanwahanwahanwahanwahanwahanwahanwahanwahanwahanwahanwahanwahanwahanwahanwahanwahanwahanwahanwahanwahanwahanwahanwahanwahanwahanwahanwahrnaanwahanwahanwahanwahanwahanwahanwahanwahanwahanwahanwahanwahanwahanwahanwahanwahanwahanwahanwahanwahanwahanwahanwahanwahanwahanwahanwahanwahanwahanwahanwahanwahanwahnawahanwahanwahanwahanwahanwahanwahanwahanwahanwahanwahanwahanwahanwahanwahanwahanwahanwahanwahanwahanwahanwahanwahanwahanwahanwahanwahanwahanwahanwahanwahanwahanwahanwashanwahanwahanwahanwahanwahanwahanwahanwahanwahanwahanwahanwahanwahanwahanwahanwahanwahanwahanwahanwahanwahanwahanwahanwahanwahanwahanwahanwahanwahanwahanwahanwahanwahnanwahanwahanwahanwahanwahanwahanwahanwahanwahanwahanwahanwahanwahanwahanwahanwahanwahanwahanwahanwahanwahanwahanwahanwahanwahanwahanwahanwahanwahanwahanwahanwahanwahanwnahanwnahanwnahanwnahanwnahanwnahanwnahanwnahanwnahanwnahanwnahanwnahanwnahanwnahanwnahanwnahanwnahanwnahanwnahanwnahanwnahanwnahanwnahanwnahanwnahanwnahanwnahanwnahanwnahanwnahanwnahanwnahanwnahanwnanhanshanlanlanlanlanlanlanlanlanlanlanlanlanlanlanlanlanlanlanlanlanlanlanlanlanlanlanlanlanlanlanlanlanlanlanlanlanlanlanlanlanlanlanlanlanlanlanlanlanlanlanlanlanlanlanlanlanlanlanlanlanlanlanlanlanlanlanlanlanlanlanlanlanlanlanlanlanlanlanlanlanlanlanlanlanlanlanlanlanlanlanlanlanlanlanlanlanlanlanlanlanbanlanlanlanlanlanlanlanlanlanlanlanlanlanlanlanlanlanlanlanlanlanlanlanlanlanlanlanlanlanlanlanlanlanlanlanlanlanlanlanlanlanlanlanlanlanlanlanlanlanlanlanlanlanlanlanlanlanlanlanlanlanlanlanlanlanlanlanlanlanlanlanlanlanlanlanlanlanlanlanlanlanlanlanlanlanlanlanlanlanlanlanlanlanlanlanlanlanlanlanplanlanlanlanlanlanlanlanlanlanlanlanlanlanlanlanlanlanlanlanlanlanlanlanlanlanlanlanlanlanlanlanlanlanlanlanlanlanlanlanlanlanlanlanlanlanlanlanlanlanlanlanlanlanlanlanlanlanlanlanlanlanlanlanlanlanlanlanlanlanlanlanlanlanlanlanlanlanlanlanlanlanlanlanlanlanlanlanlanlanlanlanlanlanlanlanlanlanlanlanianlanlanlanlanlanlanlanlanlanlanlanlanlanlanlanlanlanlanlanlanlanlanlanlanlanlanlanlanlanlanlanlanlanlanlanlanlanlanlanlanlanlanlanlanlanlanlanlanlanlanlanlanlanlanlanlanlanlanlanlanlanlanlanlanlanlanlanlanlanlanlanlanlanlanlanlanlanlanlanlanlanlanlanlanlanlanlanlanlanlanlanlanlanlanlanlanlanlanlanlanslanlanlanlanlanlanlanlanlanlanlanlanlanlanlanlanlanlanlanlanlanlanlanlanlanlanlanlanlanlanlanlanlanlanlanlanlanlanlanlanlanlanlanlanlanlanlanlanlanlanlanlanlanlanlanlanlanlanlanlanlanlanlanlanlanlanlanlanlanlanlanlanlanlanlanlanlanlanlanlanlanlanlanlanlanlanlanlanlanlanlanlanlanlanlanlanlanlanlantanlanlanlanlanlanlanlanlanlanlanlanlanlanlanlanlanlanlanlanlanlanlanlanlanlanlanlanlanlanlanlanlanlanlanlanlanlanlanlanlanlanlanlanlanlanlanlanlanlanlanlanlanlanlanlanlanlanlanlanlanlanlanlanlanlanlanlanlanlanlanlanlanlanlanlanlanlanlanlanlanlanlanlanlanlanlanlanlanlanlanlanlanlanlanlanlanlanlanlanpanlanslanlanlanlanlanlanlanlanlanlanlanlanlanlanlanlanlanlanlanlanlanlanlanlanlanlanlanlanlanlanlanlanlanlanlanlanlanlanlanlanlanlanlanlanlanlanlanlanlanlanlanlanlanlanlanlanlanlanlanlanlanlanlanlanlanlanlanlanlanlanlanlanlanlanlanlanlanlanlanlanlanlanlanlanlanlanlanlanlanlanlanlanlanlanlanlanlanplanlanbanlanlanlanlanlanlanlanlanlanlanlanlanlanlanlanlanlanlanlanlanlanlanlanlanlanlanlanlanlanlanlanlanlanlanlanlanlanlanlanlanlanlanlanlanlanlanlanlanlanlanlanlanlanlanlanlanlanlanlanlanlanlanlanlanlanlanlanlanlanlanlanlanlanlanlanlanlanlanlanlanlanlanlanlanlanlanlanlanlanlanlanlanlanlanlanlanlanplanlanplanlanlanlanlanlanlanlanlanlanlanlanlanlanlanlanlanlanlanlanlanlanlanlanlanlanlanlanlanlanlanlanlanlanlanlanlanlanlanlanlanlanlanlanlanlanlanlanlanlanlanlanlanlanlanlanlanlanlanlanlanlanlanlanlanlanlanlanlanlanlanlanlanlanlanlanlanlanlanlanlanlanlanlanlanlanlanlanlanlanlanlanlanlanlanlanlanlanlanslanslanslanslanslanslanslanslanslanslanslanslanslanslanslanslanslanslanslanslanslanslanslanslanslanslanslanslanslanslanslanslanslanslanslanslanslanslanslanslanslanslanslanslanslanslanslanslanslanslanzlanslanslanslanslanslanslanslanslanslanslanslanslanslanslanslanslanslanslanslanslanslanslanslanslanslanslanslanslanslanslanslanslanslanslanslanslanslanslanslanslanslanslanslanslanslanslanslanslanslanaanlanslanslanslanslanslanslanslanslanslanslanslanslanslanslanslanslanslanslanslanslanslanslanslanslanslanslanslanslanslanslanslanslanslanslanslanslanslanslanslanslanslanslanslanslanslanslanslanslanslangkukukukukukukukukukukukukukukukukukukukukukukukukukukukukukukukukukukukukukukukukukukukukukukukukukukukukukukukukukukukukukukukukukukukukukukukukukukukukukukukukukukukukukukukukukukukukukukukukukukukukufukukukukukukukukukukukukukukukukukukukukukukukukukukukukukukukukukukukukukukukukukukukukukukukukukukukukukukukukukukukukukukukukukukukukukukukukukukukukukukukukukukukukukukukukukukukukukukukukukukukutukukukukukukukukukukukukukukukukukukukukukukukukukukukukukukukukukukukukukukukukukukukukukukukukukukukukukukukukukukukukukukukukukukukukukukukukukukukukukukukukukukukukukukukukukukukukukukukukukukukuhukukukukukukukukukukukukukukukukukukukukukukukukukukukukukukukukukukukukukukukukukukukukukukukukukukukukukukukukukukukukukukukukukukukukukukukukukukukukukukukukukukukukukukukukukukukukukukukukukukukunkukukukukukukukukukukukukukukukukukukukukukukukukukukukukukukukukukukukukukukukukukukukukukukukukukukukukukukukukukukukukukukukukukukukukukukukukukukukukukukukukukukukukukukukukukukukukukukukukukukukuko | ||||
Chatpat Corner
चटपट कॉर्नेर
| Category Weight Limit Utensil Instructions | ||||
| CC4 | Pizza Sauce | 0.3 kg | Microwave Safe Glass Bowl | Tomato200 gmsOnions1 No.Salt, Sugar, Ajwain, Oregano, Basil leavesAs per your tasteGarlic pods7-8Oil2 tbspMethod: 1. In a MWS bowl put oil, tomato, onion, garlic pods and keep it in Microwave. Select menu & press start to cook. When it gives a beep, remove and grind it in a mixer. Now add salt, sugar, ajwain, basil leaves. Keep it in Microwave and press start. When it gives a beep, the sauce is ready. विधि: 1. नाइक्रोवेव स्तारा बाउल में तेल, टमाटर, पाज, लहरान की फलिया डालकर ओवन के अन्दर रख्ब दें। मीनू चुनकर पकने के लिए स्टार्ट दबाए। बीप सुनाई देने पर, बाहर निकाले और मिब्बार में पीस्त लें। अब उसमें नमक, वीनी, अजवाइन, तुलसी के पते ढालें और ओवन में रखकर स्टार्ट दबाएं। बीप सुनाई देने पर सौस तैयार हो जायमी। |
| CC-5 | Tomato Sauce | 0.5 kg | Microwave Safe Glass Bowl | Tomato500 gmOnion1 No.Chilli powder, Salt, SugarAs per your lasteChopped ginger and garlic2 tbspGaram masala1 tspMethod: 1. In a MWS bowl put tomato pieces, cover and keep it in a Microwave. Select menu & press start to cook.When it gives a beep, remove and grind it in a mixer.Strain it. Again keep this in a Microwave and press start. When it gives a beep, add salt, sugar, garam masala and mix well. Again keep it in Microwave and press start. विधि: 1. नाइक्रोवेव सेफ बाउल में कटे पुए टमाटर ढालें, ढककर ओवन मे रख्ब दें। मीनू चुनकर पकने के लिए स्टार्ट दबाएं। बीप सुनाई देने पर, बाहर निकालकर गिवशर में पीस्त लें। निबोङकर दुबारा ओलन में रखें और स्टार्ट दबाएं। बीप सुनाई देने पर नमक, वीनी और गर्म मसाला ढालकर अष्णी तरह मिलाए। तुबारा ओवन में रखें और स्टार्ट दबाएं। |
| Masala Chutney | 0.3 kgCC6 | Microwave Safe Glass Bowl | Chana Daal, Urad Daal100 gms eachGrated dry coconut100 gmsSesame, Salt, Sugar, Turmeric, Dhaniya powder,Jeera powder, Curry leaves, Methi seedsAs per your tasteOil1 tspMethod: 1. In a MWS bowl put daals and keep It in Microwave. Select menu & press start to cook. When it gives a beep, remove. Add the rest of the ingredients and keep it in Microwave and press start. Remove, cool it and grind it in a mixer. This chutney can be served with Idly, Paratha or Rice. विधि: 1. नाइक्रोवेव सेफ बाउल में दालों को ढालकर ओवन में रखें। मीनू चुनकर पकने के लिए स्टार्ट दबाएं। बीप सुनाई देने पर बाहर निकाल लें। बाकी राथी शानग्री इरामे ढालकर फिर ओवन में रख्ब दें और स्टार्ट दबाएं। बाहर निकालकर टडा करें और इरो गिवशर में पीस लें। रह चटनी इडली, पराडा या चावल के साथ परोस सकते हैं। | |
24 HOURS
24 आवर्स
- Breakfast (bF)
- Snacks (Sn)
- Child Favourite (CF)
- Bakery (bA)
Breakfast ब्रेकफास्ट
| Category Weight Limit Utensil Instructions | |||||||
| bF1 | Vag Sandwich | 0.1~0.3kg | High rack | ||||
| For | 0.1kg | 0.2kg | 0.3kg | ||||
| Bread slices | 100g(2slices) | 200g(4slices) | 300g(6slices) | ||||
| Butter | 1tbsp | 2tbsp | 4tbsp | ||||
| Sauce / spread | 1 12 tbsp | 3tbsp | 4tbsp | ||||
| Chopped vegetables (onion, tomato, capsicum) | 2tbsp | 4tbsp | 6tbsp | ||||
| Grated cheese | 2tbsp | 4tbsp | 6tbsp | ||||
| Salt & pepper | As per taste | ||||||
| Method: 1.On a bread slice apply butter, layer with sauce, spread chopped vegetables, sprinkle grated cheese.Cover it with the other bread slice.2. Keep the sandwich on high rack. Select menu & weight& press start.3. When beeps, change the side of the sandwich & againpress start. | |||||||
| Poha Microwave~0.3kgbF2 | safe bowl | ||||||
| Poha | 0.1kg | 0.2kg | 0.3kg | ||||
| Oil | 1tbsp | 2tbsp | 3tbsp | ||||
| Onion Chopped | 1/2cup | 1cup | 1cup | ||||
| Green Chilli | 2nos. | 3nos. | 4nos. | ||||
| Rai, Jeera, Hing, HaldiCurry Leaves | For Tempering (Tadka) | ||||||
| Grated Coconut andHara Dhania | For Gamishing | ||||||
| Method: 1.In Microwave Safe Bowl put oil, rai, jeera, green chilli,curry leaves, select menu & press start.2.When beep add chopped onion, haldi powder & hing,press start.3.When beep add washed poha, salt & sugar to tastemix well and press start. Garnish with cocobnut andhara dhania serve hot. | |||||||
Breakfast
ब्रेकफास्ट
| Category Weight Limit Utensil Instructions | ||||||
| bF3 | Upma Microwave - 0.3 kg | safe bowl | Suji | 0.1 kg | 0.2 kg | |
| Oil | 2 tbsp | 3 tbsp | ||||
| Water | 200 ml | 400 ml | ||||
| Salt & Sugar | To taste | |||||
| Onion | 1 no. | 2 nos. | ||||
| Green Chilli | 2 nos. | 3 nos. | ||||
| Rai, Jeera, Hing, Curry Leaves, Urad Dal | As per your taste | |||||
| Method: 1. In Microwave Safe Bowl put oil, jeera, rai, urad dal, hari mirch, curry leaves and suji, select Menu then press Start.2. When beep, add onion, stir well and keep inside and press Start.3. When beep, add water, sugar & salt to taste, lemon juice mix well and keep inside press Start to cook stand for 5 minutes. Garnish with hara dhania and bhujiya. | ||||||
| bF4 | Daliya | 0.1 ~ 0.3 kg | Microwave safe bowl | For | 0.1 kg | 0.2 kg |
| Daliya | 100 g | 200 g | ||||
| Sugar or gud | 75 g | 150 g | ||||
| Ghee (melted) | 1 tbsp | 2 tbsp | ||||
| Water | 300 ml | 600 ml | ||||
| Elaichi powder, nutmeg powder, chashewnuts | As per taste | |||||
| Milk | As required | |||||
| Method: 1. In a MWS bowl, add dalla & ghee. Mix well.2. Select menu & weight & press start.3. When beeps, mix, add water, sugar or gud, elaichi, powder/nutmeg powder, cashewnuts. Mix well & press start.Stand for 5 minutes. Serve with hot milk.Note: If you are using gud for sweetness then add nutmeg powder & add elaichi powder if using sugar for sweetness. | ||||||
Breakfast ब्रेकफास्ट
| Category Weight Limit Utensil Instructions | ||||||
| bF5 | Parantha 0.2 kg High Rack | +Metal Tray | Parantha Dough | 0.2 kg | ||
| Stuffing : Alu, Muli, Methi, Paneer, whichever you like. | As per your taste | |||||
| Oil/Ghee | 2 tbsp | |||||
| Method:1. Select menu keep metal tray on high rack. press start.2. When beep keep paratha on tawa and brush with oil press start.3. When beep turn parantha and press start serve hot with chutney or ralta. | विधि:1. मीनू चुनें। मैटल द्रे हाई रैक पर रखें। स्टार्ट दवाएं।2. बीप सुनाई देने पर परांता तवे पर झाले और पी लगाकर स्टार्ट दवाएं।3. बीप सुनाई देने पर परांता को पलटें और स्टार्ट दवाएं। वटनी शारायता के साथ गर्म-गर्म परोसें। | |||||
| bF6 | Pongal | 0.1 ~ 0.3 kg Microwave safe glass bowl | For | 100 gm | 200 gm | 300 gm |
| Rice (soaked) | 50 gm | 100 gm | 150 gm | |||
| Moong dal (soaked) | 25 gm | 50 gm | 75 gm | |||
| Water (Hot) | 300ml | 500ml | 700ml | |||
| Jaggery(grated) | 100 gm | 200 gm | 300 gm | |||
| Ghee | 25 gm | 50 gm | 75 gm | |||
| Elaichi powder | 2 tsp2 tsp1 tsp | |||||
| Dry fruits | As per your taste | |||||
| Method:1. In MWS bowl put ghee , soaked Rice & Moongdal, select menu & press start.2. When Beep add hot water, cover it and press start.3. When beep, remove cover add all the ingredients and mix well press start. | विधि:1. माइकोमेव सैफ वाजल मे पी, भीगे हुए वापल और मैंग दाल ले, भीनू पुनकर स्टार्ट दवाएं।2. बीप सुनाई देने पर गर्ग गानी झालकर चक दें और स्टार्ट दवाएं।3. बीप सुनाई देने पर दककन इटाकर सभी सामिणाँ जाल दें और अभी तरह गिलाकर स्टार्ट दवाएं। | |||||
| Category Weight Limit Utensil Instructions | |||||||
| Sn1 | Pav Bhaji 0.1 - 0.3 kg Microwave | safe glass bowl, high rack & Metal tray | Boiled & Mashed Vegetables (Potato, Cauliflower, Capsicum, green Peas etc.) | 100 gm | 200 gm 300 gm | ||
| Oil | 1 lbsp 2 tbsp 2 tbsp | ||||||
| Chopped Onion | 1 No. 2 No. 2 No. | ||||||
| Chopped Tomato | 1 No. 2 No. 3 No. | ||||||
| Pav Bhaji Masala | 1 tsp | 112 tsp | 2 tsp | ||||
| Garlic Paste | 1 tsp | 112 tsp | 2 tsp | ||||
| Red Chilli Powder, Salt, Lemon Juice, Butter | As per your taste | ||||||
| Hara Dhania | For gamishing | ||||||
| Method:1. In MWS bowl take oil, garlic paste, chopped onion, chopped tomato. Select menu & weighty. Press start.2. When beep add mashed vegetables, red chill powder, Pavbhaji Masala, Salt. Mix well and press start.3. When beep, remove from microwave add butter & lemon juice and mix well, garnish with hara dhania.4. For grilling Pav-bhaji buns: Cut each Pav-bhaji bun in center apply some butter on it, arrange on metal tray. Keep high rack in the oven. Place the metal tray on high rack. Press start. After cook ends, serve hot with grilled Pav-bhaji buns. | |||||||
| Sn2 | Dhokla 0.1 ~ 0.3 kg Microwave safe flat glass dish + Microwave safe bowl | For | 0.1 kg | 0.2 kg | 0.3 kg | ||
| Basen | 100 g | 200 g | 300 g | ||||
| Suji | 1 tbsp | 112 tbsp | 2 tbsp | ||||
| Warm Water | 100 ml | 150 ml | 200 ml | ||||
| Curds | 2 tbsp | 3 tbsp | 4 tbsp | ||||
| Green Chilli & Ginger Paste | 1 tsp | 112 tsp | 2 tsp | ||||
| Salt & Sugar | As per taste | ||||||
| Fruit Salt | 1 tsp | 112 tsp | 2 tsp | ||||
| Oil, rai, curry leaves, water | For tempering | ||||||
| Grated coconut | For garnishing | ||||||
| Method:1. Mix besan, suji, curd, sugar, salt, water, green chilli-ginger paste, yellow color, fruit salt together. Mix well. Keep for 5-10 minutes.2. Pour the mixture in greased MWS flat glass dish & cover. Select menu & weight & press start.3. When beeps, remove. In another MWS bowl add oil, rai & curry leaves & press start. Add some water to the tempering.4. Add this tempering to the dhokla & cover. Stand for 5 minutes. Garnish with grated coconut & serve. | |||||||
Snacks रनैक्स
| Category Weight Limit Utensil Instructions | |||||||
| Sn3 | Sprouts | 0.1 - 0.3 kg | Microwave safe glass bowl | Moong Sprout | 0.1 kg | 0.2 kg | 0.3 kg |
| Water | 150 ml | 200 ml | 300 ml | ||||
| Salt, Chat Masala, Hara Dhania | As per your taste | ||||||
| Chopped Onion | 2 tbsp | 3 tbsp | 4 tbsp | ||||
| Chopped Tomato | 2 tbsp | 3 tbsp | 4 tbsp | ||||
| Method: 1. In Microwave Safe Bowl add sprouts, water and salt select menu & press start.2. When cooking ends, take it out and strain add chopped onion, chopped tomatoes, hara dhania, chat masala and serve. | Vitibi: 1. माइक्रोपेव सेफ बाउल में स्प्राउट, पानी और नमक डाले तथा नीनु चुनकर रटार्ट दबाए। 2. पक आने पर उन्है बाहर निकालकर निबोड़ लै। कटी हुई प्याज एवे टमाटर, हरा धनिया और चाट मसाला झाले और परोसे। | ||||||
| Sn4 | Peanuts | 0.1 ~ 0.3 kg | Microwave safe glass bowl | For | 0.1 kg | 0.2 kg 0.3 kg | |
| Peanuts | 200 g 300 g100 g | ||||||
| Oil | As required | ||||||
| Method: 1. In a microwave safe flat glass dish add little oil, peanuts.Mix well.2. Select menu & press start.3. When beeps, stir it & press start.4. Serve plain or with chaat masala. | Vitibi: 1. माइक्रोपेव सेफ पर्तैट म्लास डिश में थोड़ा तेल और पीगन्दस लेकर अक्षी तारहं गिला लै। 2. मीनू चुनकर स्टार्ट दबाए।3. ग्रीप तुनाई देने पर चलायें और स्टार्ट दबाए।4. सादा या चाट मसाले के साथ परोसे। | ||||||
| Sn5 | Murmura | 0.1 ~ 0.3 kg | Microwave safe glass bowl | For | 0.1 kg | 0.2 kg | 0.3 kg |
| Murmura | 50 gm | 100 gm | 150 gm | ||||
| Peanuts | 25 gm | 50 gm | 75 gm | ||||
| Oil | 1 tbsp | 2 tbsp | 3 tbsp | ||||
| Dhanla jeera powder | 1 tsp | 2 tsp | 3 tsp | ||||
| Garam masala, Rai, Jeera, Hing, Haldi, Chopped green chilli | 14 tsp | 12 tsp | 12 tsp | ||||
| Curry leaves | For tempering | ||||||
| Salt & sugar | To taste | ||||||
| Method: 1. In microwave glass bowl put oil, rai, jeera, peanuts, green chilli, curry leaves, select menu and weight, press start.2. When beep add all the ingredients. Mix well and press start. | Vitibi: 1. \( \underline{\underline{\text{माइक्रोपेव न्यास चापज में रेल. राई, और. टूर्णफली, हरी निर्न तथा करी के पते झाले। ग्रीनू और खान चुनकर स्टार्ट दबाए।2. वीप तुनई देने पर सागी साग्रियों को ढाल दें, अक्षी तारह गिलाएं और स्टार्ट दबाए। | ||||||
| Category Weight Limit Utensil Instructions | ||||||
| Sn6 | Chana Chat | 0.1 – 0.3 kg | Microwave safe glass bowl | Soaked chhole (4 to 5 hours) | 100 gm | 200 gm |
| Hot water | 250 ml | 500 ml | ||||
| Boiled Potato | 2 No.1 No. | |||||
| Green chilli paste | 1 tsp | 2 tsp | ||||
| Ginger paste | 2 tsp1 tsp | |||||
| Garam Masala, salt, sugar & lemon juice | As per your taste | |||||
| Oil | ||||||
| Rai, Jeera, Hing | For tempering | |||||
| Method:1.In MWS bowl take soaked chhole with hot water & cover. Select menu & weight. Press start. After cooking drain water from it.2.When beep in another MS bowl take oil, Rai, jeera, chilli paste, ginger paste & garam masala mix well and press start.3.Mix this tempering with boiled chhole & potato pieces, add salt sugar and lemon juice, mix well for preparing chat.To make chat:In a serving dish take some of this chhole mixture. Spread crushed potato & Banana wafers on it, add Imli chatni and some sweet curd to it, sprinkle red chilli powder, chat masala and salt on it, decorate with chopped tomato, cucumber, onion & hara chania and serve. | ||||||
Child's Favourite बच्चों की मनपसन्द
| Category Weight Limit Utensil Instructions | |||||||
| Omelette | 0.2-0.4 kgCF1 | Microwave safe flat glass dish | For | 0.2 kg | 0.3 kg | 0.4 kg | |
| Eggs | 1 nos. | 2 nos. | 3 nos. | ||||
| Chopped Onion | 1/4 cup | 1/2 cup | 3/4 cup | ||||
| Chopped Tomato | 1/4 cup | 1/2 cup | 3/4 cup | ||||
| Chopped Green Chilli | 1 nos. | 2 nos. | 3 nos. | ||||
| Oil | 1/2 tbsp | 1 tbsp | 1 12 tbsp | ||||
| Chopped Hara Dhania | 1 tbsp | 1 tbsp | 1 tbsp | ||||
| Salt & Kali Mirch | As per your taste | ||||||
| Method: 1. Beat the eggs add chopped onion, chopped tomatoes, green chilli, hara dhania, salt & paper to taste.2. Apply some oil to MWS flat glass dish, add egg mixture & cover. Select menu & weight and press start. | |||||||
| Noodles Microwave- 0.3 kgCF2 | safe bowl | Noodles | 0.1 kg | 0.2 kg | 0.3 kg | ||
| Water | 400 ml | 800 ml | 1200 ml | ||||
| Oil | 1 tsp | 2 tsp | 3 tsp | ||||
| Vinegar | 1/2 tsp | 1 tsp | 1 tsp | ||||
| Soya Sauce | 1/2 tsp | 1 tsp | 1 tsp | ||||
| Chilli Sauce | 1/2 tsp | 1 tsp | 1 tsp | ||||
| Mix Vegetables -Cabbage, Capsicum,Carrot, French Beans etc. | 1/2 cup | 1/2 cup | 1 cup | ||||
| Salt, Sugar, Kali MirchPowder | As per your taste | ||||||
| Method: 1. In Microwave Safe Bowl take noodles, water, oil, select menu & press start.2. When beep, strain noodles & pure cold water over it. In Microwave Safe Bowl put some oil and finely chopped vegetables, add vinegar, soyasauce, chilli sauce, MSG salt & paper to taste press start.3. When beep, add noodles and mix well press start serve hot. | |||||||
Child's Favourite
बच्यों की मनपसन्द
| Category Weight Limit Utensil Instructions | ||||||||
| CF3 | Corn Chaat | 0.1~0.3kg Microwave safe bowl | For | 0.1kg | 0.2kg | 0.3kg | ||
| Sweet corn | 100g | 200g | 300g | |||||
| Mix fruits (Pomegranate, cucumber, apple) | 12 cup | 1cup | 2cup | |||||
| Salt, red chilli powder, chaat masala, lemon juice | As per taste | |||||||
| Method:1.In a MWS bowl add some water & sweet corns. Select menu & weight & press start.2.When beeps, transfer the coms in a bowl add mix fruits,salt, red chilli powder, chaat masala, lemon juice.Mix well & serve. | Vitibi:1. माइक्रोवेव रोफ बाउत में कुछ पानी और रवीट कौर्न्य डालें। मौनू और वजन चुनकर स्टार्ट दबाए।2. बीप सुनाई देने पर कौर्न्य को बाउत में विर्स्थापित कर दें। मिश्रित कल, नमक, लाल मिर्च पातडर, चाट मराला, गीदू सरा डालें। अच्ची तरह मिलाकर परोसें। | |||||||
| CF4 | Pizza* 0.3kg Low rack | & High rack | Pizza base | 1 Big Pizza base | ||||
| Topping | 3 tbsp | |||||||
| Mix Vegetables - Tomato, Capsicum, Onion | 1 cup | |||||||
| Grated Cheese | 1/2 cup | |||||||
| Oregano & Chilli flakes (Optional) | As per your taste | |||||||
| Method:1. Select menu & press start to preheat2. Spread pizza topping on pizza base, spread chopped vegetables on it. Sprinkle grated cheese.3. When beeps, place he pizza on low rack & press start.4. When beeps, transfer the pizza on high rack & press start. | Vitibi:1. पहले मर्ग करसे के लिए मीनू चुनें और स्टार्ट दबाएं।2. पीज़ा बेस के ऊपर टीपिंस फैलाए। उसके ऊपर कटी हुई संखियों को फैलाए। फिर कुछ करा हुआ चीज फिङ्कें।3. अभ पीज़ा को लो रैफ के ऊपर रखें और स्टार्ट दबाएं।4. बीप सुनाई देने पर, पीज़ा को हाई रैक पर विस्थापित कर दें और स्टार्ट दबाएं। | |||||||
| CF5 | 0.3 kg Garlic Bread* | Low Rack & Metal Tray | Bread slices | 4 pcs | ||||
| Butter | 5 tbsp | |||||||
| Garlic paste | 2 tbsp | |||||||
| Grailed cheese | 4 tbsp | |||||||
| Salt, kali mirchi powder, Oregano, chilli flakes | As per your taste | |||||||
| Method:1. Mix butter, garlic paste, salt, kali mirchi powder and oregano together. Apply this mixture to both sides of bread slices, arrange on metal tray.2. Keep low rack in the oven, select menu and press start.Note:Use French bread to make garlic bread. | Vitibi:1. मक्षण, लह्जुना की पैरट, नमक, काती मिर्च का पातडर तथा ओरिगानों को एक राथ पिला लें। ङ्या मिश्रण को ब्रैड रलाइरिज के दोनों तरफ लगाक्ल मैटल ट्रे के ऊपर रखे दें।2. लो रैक के ऋपर रखकर ओवना के अन्दर रख दें। मीनू चुनकर स्टार्ट दबाए।नोट:गालिंक ब्रैड बनाने के लिए प्रैच ब्रैड का इस्तेमाल करें। | |||||||
* Do not put anything in the oven during preheat mode (Pre-h). / प्री-हीट मोड (Pre-h) के दौरान कोई भी वत्तु ओण के अन्दर न रखें।
Child's Favourite बच्चों की मनपसन्द
| Category Weight Limit Utensil Instructions | |||||||
| Bread Pudding | 0.1~0.3 kgCF6 | Microwave safe flat glass dish | For | 0.1 kg | 0.2 kg | 0.3 kg | |
| Bread slices | 2 Nos. | 3 Nos. | 4 Nos. | ||||
| Milk (for dipping the bread) | 12 cup | 1 cup | 112 cup | ||||
| Egg | 1 Nos. | 2 Nos. | 2 Nos. | ||||
| Vanilla Essence | 12 tsp | 34 tsp | 1 tsp | ||||
| Sugar | 3 tbsp | 4 tbsp | 5 tbsp | ||||
| Dry fruits | As per your taste | ||||||
| Method:1.Make small pieces of Bread slices. Beat the egg very well . Mix all the ingredient very well.2.Arrange the bread slices in MWS flat glass dish.3.Pour the mixture over the bread slices & sprinkle dry fruits. Press start. | Vitibi:1. \( \textbf{B}\textbf{r}\textbf{e}\textbf{i}\textbf{d}\textbf{S}\textbf{l}\textbf{a}\textbf{i}\textbf{s}\textbf{i}\textbf{s}\textbf{i}\textbf{j}\textbf{k}\textbf{c}\textbf{e}\textbf{f}\textbf{t}\textbf{e}\textbf{t}\textbf{e}\textbf{t}\textbf{e}\textbf{t}\textbf{e}\textbf{t}\textbf{e}\textbf{t}\textbf{e}\textbf{t}\textbf{e}\textbf{t}\textbf{e}\textbf{t}\textbf{e}\textbf{t}\textbf{e}\textbf{t}\textbf{u}\textbf{u}\textbf{u}\textbf{u}\textbf{u}\textbf{u}\textbf{u}\textbf{u}\textbf{u}\textbf{u}\textbf{u}\textbf{u}\textbf{u}\textbf{u}\textbf{u}\textbf{u}\textbf{u}\textbf{u}\textbf{u}\textbf{u}\textbf{v}\textbf{u}\textbf{u}\textbf{u}\textbf{u}\textbf{u}\textbf{u}\textbf{u}\textbf{u}\textbf{u}\textbf{u}\textbf{u}\textbf{u}\textbf{u}\textbf{u}\textbf{u}\textbf{u}\textbf{u}\textbf{u}\textbf{u}\textbf{b}\textbf{u}\textbf{u}\textbf{u}\textbf{u}\textbf{u}\textbf{u}\textbf{u}\textbf{u}\textbf{u}\textbf{u}\textbf{u}\textbf{u}\textbf{u}\textbf{u}\textbf{u}\textbf{u}\textbf{u}\textbf{u}\textbf{u}\textbf{a}\textbf{u}\textbf{u}\textbf{u}\textbf{u}\textbf{u}\textbf{u}\textbf{u}\textbf{u}\textbf{u}\textbf{u}\textbf{u}\textbf{u}\textbf{u}\textbf{u}\textbf{u}\textbf{u}\textbf{u}\textbf{u}\textbf{u}\textbf{y}\textbf{u}\textbf{u}\textbf{u}\textbf{u}\textbf{u}\textbf{u}\textbf{u}\textbf{u}\textbf{u}\textbf{u}\textbf{u}\textbf{u}\textbf{u}\textbf{u}\textbf{u}\textbf{u}\textbf{u}\textbf{u}\textbf{u}\textbf{U}\textbf{u}\textbf{u}\textbf{u}\textbf{u}\textbf{u}\textbf{u}\textbf{u}\textbf{u}\textbf{u}\textbf{u}\textbf{u}\textbf{u}\textbf{u}\textbf{u}\textbf{u}\textbf{u}\textbf{u}\textbf{u}\textbf{u}\textbf{ u}\textbf{u}\textbf{u}\textbf{u}\textbf{u}\textbf{u}\textbf{u}\textbf{u}\textbf{u}\textbf{u}\textbf{u}\textbf{u}\textbf{u}\textbf{u}\textbf{u}\textbf{u}\textbf{u}\textbf{u}\textbf{u}\textbf{u}\textbf{ U}\textbf{u}\textbf{u}\textbf{u}\textbf{u}\textbf{u}\textbf{u}\textbf{u}\textbf{u}\textbf{u}\textbf{u}\textbf{u}\textbf{u}\textbf{u}\textbf{u}\textbf{u}\textbf{u}\textbf{u}\textbf{u}\textbf{u}\textbf{uu}\textbf{u}\textbf{u}\textbf{u}\textbf{u}\textbf{u}\textbf{u}\textbf{u}\textbf{u}\textbf{u}\textbf{u}\textbf{u}\textbf{u}\textbf{u}\textbf{u}\textbf{u}\textbf{u}\textbf{u}\textbf{u}\textbf{u}\textbf{ua}\textbf{u}\textbf{u}\textbf{u}\textbf{u}\textbf{u}\textbf{u}\textbf{u}\textbf{u}\textbf{u}\textbf{u}\textbf{u}\textbf{u}\textbf{u}\textbf{u}\textbf{u}\textbf{u}\textbf{u}\textbf{u}\textbf{u}\textbf{ui}\textbf{u}\textbf{u}\textbf{u}\textbf{u}\textbf{u}\textbf{u}\textbf{u}\textbf{u}\textbf{u}\textbf{u}\textbf{u}\textbf{u}\textbf{u}\textbf{u}\textbf{u}\textbf{u}\textbf{u}\textbf{u}\textbf{u}\textbf{uf}\textbf{u}\textbf{u}\textbf{u}\textbf{u}\textbf{u}\textbf{u}\textbf{u}\textbf{u}\textbf{u}\textbf{u}\textbf{u}\textbf{u}\textbf{u}\textbf{u}\textbf{u}\textbf{u}\textbf{u}\textbf{u}\textbf{u}\textbf{uk}\textbf{u}\textbf{u}\textbf{u}\textbf{u}\textbf{u}\textbf{u}\textbf{u}\textbf{u}\textbf{u}\textbf{u}\textbf{u}\textbf{u}\textbf{u}\textbf{u}\textbf{u}\textbf{u}\textbf{u}\textbf{u}\textbf{u}\textbf{uh}\textbf{u}\textbf{u}\textbf{u}\textbf{u}\textbf{u}\textbf{u}\textbf{u}\textbf{u}\textbf{u}\textbf{u}\textbf{u}\textbf{u}\textbf{u}\textbf{u}\textbf{u}\textbf{u}\textbf{u}\textbf{u}\textbf{u}\textbf{uy}\textbf{u}\textbf{u}\textbf{u}\textbf{u}\textbf{u}\textbf{u}\textbf{u}\textbf{u}\textbf{u}\textbf{u}\textbf{u}\textbf{u}\textbf{u}\textbf{u}\textbf{u}\textbf{u}\textbf{u}\textbf{u}\textbf{u}\textbf{uw}\textbf{u}\textbf{u}\textbf{u}\textbf{u}\textbf{u}\textbf{u}\textbf{u}\textbf{u}\textbf{u}\textbf{u}\textbf{u}\textbf{u}\textbf{u}\textbf{u}\textbf{u}\textbf{u}\textbf{u}\textbf{u}\textbf{u}\textbf{uv}\textbf{u}\textbf{u}\textbf{u}\textbf{u}\textbf{u}\textbf{u}\textbf{u}\textbf{u}\textbf{u}\textbf{u}\textbf{u}\textbf{u}\textbf{u}\textbf{u}\textbf{u}\textbf{u}\textbf{u}\textbf{u}\textbf{u}\textbf{ut}\textbf{u}\textbf{u}\textbf{u}\textbf{u}\textbf{u}\textbf{u}\textbf{u}\textbf{u}\textbf{u}\textbf{u}\textbf{u}\textbf{u}\textbf{u}\textbf{u}\textbf{u}\textbf{u}\textbf{u}\textbf{u}\textbf{u}\textbf{ul}\textbf{u}\textbf{u}\textbf{u}\textbf{u}\textbf{u}\textbf{u}\textbf{u}\textbf{u}\textbf{u}\textbf{u}\textbf{u}\textbf{u}\textbf{u}\textbf{u}\textbf{u}\textbf{u}\textbf{u}\textbf{u}\textbf{u}\textbf{ug}\textbf{u}\textbf{u}\textbf{u}\textbf{u}\textbf{u}\textbf{u}\textbf{u}\textbf{u}\textbf{u}\textbf{u}\textbf{u}\textbf{u}\textbf{u}\textbf{u}\textbf{u}\textbf{u}\textbf{u}\textbf{u}\textbf{u}\textbf{uc}\textbf{u}\textbf{u}\textbf{u}\textbf{u}\textbf{u}\textbf{u}\textbf{u}\textbf{u}\textbf{u}\textbf{u}\textbf{u}\textbf{u}\textbf{u}\textbf{u}\textbf{u}\textbf{u}\textbf{u}\textbf{u}\textbf{u}\textbf{ux}\textbf{u}\textbf{u}\textbf{u}\textbf{u}\textbf{u}\textbf{u}\textbf{u}\textbf{u}\textbf{u}\textbf{u}\textbf{u}\textbf{u}\textbf{u}\textbf{u}\textbf{u}\textbf{u}\textbf{u}\textbf{u}\textbf{u}\textbf{uj}\textbf{u}\textbf{u}\textbf{u}\textbf{u}\textbf{u}\textbf{u}\textbf{u}\textbf{u}\textbf{u}\textbf{u}\textbf{u}\textbf{u}\textbf{u}\textbf{u}\textbf{u}\textbf{u}\textbf{u}\textbf{u}\textbf{u}\textbf{uz}\textbf{u}\textbf{u}\textbf{u}\textbf{u}\textbf{u}\textbf{u}\textbf{u}\textbf{u}\textbf{u}\textbf{u}\textbf{u}\textbf{u}\textbf{u}\textbf{u}\textbf{u}\textbf{u}\textbf{u}\textbf{u}\textbf{u}\textbf{uo}\textbf{u}\textbf{u}\textbf{u}\textbf{u}\textbf{u}\textbf{u}\textbf{u}\textbf{u}\textbf{u}\textbf{u}\textbf{u}\textbf{u}\textbf{u}\textbf{u}\textbf{u}\textbf{u}\textbf{u}\textbf{u}\textbf{u}\textbf{um}\textbf{u}\textbf{u}\textbf{u}\textbf{u}\textbf{u}\textbf{u}\textbf{u}\textbf{u}\textbf{u}\textbf{u}\textbf{u}\textbf{u}\textbf{u}\textbf{u}\textbf{u}\textbf{u}\textbf{u}\textbf{u}\textbf{u}\textbf{ur}\textbf{u}\textbf{u}\textbf{u}\textbf{u}\textbf{u}\textbf{u}\textbf{u}\textbf{u}\textbf{u}\textbf{u}\textbf{u}\textbf{u}\textbf{u}\textbf{u}\textbf{u}\textbf{u}\textbf{u}\textbf{u}\textbf{u}\textbf{un}\textbf{u}\textbf{u}\textbf{u}\textbf{u}\textbf{u}\textbf{u}\textbf{u}\textbf{u}\textbf{u}\textbf{u}\textbf{u}\textbf{u}\textbf{u}\textbf{u}\textbf{u}\textbf{u}\textbf{u}\textbf{u}\textbf{u}\textbf{ud}\textbf{u}\textbf{u}\textbf{u}\textbf{u}\textbf{u}\textbf{u}\textbf{u}\textbf{u}\textbf{u}\textbf{u}\textbf{u}\textbf{u}\textbf{u}\textbf{u}\textbf{u}\textbf{u}\textbf{u}\textbf{u}\textbf{u}\textbf{m}\textbf{u}\textbf{u}\textbf{u}\textbf{u}\textbf{u}\textbf{u}\textbf{u}\textbf{u}\textbf{u}\textbf{u}\textbf{u}\textbf{u}\textbf{u}\textbf{u}\textbf{u}\textbf{u}\textbf{u}\textbf{u}\textbf{u}\textbf{g}\textbf{u}\textbf{u}\textbf{u}\textbf{u}\textbf{u}\textbf{u}\textbf{u}\textbf{u}\textbf{u}\textbf{u}\textbf{u}\textbf{u}\textbf{u}\textbf{u}\textbf{u}\textbf{u}\textbf{u}\textbf{u}\textbf{u}\textbf{f}\textbf{u}\textbf{u}\textbf{u}\textbf{u}\textbf{u}\textbf{u}\textbf{u}\textbf{u}\textbf{u}\textbf{u}\textbf{u}\textbf{u}\textbf{u}\textbf{u}\textbf{u}\textbf{u}\textbf{u}\textbf{u}\textbf{u}\textbf{fu}\textbf{u}\textbf{u}\textbf{u}\textbf{u}\textbf{u}\textbf{u}\textbf{u}\textbf{u}\textbf{u}\textbf{u}\textbf{u}\textbf{u}\textbf{u}\textbf{u}\textbf{u}\textbf{u}\textbf{u}\textbf{u}\textbf{u}\textbf{w}\textbf{u}\textbf{u}\textbf{u}\textbf{u}\textbf{u}\textbf{u}\textbf{u}\textbf{u}\textbf{u}\textbf{u}\textbf{u}\textbf{u}\textbf{u}\textbf{u}\textbf{u}\textbf{u}\textbf{u}\textbf{u}\textbf{u}\textbf{us}\textbf{u}\textbf{u}\textbf{u}\textbf{u}\textbf{u}\textbf{u}\textbf{u}\textbf{u}\textbf{u}\textbf{u}\textbf{u}\textbf{u}\textbf{u}\textbf{u}\textbf{u}\textbf{u}\textbf{u}\textbf{u}\textbf{u}\textbf{up}\textbf{u}\textbf{u}\textbf{u}\textbf{u}\textbf{u}\textbf{u}\textbf{u}\textbf{u}\textbf{u}\textbf{u}\textbf{u}\textbf{u}\textbf{u}\textbf{u}\textbf{u}\textbf{u}\textbf{u}\textbf{u}\textbf{u}\textbf{ub}\textbf{u}\textbf{u}\textbf{u}\textbf{u}\textbf{u}\textbf{u}\textbf{u}\textbf{u}\textbf{u}\textbf{u}\textbf{u}\textbf{u}\textbf{u}\textbf{u}\textbf{u}\textbf{u}\textbf{u}\textbf{u}\textbf{u}\textbf{au}\textbf{u}\textbf{u}\textbf{u}\textbf{u}\textbf{u}\textbf{u}\textbf{u}\textbf{u}\textbf{u}\textbf{u}\textbf{u}\textbf{u}\textbf{u}\textbf{u}\textbf{uu}\textbf{u}\textbf{u}\textbf{u}\textbf{u}\textbf{uu}\textbf{u}\textbf{uu}\textbf{u}\textbf{uu}\textbf{uu}\textbf{uu}\textbf{uu}\textbf{uu}\textbf{uu}\textbf{uu}\textbf{uu}\textbf{uu}\textbf{uu}\textbf{uu}\textbf{uu}\textbf{uu}\textbf{uu}\textbf{uu}\textbf{uu}\textbf{uu}\textbf{uu}\textbf{uu}\textbf{uu}\textbf{UU}\textbf{uu}\textbf{uu}\textbf{uu}\textbf{uu}\textbf{uu}\textbf{uu}\textbf{uu}\textbf{uu}\textbf{uu}\textbf{uu}\textbf{uu}\textbf{uu}\textbf{uu}\textbf{uu}\textbf{uu}\textbf{uu}\textbf{uu}\textbf{uu}\textbf{uu}\textbf{ulu}\textbf{uu}\textbf{uu}\textbf{uu}\textbf{uu}\textbf{uu}\textbf{uu}\textbf{uu}\textbf{uu}\textbf{uu}\textbf{uu}\textbf{uu}\textbf{uu}\textbf{uu}\textbf{uu}\textbf{uu}\textbf{uu}\textbf{uu}\textbf{uu}\textbf{uu}\textbf{ul}\textbf{uu}\textbf{uu}\textbf{uu}\textbf{uu}\textbf{uu}\textbf{uu}\textbf{uu}\textbf{uu}\textbf{uu}\textbf{uu}\textbf{uu}\textbf{uu}\textbf{uu}\textbf{uu}\textbf{uu}\textbf{uu}\textbf{uu}\textbf{uu}\textbf{uu}\textbf{u}\textbf{uu}\textbf{uu}\textbf{uu}\textbf{uu}\textbf{uu}\textbf{uu}\textbf{uu}\textbf{uu}\textbf{uu}\textbf{uu}\textbf{uu}\textbf{uu}\textbf{uu}\textbf{uu}\textbf{uu}\textbf{uu}\textbf{uu}\textbf{UU}\textbf{uu}\textbf{UU}\textbf{uu}\textbf{UU}\textbf{uu}\textbf{UU}\textbf{uu}\textbf{UU}\textbf{uu}\textbf{UU}\textbf{uu}\textbf{UU}\textbf{uu}\textbf{UU}\textbf{uu}\textbf{UU}\textbf{uu}\textbf{UU}\textbf{uu}\textbf{U}\textbf{uu}\textbf{uu}\textbf{uu}\textbf{uu}\textbf{uu}\textbf{uu}\textbf{uu}\textbf{uu}\textbf{uu}\textbf{uu}\textbf{uu}\textbf{uu}\textbf{uu}\textbf{uu}\textbf{uu}\textbf{uu}\textbf{uu}\textbf{uu}\textbf{uu}\textbf{U}\textbf{uu}\textbf{uu}\textbf{uu}\textbf{uu}\textbf{uu}\textbf{uu}\textbf{uu}\textbf{uu}\textbf{uu}\textbf{uu}\textbf{uu}\textbf{uu}\textbf{uu}\textbf{uu}\textbf{uu}\textbf{uu}\textbf{uu}\textbf{UU}\textbf{uu}\textbf{U}\textbf{uu}\textbf{UU}\textbf{uu}\textbf{UU}\textbf{uu}\textbf{UU}\textbf{uu}\textbf{UU}\textbf{uu}\textbf{UU}\textbf{uu}\textbf{UU}\textbf{uu}\textbf{UU}\textbf{uu}\textbf{UU}\textbf{uu}\textbf{UU}\textbf{uu}\textbf{uu}\textbf{UU}\textbf{uu}\textbf{UU}\textbf{uu}\textbf{UU}\textbf{uu}\textbf{UU}\textbf{uu}\textbf{UU}\textbf{uu}\textbf{UU}\textbf{uu}\textbf{UU}\textbf{uu}\textbf{UU}\textbf{uu}\textbf{UU}\textbf{UU}\textbf{uu}\textbf{UU}\textbf{UU}\textbf{UU}\textbf{UU}\textbf{UU}\textbf{UU}\textbf{UU}\textbf{UU}\textbf{UU}\textbf{UU}\textbf{UU}\textbf{UU}\textbf{UU}\textbf{UU}\textbf{UU}\textbf{UU}\textbf{UU}\textbf{UU}\textbf{UU}\textbf{UU}\textbf{U}\textbf{UU}\textbf{UU}\textbf{UU}\textbf{UU}\textbf{UU}\textbf{UU}\textbf{UU}\textbf{UU}\textbf{UU}\textbf{UU}\textbf{UU}\textbf{UU}\textbf{UU}\textbf{UU}\textbf{UU}\textbf{UU}\textbf{UU}\textbf{UU}\textbf{UU}\textbf{uu}\textbf{U}\textbf{UU}\textbf{UU}\textbf{UU}\textbf{UU}\textbf{UU}\textbf{UU}\textbf{UU}\textbf{UU}\textbf{UU}\textbf{UU}\textbf{UU}\textbf{UU}\textbf{UU}\textbf{UU}\textbf{UU}\textbf{UU}\textbf{UU}\textbf{UU}\textbf{U}\textbf{U}\textbf{U}\textbf{U}\textbf{U}\textbf{U}\textbf{U}\textbf{U}\textbf{U}\textbf{U}\textbf{U}\textbf{U}\textbf{U}\textbf{U}\textbf{U}\textbf{U}\textbf{U}\textbf{U}\textbf{U}\textbf{U}\textbf{UU}\textbf{U}\textbf{U}\textbf{U}\textbf{U}\textbf{U}\textbf{U}\textbf{U}\textbf{U}\textbf{U}\textbf{U}\textbf {U}\textbf {U}\textbf {U}\textbf {U}\textbf {U}\textbf {U}\textbf {U}\textbf {U}\textbf {U}\textbf {U}\textbf {U}\textbf {U}\textbf {U}\textbf {U}\textbf {U}\textbf {U}\textbf {U}\textbf {U}\textbf {U}\textbf {U}\textbf {\mathrm {U}}\mathrm {U} \mathrm {U} \mathrm {U} \mathrm {U} \mathrm {U} \mathrm {U} \mathrm {U} \mathrm {U} \mathrm {U} \mathrm {U} \mathrm {U} \mathrm {U} \mathrm {U} \mathrm {U} \mathrm {U} \mathrm {U} \mathrm {U} \mathrm {U} \mathrm {U} \mathrm {U} \mathrm {U} = \mathrm {U} \mathrm {U} \mathrm {U} \mathrm {U} \mathrm {U} \mathrm {U} \mathrm {U} \mathrm {U} \mathrm {U} \mathrm {U} \mathrm {U} \mathrm {U} \mathrm {U} \mathrm {U} \mathrm {U} \mathrm {U} \mathrm {U} \mathrm {U} \mathrm {U} \mathrm {U}<|content_end|> | ||||||
Bakery बेकरी
| Category Weight Limit Utensil Instructions | ||||
| bA1 | Brownie | 0.3 kg | Low rack & Metal cake tin | |
| Malda 125 gms | ||||
| Condensed milk 150 gms | ||||
| Butter 100 gms | ||||
| Almonds, Wallnuts As per your taste | ||||
| Soda Bicarb 1/2 tsp | ||||
| Baking powder 1 tsp | ||||
| Chocolate essence 1 tsp | ||||
| Coco powder 2 tbsp | ||||
| Method: 1. Sieve maida, baking powder and soda. In a bowl add milkmaid and butter and beat well. Add maida, coco powder, essence and mix. For spoon dropping consistency add milk or water. Select menu, press start. When there is a beep put the tin in microwave lower rack. Press start to bake. Remove when it gives a beep. | ||||
| Vitibi: 1. Ἀμένα, ὅξείηση πατωδρ and σολακα κος ἀλαπόν | Μιλίκημεύση δουν μακλυκη κος αλυκλη μεύ σλυκλη μεύ δι τε | μεύνα, κούκο πατωδρ and σολακη μεύ σλυκλη μεύ δι τε | μεύνα, κούκο πατωδρ and σολακη μεύ δι τε | μεύνα, κούκο πατωδρ and σολακη μεύ δι τε | μεύνα, κούκο πατωδρ and σολακη μεύ δι τε | μεύνα, κούκο πατωδρ and σολακη μεώ | μεύνα, κούκο πατωδρ and σολακη μεώ | μεύνα, κούκο πατωδρ and σολακη μεώ | μεύνα, κούκο πατωδρ and σολακη μεώ | μεύνα, κούκο πατυκλη μεώ | μεύνα, κούκο πατυκλη μεώ | μεύνα, κούκο πατυκλη μεώ | μεύνα, κούκο πατυκλη μεώ | μεύνα, κούκο πατυκλη μεώ | μεύνα,κούκο πατυκλη μεώ | μεύνα,κούκο πατυκλη μεώ | μεύνα,κούκο πατυκλη μεώ | μεύνα,κούκο πατυκλη μεώ | μεύνα,κούκο πατυκλημεύ | μεύνα,κούκο πατυκλημεύ | μεύνα,κούκο πατυκλημεύ | μεύνα,κούκο πατυκλημεύ | μεύνα,κούκο πατυκλημεύ | μεύνα,κούκα | μεύνα,κούκα | μεύνα,κούκα | μεύνα,κούκα | μεύνα,κούκα | μεύνα,κούκα | μεύνα,κούκα | μεύνα,κούκα | μεύνα,κούκα | μεώ | μεύνα,κούκα | μεύνα,κούκα | μεύνα,κούκα | μεύνα,κούκα | μεύνα,κούκα | μεύνα,κούκα | μεύνα,κούκα | μεύνα,κούκα | μείν | μεύνα,κούκα | μεύνα,κούκα | μεύνα,κούκα | μεύνα,κούκα | μεύνα,κούκα | μεύνα,κούκα | μεύνα,κούκα | μεύνα,κούκα | μεό | μεύνα,κούκα | μεύνα,κούκα | μεύνα,κούκα | μεύνα,κούκα | μεύνα,κούκα | μεύνα,κούκα | μεύνα,κούκα | μεύνα,κούκα | μεά | μεύνα,κούκα | μεύνα,κούκα | μεύνα,κούκα | μεύνα,κούκα | μεύνα,κούκα | μεύνα,κούκα | μεύνα,κούκα | μεύνα,κούκα | μερ | μεύνα,κούκα | μεύνα,κούκα | μεύνα,κούκα | μεύνα,κούκα | μεύνα,κούκα | μεύνα,κούκα | μεύνα,κούκα | μεύνα,κούκα | μευ | μεύνα,κούκα | μεύνα,κούκα | μεύνα,κούκα | μεύνα,κούκα | μεύνα,κούκα | μεύνα,κούκα | μεύνα,κούκα | μεύνα,κούκα | μεμ | μεύνα,κούκα | μεύνα,κούκα | μεύνα,κούκα | μεύνα,κούκα | μεύνα,κούκα | μεύνα,κούκα | μεύνα,κούκα | μεύνα,κούκα | μει | μεύνα,κούκα | μεύνα,κούκα | μεύνα,κούκα | μεύνα,κούκα | μεύνα,κούκα | μεύνα,κούκα | μεύνα,κούκα | μεύνα,κούκα | μεή | μεύνα,κούκα | μεύνα,κούκα | μεύνα,κούκα | μεύνα,κούκα | μεύνα,κούκα | μεύνα,κούκα | μεύνα,κούκα | μεύνα,κούκα | μεχ | μεύνα,κούκα | μεύνα,κούκα | μεύνα,κούκα | μεύνα,κούκα | μεύνα,κούκα | μεύνα,κούκα | μεύνα,κούκα | μεύνα,κούκα | μεψ | μεύνα,κούκα | μεύνα,κούκα | μεύνα,κούκα | μεύνα,κούκα | μεύνα,κούκα | μεύνα,κούκα | μεύνα,κούκα | μεύνα,κούκα | μεγ | μεύνα,κούκα | μεύνα,κούκα | μεύνα,κούκα | μεύνα,κούκα | μεύνα,κούκα | μεύνα,κούκα | μεύνα,κούκα | μεύνα,κούκα | μεβ | μεύνα,κούκα | μεύνα,κούκα | μεύνα,κούκα | μεύνα,κούκα | μεύνα,κούκα | μεύνα,κούκα | μεύνα,κούκα | μεύνα,κούκα | μεδ | μεύνα,κούκα | μεύνα,κούκα | μεύνα,κούκα | μεύνα,κούκα | μεύνα,κούκα | μεύνα,κούκα | μεύνα,κούκα | μεύνα,κούκα | μεθ | μεύνα,κούκα | μεύνα,κούκα | μεύνα,κούκα | μεύνα,κούκα | μεύνα,κούκα | μεύνα,κούκα | μεύνα,κούκα | μεύνα,κούκα | μεφ | μεύνα,κούκα | μεύνα,κούκα | μεύνα,κούκα | μεύνα,κούκα | μεύνα,κούκα | μεύνα,κούκα | μεύνα,κούκα | μεύνα,κούκα | μεπ | μεύνα,κούκα | μεύνα,κούκα | μεύνα,κούκα | μεύνα,κούκα | μεύνα,κούκα | μεύνα,κούκα | μεύνα,κούκα | μεύνα,κούκα | μετ | μεύνα,κούκα | μεύνα,κούκα | μεύνα,κούκα | μεύνα,κούκα | μεύνα,κούκα | μεύνα,κούκα | μεύνα,κούκα | μεύνα,κούκα | μεζ | μεύνα,κούκα | μεύνα,κούκα | μεύνα,κούκα | μεύνα,κούκα | μεύνα,κούκα | μεύνα,κούκα | μεύνα,κούκα | μεύνα,κούκα | μεξ | μεύνα,κούκα | μεύνα,κούκα | μεύνα,κούκα | μεύνα,κούκα | μεύνα,κούκα | μεύνα,κούκα | μεύνα,κούκα | μεύνα,κούκα | μελ | μεύνα,κούκα | μεύνα,κούκα | μεύνα,κούκα | μεύνα,κούκα | μεύνα,κούκα | μεύνα,κούκα | μεύνα,κούκα | μεύνα,κούκα | μεέ | μεύνα,κούκα | μεύνα,κούκα | μεύνα,κούκα | μεύνα,κούκα | μεύνα,κούκα | μεύνα,κούκα | μεύνα,κούκα | μεύνα,κούκα | μεῦ | μεύνα,κούκα | μεύνα,κούκα | μεύνα,κούκα | μεύνα,κούκα | μεύνα,κούκα | μεύνα,κούκα | μεύνα,κούκα | μεύνα,κούκα | μεῖ | μεύνα,κούκα | μεύνα,κούκα | μεύνα,κούκα | μεύνα,κούκα | μεύνα,κούκα | μεύνα,κούκα | μεύνα,κούκα | μεύνα,κούκα | μεú | μεύνα,κούκα | μεύνα,κούκα | μεύνα,κούκα | μεύνα,κούκα | μεύνα,κούκα | μεύνα,κούκα | μεύνα,κούκα | μεύνα,κούκα | μεuf | μεύνα,κούκα | μεύνα,κούκα | μεύνα,κούκα | μεύνα,κούκα | μεύνα,κούκα | μεύνα,κούκα | μεύνα,κούκα | μεύνα,κούκα | μες | μεύνα,κούκα | μεύνα,κούκα | μεύνα,κούκα | μεύνα,κούκα | μεύνα,κούκα | μεύνα,κούκα | μεύνα,κούκα | μεύνα,κούκα | μεω | μεύνα,κούκα | μεύνα,κούκα | μεύνα,κούκα | μεύνα,κούκα | μεύνα,κούκα | μεύνα,κούκα | μεύνα,κούκα | μεύνα,κούκα | με υ υ υ υ υ υ υ υ υ υ υ υ υ υ υ υ υ υ υ υ υ υ υ υ υ υ υ υ υ υ υ υ υ υ υ υ υ υ υ υ υ υ υ υ υ υ υ υ υ υ ρ υ υ υ υ υ υ υ υ υ υ υ υ υ υ υ υ υ υ υ υ υ υ υ υ υ υ υ υ υ υ υ υ υ υ υ υ υ υ υ υ υ υ υ υ υ υ υ υ υ τ υ υ υ υ υ υ υ υ υ υ υ υ υ υ υ υ υ υ υ υ υ υ υ υ υ υ υ υ υ υ υ υ υ υ υ υ υ υ υ υ υ υ υ υ υ υ υ υ υ ω υ υ υ υ υ υ υ υ υ υ υ υ υ υ υ υ υ υ υ υ υ υ υ υ υ υ υ υ υ υ υ υ υ υ υ υ υ υ υ υ υ υ υ υ υ υ υ υ υ ώ υ υ υ υ υ υ υ υ υ υ υ υ υ υ υ υ υ υ υ υ υ υ υ υ υ υ υ υ υ υ υ υ υ υ υ υ υ υ υ υ υ υ υ υ υ υ υ υ υ φ υ υ υ υ υ υ υ υ υ υ υ υ υ υ υ υ υ υ υ υ υ υ υ υ υ υ υ υ υ υ υ υ υ υ υ υ υ υ υ υ υ υ υ υ υ υ υ υ υ χ υ υ υ υ υ υ υ υ υ υ υ υ υ υ υ υ υ υ υ υ υ υ υ υ υ υ υ υ υ υ υ υ υ υ υ υ υ υ υ υ υ υ υ υ υ υ υ υ υ ψ υ υ υ υ υ υ υ υ υ υ υ υ υ υ υ υ υ υ υ υ υ υ υ υ υ υ υ υ υ υ υ υ υ υ υ υ υ υ υ υ υ υ υ υ υ υ υ υ υ ύ υ υ υ υ υ υ υ υ υ υ υ υ υ υ υ υ υ υ υ υ υ υ υ υ υ υ υ υ υ υ υ υ υ υ υ υ υ υ υ υ υ υ υ υ υ υ υ υ υ ς υ υ υ υ υ υ υ υ υ υ υ υ υ υ υ υ υ υ υ υ υ υ υ υ υ υ υ υ υ υ υ υ υ υ υ υ υ υ υ υ υ υ υ υ υ υ υ υ υ ϫ υ υ υ υ υ υ υ υ υ υ υ υ υ υ υ υ υ υ υ υ υ υ υ υ υ υ υ υ υ υ υ υ υ υ υ υ υ υ υ υ υ υ υ υ υ υ υ υ υ Ϯ υ υ υ υ υ υ υ υ υ υ υ υ υ υ υ υ υ υ υ υ υ υ υ υ υ υ υ υ υ υ υ υ υ υ υ υ υ υ υ υ υ υ υ υ υ υ υ υ υ ϕ υ υ υ υ υ υ υ υ υ υ υ υ υ υ υ υ υ υ υ υ υ υ υ υ υ υ υ υ υ υ υ υ υ υ υ υ υ υ υ υ υ υ υ υ υ υ υ υ υ ϵ υ υ υ υ υ υ υ υ υ υ υ υ υ υ υ υ υ υ υ υ υ υ υ υ υ υ υ υ υ υ υ υ υ υ υ υ υ υ υ υ υ υ υ υ υ υ υ υ υ ϸ υ υ υ υ υ υ υ υ υ υ υ υ υ υ υ υ υ υ υ υ υ υ υ υ υ υ υ υ υ υ υ υ υ υ υ υ υ υ υ υ υ υ υ υ υ υ υ υ υ ϋ υ υ υ υ υ υ υ υ υ υ υ υ υ υ υ υ υ υ υ υ υ υ υ υ υ υ υ υ υ υ υ υ υ υ υ υ υ υ υ υ υ υ υ υ υ υ υ υ υ ό υ υ υ υ υ υ υ υ υ υ υ υ υ υ υ υ υ υ υ υ υ υ υ υ υ υ υ υ υ υ υ υ υ υ υ υ υ υ υ υ υ υ υ υ υ υ υ υ υ σ υ υ υ υ υ υ υ υ υ υ υ υ υ υ υ υ υ υ υ υ υ υ υ υ υ υ υ υ υ υ υ υ υ υ υ υ υ υ υ υ υ υ υ υ υ υ υ υ υ ϝ υ υ υ υ υ υ υ υ υ υ υ υ υ υ υ υ υ υ υ υ υ υ υ υ υ υ υ υ υ υ υ υ υ υ υ υ υ υ υ υ υ υ υ υ υ υ υ υ υ ϖ | μεύ | μεύ | μεύ | μεύ | μεύ | μεύ | μεύ | μεύ | μεύ | μεύ | μεύ | μεύ | μεύ | μεύ | μεύ | μεύ | μεύ | μεύ | μεύ | μεύ | μεύ | μεύ | μεύ | μεύ | μεύ | μευ | μευ | μευ | μευ | μευ | μευ | μευ | μευ | μευ | μευ | μευ | μευ | μευ | μευ | μευ | μευ | μευ | μευ | μευ | μευ | μευ | μευ | μευ | μευ | μευ | μει | μει | μει | μει | μει | μει | μει | μει | μει | μει | μει | μει | μει | μει | μει | μει | μει | μει | μει | μει | μει | μει | μει | μει | μει | μεμ | μεμ | μεμ | μεμ | μεμ | μεμ | μεμ | μεμ | μεμ | μεμ | μεμ | μεμ | μεμ | μεμ | μεμ | μεμ | μεμ | μεμ | μεμ | μεμ | μεμ | μεμ | μεμ | μεμ | μεμ | μει | μει | μει | μει | μει | μει | μει | μει | μει | μει | μει | μει | μει | μει | μει | μει | μει | μει | μει | μει | μει | μει | μει | μει | μεπ | μεπ | μεπ | μεπ | μεπ | μεπ | μεπ | μεπ | μεπ | μεπ | μεπ | μεπ | μεπ | μεπ | μεπ | μεπ | μεπ | μεπ | μεπ | μεπ | μεπ | μεπ | μεπ | μεπ | μεπ | με π | μεπ | μεπ | μεπ | μεπ | μεπ | μεπ | μεπ | μεπ | μεπ | μεπ | μεπ | μεπ | μεπ | μεπ | μεπ | μεπ | μεπ | μεπ | μεπ | μεπ | μεπ | μεπ | μεπ | μεπ | με丙 | με丙 | με丙 | με丙 | με丙 | με丙 | με丙 | με丙 | με丙 | με丙 | με丙 | με丙 | με丙 | με丙 | με丙 | με丙 | με丙 | με丙 | με丙 | με丙 | με丙 | με丙 | με丙 | με丙 | με丙 | με乙 | με乙 | με乙 | με乙 | με乙 | με乙 | με乙 | με乙 | με乙 | με乙 | με乙 | με乙 | με乙 | με乙 | με乙 | με乙 | με乙 | με乙 | με乙 | με乙 | με乙 | με乙 | με乙 | με乙 | με乙 | με己 | με己 | με己 | με己 | με己 | με己 | με己 | με己 | με己 | με己 | με己 | με己 | με己 | με己 | με己 | με己 | με己 | με己 | με己 | με己 | με己 | με己 | με己 | με己 | με己 | με丙 | με丙 | με丙 | με丙 | με丙 | με丙 | με丙 | με丙 | με丙 | με丙 | με丙 | με丙 | με丙 | με丙 | με丙 | με丙 | με丙 | με丙 | με丙 | με丙 | με丙 | ||||
Bakery बेकरी
| Category Weight Limit Utensil Instructions | ||||
| Muffins | 0.2 kgbA3 | Low rack & Metal Muffin Tray | Maida100 gmsPowder sugar75 gmsButter75 gmsAlmonds, WallnutsAs per your tasteEgg1 No.Baking powder1/2 tspAlmond essence1/2 tspWater / Milk2 tbspMethod:1. Sieve maida, baking powder. In a bowl add powdered sguar and butter and beat well. Add maida, essence and mix. For spoon dropping consistency add milk or water. Pour in to the greased muffin tray and sprinkle chopped almonds/walnuts. Select menu, press start. When there is a beep, put the tray in microwave lower rack. Press start to bake. Remove when it gives a beep. | |
| Jeera Biscuits | 0.2 kgbA4 | Low rack & Metal Tray | Maida120 gmsPowdered sugar1 tbspButter50 gmsJeera/AjwainAs per your tasteSoda Bicarb1 pinchBaking powder1/4 tspWaterAs requiredMethod:1. Sieve maida, baking powder and Soda. In a bowl add powdered sugar and butter and beat well. Add maida, jeera powder, ajwain and make a soft dough with little water. Roll a thick roli and cut cookies with the cutter. Prick with a fork. Arrange in a tray. Select menu, press start. When there is a beep put the tray in microwave lower rack. Press start to bake. Remove when it gives a beep. | |
Bakery बेकरी
| Category Weight Limit Utensil Instructions | ||||
| bA5 | Marble Cake | 0.3 kg | Low rack & Metal Tray | Maida150 gmsCondensed milk150 gmsButter100 gmsSoda Bicarb1/2 tspBaking powder1 tspVanilla Essence1 tspCoco powder2 tbspMethod:1. Sieve maida, baking powder and soda, in a bowl add milkmaid and butter and beat well. Add maida, essence and mix well. For spoon dropping consistency add milk or water. Divide the mixture in 2 parts. Add coco powder in 1 part. Put the plain batter and coco batter alternately in the lin. Run a spoon through the baller only once. Select menu, press start. When there is a beep put the tin in microwave lower rack. Press start to bake. Remove when it gives a beep. |
| bA6 | Patties | 0.3 kg | Low rack & Multi cook tawa | For0.3 kgMaida300 gSalt1/2 tspCold fat (Butter or margarine)150 gCold waterFor making doughDry mix vegetables for stuffingAs required |
 : : | Method:1. Sieve the flour with salt. Divide the fat into three equal portions. Rub one portion into the flour to get a bread crumb texture, add salt & make a dough of rolling consistency with iced water.2. On a lightly floured marble top roll out the dough (about 1⁄4 cm thickness) into oblong shape (Fig.1). Take the second portion of fat; cut into small pieces; place them on 2/3rd of the rolled dough. Leave the remaining 1/3rd portion without fat.3. Bring up the bottom third of the pastry dough & fold like an envelope with its flap open (Fig.2). Then bring up the folded portion over again so as to close the envelope (Fig.3).4. Turn the pastry at right angles; seal open ends of the pastry & rib it (Fig.4). This means to depress it with rolling pin at intervals. Cover & cool in the fridge for 5-10 minutes. Repeat the step 2 with third portion of the fat & chill it for 30 minutes.5. Roll out the dough 1/4" thick & put the stuff. Fold it back. Prepare all the patties in same way.6. Select menu & press start. When beeps, arrange the patties on square rack & press start. | |||
| Vitibi:1. आटे को नमक के साथ भान लें। चबी को तीन अबबर भानी में विम्भाजित कर लें। एक भान को आटे के साथ इतना राण्डे कि बैड प्रम्य के टैसावर जौसा हो आए। नमक दालकर लगतार बर्ग का पती डालवे दुए लौदा जना लें।2. किर उस लौदी को माझेन के कर्श के ऊपर 1⁄2 cm की मोटाई में आयकाकर के आलार में बेलें। वर्ष के दुसरे भान की लेकर लोटें-छोटे दुकड़ी में काट, बेले गमें लोंदे के दी तिङ्गई शाग के उमर रख्ग। बचे दुए एक तिंई भान की लोड दें।3. पेप्त्री लोंदे के तिङ्गई गान की भीवे वली सात्ह को ऊपर की तरफ लाए और खुले पलेप से लिकाफे के समान मोई (विवर 2)। लिफाके को प्रद्य कर्से के हिए निर गुढ़े दुए गान को उपर की और लाए। की डुबार जपर की और लाए।4. पेप्त्री को साथकोण पर पतें, स्त्त्री के छोसी का बन्द करक्से गोडे। इत्तका तास्यर्य रोजिंग पिंग द्वच ओहे-शोडे अन्तर पर द्वबर्ग। दकलर 5-10 मिन्द तक मिज ने ठक्षा करे। दुसरे वरण को कैट के तिङ्गई शाग के साथ नोहसाएं और उसी 30 गिन्द तक टंड़ा करें।5. लौदे को की मोटाई में बेले और भवान को रख्ग और धीडे की तरफ गोडे। सरी पेटोज को इसी प्रकार तौयार करे।6. मीनु, पुलाकर स्टार्टे द्वाएं। बीप सुनाई दें पर पेटीज को स्लवेकर रेक के उसर व्यवस्थिका करके स्टार्टे दमाए। | ||||
JUST 4 U जस्ट फॉर यू
- Baby Food (bb)
- Cake (CA)
- Sea Food (SF)
Baby Food बेबी फूड
| Category Weight Limit Utensil Instructions | |||||
| bb1 | Khichdi | 0.1 - 0.2 kg | Microwave Safe Glass Bowl | For | 100 gm |
| Soaked rice | 50 gm | ||||
| Moong daal | 25 gm | ||||
| Salt, Jeera powder (optional) | As per your taste | ||||
| Ghee | 1 tsp | ||||
| Water | 3 cups | ||||
| Method: 1. Soak rice for 1 hour. In a MWS bowl put ghee, rice and daal. Keep it in microwave. Select menu and press start. When it gives a beep, remove and add water, salt, jeera powder and cover. Put this in microwave and press start. When it gives a beep, remove and add some water if required. Mix well and put this in microwave and press start. | |||||
| bb2 | Fruit dessert | 0.2 kg | Microwave safe glass bowl | Apple, Banana | 150 gm |
| Orange juice | 2 tbsp | ||||
| Sugar (optional) | 2 tbsp | ||||
| Method: 1. Put peeled apple pieces, banana pieces, orange juice and sugar in a MWS bowl. Select menu and press start. When it gives a beep, remove and mash. Cover and put in microwave. Press start. | |||||
| bb3 | Raagi Kheer | 0.1 kg | Microwave safe glass bowl | Raagi powder | 2 tbsp |
| Milk | 1 cup | ||||
| Sugar | As per your taste | ||||
| Ghee | 1 tsp | ||||
| Water | 1/2 cup | ||||
| Method: 1. Put Raagi powder and water in MWS bowl and keep in microwave. Select menu and press start. When gives a beep, remove and add sugar, milk and ghee. Mix well. Put this in microwave and press start. When it gives a beep, remove. | |||||
Baby Food बेबी फूड
| Category Weight Limit Utensil Instructions | ||||||
| bb4 | Homemadecereal | 0.1 – 0.2 kg | Microwave SafeGlass Bowl | For | 100 gm | 200 gm |
| Rice | 1 tbsp | 2 tbsp | ||||
| Moong daal | 1 tbsp | 2 tbsp | ||||
| Salt, Jeera powder, Almonds (optional) | As per your taste | As per your taste | ||||
| Ghee | 1 tsp | 2 tsp | ||||
| Ground nuts | 1 tbsp | 2 tbsp | ||||
| Poha | 1 tbsp | 2 tbsp | ||||
| Daliya | 1 tbsp | 2 tbsp | ||||
| Method: 1. Soak rice for 1 hour. In a MWS bowl put all the ingredients except water. Keep it in microwave. Select menu and press start. When it gives a beep, remove and grind it in a mixer to a powder. You can store this mixture in a fridge. Take 2 tbsp of this powder, add water, salt, jeera powder and mix. Put this in microwave and press start. When it gives a beep, remove. | Vitibi: 1. चायलों को एक घण्टे तक भिगोए। माइक्रोयेव सेफ बाउल में पानी के अतिरिक्ता शामी सागमी लेकर ओवन में रख दें। गीनू युनकर रटार्ट दबाएं। बीप तुनाई देने पर बाहर निकालें और मिक्षार में बीसकर पाउडर वरा लें। इस मिश्रण को आर ग्रिज में गी रख शाकते है। इस मिश्रण में से 2 tbsp पाउडर लें, पानी, ननक, औरा पाउडर डाल कर मिला लें। ओवन में रखकर स्टार्ट दबाएं। बीप तुनाई देने पर बाहर निकाल लें। | |||||
| bb5 | AppleCustard | 0.2 kg | Microwavesafe glass bowl | Apple | 150 gm | |
| Sugar (optional) | 2 tbsp | |||||
| Method: 1. Put pealed apple pieces and sugar in a MWS bowl. Select menu and press start. When it gives a beep, remove and mash. Cover and put in microwave. Press start. | Vitibi: 1. छिले हुए सेव के टुकडे और डीनी माइक्रोयेव सेफ बाउल में लेकर ओवन में रख दें और मीनू चुनक रटार्ट दबाएं। बीप तुनाई देने पर बाहर निकालकर कुचल लें। डककर ओवन में रख दें और स्टार्ट दबाएं। | |||||
| Category Weight Limit Utensil Instructions | ||||
| CA1 | Walnut Cake | 0.25 kg | Low Rack & Metal Cake Tin | |
| Malda 100 gmPowdered sugar 80 gmButter 75 gmEggs 2 Nos.Walnut pieces 3 tbspBaking powder 1 tspVanilla essence 1 tspchopped dates 4 tbsp | ||||
| Method:1. Sieve maida, baking powder. In a bowl add powdered sugar and butter and beat well. Add eggs and essence and again beat well. Add dates to maida. Mix well. Add wallnuts. Add maida mixed with dates to this. For spoon dropping consistency add milk or water. Pour the mixture In a greased cake tin. Select menu and press start.When there is a beep, put the tin in microwave low rack. Press start to bake. Remove when it gives a beep. | ||||
| Swiss Role | 0.2 kgCA2 | Low Rack & Metal Cake Tin | ||
| Maida 80 gmCondensed milk 100 gmButter 50 gmSoda Bicarb 1/8 tspBaking Powder 1/2 tspVanilla essence 1/2 tspMix fruit jam 2 tbsp | ||||
| Method:1. Sieve maida, baking powder and soda. In a bowl add milkmaid and butter and beat well. Add maida, essence and mix. For spoon dropping consistency add milk or water. Place the butter paper at the bottom of the tray and pour the batter on it. Select menu and press start.When there is a beep, put the tray in microwave lower rack. Press start to bake. Remove when it gives a beep. Remove this cake on another butter paper and spread mix fruit jam over it. Roll it and cut slices. | ||||
Cake केक
| Category Weight Limit Utensil Instructions | ||||
| Carrot Cake | 0.3 kgCA3 | Low Rack & Metal Cake Tin | ||
| Malda80 gmPowdered sugar75 gmButter75 gmEggs2 Nos.Grated carrots1 cupBaking powder1 tspVanilla essence1 tspchopped dates2 tbspMethod:1. Sieve maida, baking powder. In a bowl add powdered sugar and butter and beat well. Add eggs and essence and again beat well. Add dates and carrot to maida.Mix well. Add maida mixed with dates and carrot to this.For spoon dropping consistency add milk or water. Pour the mixture in a greased cake tin. Select menu and press start. When there is a beep, put the tin in microwave low rack. Press start to bake. Remove when it gives a beep. | ||||
| Chocolate Cake | 0.3 kgCA4 | Low Rack & Metal Cake Tin | ||
| Maida100 gmPowdered sugar80 gmButter75 gmEggs2 Nos.Chopped almonds3 lbspBaking powder1 tspChocolate essence1 tspCoco powder2 tbspMethod:1. Sieve maida, baking powder. Mix coco powder with 1/2 cup hot water. In a bowl add powdered sugar and butter and beat well. Add eggs and essence and again beat well. Add almonds to maida. Mix well. Add maida mixed with almonds to this. Mix it well. Add coco solution to it and again mix well. For spoon dropping consistency add milk or water. Pour the mixture in a greased cake tin. Select menu, press start. When there is a beep, put the tin in microwave lower rack. Press start to bake. Remove when it gives a beep. | ||||
Cake केक
| Category Weight Limit Utensil Instructions | ||||
| CA5 | Lamington Cake | 0.2 kg | Low rack & metal cake tin & Microwave safe bowl | For 0.2 kgMaida 100 gPowdered suger 75 gButter 75 gEggs 1 No.Baking powder 1 tspVanilla essence 1 tspFor Lamington solution - Coco powder 2 tbspWater 2 cupsDesiccated coconut As requiredMethod: 1. Sieve maida, baking powder. In a bowl add powdered sugar and butter and beat well. Add eggs and essence and again beat well.Add maida to this. For spoon dropping consistency add milk or water. Pour the mixture in a greased cake tin.Select menu, press start. When there is a beep put the tin on low rack. Press start to bake. Remove when it gives a beep.In MWS bowl add water and coco powder and put in the microwave. Press start. When it gives a beep remove and cool. Cut the cake in to squares and dip the pieces in the coco solution on all sides. Roll these in the desiccated coconut and serve. |
| Vitighi: 1. #ndla #ar b#k##ng pata#d#r koe #an# 1. Eek bra#l m#e #u#a #ir n##n#n koe le#k##r #c##i t#h# ###t le# 1. A#p#e #ir #tr #at#k#r du#b#ra r# ##t le# 1. M#da koe ##s#e #a#le 1. C#m#v se ##gata#r ch#lato ##ur d#u y#a pa#ni #a#te 1. I### sh##n ##ic#ne ke## d#in m#e #a#at de 1. M#n du#n k#r s##t #b#a# 1. B#p u#nai#e #de ne par #in k#o lo #e k# ke ##m#r s## d# 1. #ek kcr#e k# l##es s##t #d#a# 1. B#p ho#ne p#r #in k#o bra#hr nikalal le 1. M#dk#o#ve #ia# b#al l m# e p#n#i #or k#o#o pata#d#r #a#l k#r ma#dk#o#ve #opn koe ##dr r## 1. S##t #d#a# 1. B#p ho#ne p#r bra#hr nikalak#r ##a k#r le# 1. A#k #e#k koe p#g#k#r du#k#o# me kast le# #ir du#k#o koe k##k o# v#l#chon me g# c##n #r## ro ##ub# le 1. F#ir #n#ko na#ri#al ke bu#a# me ##le#ckr p#os# 1. | ||||
Sea Food सी फूड
| Category Weight Limit Utensil Instructions | ||||
| Roasted Prawns | 0.3 kgSF1 | Microwave Safe Glass Bowl | Prawns200 gmOnions2 Nos.Tomato1 No.Oll2 tbspChilli powder, turmeric, ginger garlic paste, saltAs per your tasteGaram masala1 tspDhaniya and jeera powder2 tspMethod: 1.In MWS bowl take oil and chopped onion. Select menu and press start. When it gives a beep, remove and add prawn and tomato. Put it in a microwave and press start.When it gives a beep, add all the other ingredients and mix well. Put the bowl in microwave, press start. When it gives a beep, remove and garnish with coriander. विधि: 1. माइक्रोपेय रोक बाउत में तेल और कटी हुई प्पातज लें। पीनू चुनकर स्टाट द्वाए। पीप तुमाई देने पर बाहर निकाले और अंग और टमाटर झाले। इराफो गिर औवन में रखकर स्टाट द्वाए। पीप सुनाई देने पर बाली सभी सम्भी डाल दें और आच्ची तर्ष मिलाए। बालल को ओवन में रखकर स्टाट द्वाए। पीप होने गर बाहर सिकाले और धनिया के साथ सजाए। | |
| SF2 | Fish Cullet | 0.3 kg | Microwave safe bowl &High rack &Multi cook tawa | For0.3 kgFish fillet300 gBoiled potato2 Nos.Bread crumbs1 cupOil2 tbspChilli powder, turmeric, ginger garlic paste, saltAs per lasileGaram masala powder1 tspCoriander leavesA few springsMethod: 1.In a MWS bowl take fish fillet add 1 cup water. Select menu & press start. Mash the fish.Add all the other ingredients except oil and mix well with boiled and mashed fish. Make cutlets and roll them in bread crumbs.Put them on multi cook tawa, put some oil around the cutlets. Keep this on high rack and press start.When beeps, remove and turn them over. Press start.4. When beeps, remove and garnish with coriander leaves. विधि: 1. गाइक्रोपेय रोक बाउत में शिंग फितेंट लेकर 1 कग पानी लाले। पीपू तुनकर स्टाट द्वाए। किर भाली को मसल ले।2. तेल की छाङ्कर तथी सायगी झाल दें और उवेश हुर आलू तथा नलती हुई भाली के साथ निला ले। कलेटेल नमांकर उदे बेद ऋम्नुरा में लगेंट दें। उनकी मल्टी कुक ताव पर एर्ख, कलेटरा चारो तरफ शिड़ा तेल लगाए। हाई रैक पर रख स्टाट माएए।3. यौण सुनाई देने पर उनकी पातटकर किर स्टाट द्वाए।4. पीप सुनाई देने पर बाहर निकाले और धनिया की पतियों से सजाएं। |
| Crab Curry | 0.5 kgSF3 | Microwave Safe Glass Bowl | Crab pieces250 gmGinger garlic paste2 Nos.Water1 cupSalt, dhaniya-jeera powder, garam masala, chilli powder, turmeric2 tbspOilAs per your lasileChopped onions1 tspCoconut milk2 tbspMethod: 1.In a MWS bowl put oil, onion and ginger garlic paste and keep it in microwave. Select menu & start to cook. When it gives a beep, remove. Add crab and I cup water. Put in microwave and press start. When it gives a beep add coconut milk, salt, garam masala, dhaniya-jeera powder and mix well. Press start. Serve hot with rice. विधि: 1. बाउत में तेल, पाज और अदसक लाहसुन पेस्ट. ले और ओवन में रख्य दें और पीनू चुनकर स्टाट द्वाए। पीप सुनाई देने पर बाहर निकाल ले। परोमी क्रेच और एक कग पानी लेले। ओवन में रतें और स्टाट द्वाए। पीप सुनाई देने पर नारिस्ल, पूर्ण, नामक, परन मलाला, धनिया जीण पाउडर झालकर अच्छी तर्ष मिलाए और स्टाट द्वाए। पावल के साथ माँ-गमे परोसे। | |
Sea Food सी फूड
| Category Weight Limit Utensil Instructions | ||||
| SF4 | Fish Masala | 0.3 kg | Microwave Safe Glass Bowl | Pomphret pieces200 gmOnions2 Nos.Tomato1 No.Oll2 tbspChilli powder, turmeric, ginger garlic paste, salt, Saunl powderAs per your tasteGaram masala1 tspDhaniya and jeera powder2 tspCoriander2 tbspMethod:1.In MWS bowl take oil and chopped onion. Select menu and press start. When it gives a beep, remove and add promphret pieces and tomato. Put it in a microwave and press start. When it gives a beep, add all the other ingredients and 2 cup water and mix well. Put the bowl in microwave, press start. When it gives a beep, remove and garnish with coriander. विधि:1. माइक्रोवेव रोफ बाउल में तेल और कटी हुई प्याज ले। गीनू वृनकर स्टार्ट दबाएं। बीप तुनाई देने पर बहर निकालें और पोम्फेट के दुक्कें और टमाटर बालें। इसको फिर ओवन में रखकर स्टार्ट दबाएं। बीप सुनाई देने पर बाकी सभी सामग्री और दो कच पानी डाल दें और अच्छी तरह मिलाएं। बाउल को ओवन में रखकर स्टार्ट दबाएं। बीप होने पर बहर निकालें और भनिया के राथ राजाए। |
| Kappa Ayala | 0.2 kgSF5 | Microwave Safe Glass Bowl | Surmany fish1000 gmKappa pieces2 Nos.Coconut milk1 cupCoconut oil2 tbspChilli powder, turmeric, ginger garlic paste, salt, pepper powderAs per your tasteOnion1 tspDhaniya and jeera powder2 tbspCoriander2 tbspMethod:1.In a bowl take oil and chopped onion. Select menu and press start. When it gives a beep, remove and add chopped kappa and fish pieces. Put it in microwave and press start. When it gives a beep, add all the other ingredients and mix well. Put the bowl in microwave, press start. When it gives a beep, remove and garnish with coriander. विधि:1. माइक्रोवेव रोफ बाउल में तेल और कटी हुई प्याज ले। मीनू चृताकर स्टार्ट दबाएं। बीप तुनाई देने पर बहर निकालें और कष्पा और मफली के दुक्कें झालें। फिर ओवन में रखकर स्टार्ट दबाएं। बीप सुनाई देने पर बाकी सभी सामग्री ढालकर अच्छी तरह मिला दें। बाउ को फिर ओवन में रखकर स्टार्ट दबाएं। बीप सुनाई देने पर बहर निकालें और धनिया से सजाएं। | |
UTILITY CORNER
यूटीलिटी कॉर्नर
- Utility Corner (UC)
- Fermentation (FE)
Utility Corner सुविधा कॉर्नर
| Category | Weight Limit | Utensil | Instructions | |
| UC1 | Keep warm | 0.3 kg | Microwave safe bowl | Method: 1. Any cooked food with cover (rice, dial, subzi, halwa, upma etc.). Select menu & press start.विति : 1. कोई भी भोजना (चापल, दाल, सबी, हलवा, उपमा इत्यादि) लेकर ढक दें। मीू चुनकर स्टार्ट दबाएं। |
| UC2 | Steam clean | 0.3 kg | Microwave safe bowl | Method: 1. Take water in a MWS bowl, add vinegar & lemon juice in it. Select menu & press start.विति : 1. माइक्रोवेव सेफ बाउल में पानी लेकर उसमें सिरका और नीबू रस डालें। मीू चुनकर स्टार्ट दबाएं। |
| UC3 | Defrost Veg | 0.2 ~ 0.5 kg | Microwave safe bowl | Veg - (Paneer, Green Peas, Corn etc.)Method: 1. Take in Microwave Safe Bowl, select menu and press start.2. When beep turn the food.विति : 1. माइक्रोवेव सेफ बाउल में लेकर नीबू चुनें और स्टार्ट दबाएं।2. बीप सुनाई देने पर खाने को पलट दें। |
| UC4 | Defrost Non Veg | 0.5 ~ 1.0 kg | Microwave safe bowl | Non-Veg - (Chicken, Mutton etc.)Method: 1. Take in Microwave Safe Bowl, select menu and press start.2. When beep turn the food.विति : 1. माइक्रोवेव सेफ बाउल में लेकर नीबू चुनें और स्टार्ट दबाएं।2. बीप सुनाउ देने पर खाने को पलट दें। |
| UC5 | Denumidification | 0.3 kg | Microwave safe bowl | Namkin, Biscuits, Bhujla, Papad and Waters etc.Method: 1. In MWS bowl add the food to be denumidified. Select menu and press start.विति : 1.खाना चुखाने के लिए उरो माइक्रोवेव रोफ बाउल में रखें। मीू चुनकर स्टार्ट दबाएं। |
Fermentation फरमेंटेशन
| Category Weight Limit Utensil Instructions | ||||
| FE1 | Yogurt | 0.3 kg | Microwave SafeGlass Bowl&Low Rack | Milk300 ml |
| Curd2 tbsp | ||||
| Sugar3 tbsp | ||||
| Pink food colour1/4 tsp | ||||
| Strawberry1/4 tsp | ||||
| Method: 1. Put lukewarm milk in MWS bowl. Add curd, sugar,colour, essence to it. Stir it very well. Select menuand press start. When it gives a beep, put the bowlin lower rack. Press start. Remove and cool.Refrigerate it. विधि: 1. माइक्रोवेव सेफ बाउल में गुनगुना टूध लें। फिर उसमें दही, चीनी, रंगऔर इत्र डालें। अखी तरह हिलाए। मीनू चुनकर स्टार्ट दबाएं। बीपसुनाई देने पर बाउल को ओवन में जोअर रैक पर रखें। रटाट दबाएं।बाहर निकालकर वंढा करें और रेक्रिजरेटर में रख दें। | ||||
| MasalaPaneer | 0.5 kgFE2 | Microwave SafeGlass Bowl | Milk500 ml | |
| Curd2 tbsp | ||||
| Coriander1 tbsp | ||||
| Jeera1 tsp | ||||
| Method: 1. In MWS bowl add milk. Select menu and press start.When it gives a beep, remove and add curd, corianderand jeera. Put in microwave. Press start. When it givesa beep, remove and strain and press in a muslin cloth. विधि: 1. माइक्रोवेव सेफ बाउल में दूध लें। मीनू चुनकर स्टार्ट दबाएं। बीपसुनाई देने पर बाहर निकाले और दही, धनिया और जीरा डालें।ओवन में रखकर स्टार्ट दबाएं। बीप सुनाई देने पर बाहर निकालें और निबाड़कर मर्लिन के कप्प्ठे से दबाएं। | ||||
| Yeast dough | 0.25 kgFE3 | Microwave SafeGlass Bowl | Maida250 ml | |
| Yeast1 tbsp | ||||
| Salt1/2 tsp | ||||
| Sugar1 tsp | ||||
| WaterAs required | ||||
| Method: 1. In MWS bowl add maida, yeast, salt and sugar. Mix well,add water and make a soft dough. Select menu and pressstart. When it gives a beep, rest for 3 minutes. Now remove विधि: 1. माइक्रोवेव रोक बाउल में मैदा, ईरट, नमक और चीनी जातकर अच्छीतरह गिलाएं तथा पानी गिलाकर मुलायण डक बना लें। गौनू चूनकरस्टार्ट दबाएं। बीप सुनाई देने के 3 गिनट बाद बाहर निकाल लें। | ||||
Fermentation फरमेंटेशन
| Category Weight Limit Utensil Instructions | ||||
| FE4 | Pizza Base | 0.2 kg | Low Rack & Metal Tray | Malda 200 mlYeasl 1 lbspSalt 1/2 tspSugar 1 tspWater As requiredMethod: 1. In a bowl add malda, yeast, salt and sugar. Mix well, add water and make a soft dough. Keep for half an hour. Roll a roti, prick with a fork and rest for 5 minutes. Select menu and press start. When it gives a beep, keep it in low rack. Press start. Remove when it gives a beep. विति: 1. माइकोपेव सेफ बाउल में यैदा, ईस्ट, नगक और बीमी ढालें। अत्छी तरह मिलाएं और पानी डालकर मुलायम डफ बना लें और आधा घंटे के लिए रख होजे। रोटी बेलकर कॉटे तो फ्रेद दें और 5 मिनर तक रखा रहने दें। गीनू खुनकर स्टार्ट दबाए। बीप खुनाई देने पर इरो लो रैक पर रखकर स्टार्ट दबाए। बीप सुनाई देने पर बाहर निकाले। |
BODY CARE
बॉडी केअर
- Body Care (bC)
Body Care बॉडी केअर
| Category Weight Limit Utensil Instructions | ||||
| bC1 | Lip Gloss | 0.2 kg | Microwave Safe Glass Bowl | |
| Alovera gel 100 ml | ||||
| Rose water 1/2 cup | ||||
| Almond oil 1/4 cup | ||||
| Method: 1. In MWS bowl add all the ingredients. Mix well. Select menu and press start. When it gives a beep, remove and mix well. Again put in microwave. Press start. Remove when it gives a beep. Store it in a clean glass bottle. | ||||
###: 1. nafakovav lekabatl mei rangai rangai leekar akch## tarrh g##la tei m##### #### #### #### #### #### #### #### #### #### #### #### #### #### #### #### #### #### #### #### #### #### #### #### #### #### #### #### #### #### #### #### #### #### #### #### #### #### #### #### #### #### #### #### #### #### #### #### #### #### #### #### #### #### #### #### #### #### #### #### #### #### #### #### #### #### #### #### #### #### #### #### #### #### #### #### #### #### #### #### #### #### #### #### #### #### #### #### #### #### #### #### #### #### #### #### #### #### #### #### #### ## #### #### #### #### #### #### #### #### #### #### #### #### #### #### #### #### #### #### #### #### #### #### #### #### #### #### #### #### #### #### #### #### #### #### #### #### #### #### #### #### #### #### #### #### #### #### #### #### #### #### #### #### #### #### #### #### #### #### #### #### #### #### #### #### #### #### #### #### #### #### #### #### #### #### #### #### #### #### #### #### #### #### #### #### #### #### #### #### #### #### #### #### #### #### #### #### #### #### #### ##### #### #### #### #### #### #### #### #### #### #### #### #### #### #### #### #### #### #### #### #### #### #### #### #### #### #### #### #### #### #### #### #### #### #### #### #### #### #### #### #### #### #### #### #### #### #### #### #### #### #### #### #### #### #### #### #### #### #### #### #### #### #### #### #### #### #### #### #### #### #### #### #### #### #### #### #### #### #### #### #### #### #### #### #### #### #### #### #### #### #### #### #### #### #### #### #### #### #### ####### #### #### #### #### #### #### #### #### #### #### #### #### #### #### #### #### #### #### #### #### #### #### #### #### #### #### #### #### #### #### #### #### #### #### #### #### #### #### #### #### #### #### #### #### #### #### #### #### #### #### #### #### #### #### #### #### #### #### #### #### #### #### #### #### #### #### #### #### #### #### #### #### #### #### #### #### #### #### #### #### #### #### #### #### #### #### #### #### #### #### #### #### #### #### #### #### #### #### #######
Method: 1. In MWS bowl put all the ingredients. Select menu and press start. Remove when it gives a beep. Keep it for 2 hours. Strain and store in a glass jar. | ||||
| Garlic 10 pods | ||||
| Ajwain 1/2 tsp | ||||
| Cloves 2-3 Nos. | ||||
| Almonds 3-4 Nos. | ||||
| Mustard oil 1 cup | ||||
| ###: 1. nafakovav lekabatl mei rangai rangai leekar akch#### tarrh g#### ma##### #### #### #### #### #### #### #### #### #### #### #### #### #### #### #### #### #### #### #### #### #### #### #### #### #### #### #### #### #### #### #### #### #### #### #### #### #### #### #### #### #### #### #### #### #### #### #### #### #### #### #### #### #### #### #### #### #### #### #### #### #### #### #### #### #### #### #### #### #### #### #### #### #### #### #### #### #### #### #### #### #### #### #### #### #### #### #### #### #### #### #### #### #### #### #### #### #### #### ## ### #### #### ## ### ## ## ## ## ## ## ## ## ## ## ## ## ## ## ## ## ## ## ## ## ## ## ## ## ## ## ## ## ## ## ## ## ## ## ## ## ## ## ## ## ## ## ## ## ## ## ## ## ## ## ## ## ## ## ## ## ## ## ## ## ## ## ## ## ## ## ## ## ## ## ## ## ## ## ## ## ## ## ## ## ## ## ## ## ## ## ## ## ## ## ## ## ## ## ## ## ## ## ## ## # | ||||
| Astringent 0.2 kgbC3 | ||||
Body Care बॉडी केअर
| Category Weight Limit Utensil Instructions | ||||
| bC4 | Hair Oil | 0.3 kg | Microwave Safe Glass Bowl | Coconut oil 200 mlAmla 100 gmsJasmin flowers 5-6 Nos.Hibiscus flowers 3-4 Nos.Bhahmi leaves 1/2 cupMethod: 1. In MWS bowl put all the ingredients. Select menu and press start. Remove when it gives a beep. Keep it for 2 hours. Strain and store in a glass jar. विधि: 1. माइकोवेव सेक बाउल में सभी सामग्री लें। मीनू तुनकर स्टार्ट दबाएं। बीप सुनाई देने पर बाहर निकालें और दो चंटे तक रखा रहने दें। निचोड़कर कॉच के जार में रख दें। |
| Wrinkle Lift Face Pack | 0.1 kgbC5 | Microwave Safe Glass Bowl | Almonds 5-7 Nos.Urad Daal 2 tbspWater 1 cupMethod: 1. In MWS bowl put all the ingredients. Select menu and press start. Remove when it gives a beep. Grind it fine. विधि: 1. माइकोवेव सेक बाउल में सभी सामग्री जालें। मीनू डुनकर रट्यार्ट दबाएं। बीप सुनाई देने पर बाहर निकाल लें। इसे वारीक पीस लें और इसे तुरन्न इस्सेमाल करें। | |
⚠ WARNING/चेतावनी
Please ensure cooking times are correctly set as over cooking may result in FIRE and subsequent DAMAGE to the OVEN. आप ये निर्धरीत करे की पकाने का समय आपने सही सेट किया है नही तो ज्यादा गर्म होने से आग या अवन को क्षित पहुँच सकती है ।
IMPORTANT SAFETY INSTRUCTIONS READ CAREFULLY AND KEEP FOR FUTURE REFERENCE महत्वपूर्ण सुरक्षा निर्देश - ध्यान से पढ़ और भविष्य के संदर्भ के लिए रखें
⚠ WARNING/चेतावनी
1 Do not attempt to tamper with, or make any adjustments or repairs to the door, control panel, safety interlock switches or any other part of the oven. It is hazardous for anyone to carry out any service or repair operation which involves the removal of any cover which gives protection against exposure to microwave energy. Repairs should only be undertaken by a qualified service technician.
कभी भी डोर, कंट्रोल पैनल, सुरक्षा इंटरलाक स्विच या अवन के किसी पार्ट से छेड़छाङ न करें । मरम्मत के लिए कुशल तकनीशियन ही बुलाएँ ।
2 Do not operate the oven when empty. It is best to leave a glass of water in the oven when not in use. The water will safely absorb all microwave energy, if the oven is accidentally started.
कमी भी अवन खाली न चलाएँ, यह बेहतर होगा कि एक ग्लास पानी हमेशा अवन में सखे ताकि दुर्धटनावश खाली चलने पर पानी सारी ऊर्जा सोख लेगा।
3 Do not use the oven for the purpose of dehumidification. It can be the cause of serious damage of safety.(ex. Operating the microwave oven with the wet newspapers, clothes, toys, pet or portable electric devices, etc.)
डिह्यूमीडिफिकेशन के उद्देश्य के लिए ओवन का प्रयोग नडी करना चाहिए। इससे सुरक्षा की गम्भीर क्षति हो सक्ती है।
4 Do not cook food wrapped in paper towels, unless your cook book contains instructions, for the food you are cooking.
कागज़ मे लिपटा हुआ भोजन न पकाई जब्र तक कृर्किंग पुस्तिका में ऐसा कोई निर्देश न हो ।
5 Do not use newspaper in place of paper towels for cooking.
पकाने के लिए कागजी तौलिया के बजाए अखबार का प्रयोग न करें ।
6 Do not use wooden containers. They may heat-up and char. Do not use ceramic containers which have metallic (e.g. gold or silver) inlays. Always remove metal twist ties. Metal objects in the oven may arc, which can cause serious damage.
पकाने के लिए लकड़ी के बर्तन प्रयोग न करें, वे गर्म हो सकते हैं और जल सकते हैं । धातु के बर्तन और काकरी जिसमें धातु की परत हो प्रयोग न करें । हमेशा धातु की तारे निकाल कर ही अवन में रखे क्यॉकि धातु से आर्किंग हो सकती हैं ।
7 Do not operate the oven with a kitchen towel, a napkin or any other obstruction between the door and the front edges of the oven, which may cause microwave energy leakage.
कीचन टॉवल, नंपकीन और अन्य वस्तु आप अवन के फ्रंट सतह और दरवाजे के बीच रख के ना चलाए जिससे मायक्रोवेव लिकेज हो सकता है ।
8 Do not use recycled paper products since they may contain impurities which may cause sparks and/or fires when used in cooking.
रिसाइकल करे हुए कागज का प्रयोग न करें क्यौंकि इसमें मिलावट होने का खतरा है, जिससे खाना पकाते समय चिनगारी या आग लगने का खतरा हो सकता हैं।
9 Do not rinse the turntable by placing it in water just after cooking. This may cause breakage or damage.
खाना पकाने के तुरेत बाद ग्लास टेपानी मेन डाले । इससे यह दूट सकती हैं ।
10 Small amounts of food require shorter cooking or heating time. If normal times are allowed they may overheat and burn.
शोड़े भोजन के लिए कम समय चाहिए । साधारण समय से यह अधिक गर्म हो सकते हैं और जल सकते हैं ।
11 Be certain to place the oven so the front of the door is 8 cm or more behind the edge of the surface on which it is placed, to avoid accidental tipping of the appliance.
यह निश्चित कर ले कि डोर अगली सतह से 8 सेमी पीछे हो कि उपकरण पलटे नहीं ।
12 Before cooking, pierce the skin of potatoes, apples or any such fruit or vegetable.
पकाने से पहले आलु, सेब जैसी चीजों को पिअर्स करे ।
13 Do not cook eggs in their shell. Pressure will build up inside the egg which will burst.
अंडे को छिल्के में मत पकाएँ। ऐसे पकाने से छिल्के के अन्दर दबाव बढ़ सकता है और अंडा फट सकता हैं।
14 Do not attempt deep fat frying in your oven.
अवन में डीप फ्राई करने का प्रयत्न न करें ।
15 Remove the plastic wrapping from food before cooking or defrosting. Note though that in some cases food should be covered with plastic film, for heating or cooking.
खाना पकाने या डिफ्रास्ट करने से पहले प्लास्टिक रैपिंग उतार लें। कुछ व्यंजनों में फिल्म से कवर करके जैसा कि कुर्किंग पुरितका में बताया गया है प्रयोग कर सकते है।
16 If the oven door or door seals are damaged, the oven must not be operated until it has been repaired by a qualified service technician.
यदि अवन का दरवाजा क्षित्यिस्त है तो उसे प्रयोग तब तक न करें जब तक किसी कुशल कारीगर से मरम्मत न करा लें ।
17 If smoke is observed, switch off or disconnect the oven from the power supply and keep the oven door closed in order to stifle any flames.
यदि अवन मैं धूँआ दिखाई देतो दरवाजा बन्द सखे, बन्द करके पावर सप्लाई से अवन हटा लें ।
18 When food is heated or cooked in disposable containers of plastic, paper or other combustible materials, check the oven frequently due to the possibility of the food container is deteriorating.
जब खाना प्लास्टिक के फेकने वाले बर्तन में पकाया जाता हैं या गर्म किया जाता हैं तो उसे लगातार चैक करें कि बर्तन खराब तो नहीं हो रुहा ।
19 Only allow children to use the oven without supervision when adequate instructions have been given so that the child is able to use the oven in a safe way and understands the hazards of improper use.
बच्चों को बिना निगरानी के अवन तभी प्रयोग करने दे जब उन्हे अवन सुरक्षित तरीके से प्रयोग पता हो और गलत तरीके से प्रयोग करने के खलरे भी पता हो।
20 Liquids or other foods must not be heated in sealed containers since they are liable to explode.
तरल पदार्थ या अन्न बंद केटेनर में ना पकाए जिससे वो फट सकता है।
⚠ WARNING/चेतावनी
⚠ WARNING/चेतावनी
⚠ WARNING/चेतावनी
21 Do not operate the oven, if the door seals and adjacent parts of the microwave oven are faulty, until the oven has been repaired by a qualified service technician. यदि अवन का दर्शवाजा क्षितिग्रस्त है तो उसे प्रयोग तब तक न करें जब तक किसी कुशल कारीगर से मरम्मत न करा ले ।
22 Check the utensils are suitable for use in microwave ovens before use. Do not touch the oven door, outer cabinet, rear cabinet, oven cavity, accessories and dishes during grill mode and auto cook operations, unless wearing thick oven gloves, as they will become hot. Before clearing make sure they are not hot. ये आप देख ले की अवन प्रयोग के लिए चुने हुए बर्तन सही है या नही। ग्रील मोड अथवा ऑटों मोड के प्रयोग के दौरान बिना दस्तानों के ओवन जोअर, आक्टर केबिनेटर, रेअर केबिनेट, अवन केविटी, ऑसेसरिज और डिशेस को ना छुएं।
23 Children should be supervised to ensure that they do not play with the appliance. Cleaning and user maintenance shall not be made by children unless they are aged from 8 year and above and supervised. बच्चे के लिए सुनिश्चित करें कि ये उपकरण के साथ नही खले तथा सफाई व मेन्टीनेन्स 8 वर्ष या उससे अधिक उम्र के बच्चों को सुपरवाइज करके ही आपरेट करवाना चाहिए।
24 The appliance is not intended to be operated by means of an external timer or separate remote-control system. उपकरण को किसी भी बाहरी टाइमर व अलग रिमोट कन्ट्रेल सिस्टम से आपरेट करने के लिए नही बनाथा गया है।
25 Oven Lamp power rating is 35W. ओवन लैम्प की पावर रेंटिंग 35W है।
26 The Microwave oven shall be used freestanding. माइक्रोवेव ओवन का फ्रीस्टैन्डिंग इस्तेमाल होना चाहिए।
27 This appliance can be used by children aged from 8 years and above and persons with reduced physical, sensory or mental capabilities or lack of experience and knowledge if they have been given supervision or instruction concerning use of the appliance in a safe way and understand the hazards involved. यह उपकरण 8 वर्ष या अधिक उम्र के बच्चों द्वारा इस्तेमाल किया जा सकता है, और कम शारीरिक, समझ व दिमागी क्षमता वाले व्यक्ति को उपकरण से सम्बचित निर्देशों को टीक प्रकार से सुपरवाइज करके बिना किसी रुकावट के चलाया जा सकता है।
Technical Specifications / Two Recipes for starter तकनीकी जानकारी / नवसिखुए के लिए दो व्यंजन
⚠ WARNING/ चेतावनी
This appliance must be earthed/यह यन्त्र अर्थ किया जाना चाहिए
The wires in this mains lead are colored in accordance with the following codes/पावर कॉर्ड का रंग निम्न निर्देशानुसार होता है-
BLACK \~ Neutral RED \~ Live GREEN & YELLOW \~ Earth
As the colours of the wires in the mains lead of this appliance may not correspond with the coloured markings identifying the terminals in your plug proceed as follows:/वायरिंग करने का निर्देश :
The wire which is colored BLACK must be connected to the terminal which is marked with the letter N or Colored BLACK.
BLACK रंग के वायर का कनेक्शन प्लग के 'N' पिन से
The wire which is colored RED must be connected to the terminal which is marked with the letter L or colored RED.
RED संग के वायर का कनेक्शन प्लग के 'L' पिन से
The wire which is colored GREEN & YELLOW must be connected to the terminal which is marked with the letter E or ± . GREEN/YELLOW or GREEN लंग के वायर का कनेवशन प्लग के 'E' ± से
Two recipes for starter / नवसिखुप के लिप सा चंजन
NOTE: The time variation during Cooking of recipe depends upon the ingredients, method adopted & type of food category.
व्यजन बनाने के दौरान, समय परिवर्तन खाने के तत्त्य या अंश, बनाने की विधि और खाने की ऋणी पर निर्भर करता है।
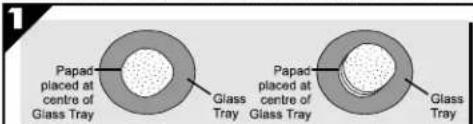
text_image
Papad placed at centre of Glass Tray Glass Tray Papad placed at centre of Glass Tray Glass Tray1. ROASTED PAPAD
Procedure
Papad:
-
Place the raw papad at the centre of Glass Tray, as shown in the picture above.
-
Select Micro-100% Power Level and Cook time.
-
After Papad cooking give standing time of 30-45 seconds.
To Cook Multiple Papads
*Place Multiple papads over one another, as shown in the picture above.
Crispy Papad :
-
Press Quick Start without papad.
-
Sprinkle little water or oil over the papad.
-
After beep, place the papad at the centre and press Start.
*Note : The cooking time may vary –
a. As per the composition of the papad material.
b. As per the Quantity of papad used.
1. भुने हुए पापड़
विधे
पापड़
-
ग्लास ट्रे के बीच में कच्चा पापडु रखे, जैरा कि उपरोक्ता चित्र नें दशाया गय है।
-
माइक्रो-100% पावर स्तर और एकाने का समय निधारित करें।
-
पापड़ पक जाने के बाद 30-45 सैकेड तक रखा रहने दें।
अधिक पापड़ पकाने के लिए :
*बहत सारे पापड़ एक दूसरे के ऊपर रखें जैरी कि उपरोका चित्र में दर्शाया गया है किस्पी पापल :
-
पापड़ रखने से पहले विक स्टार्ट दबाएं।
-
पापड़ के ऊपर थोड़ा गानी या तेल फिडकें।
-
नीप के बाद, ग्लास ट्रे के बीच में पामड़ रखे, जैसा कि उपरोका वित्र में दर्शाया गया है।
*नोट : पकाने के समय में अन्तर सकता है -
a. पापर की सामग्री की बनावत के अनुसार।
b. इस्तेमाल किये गए पापलकी की मात्रा के अनुरार।
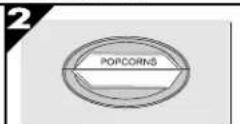
- POP CORN : Place the pop com bag to the glass tray properly as instructed on packing. Use Quick Start to set 3\~4 minutes. Remove the bag after popping sound has stopped. Take care that bag corners do not touch sides while rotating.
Note : Allend popping process carefully. Do not overheat as cause flash fire.
- पाप कर्न : निक्तिर न दिये गए निदेशनुसार पाप कर्न गए का वैग कर्न की ट्रै एर ठीक से रों सर्खे । 3-4 मिंट सैट कर्ने के दिए विक सदार्टि क्रमोग होरे. भुनने की आवाज समाथत कों कबाद दैन की हुटा लै द्याण सखे क्षि दैन के कों बुमाति सामय साइड से न छुपरें. नोट : भुनने की प्रक्रिया कों द्याणपूर्डक देखे। आयककता ते आविक पर्म न करे अयोकि इसो आग लग साकती हे।

LG Electronics
MFL06477271