Slice 656 - Hi-Fi System Teradek - Gratis brugsanvisning og manual
Find enhedens vejledning gratis Slice 656 Teradek i PDF-format.


Brugerspørgsmål om Slice 656 Teradek
0 spørgsmål om dette apparat. Besvar dem du kender, eller stil dit eget.
Stil et nyt spørgsmål om dette apparat
Download vejledningen til din Hi-Fi System i PDF-format gratis! Find din vejledning Slice 656 - Teradek og tag din elektroniske enhed tilbage i hånden. På denne side er alle dokumenter nødvendige for brugen af din enhed offentliggjort. Slice 656 af mærket Teradek.
BRUGSANVISNING Slice 656 Teradek

Slice
Encoder
text_image
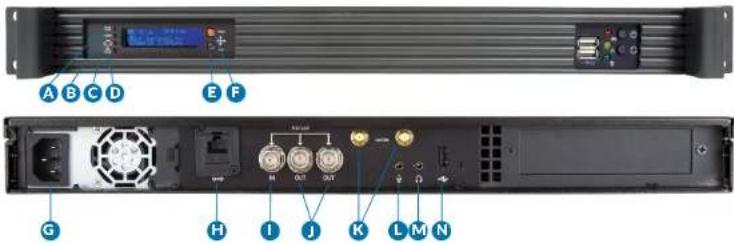
A B C D E F G H I J K L M NA:Video Input
B:Status
C:Broadcast/Record
D:Fault/Error
E:Menu Joystick
F:Stream Joystick
G:A/C Input
H:Ethernet Port
I: SDI In
J:SDI Out
K:Wireless Antenna
L: MIC Audio Input
M:Headphone Audio Output
N: USB Port
Stream Joystick:
◀: Selects options from streaming/recording prompts
- (button press): Returns to main status screen, start/stop recordings and broadcasts
Menu Joystick:
▲,▼: Select menu items, change status screen on main display, select characters
◄ : Back, move to higher menu level
▶, ● (button press): Confirm selection, open selected menu
SLICE'S WEB UI LOGIN
username: admin
password: admin
POWER & CONNECT
1
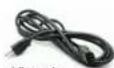
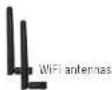
1 Connect A/C power to the Power Input (G). Attach the included Wireless antennas via the threaded RP-SMA connectors (K).
2 Connect Slice to your network via the 10/100 Ethernet port (H).
3 Connect the SDI output from your video Source to the HD-SDI input (1) on Slice.
AC adapter
NETWORK CONNECTION

OPTION A: MASTER MODE: Connect Slice to one other device.
Slice defaults to Master mode, which will create and advertise its own network name (SSID). Your computer, decoder, or mobile device connects directly to Slice with no additional network equipment required.
- On your computer or iOS device, open your wireless networking utility.
- Choose your Slice from the list of WiFi devices in your area and connect to that network.
WiFi CONNECTION ON MAC/PC OR iPAD
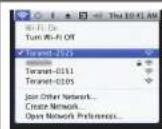

OPTION B: INFRASTRUCTURE MODE: Add Slice to an existing network.
In Infrastructure mode, Slice connects to an existing network via a wireless access point or Ethernet connection. Infrastructure mode allows Slice to communicate with all devices on the network and is required for streaming to the Internet. Wireless range can be greatly improved by using a wireless access point.
Connecting Slice to an existing wireless network:
- Enter the main menu by pressing ▶ or ●
Select Network Setup with ▼ and enter the
menu with ▶
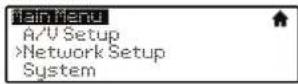
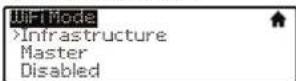
- Select Mode, and then choose Infrastructure. The Wireless mode will be set.
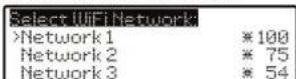
- Select your preferred network, (the ★ icon indicates a secured network), and the number on the far right is the signal strength.
- Choose Yes to apply the new network settings.

- Select Configure.
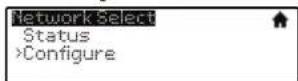
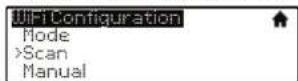
- From the WiFi Configuration menu, choose Scan.
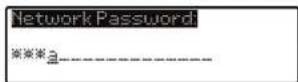
- If prompted, enter your network password. Choose characters with ▲ and ▼, choose the position with ◀ and ▶, and confirm with ●. To cancel, press ●
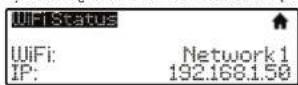
- Once configured, you can view the network status by selecting Status from the Network Setup menu.
NEED MORE HELP?
- Support forum: http://support.teradek.com - Contains tips, information and all the latest firmware & software updates
- Training videos: http://www.teradek.com/training
TERADEK SUPPORT STAFF: support@teradek.com or call 888-841-2111 ext2 (Mon-Fri 9am to 6pm PST)
STREAM (WEB UI LOGIN: username: admin password: admin)

OPTION A: STREAM FROM SLICE TO THE INTERNET
Configure your Slice for Internet streaming on Slice's Stream Settings page.
- Launch Slice's configuration page by clicking Configure in TeraCentral.
- If the wizard appears, click Skip the Setup Wizard, then log in to Slice's web UI (user: admin, password: admin). Navigate to Video Setup → Stream Settings.
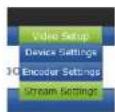
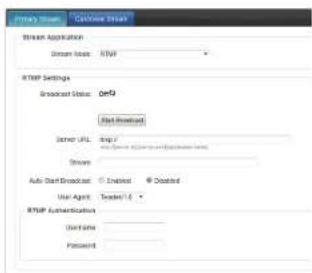
RTMP streaming:
- Select RTMP as the Stream Mode.
- Enter the server URL. Depending on your destination (local server or CDN), this will look something like rlmp://server.address:1935/live. The URL varies based on your streaming provider. Check with them or Teradek Support to get the proper address. Often the server URL is found with FMLE instructions or in a downloadable XML file.
- Enter the stream name. Again this varies by platform, but should be found with the server URL.
- Select enabled or disabled for auto-start broadcast. If enabled, Slice will attempt to start a broadcast whenever it powers up.
- Click Apply Start/stop the stream by clicking Start Broadcast on the Stream Settings page or by pressing the Stream joystick on Slice.
- See the reference guide for additional information.
text_image
Primary Stream Custom Stream Stream Application Stream Level: RTSP RTSP Settings Broadcast Status: OnE Net Approach Server URL: Any Auto-Service (RTSP) Application Stream Auto-Select Broadcast: Enabled Cancelled User Agent: Document1.0 RTSP Authentication Uniform Forward
Livestream
-
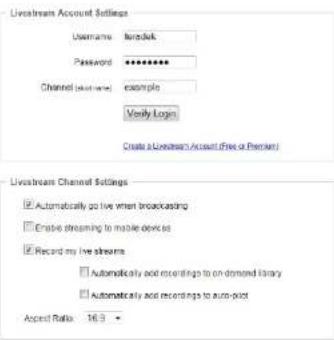
Under Stream Mode, select Livestream (Live Internet Streaming).
-
Enter your Livestream username, password, and channel short name. Click Verify Login to check that Slice can contact Livestream and that your login information is valid. NOTE: the channel short name is case sensitive.
- Click Apply Start/stop the stream by clicking Start Broadcast on the Stream Settings page or by pressing the Stream joystick on Slice.
text_image
Livestream Account Settings Username: Booklets Password: ********** Channel (select name): example Modify Login Create a Livestream Account (free or Premium) Livestream Channel Settings Automatically do live when broadcasting Enable streaming to mobile devices Record my live streams Automatically acid recordings to on-demand library Automatically acid recordings to auto-pilot Accred Ratio: 16.9OPTION B: LOCAL MONITORING WITH iOS DEVICES AND TERACENTRAL
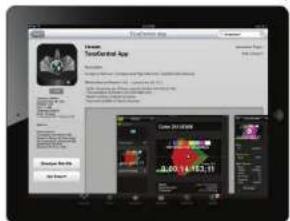
- Download TeraCentral from the iTunes App Store.
text_image
Home Decorer App Home Decorer App Home Decorer App Home Decorer App Home Decorer App Home Decorer App Home Decorer App Home Decorer App Home Decorer App Home Decorer App Home Decorer App Home Decorer App Home Decorer App Home Decorer App Home Decorer App Home Decorer App Home Decorer App Home Decorer App Home Decorer App Home Decorer App Home Decorer App- Open the TeraCentral app. You will see your Slice's stream listing.
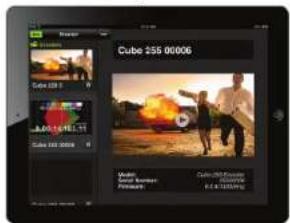
text_image
Cube 255.0006 Cube 255.0 Cube 255.0 Cube 255.0006 Cube 255.0006 Cube 255.0006 Cube 255.0006 Cube 255.0006 Cube 255.0006 Cube 255.0006 Cube 255.0006 Cube 255.0006 Cube 255.0006- Open the Wifi Settings and connect to Slice's network (see section 2 for more information).
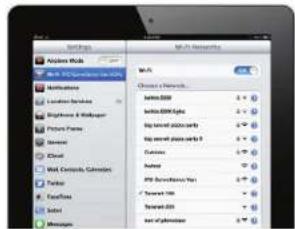
text_image
Multi-Resources Multi-Resources Mode Multi-Resources Mode 1 Multi-Resources Mode 2 Multi-Resources Mode 3 Multi-Resources Mode 4 Multi-Resources Mode 5 Multi-Resources Mode 6 Multi-Resources Mode 7 Multi-Resources Mode 8 Multi-Resources Mode 9 Multi-Resources Mode 10 Multi-Resources Mode 11 Multi-Resources Mode 12 Multi-Resources Mode 13 Multi-Resources Mode 14 Multi-Resources Mode 15 Multi-Resources Mode 16 Multi-Resources Mode 17 Multi-Resources Mode 18 Multi-Resources Mode 19 Multi-Resources Mode 20 Multi-Resources Mode 21 Multi-Resources Mode 22 Multi-Resources Mode 23 Multi-Resources Mode 24 Multi-Resources Mode 25 Multi-Resources Mode 26 Multi-Resources Mode 27 Multi-Resources Mode 28 Multi-Resources Mode 29 Multi-Resources Mode 30 Multi-Resources Mode 31 Multi-Resources Mode 32 Multi-Resources Mode 33 Multi-Resources Mode 34 Multi-Resources Mode 35 Multi-Resources Mode 36 Multi-Resources Mode 37 Multi-Resources Mode 38 Multi-Resources Mode 39 Multi-Resources Mode 40 Multi-Resources Mode 41 Multi-Resources Mode 42 Multi-Resources Mode 43 Multi-Resources Mode 44 Multi-Resources Mode 45 Multi-Resources Mode 46 Multi-Resources Mode 47 Multi-Resources Mode 48 Multi-Resources Mode 49 Multi-Resources Mode 50 Multi-Resources Mode 51 Multi-Resources Mode 52 Multi-Resources Mode 53 Multi-Resources Mode 54 Multi-Resources Mode 55 Multi-Resources Mode 56 Multi-Resources Mode 57 Multi-Resources Mode 58 Multi-Resources Mode 59 Multi-Resources Mode 60 Multi-Resources Mode 61 Multi-Resources Mode 62 Multi-Resources Mode 63 Multi-Resources Mode 64 Multi-Resources Mode 65 Multi-Resources Mode 66 Multi-Resources Mode 67 Multi-Resources Mode 68 Multi-Resources Mode 69 Multi-Resources Mode 70 Multi-Resources Mode 71 Multi-Resources Mode 72 Multi-Resources Mode 73 Multi-Resources Mode 74 Multi-Resources Mode 75 Multi-Resources Mode 76 Multi-Resources Mode 77 Multi-Resources Mode 78 Multi-Resources Mode 79 Multi-Resources Mode 80- Tap the Play button to open your video stream.

natural_image
Two people in a desert scene with a large explosion and fire, no visible text or symbolsOPTION C: DECODER SETUP: Output live video to a monitor or switcher.
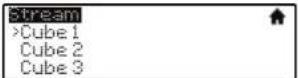
Selecting which stream to view:
- Enter the menu with ●. Select Decoder Setup.
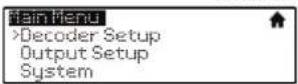
- Select Automatic
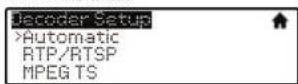
- Choose the stream you want to view and confirm the setting when prompted.
Changing output format:
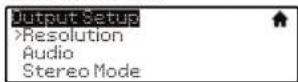
- Enter the menu, select Output Setup
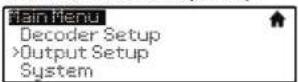
- Adjust your output resolution and audio settings in the appropriate menu.