QX1020A - Subwoofer James - Gratis brugsanvisning og manual
Find enhedens vejledning gratis QX1020A James i PDF-format.

Brugerspørgsmål om QX1020A James
0 spørgsmål om dette apparat. Besvar dem du kender, eller stil dit eget.
Stil et nyt spørgsmål om dette apparat
Download vejledningen til din Subwoofer i PDF-format gratis! Find din vejledning QX1020A - James og tag din elektroniske enhed tilbage i hånden. På denne side er alle dokumenter nødvendige for brugen af din enhed offentliggjort. QX1020A af mærket James.
BRUGSANVISNING QX1020A James
PBF (FLUSH) PRE-CONSTRUCTION BOARD INSTALLATION GUIDE
PBF Pre-construction Board Installation guide
natural_image
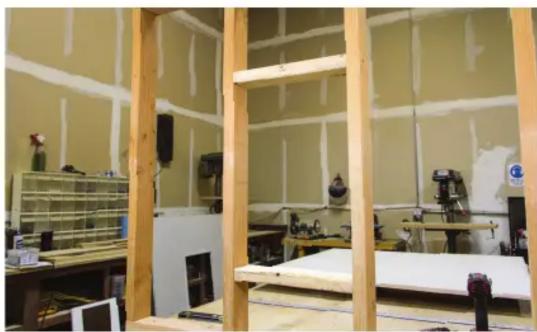
Interior view of a workshop with wooden structural beams and exposed white panels (no visible text or symbols)Before installing the PBF pre-construction board, we recommend securing two horizontal studs, at PBF board height, between the vertical studs of the chosen installation location to add additional support.
natural_image
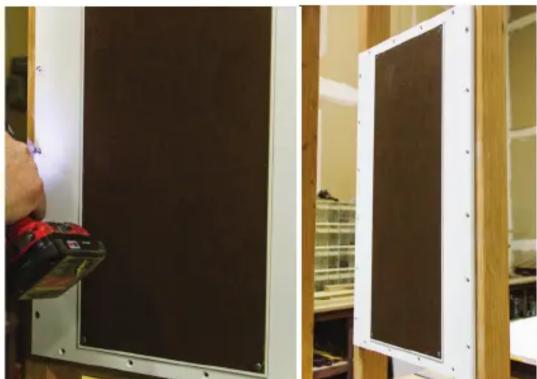
Two-panel photo showing a hand using a power tool to clean or store floor panels, no visible text or symbols3 Once the board has been properly leveled, fasten the PBF board to the vertical and horizontal studs.
natural_image
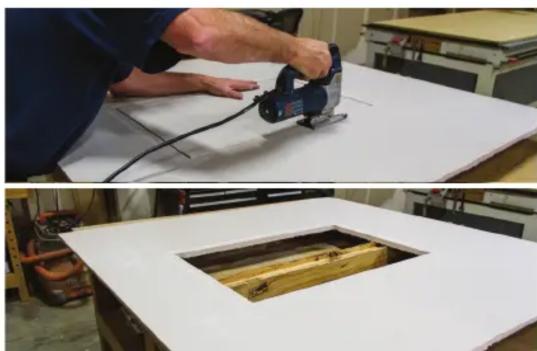
Two-panel photo showing a person using a power tool on a whiteboard, and a wooden frame with wood shavings in the foreground (no visible text or symbols)5 Cut along the traced path to make a frame for the pre-construction board.
natural_image
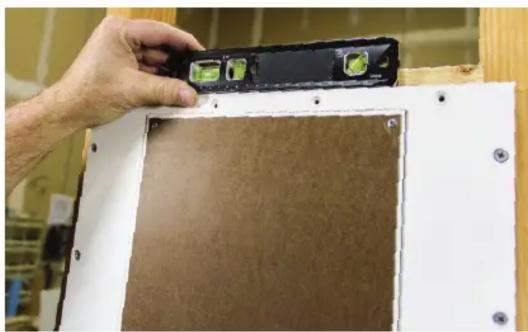
Hand installing a wall-mounted level indicator on a wooden frame (no text or symbols visible)2 After this has been done, ensure that the board is level before fully securing it to the wall studs.
natural_image
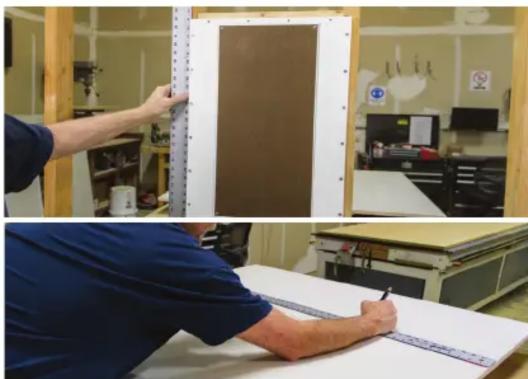
Two-panel image showing a person measuring a brown panel in a workshop (top) and another writing on paper at a table (bottom), both without visible text or symbols.4 Measure the PBF board and make an outline of the board on a new panel of sheet rock.
natural_image
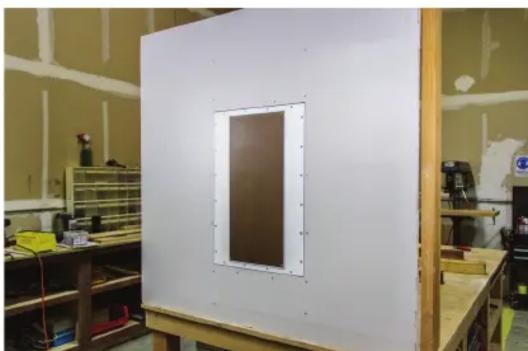
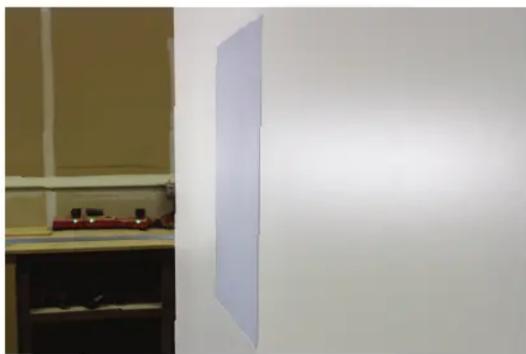
Interior view of a workshop with a large white panel and a rectangular cutout on a wooden platform (no visible text or symbols)6 Lay the frame panel of sheet rock over the PBF board and fasten the frame to studs of the wall.
PBF PRECONSTRUCTION BOARD INSTALLATION GUIDE
natural_image
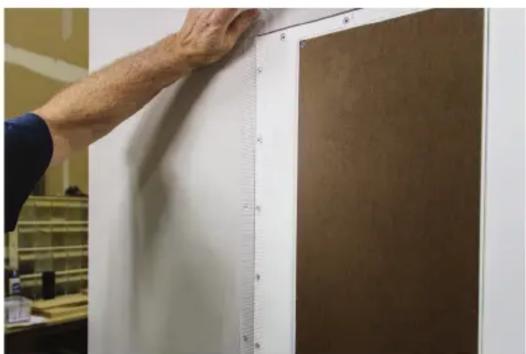
Person measuring a wall panel with measurement markings (no visible text or symbols)7 Now, cover the seams around the board with mesh tape, and begin the mudding process. Make sure to apply mud up to the lip of the PBF board.
natural_image
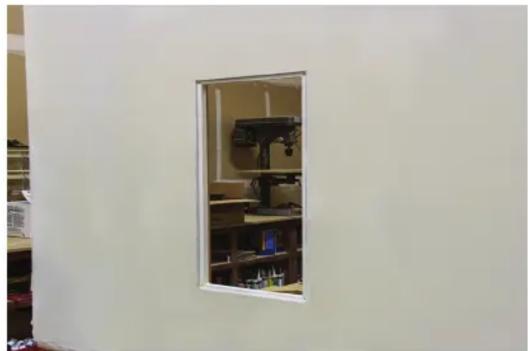
Interior view of a lab or workshop with a white-framed window showing a mechanical setup inside (no visible text or symbols)8 After you finish the mudding process, the inner plug can now be removed and sanding can be performed to remove any unwanted surface features.
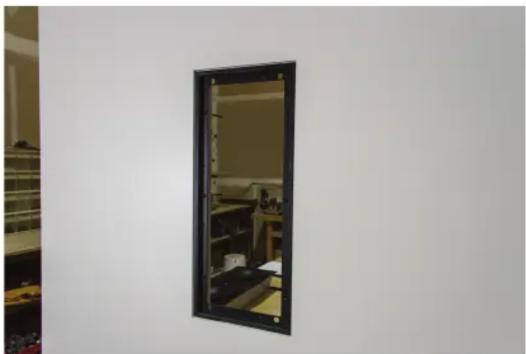
natural_image
Exterior view of a wall-mounted black-framed mirror reflecting a small room with shelves and equipment (no text or symbols visible)9 Mount the speaker bracket to the wall, and begin the speaker installation process.
natural_image
Interior view of a kitchen with a whiteboard and a red appliance on a counter (no visible text or symbols)10 After the speaker installation is completed, the grille will be flush with the wall.
Mærke : James
Model : QX1020A
Kategori : Subwoofer