SKV 1200 B2 - Køkkenmaskine SILVERCREST - Gratis brugsanvisning og manual
Find enhedens vejledning gratis SKV 1200 B2 SILVERCREST i PDF-format.

Brugerspørgsmål om SKV 1200 B2 SILVERCREST
0 spørgsmål om dette apparat. Besvar dem du kender, eller stil dit eget.
Stil et nyt spørgsmål om dette apparat
Download vejledningen til din Køkkenmaskine i PDF-format gratis! Find din vejledning SKV 1200 B2 - SILVERCREST og tag din elektroniske enhed tilbage i hånden. På denne side er alle dokumenter nødvendige for brugen af din enhed offentliggjort. SKV 1200 B2 af mærket SILVERCREST.
BRUGSANVISNING SKV 1200 B2 SILVERCREST
GB Quick Start Guide
NOTICE
Carefully read the safety instructions in the operating manual before using the appliance for the first time!
Preparations
1) Take all the parts out of the box and remove the packaging material and any protective wrapping or stickers.
2) Clean all components as described in the section "Cleaning and care".
3) Place the appliance on a clean and level surface.
4) Insert the power plug into the socket.
Working with kneading hook, beater and whisk
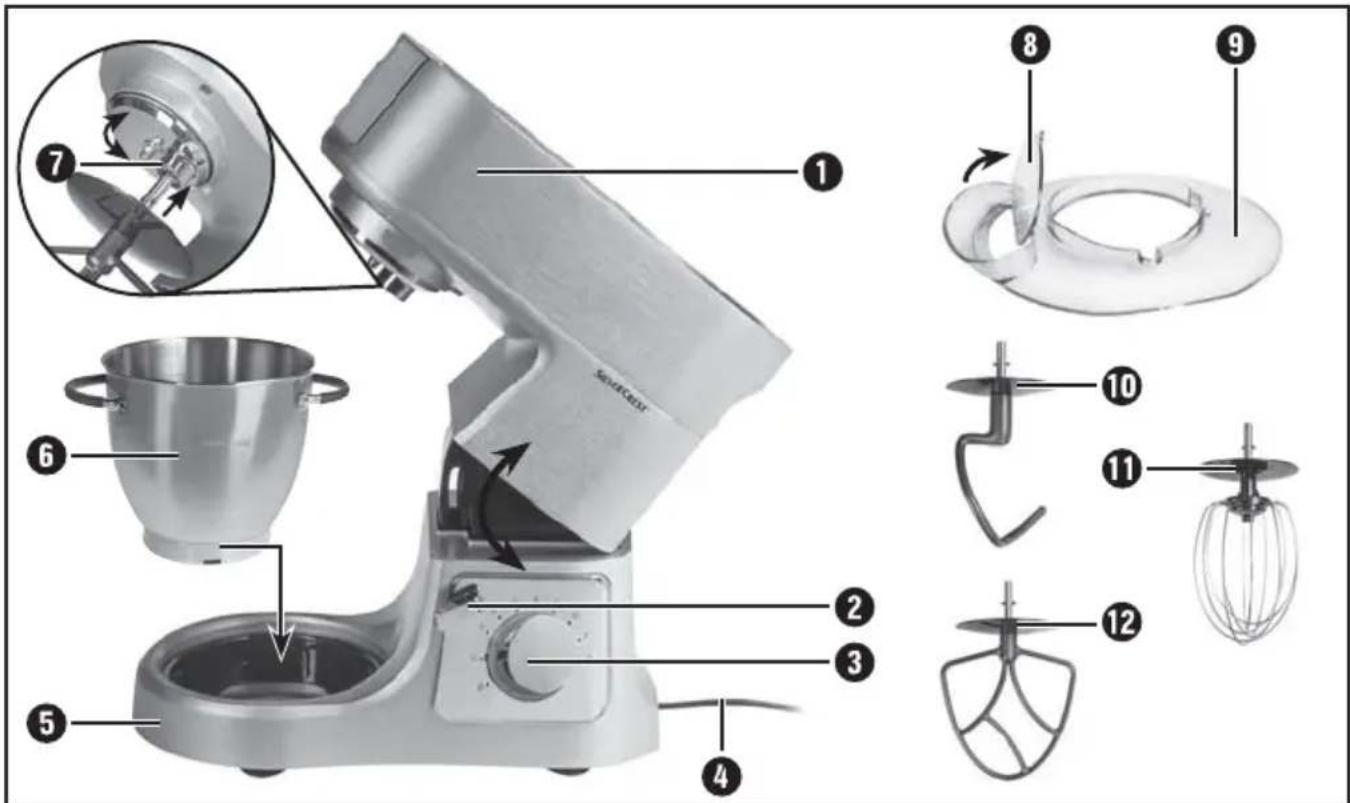
1) Press down the release lever ② and move the swivel arm ① to the highest position.
2) Insert the mixing bowl ⑥ in such a way that the protrusions on the mixing bowl ⑥ fit into the recesses in the base ⑤. To do this, one of the handles must be pointing in the direction of the rotary switch ③. Turn the mixing bowl ⑥ clockwise so that it is locked and firmly held in place.
3) To use the lid ⑨, place it on the part of the housing which surrounds the attachment tool socket ⑦ in such a way that the filling opening is facing you.
4) Depending on what you want to do, attach the kneading hook ⑩, whisk ⑪ or beater ⑫ in the retainer for inserting attachments ⑦:
5) Add the ingredients you wish to process into the mixing bowl ⑥.
6) Press down the release lever ② and push the swivel arm ① with the mounted insert downwards into the working position.
7) Turn the rotary switch ③ to the desired level.
text_image
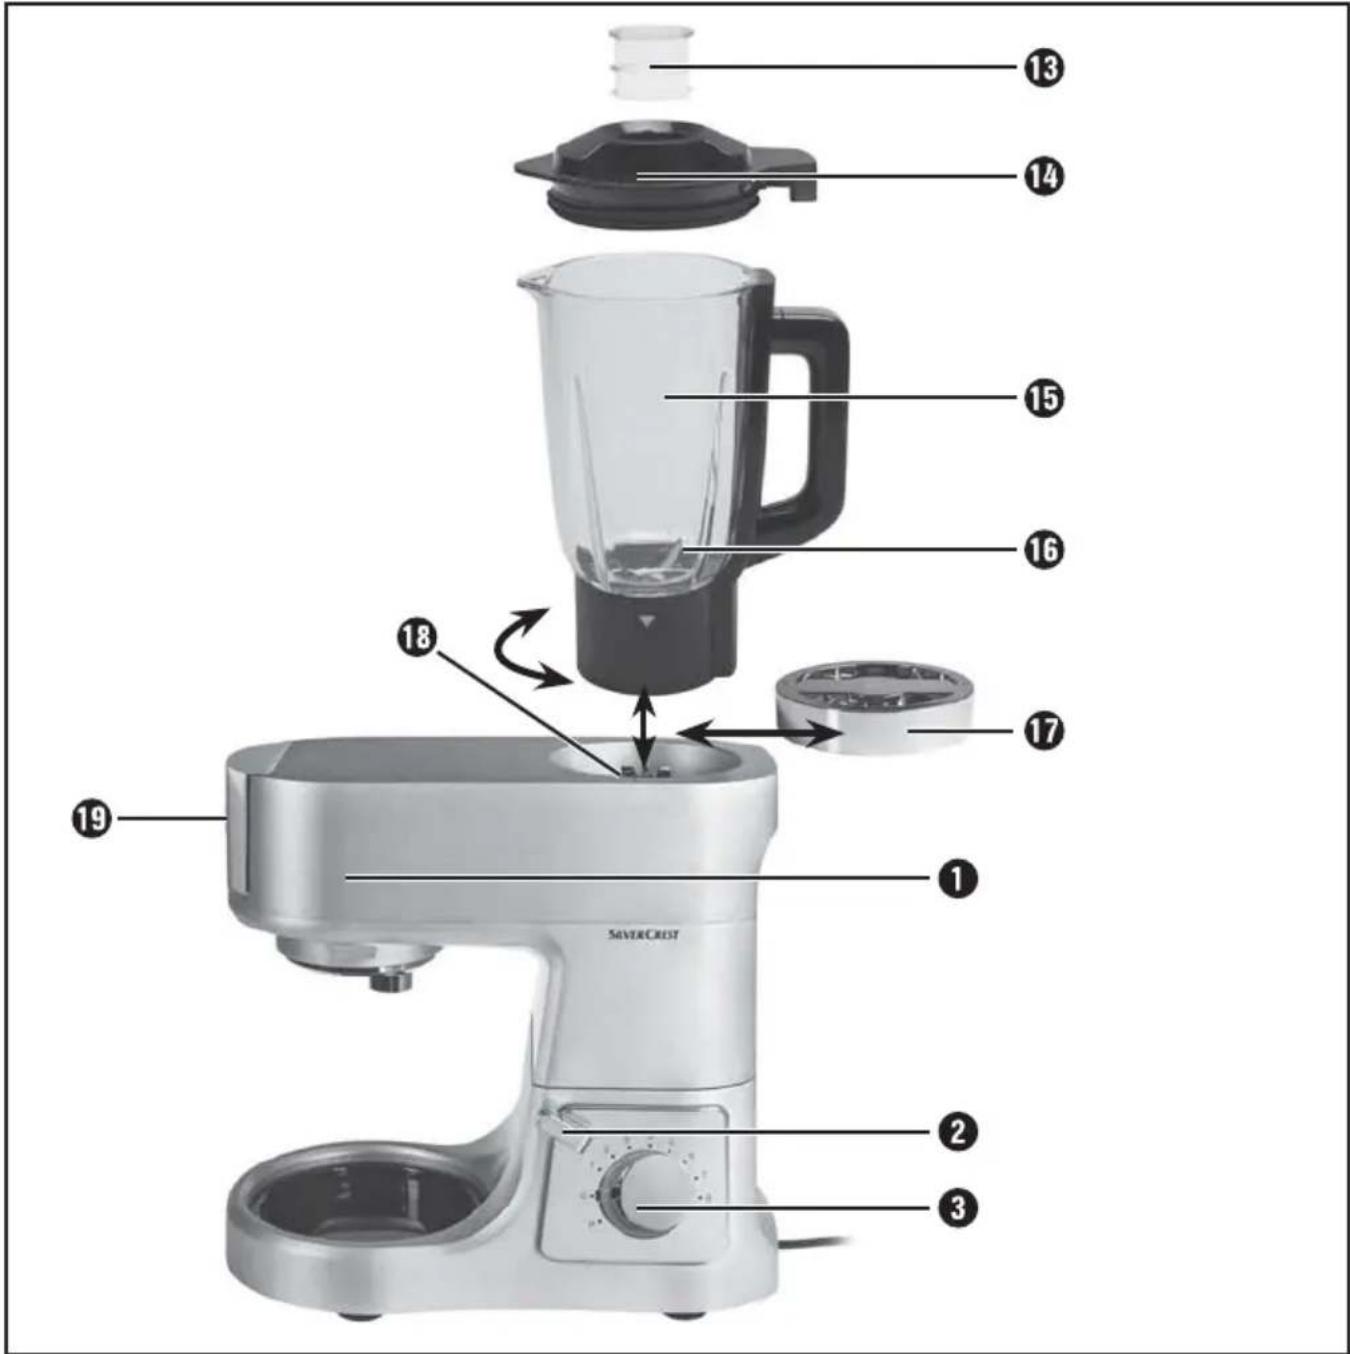
Labeled diagram of a kitchen mixer with numbered parts for assembly or manufacturing stepsWorking with the blender
1) If necessary, press down the release lever ② and press the swivel arm ① downwards into the working position.
2) Remove the drive protection lid ⑰.
3) Place the blender 15 on the blender drive unit 18 in such a way that the protrusions on the underside of the blender 15 engage with the recesses of the blender drive unit 18. The ▼ symbol on the blender 15 must be pointing to the 🔒 symbol on the appliance. Turn the blender 15 anticlockwise as far as it will go. The ▼ symbol on the blender 15 must then be pointing to the 🔒 symbol on the appliance.
4) Add the ingredients.
5) Press the blender lid 14 with the measuring cup 13 slightly offset firmly back onto the blender 15. Close the blender lid 14 by turning it clockwise as far as the stop back into the catch on the blender 15. Ensure that the pouring spout on the blender 15 is closed.
6) Turn the rotary switch ③ to the desired level.