
CTO6335S - Ovn BLACK & DECKER - Gratis brugsanvisning og manual
Find enhedens vejledning gratis CTO6335S BLACK & DECKER i PDF-format.


Brugerspørgsmål om CTO6335S BLACK & DECKER
0 spørgsmål om dette apparat. Besvar dem du kender, eller stil dit eget.
Stil et nyt spørgsmål om dette apparat
Download vejledningen til din Ovn i PDF-format gratis! Find din vejledning CTO6335S - BLACK & DECKER og tag din elektroniske enhed tilbage i hånden. På denne side er alle dokumenter nødvendige for brugen af din enhed offentliggjort. CTO6335S af mærket BLACK & DECKER.
BRUGSANVISNING CTO6335S BLACK & DECKER
DIGITAL
CONVECTION OVEN
HORNO DE CONVECCIÓN
DIGITAL
Customer Care Line:
USA
1-800-231-9786
Accessories/Parts (USA)
1-800-738-0245
Servicio para el cliente:
México
01-800 714-2503
Accesorios/Partes (EE.UU)
1-800-738-0245
For online customer service
and to register your product, go to
www.prodprotect.com/applica
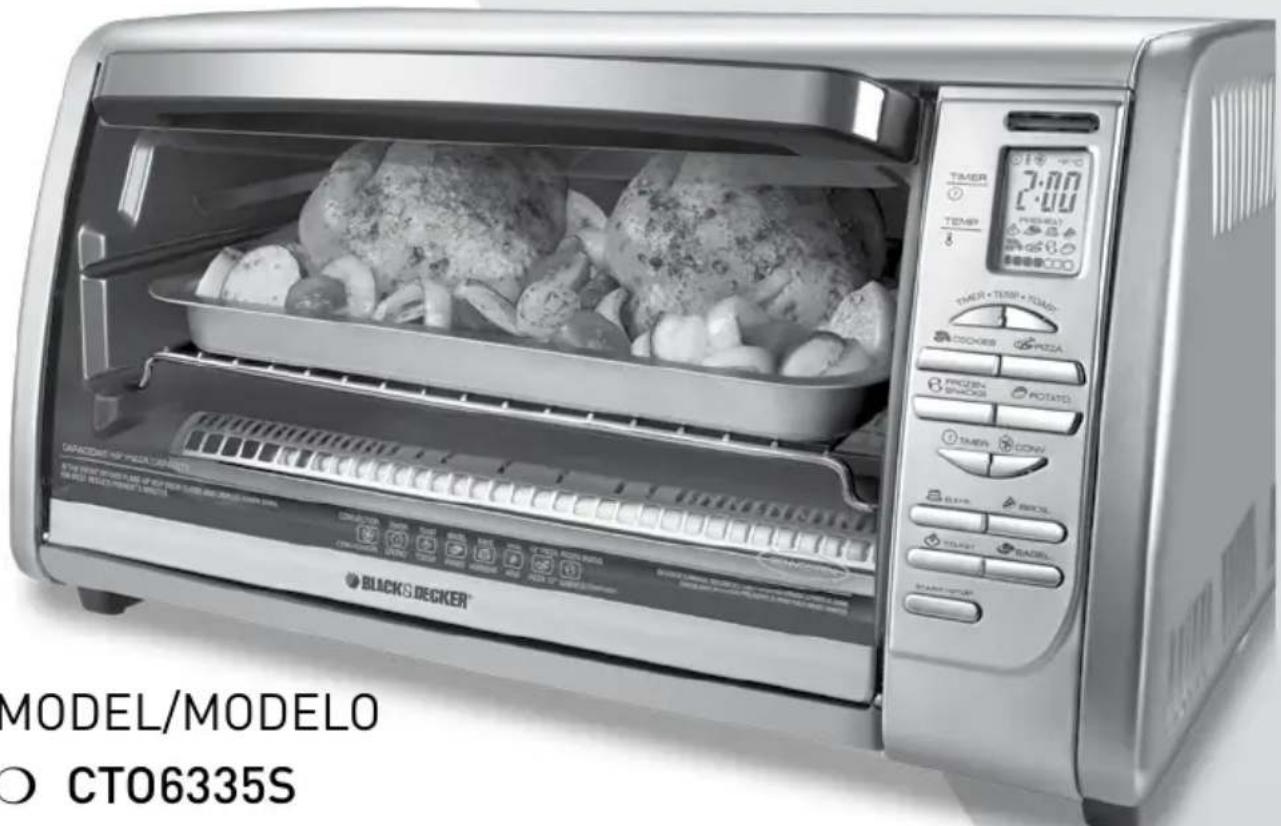
MODEL/MODELO
○ CT06335S
Please Read and Save this Use and Care Book.
IMPORTANT SAFEGUARDS
When using electrical appliances, basic safety precautions should always be followed, including the following:
Read all instructions.
○ Do not touch hot surfaces. Use handles or knobs.
To protect against electrical shock do not immerse cord, plugs or appliance in water or other liquid.
○ Close supervision is necessary when any appliance is used by or near children.
- Unplug from outlet when not in use and before cleaning. Allow to cool before putting on or taking off parts.
Do not operate any appliance with a damaged cord or plug, or after the appliance malfunctions or has been damaged in any manner. Return appliance to the nearest authorized service facility for examination, repair or adjustment. Or, call the appropriate toll-free number on the cover of this manual.
The use of accessory attachments not recommended by the appliance manufacturer may cause injuries.
○ Do not use outdoors.
○ Do not let cord hang over edge of table or counter, or touch hot surfaces.
○ Do not place on or near a hot gas or electric burner, or in a heated oven.
- Extreme caution must be used when moving an appliance containing hot oil or other hot liquids.
○ Always attach plug to appliance first, then plug cord into the wall outlet. To disconnect, press START/STOP button, then remove plug from wall outlet.
○ Do not use appliance for other than intended use.
○ Use extreme caution when removing tray or disposing of hot grease.
O Oversized foods or metal utensils must not be inserted in a toaster oven, as they may create a fire or risk of electric shock.
A fire may occur if the toaster oven is covered or touching flammable material including curtains, draperies, walls and the like, when in operation.
Do not clean with metal scouring pads. Pieces can break off the pad and touch electrical parts resulting in a risk of electric shock.
- Extreme caution should be exercised when using containers constructed of other than metal or glass.
Do not store any material, other than manufacturer's recommended accessories, in this oven when not in use.
Do not place any of the following materials in the oven: paper, cardboard, plastic and the like.
Do not cover crumb tray or any part of this oven with metal foil. This will cause overheating of the oven.
SAVE THESE INSTRUCTIONS.
This product is for household use only.
GROUNDED PLUG
As a safety feature, this product is equipped with a grounded plug, which will only fit into a three-prong outlet. Do not attempt to defeat this safety feature. Improper connection of the grounding conductor may result in the risk of electric shock. Consult a qualified electrician if you are in doubt as to whether the outlet is properly grounded.
TAMPER-RESISTANT SCREW
Warning: This appliance is equipped with a tamper-resistant screw to prevent removal of the outer cover. To reduce the risk of fire or electric shock, do not attempt to remove the outer cover. There are no user-serviceable parts inside. Repair should be done only by authorized service personnel.
ELECTRICAL CORD
a) A short power-supply cord (or detachable power-supply cord) is to be provided to reduce the risk resulting from becoming entangled in or tripping over a longer cord.
b) Longer detachable power-supply cords or extension cords are available and may be used if care is exercised in their use.
c) If a long detachable power-supply cord or extension cord is used,
1) The marked electrical rating of the cord set or extension cord should be at least as great as the electrical rating of the appliance, and
2) The cord should be arranged so that it will not drape over the countertop or tabletop where it can be pulled on by children or tripped over unintentionally.
If the appliance is of the grounded type, the extension cord should be a grounding-type 3-wire cord.
Note: If the power supply cord is damaged, it should be replaced by qualified personnel; in Latin America, by an authorized service center.
Product may vary slightly from what is illustrated.
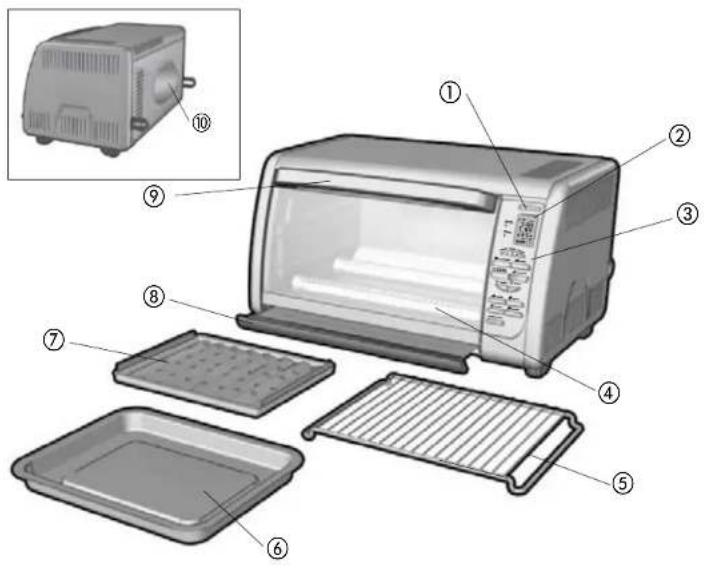
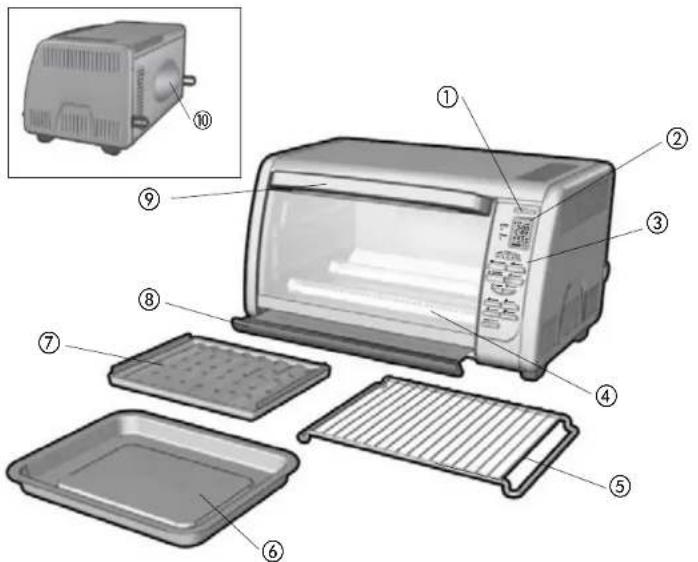
A
- On indicator light
- Digital display
- Digital control panel (See B)
- Curved glass door
† 5. Dual-position rack (Part # 14732105)
† 6. Bake pan (drip tray) (Part # 20228833) -
- Broil rack (Part # 14732601)
-
- Slide-out crumb tray (Part # 20228837)
- Door handle
+10. Extra-deep curved interior
Note: † indicates consumer replaceable/removable parts
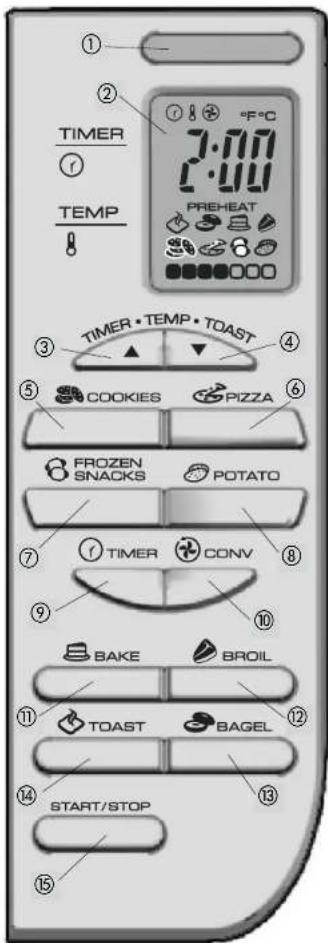
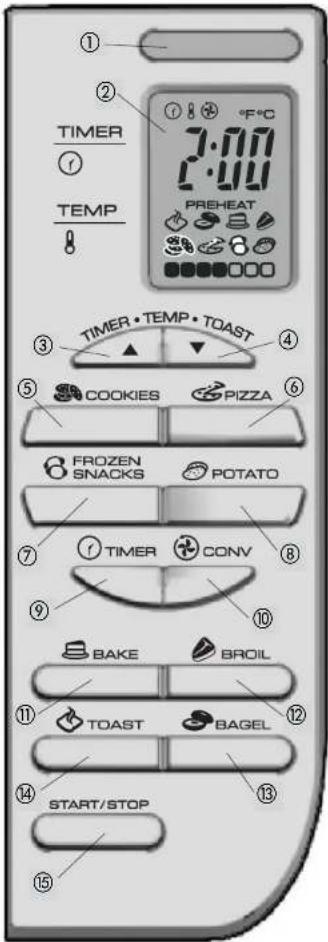
DIGITAL CONTROL PANEL FUNCTIONS (B)
- Indicates when a function is selected and activated.
- Lets you monitor cooking time, temperature and toast/bagel shade levels.
- Increases time, temperature and toast/bagel shade level.
- Decreases time, temperature and toast/bagel shade level.
- Allows you to use preset cooking time (12 minutes) and temperature (350°F) or adjust as desired.
- Allows you to use preset cooking time (20 minutes) and temperature (400°F) or adjust as desired.
- Allows you to use preset cooking time (6 minutes) and temperature (400°F) or adjust as desired.
- Allows you to use preset cooking time (45 minutes) and temperature (400°F) or adjust as desired.
- Sets desired cooking time up to 2 hours.
- Turns on the internal fan to distribute heat evenly as it cooks. Works with the BAKE function. When using this function, lower the temperature 25 degrees.
- Preheats and cooks to set temperature (350°F) and time (30 minutes) or you can adjust as desired.
- Broils at preset temperature (450°F) and time (20 minutes) or you can adjust as desired. You do not need to preheat unit.
- Sets bagel shade level (1-7).
- Sets toast shade level (1-7).
- Press START to activate all functions. Press STOP to end all functions; the On indicator light shuts off.
How to Use
This product is for household use only.
CAUTION
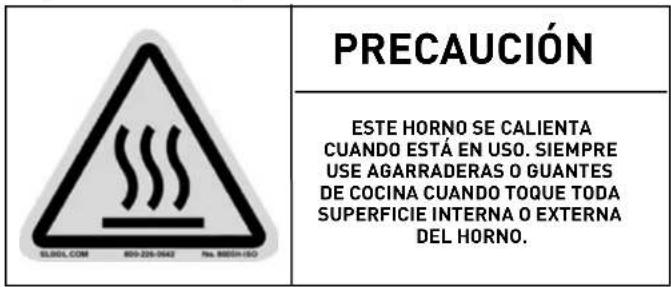
THIS OVEN GETS HOT. WHEN IN USE, ALWAYS USE OVEN MITTS OR POT HOLDERS WHEN TOUCHING ANY OUTER OR INNER SURFACE OF THE OVEN.
GETTING STARTED
- Remove packing materials and any stickers. Peel off clear protective film from control panel.
- Remove and save literature.
- Please go to www.prodprotect.com/applica to register your warranty.
- Wash all parts as instructed in CARE AND CLEANING.
- Select a location for the unit. Leave some space between the back of the unit and your wall to allow heat to flow without damaging cabinet and walls.
- Insert crumb tray underneath the bottom heating elements.
- Untie the cord and unwind it.
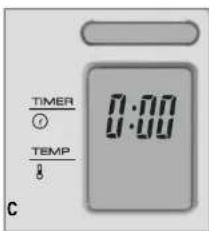
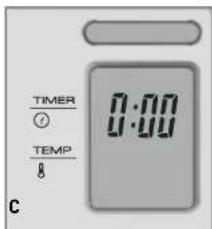
- Plug unit into electrical outlet. 0 00 shows on the digital display (C).
Important: During the first few minutes of use, you may notice smoke and a slight odor. This is normal and is not a cause for concern.
HELPFUL INFORMATION ABOUT YOUR OVEN
- You can change the temperature from °F to °C by pressing the▲ and ▼ buttons simultaneously.
- For your convenience, the unit always remembers the last selected setting unless unplugged. You can change this setting before the oven begins preheating or once it has reached the preset temperature and time.
- You cannot change the temperature or time during the preheat cycle. Once the set temperature is reached, you can then change the temperature or time at any time.
- If using convection bake, remember to lower the suggested temperature of a recipe or package by 25°F.
Caution: Unit gets hot. NEVER touch outer surfaces, including the glass door. Always use oven mitt or pot holder.
SLIDE RACK POSITIONS
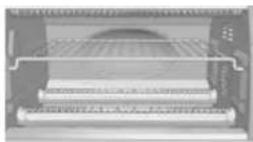
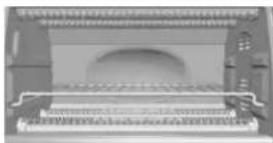
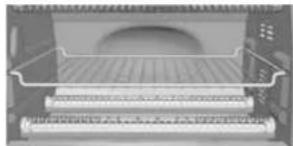
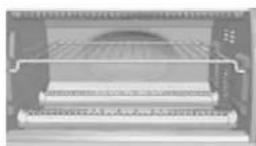
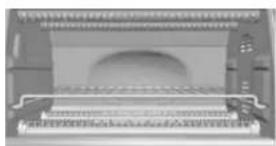
There are four positions for the slide rack (D). It can be inserted in either the upper or lower slot. It can also be inverted for two additional positions.
Position 1
Use upper slots along oven walls.
Insert rack using a rack-up position.
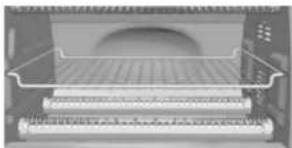
Position 2
Use lower slots along oven walls.
Insert rack using a rack-up position.
natural_image
Architectural elevation view showing a modern building facade with arched entrance and decorative elements (no text or symbols visible)Position 3
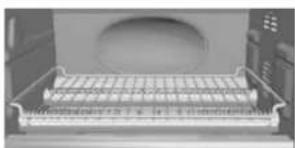
Use upper slots along oven walls.
Insert rack using a rack-down position.
natural_image
Interior view of a microwave oven with cooling rack and ventilation grilles (no visible text or labels)Position 4
Use lower slots along oven walls.
Insert rack using a rack-down position.
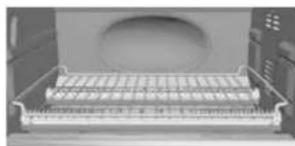
natural_image
Interior view of a computer with a rack and monitor (no visible text or symbols)D
BAKE FUNCTION
Selecting Cooking Temperature and Time
Caution: Unit gets hot. NEVER touch outer surfaces, including the glass door. Always use oven mitt or pot holder.
Note: You have 10 seconds for selecting the temperature and time. If you exceed this time, the display will change back to the default (000) temperature and time; simply repeat steps 1-5 below to begin again.
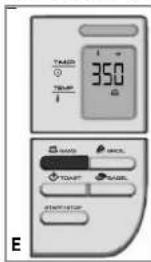
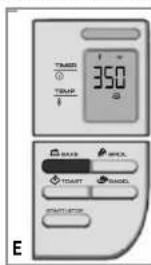
- Press BAKE button. The unit beeps, On indicator light blinks and 350°F (180°C) default temperature flashes on the digital display (E).
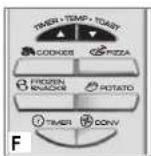
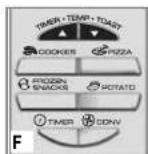
- To adjust the temperature, immediately press (▲) or (▼) button until you reach desired temperature (F).
Note: Cooking temperature can be adjusted from 200°F to 450°F (93°C - 232°C).
- Tap button and release to change in increments of 5 degrees. - Press and hold button to change rapidly in increments of 25 degrees.
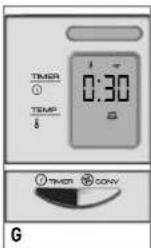
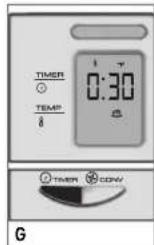
- To set the cooking time, press the TIMER button. If you just plugged in the unit, the default cooking time of :30 (30 minutes) flashes on the display (G); otherwise it will display the last selected time.
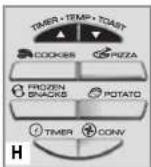
- Immediately press (▲) or (▼) buttons to select desired time up to a maximum of 2 hours (H).
- Tap button and release to change in one-minute increments.
- Press and hold button, to change rapidly in 10-minute increments.
-
Once you have set desired temperature and time, press START/STOP button.
-
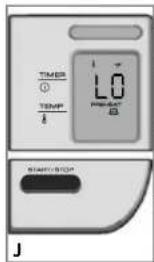
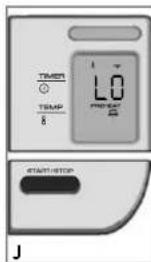
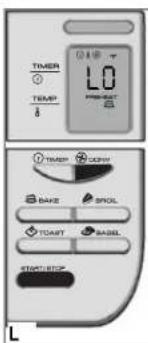
Digital display flashes LO and PREHEAT until the unit reaches 150^ F then it flashes temperature until the set temperature is reached (J).
- Open oven door. Insert food to be cooked or heated in bake pan or pizza pan into the oven. See COOKING CHART on pages 16 and 17 for recommended temperatures and times.
- Close oven door.
Important: You cannot change the temperature or time during the preheat cycle. Once unit reaches selected temperature, then you can change them at any time. For your convenience, the unit always remembers the last selected setting, unless unplugged.
- When unit reaches set temperature, it beeps and display alternates between temperature and time during the entire cooking cycle.
- The time will count down in one-minute increments until it reaches 59 seconds, then it counts down in one-second increments.
- At the end of the cooking cycle, the unit beeps 3 times and cooking stops. Note: You can stop the cooking at any time by pressing the START/STOP button.
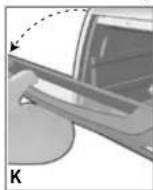
- To open the oven door, use an oven mitt to grip handle and gently pull forward to bring door down until it rests on the counter (K).
CONVECTION COOKING FUNCTION
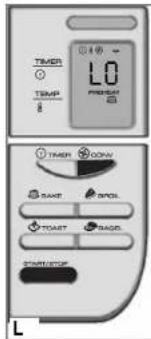
The CONVECTION function uses an internal fan to distribute heat evenly. Use this feature with the BAKE function.
- To turn on the fan for convection cooking:
- After you have selected the desired temperature and time, press START/STOP button then press the CONV button. You will hear the fan running and the digital display shows the fan symbol throughout the cooking cycle (L).
- When baking using convection, the temperature selected should be 25 degrees lower than recommended temperature for conventional cooking.
• Watch cooking time as some foods will bake faster.
QUICK BAKE FUNCTIONS
These functions allow you to cook at preset cooking temperatures and times, or can be adjusted as desired.
Note: You can stop the cooking at any time by pressing the START/STOP button.
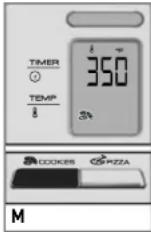
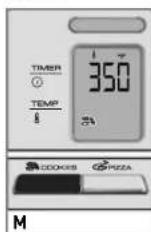
COOKIES FUNCTION (M)
Preset Temperature: 350°F.
Preset Time: 12 minutes
Rack Position: 2 or 3 (refer to Figure D). Place in the center of the oven.
-
Press COOKIES button.
-
To change the temperature, immediately press ▲ or ▼ buttons. Tap button and release to change in increments of 5 degrees. Press and hold button to change in increments of 25 degrees.
- To change the time, press the TIMER button. Tap button and release to change in one-minute increments. Press and hold button to change in 10-minute increments.
- Press START/STOP button.
- Digital display flashes PREHEAT until 150°F temperature is reached; temperature continues to increase until set temperature is reached.
- Once unit reaches set temperature, it beeps and display alternates between temperature and time during the entire cooking cycle.
- The time will count down in one-minute increments until it reaches 59 seconds, then it counts down in one-second increments.
-
At the end of the cooking cycle, the unit beeps 3 times and cooking stops.
-
Open oven door using oven mitt or pot holder and carefully remove food.
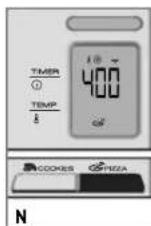
PIZZA FUNCTION (N)
Preset Temperature: 400°F.
Preset Time: 20 minutes
Rack Position: 2 or 3 (refer to Figure D)
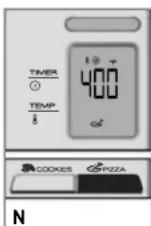
- Press PIZZA button.
- To change the temperature, immediately press ▲ or ▼ buttons. Tap button and release to change in increments of 5 degrees. Press and hold button to change in increments of 25 degrees.
- To change the time, press the TIMER button. Tap button and release to change in one-minute increments. Press and hold button to change in 10-minute increments.
- Press START/STOP button.
- Digital display flashes PREHEAT until 150°F temperature is reached; temperature continues to increase until set temperature is reached.
- Once unit reaches set temperature, it beeps and display alternates between temperature and time during the entire cooking cycle.
- The time will count down in one-minute increments until it reaches 59 seconds, then it counts down in one-second increments.
• At the end of the cooking cycle, the unit beeps 3 times and cooking stops.
5. Open oven door using oven mitt or pot holder and carefully remove food.
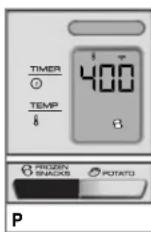
FROZEN SNACKS FUNCTION (P)
Preset Temperature: 400°F.
Preset Time: 6 minutes
Rack Position: 2 or 3 (refer to Figure D)
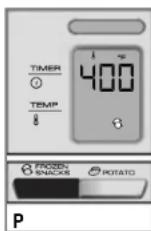
- Press FROZEN SNACKS button.
- To change the temperature, immediately press ▲ or ▼ buttons. Tap button and release to change in increments of 5 degrees. Press and hold button to change in increments of 25 degrees.
- To change the time, press the TIMER button. Tap button and release to change in one-minute increments. Press and hold button to change in 10-minute increments.
- Press START/STOP button.
-
Digital display flashes PREHEAT until 150°F temperature is reached; temperature continues to increase until set temperature is reached.
-
Once unit reaches set temperature, it beeps and display alternates between temperature and time during the entire cooking cycle.
- The time will count down in one-minute increments until it reaches 59 seconds, then it counts down in one-second increments.
• At the end of the cooking cycle, the unit beeps 3 times and cooking stops. - Open oven door using oven mitt or pot holder and carefully remove food.
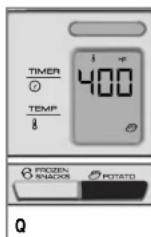
POTATO FUNCTION (Q)
Preset Temperature: 400°F.
Preset Time: 45 minutes
Rack Position: 2 or 3 (refer to Figure D)
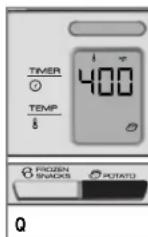
- Press POTATO button.
- The 400^ F preset temperature for the potato function cannot be changed.
- To change the time, press the TIMER button. Tap button and release to change in one-minute increments. Press and hold button to change in 10-minute increments.
-
Press START/STOP button.
-
Digital display flashes PREHEAT until 150°F temperature is reached; temperature continues to increase until set temperature is reached.
-
Once unit reaches set temperature, it beeps and display alternates between temperature and time during the entire cooking cycle.
-
The time will count down in one-minute increments until it reaches 59 seconds, then it counts down in one-second increments.
- At the end of the cooking cycle, the unit beeps 3 times and cooking stops.
- Open oven door using oven mitt or pot holder and carefully remove food.
BROIL FUNCTION
Caution: Unit gets hot. NEVER touch outer surfaces, including the glass door. Always use oven mitt or pot holder.
Note: Broiling temperature is preset at 450^ F. You do not need to preheat the oven.
- Place the broil rack in the bake pan.
- Place food to be cooked on broil rack.
- Open oven door.
natural_image
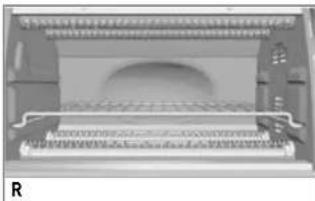
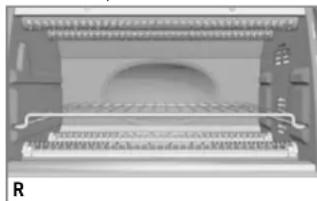
Cross-sectional view of a mechanical or electrical component with layered structure and no visible text or symbols- Insert rack into oven. Use rack position 2 (R). See COOKING CHART on pages 16 and 17 for recommended temperatures and times.
Important: Allow at least 2 inches between the food and the top heating elements.
- Close oven door.
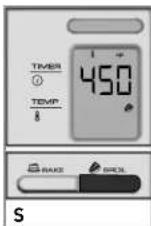
- Press BROIL button. On indicator light blinks and 450°F default temperature flashes on the digital display (S).
- To set cooking time, press the TIMER button then immediately press ▲ or ▼ button. Tap button and release to change in one-minute increments. Press and hold button to change in 10-minute increments.
- Digital display alternates between cooking temperature and set time during the entire cooking cycle.
- The time will count down in one-minute intervals until it reaches 59 seconds, then it counts down in one-second increments.
- At the end of the cooking cycle, the unit beeps 3 times and cooking stops.
Note: You can stop the cooking at any time by pressing the START/STOP button.
- Open oven door.
Caution: The unit gets hot! Always use an oven mitt to open or close the door.
TOASTING BREAD OR BAGELS
Caution: Unit gets hot. NEVER touch outer surfaces, including the door. Always use oven mitt or pot holder.
- Open oven door.
- Place slices of bread or bagel halves (cut side up) on the slide rack. Temperature and time are preset. It is not necessary to preheat the oven for toasting.
- For best performance, use rack position 2.
- Close oven door.
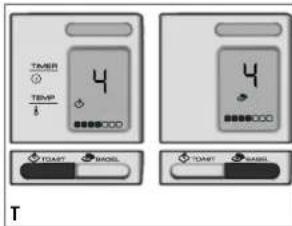
- For toasting bread, press TOAST button. For bagels, press BAGEL button. For both functions the On indicator blinks and the digital display shows 4 flashing (medium setting) [T]. This is the preset shade level.
Note: The bagel function toasts the top side and gently warms the bottom. -
To change shade level [1-7], immediately press ▲ or ▼ button. For best results, select the medium setting [4] for your first cycle than adjust lighter or darker to suit your taste.
-
Press the START/STOP button.
- Once toasting cycle is finished, the unit beeps 3 times and cycle ends.
Note: For your convenience, the unit will remember the last selected shade level, unless unplugged. - Open oven door using oven mitt or pot holder, slide out the rack to remove bread or bagels.
Care and Cleaning
This product contains no user serviceable parts. Refer service to qualified service personnel.
CLEANING
- Turn off unit, unplug from wall outlet and let it cool before cleaning.
- Clean the glass door with a nylon pad and sudsy water. Do not use a spray glass cleaner.
- To remove slide rack, open the door, pull the rack forward and out. Wash in warm, sudsy water or in a dishwasher. To remove stubborn spots, use a polyester or nylon pad. To replace the slide rack, open the door completely and slide into the rail and close the door.
- Wash the bake pan, broil rack and pizza pan in warm, sudsy water or in the dishwasher. To minimize scratching, use a polyester or nylon pad.
- To remove the crumb tray, grasp the handle at the front of the oven and pull it out. Dispose of crumbs and wash the tray in warm, sudsy water. Remove stubborn spots with a nylon mesh pad. Be sure to dry thoroughly before inserting the tray back into the oven.
EXTERIOR SURFACES
Let the oven cool completely before cleaning any outer surface. Wipe with a damp cloth or sponge and dry with paper towel or soft cloth.
COOKING CONTAINERS
- Metal, ovenproof glass or ceramic bake ware without glass lids can be used in your oven. Follow manufacturer's instructions.
- Be sure the top edge of the container is at least 2" away from the upper heating elements.
TROUBLESHOOTING
| PROBLEM POSSIBLE CAUSE SOLUTION | ||
| Unit is not heating or stops heating. | Electrical outlet is not working or oven is unplugged. | Check to make sure outlet is working. Both the temperature control and the timer must be set in order for the oven to function. |
| Second toasting is too dark. Setting on toast is too dark. | If doing repeated toasting in the oven, select a shade slightly lighter than the previous setting. | |
| Moisture forms on the inside of the glass door during toasting. | The amount of moisture differs in different products, whether bread, bagels or frozen pastries. | The moisture that forms on the oven door is quite common and will usually disappear during the toasting cycle. Since the oven is closed the moisture cannot evaporate as it would in a toaster. |
| Food is overcooked or undercooked. | Temperature and cook time may need to be adjusted. | As your a toaster oven is much smaller than a regular oven, it may heat up faster and cook faster. Try lowering the temperature 25 degrees from the suggested temperature in a recipe or on a label. |
| There is burnt food odor or smoking when oven is being used. | There are remnants of food in crumb tray or on the walls of the oven. | Refer to the directions in the CARE AND CLEANING section of this Use & Care booklet. Make sure all parts of the oven, baking pan and rack are clean. |
| Heating elements do not seem to be on. | The heating elements cycle on and off during baking. | Check the oven to make certain the function desired is being used. On broil, only the top element is on. |
| COOKING CHART | ||||
| POPULAR FOODS AMOUNT/WEIGHT TEST FOR DONENESS/INTERNAL TEMPERATURE | COOKING TEMPERATURE/TIME COMMENTS | |||
| Hamburger pattiesabout 3/4-inch [71.(19 mm) thick W - 170°F 20 - 25 minutes(76.7 °C) | M - 160°F | Broil at | Turn halfway through cooking time | |
| Fish filletsFish steaks | 2 to 44 to 6 ounces (110 - 171g) each2 to 46 to 8 ounces (171 g - 227 g) | To desireddoneness145°F [62.8 °C]145°F [62.8 °C]12 to 15 minutes | Bake at 400°F [204°C] orBroil at 450°F [232°C]8 to 10 minutesBake at400°F [204°C] or Broil at 450°F [232°C] | Brush with melted butter/sprinkle with parsley and dill/serve with lemon wedge |
| Boneless, skinless chicken breastsRoasting chickento 4 lb (1.81 kg) | 4, about 7 ounces(199 g) each/totalweight 1-3/4 lb3-1/2 (1.59 kg)(82.2 °CBreast 170 °F(76.7 °C) | 170°F [76.7 °C]Thigh 180°F last | Bake at 350°F [180°C] about 40 minutesBake at 350°F [180°C] about 1-1/4 hours15 minutes | Brush with melted butter or margarine for added flavor and browning, sprinkle with herbs or with marinade or basting sauce |
| Baked potatoes | 4 to 6 about1-3/4 lb (0.8 kg) | 220°F [104.4 °C] | Bake at 400°F[204.5°C] | Wash skins well and prick potatoes with fork in several places |
| Popular snack foods:Frozen french fries, pizza rolls, cheese sticks, quesadillas, mini pizzas, hot wings cocktail franks in pastry, refrigerated cookie dough | 1 package about10 to 14 ounces (284 - 397 g)9 cookies on pizza pan | Bake according to packagedirections or at 400°F [204°C]Bake according to packagedirections or at 450°F [232°C] | Bake on pizza pan or bake pan in center of ovenBake on pizza pan or on bake pan in center of oven | |
| PizzasFrench bread pizza | and crisp.212-inch about20 ounces (567 g)12-inch about24 ounces (681 g)12-inch | Crust is brownedCheese is melted and beginning to brown.12 minutes | Bake at 325°F[162.8°C]about 30 minutesprovided with oven.For even browning, spinBake at 400°F[204°C] aboutBake at 400°F[204°C] about 15 minutesBake at 400°F [204°C] about 15 minutes | For crisp crust, place pizza directly on rack.For softer crust, bake in pizza panpizza 1/4-turn about halfway through baking |
| Frozen thin crustSelf-rising crust pizzaShelf stable pizza | ||||
Recipes
SPINACH PESTO QUICHE
1 single crust pie or refrigerated pie crust
5 large eggs
1½ cups milk
3 tbsp. basil pesto
14 tsp. garlic pepper
1 pkg. (10 oz.) frozen spinach, defrosted and squeezed dry
^1/3 cup minced purple onion
14 cup diced pimentos
1½ cups shredded mozzarella and Provolone cheese blend
Preheat Black & Decker® Oven on BAKE to 425°F. Roll out pastry on lightly floured board to fit 9-inch glass pie plate. Place in plate and make a standing rim of pastry around edges. Follow package directions for baking unfilled pie crust or bake until edges are light golden brown.
Meanwhile, in large bowl, blend eggs, milk, pesto and garlic pepper. Stir in remaining ingredients. Spoon into pre-baked crust.
Bake 7 minutes longer; reduce temperature to 325^ and bake 35 minutes longer or until pie filling is set and knife inserted in center comes out clean. Let rest 5 minutes before serving.
Makes 8 servings.
BASIL LEMON HALIBUT
1½ cups halved cherry tomatoes
3 tbsp. chopped Italian parsley
1 tbsp. slivered fresh basil
1 tbsp. snipped fresh chives
1 tbsp. slivered lemon peel
12 tsp. kosher salt
2 tbsp. fresh lemon juice
1 tbsp. olive oil
2 halibut fillets (about 6 oz., ea.)
14 tsp. garlic pepper
Preheat Black & Decker® Oven on BAKE to 400°F. Meanwhile, in medium bowl, combine tomatoes, parsley, basil, chives, lemon peel, 14 tsp. salt, lemon juice and olive oil; blend well.
Spoon into 1- quart shallow baking dish. Place fish on top and season with remaining 14 tsp. salt and garlic pepper.
Bake for 20 minutes or until fish flakes easily when tested with a fork (Fish will have an internal temperature of 145^ ).
Makes 2 servings.
APPLE BREAD PUDDING
4 cups lightly toasted cubed French bread, crusts removed
1 large apple, finely chopped
12 cup golden raisins
4 large eggs
1½ cups milk
1 tsp. vanilla extract
1 tsp. ground cinnamon
12 tsp. ground nutmeg
14 tsp. salt
Preheat Black & Decker® Oven on BAKE to 350°F. Spread bread evenly in buttered 2-quart baking dish. Top with apples and raisins.
In medium bowl, blend eggs, milk, vanilla, cinnamon, nutmeg and salt. Pour mixture over bread and let stand about 15 minutes to allow bread to absorb the liquid.
Bake for about 1 hour until puffed and firm in the center, and knife inserted in center comes out clean.
Makes about 6 servings.
NEED HELP?
For service, repair or any questions regarding your appliance, call the appropriate 800 number on cover of this book. Please DO NOT return the product to the place of purchase. Also, please DO NOT mail product back to manufacturer, nor bring it to a service center. You may also want to consult the website listed on the cover of this manual.
Two-Year Limited Warranty
(Applies only in the United States and Canada)
What does it cover?
- Any defect in material or workmanship provided; however, Applica's liability will not exceed the purchase price of product.
For how long?
- Two years from the date of original purchase with proof of such purchase.
What will we do to help you?
- Provide you with a reasonably similar replacement product that is either new or factory refurbished.
How do you get service?
• Save your receipt as proof of date of sale.
- Visit the online service website at www.prodprotect.com/applica, or call toll-free 1-800-231-9786, for general warranty service.
• If you need parts or accessories, please call 1-800-738-0245.
What does your warranty not cover?
• Damage from commercial use
• Damage from misuse, abuse or neglect
• Products that have been modified in any way
• Products used or serviced outside the country of purchase
• Glass parts and other accessory items that are packed with the unit
• Shipping and handling costs associated with the replacement of the unit
- Consequential or incidental damages (Please note, however, that some states do not allow the exclusion or limitation of consequential or incidental damages, so this limitation may not apply to you.)
How does state law relate to this warranty?
- This warranty gives you specific legal rights. You may also have other rights that vary from state to state or province to province.
BLACK&DECKER. is a trademark of The Black & Decker Corporation, Towson, Maryland, USA
Made in People's Republic of China Printed in People's Republic of China
Por favor lea este instructivo antes de usar el producto.
INSTRUCCIONES IMPORTANTES DE SEGURIDAD
Cuando se utilizan aparatos eléctricos, siempre se debe respetar ciertas medidas de seguridad, incluyendo las siguientes:
○ Por favor lea todas las instrucciones.
○ No toque las superficies calientes. Use las asas o las perillas.
O A fin de protegerse contra un choque eléctrico y lesiones a las personas, no sumerja el cable, los enchufes ni el aparato en agua ni en ningún otro líquido.
- Todo aparato eléctrico usado en la presencia de los ninos o por ellos mismos requiere la supervision de un adulto.
○ Desconecte el aparato del tomacorriente cuando no este en uso y antes de limpiarlo. Espere que el aparato se enfrie antes de instalarle o retirarle piezas y antes de limpiarlo.
○ No use ningún aparato eléctrico que tenga el cable o el enchufe averiado, que presente un problema de funcionamiento o que este danado. Acuda a un centro de servicio autorizado para que lo examinen, reparen o ajusten o llame gratis al numero correspondiente en la cubierta de este manual.
○ El uso de accesorios no recomendados por el fabricante del aparato puede ocasionar incendio, choque eléctrico o lesiones a las personas.
○ No use este aparato a la intemperie.
○ No permita que el cable cuelgue del borde de la mesa o del mostrador ni que entre en contacto con superficies calientes.
○ No coloque el aparato sobre ni cerca de las hornillas de gas o eléctricas ni adentro de un horno caliente.
○ Tome mucha precaución al mover de un lugar a otro un aparato que contenga aceite u otros líquidos calientes.
Siempre conecte primero el cable al aparato y despues, enchufelo a la toma de corriente. Para desconectar, presione el botón START/STOP y después, retire el enchufe del tomacorriente.
○ Este aparato se debe usar unicamente con el fin previsto.
○ Tenga muchísimo cuidado al retirar la bandeja o al desechar la grasa caliente.
○ A fin de evitar el riesgo de incendio o choque eléctrico, jamás introduzca alimentos demasiado grandes ni utensilios de metal adentro del aparato.
○ Existe el riesgo de incendio si el aparato permanece cubierto mientras se encuentra en funcionamiento o si este llegase a entrar en contacto con cualquier material inflamable, incluyendo las cortinas y las paredes.
○ No utilice almohadillas de fibras metálicas para limpiar el aparato. Las fibras metálicas podrian entrar en contacto con las piezas eléctricas del aparato, resultando en el riesgo de un choque eléctrico.
O Asegúrese de no colocar nada sobre el aparato mientras se encuentre en uso. Tenga mucho cuidado al utilizar recipientes que no sean de metal ni de vidrio.
○ Cuando este aparato no se encuentre en funcionamiento no se debe almacenar nada aparte de los accesorios recomendados por el fabricante.
○ No introduzca los siguientes materiales en el aparato: papel, cartón, envolturas plasticas ni materiales semejantes.
A fin de evitar que el aparato se sobrecaliente, no cubra la bandeja para los residuos como ninguna otra superficie del aparato con papel de aluminio.
CONSERVE ESTAS INSTRUCCIONES.
Este aparato eléctrico es para uso doméstico únicamente.
ENCHUFE DE TIERRA
Como medida de seguridad, este producto cuenta con un enchufe de tierra que tiene tres contactos. No trate de alterar esta medida de seguridad. La conexión inapropiada del conductor de tierra puede resultar en un riesgo de choque eléctrico. Si tiene alguna duda, consulte con un electricista calificado para asegurarse de que el tomacorriente sea uno de tierra.
TORNILLO DE SEGURIDAD
Advertencia: Este aparato cuenta con un tornillo de seguridad para evitar la remoción de la cubierta exterior del mismo. A fin de reducir el riesgo de incendio o de choque eléctrico, por favor no trate de remover la cubierta exterior. Este producto no contiene piezas reparables por el consumidor. Toda reparación se debe llevar a cabo únicamente por personal de servicio autorizado.
CABLE ELÉCTRICO
a) El producto debe proporcionarse con un cable corto para reducir el riesgo de enredarse o de tropezar con un cable largo.
b) Se encuentran disponibles cables de extensión más largos, que es posible utilizar si se emplea el cuidado debido.
c) Si se utiliza un cable de extensión,
1 El voltaje eléctrico del cable o del cable de extensión debe ser, como mínimo, igual al del voltaje del aparato, y
2) El cable debe acomodarse de modo que no cuelgue del mostrador o de la mesa, para evitar que un niño tire del mismo o que alguien se tropiece accidentalmente.
Si el aparato es del tipo que es conectado a tierra, el cable de extensión deberá ser un cable de tres alambres conectado a tierra.
Nota: Si el cordón de alimentación esta dañado, en América Latina debe sustituirse por personal calificado o por el centro de servicio autorizado.
El producto puede variar ligeramente del que aparece ilustrado.
- Pantalla digital
- luz indicadora de encendido
- Panel electrónico (Vea B)
- Puerta de cristal redondeada
- Parrilla corrediza
- Bandeja de horneado (bandeja para goteo)
- Parrilla de asado
- Bandeja de residuos removable
- Manigueta de la puerta
- Espacio interior profundo redondeado
FUNCIONES DEL PANEL ELECTRÓNICO DE CONTROLES (B)
- Indica cuando se ha seleccionado y activado una función.
- Le permite revisar el tiempo de cocción, la temperatura, y el tostado del pan y del bagel.
- Aumenta el tiempo, la temperatura y el nivel de tostado del pan y el bagel.
- Reduce el tiempo, la temperatura y el nivel de tostado del pan y el bagel.
- Puede prepararlas a la temperatura (350°F) y tiempo (12 minutos) prefijado o lo puede adaptar a su gusto.
- Puede prepararla a la temperatura (400°F) y tiempo (20 minutos) prefijado o lo puede adaptar a su gusto.
- Puede prepararlas a la temperatura (400°F) y tiempo (6 minutos) prefijado o lo puede adaptar a su gusto.
- Puede prepararlas a la temperatura (400°F) y tiempo (45 minutos) prefijado o lo puede adaptar a su gusto.
- Le permite fijar el tiempo de cocción hasta 2 horas.
- Enciende el ventilador interno para distribuir calor uniformemente a medida que cocina. Sólo funciona con la función de hornear (BAKE). Baje la temperatura 25 grados cuando use esta función.
- El horno se calienta y cocina automaticamente (350°F por 30 minutos), o lo puede adaptar a su gusto.
- La temperatura y el tiempo de cocción están prefijados (450°F y 20 minutos) o se pueden adaptar a su gusto. No hace falta calentar la unidad.
- Regula el tostado para bagels (1-7).
- Regula el nivel de tostado (1-7).
- Presione la perilla de inicio (START) para activar todas las funciones. Presione la perilla de finalizar (STOP) para cesar todas las funciones; la luz indicadora de encendido (On) se apagara.
Como usar
Este producto está diseñado para uso doméstico únicamente.
PASOS PRELIMINARES
- Remueva todo el empaquetado y cualquier etiqueta engomada. Desprenda el plástico protector del control de paneles.
• Retire el material de lectura y guárdelo. - Por favor visite www.prodprotect.com/applica para registrar su garantía.
- Lave todas las piezas de acuerdo a las instrucciones en la sección de Cuidado y Limpieza.
- Seleccione un lugar para colocar la unidad. Deje un espacio entre la unidad y la pared para que salga el calor sin dañar los cabinetes ni la pared.
- Introduzca la bandeja de residuos debajo de los elementos de calefacción.
- Desenrolle el cable y estírelo.
- Conecte la unidad al enchufe eléctrico. Los números 0 00 aparecerán en la pantalla digital (C). Importante: Notará un poco de humo y de olor a quemado durante los primeros momentos. No se alarme, esto es común.
INFORMACIÓN UTIL ACERCA DE SU HORNO
- Puede cambiar la temperatura de °F a °C con presionar las perillas ▲ y ▼ simultaneamente.
- Para su conveniencia, la unidad siempre guarda en memoria la última selección antes de ser desconectada. Usted puede cambiarlo antes que la unidad empieze a calentarse o una vez que alcanze la temperatura y el tiempo prefijado.
- No puede cambiar la temperatura y el tiempo durante el ciclo de calentación. Cuando llegue a la temperatura fijada, puede cambiar la temperatura ó el tiempo en cualquier momento.
- Para hornear con el modo convencional, recuerde bajar la temperatura unos 25°F [10 °C].
Precaución: Esta unidad se calienta. NUNCA toque las superficies exteriores ni la puerta de cristal. Use siempre un guante o agarradera de olla.
POSICIONES DE LA PARRILLA CORREDIZA
La parrilla corrediza tiene cuatro posiciones (D). Se puede colocar en la abertura de arriba o la de abajo. También se puede invertir en dos posiciones adicionales.
Posición 1 Use la abertura de arriba a lo largo de las paredes del horno. Deslize la parrilla hacia arriba.
Posición 2 Use la abertura de abajo a lo largo de las paredes del horno. Deslize la parrilla hacia arriba.
natural_image
Architectural elevation view of a modern building facade with arched windows and balconies (no visible text or symbols)Posición 3 Use la abertura de arriba a lo largo de las paredes del horno. Deslize la parrilla hacia abajo.
natural_image
Interior view of a microwave oven with cooling rack and tray (no visible text or labels)Posición 4 Use la abertura de abajo a lo largo de las paredes del horno. Deslize la parrilla hacia abajo.
natural_image
Interior view of a computer with a rack and ventilation unit (no visible text or symbols)FUNCIÓN PARA HORNEAR
Cómo seleccionar la temperatura y el tiempo de cocción
Precaucion: La unidad se calienta. NUNCA toque la carcasa exterior ni la puerta de cristal. Use siempre un guante o agarrador de ollas.
Nota: Usted cuenta con 10 segundos para seleccionar la temperatura y el tiempo. Si se pasan los cinco segundos, la pantalla volverá automaticamente a la temperatura y tiempo 000; simplemente repita los pasos abajo del 1-5 para comenzar de nuevo.
- Presione la perilla de hornear [BAKE]. La campana sonará, la luz de encendido pestaña, y la temperatura original de 350 °F chiespea en la pantalla (E).
-
Para cambiar la temperatura, inmediatamente presione las perillas (▲) ó (▼) hasta llegar a la temperatura deseada (F). Nota: La temperatura de cocción se puede regular desde 200°F hasta 450 °F (93 °C - 232 °C).
-
Toque ligeramente la perilla para cambiar en incrementos de 5 grados.
- Mantenga presionada la perilla para cambiar rápidamente en incrementos de 25 grados.
- Para fijar el tiempo de cocción, presione la perilla de tiempo (TIME). Si usted acaba de conectar la unidad, el tiempo original de 30 minutos chispea en la pantalla. (G); de lo contrario, aparece el tiempo seleccionado anteriormente.
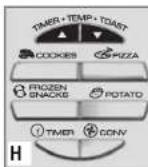
- Presione immediatamente las perillas (▲) ó (▼) para seleccionar el tiempo deseado hasta 2 horas máximo (H).
- Toque ligeramente la perilla para cambiar en incremento de un minuto.
- Mantenga presionada la perilla para cambiar en incremento de 10 minutos.
- Una vez ya fijada la temperatura y el tiempo, presione la perilla de iniciar/finalizar (START/STOP).
- La pantalla exhibirá las letras LO y PREHEAT (precalentado) hasta que la temperatura llegue a 150 °F, luego exhibirá la temperatura intermitentemente hasta llegar a la temperatura fijada (J).
-
Abra la puerta del horno. Coloque los alimentos en la bandeja caliente dentro del horno. Vea la sección GUÍA DE COCCIÓN en las páginas 36 y 37 a qué temperatura y por cuánta duración.
-
Cierre la puerta del horno.
Importante: No puede cambiar la temperatura ni el tiempo durante el ciclo de calentamiento. Una vez la unidad llega a la temperatura seleccionada, puede entonces cambiarlos en cualquier momento. Para su conveniencia, la unidad guarda en la memoria la última selección antes de desconectarse.
- Cuando la unidad llegue a la temperatura ajustada, sonará la campana y la pantalla exhibirá alternamente la temperatura y el tiempo de cocción.
- El tiempo baja por intervalos de un minuto hasta llegar a 59 segundos, luego baja en intervalos de segundos.
- Al terminar el ciclo, la unidad sonará la campana 3 veces y se detendrá.
Nota: Usted puede detener la cocción en cualquier momento con sólo presionar la perilla de iniciar/finalizar (START/STOP).
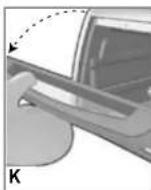
- Para abrir la puerta del horno, póngase un guante o agarradera de horno y abra suavemente la puerta hacia adelante hasta que descanse encima del mostrador (K).
FUNCIÓN DE MODO CONVENCIONAL
La función de modo convencional utiliza un ventilador interno para distribuir el calor uniformemente. Este se puede usar únicamente con la función de hornear (BAKE).
-
Cómo prender el ventilador:
-
Después de seleccionar la temperatura y el tiempo, presione la perilla de iniciar/finalizar primero y después la perilla CONV. Podrá escuchar el sonido del ventilador y en la pantalla digital aparecerá el símbolo del ventilador (L) durante el ciclo de cocción.
- Cuano hornee a modo convencional, seleccione la temperatura a 25 grados menos que la recomendada para cocinar.
- Tenga cuidado con el tiempo ya que algunos alimentos se cocinan en el horno más rápido que otros.
FUNCIONES PARA HORNEAR RAPIDO
Estas funciones le permiten cocinar con temperaturas y tiempo de cocción prefijado pero los puede cambiar a su gusto.
Nota: Usted puede detener el tiempo de cocción en cualquier momento con sólo presionar la perilla de iniciar/finalizar (START/STOP).
FUNCIÓN PARA GALLETICAS (M)
Ponga la temperatura a: 180 °C (350 °F)
Ponga el tiempo a: 12 minutes
Posición de la bandeja: 2 ó 3 (refiérase al dibujo D). Colóquela en el centro del horno.
- Presione la perilla de galleticas (COOKIES).
- Para alterar la temperatura, presione inmediatamente las perillas ▲ ó ▼. Toque ligeramente la perilla para cambiar en incrementos de 5 grados. Mantenga presionada la perilla para cambiar rápidamente en incrementos de 25 grados.
- Para alterar el tiempo, presione la perilla del tiempo [TIMER]. Toque ligeramente la perilla para cambiar en incrementos de 1 minuto. Mantenga presionada la perilla para cambiar rápidamente en incrementos de 10 minutos.
-
Presione la perilla para iniciar/finalizar (START/STOP).
-
La pantalla digital chispea las letras PREHEAT (precalentar) hasta que llegue a 150 °F; continuará aumentando hasta llegue a la temperatura deseada.
- Cuando alcanze la temperatura fijada, sonará la campana y la pantalla exhibirá la temperatura y el tiempo alternamente durante todo el ciclo de cocción.
- El tiempo irá bajando en intervalos de un minuto hasta llegar a 59 segundos, luego baja en intervalos de segundos.
- Al final del ciclo de cocción, la unidad suena la campana 3 veces y se detiene.
- Use un guante o agarrador de olla para abrir el horno y sacar la comida con cuidado.
FUNCIÓN PARA PIZZA (N)
Ponga la temperatura a: 204 °C (400 °F)
Ponga el tiempo: 20 minutes
Posición de la bandeja: 2 o 3 (refiérase al dibujo D)
-
Presione la perilla de galleticas (PIZZA).
-
Para alterar la temperatura, presione inmediatamente las perillas ▲ ó ▼. Toque ligeramente la perilla para cambiar en incrementos de 5 grados. Mantenga presionada la perilla para cambiar rápidamente en incrementos de 25 grados.
- Para alterar el tiempo, presione la perilla del tiempo (TIMER). Toque ligeramente la perilla para cambiar en incrementos de 1 minuto. Mantenga presionada la perilla para cambiar rápidamente en incrementos de 10 minutos.
-
Presione la perilla para iniciar/finalizar (START/STOP).
-
La pantalla digital chispea las letras PREHEAT (precalentar) hasta que llegue a 150 °F; continuará aumentando hasta llegue a la temperatura deseada.
- Cuando alcanze la temperatura fijada, sonará la campana y la pantalla exhibirá la temperatura y el tiempo alternamente durante todo el ciclo de cocción.
- El tiempo irá bajando en intervalos de un minuto hasta llegar a 59 segundos, luego baja en intervalos de segundos.
- Al final del ciclo de cocción, la unidad suena la campana 3 veces y se detiene.
- Use un guante o agarrador de olla para abrir el horno y sacar la comida con cuidado.
FUNCIÓN PARA MERIENDAS CONGELADAS (P)
Ponga la temperatura a: 204 °C (400 °F)
Ponga el tiempo a: 6 minutos
Posición de la bandeja: 2 ó 3 (refiérase al dibujo D)
-
Presione la perilla de FROZEN SNACKS.
-
Para alterar la temperatura, presione inmediatamente las perillas ▲ ó ▼. Toque ligeramente la perilla para cambiar en incrementos de 5 grados. Mantenga presionada la perilla para cambiar rápidamente en incrementos de 25 grados.
- Para alterar el tiempo, presione la perilla del tiempo (TIMER). Toque ligeramente la perilla para cambiar en incrementos de 1 minuto. Mantenga presionada la perilla para cambiar rápidamente en incrementos de 10 minutos.
-
Presione la perilla para iniciar/finalizar (START/STOP).
-
La pantalla digital chispea las letras PREHEAT (precalentar) hasta que llegue a 150 °F; continuará aumentando hasta llegue a la temperatura deseada.
- Cuando alcanze la temperatura fijada, sonará la campana y la pantalla exhibirá la temperatura y el tiempo alternamente durante todo el ciclo de cocción.
- El tiempo irá bajando en intervalos de un minuto hasta llegar a 59 segundos, luego baja en intervalos de segundos.
- Al final del ciclo de cocción, la unidad sonará la campana 3 veces y se detendrá.
- Use un guante o agarrador de olla para abrir el horno y sacar la comida con cuidado.
FUNCIÓN PARA PAPAS (Q)
Ponga la temperatura a: 204 °C (400 °F)
Ponga el tiempo a: 45 minutos
Posición de la bandeja: 2 ó 3 (refiérase al dibujo D)
-
Presione la perilla para papas (POTATO).
-
La temperatura preprogramada de 204 °C para la función para papas no se puede cambiar.
- Para cambiar el tiempo, presione la perilla del tiempo (TIMER). Toque ligeramente la perilla para cambiarlo en incrementos de un minuto. Mantenga presionada la perilla para cambiarlo en incrementos de 10 minutos.
- Presione la perilla de iniciar/finalizar (START/STOP).
-
La pantalla digital exhibirá las letras PREHEAT (precalentado) hasta que llegue a 150 °F, y continuará aumentado hasta llegar a la temperatura deseada.
-
Cuando alcanze la temperatura ajustada, sonará la campana y la pantalla exhibirá la temperatura y el tiempo alternamente durante todo el ciclo de cocción.
- El tiempo irá disminuyendo en intervalos de un minuto hasta llegar a 59 segundos, entonces descenderá en intervalos de segundos.
- Al final del ciclo de cocción, la unidad sonará la campana 3 veces y se detendrá.
- Use un guante o agarrador de olla para abrir el horno y sacar la comida con cuidado.
FUNCIÓN PARA ASAR
Precaucion: La unidad se calienta. NUNCA toque la carcasa exterior ni la puerta de cristal. Use siempre un guante o agarrador de ollas.
Nota: La temperatura ya está programada a 450 °F. No hace falta precalentar el horno.
- Coloque la parrilla de asado en la bandeja de hornear.
- Coloque los alimentos en la parrilla de asado.
- Abra la puerta del horno.
natural_image
Architectural elevation view of a building facade with arched windows and a central skylight (no text or symbols visible)- Introduzca la parrilla en el horno. Use la posición 2 (R). Vea en la sección de GUÍA DE COCCIÓN en las paginas 36 y 37 a qué temperatura y por cuánta duración.
Importante: Deje al menos 2 pulgadas entre los alimentos y los elementos calefactores.
- Cierre la puerta del horno.
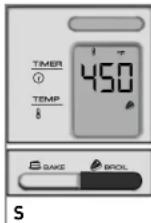
- Presione la perilla de asar (BROIL). La luz indicadora de encendido pestaña y aparecerá en la patalla la temperatura a 450 °F (S).
- Para fijar el tiempo de cocción, presione la perilla del tiempo e immediatamente presione las perillas de ▲ ó ▼. Toque ligeramente la perilla para cambiar el tiempo en incrementos de un minuto. Mantenga presionada la perilla para cambiarlo en incrementos de 10 minutos.
-
La pantalla mostrará alternamente la temperatura y el tiempo fijado durante todo el ciclo de cocción.
-
El tiempo irá bajando en intervalos de un minuto hasta llegar a 59 segundos, luego irá bajando en intervalos de segundos.
- Al terminar el ciclo de cocción, la unidad sonará la campana 3 veces y se detendrá.
Nota: Puede detener la unidad en cualquier momento con solo presionar la perilla de iniciar/finalizar (START/STOP).
- Abra la puerta del horno.
Precaución: La unidad se calienta. Use siempre un guante o agarrador de ollas.
PARA TOSTAR PAN Y BAGELS
Precaución: La unidad se calienta. NUNCA toque la carcasa exterior ni la puerta de cristal. Use siempre un guante o agarrador de ollas.
- Abra la puera del horno.
- Coloque la tostada de pan o la mitad del bagel en la parrilla corrediza. La temperatura y el tiempo están prefijados. No hace falta calentar el horno para tostar.
- Para mejor funcionamento, use la posición de parrilla 2
- Cierre la puerta del horno.
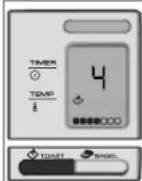
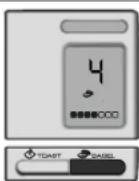
- Para tostar pan, presione la perilla de tostado (TOAST). Para bagels presione la perilla de BAGEL. Para ambas funciones, la luz de encendido pestaña y la pantalla digital exhibirá el #4 intermitente (mediano) (T). Este es el nivel de tostado ya programado.
Nota: La función para bagels tuesta la parte de arriba y calienta la de abajo.
T
- Para cambiar el nivel de tostado (1-7), presione inmediatamente las perillas ▲ ó ▼. Para mejores resultados, seleccione el tostado mediano (4) para el primer ciclo luego escoga menos o más tostado, según su gusto.
- Presione la perilla de iniciar/finalizar (START/STOP).
- Cuando termine el ciclo de tostar, sonará la campana 3 veces y terminará el ciclo.
Nota: Para su conveniencia, la unidad recuerda las últimas instrucciones de tostado. - Abra la puerta del horno y con un guante o agarradera de olla, saque la parrilla para remover el pan o los bagels.
34
Cuidado y limpieza
Este producto no contiene piezas que el usuario pueda reparar. Para reparaciones, refiérase a un personal calificado.
LIMPIEZA
- Apage la unidad, desconéctela del enchufe y deje que se enfrie antes de limpiarla.
- Limpie la puerta de cristal con una almohadilla de nailon y agua enjabonada. No utilize rociadores de limpiar cristales.
- Para retirar la parrilla corrediza, abra la puerta, tire de la parrilla hacia adelante y sáquela. Lávela en agua tibia enjabonada o en la lavadora de platos. Para remover las manchas persistentes, utilice una almohadilla de poliester o nailon. Para instalar la parrilla nuevamente, abra la puerta completamente y deslice la parrilla en las ranuras.
- Lave la bandeja de hornear, la parrilla de asar y la bandeja para pizza con agua tibia enjabonada o en la lavadora de platos. Para no rallarla, use una almohadilla de poliester o de nailon.
- Para remover la bandeja de residuos, sujete el asa de la parte delantera y tire de la bandeja hacia fuera. Retire las migajas y lave la bandeja con jabón y agua caliente. Las manchas se pueden eliminar con una almohadilla de nailon. Asegúrese de secar bien la bandeja antes de colocarla de nuevo en el horno.
SUPERFICIES EXTERIORES
Deje que el horno se enfríe bien antes de limpiar la superficie exterior. Limpie con una toalla húmeda o esponja y seque con papel toalla o paño húmedo.
RECIPIENTES PARA COCINAR
- Puede utilizar recipientes de metal, de cristales resistente al calor, o de cerámica sin tapas. Siga las instrucciones del fabricante.
- Asegúrese que hay un espacio mínimo de 2 pulgadas entre el borde superior del recipiente y los elementos calefactores.
| GUÍA DE COCCIÓN | ||||
| ALIMENTOS PORCIÓN/PORCIÓN/POCORRIENTES TEMP. INTERNA TIEMPO DE COCCIÓN | ESO SUPERVISE EL TÉRMINO/ | TEMPERATURA / OBSERVACIONES | ||
| Hamburguesas cada una de 3/4" (19mm) de grosor76.7 °C (170 °F) | 6 de 1/4 lb (0,113 kg)71.1 °C (160 °F)Bien cocido – | Medio -20 a 25 minutos | Asar a 232 °C (450 °F) | Voltear a medio cocinar. |
| Filetes de pescadoBistec de pescadoDe 6 a 8 oz,(171 a 227 g) cada uno | De 2 a 4De 4 a 6 oz,(110 a 171 g) cada unoDe 2 a 4 | Al gusto62.8 °C (145 °F)62.8 °C (145 °F)o asar a 232 °C (450 °F)de 12 a 15 minutos | Hornear a 204 °C (400 °F)o asar a 232 °C (450 °F)de 8 a 10 minutosHornear a 204 °C (400 °F) | Frotar con mantequilla derretida, rociar con perejil picado y enelado y adornar con una rebanada de limón. |
| Pechugas de pollosin piel ni huesoPollo para asarPechuga76.7 °C (170 °F) | De 4 a 7 oz (199g) approx., cada una/peso max.de 1-3/4 lb (0.8 kg)De 3-1/2 (1.59 kg) a 4 lb(1.8 kg) | 76.7 °C (170 °F)Muslo82.2 °C (180 °F) | Hornear a 180 °C (350 °F)aprox. 40 minutosHornear a 180 °C (350 °F)Aprox. 1-1/4 horasdesprenda facilmente. | Frotar con mantequilla derretida o con margarina paraacentuar el sabor y dorar.Rociar con hierbas o marinar consalsa durante los últimos 15 |
| Papas al horno | De 4 a 6 aprox.1-3/4 lb (0.8 kg) | 104.4 °C (220 °F) | Hornear 204 °C (400 °F) | Lavar bien la piel y pinchar laspapas varias veces con un tenedor. |
| Bocadillos comunes:Papas fritas,enrollados de pizza,dedos de queso,quesadillas, minipizzas, alas de pollopicantes, enrolladosde salchicha, masade galleta refrigerada | 1 paquete de aprox.10 (284 g) a14 oz. (397 g)9 galletas en la bandejapara pizza | Seguir las direcciones delpaquete u horneara 204 °C (400 °F)Seguir las direcciones delpaquete u horneara 232 °C (450 °F) | Cocinar en la bandeja parapizza o en la de hornear ycolocar en el centro del hornoCocinar en la bandeja para pizzao en la bandeja de hornear ycolocar en el centro del horno. | |
| PizzasPizza en pan francesPizza congelada decostra finaPizza de levaduraincluidaPizza corriente | Costra dorada y crujiente2aprox. 301 de 12" [30.5 cm]aprox. 20 oz. (567 g)1 de 12" [30.5 cm]de aprox. 24 oz. (681 g)1 de 12" [30.5 cm]aprox. 15 | Queso derretidoya por doraminutosPara uncastra más blanda,colocarla pizza en la bandejavuelta amedio hornear.Hornear a 204 °C (400 °F)aprox. 15 minutosHornear a 204 °C (400 °F) | Hornear a162,8 °C (325 °F)para una costra más blanda,Hornear a 204 °C (400 °F)aprox. 12 minutosHornear a 204 °C (400 °F)aprox. 15 minutosHornear a 204 °C (400 °F) | Para una costra tostada colocarla pizza directamente en la parrillapara pizza provista. Para un doradouniforme, girar la pizza 1/4 de |
SOLUCIÓN DE PROBLEMAS O FALLAS
| PROBLEMA POSIBLE CAUSA | SOLUCIÓN | |
| El aparato no calienta o deja de calentar. | El tomacorriente no funciona o el horno está desconectado. | Verifique que el tomacorriente esté funcionando. Tanto el control de temperatura como el cronómetro deben ser ajustados para que el horno funcione. |
| La segunda tanda de tostado resulta muy oscura. | El control del grado de tostado está a un nivel demasiado alto. | Si repite varias tandas, escoja un grado de tostado más bajo que el anterior. |
| Se forma humedad por dentro en la puerta de vidrio durante el ciclo de tostado. | La cantidad de humedad varía entre un producto y otro según los productos; pan, bagels, pasteles etc. | La humedad que se forma por dentro en la puerta del horno es bastante común y generalmente desaparece durante el ciclo de tostado. Como la puerta permanece cerrada, la humedad no se puede evaporar como en un tostador normal. |
| Los alimentos se sobre cocinan o no se cocinan bien. | La temperatura y el tiempo de cocción pueden requerir reajuste. | Como un horno tostador es mucho más pequeño que un horno regular, puede que se caliente y cocina más rápido. Ensaye, reduciendo 25 grados de la temperatura indicada en la receta o en el paquete. |
| El aparato despide olor a comida quemada o humea cuando está en funcionamiento. | Hay residuos de comida en la bandeja de recolección o en las paredes del horno. | Consulte las instrucciones en la sección de CUIDADO Y LIMPIEZA de este manual. Asegúrese de que todas las partes del horno, bandeja de hornear y parrilla estén limpias. |
| Los elementos calefactores parecen no estar encendidos. | Los elementos calefactores funcionan intermitentemente durante el ciclo de cocción. | Asegúrese que el aparato esté ajustado a la función correcta. Para el caso, cuando uno asa los alimentos, solamente se enciende el elemento calefactor superior. |
RECETAS
QUICHE CON PESTO DE ESPINACAS
1 masa de pastel o una concha de pastel refrigerada
5 huevos, grandes
240 ml (1 taza) leche
40 ml (3 cdas) pesto de albahaca
1 ml (¼ cdta) pimienta con ajo
1 paquete (280 g o 10 oz) espinacas descongeladas, escurridas
80 ml (1/3 taza) cebolla morada, finamente picada
60 ml (¼ taza) chiles pimiento, cortados en cubitos
350 ml (1½ tazas) mezcla de quesos mozzarella y Provolone, rallados
Precaliente el horno Black & Decker® a 220° C (425° F) con la función BAKE (hornear). Estire la masa sobre una superficie ligeramente enharinada hasta cubrir un molde de vidrio para pastel de 25 cm (9 pulgadas). Coloque la masa en el molde y forme una orilla alta. Siga las instrucciones del paquete para hornear la concha vacía u hornee hasta que esté ligeramente dorada.
Mientras tanto, en un tazón grande, mezcle los huevos, el pesto y la pimienta con ajo. Añada y mezcle los ingredientes restantes. Vierta en la concha previamente horneada.
Cocine por 7 minutos adicionales; reduzca la temperatura a 160° C (325° F) y cocine durante 35 minutos o hasta que el relleno del pastel esté firme y al insertar un cuchillo en el centro este salga limpio. Deje reposar 5 minutos antes de servir.
Rinde 8 porciones.
HALIBUT (LENGUADO) CON LIMÓN Y ALBAHACA
350 ml (1½ tazas) tomates cerezos, partido por mitad
40 ml (3 cdas) perejil italiano, picado
15 ml (1 cda) albahaca fresca, cortada en tiras
5 ml (1 cdta) cebollinos frescos, picados
15 ml (1 cda) cáscara de limón, cortada en tiras
2 ml (½ cdta) sal kosher
30 ml (2 cdas) jugo fresco de limón
15 ml (1 cda) aceite de oliva
2 filetes lenguado (de unas 170 g (6 oz), cada uno)
1 ml (¼ cdtal) pimienta con ajo
Precaliente el horno Black & Decker® a 215° C (400° F) con la función BAKE (hornear). Mientras tanto, en un tazón mediano, combine los tomates, el perejil, la albahaca, los cebollinos, la cáscara de limón, 1 ml (¼ cdta) de sal, el jugo de limón y el aceite de oliva; mezcle bien.
Vierta en un molde de hornear superficial con capacidad de 950 ml (1 cuarto de galón). Coloque el pescado encima y sazone con el 1 ml (¼ cdta) de sal y la pimienta con ajo restantes.
Cocine durante 20 minutos o hasta que el pescado se separe fácilmente al probarlo con un tenedor. (El pescado debe tener una temperatura interna de 60° C (145° F)).
Rinde 2 porciones.
PUDIN DE PAN CON MANZANA
950 ml (4 tazas) pan francés, en cubos, ligeramente tostado y sin corteza
1 manzana grande, finamente picada
120 ml (½ taza) pasas doradas
4 huevos grandes
350 ml (1½ tazas) leche
5 ml (1 cdta) extracto de vainilla
5 ml (1 cdta) canela molida
2 ml (½ cdta) nuez moscada molida
1 ml (¼ cdta) sal
Precaliente el horno Black & Decker® a 175° C (350° F) la función BAKE (hornear). Esparza el pan uniformemente en un molde de hornear con capacidad de 2 litros (2 cuartos de galón), untado con mantequilla. Cubra con la manzana y las pasas.
En un tazón mediano, combine los huevos, la leche, la vainilla, la canela, la nuez moscada y la sal. Vierta la mezcla sobre el pan y deje reposar durante 15 minutos para permitir que el pan absorba el líquido.
Cocine durante 1 hora hasta que esté crecido y firme y al insertar un cuchillo en el centro este salga limpio.
Rinde alrededor de 6 porciones.
¿NECESITA AYUDA?
Para servicio, reparaciones o preguntas relacionadas al producto, por favor llame al número del centro de servicio que se indica para el país donde usted compró su producto.
NO devuélva el producto al fabricante. Llame o lleve el producto a un centro de servicio autorizado.
DOS AÑOS DE GARANTÍA LIMITADA
(No aplica en México o Estados Unidos)
¿Qué cubre la garantía?
- La garantía cubre cualquier defecto de materiales o de mano de obra que no haya sido generado por el uso incorrecto del producto.
¿Por cuánto tiempo es válida la garantía?
- Por dos años a partir de la fecha original de compra mientras que tenga una prueba de la compra.
¿Cómo se obtiene el servicio necesario?
- Conserve el recibo original como comprobante de la fecha de compra, comuníquese con el centro de servicio de su país y haga efectiva su garantía si cumple lo indicado en el manual de instrucciones.
¿Cómo se puede obtener servicio?
- Conserve el recibo original de compra.
- Por favor llame al número del centro de servicio autorizado.
¿Qué aspectos no cubre esta garantía?
- Los productos que han sido utilizados en condiciones distintas a las normales.
- Los daños ocasionados por el mal uso, el abuso o negligencia.
- Los productos que han sido alterados de alguna manera.
- Los daños ocasionados por el uso comercial del producto.
- Los productos utilizados o reparados fuera del país original de compra.
• Las piezas de vidrio y demás accesorios empacados con el aparato. - Los gastos de tramitación y embarque asociados al reemplazo del producto.
- Los daños y perjuicios indirectos o incidentales.
¿Qué relación tiene la ley estatal con esta garantía?
- Esta garantía le otorga derechos legales específicos y el consumidor podría tener otros derechos que varían de una región a otra.
BLACK&DECKER. es una marca registrada de The Black & Decker Corporation, Towson, Maryland, E.U.
Fabricado en la República Popular de China
Impreso en la República Popular de China
Póliza de Garantía
(Válida sólo para México)
Duración
Applica Manufacturing, S. de R. L. de C.V. garantiza este producto por 2 años a partir de la fecha original de compra.
¿Qué cubre esta garantía?
Esta Garantía cubre cualquier defecto que presenten las piezas, componentes y la mano de obra contenidas en este producto.
Requisitos para hacer válida la garantía
Para reclamar su Garantía deberá presentar al Centro de Servicio Autorizado la póliza sellada por el establecimiento en donde adquirió el producto. Si no la tiene, podrá presentar el comprobante de compra original.
¿Donde hago válida la garantía?
Llame sin costo al teléfono 01 800 714 2503, para ubicar el Centro de Servicio Autorizado más cercano a su domicilio en donde usted podrá encontrar partes, componentes, consumibles y accesorios.
Procedimiento para hacer válida la garantía
Acuda al Centro de Servicio Autorizado con el producto con la póliza de Garantía sellada o el comprobante de compra original, ahí se reemplazará cualquier pieza o componente defectuoso sin cargo alguno para el usuario final. Esta Garantía incluye los gastos de transportación que se deriven de su cumplimiento.
Excepciones
Esta Garantía no será válida cuando el producto:
A) Se hubiese utilizado en condiciones distintas a las normales.
B) No hubiese sido operado de acuerdo con el instructivo de uso que le acompaña.
C) Cuando el producto hubiese sido alterado o reparado por personas no autorizadas por Applica Manufacturing, S. de R. L. de C.V.
Nota: Usted podra encontrar partes, componentes, consumibles y accesorios en los centros de servicios autorizados. Esta garantía incluyen los gastos de transportación que se deriven de sus cumplimiento dentro de sus red de servicio.
Por favor llame al número correspondiente que aparece en la lista a continuación para solicitar que se haga efectiva la garantía y donde Ud. puede solicitar servicio, reparaciones o partes en el país donde el producto fué comprado. También puede consultarnos en el e-mail servicio@applicamail.com.mx
Argentina
SERVICIO TECNICO CENTRAL
ATTENDANCE
Avda. Monroe N° 3351
Buenos Aires - Argentina
Fonos: 0810 - 999 - 8999
011-4545-4700
011-4545-5574
supervision@attendance.com.ar
Chile
MASTER SERVICE SERVICENTER
Nueva Los Leones N° 0252
Providencia
Santiago - Chile
Fono Servicio: (562) - 232 77 22
servicente@servicenter.cl
Colombia
PLINARES
Avenida Quito # 88A-09
Bogotá, Colombia
Tel. sin costo 01 800
7001870
Costa Rica
Aplicaciones Electromecanicas, S.A.
Calle 26 Bis y Ave. 3
San Jose, Costa Rica
Tel.: (506) 257-5716 / 223-0136
Ecuador
Servicio Master de Ecuador
Av. 6 de Diciembre 9276 y los Alamos
Tel. (593) 2281-3882
El Salvador
Calle San Antonio Abad 2936
San Salvador, El Salvador
Tel. (503) 2284-8374
Guatemala
MacPartes SA
3ª Calle 414 Zona 9
Frente a Tecun
Tel. (502) 2331-5020 / 2332-2101
Honduras
ServiTotal
Contigua a Telecentro
Tegucigalpa, Honduras,
Tel. (504) 235-6271
México
Articulo 123 # 95 Local 109 y 112
Col. Centro, Cuauhtemoc,
México, D.F.
Tel. 01 800 714 2503
Nicaragua
ServiTotal
De semáforo de portezuelo
500 metros al sur.
Managua, Nicaragua.
Tel. (505) 248-7001
Panamá
Servicios Técnicos CAPRI
Tumbamuerto Boulevard
El Dorado Panamá
500 metros al sur
Tel. 3020-480-800 sin costo
(507) 2360-236 / 159
Perú
Servicio Central Fast Service
Av. Angamos Este 2431
San Borja, Lima Perú
Tel. (511) 2251 388
Puerto Rico
Buckeye Service
Jesús P. Piñero #1013
Puerto Nuevo, SJ PR 00920
Tel.: (787) 782-6175
Republica Dominicana
Plaza Lama, S.A.
Av, Duarte #94
Santo Domingo
República Dominicana
Tel.: (809) 687-9171
Venezuela
Inversiones BDR CA
Av. Casanova C.C.
City Market Nivel Plaza Local 153
Diagonal Hotel Melia,
Caracas
Tel. (582) 324-0969
www.applicaservice.com
servicio@applicamail.com
Sello del Distribuidor:
Fecha de compra:
Modelo:
Código de fecha / Date Code
Comercializado por:
Applica Manufacturing, S. de R. L. de C.V.
Presidente Mazarik No. 111, 1er Piso
Col. Chapultepec Morales, Mexico D.F
Deleg. Miguel Hidalgo
CP 11570
MEXICO
Servicio y Reparación
Art. 123 No. 95
Col. Centro, C.P. 06050
Deleg. Cuauhtemoc
Servicio al Consumidor,
Venta de Refacciones y Accesorios
01 800 714 2503
1 500 W 120 V\~ 60 Hz

Applica Consumer Products, Inc.
© 2010 Applica Consumer Products, Inc.
Importado por / Imported by:
APPLICA AMERICAS, INC.
Av. Juan B Justo 637 Piso 10
(C1425FSA) Ciudad Autonoma de Buenos Aires
Argentina
C.Ü.I.T No. 30-69729892-0
Importado por / Imported by:
APPLICA MANUFACTURING, S. DE R. L. DE C. V.
Presidente Mazarik No. 111, 1er Piso
Col. Chapultepec Morales, Mexico D.F
Deleg. Miguel Hidalgo
CP 11570
MEXICO
Teléfono: (55) 5263-9900
Del interior marque sin costo
01 (800) 714 2503

Printed on recycled paper.
Impreso en papel reciclado.
- DIGITAL
- CONVECTION OVEN
- HORNO DE CONVECCIÓN
- Customer Care Line:
- Servicio para el cliente:
- Please Read and Save this Use and Care Book.
- IMPORTANT SAFEGUARDS
- SAVE THESE INSTRUCTIONS.
- This product is for household use only.
- GROUNDED PLUG
- TAMPER-RESISTANT SCREW
- ELECTRICAL CORD
- A
- DIGITAL CONTROL PANEL FUNCTIONS (B)
- How to Use
- CAUTION
- GETTING STARTED
- HELPFUL INFORMATION ABOUT YOUR OVEN
- SLIDE RACK POSITIONS
- BAKE FUNCTION
- Selecting Cooking Temperature and Time
- CONVECTION COOKING FUNCTION
- QUICK BAKE FUNCTIONS
- COOKIES FUNCTION (M)
- PIZZA FUNCTION (N)
- FROZEN SNACKS FUNCTION (P)
- POTATO FUNCTION (Q)
- BROIL FUNCTION
- TOASTING BREAD OR BAGELS
- Care and Cleaning
- CLEANING
- EXTERIOR SURFACES
- COOKING CONTAINERS
- Recipes
- SPINACH PESTO QUICHE
- BASIL LEMON HALIBUT
- APPLE BREAD PUDDING
- NEED HELP?
- Two-Year Limited Warranty
- (Applies only in the United States and Canada)
- What does it cover?
- For how long?
- What will we do to help you?
- How do you get service?
- What does your warranty not cover?
- How does state law relate to this warranty?
- Por favor lea este instructivo antes de usar el producto.
- INSTRUCCIONES IMPORTANTES DE SEGURIDAD
- CONSERVE ESTAS INSTRUCCIONES.
- Este aparato eléctrico es para uso doméstico únicamente.
- ENCHUFE DE TIERRA
- TORNILLO DE SEGURIDAD
- CABLE ELÉCTRICO
- FUNCIONES DEL PANEL ELECTRÓNICO DE CONTROLES (B)
- Como usar
- PASOS PRELIMINARES
- INFORMACIÓN UTIL ACERCA DE SU HORNO
- POSICIONES DE LA PARRILLA CORREDIZA
- FUNCIÓN PARA HORNEAR
- Importante: No puede cambiar la temperatura ni el tiempo durante el ciclo de calentamiento. Una vez la unidad llega a la temperatura seleccionada, puede entonces cambiarlos en cualquier momento. Para su conveniencia, la unidad guarda en la memoria la última selección antes de desconectarse.
- FUNCIÓN DE MODO CONVENCIONAL
- FUNCIONES PARA HORNEAR RAPIDO
- FUNCIÓN PARA GALLETICAS (M)
- FUNCIÓN PARA PIZZA (N)
- FUNCIÓN PARA MERIENDAS CONGELADAS (P)
- FUNCIÓN PARA PAPAS (Q)
- FUNCIÓN PARA ASAR
- PARA TOSTAR PAN Y BAGELS
- Precaución: La unidad se calienta. NUNCA toque la carcasa exterior ni la puerta de cristal. Use siempre un guante o agarrador de ollas.
- T
- 34
- Cuidado y limpieza
- LIMPIEZA
- SUPERFICIES EXTERIORES
- RECIPIENTES PARA COCINAR
- RECETAS
- QUICHE CON PESTO DE ESPINACAS
- HALIBUT (LENGUADO) CON LIMÓN Y ALBAHACA
- PUDIN DE PAN CON MANZANA
- ¿NECESITA AYUDA?
- DOS AÑOS DE GARANTÍA LIMITADA
- (No aplica en México o Estados Unidos)
- ¿Qué cubre la garantía?
- ¿Por cuánto tiempo es válida la garantía?
- ¿Cómo se obtiene el servicio necesario?
- ¿Cómo se puede obtener servicio?
- ¿Qué aspectos no cubre esta garantía?
- ¿Qué relación tiene la ley estatal con esta garantía?
- Póliza de Garantía
- (Válida sólo para México)
- Duración
- ¿Qué cubre esta garantía?
- Requisitos para hacer válida la garantía
- ¿Donde hago válida la garantía?
- Procedimiento para hacer válida la garantía
- Excepciones
- Argentina
- Chile
- Colombia
- Costa Rica
- Ecuador
- El Salvador
- Guatemala
- Honduras
- México
- Nicaragua
- Panamá
- Perú
- Puerto Rico
- Republica Dominicana
- Venezuela
Mærke : BLACK & DECKER
Model : CTO6335S
Kategori : Ovn