xPRESS - Tastatur iPort - Gratis brugsanvisning og manual
Find enhedens vejledning gratis xPRESS iPort i PDF-format.


Brugerspørgsmål om xPRESS iPort
0 spørgsmål om dette apparat. Besvar dem du kender, eller stil dit eget.
Stil et nyt spørgsmål om dette apparat
Download vejledningen til din Tastatur i PDF-format gratis! Find din vejledning xPRESS - iPort og tag din elektroniske enhed tilbage i hånden. På denne side er alle dokumenter nødvendige for brugen af din enhed offentliggjort. xPRESS af mærket iPort.
BRUGSANVISNING xPRESS iPort
Wall Installation
text_image
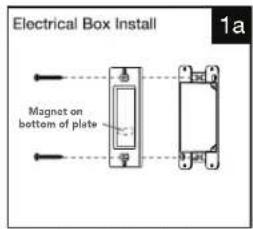
Electrical Box Install 1a Magnet on bottom of plateScrew the wall plate adapter to the wallbox with the provided screws. Be sure the magnet is on the bottom.
text_image
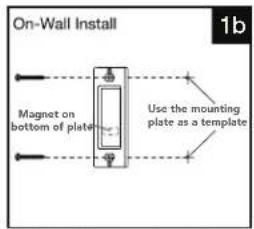
On-Wall Install Magnet on bottom of plate Use the mounting plate as a template 1bMark the holes using the wall plate adapter and use the screws provided to screw the wall plate adapter to the wall. No other anchors are required.
natural_image
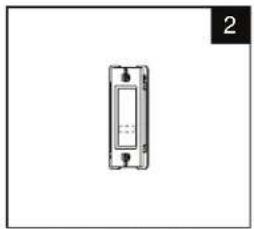
Simple line drawing of a rectangular electronic component with mounting holes (no text or symbols)Be sure the wall plate adapter is level and tightened.
text_image
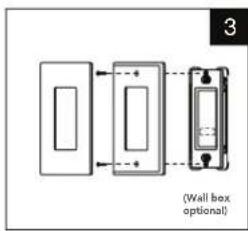
(Wall box optional)Use any Decora compatible wall plate (sold separately). Screw the wall plate base on with the trim screws provided with the wall plate.
natural_image
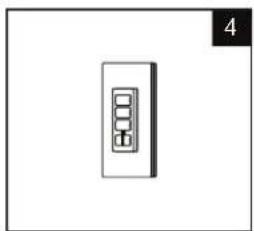
Simple 3D diagram of a vertical rectangular block with three internal dots, labeled '4' in the corner (no text or symbols on the block itself)Snap the wall plate cover on and attach the xPRESS Audio Keypad. The keypad magnetically attaches to the wall plate adapter and can be removed at any time. NOTE: If keypad does not magnetically attract, check the orientation of the wall plate adapter.
text_image
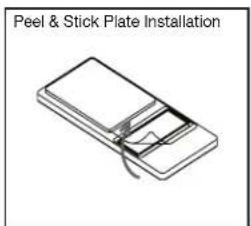
Peel & Stick Plate InstallationPeel plastic to reveal the adhesive strip. Stick onto a wall or furniture. The keypad magnetically attaches to the wall plate adapter and can be removed at any time.
text_image
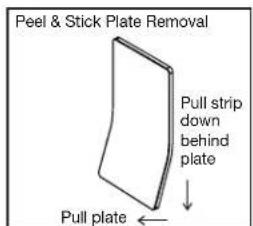
Peel & Stick Plate Removal Pull strip down behind plate Pull plate ←To remove the peel and stick plate, pry up the bottom and pull/stretch the adhesive strip downward.
NOTE: The plate is designed to bend and break when removing from the wall.
× PRESS
Audio Keypad
Quickstart Guide
text_image
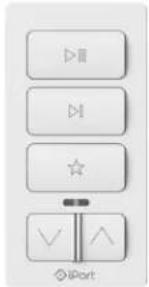
User interface control panel with play, pause, star, and download icons, labeled 'iPort'Download the iPort Connect iOS App to set up your Audio Keypad.

Designed and engineered in the USA. Assembled in the USA.
Warranty, Terms and Conditions at iportproducts.com
iPort
212 Avendia Fabricante
San Clemente, CA 92672 USA
+1.949.226.5222
iportproducts.com

CAUTION: Only use this product as directed. Do not dismantle product. Unspecified use could result in injury.

CAUTION: This product contains magnets. Do not palce in direct proximity with magnetically sensitive objects such as credit cards or exposed hard drives. Persons with pace makers are not recommended to use this product.
iPort is a trademark of Dana Innovations, registered in the U.S. and other countries. Copyright 2017, all rights reserved.
Sonos is a trademark of Sonos Inc., registered in the U.S. and other countries. Copyright 2016, all rights reserved. Decora is a trademark of Leviton.
33-7786 REVF APR242017

text_image
Front Status LED Micro USB Charging Port Product Label Hidden Magnet Back Keypad Micro-USB Cable Adhesive Back Magnet Peel & Stick Mount Decora® Wall Plate Adapter Mounting ScrewsQuick Start
1 Charge Your Keypad
natural_image
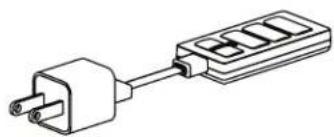
Pure electrical circuit lines without any symbolsTo charge, connect the USB A connector on the supplied USB cable to any 5v USB power adapter like a smart phone charger. Connect the micro-USB end to your Keypad. Charging can take up to 3 hours. When the red LED on the Keypad turns green, charging is complete.
2 Download the iPort Connect App

To configure your Keypad to work with your Sonos devices, download the iPort Connect App from the App Store and follow the steps within the App. Requires an iPhone, iPad or iPod touch with iOS 10 or later.
3 Configure Your Keypad with Sonos Using the iPort Connect App Instructions are included in the iPort Connect App, including firmware update.
Keypad LED Color & Blink Quick Reference
Blue - Configuration Mode
White - Device Functioning on the network
Yellow - Fail State, could mean several things:
- Failed connection to the network
- Failed connection to Sonos device
- Sonos does not currently allow this function
- During firmware update, battery is not sufficiently charged
Blinking Red - Low Battery
Solid Red - Battery is charging
Solid Green - Battery is fully charged
Purple - Firmware Update mode, goes away when firmware update is complete
Keypad Button Press Quick Reference
| Function | Button Press | Action |
| Keypad Force-Reboot (in any mode) | Track Forward | Press and Hold for 6 Seconds |
| Update Keypad Firmware | Play/Pause & Volume Down | Press and Hold both for 10 Seconds |
| Enters Keypad into Configuration Mode | Volume Up and Down | Press and Hold both for 6 Seconds |
| Wake Up Keypad for 2 Minutes(Talk to iPort Connect App) | Play/Pause | Press and Hold for 6 Seconds |