Knitmaster 305 - Symaskine Empisal - Gratis brugsanvisning og manual
Find enhedens vejledning gratis Knitmaster 305 Empisal i PDF-format.


Brugerspørgsmål om Knitmaster 305 Empisal
0 spørgsmål om dette apparat. Besvar dem du kender, eller stil dit eget.
Stil et nyt spørgsmål om dette apparat
Download vejledningen til din Symaskine i PDF-format gratis! Find din vejledning Knitmaster 305 - Empisal og tag din elektroniske enhed tilbage i hånden. På denne side er alle dokumenter nødvendige for brugen af din enhed offentliggjort. Knitmaster 305 af mærket Empisal.
BRUGSANVISNING Knitmaster 305 Empisal
text_image
Your easy guide to modern KNITTING Empirical Knitmaster MOD 305 AUTOMATICKNITTING
STEP 1
natural_image
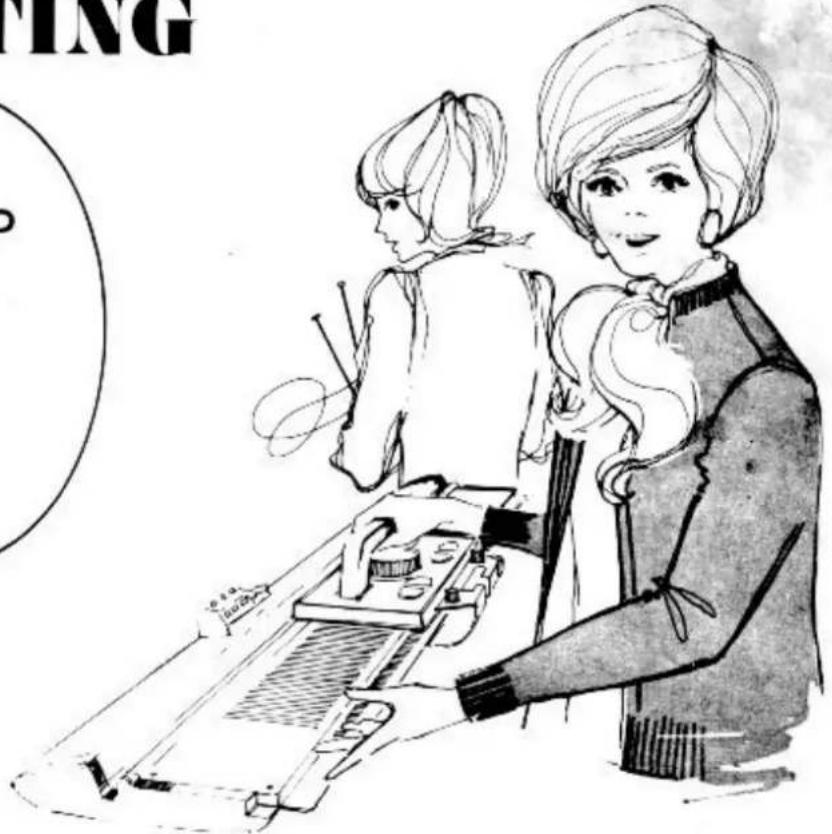
Illustration of two women operating a vintage typewriter, one in foreground and one in background (no text or symbols)This booklet has been divided into 5 basic and easy to follow STEPS, with all you need to know about machine knitting - BUT KNITTING WITH 200 NEEDLES INSTEAD OF 2 AS FOR HAND KNITTING.
Follow the instructions and illustrations carefully and in no time at all you will be machine knitting - not only knitting, but also enjoying using yout new knitting machine.
Interesting notes about wools and yarns PAGE 4 - 5
Setting up the machine and knitting 8 - 27
Casting-on and Casting-off 28 - 30
Steaming, Sewing up, Cord knitting, Fringes 31 - 33
Tension Guide 34 - 35
Your FIRST 15 garments 36 · 37
Useful Hints 92
ACCESSORIES
natural_image
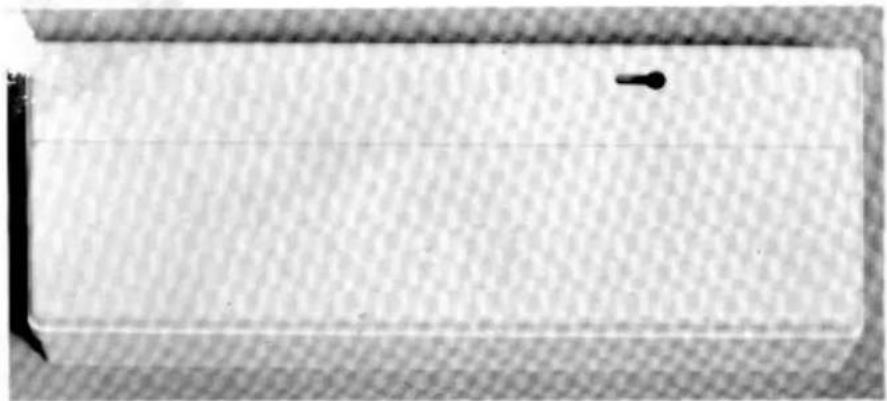
Close-up of a textured rectangular surface with a small black hole, no visible text or symbolsAccessory Case
natural_image
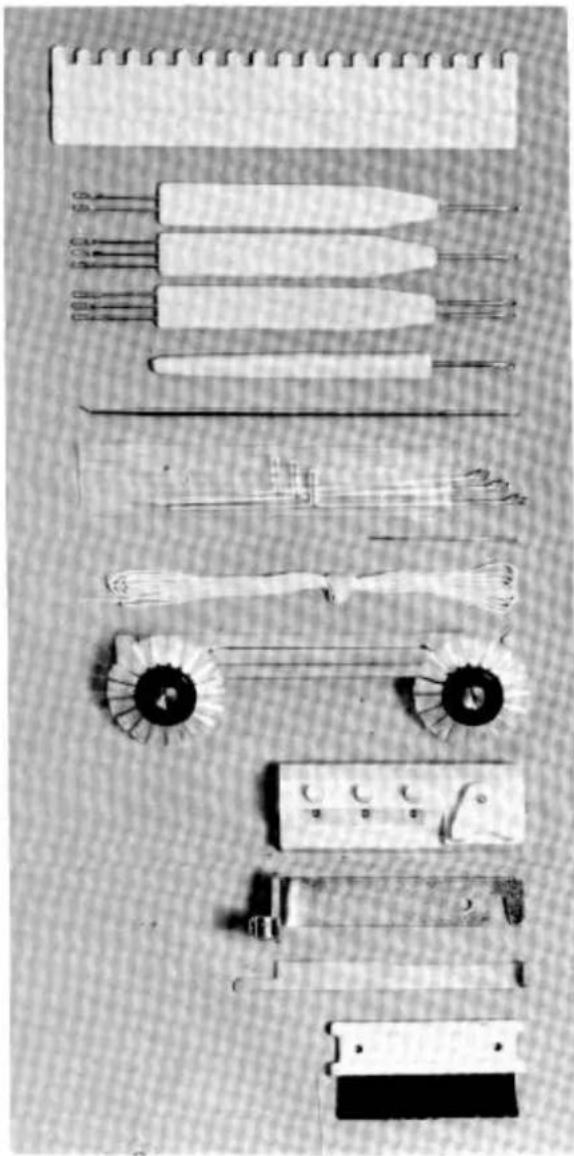
Collection of various mechanical components and tools laid out on a grid background (no visible text or symbols)Needle Pusher
Single and double Transfer Tool
Single and prible Transfer Tool
Double and Triple Transfer Tool
Latchet Tool
Crochet and work Hook
3 Spare needles and seaming needle
Nylon Thread
Weaving Brush
Row Counter
Carriage Lock Plate
Lock Plate for Pattern Panel
Brush
ACCESSORIES
Sinker Arm Assembly
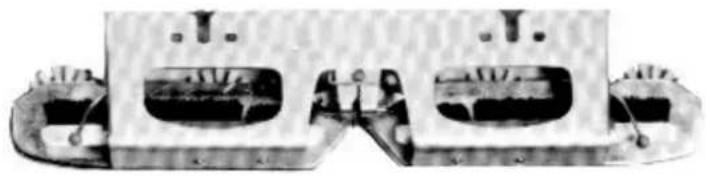
natural_image
Close-up of a metallic mechanical component with two recessed slots and mounting flanges (no visible text or symbols)Oil Bottle
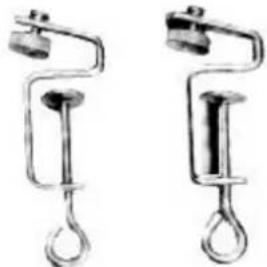
natural_image
Two identical metal pulley devices with hooks and hooks, no text or symbols visible.Table Clamps
Card Holder
Wool Guide
Rib Frame

natural_image
Simple line drawing of a vertical pole with three arms and a base, no text or symbols present.Yarn Brake

natural_image
Vertical strip of textured gray material, no visible text or symbolsYarn Brake Rod
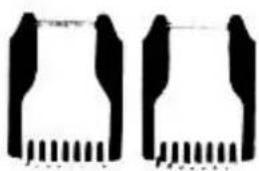
natural_image
Two identical black plastic components with serrated edges, no text or symbols visible4 Claws
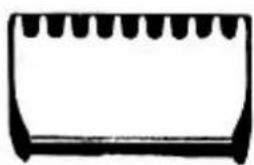
natural_image
Simple line drawing of a notepad with no text or symbols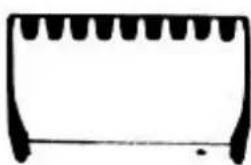
natural_image
Simple line drawing of a resistor with no text or symbols4 Balance Rods
PREPARATION OF YOUR YARNS
You new knitting machine has been designed to give you perfect results using a wide range of yarns from cotton and 2 Ply wool right through to double knitting wool or even thicker. However, it is best to start with a standard 3 Ply wool. Always use the best quality wool or yarn available and remember - your garment can never be better than the yarn you choose.
Correct preparation of your yarns before you start knitting is important. This extra care will make knitting much more enjoyable, easier and the quality of your garment much better.
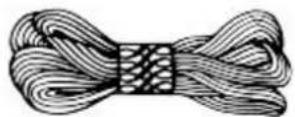
It is quite impossible to knit from a hank like this. You will have to open it and place it onto a skein holder to wind it into a ball suitable for machine knitting.
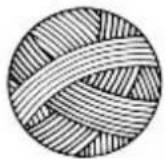
This hand wound ball of yarn looks good but is completely unsuitable for machine knitting. It will roll around and become tangled.
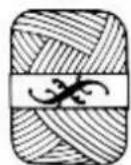
Although it is not recommended, it is possible to knit from this ball if you are able to draw the yarn smoothly from the centre. You cannot knit by drawing the yarn from the outside.
natural_image
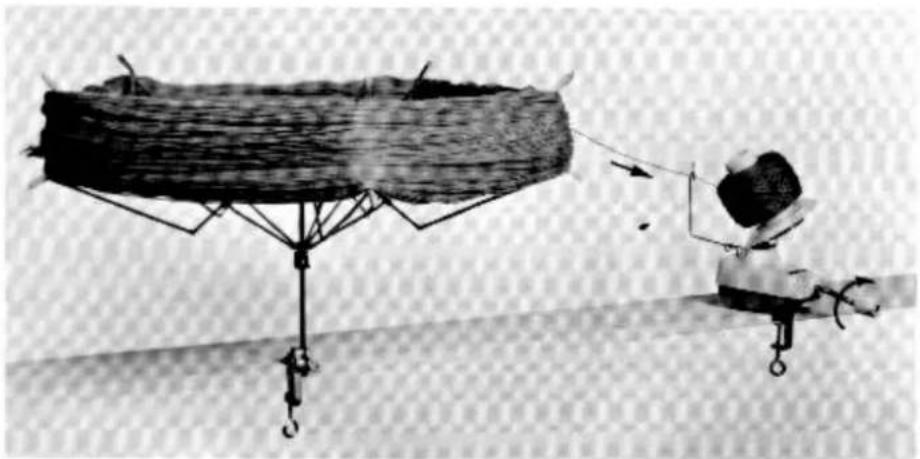
Illustration of a person sitting on a platform with a large, textured object and hanging weights (no text or symbols visible)Place the hank onto the skein holder. Loosen the knot where the thread is joined and thread one end through the guide of the wool winder and then into the groove across the top of the bobbin.
While you wind the yarn from the skein holder onto the wool winder, let the yarn slide over wax. This will make the thread smooth and much easier to knit.
When you wax your yarn at the same time as you wind, the ball will be small and tight. You CANNOT knit from this small, tight ball. You MUST rewind it, allowing your yarn to run VERY LIGHTLY through your hand.
If a knot passes through your hand as you wind - STOP. Separate the yarn and start a new ball. Never leave knots inside your yarn ball as they cause faults or dropped stitches as you knit.
PREPARATION OF YOUR YARNS
I am sure that you have a few odd balls of yarn lying around at home. PLEASE DO NOT use this yarn while learning. Use a thin 3 Ply yarn ONLY. As you become accustomed to machine knitting, you can use all types of yarn. Meanwhile, ONLY use the recommended yarn and wind it exactly as explained in the following instruction.
THE AUTOMATIC BALL WINDER
natural_image
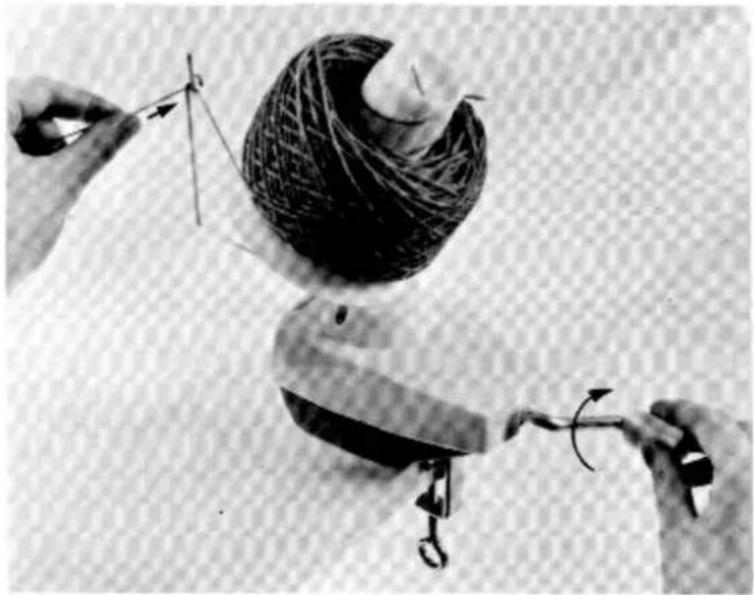
Black-and-white photo of hands manipulating a yarn ball with a string, no visible text or symbolsYour machine will knit the yarn so quickly and effortlessly that you won't have time to catch knots and snags. It is important to the smooth running of your machine to have well wound wool and well worth the trouble.
The ball winder will wind your yarns speedily and perfectly, ready for machine knitting.
It saves a great deal of time by winding the yarn into a ball in a few seconds.
Also very useful while you are still practising as you are able to unravel and rewind the knitted yarn.
Always start unravelling from the last row knitted. When joining yarns make sure the joins come at the beginning or end of rows. When you see the ball is almost finished, pull down the yarn from the Yarn Brake and re-thread with the new ball of yarn.
While winding the yarn the first time - hold the wax in your hand and merely allow the yarn to run over the wax while winding. Waxing smoothes the tiny hairs on the yarn and makes it ready for very smooth running - very helpful for automatic patterning. All traces of wax will disappear when the garment is pressed.
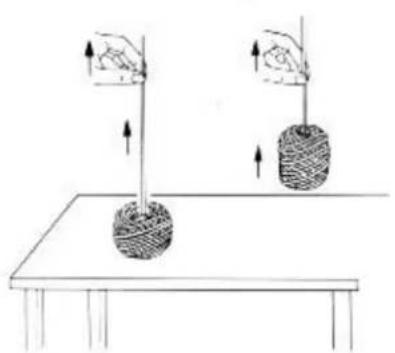
AN IMPORTANT TEST
natural_image
Diagram showing two hands holding weights on a table, with one lifting a weight and the other lifting a weight (no text or symbols present)WHEN THE YARN IS PULLED FROM THE CENTRE OF THE BALL - THE THREAD MUST COME OUT FREELY WITHOUT LIFTING THE BALL FROM THE TABLE.
natural_image
Simple line drawing of a girl in a polka-dot dress waving (no text or symbols)ONDERFUL, YET SO SIMPLE LATCH NEEDLE

text_image
HOOK LATCH STEM BUTT SHANK
natural_image
Line drawing of a woman in a polka-dot dress waving (no text or symbols)Over a century ago, the latch needle was invented in Europe. This invention was so wonderful that, to this day, the basic shape of latch needles has remained unchanged and machines fitted with these needles are used to produce most of the knitwear on sale today.
HOW STITCHES ARE FORMED
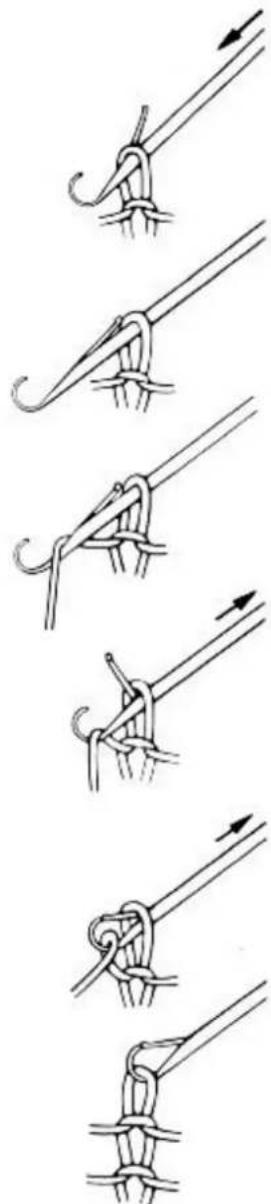
The movement of the latch needle, in and out of the needle bed while knitting, is controlled by the carriage.
natural_image
Sequence of five hand-drawn diagrams showing a rope knot being twisted, with arrows indicating direction (no text or symbols)-
As the needle moves out, the stitch automatically opens the latch.
-
The needle moves out further and the stitch slides behind the latch.
-
The yarn is automatically fed onto the hook by the yarn feeder - preparing for a new stitch.
-
The needle moves back inside the needle bed and the old stitch slides forward causing the latch to close over the yarn inside the hook.
The latch needle will ONLY drop a stitch if there is NO YARN in the needle hook when the needle returns into the needle bed.
-
The needle is pulled backwards, causing the old stitch to slide onto the needle latch.
-
When the needle is completely pulled back - the old stitch slides over the closed latch and the yarn forms a new stitch in the needle hook.
As this cycle of movements is repeated, stitches are formed and when the carriage moves across the needle bed 200 needles form as many stitches in the manner explained above.
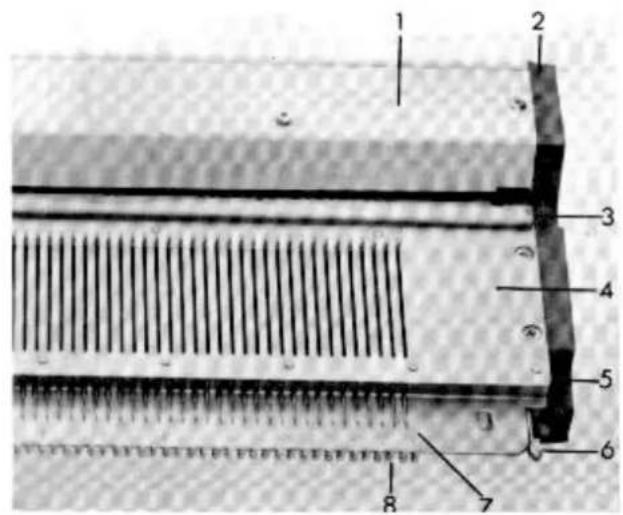
MAIN PARTS OF THE MACHINE
text_image
Technical diagram of a mechanical or electronic component with numbered parts labeled 1 through 8.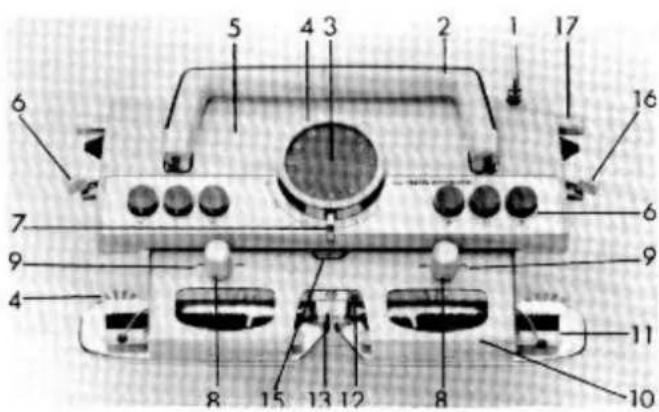
text_image
Labeled diagram of a device with numbered components for identification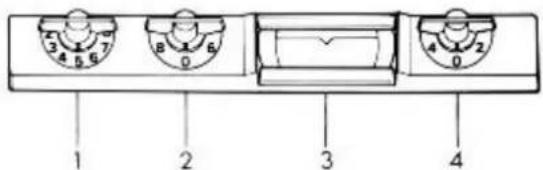
text_image
1 2 3 4NEEDLE BED
- Rear Cover Plate
- Side Covers
- Carriage Guide Rail
- Needle Bed
- Needle Retaining Bar
- Yarn Clip (left & right)
-
Needle Number Plate
-
Sinker Gate and Sinker Gate Pins
CARRIAGE PARTS
- Row Counter Tripper
- Handle
- Stitch Tension Dial
- Tension Dial Ring
- Carriage Plate
- Push Buttons (left & right)
- Cam Lever
- Knurled nuts to fasten Sinker Arm Assembly onto carriage.
- Studs to secure Sinker Arm Assembly onto the carriage
- Sinker Arm Assembly
- Latch Opening Brushes
- Lock Spring for Yarn Feeder
- Yarn Feeder
- Roller Brush Wheels (left & right)
- Lock Spring for Sinker Arm
- Side Levers
- Carriage Guide Rail
PATTERN PANEL
- Zig Zag Button
- LEFT side Needle Selector Button
- Pattern Needle Indicator
- RIGHT side Needle Selector Button
UNPACKING THE MACHINE
natural_image
Line drawing of a woman in a polka-dot dress waving (no text or symbols)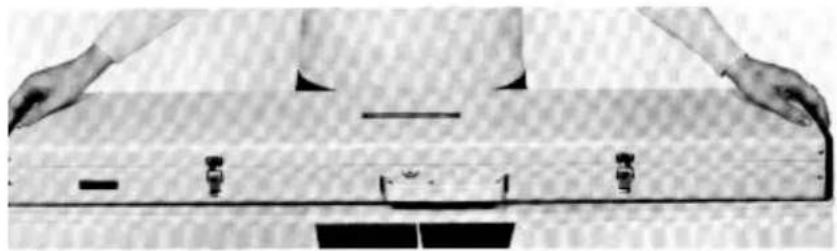
natural_image
Person holding a wooden table with metal fixtures, viewed from above (no visible text or symbols)Set the machine onto the table. Handle of casing facing away.
natural_image
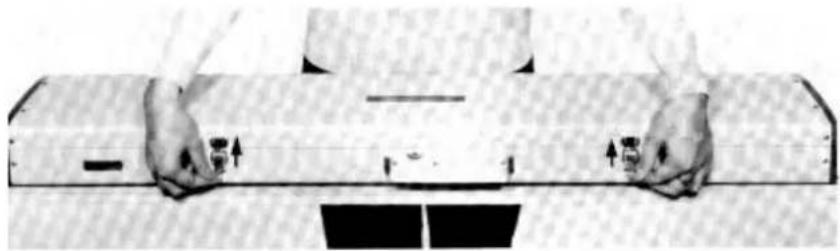
Close-up of hands holding a cylindrical object with arrows indicating motion or force direction (no visible text or symbols)Undo both latch locks which are situated at rear of the machine casing.

natural_image
Person holding a rolled-up document or scroll with arrows indicating motion (no visible text or symbols)Lift up far side of cover and then pull cover towards you to free it.
natural_image
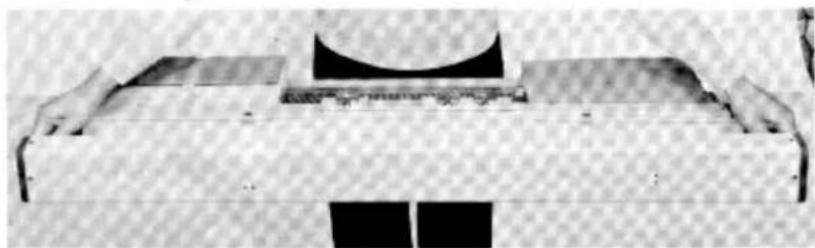
Close-up of a mechanical component with a circular feature and rectangular base (no visible text or symbols)Place the cover to rear of machine, the lower side of the cover forward.
UNPACKING THE MACHINE
natural_image
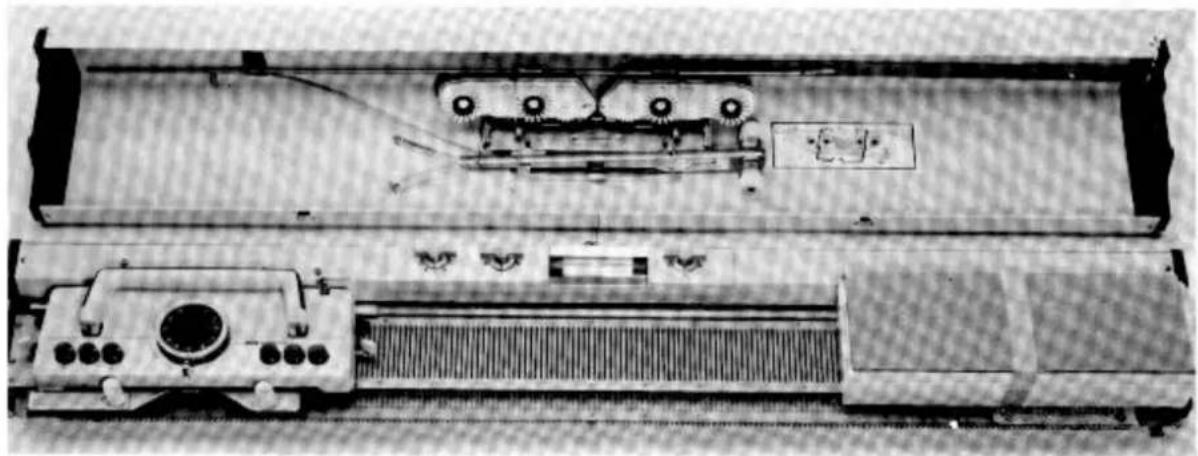
Top-down view of a mechanical device with internal components and wiring (no visible text or symbols)On right side of your knitter is a case for the small accessories.
natural_image
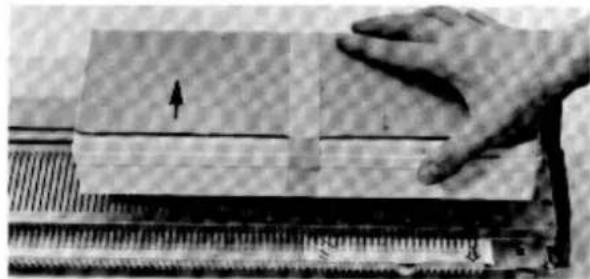
Close-up of a hand holding a ruler over a textured surface with a small arrow symbol (no text or labels visible)Raise the Accessory Case to remove it from your knitter. Place it inside the cover.
natural_image
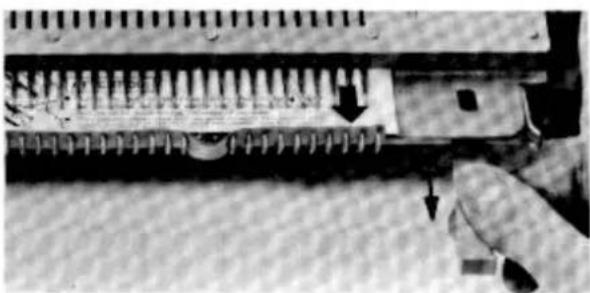
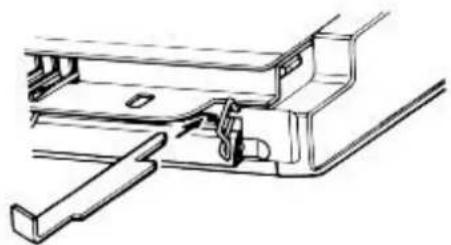
Close-up of a hand operating a mechanical component with threaded pins and a close-up view showing a small component (no visible text or symbols)Below the RIGHT hand side of the needle bed a copper plate is inserted. Remove it by pulling it towards you.
Remove the little pink instruction slip from below the last needles.
natural_image
Technical line drawing of a mechanical assembly with no visible text or symbolsWhen transporting the machine - ALWAYS re-insert the copper plate with the tongue at LEFT and the bent end upwards as shown.
SETTING UP THE MACHINE
natural_image
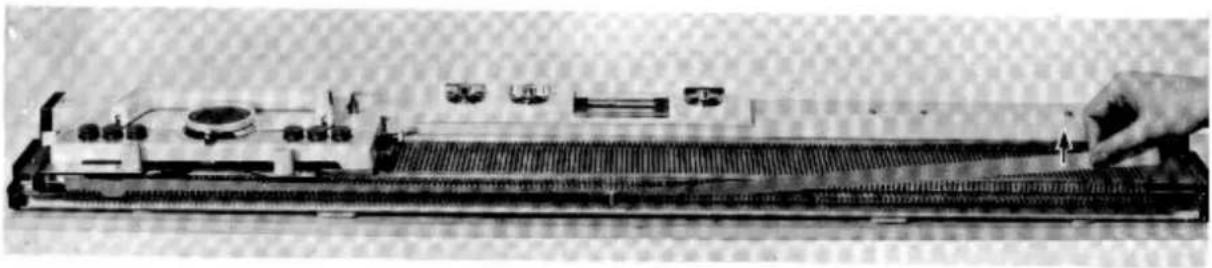
Black-and-white photo of a vintage typewriter with a hand adjusting its tray (no visible text or symbols)Remove the cardboard Needle Protector from the Sinker Gate of the knitter. If you wish, you can keep it.
text_image
A B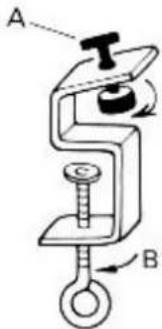
text_image
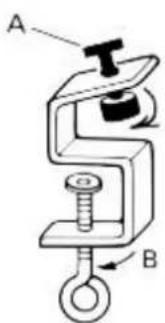
A BTake the two Table Clamps from inside the Accessory Case.
Turn screws A and B until they are wide open.
natural_image
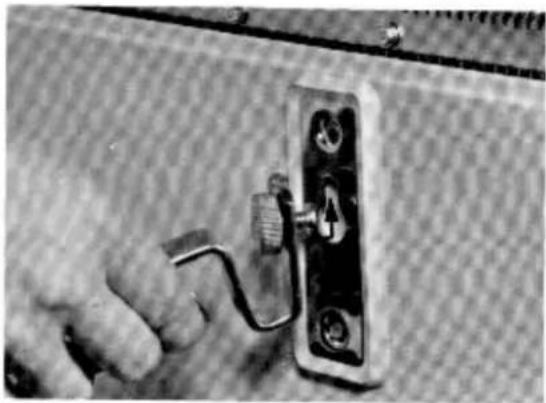
Close-up of a hand holding a small electrical switch mounted on a metal bracket (no visible text or symbols)Tilt the machine and put the head of screw A into the keyhole on the underside of the machine. Pull the Clamp upwards into the narrow neck of the hole and turn the knurled nut in a clockwise direction - thus securing the Table Clamp firmly to the machine. Secure the second Table Clamp onto the machine.
natural_image
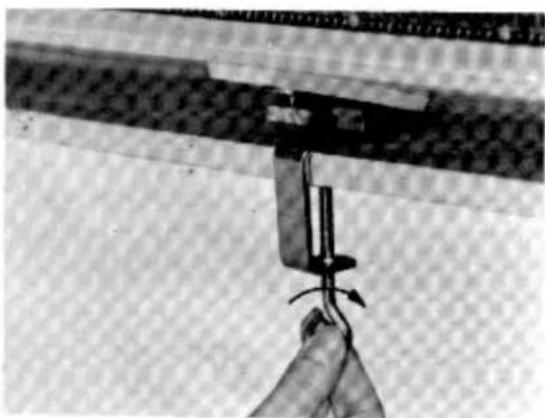
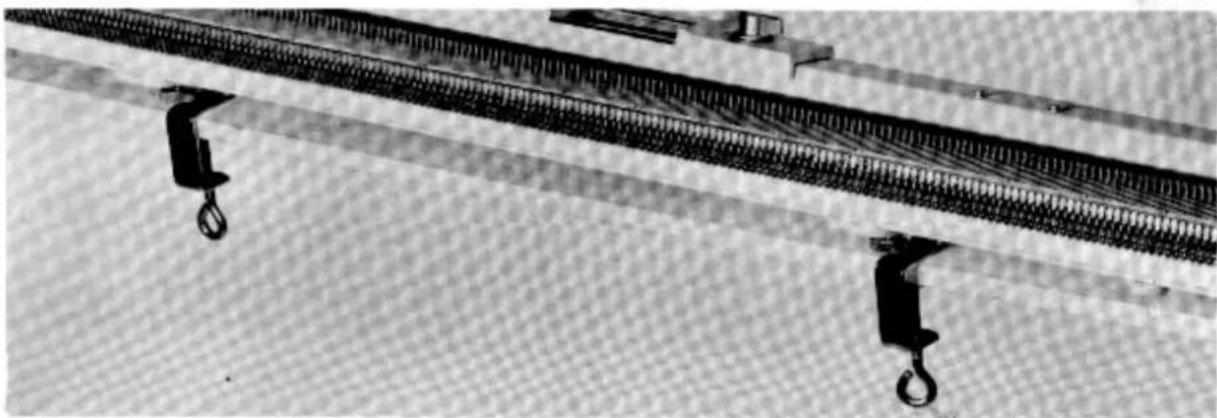
Close-up of a hand holding a small object with a string, against a textured background (no visible text or symbols)Now lower the machine, setting it flush with the table edge, and turn both screws B in a clockwise direction until they are fixed firmly onto the table.
SETTING UP THE MACHINE
natural_image
Close-up of a mechanical conveyor system with hanging weights and a chain, no visible text or symbols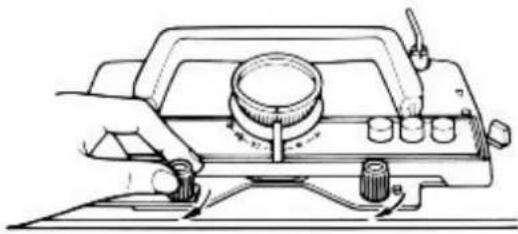
natural_image
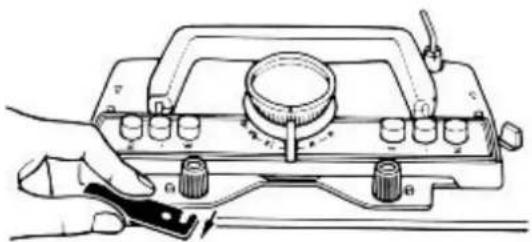
Line drawing of a hand operating a mechanical device with a knob and adjustment knobs (no text or symbols)TO PROTECT THE MACHINE WHILE IN TRANSIT OR WHILE IT IS NOT BEING USED, THE CARRIAGE IS SECURED AT THE LEFT HAND SIDE OF THE NEEDLE BED BY MEANS OF A LOCK PLATE.
To free carriage - turn both white knurled nuts in an anti-clockwise direction until they are loose.
natural_image
Illustration of a hand using a power tool to switch a component with multiple switches and a dial (no text or symbols present)Remove the Lock Plate by pulling it towards you, away from the carriage and off the needle bed. Keep it in a safe place for future use.
NOTE: Whenever the machine is not in use, be sure to replace the Lock Plate to fasten the carriage to the needle bed.
natural_image
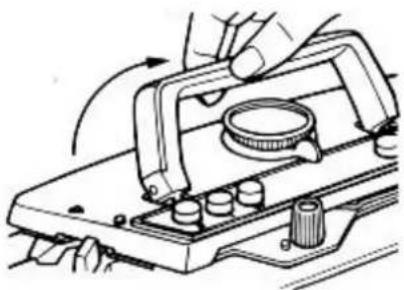
Illustration of a hand using a tool to adjust or install a mechanical component (no text or symbols visible)Raise the handle until it snaps into a locked vertical position.
When machine is not in use, return the handle onto carriage plate.
THE AUTOMATIC ROW COUNTER

natural_image
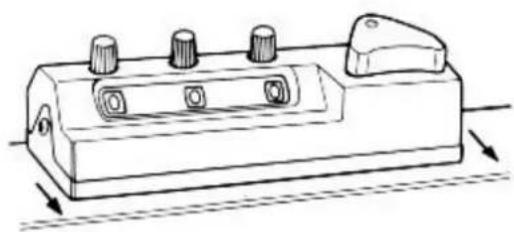
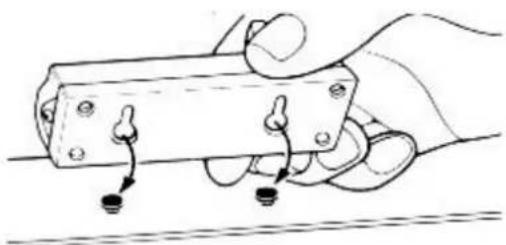
Close-up of a mechanical or electronic component with no visible text, numbers, or symbols.On the LEFT side of the Pattern Panel are TWO small studs (A). On these studs you can fix the Row Counter. Take the Row Counter out of the Accessory Case and place it, with the two keyholes on the underside, on top of the two studs. Push it down and back - this will lock the Row Counter in position. The Row Counter is automatically operated by the Row Counter Tripper at the RIGHT side rear corner of the carriage. Each time the carriage moves past the Row Counter it will register one more row of knitting.
text_image
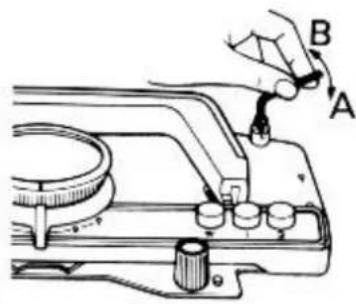
Diagram showing a hand holding a tool labeled A and B, with a mechanical component visible below.To put the Row Counter Tripper into operation pull it upwards and turn it backwards from A to B as shown by the arrow.
text_image
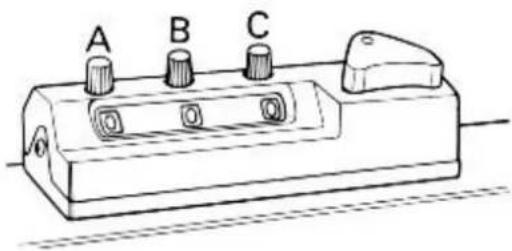
A B CYou can reset your Row Counter to zero by turning the knurled nuts A, B and C.
natural_image
Line drawing of a mechanical device with three knobs and a handle, showing motion arrows (no text or symbols)Should you wish to remove the Row Counter, just slide it firmly towards you until it lifts off easily.
natural_image
Hand holding a small electronic component with three leads, no visible text or symbolsTo replace the Row Counter, press it down firmly so that the slots engage the raised studs, then slide it backwards until it locks in the correct position.
ATTACH THE SINKER ARM ASSEMBLY
text_image
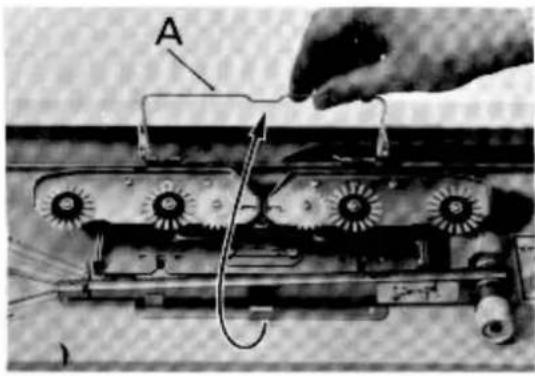
ARelease the Retaining Spring A by pushing it down on either side of the clip, then pull it forward and upwards.
Remove the Sinker Arm Assembly from the cover.
natural_image
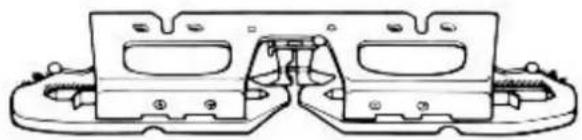
Technical line drawing of a mechanical housing component (no text or symbols)Turn the Sinker Arm Assembly so that the Brush Wheels are on the underside.
natural_image
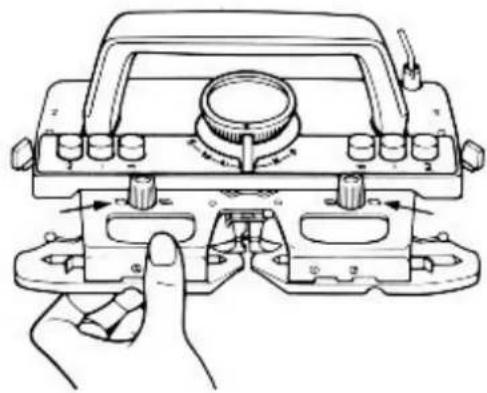
Technical line drawing of a mechanical device with hands operating it (no text or symbols present)Slide the Sinker Arm Assembly under the two knurled nuts and push it back as far as it will go - under the Retaining Spring at the front of the carriage and ensure that the studs on the top of the carriage plate FIT INTO THE HOLES IN THE SINKER ARM ASSEMBLY.
natural_image
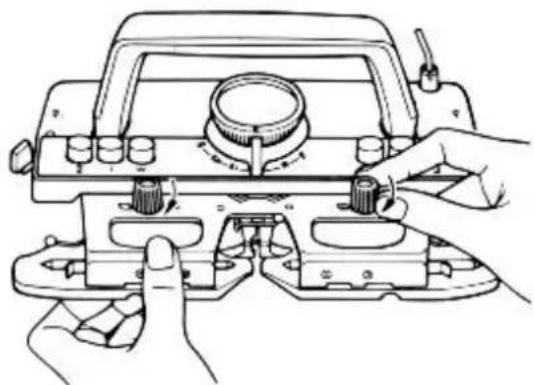
Line drawing of hands operating a mechanical device with adjustment knobs and a central knob (no text or symbols)Check to be sure that the two STUDS ARE SHOWING THROUGH THE SINKER ARM.
Tighten the knurled nuts by turning them in a clockwise direction so that the Sinker Arm is firmly attached to the front of the carriage.
ALWAYS SECURE THE SINKER ARM FIRMLY ONTO THE CARRIAGE PLATE.
THE DIFFERENT NEEDLE POSITIONS
natural_image
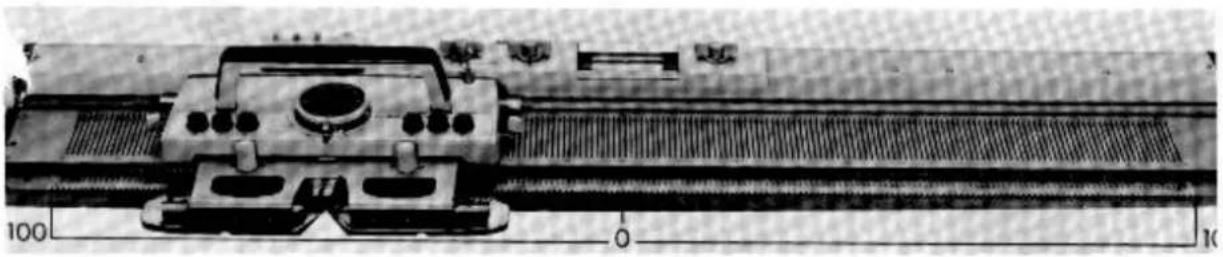
Technical line drawing of a mechanical assembly with no visible text or symbolsYour machine has 200 needles, they are numbered from the centre 0 outwards in groups of 10, 100 needles on each side of the centre.
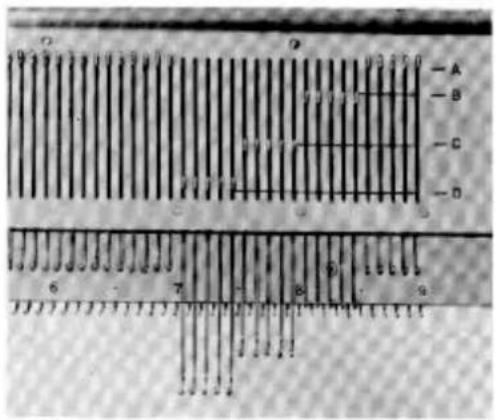
On both the LEFT and RIGHT side of the needle bed you will see markings A, B, C and D. These are the various positions used during knitting.
text_image
0 1 2 3 4 5 6 7 8 9 10 11 12 13 14 15 16 17 18 19 20 21 22 23 24 25 26 27 28 29 30 31 32 33 34 35 36 37 38 39 40 41 42 43 44 45 46 47 48 49 50 51 52 53 54 55 56 57 58 59 60 61 62 63 64 65 66 67 68 69 70 71 72 73 74 75 76 77 78 79 80 81 82 83 84 85 86 87 88 89 90'A' is resting, or non-knitting position.
'B' if the needles are pushed up to 'B' position they are in normal position for plain knitting.
'C' position is used for different patterns.
'D' is holding or carrying position, used for Tuck stitch patterning. It is also used for partial knitting which I shall show later in this book.
natural_image
Close-up of a hand pressing down on a perforated metal strip with a small inset showing a small object (no text or symbols visible)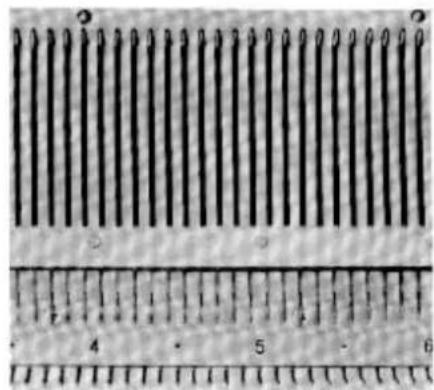
natural_image
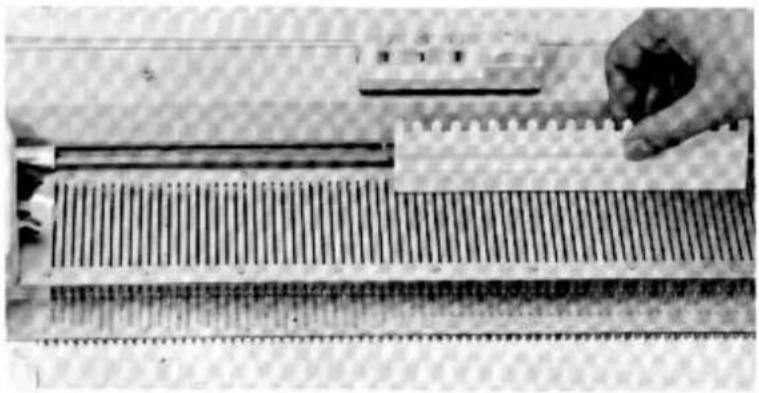
Close-up of a microarray array with parallel ridges and a ruler at the bottom (no visible text or symbols)Move the carriage to the extreme LEFT of the machine, completely clear of ALL needles. From the Accessory Case take the straight edge Needle Pusher and push all needles back to 'A' position along the entire length of the needle bed.
MAKE SURE ALL NEEDLES ARE IN 'A' POSITION. Slide the carriage across the needle bed to the RIGHT to make sure that it moves across smoothly and easily.
OILING THE MACHINE
natural_image
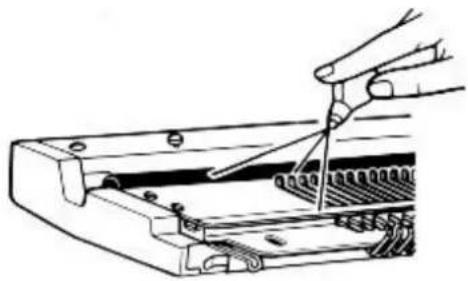
Illustration of a hand using a tool to adjust or install electronic components (no text or symbols visible)Wipe all the packing dust off the machine with a soft dry cloth. There is a small bottle of oil in your Accessory Case. Unscrew the cap, but DO NOT remove the brush which is in the neck of the bottle. Tilt the bottle and squeeze it lightly, rubbing the brush across the guide rail and the needle butts. Make sure you replace the cap firmly after use.
natural_image
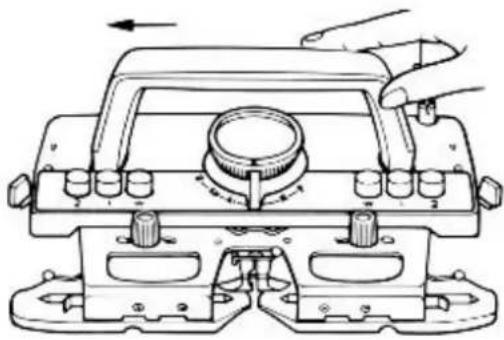
Technical line drawing of a mechanical device with adjustment knobs and a hand operating it (no text or symbols)Move the carriage to the LEFT.
natural_image
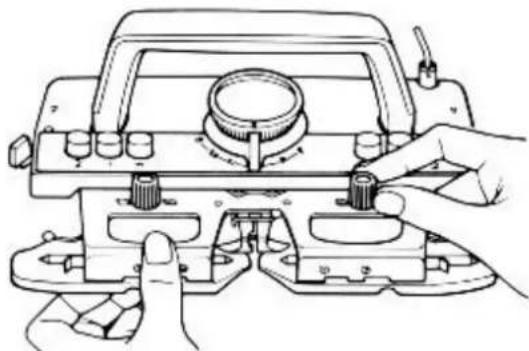
Line drawing of hands operating a mechanical device with adjustment knobs and a dial (no text or symbols)If the carriage does not move smoothly across the needle bed, check if both studs fit exactly into the holes in the Sinker Arm Assembly.
natural_image
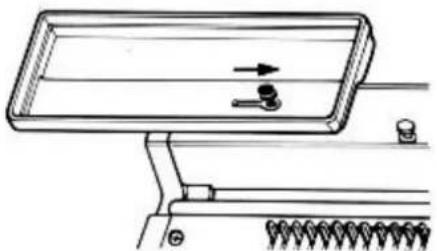
Technical line drawing of a mechanical component with no visible text or symbolsThe top of the Accessory Case can be used as a tray for your accessories during knitting.
At the LEFT side of the Row Counter is another stud - allow the stud to pass through the keyhole slot in the tray, slide the tray to the RIGHT and it will be secure.
SETTING UP THE MACHINE
natural_image
Close-up of a hand operating a mechanical device with a ruler and grid array (no visible text or symbols)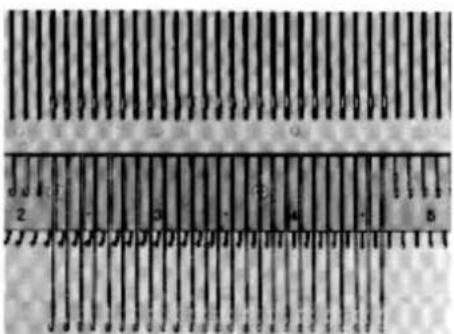
text_image
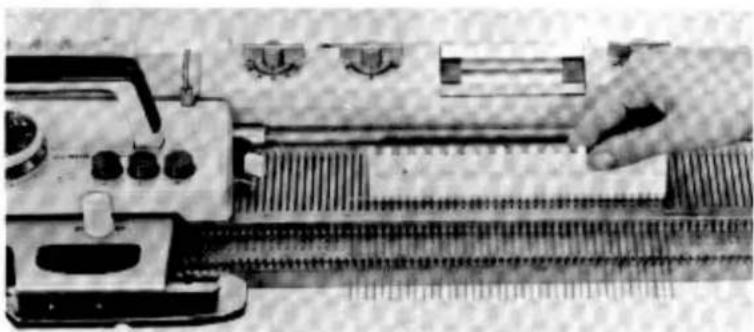
1 2 3 4 5The carriage is at the LEFT. Using the straight edge of the Needle Pusher, bring 20 needles on either side of centre 0 from 'A' to 'D' position - this means completely towards the front of the needle bed.
The more needles you push up to 'D' position, the wider your knitting will be. In the next STEP you will learn how easy it is to INCREASE and DECREASE while knitting.
natural_image
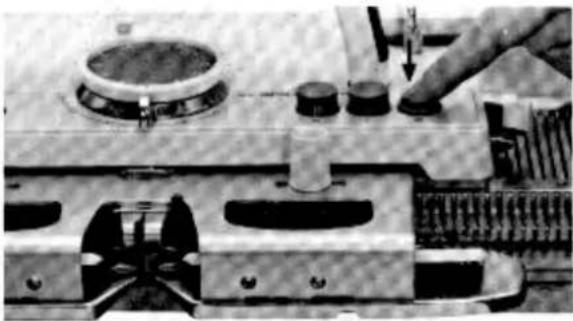
Close-up of a mechanical assembly with a hand operating a tool, no visible text or symbolsPush DOWN button 2 on the RIGHT side of the carriage.
natural_image
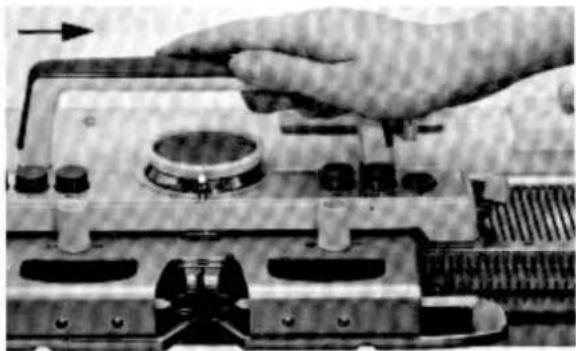
Close-up of a hand adjusting a mechanical component with no visible text or symbolsMove the carriage towards the RIGHT of the machine.
natural_image
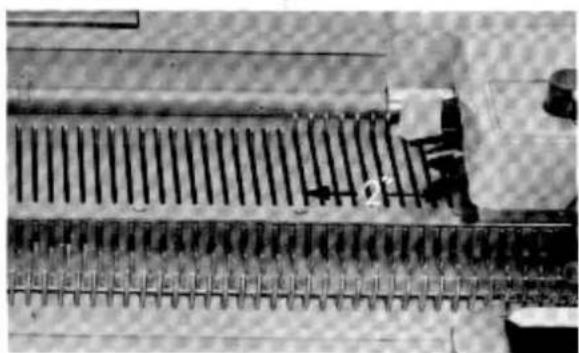
Aerial view of a large industrial machine with rows of pipes and a small table, no visible text or symbols.Leave the carriage about 2 inches away from the needles in 'B' position, as this is the position in which the needles come back because button 2 at the RIGHT of the carriage was pushed DOWN.
SETTING UP THE MACHINE
natural_image
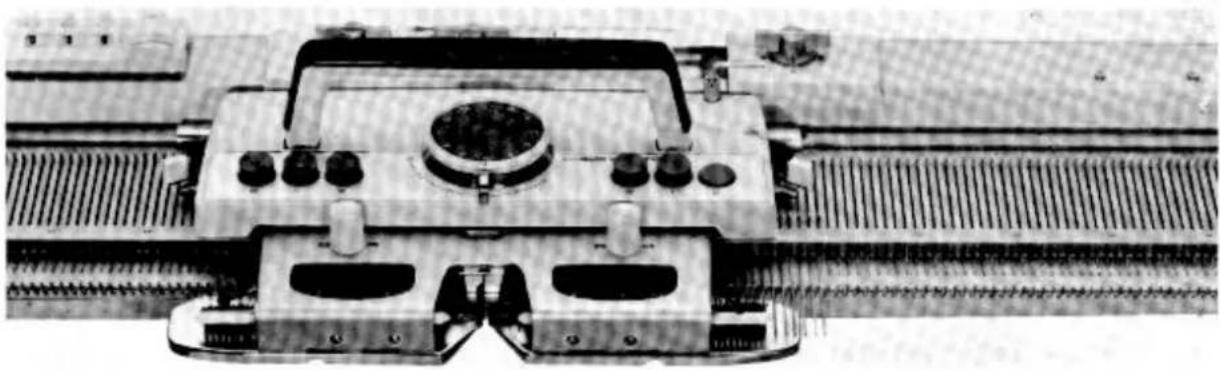
Close-up of a mechanical assembly with rollers and a central hub (no visible text or symbols)- NEVER STOP THE CARRIAGE IN THE MIDDLE OF A ROW - ALWAYS MOVE IT PAST ALL NEEDLES IN KNITTING POSITION, AND LET IT REST ABOUT 2 OR 3 INCHES PAST THE LAST NEEDLE IN 'B' POSITION.
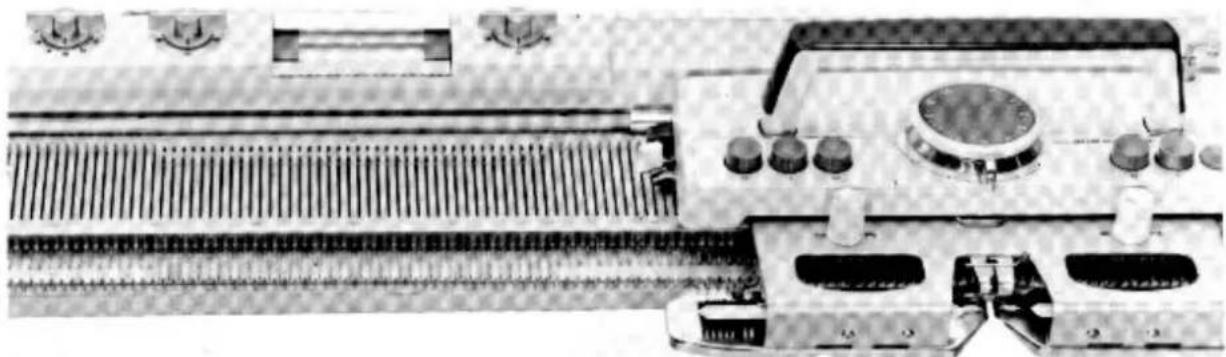
natural_image
Close-up of a vintage electronic circuit board with visible components and wiring (no text or symbols)- Now move the carriage to the LEFT and back to the RIGHT side again until it is at least 2 inches past all needles in 'B' position.
- IMPORTANT: NEVER REVERSE THE MOVEMENT OF THE CARRIAGE WHILE IT IS STILL IN CONTACT WITH ANY NEEDLES IN 'B' POSITION. THE CARRIAGE MUST BE CLEAR OF ALL NEEDLES BEFORE RETURNING.
- Continue practising until you can slide the carriage smoothly back and forth across the needles. BE SURE, each time, that the carriage is at least 2 inches beyond the 40 needles BEFORE starting the return journey.
natural_image
Line drawing of a woman in a polka-dot dress and blouse, waving (no text or symbols)The next pages will show you how to set up the Yarn Brake and thread in the yarn.
You will then be ready to start knitting.
Correct threading up is very IMPORTANT - so please follow the instructions carefully.
SETTING UP THE YARN BRAKE
natural_image
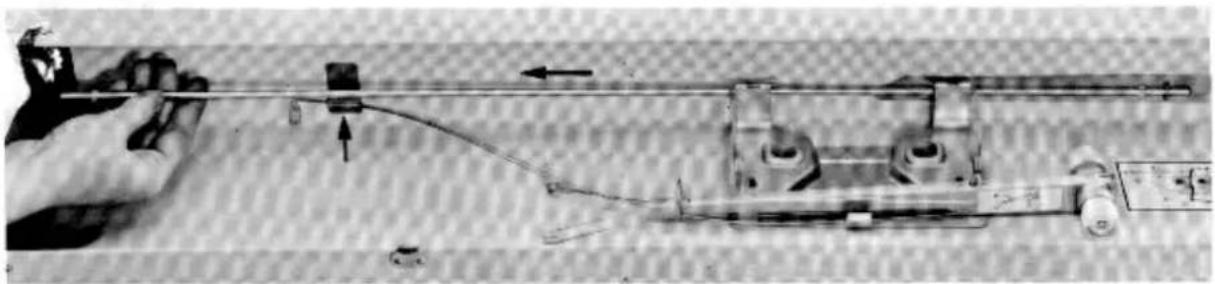
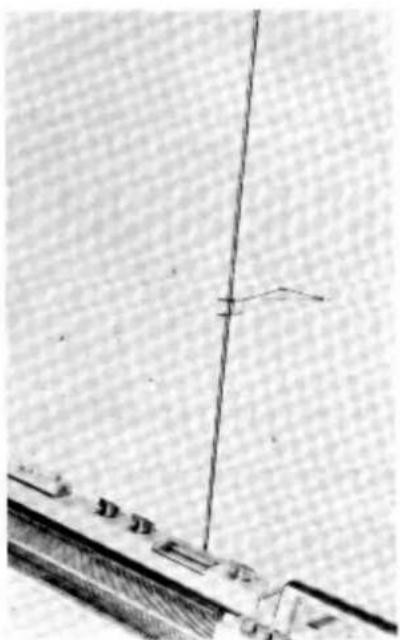
Close-up of a hand operating a mechanical device with wires and components (no visible text or symbols)- Lift the Yarn Brake Rod from the Retaining Clip.
- Pull the Yarn Brake Rod to the LEFT until it is clear of the bracket and then remove it from the case.
natural_image
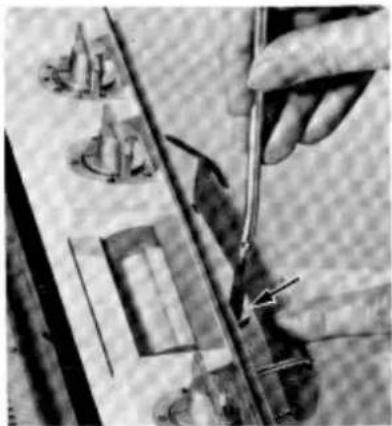
Close-up of hands using a tool to cut or mark fabric with a small object on the edge (no visible text or symbols)Slide the Yarn Brake Rod - with the slightly bent end at the bottom and pointing towards the back - into the socket inside the carrying handle on the rear cover of the machine.
natural_image
Pure mechanical assembly diagram without any text, numbers, or symbols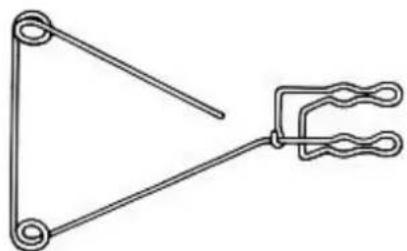
natural_image
Pure electrical circuit lines without any symbolsTake the Wool Guide from the Accessory Case and clip it halfway up the Yarn Brake Rod. The wire with the two guides must point towards the back.
SETTING UP THE YARN BRAKE
natural_image
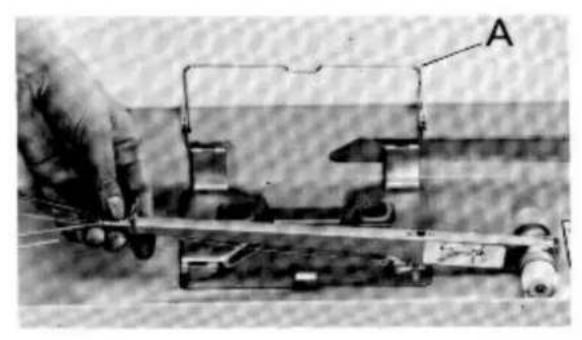
Close-up of a hand operating a mechanical device with labeled component A (no visible text or symbols beyond label)The Yarn Brake is retained by the same spring A through the Sinker Arm Assembly.
Remove it from the cover.
natural_image
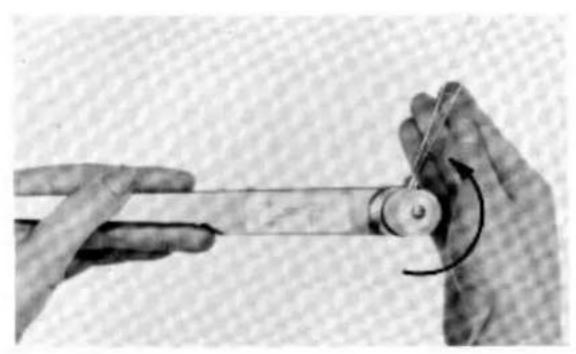
Close-up of hands using a tool to measure a cylindrical object with a curved arrow indicating rotation (no text or symbols visible)Turn the two Take-up Springs upwards as shown by the arrow until they snap into position.
natural_image
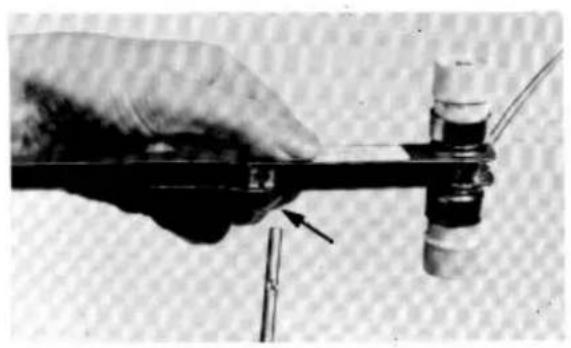
Close-up of a hand holding a mechanical tool with a pointed tip and a small component, no visible text or symbols.Set the Yarn Brake onto the Rod by inserting the Rod into the round opening beneath the Yarn Brake.
natural_image
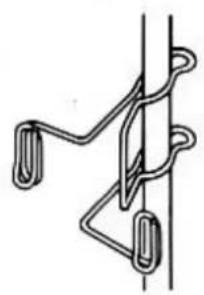
Pure mechanical linkage diagram without any text, numbers, or symbolsRemove the Card Holder from the Accessory Case and clip it around the Yarn Brake Rod - a few inches below the Yarn Guide - as shown in the diagram.
THE MACHINE READY SET UP
natural_image
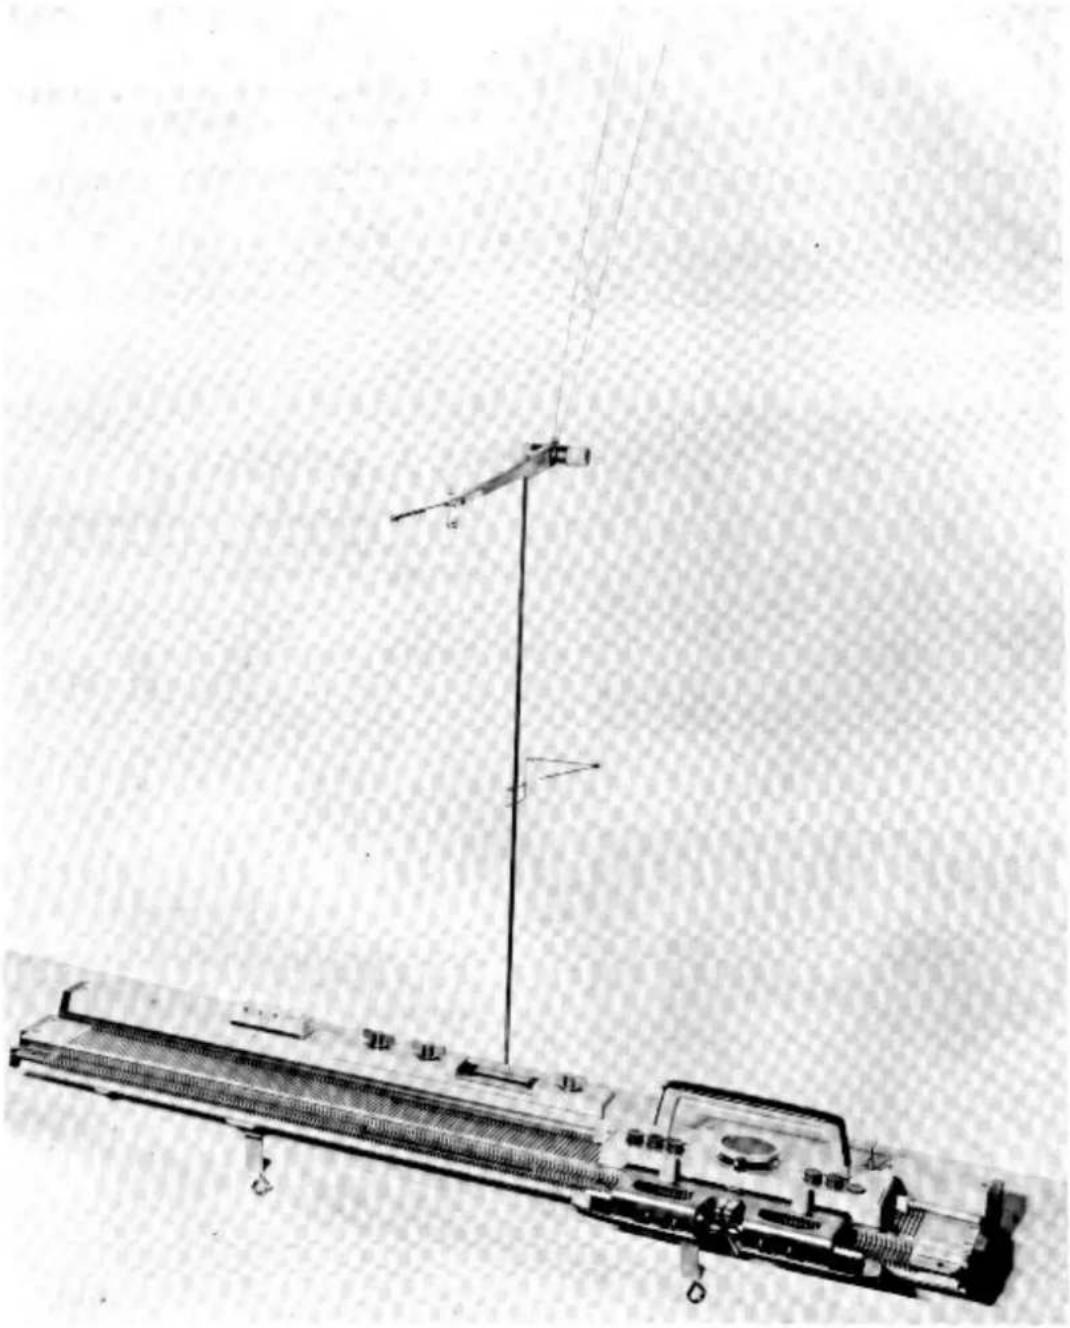
Historical scientific apparatus diagram showing a vertical rod and base with a suspended rod, no visible text or symbolsAnd this is your machine – ready for threading up the yarn and to start knitting.
I recommend you follow the next pages carefully as correct threading up is very important.
Take your ready wound ball of 3 ply wool and place it behind the machine.
THREADING UP
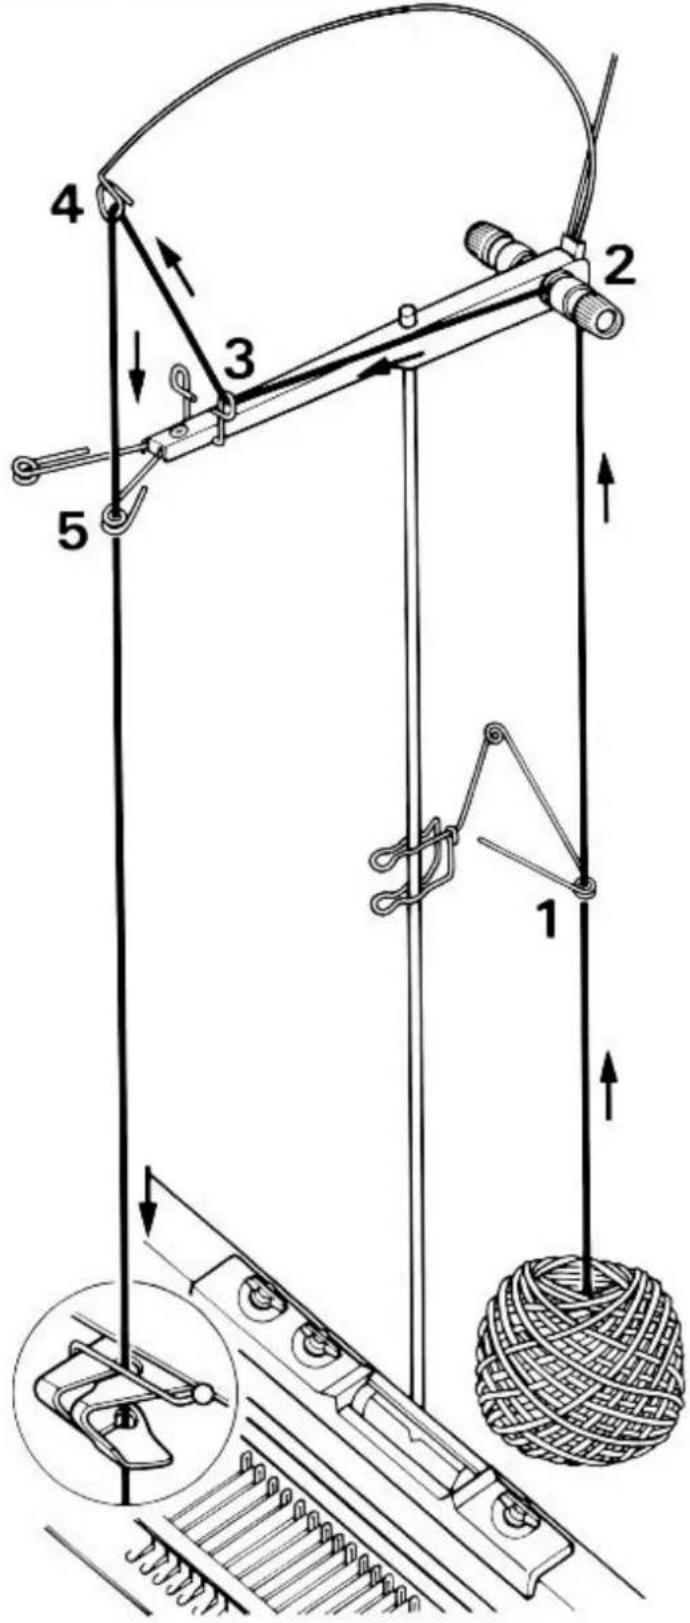
Pull the yarn end out of the centre of the ball and thread it through point 1 as shown.
YOU C A N N O T KNIT IF YOU DO NOT THREAD UP EXACTLY AS SHOWN IN THE DIAGRAM.
text_image
Technical diagram of a mechanical device with numbered components and directional arrows indicating motion or assembly.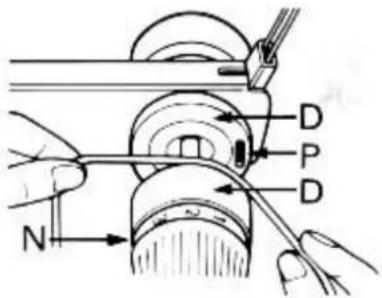
text_image
D P D NWARNING!
- PULL THE YARN THROUGH THE YARN BRAKE (2) AS EXPLAINED BELOW.
On the Yarn Brake are TWO metal discs D. Separate them and you will see a small Lock Pin P. Pull the yarn INSIDE the Yarn Brake - BETWEEN the discs D, UNDER the Lock Pin P. Let the discs come together again.
THE LOCK PIN ENSURES THE YARN ALWAYS REMAINS INSIDE THE DISCS DURING KNITTING.
Turn the plastic knurled nut N until 3 faces the red arrow on the disc.
- Thread the yarn through the Guide and Take-up Springs as shown at points 3, 4 and 5. Pull the yarn down from point 5 and hold it. If the Take-up Spring does NOT stay in a horizontal position - the yarn is NOT threaded correctly through the Yarn Brake, or the Tension is too loose for the thickness of yarn being used.
PLEASE CHECK.
The Tension of the Yarn Brake adjusts the amount of pressure on the metal discs. If you knit heavy yarn - turn the knurled nut with 2 to the red arrow - the Tension is loose enough to let the yarn pass smoothly through the discs. If you knit thin yarn - turn the 4 or 5 to the red arrow - the pressure on the discs is stronger and your yarn will have more Tension.
THE YARN FEEDER
You are now ready to thread your yarn through the Yarn Feeder. Be sure to follow the steps exactly as illustrated.
natural_image
Line drawing of a woman in a polka-dot dress and skirt, making a peace sign (no text or symbols)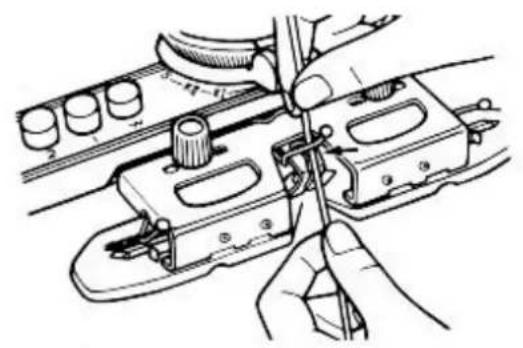
natural_image
Technical line drawing of a mechanical assembly with hands operating a tool (no text or symbols present)Slide the yarn UNDERNEATH the Guide Spring of the Yarn Feeder.
natural_image
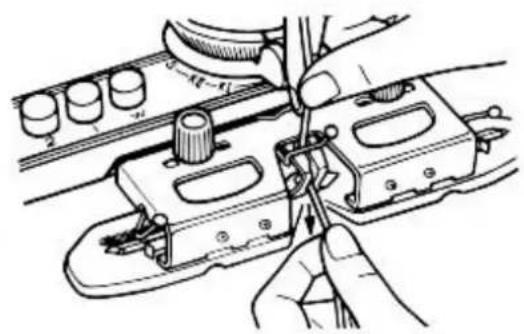
Technical line drawing of a mechanical assembly with hands operating a tool (no text or symbols present)Now pull the yarn down into the Feeder slot and through the round eye under the Feeder.
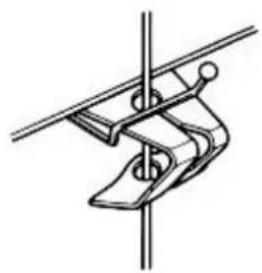
natural_image
Pure mechanical diagram of a clamp or bracket assembly without any text, numbers, or symbolsHere you can see the yarn correctly threaded in the Yarn Feeder.
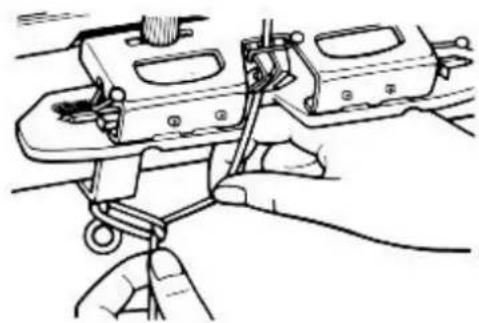
natural_image
Technical line drawing of a mechanical assembly with hands operating a tool (no text or symbols visible)Tie the end of the yarn around the RIGHT side Table Clamp.
THE YARN TENSION
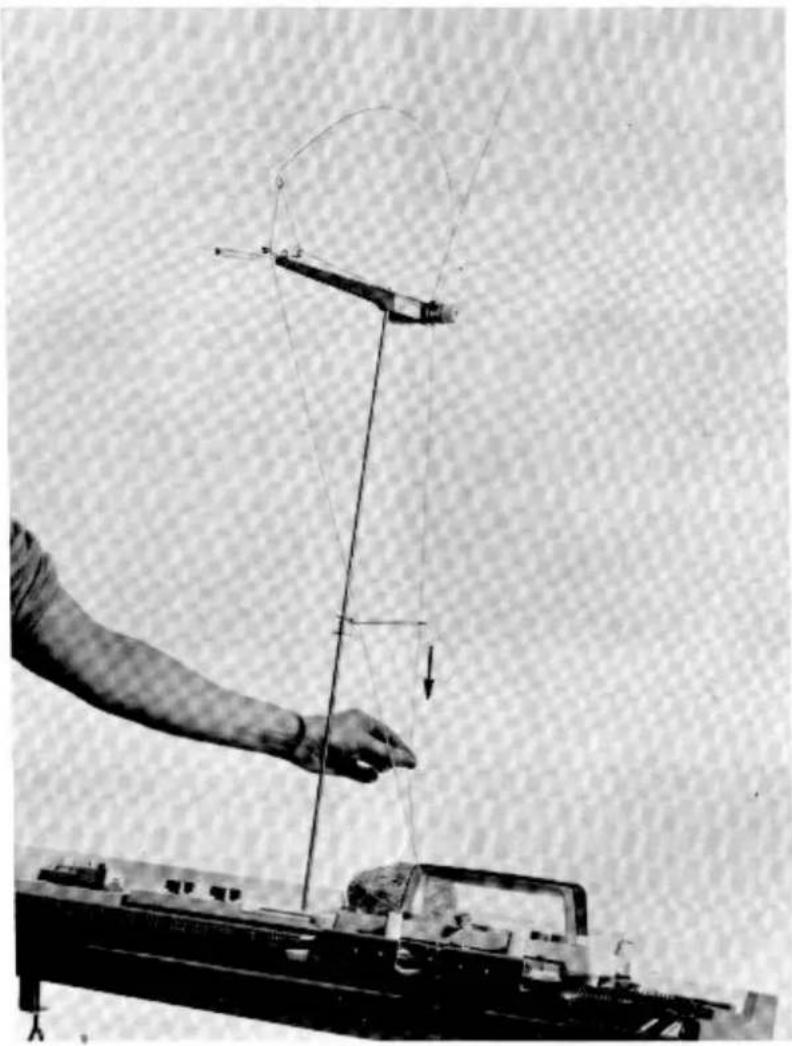
natural_image
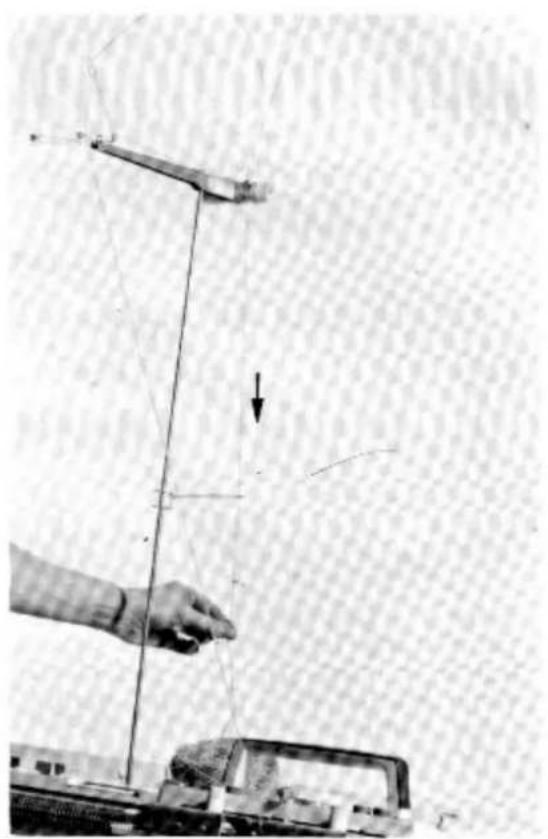
Black-and-white photo of a hand operating a mechanical device with wires and a curved arc, no visible text or symbols.Pull the yarn down at the back of the Yarn Brake (as shown by the arrow), until all slack yarn has been taken up.
This will bring the Take-up Spring into a nearly horizontal position, and it will remain there. There should NEVER be SLACK yarn BETWEEN the Table Clamp and the Yarn Brake.
When casting on, and while knitting, there should NEVER be any slack yarn BETWEEN the KNITTING and the Yarn Feeder. Be careful and you will avoid difficulty.
NOTE: If you start knitting with slack yarn, it will result in big loops or dropped stitches at the sides of your knitting.
You are now ready to make the cast on and start knitting.
START CAST ON
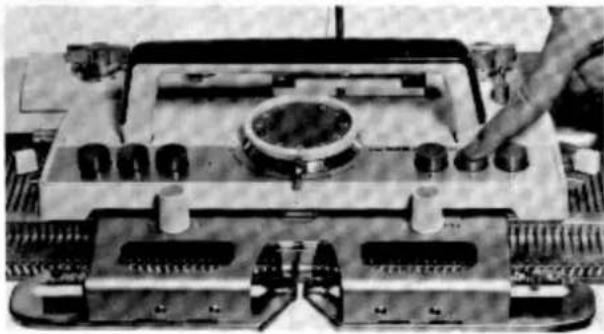
natural_image
Close-up of a mechanical device with a hand operating the top panel (no visible text or symbols)We will start knitting with an open edge cast on. An open edge cast on means an unfinished edge, therefore, if you pull on the knitting the stitches will 'run'. But don't worry - later in the book you will learn how to make a closed edge cast on.
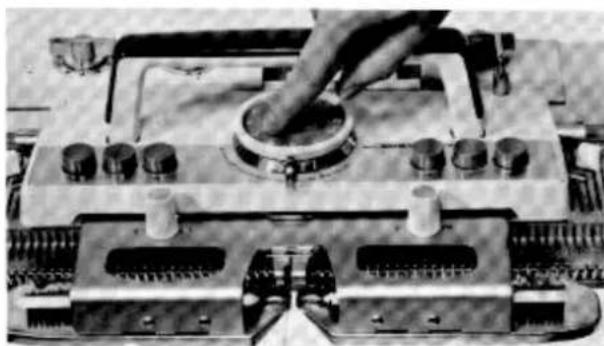
Push button 1 on the RIGHT side of the carriage HALF way DOWN, this will release button 2.
If you push button 1 TOO FAR DOWN, it will remain DOWN.
natural_image
Close-up of a mechanical device with a hand operating a circular component (no visible text or symbols)In the centre of the carriage is the Stitch Tension Dial - numbered from 0 to 10 with points between the numbers. The Tension Dial gives you 31 different stitch sizes enabling you to knit nearly every type of yarn.
-
Turn the Tension Dial with the RED mark on the Tension Dial ring towards the 7.
-
The Side Levers are set to the FRONT in ● position.
-
All buttons UP.
-
Cam Lever is set on centre 0.
natural_image
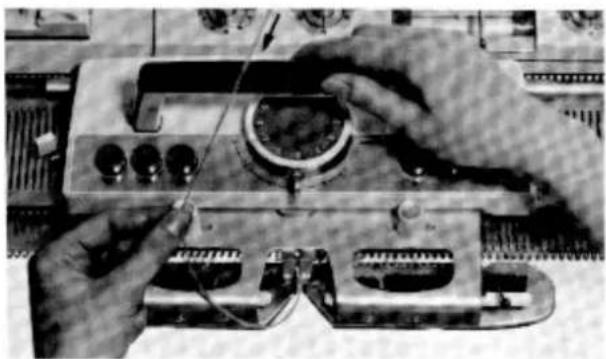
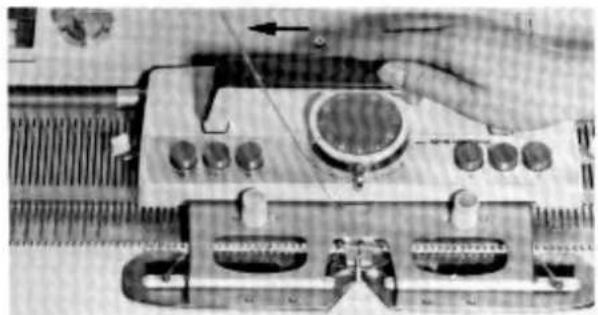
Close-up of hands operating a mechanical testing setup with wires and components (no visible text or symbols)Now slide the carriage SLOWLY from the RIGHT to the LEFT until the centre (the yarn Feeder) is about 2 inches SHORT of the LAST of the 40 needles in knitting position.
Now, pull down a little yarn from the Take-up Spring (as shown in the diagram), so that you have some slack yarn between your hand and the carriage. Continue moving the carriage LEFT, allowing it to use up the slack yarn, until it is clear of all needles IN KNITTING position. Then you release the yarn.
natural_image
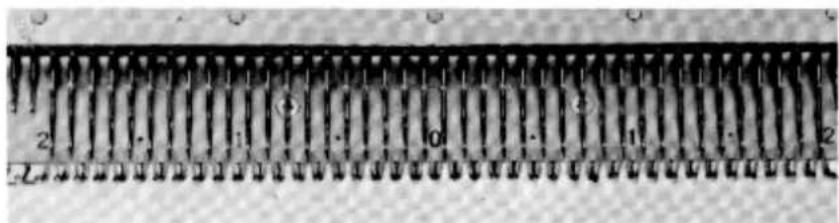
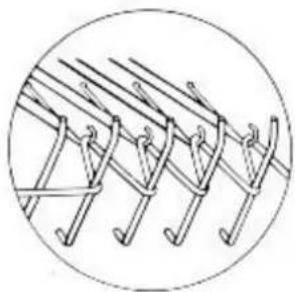
Close-up of a metallic screw with evenly spaced teeth and central bore (no text or symbols visible)THIS IS HOW YOUR CAST ON SHOULD LOOK - ALL THE NEEDLES HAVE THE SAME SIZE LOOPS.
RIGHT
natural_image
Diagram of mechanical clamping or bracketing mechanism (no text or symbols)THE OPEN EDGE CAST ON
WRONG
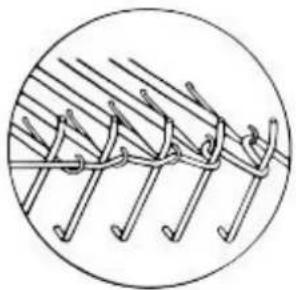
natural_image
Diagram of a chain of metal rods or wires in a circular frame, no text or symbols present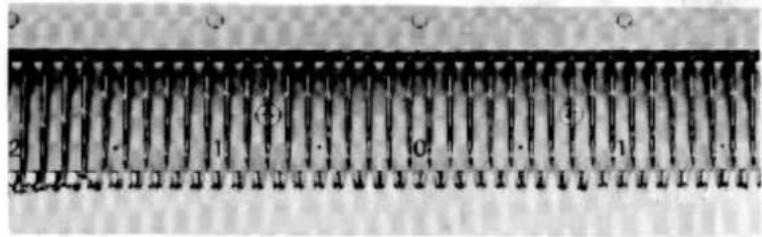
natural_image
Close-up of a mechanical component with evenly spaced pins and mounting holes (no visible text or symbols)If there is NO slack yarn above your carriage while you move it across the last needles of the cast on row - this will be the result - the loops of the last needles at the LEFT will be very small, which is definitely WRONG.
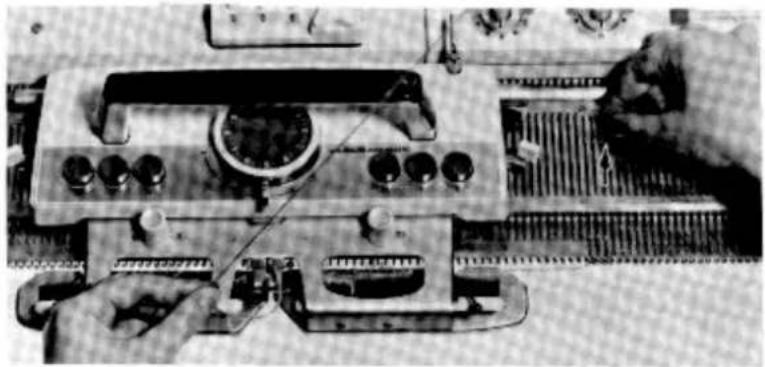
REMEDY - pull down slack yarn from the Take-up Spring with your left hand and hold it down, while with your right thumb, starting with the first small loop INSIDE the row - push back, ONE by ONE the last few needles until ALL NEEDLES are in a line and have the SAME SIZE LOOPS.
The carriage is at the LEFT.
natural_image
Close-up of hands operating a mechanical device with tools and components (no visible text or symbols)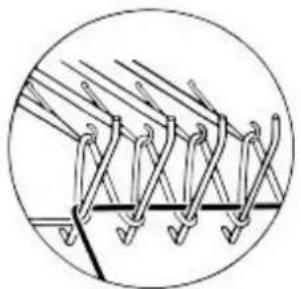
natural_image
Diagram of interlocking metal rods in a circular frame (no text or symbols)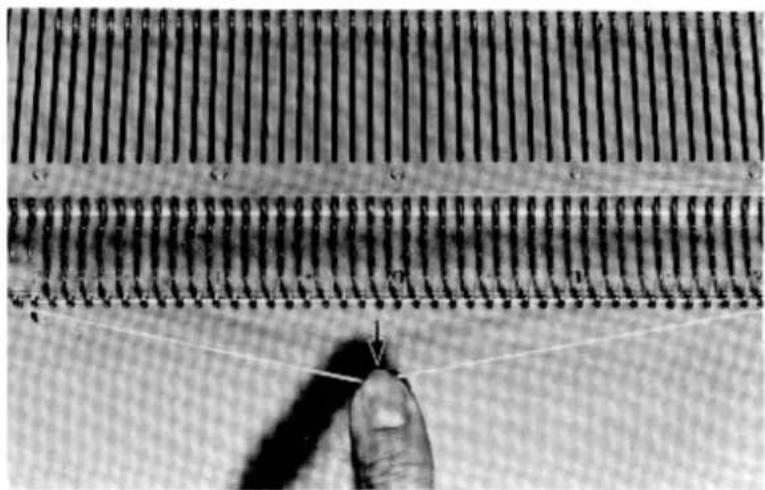
natural_image
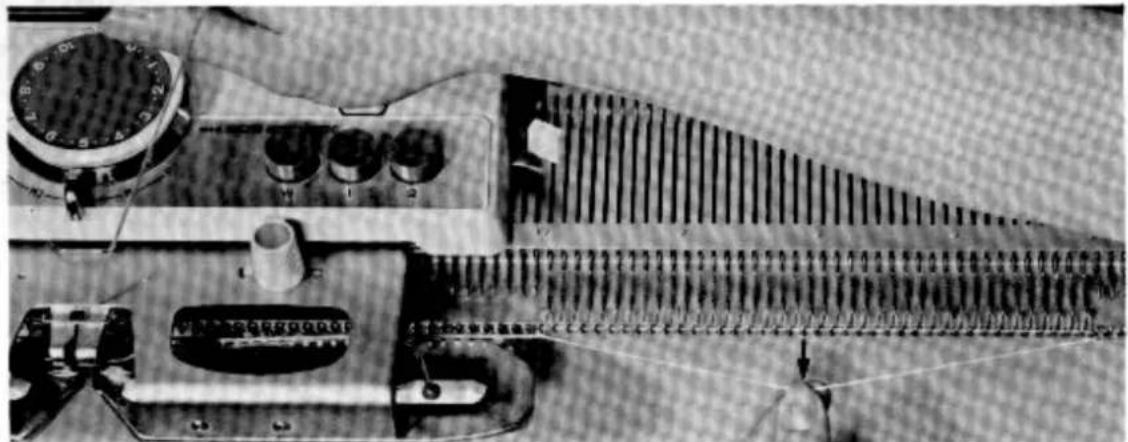
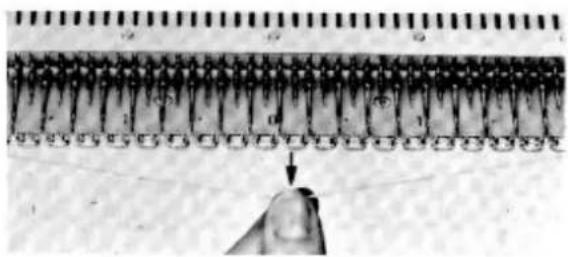
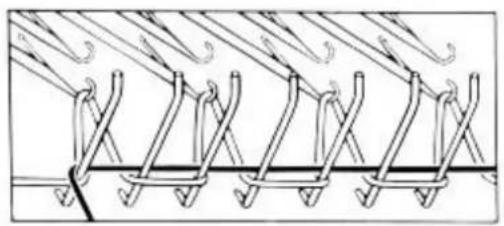
Close-up of a finger pointing to a textured surface with parallel grooves and a white arrow indicating direction (no text or symbols)In your Accessory Case you will find a Nylon Thread. Open it and lay the centre of this Nylon Thread across the yarn loops BETWEEN the needle hooks and the Sinker Gate. Hold BOTH ends together and PULL DOWN FIRMLY so that the Nylon Thread comes BELOW the bottom level of the needle hooks.
As you can see in the diagram, the Nylon Thread must pass AROUND the LAST Sinker Gate pin on each side of the knitting.
PULL BOTH ENDS OF THE NYLON THREAD FIRMLY DOWN, if you do not, the Nylon Thread will catch inside the needle hooks when moving the carriage across and you will have to restart the cast on.
YOU ARE NOW MACHINE KNITTING
natural_image
Close-up of a mechanical device with a coiled spring and control panel (no visible text or symbols)Pull down any slack yarn from behind the Yarn Brake as shown on page 23. Still holding the Nylon Thread FIRMLY DOWN - move the carriage from LEFT to RIGHT until it is well past the last of the needles in 'B' position on the RIGHT hand side.
Move the carriage from RIGHT to LEFT and back again until you have knitted 4 rows and the carriage is on the LEFT side of the machine. Now leave the Nylon Thread.
MAKE SURE THE CARRIAGE ALWAYS PASSES CLEARLY THE NEEDLES IN 'B' POSITION BEFORE RETURNING TO KNIT THE NEXT ROW.
IF . . . 1. Your yarn has been properly wound into a ball suitable for machine knitting.
AND .. 2. If your yarn is suitable for the Tension 7 to which your Tension Dial is set,
AND .. 3. Your yarn has been correctly threaded up,
THEN . . your carriage will move SMOOTHLY AND LIGHTLY ACROSS THE NEEDLES, knitting 40 stitches each time you move across.
natural_image
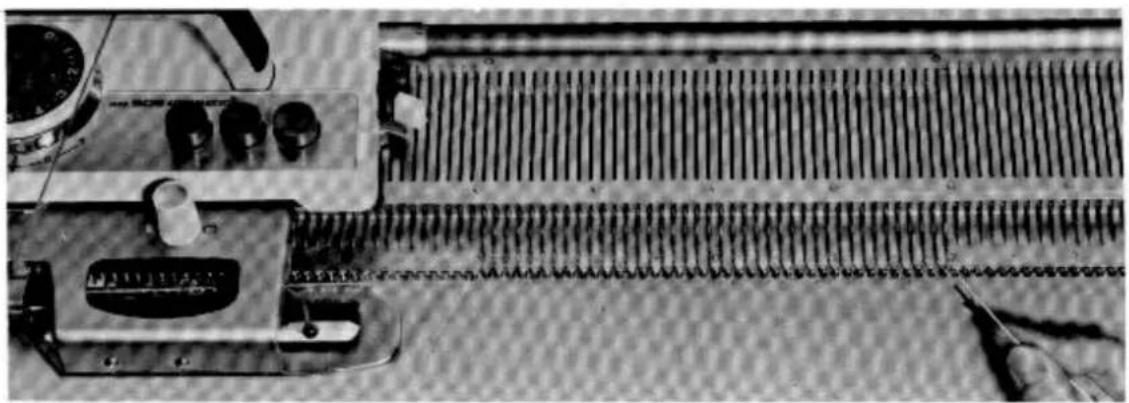
Close-up of a vintage electronic circuit board with measurement instruments and tools (no visible text or symbols)Pull out the Nylon Thread from the cast on row - towards the RIGHT. Take care you NEVER have knots in the Nylon Thread otherwise you will not be able to pull it out of the knitting.
NOW YOU ARE ALL SET FOR MACHINE KNITTING.
Knit 20 or 30 rows. REMEMBER - ALWAYS MOVE THE CARRIAGE ABOUT 2 INCHES PAST THE LAST NEEDLE IN KNITTING POSITION BEFORE YOU CHANGE THE DIRECTION FOR THE NEXT ROW.
PROBLEMS ! If you do have any problems, the General Index at the back of this book will show you just where to look to find the correct answer.
YOU ARE NOW MACHINE KNITTING
Continue knitting until your first ball of yarn has been knitted. This is the best way to get the right rhythm for knitting on your new machine and to gain confidence. DO NOT move the carriage too far beyond the knitting after each row. If you do - the yarn tension becomes too loose and the yarn will tangle around the brush wheels below the Sinker Arm Assembly, thus causing the carriage to jam.
natural_image
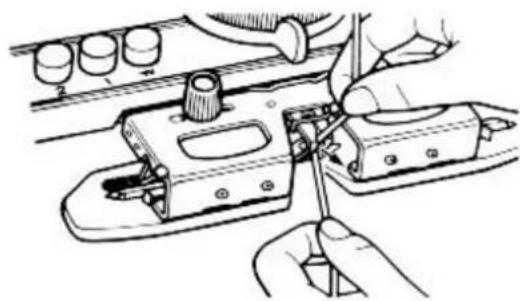
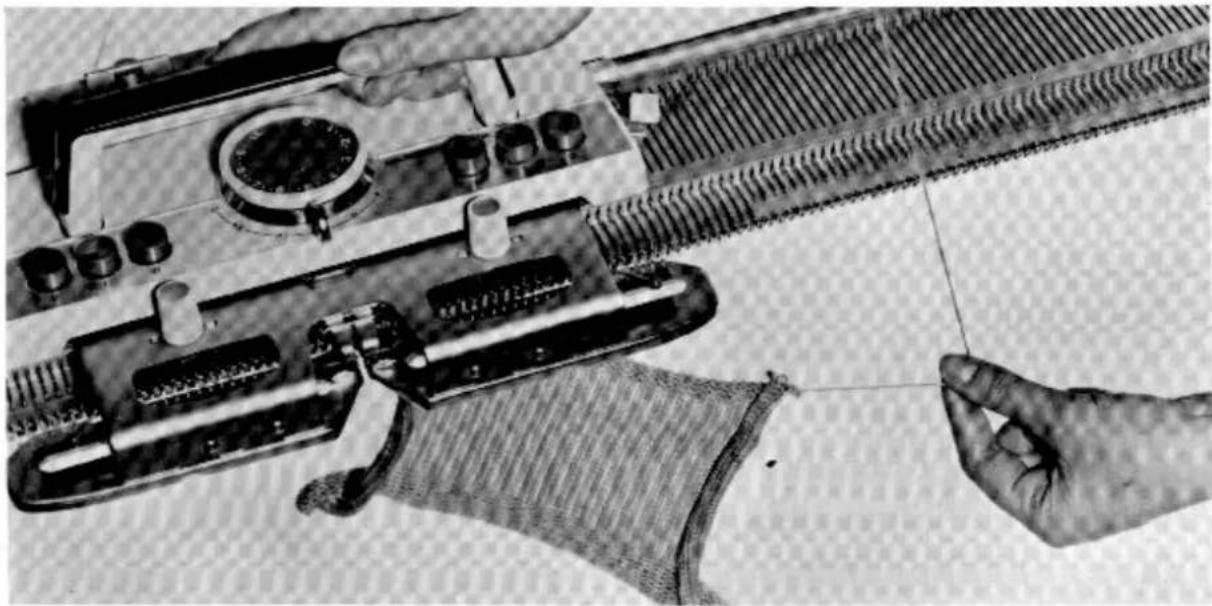
Hand operating a mechanical switch or tool on a device (no visible text or symbols)HOW TO REMOVE THE KNITTING FROM THE MACHINE WITHOUT CASTING OFF OR BINDING OFF.
You can now remove the knitting from the machine.
It is easy and quick to do - just remove the yarn from the Yarn Feeder.
natural_image
Close-up of hands operating a sewing machine tool with a knotted fabric underneath (no visible text or symbols)Hold the yarn away and below the carriage with your left hand and with the right hand move the carriage across the needles in knitting position. The knitting automatically comes away from the needles because there was NO yarn in the Feeder and the knitting will have an open edge. Later you will learn how to cast or bind off.
YOU HAVE NOW COMPLETED THE MOST IMPORTANT PART OF THE FIRST
STEP IN KNITTING.
If you are not sure of all points, it is well worthwhile to go back to the beginning and start again.
So, DO NOT hurry into the next STEP. Rather go through the FIRST section two or three more times and if you encounter any problems just look in the General Index for the correct answer.
natural_image
Line drawing of a woman in a polka-dot dress waving (no text or symbols)THE AUTOMATIC CLOSED EDGE CAST ON

text_image
0 1 2 3 4 5 6 7 8 9 0 10 11 12 13 14 15 16 17There are TWO different methods to make a closed edge cast on - one is automatic and one is made by hand.
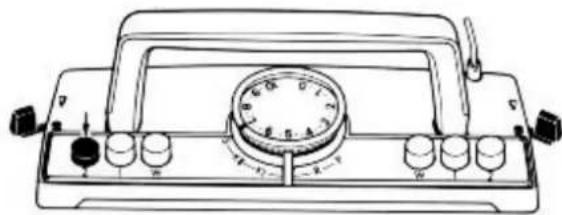
Pattern Panel Setting is: 5 - 0 - 0.
natural_image
Line drawing of a vintage analog multimeter with dial and control knobs (no text or symbols)The carriage setting is:
- Tension Dial to 7.
- Both Side Levers are in FRONT.
-
Push DOWN button 2 at the LEFT side of the carriage.
-
Cam Lever to centre 0.
natural_image
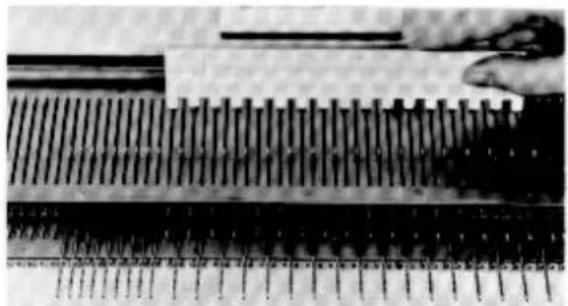
Close-up of a hand holding a thin rod placed over a grid of pins on a surface (no text or symbols visible)Using the straight edge of the Needle Pusher bring 22 needles at the LEFT and 21 needles at the RIGHT of centre from 'A' to 'D' position. You have 43 needles in 'D' position altogether.
Start with the SECOND needle from the RIGHT and push every SECOND needle back from 'D' to 'A' position, using the 1/1 side of the Needle Pusher.
natural_image
Close-up of a mechanical component with a downward arrow indicating a feature (no visible text or symbols)Thread up the yarn.
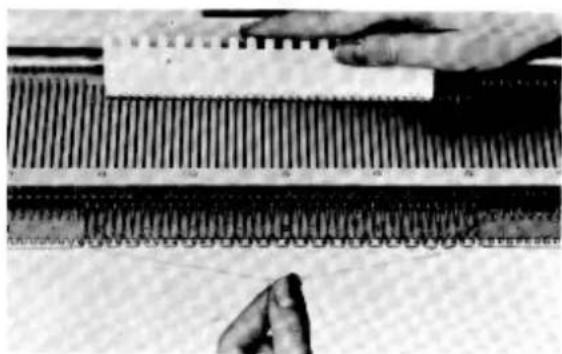
Knit 1 row to the LEFT. Now every SECOND needle has a loop of yarn. Lay the Nylon Thread across these loops and pull it FIRMLY DOWN.
natural_image
Close-up of a hand holding a small object over a textured surface, with no visible text or symbols.Still pulling the Nylon Thread down - with the straight edge of the Needle Pusher bring the rest of the 43 needles up from 'A' to 'B' position. This means in the same line as the needles with the loops.
Knit 4 rows. Pull the Nylon Thread out of the knitting.
Knit another 11 rows. Leave the carriage on the RIGHT side of the knitting. With your first row you have knitted the AUTOMATIC closed edge cast on.
THE CLOSED EDGE CAST ON BY HAND
It is slower than the AUTOMATIC cast on but gives a firmer edge. As it is often used, it is well worth learning.
The pattern panel is set on 5 - 0 - 0.
The carriage is at the RIGHT.
- Tension is set to 7.
- Side Levers are FRONT.
- Button 2 at LEFT is DOWN.
- Cam Lever on 0.
natural_image
Technical line drawing of a mechanical hook assembly with a vehicle on top (no text or symbols)
natural_image
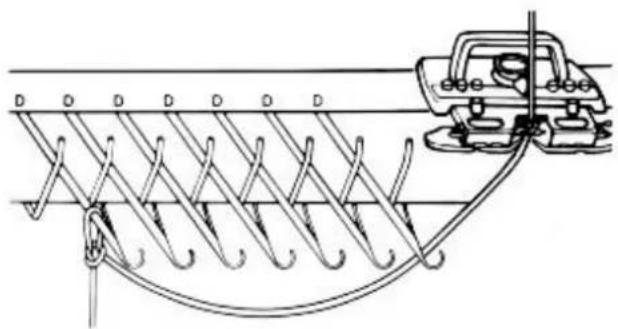
Line drawing of a woman in a polka-dot dress waving (no text or symbols)Thread the yarn through the Yarn Brake and the Yarn Feeder and pull sufficient yarn from below the Yarn Feeder to tie a loose knot around the LAST needle on the LEFT side in 'D' position.
IMPORTANT: ALWAYS start by winding the yarn around the needles from THE OPPOSITE side to the carriage.
natural_image
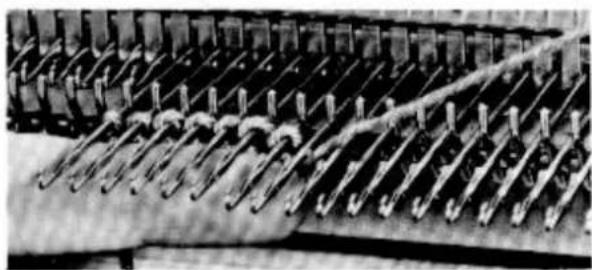
Close-up of a vintage mechanical or electronic device with multiple parallel rods and connectors (no visible text or symbols)Wind the yarn LOOSELY in anti-clockwise direction UNDER and OVER the SECOND needle in 'D' position and continue winding the yarn around the needles towards the RIGHT. As you wind a loop around a needle push it BACK against the Sinker Gate BEHIND the needle latch.
natural_image
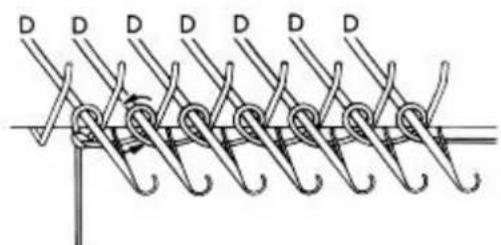
Diagram of a coiled spring with multiple hooks and clamps, no text or symbols presentWhen all needles have a loop, pull down any slack yarn from behind the Yarn Brake until there is NO slack yarn between the carriage and the needles in 'D' position.
natural_image
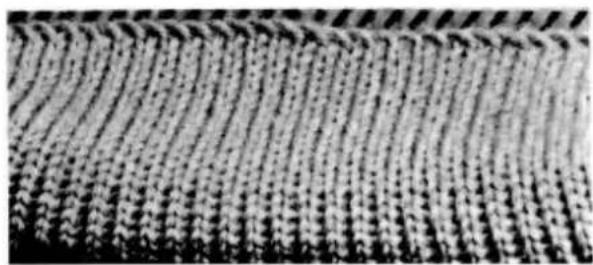
Close-up of a textured fabric surface with parallel grooves and ridges (no text or symbols)Knit 1 row towards the LEFT. All needles have been knitted back to 'B' position. Continue knitting a few rows. You have made a very attractive closed edge cast on.
WHEN STARTING AT THE LEFT, WIND THE YARN ANTI-CLOCKWISE (as shown). WHEN STARTING FROM THE RIGHT (then the carriage is at the LEFT) WIND CLOCKWISE - ALWAYS L O O S E L Y UNDER AND OVER THE NEEDLES.
LAST.NG OFF OR BINDING OFF WITH BIG LOOPS
natural_image
Illustration of a girl in a polka-dot dress waving (no text or symbols)This method of binding or casting off is ONLY suitable when using a thin to medium yarn, as the last row is knitted at a much looser Tension than the rest of the knitting. Only bind or cast off this way when your main Tension is 7 or less. Also, you can only cast off or bind off this way when you cast off a complete row at a time. Another method will be shown later in the book.
Make an open edge cast on over 40 needles and knit a few rows with Tension 7. Finish with the carriage at the RIGHT. Set the Tension to 10, knit 1 row. Break the yarn at the top of the carriage. Pull the yarn down - out of the Yarn Feeder. ALWAYS start casting or binding off on the opposite side of the carriage.
natural_image
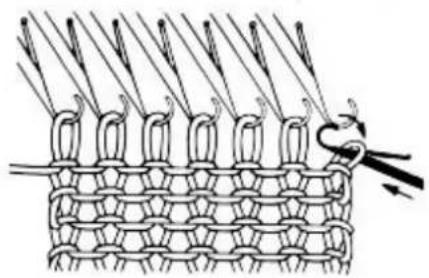
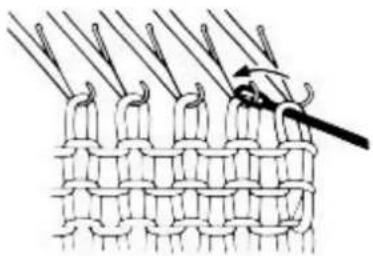
Diagram of a knitted fabric with multiple rings and a hook, no text or symbols presentInsert the Latchet Hook in the FIRST stitch from the RIGHT. Lift the stitch from its needle. Push the Latchet Hook forwards until the loop slides BEHIND THE LATCH.
natural_image
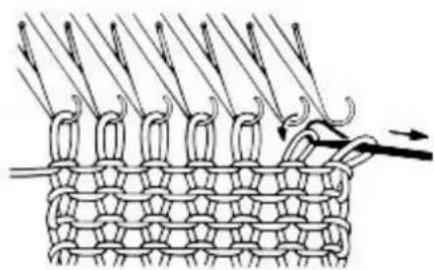
Diagram of a knitted fabric with threads and stitching details (no text or symbols)Remove the SECOND stitch from its needle but keep it IN the Latchet Hook. DO NOT let it slide behind the latch. Pull the Latchet Hook backwards.
natural_image
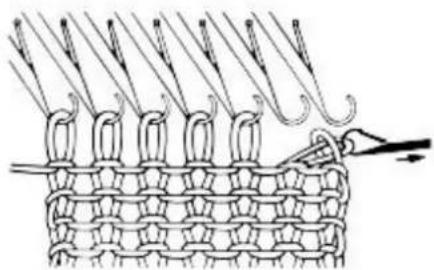
Diagram of a knotted fabric structure with threads and a hook, no text or symbols presentWhen pulling the Latchet Hook backwards, you pull the stitch from the hook through the loop which is behind the latch.
Move the Latchet Hook forwards until the remaining loop slides behind the latch again. Now remove the third stitch from its needle and pull it through the loop which is behind the latch.
natural_image
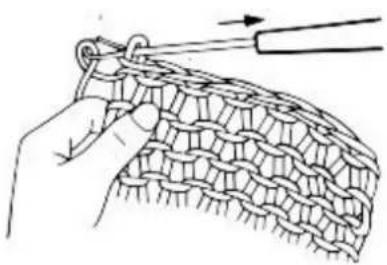
Illustration of a hand crocheted with a hook and a pointer (no text or symbols)Continue this way until the binding or casting off of the whole row is completed. When you have the last loop in the Latchet Hook, pull the rest of the yarn through the loop to bind off the knitting completely.
You can start casting or binding off from the LEFT but then you knit the last row with the Tension 10 from LEFT to RIGHT and start the binding off with the first stitch from the LEFT.
HOW TO JOIN YARN DURING KNITTING
natural_image
Line drawing of a woman in a polka-dot dress waving (no text or symbols)To start a new ball of yarn is a very simple matter. When one ball of yarn is almost finished, pull the rest of the yarn out of the Feeder and the Yarn Brake from below the Yarn Feeder and leave this end hanging down from the side of the knitting. Thread the end of the new ball through the Yarn Brake and the Yarn Feeder, tie the end around the Table Clamp.
CHANGING THE YARN WITHOUT BREAKING IT
If you wish to knit stripes - it is very easy to change the colour in the Yarn Feeder.
natural_image
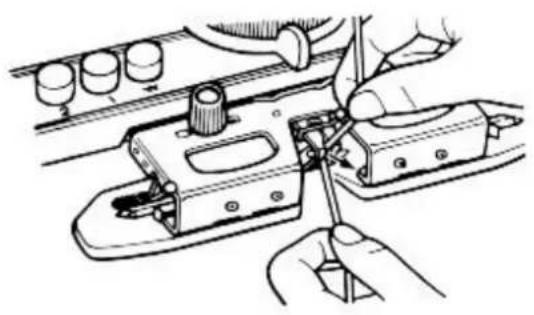
Technical line drawing of hands using a tool to adjust or install a mechanical component (no text or symbols visible)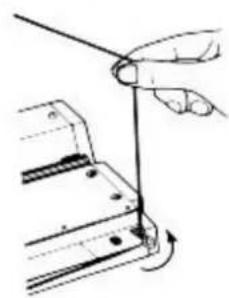
natural_image
Hand holding a thin wire or rod inserted into a mechanical component, with motion arrows indicating rotation (no text or symbols)Remove colour 1 from the Yarn Feeder and hang it around the RIGHT side Yarn Clip. Thread up colour 2, but through the LEFT hand parts of the Yarn Brake. Pull the thread inside the Yarn Feeder and fasten the end onto the RIGHT side Table Clamp. Continue knitting.
When you wish to knit colour 1 and the carriage is on the opposite side of the machine - remove the carriage from the needle bed and set it back onto the needle bed on the other side. Take care both Guide Rails fit properly.
STEAMING A FABRIC
natural_image
Close-up of a textured fabric with a grid pattern and small protrusions (no text or symbols)IMPORTANT - Please follow very carefully.
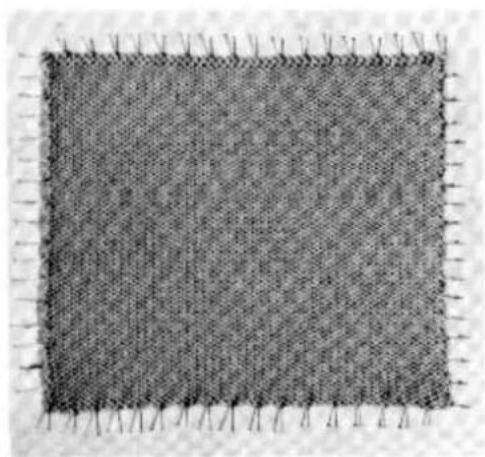
Lay the knitting on the pressing table - wrong side facing and without stretching, pin it out to the correct size using 1 pin per half inch.
Lay a wet cloth on top of the knitting and move the hot iron across the wet cloth. DO NOT PRESS the iron onto the cloth, just slide it across and let the steam penetrate into the knitting.
Remove the cloth and let the knitting dry. Remove the pins. Careful steaming helps to give your garment that look of perfection.
GRAFTING
Quick and easy to do and it is used for sewing together almost any type of open edge knitting. After a little practice you will graft stitches together so well that you cannot afterwards see where your knitwear has been joined.
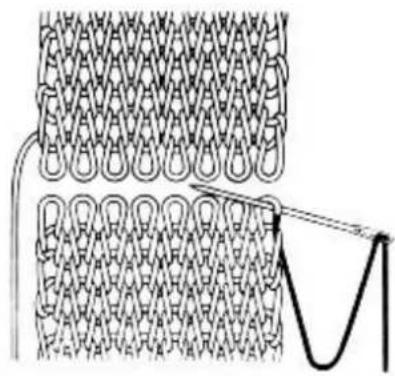
natural_image
Diagram of knitted fabric pattern with a sewing tool, showing interwoven strands and stitching (no text or symbols)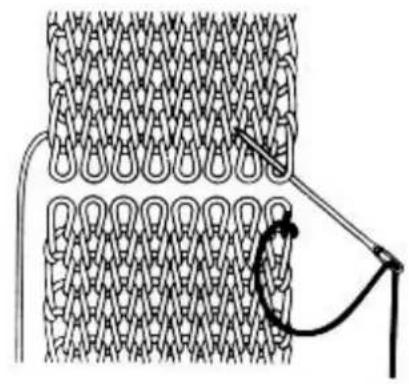
natural_image
Diagram of a knitted fabric pattern with a hook and rope, no text or symbols present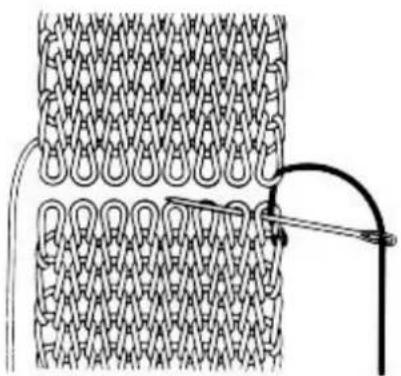
natural_image
Diagram of a knotted fabric with interlocking loops and a hook, no text or symbols present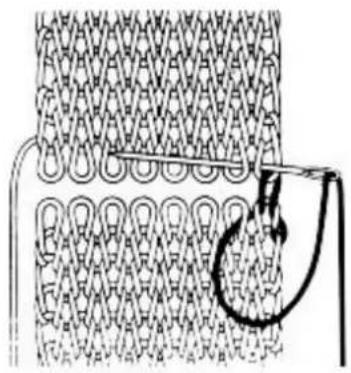
natural_image
Diagram of a knitted fabric with a curved arrow indicating a seam or knot (no text or symbols present)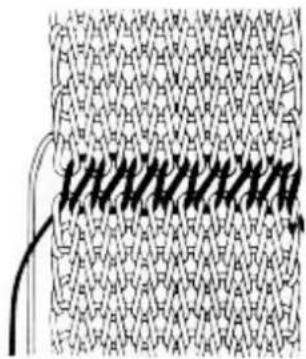
natural_image
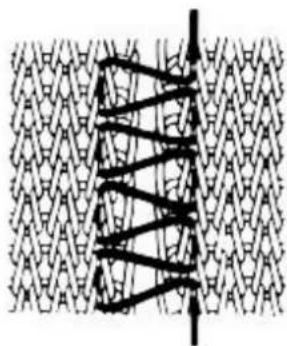
Close-up of a woven fabric pattern with interlocking hexagonal shapes and a curved seam (no text or symbols)THE MATTRESS STITCH
For hand sewing your side edges together. This mattress stitch is also very useful for sewing together skirts or dress panels or any other panels, such as trouser-legs for children's trouser suits.
natural_image
Diagram of a zigzag pattern with arrows indicating direction, no text or symbols present
natural_image
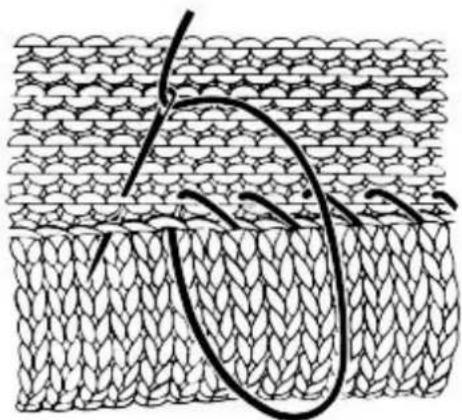
Line drawing of a woman in a polka-dot dress and turtleneck, gesturing with one hand (no text or symbols)SEWING UP A HEM
Fold up the required length of hem. Take care to join the hem to the same row of knitting, otherwise your hem will not be straight.
natural_image
Diagram of a knitted fabric with visible fibers and a curved wire (no text or symbols)
natural_image
Illustration of a woman in a polka-dot dress and blouse, waving with her index finger (no text or symbols)CIRCULAR CORD KNITTING
THIS IS A VERY USEFUL TRIMMING FOR ALL NECKLINES.
IT HAS MANY OTHER USES AND IS VERY EASY TO KNIT.
natural_image
Illustration of a woman in a polka-dot dress waving (no text or symbols)
text_image
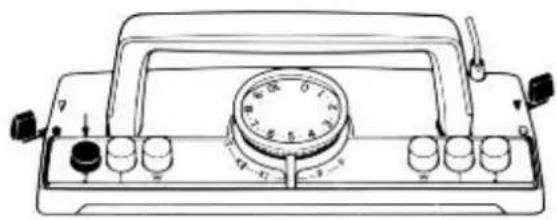
Diagram of a three-pin rotary selector with labeled buttons and display screenCarriage is at the RIGHT.
Pattern Panel setting: 5 - 8 - 0.
natural_image
Line drawing of a vintage analog instrument with dial and control knobs (no text or symbols)Carriage Setting:
- Tension Dial to 7.
- Side Lever at RIGHT back to ▼ position, leave Side Lever at LEFT in ● position.
- Push DOWN button 2 at LEFT - all other buttons are UP.
- Set Cam Lever on S.
text_image
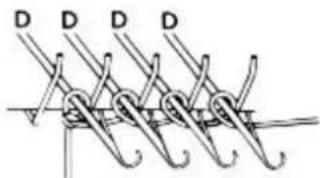
D D D D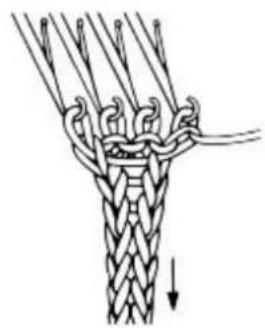
natural_image
Diagram of a rope knot with a downward arrow indicating direction (no text or symbols)Bring 4 needles RIGHT of centre 0 from 'A' to 'D' position. Thread up the yarn and make a knot around the last needle at the LEFT. Wind yarn around other needles. Pull down any slack yarn from behind the Yarn Brake. Knit 1 row towards the LEFT.
The needles have been knitted back to 'B' position.
Move the carriage to the RIGHT past the 4 needles and the thread is in front of the Sinker Gate. This is correct.
Continue knitting - always pulling lightly on the cord at the same time.
HOW TO MAKE FRINGES
natural_image
Diagram showing a rope tied to a fiber with an arrow indicating direction (no text or symbols)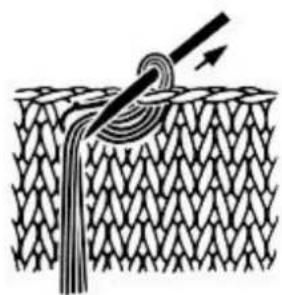
natural_image
Diagram of a rope being inserted into a woven material, showing texture and force direction (no text or symbols)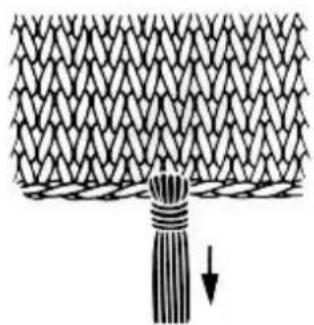
natural_image
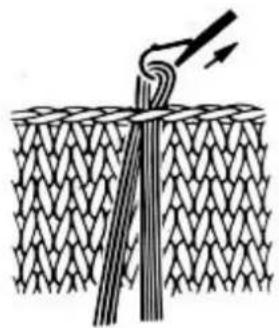
Diagram of a tassel being inserted into a mesh structure (no text or symbols)Take 4 or more threads, depending on the thickness of fringe you prefer, and cut them about 10 inches or longer according to taste.
Make your fringe as shown in the diagram 1 to 3, placing the threads as close together as you wish. Trim the edges.
STITCH SIZES AND TENSION TESTING
When doing hand knitting it is important to use the right size needles for each yarn. This is different with the knitting machine. You do not need to have different sized needles. You ONLY have to change the TENSION DIAL NUMBER. The higher the number on the Tension Dial, the bigger the stitch will be, the smaller the number on the Tension Dial, the smaller the stitch will be.
GENERAL TENSION GUIDE
Thick soft yarn
Medium 3 Ply to 4 Ply yarn
2 Ply or thin 3 Ply yarn
Fine cotton or crochet yarn
Tension Number 9 upwards
Tension Number 6 to 9
Tension Number 3 to 6
Tension Number up to 4
A very thin yarn on tension 2-3 will knit 8 to 9 stitches (needles) to the inch, or a total WIDTH of 23 inches over 200 needles.
A thick soft yarn knitted on tension 10 will give about 5 stitches (needles) to the inch, or a total WIDTH of 49 inches over 200 needles. Very thick yarn should be knitted over every second needle.
Cast on over 40 needles and start at the tension number recommended above for your yarn. Knit a few rows or enough to see if the tension is too big or too small. If it is too loose then try a tension smaller and knit a few rows. If it is too tight try a larger tension number.
Continue in this way until you find the tension number that is most suitable for the yarn and also for the type of garment you wish to make,
A sweater is usually knitted at a tension one or even two points looser than you would use for a skirt. The reason is that a sweater is comfortable when it has more stretch, but a skirt will stretch out of shape unless the tension is a little tighter. Anyway, tension setting is usually a matter of yarn thickness.
natural_image
Line drawing of a woman in a polka-dot dress waving (no text or symbols)When yarns are dyed in the factories, the natural oils are washed out by the chemicals.
This may make the yarns (especially the thicker yarns) hard and heavier to knit.
Waxing helps to replace the natural oils and makes the yarn much easier and quicker to knit.
HOW TO MEASURE A TENSION SWATCH
It is easy to make your knitwear fit perfectly, quick too, and very simple.
Every type of yarn is different and sometimes even the dye can make a difference to the thickness of the same type of yarn.
So, to make sure your garment will always fit perfectly, it is essential to make a tension swatch before starting it.
First test to see which tension number is most suitable for the yarn.
With the correct stitch size, knit 40 rows over 60 needles and remove the knitting from the machine.
natural_image
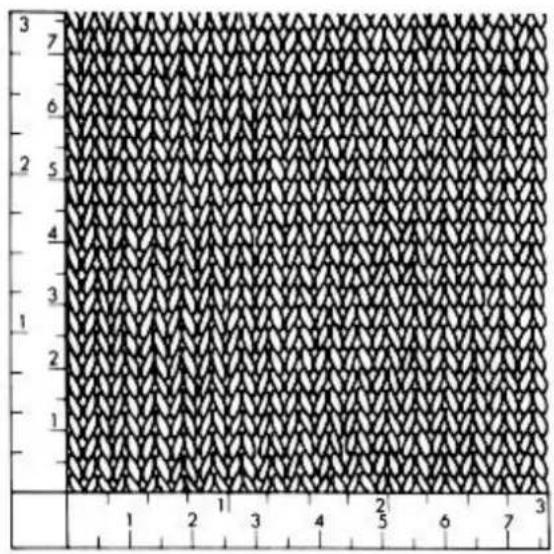
Pattern of interlocking triangular shapes on a grid background, no text or symbols presentPull the swatch a little to enable the stitches to close up slightly.
Leave the swatch for a few hours, then pin the edges of the swatch — without stretching them — onto the pressing table.
Take a metal ruler and count how many stitches and rows you have over a 2 inch square.
natural_image
Illustration of a woman in a polka-dot dress and dress, gesturing with her finger (no text or symbols present)On this picture we have
2 inches give 11 stitches
2 inches give 15 rows
It is very easy to calculate how many rows and stitches you need to knit for your own pattern instructions.
If the half of the bust width is 18 inches - then you need to cast on 99 stitches, as 2 inches occur 9 times in 18 inches and 11 × 9 is 99 stitches.
Always try to start the garment with an even number of stitches, in this case 98 or 100 stitches.
If the length of the garment should be 20 inches — you need to knit 150 rows, as there are 15 rows to 2 inches and 10 times 15 is 150 rows.
Here they are!
Some special starter designs that need no shaping
SO EASY-just knit'n'stitch up
NOW IT'S TIME TO PRACTICE ALL YOU'VE LEARNT.
So - GET KNITTING - show off your new skill to your family and friends because you're all ready to knit some simple but exciting garments and novelties on your wonderful NEW MACHINE.
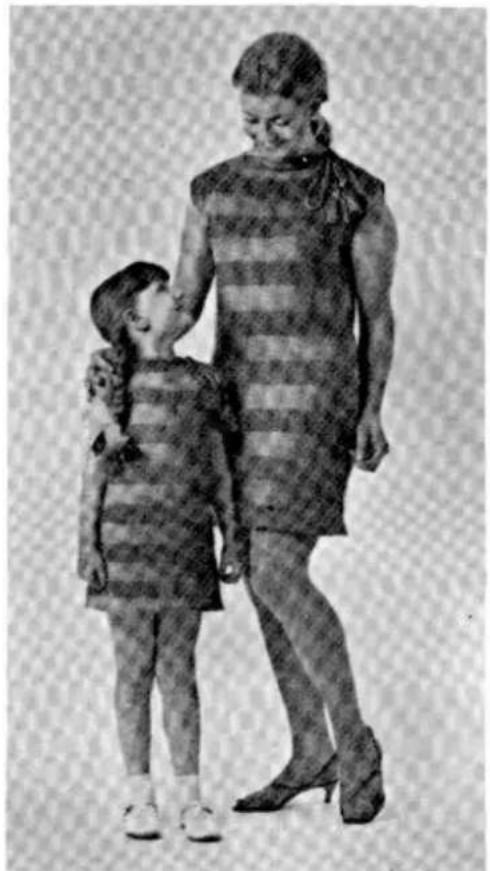
Just look at the super selection we've designed for you. Choose and knit the ones which take your fancy .... It's good practice before you progress to the interesting instructions on the pages which follow.
natural_image
Black-and-white photo of a woman and a young girl standing together, no text or symbols visible.U-8
U-9
natural_image
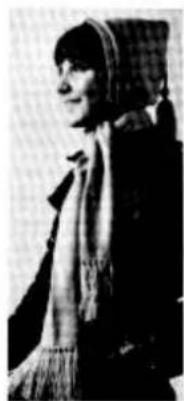
Black-and-white portrait of a person wearing a patterned scarf (no visible text or symbols)U-7
natural_image
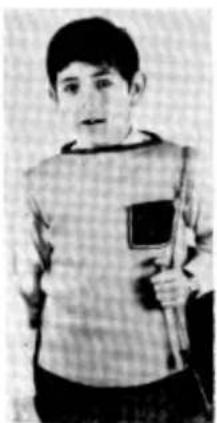
Black-and-white photo of a young boy holding a tablet and a small object (no visible text or symbols)U-6
natural_image
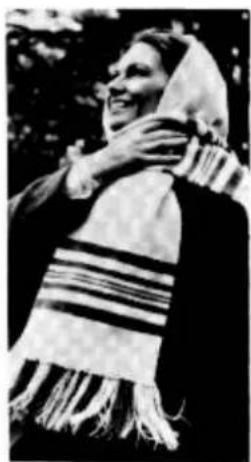
Black-and-white photo of a smiling person wearing a traditional scarf and tassels (no visible text or symbols)U-1
U-5
natural_image
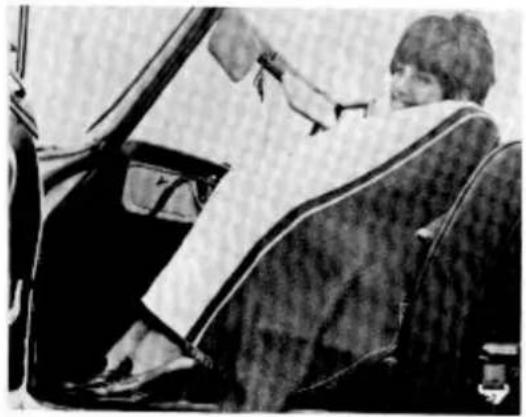
Black-and-white photo of a person seated in a car, wearing a seatbelt and holding a device (no visible text or symbols)U-3
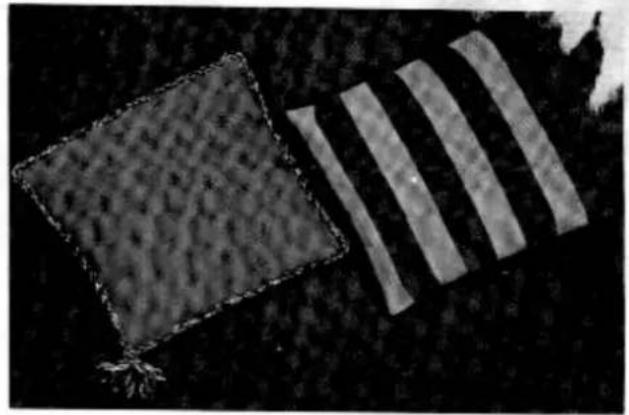
natural_image
Black-and-white photo of a textured square with four vertical striped strips on dark background (no text or symbols)U-10,11 & 12
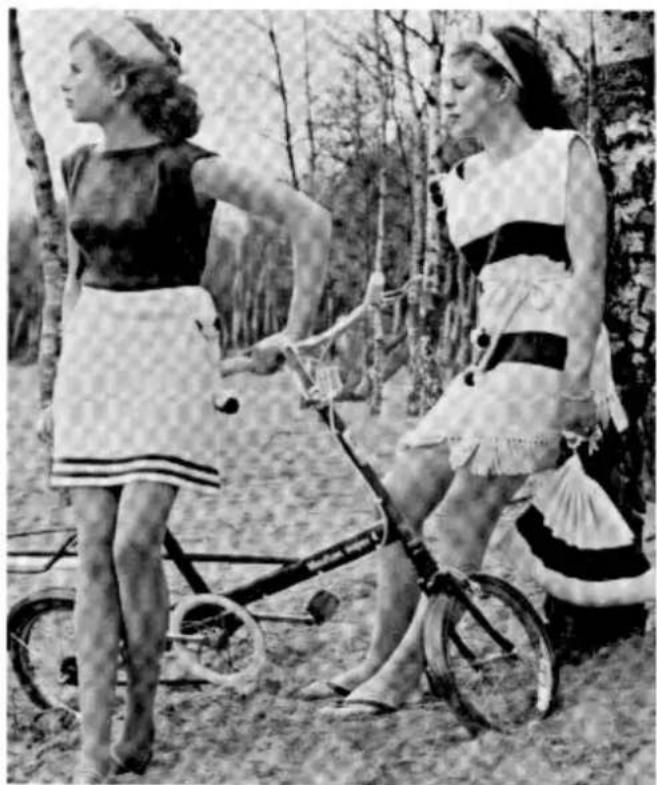
natural_image
Black-and-white photo of two women in vintage dresses standing beside a bicycle in a wooded area (no visible text or symbols)U-13 & 14
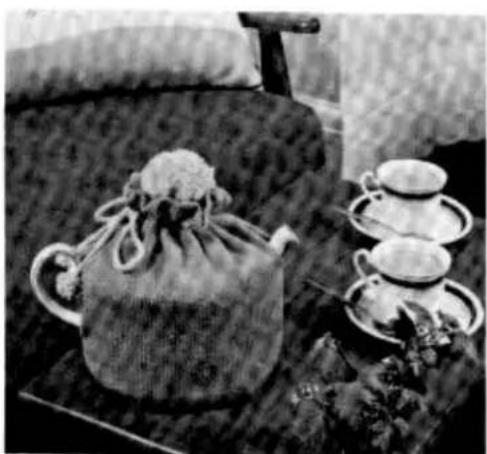
natural_image
Black-and-white photo of a traditional tea set with teapot, cups, and cloth (no visible text or symbols)U-15
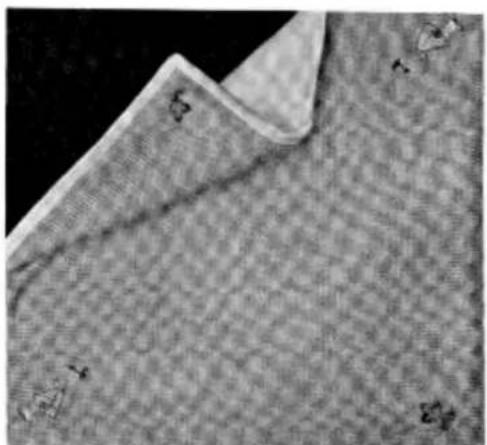
natural_image
Close-up of a textured fabric surface with no visible text or symbolsU-4
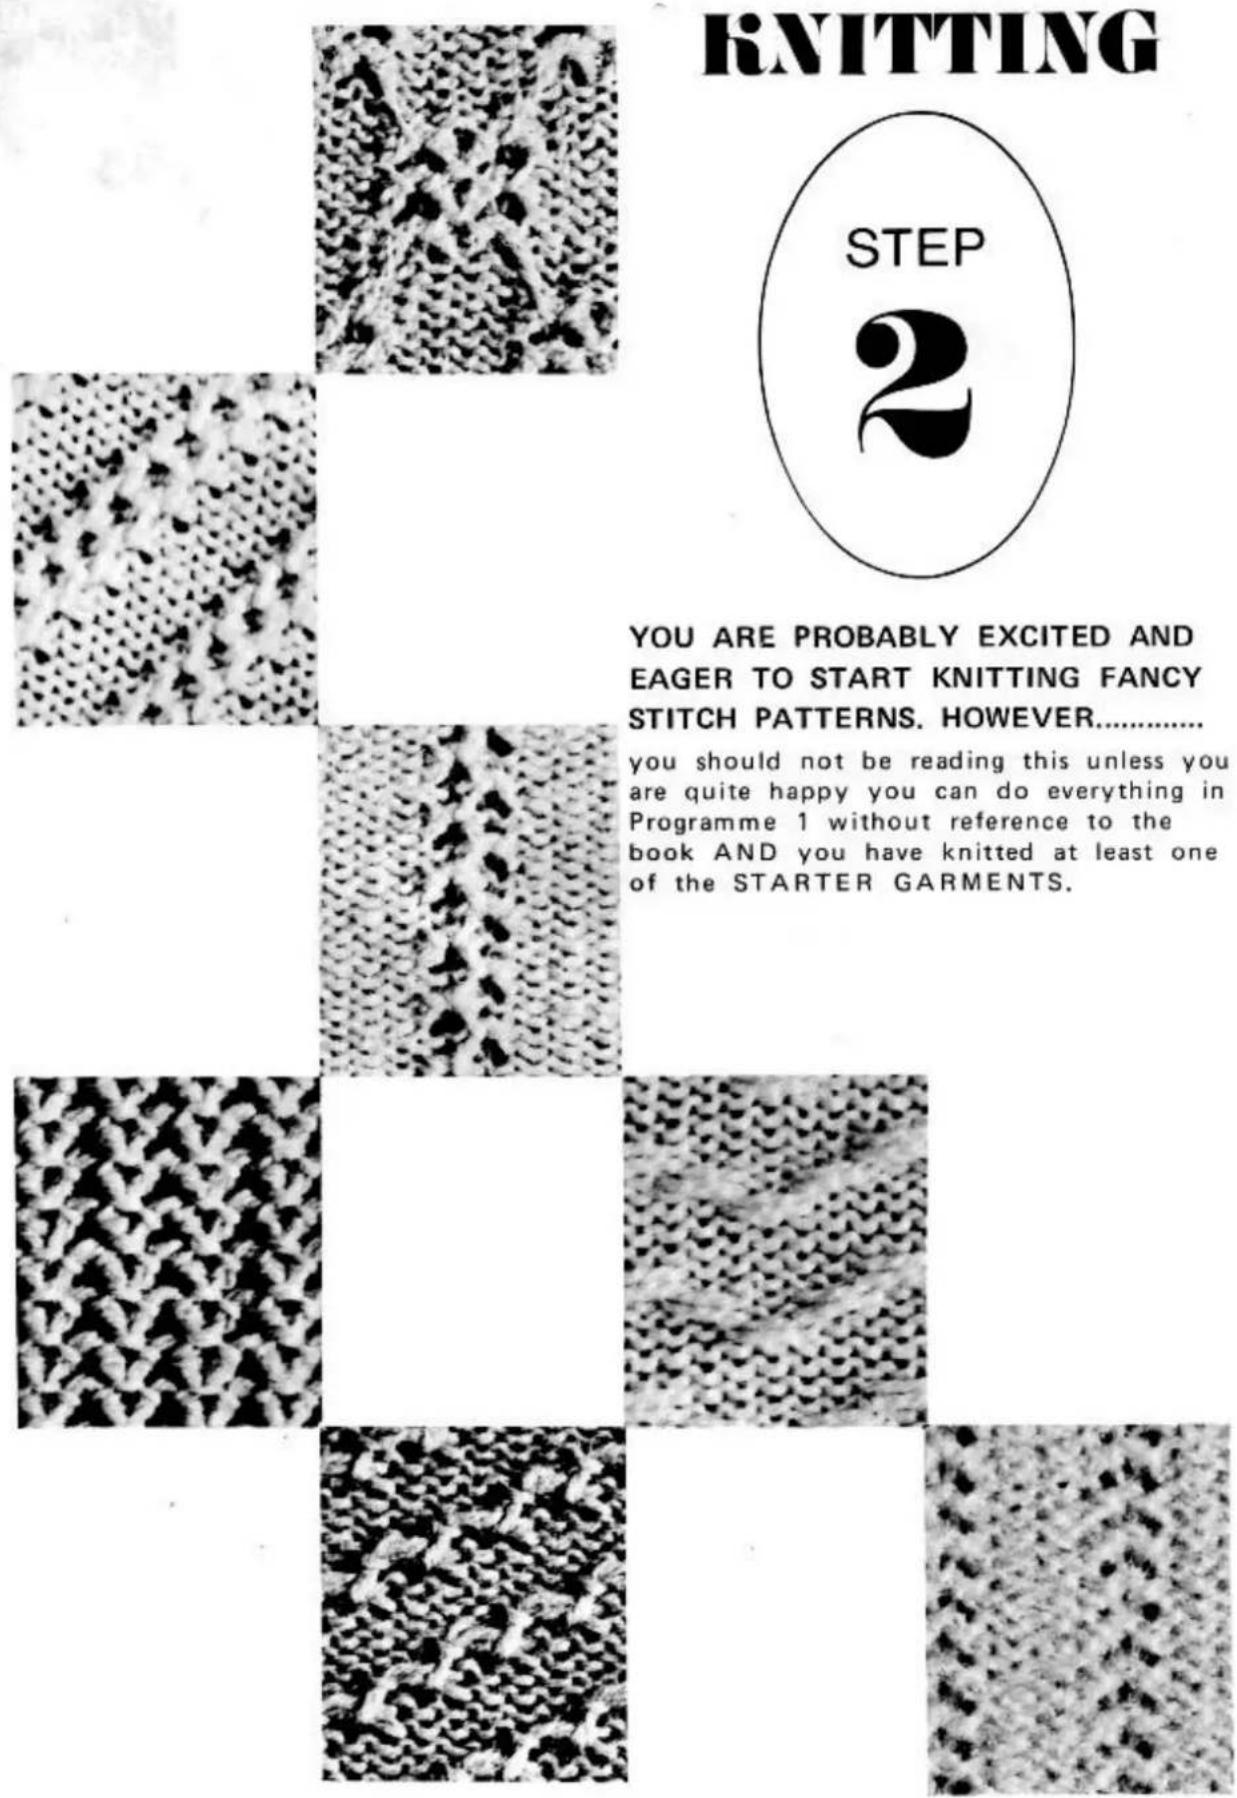
STEP
2
you should not be reading this unless you are quite happy you can do everything in Programme 1 without reference to the book AND you have knitted at least one of the STARTER GARMENTS.
READING THE PATTERN CARDS
The instructions of the pattern cards are always read from LEFT to RIGHT and also set this way on the machine.
The NEW pattern diagrams are easy to follow. They are set out in simple and easy to follow columns. In order to explain how to ready them, I have divided the diagram below into 12 main groups.
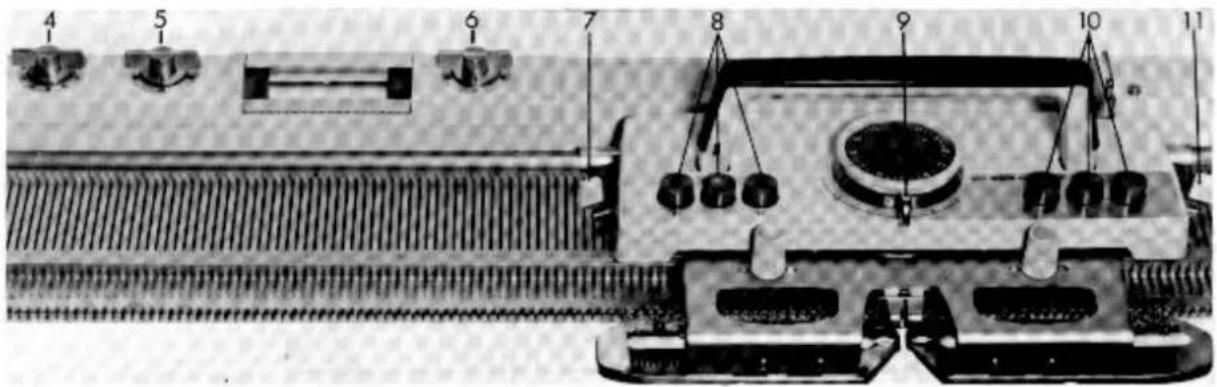
text_image
Labeled diagram of an electronic device with numbered components, likely a circuit or sensor assembly.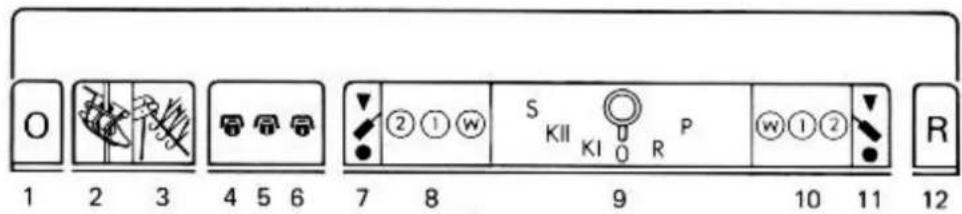
text_image
O 1 2 3 4 5 6 7 8 9 10 11 R ②①⑦ S KII KI O R P w①② ● 121, 0 - shows you the number of steps needed to achieve one pattern.
2. This diagram is for the yarn knitted through the Yarn Feeder. As long as you knit with one colour only, the number 1 will be shown in this column. When you have to change to a second colour in the Yarn Feeder, then you have a 2 in place of the 1.
3. This column will only be used for Fair Isle patterns and for Weaving In patterns, which I shall explain later.
4. This column shows you to which position the Zig Zag button should be set before you knit the next pattern setting.
5. This column shows you to which needle setting you must set the LEFT side Needle Selector button before you start knitting the next row.
6. This shows you to which needle setting you must set the RIGHT side Needle Selector button before you start knitting the next row.
7. Shows you where the LEFT Side Lever should be set.
8. Shows you which of the 3 buttons on the LEFT side of the carriage must be pushed DOWN before continuing knitting.
9. Shows you to which of the 6 different positions the Cam Lever must be set.
10. Shows you which of the 3 buttons on the RIGHT side of the carriage must be pushed DOWN before you continue knitting.
11. Shows you where the RIGHT Side Lever should be set.
12. Shows the number of rows to knit of the actual pattern setting.
KNITTING YOUR FIRST STITCH PATTERNS
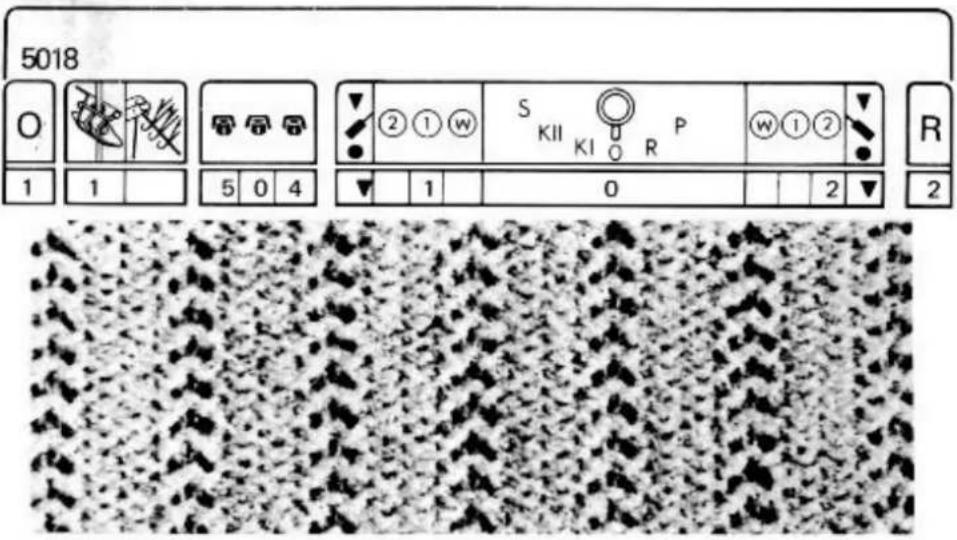
text_image
5018 O 1 1 5 0 4 ② ① w S KII KI R P W ① ② R ▼ 1 0 2 2Knit about 32 rows of pattern. Push button 2 on the LEFT side of the carriage HALF way DOWN to release button 1. Knit 4 more rows. Because you released button 1, the last rows will be knitted in plain stocking stitch.
text_image
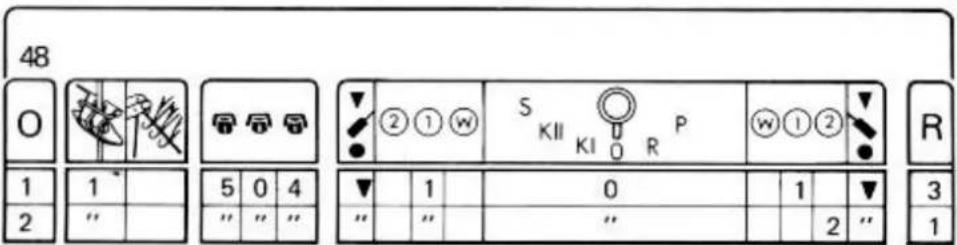
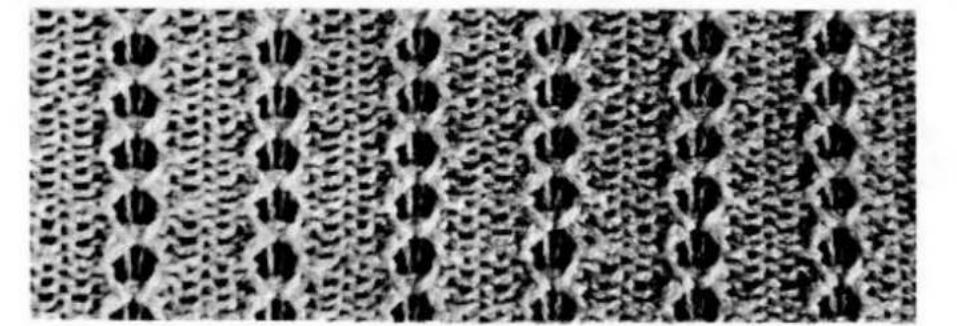
48 O 1 2 3 1 5 0 4 5 0 4 5 0 4 5 0 4 5 0 4 5 0 4 5 0 4 5 0 4 5 0 4 5 0 4 5 0 4 5 0 4 5 0 4 5 0 4 5 0 4 5 0 4 5 0 4 5 1 1 1 1 1 1 1 1 1 1 1 1 1 1 1 1 1Knit about 40 rows of this pattern. Leave button 2 at the RIGHT side of the carriage DOWN and push DOWN button 2 on the LEFT side of the carriage. This way you will knit the next 4 rows in plain stocking stitch.
natural_image
Close-up of a textured fabric with repeating diamond patterns (no text or symbols)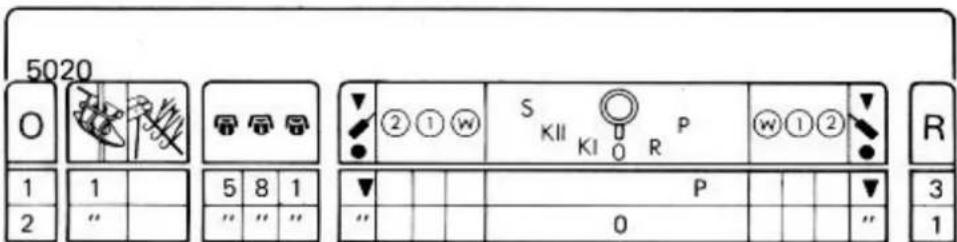
text_image
5020 O 1 2 1 " " " 5 8 1 " " " 2 1 W S KII KI R P W 1 2 R ▼ P " " " 0 3 1This card has no settings for the buttons on the carriage. This means ALL buttons on the LEFT and RIGHT side of the carriage are UP.
natural_image
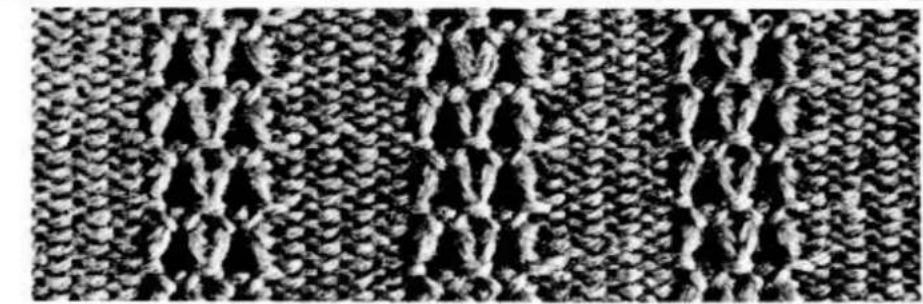
Close-up of a textured fabric with repeating geometric patterns (no text or symbols)Knit about 40 rows of the pattern. Leave the Cam Lever on 0 and knit 4 rows. With the Cam Lever on 0, the needles will NOT pick up the stitches but knit them.
USING THE ZIG-ZAG BUTTON
5019
text_image
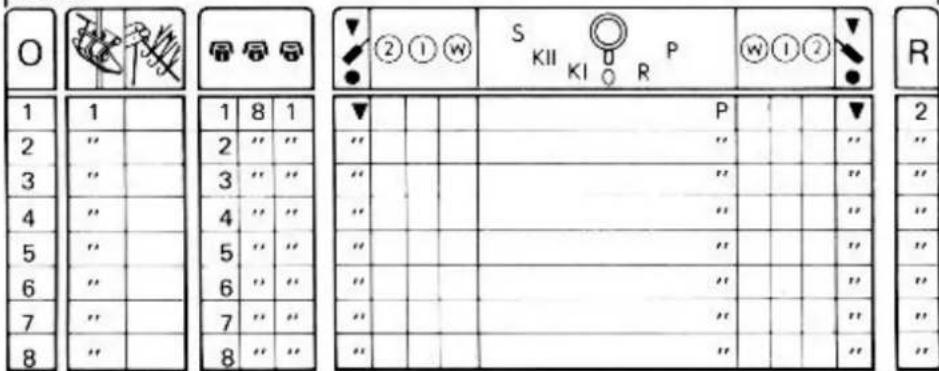
O 1 2 3 4 5 6 7 8 1 8 1 2 " " 3 " " 4 " " 5 " " 6 " " 7 " " 8 " " ▼ ▼ ▼ ▼ ▼ ▼ ▼ ▼ ▼ ▼ ▼ ▼ ▼ ▼ ▼ ▼ ▼ ▼ ▼ ▼ ▼ ▼ ▼ ▼ ▼ ▼ ▼ ▼ ▼ ▼ ▼ ▼ ▼ ▼ ▼ ▼ ▼ ▼ ▼ ▼ ▼ ▼ ▼ ▼ ▼ ▼ ▼ ▼ ▼ ▼ ▼Until here you have been knitting with the same pattern needles all the time. From this card on, we will start moving the pattern needles by using the Zig Zag button on the Pattern Panel.
natural_image
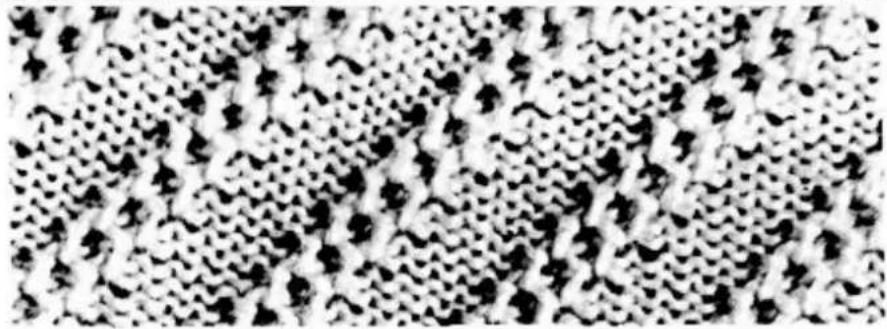
Abstract black-and-white pattern with repeating diamond-like shapes (no text or symbols)You can only turn the Zig Zag button from LEFT to RIGHT and back, not around. Knit the pattern card twice and set the Cam Lever back to 0. Knit another 4 rows plain stocking stitch.
5022
| O | 2 1 W | S KII KI O R P | W 1 2 | R | ||||||||||||
| 1 | 1 | 1 | 8 | 1 | ▼ | P | ▼ | 2 | ||||||||
| 2 | " | 2 | " | " | " | " | " | " | ||||||||
| 3 | " | 3 | " | " | " | " | " | " | ||||||||
| 4 | " | 4 | " | " | " | " | " | " | ||||||||
| 55 | " | 5 | " | " | " | " | " | " | ||||||||
| 6 | " | 6 | " | " | " | " | " | " | ||||||||
| 7 | " | 7 | " | " | " | " | " | " | ||||||||
| 8 | " | 8 | " | " | " | " | " | " | ||||||||
| 9 | " | 7 | " | " | " | " | " | " | ||||||||
| 10 | " | 6 | " | " | " | " | " | " | ||||||||
| 11 | " | 5 | " | " | " | " | " | " | ||||||||
| 12 | " | 4 | " | " | " | " | " | " | ||||||||
| 13 | " | 3 | " | " | " | " | " | " | ||||||||
| 14 | " | 2 | " " | " | " | " " | ||||||||||
In this pattern card you will find the FIRST Zig Zag pattern instruction.
Knit the pattern card twice and set the Cam Lever back on 0. Knit 4 rows.
natural_image
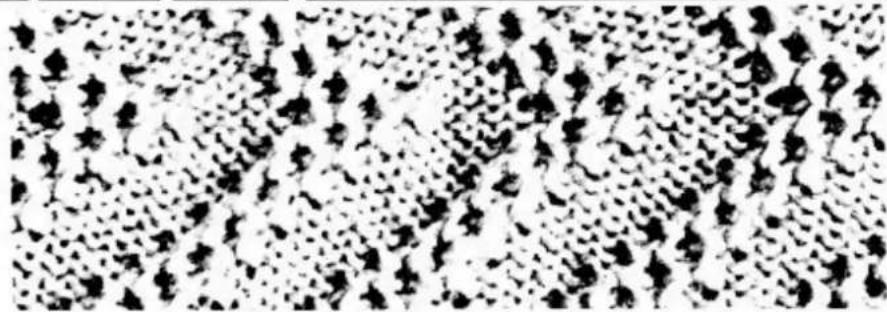
Abstract black-and-white pattern with no discernible text, symbols, or structured elementsTRANSFERRING A STITCH PATTERN
5021
| O | 2 1 W | S KII KI R P | W 1 2 | R | |||||||||||
| 1 | 1 | 5 | 8 | 1 | ▼ | P | ▼ | 3 | |||||||
| 2 | " | " | " | " | " | 0 | " | 1 | |||||||
| 3 | " | " | " | " | " | P | " | 3 | |||||||
| 4 | " | " | " | " | " | 0 | " | 1 | |||||||
| 5 | " | " | " | " | " | P | " | 3 | |||||||
| 6 | " | " | " | " | " | 0 | " | 1 | |||||||
| 7 | " | 1 | " | " | " | P | " | 3 | |||||||
| 8 | " | " | " | " | " | 0 | " | 1 | |||||||
| 9 | " | " | " | " | " | P | " | 3 | |||||||
| 10 | " | " | " | " | " | 0 | " | 1 | |||||||
| 11 | " | " | " | " | " | P | " | 3 | |||||||
| 12 | " | " | " | " | " | 0 | " " | 1 | |||||||
natural_image
Line drawing of a woman in a polka-dot dress waving (no text or symbols)On this pattern card you see that the Cam Lever is moved after every 3rd row to 0 position. This will knit off the gathered stitches, and after 3 times pattern knitting you transfer the pattern onto different needles.
Knit this card twice and leave the Cam Lever in 0 position. Knit 4 rows of plain stocking stitch.
natural_image
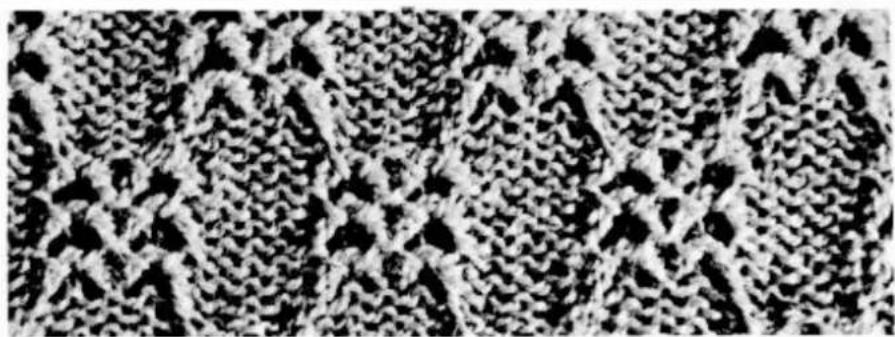
Close-up of a textured, knotted fabric pattern with no visible text or symbols85

text_image
O 1 2 5 0 3 7 " " ▼②①W S KII KI R P W①② ▼ ▼ S " " " " " " " " R R 2 " "This instruction shows you the Cam Lever set to S position which is for the pattern we call slip stitch. The thread remains in front of the knitting and these needles will not knit.
Knit this card 40 rows and then set the Cam Lever to 0 position. Knit 4 rows plain stocking stitch.
natural_image
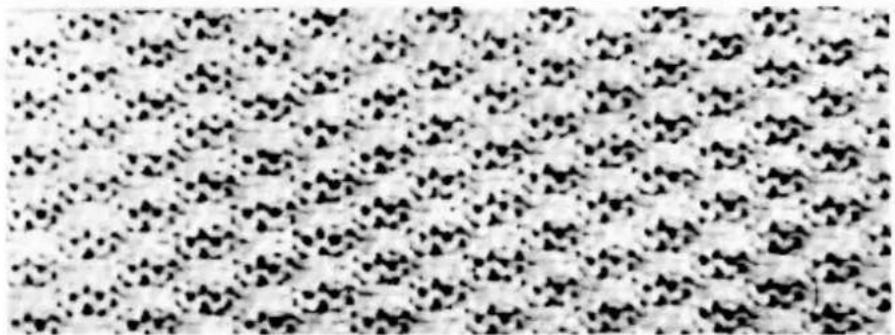
Microscopic view of a granular or cellular structure with repeating dark spots on a light background (no text or symbols)I am sure you enjoyed pattern knitting and the easy way it could be achieved. There are many more possibilities for knitting patterns, like knitting with many colours - Tuck Stitch patterns, Fair Isle patterns, Weaving patterns and Lace patterns. But all this I shall explain later.
The patterns 5021, 5022, 5019, 5020, 48, 5018 are Tuck stitch patterns. Tuck stitch means that many stitches are gathered together in one needle hook and therefore thick yarns are not so suitable for this kind of pattern.
natural_image
Line drawing of three women in fashion outfits, one wearing a striped dress with a belt (no text or symbols)Making a Hem
Simple Increasing and Decreasing
How to make Ribbings
Helpful Hints
KNITTING
STEP 3
KNITTING STRAIGHT
PANELS FOR THE
GARMENTS OF THE
FIRST STEP.
IN STEP 3 YOU WILL
LEARN HOW TO GIVE
SHAPE TO YOUR
KNITTING AND HOW TO
KNIT HEMS AND WELTS.
DON'T BE WORRIED -
IT IS EASY TO DO AND
AT THE END OF THIS
STEP YOU WILL FIND
MORE EXCITING NEW
GARMENTS TO KNIT
USING ALL YOU LEARN
IN STEP 3
PAGE 44 · 46
47 - 49
50 · 59
92
KNITTING A HEM
When knitting a hem or any other garment, always start by knitting the first rows using odd or waste yarn. By waste yarn I mean left overs from previously knitted garments, but they should be a thin quality yarn. It will make the start of the garment much easier and it is also very useful when steaming your garment, as it will be much simpler to pin onto your pressing table. After pressing you can remove the waste yarn. When knitting welts and hems, you remove the rows of waste yarn immediately after folding the welt or hem.
Thread up the waste yarn and make an open edge cast on over 40 needles. Knit a few rows, finishing with the carriage at the LEFT. Break the thread of the waste yarn above the carriage and pull the end downwards out of the Yarn Feeder. Remove the waste yarn from the Yarn Brake.

text_image
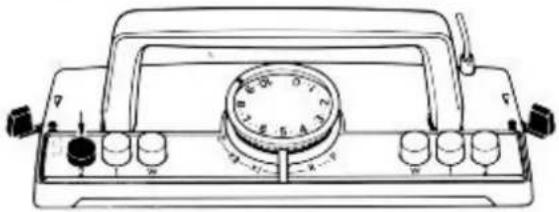
1 2 3 4 5 6 7 8 9 0 1 2 3 4 5 6 7 8The Pattern Panel is set to: 5 - 0 - 0.
natural_image
Line drawing of a vintage analog instrument with dial and control knobs (no text or symbols)Carriage setting: Turn Tension Dial to 9. Both Side Levers are set to ● position. ALL buttons are UP. The Cam Lever is set to front on 0.
natural_image
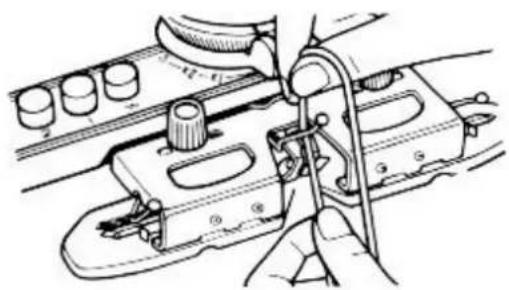
Technical line drawing of a mechanical assembly with no visible text or symbolsTake the Nylon Thread and feed it DIRECTLY into the Yarn Feeder, allowing 2 or 3 inches to hang down below the carriage.
natural_image
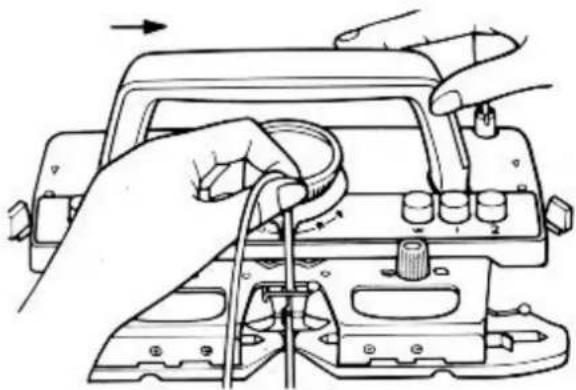
Illustration of hands operating a mechanical device with wires and components (no text or symbols visible)Allow the Nylon Thread to hang over your thumb as shown, and hold it lightly between thumb and forefinger. Knit 1 row towards the RIGHT. While moving the carriage - let the Nylon Thread slide smoothly through your fingers as the carriage needs it to make the stitches.
natural_image
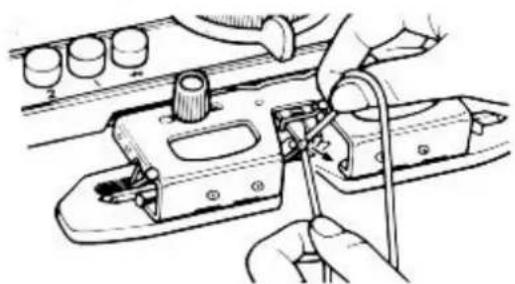
Technical line drawing of hands operating a mechanical device with tools (no text or symbols visible)Pull the remaining length of Nylon Thread out of the Yarn Feeder, downwards, and let it hang down. You have knitted IN the Nylon Thread to separate the following hem from the cast on with the waste yarn.
KNITTING A HEM
The hem is usually knitted with a smaller Tension size than the rest of the garment. This gives more elasticity so it cannot stretch out of shape.
natural_image
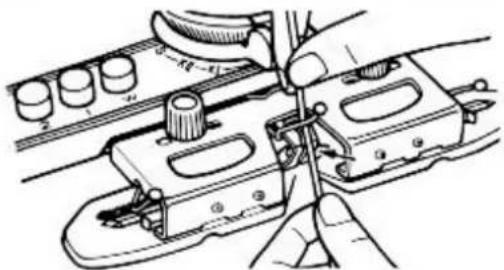
Technical line drawing of a mechanical assembly with hands operating a tool (no text or symbols visible)The carriage is at the RIGHT. Thread the main yarn through the Yarn Brake and Yarn Feeder and fasten the end onto the RIGHT hand Table Clamp. Pull down any slack yarn from behind the Yarn Brake.
natural_image
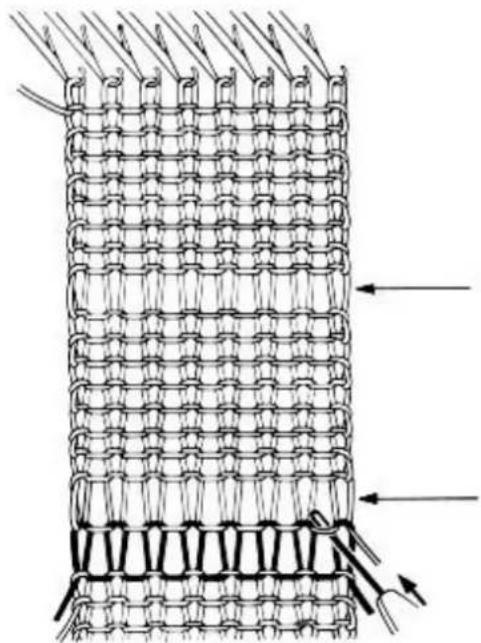
Diagram of a woven textile or mesh structure with interwoven strands and directional arrows indicating movement (no text or symbols)Set the Row Counter to 000. Knit 1 row with Tension 7. Knit 7 rows with Tension 5. Knit 1 row with Tension 7. Knit 8 rows with Tension 5. Set the Tension back to 7. The Row Counter shows 17.
These large stitches help to make a neat, flat edge when the hem is folded.
These large stitches will make it easy to lift the first row of knitting after the Nylon Thread, onto the needles, to close the hem.
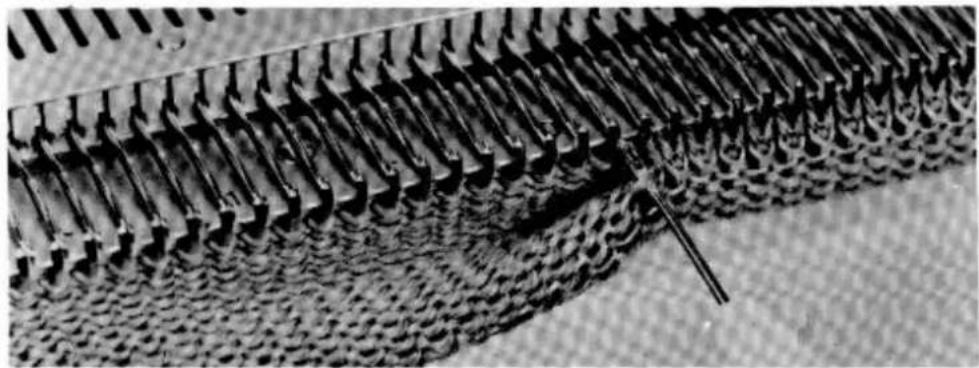
With the little brush, open all needle latches. Slip the Transfer Tool under the FIRST STITCH FROM THE RIGHT, of the FIRST ROW KNITTED AFTER the Nylon Thread.
natural_image
Close-up of a textured fabric with repeating patterned ridges and a central arrow (no text or symbols)Fold the knitting. Hold the row knitted with the Nylon Thread and the first row of knitting between thumb and forefinger of your LEFT hand. Hook the Transfer Tool into the first needle from the RIGHT. Raise the Transfer Tool and let the loop slide DOWN INTO the needle hook. This needle now has TWO loops. Lift, into the needle hooks, all the loops of the first row knitted after the Nylon Thread. When this is completed, each needle in 'B' position will have TWO loops. After a little practice you will find it much quicker to lift 3 stitches at a time with your Triple Transfer Tool.
KNITTING A HEM
natural_image
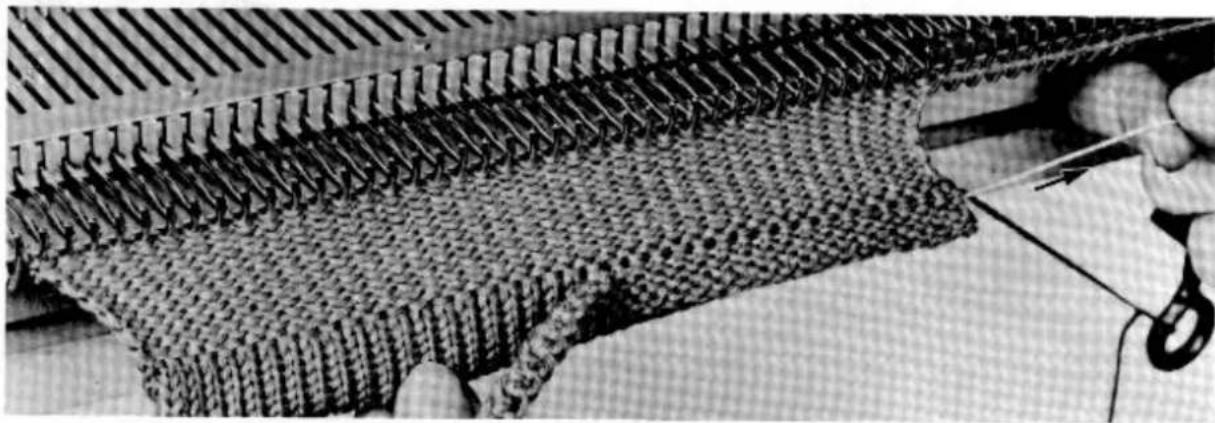
Close-up of a mechanical component with threaded mesh and a hand holding a tool, no visible text or symbolsEach needle has TWO loops. Bring all needles clearly in 'B' position and knit 2 rows. Hold the knitting with your LEFT hand and pull the Nylon Thread towards the RIGHT. The first rows knitted with waste yarn automatically fall away from the knitting, leaving a perfect hem. In future, when starting a garment, always start by knitting the first rows with waste yarn.
KNITTING A HEM WITH BULKY YARNS
When you are knitting with thicker yarns, and your hem has been lifted, you have two big stitches in each needle hook - this could cause a little trouble when knitting the next row. The best and safest method is to hold the knitting against the machine and with the straight edge of the Needle Pusher bring the needles from 'B' to 'D' position. When the carriage is at the RIGHT, push DOWN the LEFT side button 2. When the carriage is at the LEFT, push DOWN the RIGHT side button 2. Knit 1 row, pull out the Nylon Thread and continue knitting.
A very easy way to make a hem for bulky yarn is to knit the inside part of the hem with a thin to medium yarn and only the outside of the hem with the thick yarn. This makes a flat hem even with bulky yarns.

natural_image
Line drawing of a woman in a polka-dot skirt and blouse, waving (no text or symbols)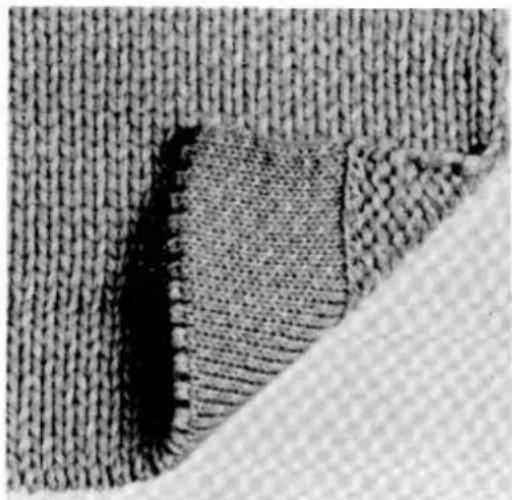
natural_image
Close-up of a textured fabric with a dark seam and woven pattern (no text or symbols)Supposing the yarn can only be knitted with every second needle and the hem should be 2 inches long, start the knitting with waste yarn and ALL needles. Knit IN the Nylon Thread - and then knit the first and inside half of the hem with thin yarn.
Transfer every second stitch onto its adjacent needle. Bring the empty needles back to 'A' position. Thread the thick yarn into the Yarn Brake and Yarn Feeder and knit the second half of the hem.
When lifting up, every second needle in 'B' position must have TWO loops of the thin yarn. The two qualities should be matching colours.
INCREASING ONE STITCH AT A TIME
HERE I SHOW YOU HOW TO INCREASE 1 STITCH ON EITHER SIDE IN A VERY SIMPLE WAY
natural_image
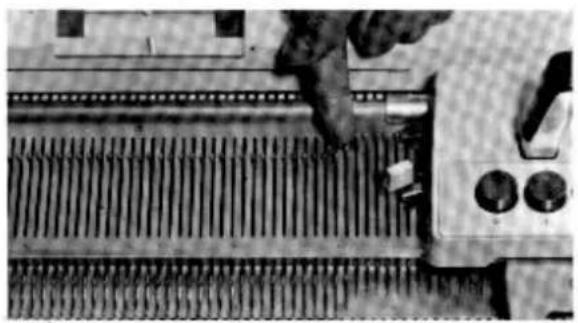
Close-up of a mechanical component with ribbed metal structure and mounting holes (no visible text or symbols)If you wish to increase ONE stitch on the RIGHT SIDE - your carriage must be at the RIGHT.
Push the next empty needle on the RIGHT side of the knitting from 'A' to 'B' position. Continue knitting.
The stitch will automatically be picked up and knitted by the carriage.
natural_image
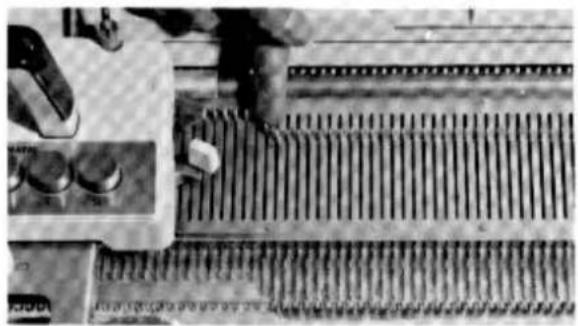
Close-up of a mechanical component with threaded metal strips and a hand operating it (no visible text or symbols)If you wish to increase ONE stitch on the LEFT side - your carriage must be at the LEFT.
Push the next empty needle on the LEFT side of the knitting from 'A' to 'B' position. Continue knitting.
The stitch will automatically be picked up and knitted by the carriage.
TRANSFERRING STITCHES WITH THE TRANSFER TOOL
The Transfer Tool has many uses but is mainly used for transferring stitches, increasing and decreasing and for fancy pattern making.
natural_image
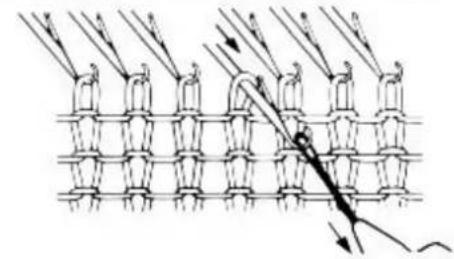
Diagram of a mechanical or electrical component with multiple cylindrical components and directional arrows indicating motion (no text or symbols)Place the eye of the Transfer Tool onto the needle hook. Pull the needle towards you from 'B' to 'D' position.
natural_image
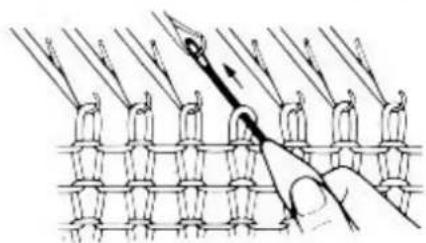
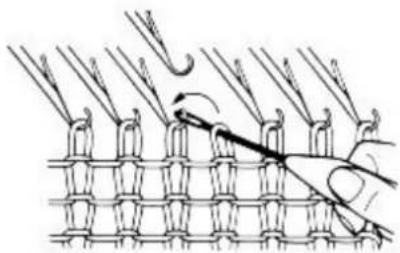
Diagram of a hand holding a pen writing on a grid of clips (no text or symbols present)Push the needle back to 'A' position, causing the stitch to slide over the needle latch onto the Transfer Tool. Lift the Transfer Tool out of the needle hook.
natural_image
Illustration of a hand using a tool to draw or mark a woven mat pattern (no text or symbols)Place the Transfer Tool in the hook of the adjacent needle. Hold the knitting down and lift the handle of the Transfer Tool until the stitch slides down into the needle hook.
E SING MORE THAN ONE STITCH AT A TIME
INCREASE SEVERAL STITCHES ON THE RIGHT SIDE — THE CARRIAGE MUST BE AT THE RIGHT.
This method is suitable when knitting plain stocking stitch.

natural_image
Illustration of a woman in a polka-dot dress waving (no text or symbols)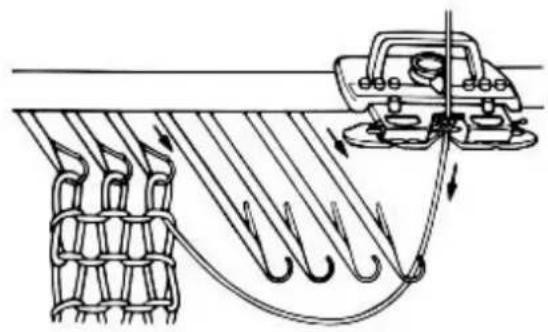
natural_image
Diagram of a rope knot being lifted by a car, showing rope routing and hook positioning (no text or symbols)Push DOWN button 2 at the LEFT side of the carriage.
To increase 4 stitches at the RIGHT - push 4 extra needles from 'A' to 'D' position on the RIGHT side.
Pull some yarn downwards through the Yarn Feeder.
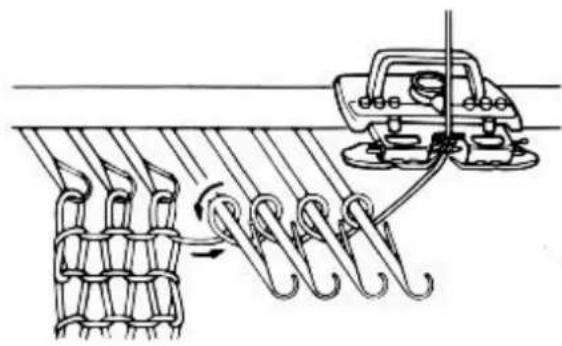
natural_image
Diagram showing rope knotting and car suspension mechanism (no text or symbols)Wind the yarn LO O S E L Y under and around every needle in anti-clockwise direction. As you wind, push each loop BEHIND the needle latch.
Pull down any slack yarn from the Yarn Brake. Knit 1 row. You will notice that you have increased 4 stitches on the RIGHT side of the knitting.
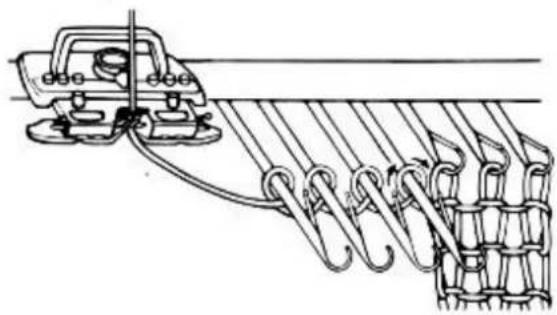
TO INCREASE SEVERAL STITCHES ON THE LEFT SIDE — THE CARRIAGE MUST BE AT THE LEFT.
natural_image
Technical line drawing of a mechanical clamp or spring assembly with coiled spring (no text or symbols)To increase 4 stitches at the LEFT - push 4 extra needles from 'A' to 'D' position on the LEFT side.
Wind the yarn L O O S E L Y around the 4 needles in clockwise direction as shown by the arrows. Push DOWN button 2 at the RIGHT side of the carriage.
Pull down any slack yarn from behind the Yarn Brake and knit 1 row. You have now increased 4 stitches on the LEFT side of the knitting.
DECREASING ONE STITCH AT A TIME
natural_image
Diagram of a knotted fabric pattern with a hand holding a tool (no text or symbols)You can decrease 1 stitch on both sides of the SAME ROW.
Transfer the last stitch on each side onto its adjacent needle.
Push the EMPTY needle BACK to 'A' position.
natural_image
Line drawing of a woman in a polka-dot dress and dress, making a peace sign (no text or symbols)DECREASING MORE THAN ONE STITCH AT A TIME
THE CARRIAGE IS AT THE RIGHT.
- Transfer the stitch from the LAST needle on the RIGHT onto the adjacent needle on the LEFT. Push the needle with the 2 stitches up to 'D' position.
- Leave the empty needle in 'B' position.
- With your left thumb, push the needle with the TWO stitches carefully from 'D' to 'C' position. The latch MUST remain OPEN.
natural_image
Close-up of a textured surface with raised pins and a small object at the bottom (no visible text or symbols)- Pull a little yarn from the Feeder and lay it from RIGHT to LEFT across the open hook as shown.
- Holding the needle by the butt, pull it BACK to 'B' position.
- Repeat 1 to 5 until the required number of stitches have been decreased.
When this is completed, you may bring BACK to 'A' position all the empty needles. We leave the empty needles in 'B' position while decreasing because it makes the counting of the empty needles easier.
CASTING OFF OR BINDING OFF THIS WAY
In this manner, you can DECREASE AS MANY STITCHES AS NEEDED. To BIND OFF OR CAST OFF COMPLETELY, you just continue this process until there are no stitches left in the needles. Then you break the yarn and pull the end through the last loop to lock your stitches.
A NEW WAY TO KNIT RIBBED WELTS
natural_image
Line drawing of a woman in a polka-dot skirt and top, waving (no text or symbols)THE OLD: For many years now the traditional method has been to knit plain and purl rib combinations. They look fine when they are new but 'fan' out of shape after a while - and, especially on childrens' knitwear, the first row of cast on breaks too easily and then the welt must be re-knitted or the whole sweater must be thrown away.
THE NEW: The special DOUBLE ELASTIC welts.
The welts, ribbings and borders on knitwear are so important. They are snug fitting, but still soft and elastic.
They will not wash out of shape and will never sag and spoil the whole garment.
I recommend the new welts because they look better, are far more elastic and last much longer.
Of course, it is important to use the correct Tension - but even this is no problem at all. Just try a few different Tensions and soon you will find the perfect Tension for whichever yarn you are using - and you will also enjoy the perfect results illustrated here.
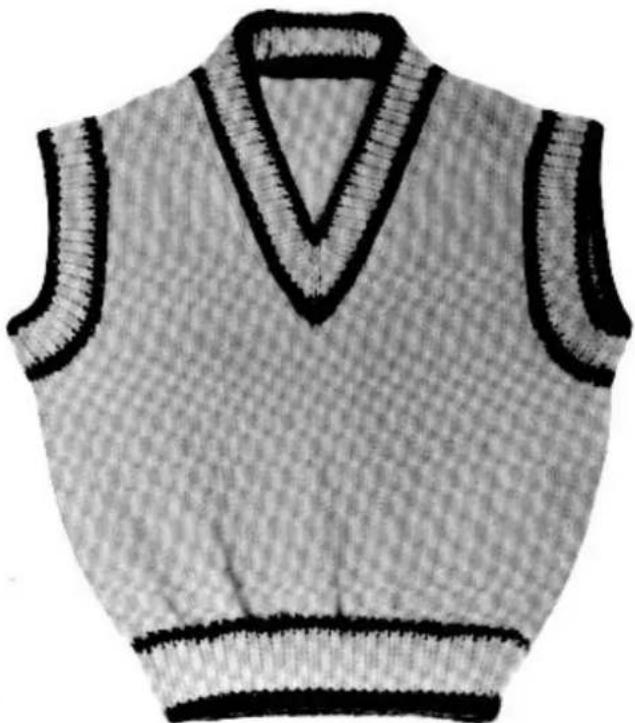
natural_image
Black and white photo of a knitted sleeveless sweater with V-neck collar (no text or symbols)Boy's sweater knitted with the NEW special DOUBLE 1 by 1 welt. Very easy and great fun to knit. On the next pages you will find the instructions on how to knit them.
THE NEW WAY TO MAKE RIBBED WELTS
THE NEW SYSTEM TO KNIT PERFECT DOUBLE WELTS FOR ALL KNITWEAR.
Double to give a perfect, snug fit, and more elastic than ever before.
Double hems last much longer too, and - they are SO easy to knit.
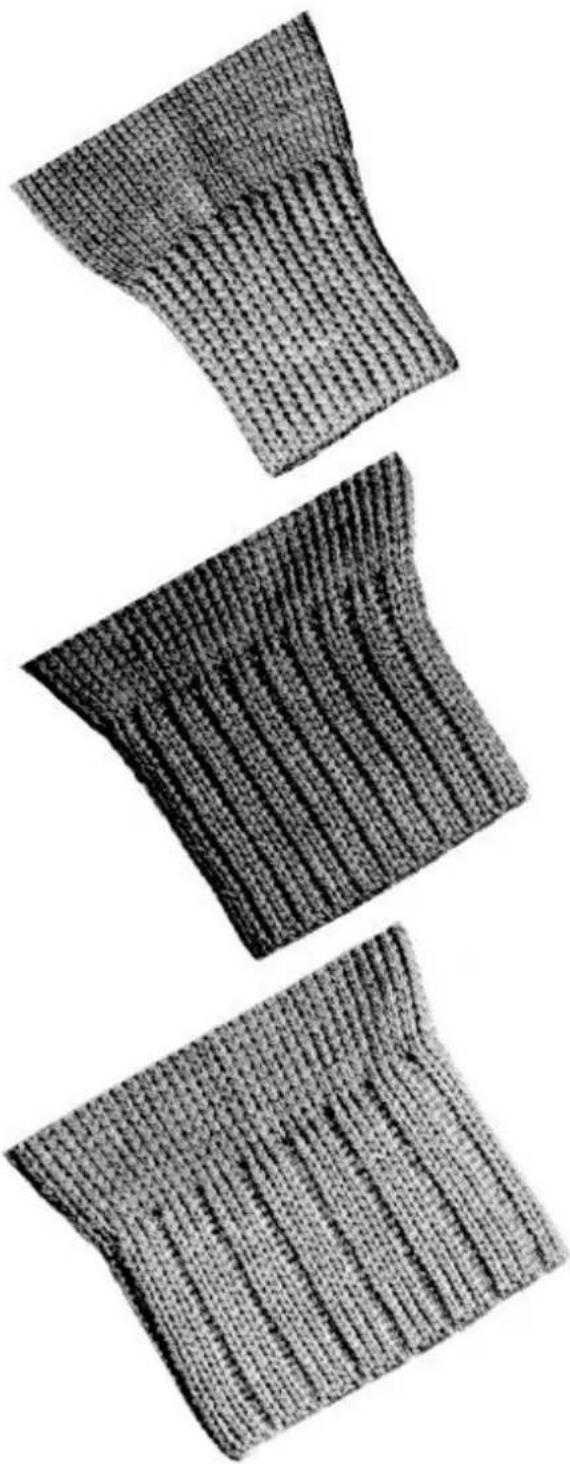
natural_image
Three textured fabric swatches arranged vertically, showing different textures and patterns (no text or symbols)These hems will give your knitwear that professional finish found in couture garments.
Particularly suitable for children's clothes and sportswear as they are tough and can withstand the roughest handling.
1 by 1 ribbing effects are most suitable when you are knitting with medium to thick yarns using Tension 6 and higher.
2 by 1 ribbing effects - very suitable and useful for every type of yarn and all Tensions from 2 upwards.
3 by 1 - Can also be used for all yarns using Tensions from 2 upwards, but it is most attractive and elastic when knitted in a fine soft yarn using Tensions between 2 - 4.
THE 1 BY 1 DOUBLE WELT
In order to make perfect welts - elastic, neat and durable - it is most important to knit them with the correct Tension. Every yarn is different but in principle the Tension used for the 1 by 1 welt is set about 3 to 4 numbers lower than the yarn word usually be knitted
The carriage is at the RIGHT. Bring 22 needles at the LEFT and 21 needles at the RIGHT of centre 0 from 'A' to 'B' position.
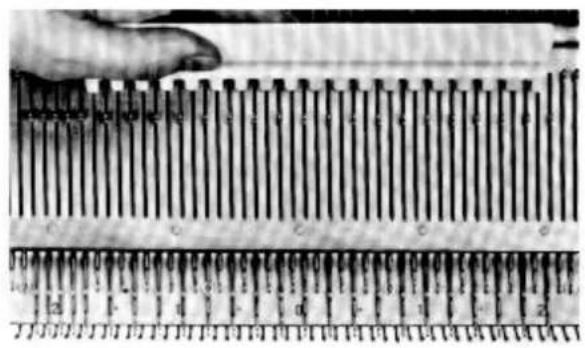
natural_image
Close-up of a hand using a ruler to measure a physical object, showing parallel rods and measurement markings (no readable text or symbols)Starting with the SECOND needle from the RIGHT - bring every SECOND needle BACK to 'A' position using the 1 / 1 side of the Needle Pusher.
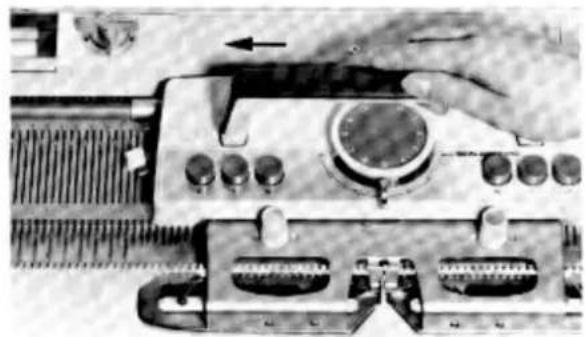
natural_image
Close-up of a mechanical device with multiple ports and a hand adjusting a dial (no visible text or symbols)Slide the carriage to the LEFT and back to the RIGHT across the needles to ensure that they are clear and ready for the cast on.
natural_image
Close-up of a hand operating a sewing machine needle with a pointer and load, no visible text or symbolsThread up the waste yarn through the Yarn Brake and the Yarn Feeder, pull down any slack yarn from behind the Yarn Brake.
Remember there must NOT be any slack yarn between the Yarn Feeder and the Table Clamp.
KNITTING THE 1 BY 1 DOUBLE WELT
natural_image
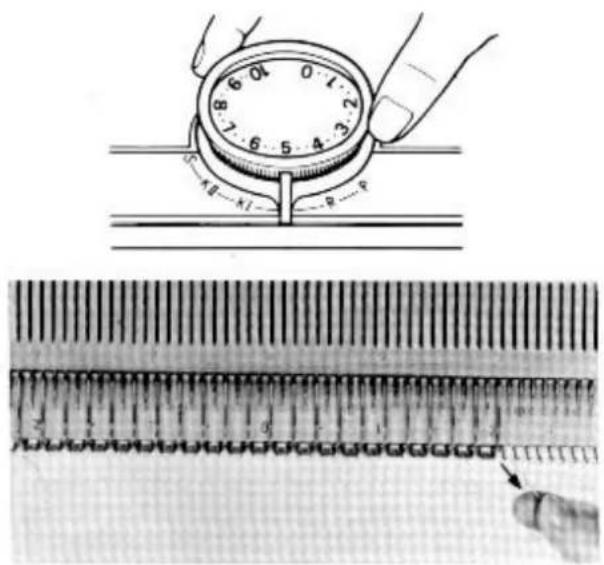
Close-up of a mechanical device with multiple ports and a central circular component (no visible text or symbols)The carriage is at the RIGHT Turn the Tension Dial to 7. Both levers are at FRONT. All buttons are UP. Cam Lever set to 0.
Knit 1 row towards the LEFT.
natural_image
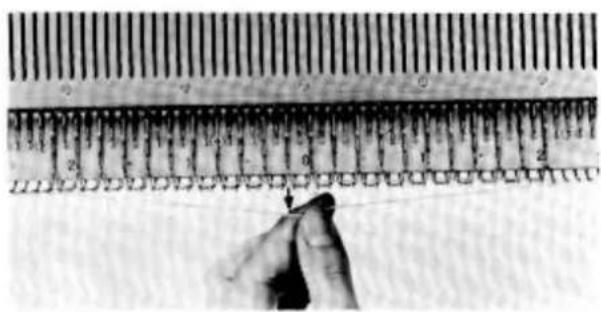
Diagram of hanging clips with curved arrows indicating motion (no text or symbols)Lay the Nylon Thread across the loops between the needle hooks and the Sinker Gate.
natural_image
Close-up of a hand holding a ruler measuring a metric with tick marks (no visible text or symbols)Pull the Nylon Thread FIRMLY DOWN.
text_image
Diagram showing a hand holding a dial and a close-up of a measuring tool with labeled parts and a magnified view below.Turn the Tension Dial to 5 and knit a few more rows finishing with the carriage at the LEFT.
Pull out the Nylon Thread from the knitting.
KNITTING THE 1 BY 1 DOUBLE WELT
natural_image
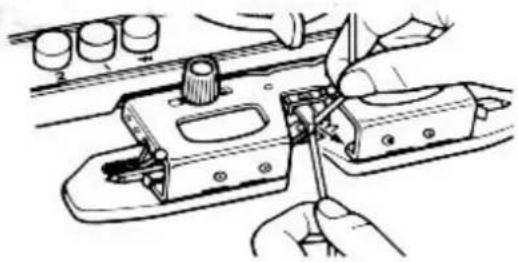
Technical line drawing of a mechanical assembly with hands operating a tool (no text or symbols present)Remove the waste yarn from the Yarn Feeder and the Yarn Brake and break it.
natural_image
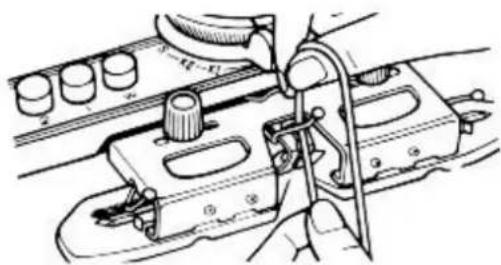
Technical line drawing of a mechanical assembly with no visible text or symbolsThread the Nylon Thread into the Yarn Feeder allowing a few inches to hang down below the carriage.
natural_image
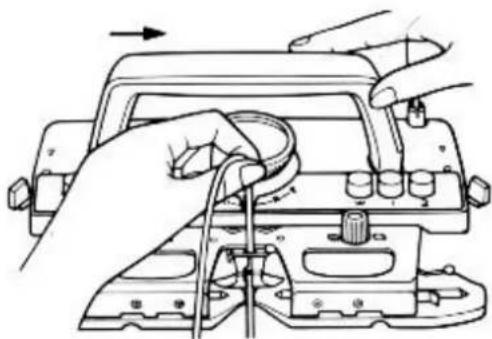
Illustration of hands operating a mechanical device with a knob and adjustment knob (no text or symbols)Hold it over your thumb and lightly between your thumb and forefinger, as shown.
Knit 1 row towards the RIGHT allowing the Nylon Thread to slide through your fingers as you knit across.
text_image
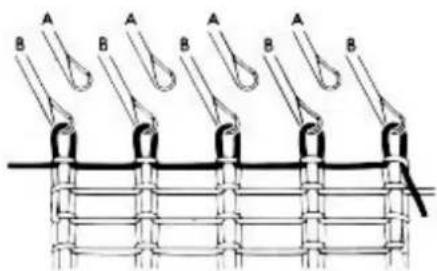
A B A B A B A BNow you have knitted IN the Nylon Thread to separate the waste yarn from the welt.
natural_image
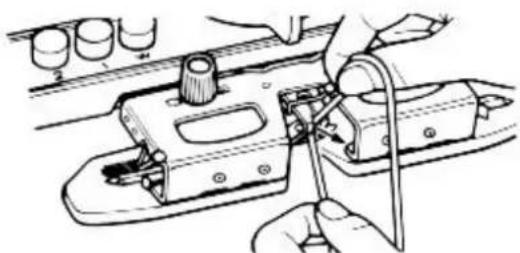
Illustration of hands using a tool to adjust or install a mechanical component (no text or symbols visible)Remove the Nylon Thread from the Yarn Feeder and let it hang down on the side of the knitting.
KNITTING THE 1 BY 1 DOUBLE WEL
natural_image
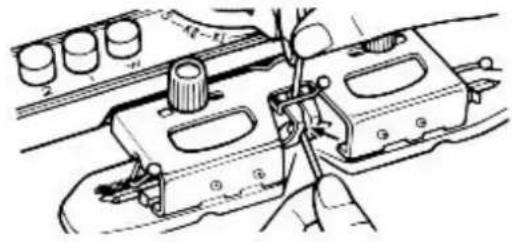
Technical line drawing of a mechanical assembly with no visible text or symbolsThread the main yarn through Brake and the Yarn Feeder.
natural_image
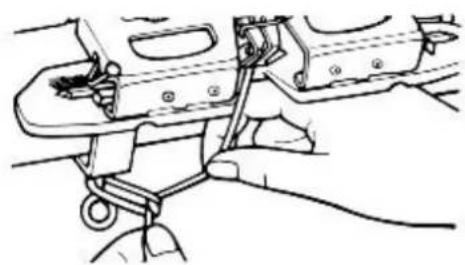
Technical line drawing of a mechanical assembly with no visible text or symbolsFasten the end onto the RIGHT side Table Clamp. Check to make sure your yarn is properly threaded up.
natural_image
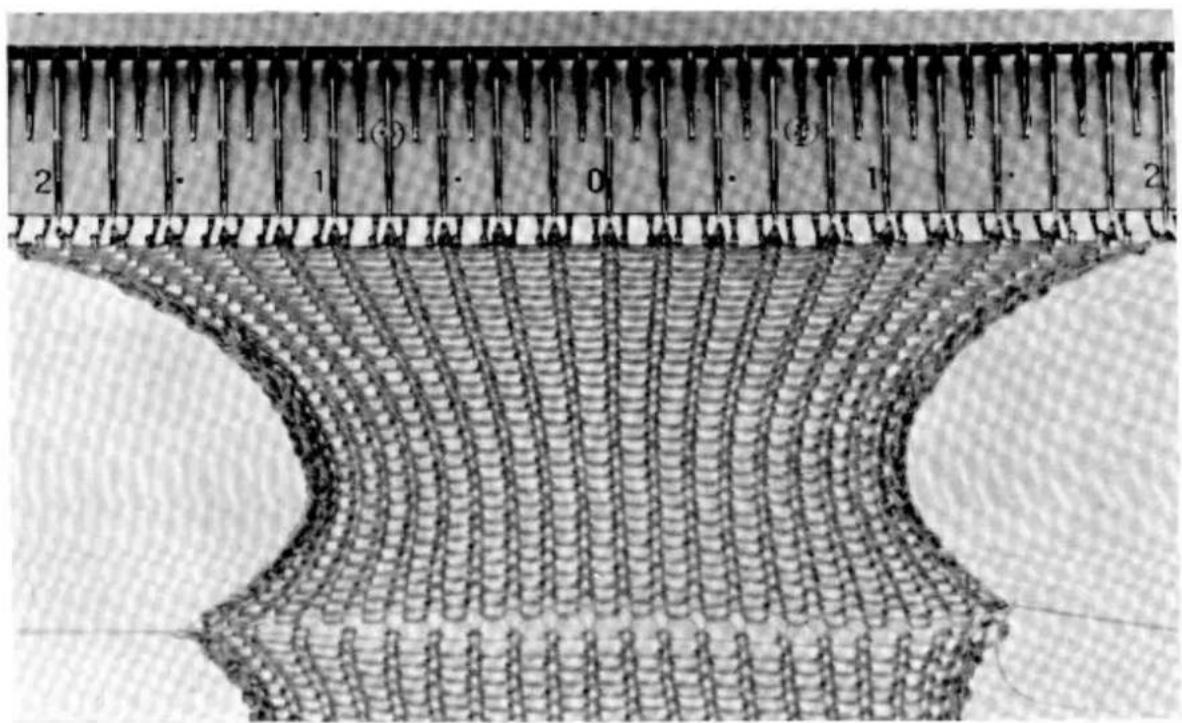
Close-up of a mesh grid structure with measurement rulers (no text or symbols visible)The carriage is at the RIGHT. Turn the Tension Dial to 3. Knit 32 rows.
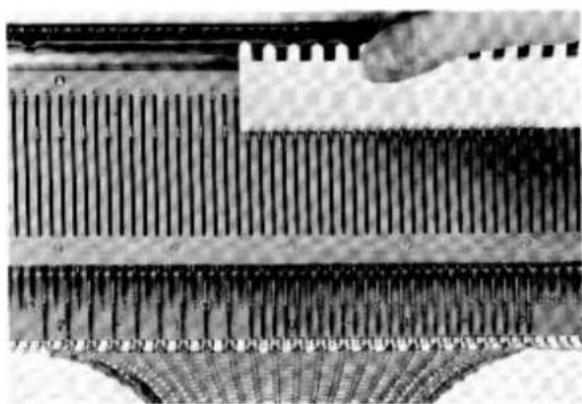
natural_image
Close-up of a microelectronic component with parallel grooves and a finger pointing to it (no visible text or symbols)The carriage is at the RIGHT. Using the straight edge of the Needle Pusher, raise from 'A' to 'B' position the remaining 21 needles of the welt (the ones you pushed back to 'A' position earlier).
There are now 43 needles in 'B' position and EVERY SECOND needle has a stitch.
KNITTING THE 1 BY 1 DOUBLE WELT
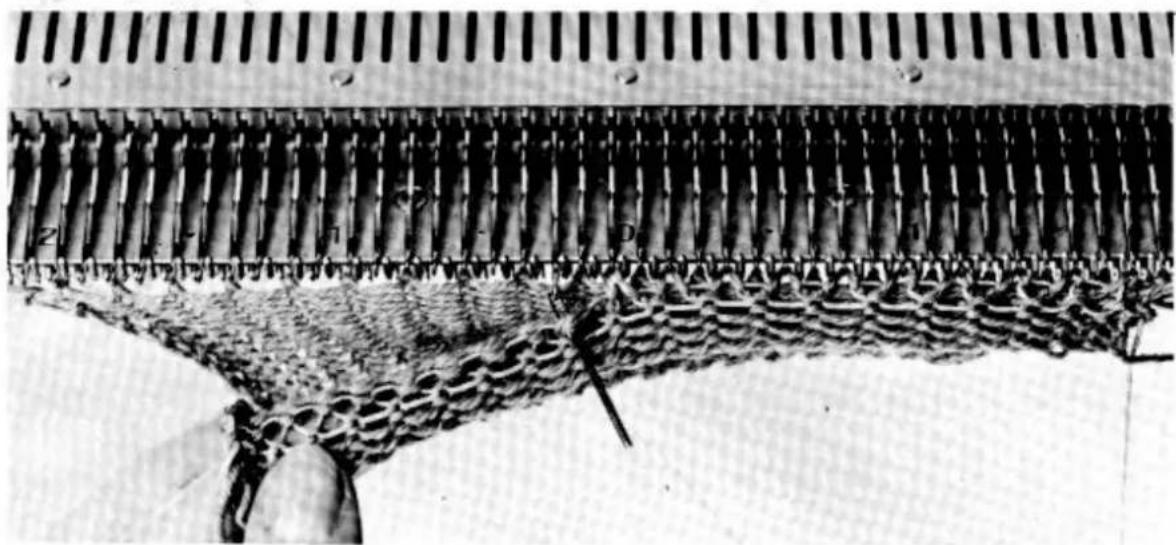
natural_image
Microscopic view of a layered material structure with repeating patterns and no visible text or symbols
natural_image
Line drawing of a woman in a polka-dot dress waving (no text or symbols)Fold the welt as shown. Starting at the RIGHT, slip the Transfer Tool inside the FIRST LOOP at the RIGHT of the FIRST row knitted AFTER the Nylon Thread.
Lift this loop into the hook of the FIRST EMPTY NEEDLE IN 'B' position at the RIGHT.
Now lift the SECOND loop into the SECOND EMPTY needle in 'B' position.
Continue lifting each loop and placing it IN the EMPTY needles until the complete welt has been lifted.
YOUR DOUBLE RIBBED WELT IS NOW KNITTED.
With your LEFT hand hold the knitting against the machine. Use the straight edge of the Needle Pusher to push the needles from 'B' to 'D' position. Push DOWN button 2 on the LEFT side of the carriage.
Check the yarn Tension. Turn the Tension Dial to 7, knit 1 row. Pull the Nylon Thread out of the knitting.
Knit another 40 rows - and if you wish, remove the knitting from the machine.
Your first DOUBLE RIBBED WELT is now completed, it only needs to be steamed. For this, follow the instruction on the next pages carefully.
STEAMING THE DOUBLE WELT
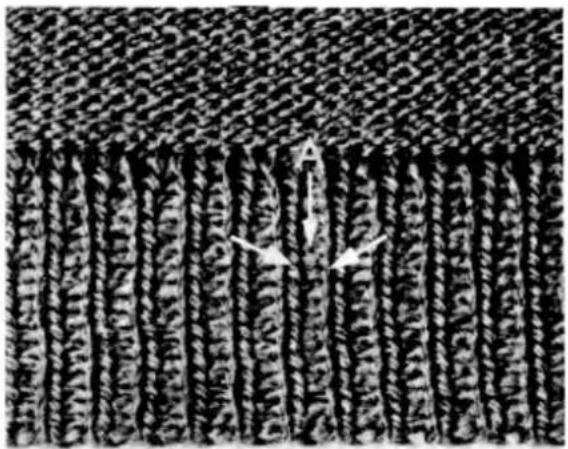
natural_image
Microscopic view of a textured surface with parallel grooves and two white arrows pointing to specific features (no text or symbols present)BEFORE STEAMING
Your 1 by 1 double welt will now look like this. After steaming and blocking which is explained on the next page, you will notice that the linking bars A have been absorbed into the ribs.
You may steam and block your rib with the Rib Frame, which is a new, useful accessory.
You only start steaming the welts when the rest of the garment has been steamed. REMEMBER - first the garment, then the welts.
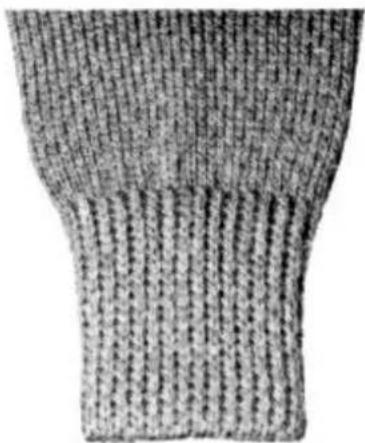
natural_image
Close-up of a knitted sweater with visible stitching and texture (no text or symbols)AFTER STEAMING
This is how the welt should look when you have steamed according to the instructions given in the book.
If you are knitting with synthetic yarns exercise the greatest care when steaming your garment, as synthetic yarns do NOT RESPOND to heat in the same manner as natural wools. Always work lightly and quickly.
natural_image
Close-up of a textured fabric or material surface with a vertical line and measurement markings (no readable text or symbols)Place both clamps of the Rib Frame onto the front of your pressing table. Insert the metal bar through the welt and slide the ends of the bar under the clamps.
The picture shows you how the welt will look when it comes off the machine.
Please note that the welt is 2 inches wide.
STEAMING THE DOUBLE WELT
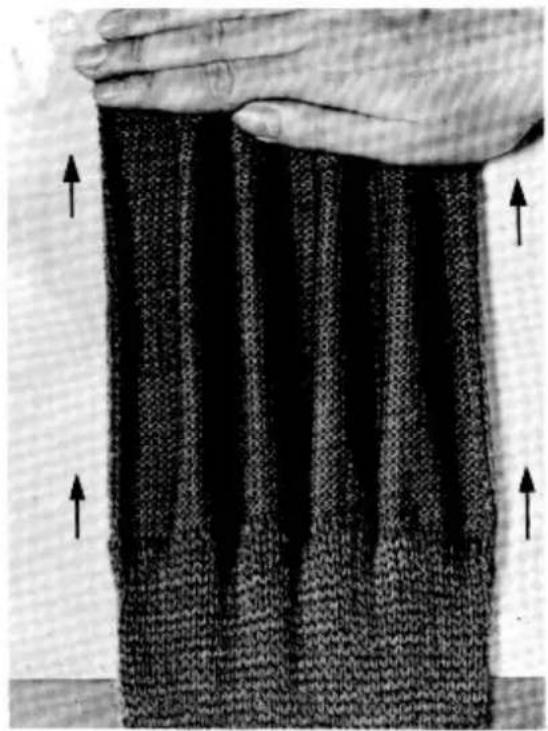
natural_image
Close-up of a knitted fabric with vertical ridges and a hand holding the edge (no text or symbols visible)With one hand stretch out your knitted piece as much as possible. At the same time, with the other hand, gather the welt together as closely as possible.
The welt is now 3 inches dd
The welt is now 3 inches deep, so always knit your welt 1/3 shorter than you wish the final depth to be. This applies to all 1 by 1 rib combinations.
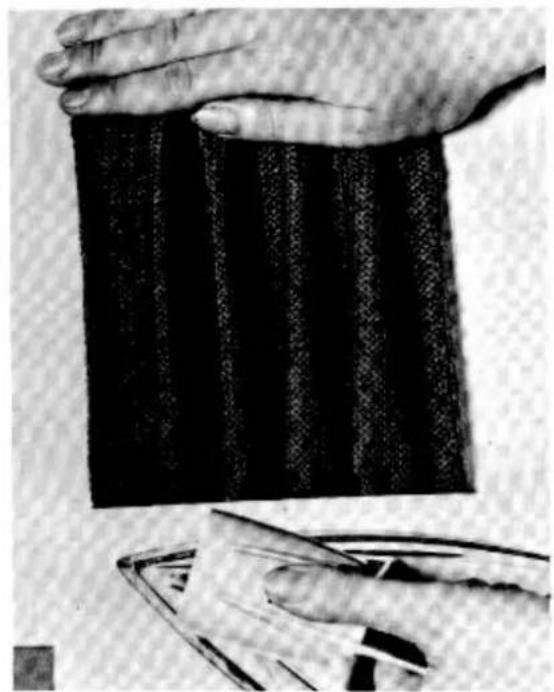
natural_image
Close-up of hands holding a dark textured fabric with a small transparent object nearby (no visible text or symbols)Lay a wet cloth on top of the welt, still stretching it as much as possible, lower the hot iron onto the wet cloth and let the hot steam penetrate into the knitting. Do NOT PRESS, just slide the iron over the wet cloth until the entire welt has been steamed.
When steaming 4 ply or double knitting yarn you may let the iron rest on the welt for 1 or 2 seconds on each spot.
Remove the cloth and, while the knitting is still hot and damp, continue to stretch it with one hand and then let the knitting cool and dry, while 'gathering' the welt closely with the other hand. If necessary this procedure may be repeated for added elasticity. When the welt is completely dry, remove it from the rib frame.
NOTE: Do NOT stretch 2 by 1 and 3 by 1 rib welts as much as the 1 by 1. The linking bars between the stitches must contract and should look like a fine rib after being steamed.
KNITTING A 2 BY 1 WELT

natural_image
Completely blank white image with no visible content, text, or symbols.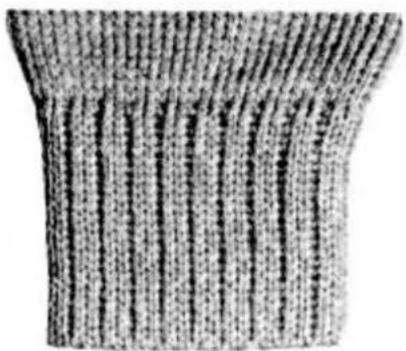
natural_image
Close-up of a textured, ribbed cylindrical object with vertical striations (no visible text or symbols)Knitting a 2 by 1 welt means - knit 2 and leave 1 needle in 'A' position.
Here are the instructions for knitting this well it is really easy to do.
It can be knitted with almost any type of yarn.
Bring 33 needles at the RIGHT and 33 needles at the LEFT of centre from 'A' to 'B' position.
Starting with the THIRD needle from the RIGHT, push every THIRD needle back to 'A' position.
Make an open edge cast on with waste yarn and knit a few rows finishing with the carriage at the LEFT.
Knit in the Nylon Thread from LEFT to RIGHT. Set the Row Counter to 000.
Thread the main yarn through the Yarn Brake and Yarn Feeder. Set the Tension Dial to 3.
Knit 50 rows. The carriage is at the RIGHT. Set Tension Dial to 6.
Bring the needles which you pushed to 'A' position back to 'B' position.
Lift the loops of the first row knitted after the Nylon Thread. Hang the FIRST loop from the RIGHT onto the SECOND needle from the RIGHT which has a stitch. Hang the SECOND loop onto the FIRST EMPTY needle from the RIGHT. Hang the THIRD loop onto the next SECOND needle with a stitch. Hang the FOURTH loop onto the next empty needle. Repeat until all loops have been lifted.
Bring all needles into a straight line - pull out the Nylon Thread and continue knitting the sleeve.
KNITTING A 3 BY 1 WELT
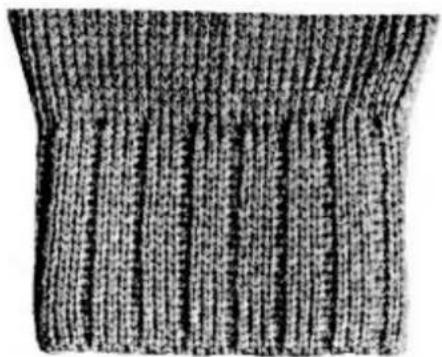
natural_image
Close-up of a textured fabric with vertical striations and a pointed tip (no text or symbols)The 3 by 1 welt is knitted leaving every 4th needle back to 'A' position.
It is really simple to do as you know how to knit the others.
And it is most attractive when knitted with thin to medium yarns.
Bring 33 needles at the RIGHT and 33 needles at the LEFT of centre from 'A' to 'B' position.
Starting with the 4th needle from the RIGHT - bring every 4th needle back to 'A' position.
Make an open edge cast on with waste yarn and knit a few rows - finishing with the carriage at the LEFT.
Knit in the Nylon Thread from LEFT to RIGHT. Set the Row Counter to 000,
Thread the main yarn through the Yarn Brake and the Yarn Feeder. Set the Tension Dial to 3.
Knit 50 rows. The carriage is at the RIGHT. Set the Tension Dial to 6.
Bring the needles which you pushed to 'A' position to 'B' position again.
Lift the loops of the first row knitted after the Nylon Thread. The FIRST loop goes onto the SECOND needle WITH a stitch. The SECOND loop goes onto the THIRD needle with a stitch. The THIRD loop goes onto the FIRST EMPTY needle.
Repeat until all loops are lifted. Bring the needles in a straight line - pull out the Nylon Thread and continue knitting the sleeve.
KNITTING A 2 BY 1 WELT
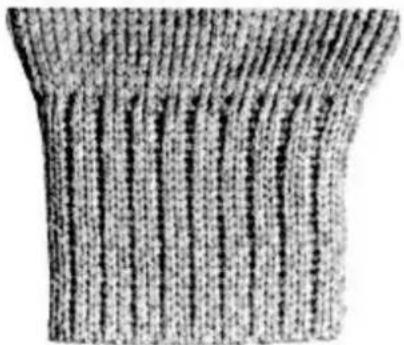
natural_image
Close-up of a textured, vertically striped object resembling a mechanical or architectural component (no visible text or symbols)Knitting a 2 by 1 welt means - knit 2 and leave 1 needle in 'A' position.
Here are the instructions for knitting this well it is really easy to do.
It can be knitted with almost any type of yarn.
Bring 33 needles at the RIGHT and 33 needles at the LEFT of centre from 'A' to 'B' position.
Starting with the THIRD needle from the RIGHT, push every THIRD needle back to 'A' position.
Make an open edge cast on with waste yarn and knit a few rows finishing with the carriage at the LEFT.
Knit in the Nylon Thread from LEFT to RIGHT. Set the Row Counter to 000. Thread the main yarn through the Yarn Brake and Yarn Feeder. Set the Tension Dial to 3. Knit 50 rows. The carriage is at the RIGHT. Set Tension Dial to 6. Bring the needles which you pushed to 'A' position back to 'B' position.
Lift the loops of the first row knitted after the Nylon Thread. Hang the FIRST loop from the RIGHT onto the SECOND needle from the RIGHT which has a stitch. Hang the SECOND loop onto the FIRST EMPTY needle from the RIGHT. Hang the THIRD loop onto the next SECOND needle with a stitch. Hang the FOURTH loop onto the next empty needle. Repeat until all loops have been lifted. Bring all needles into a straight line - pull out the Nylon Thread and continue knitting the sleeve.
KNITTING A 3 BY 1 WELT
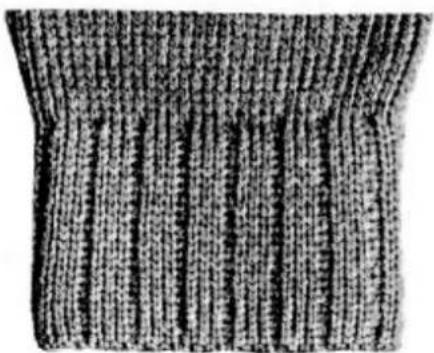
natural_image
Close-up of a textured fabric with vertical striations and a tapered top (no visible text or symbols)The 3 by 1 welt is knitted leaving every 4th needle back to 'A' position.
It is really simple to do as you know how to knit the others.
And it is most attractive when knitted with thin to medium yarns.
Bring 33 needles at the RIGHT and 33 needles at the LEFT of centre from 'A' to 'B' position.
Starting with the 4th needle from the RIGHT bring every 4th needle back to 'A' position.
Make an open edge cast on with waste yarn and knit a few rows - finishing with the carriage at the LEFT.
Knit in the Nylon Thread from LEFT to RIGHT. Set the Row Counter to 000.
Thread the main yarn through the Yarn Brake and the Yarn Feeder. Set the Tension Dial to 3.
Knit 50 rows. The carriage is at the RIGHT. Set the Tension Dial to 6.
Bring the needles which you pushed to 'A' position to 'B' position again,
Lift the loops of the first row knitted after the Nylon Thread. The FIRST loop goes onto the SECOND needle WITH a stitch. The SECOND loop goes onto the THIRD needle with a stitch. The THIRD loop goes onto the FIRST EMPTY needle.
Repeat until all loops are lifted. Bring the needles in a straight line - pull out the Nylon Thread and continue knitting the sleeve.
ERE ARE SOME MORE EASY TO AKE GARMENTS.
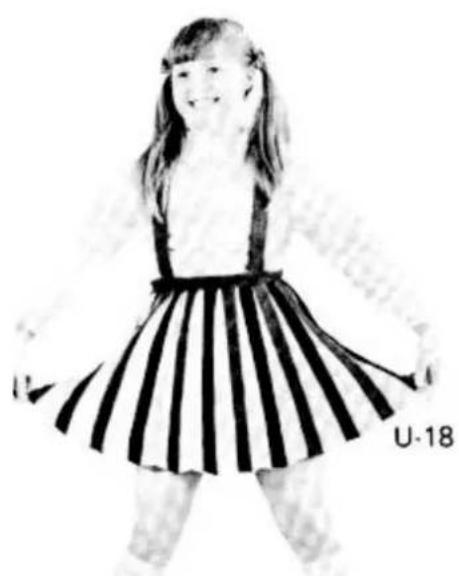
natural_image
Black-and-white sketch of a girl wearing a striped skirt and puffed sleeves (no text or symbols)BEFORE PROCEEDING ANY FURTHER ON YOUR INSTRUCTIONS - TAKE YOUR CHOICE AND MAKE SOMETHING FROM THE RANGE ON THIS OR THE FOLLOWING PAGE.
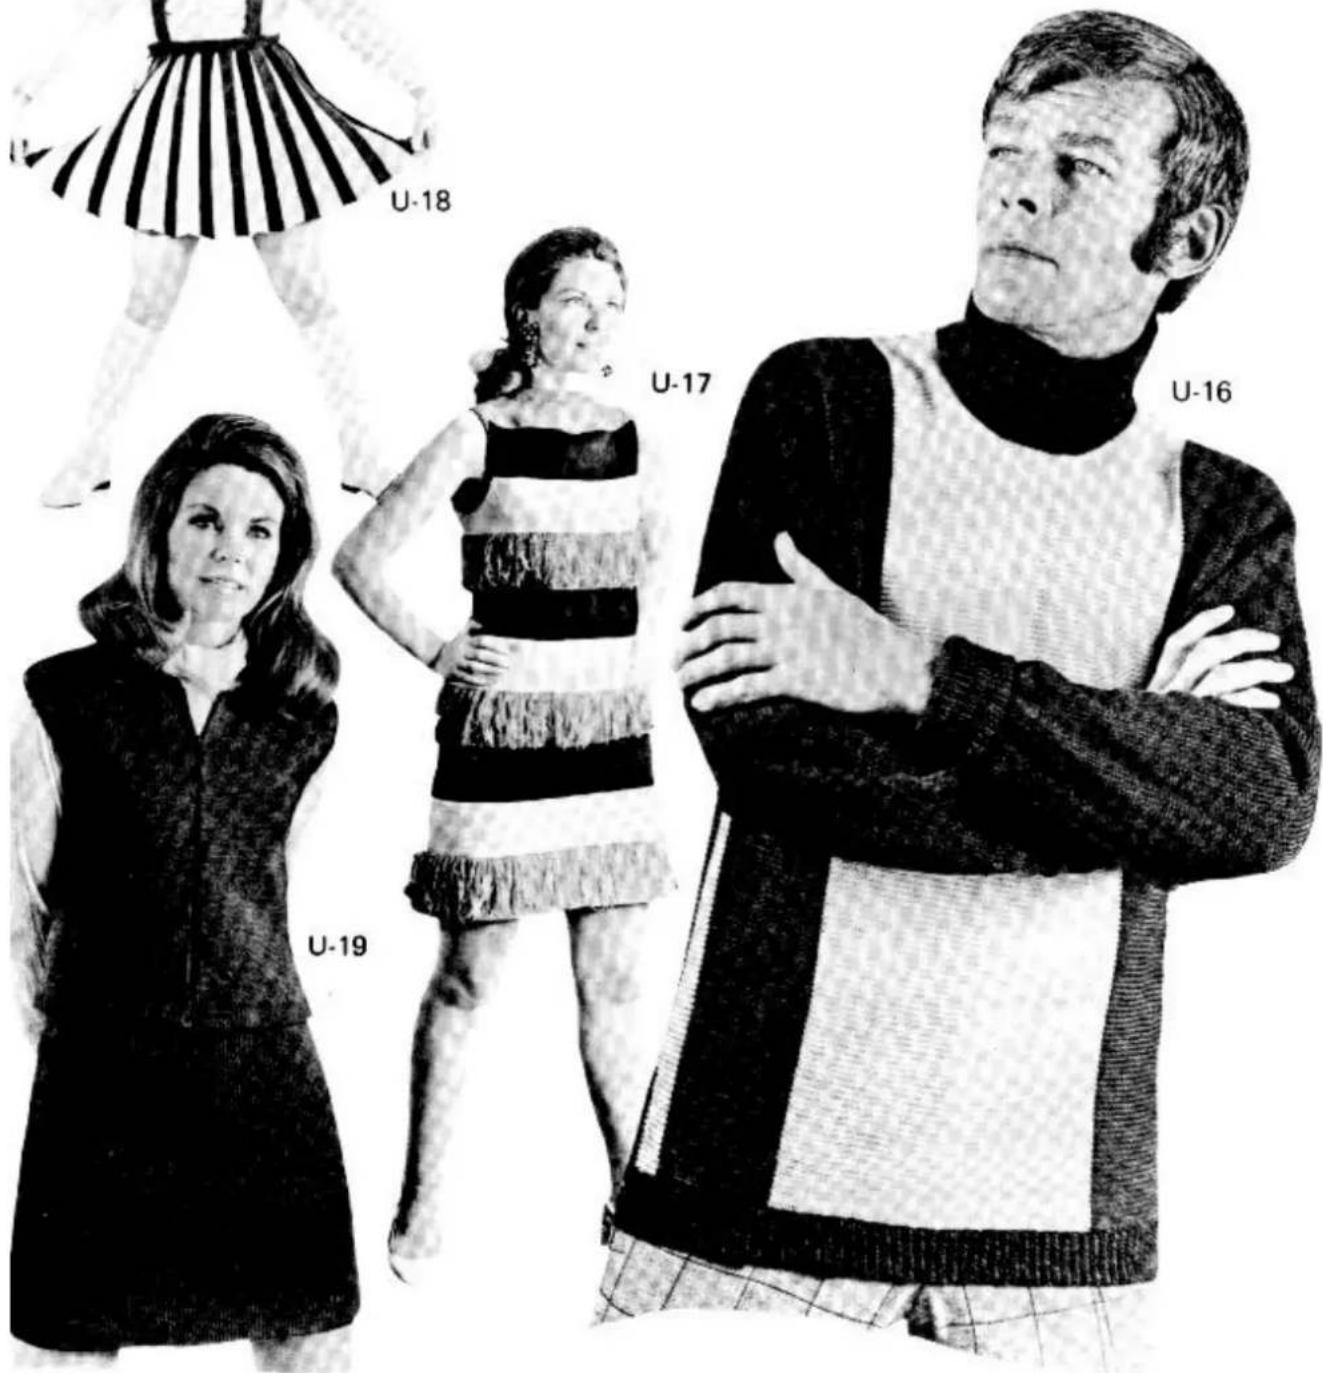
text_image
U-18 U-17 U-16 U-19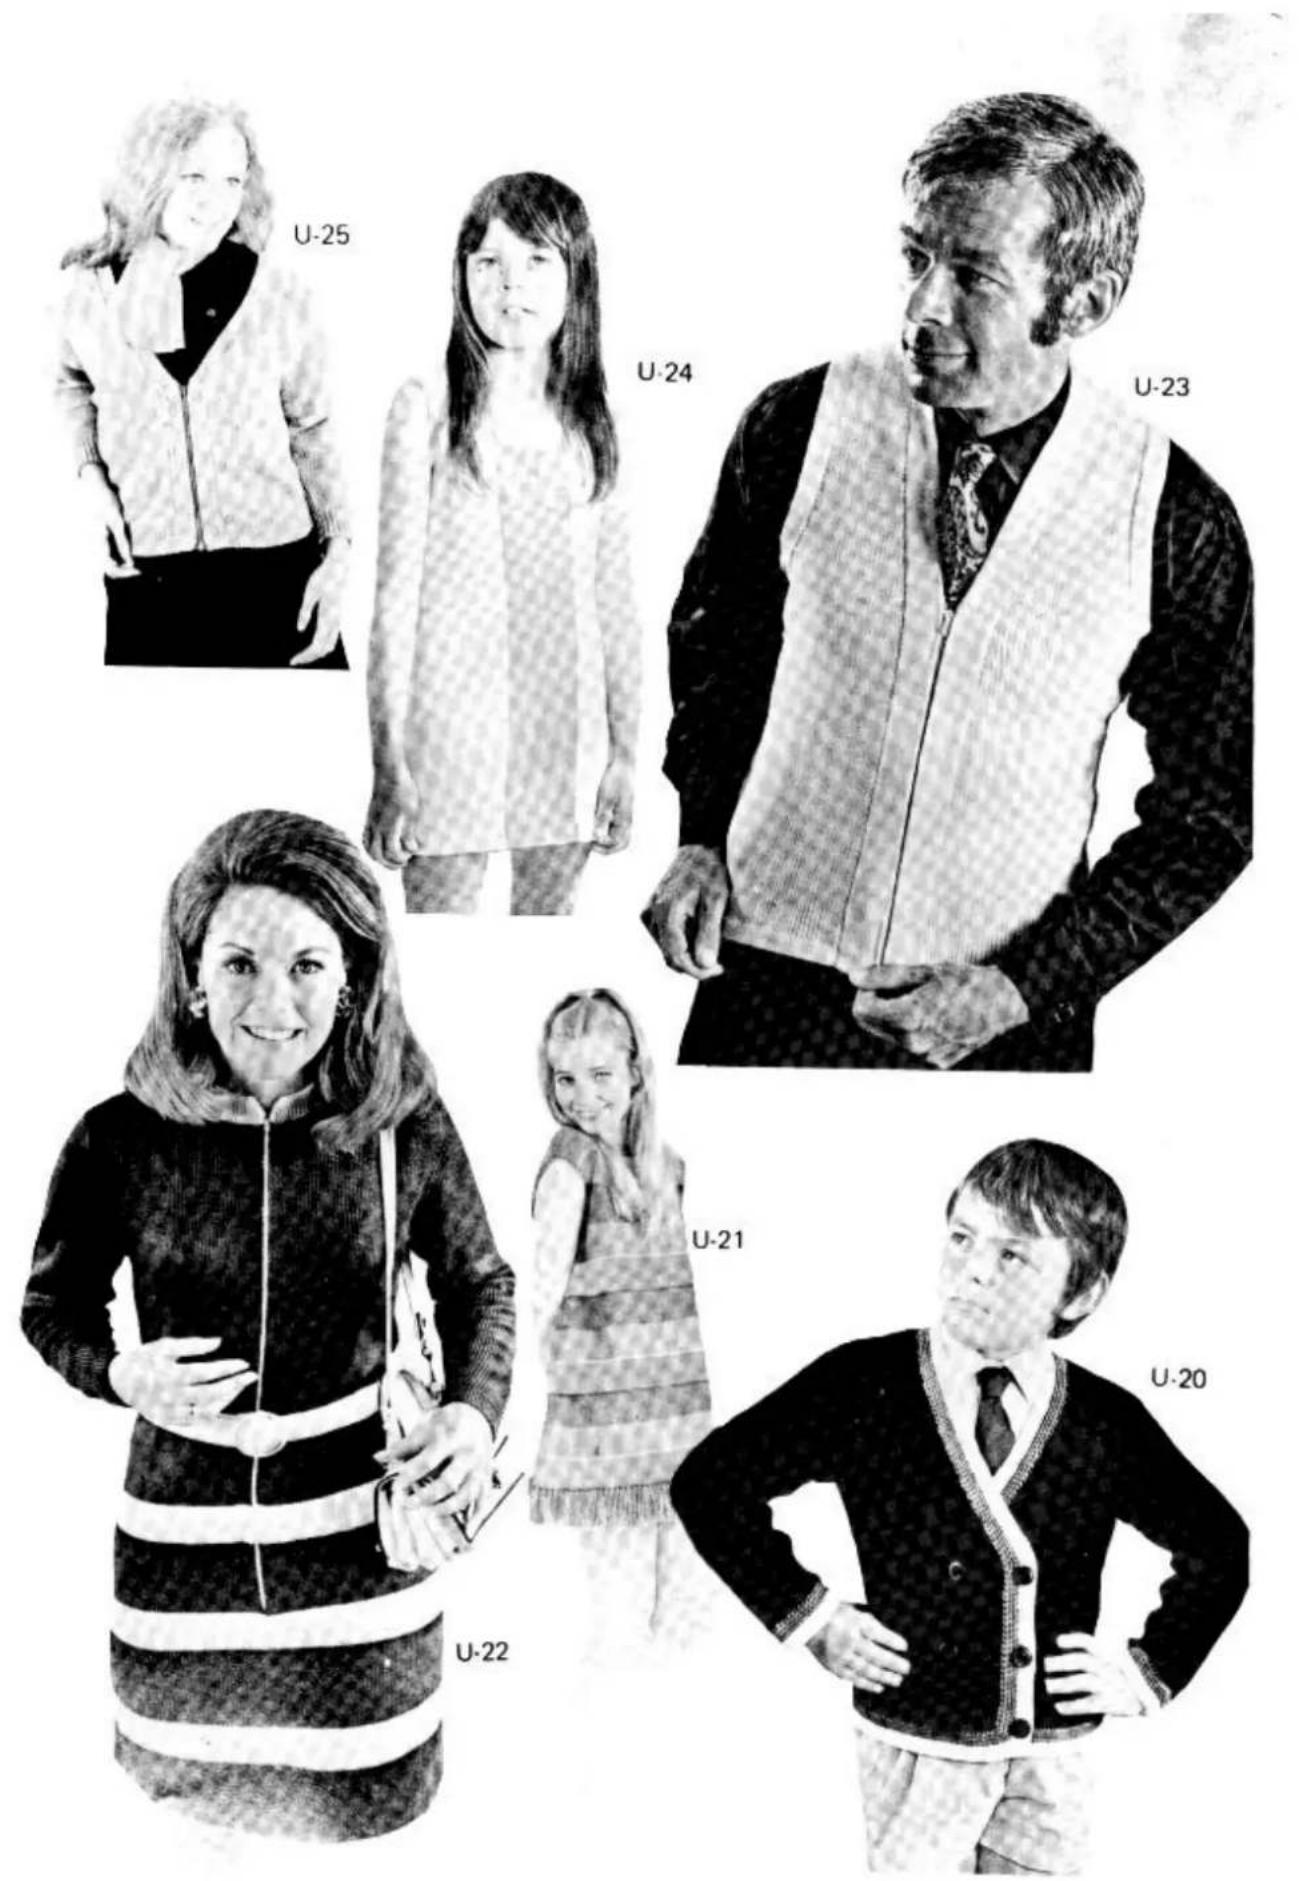
text_image
U-25 U-24 U-23 U-21 U-20 U-22KNITTING
text_image
STEP 4This STEP will give you the last little hints and instructions you need in order to really use your new knitting machine to its best advantage.
4 different methods of Increasing and Decreasing PAGE 63 - 65 for fully fashioned shaped knitwear.
Shaping a 'V' Neck 66 - 68
Shaping a round neck 69 - 71
Buttonholes 72 · 76
Partial knitting - Darts - Pockets 77 · 80
Picot Edge Hem 81
'V' neck with pattern 82 - 83
Slit for Zip Fastener 84
Pockets with pattern 84 - 85
1 PLAIN - 1 PURL Rib 86 - 89
'V' neckband 90.91
Helpful Hints 92
INCREASING ONE STITCH FULLY FASHIONED
Previously I showed you the simple way to increase 1 stitch at a time. Now try this fully fashioned increasing which you will find on expensive knitwear. It is not difficult to do – it does require a little more time but the improvement in appearance is well worth the extra time.
Another important advantage of fully fashioned shaping is that the garment is very much easier to sew up - and you will be absolutely thrilled with the professional results you achieve.
natural_image
Line drawing of a woman in a polka-dot dress waving (no text or symbols)FULLY FASHIONED INCREASING 1 STITCH AT A TIME WITH THE SINGLE TRANSFER TOOL.
YOU MAY USE THIS METHOD TO INCREASE AT BOTH EDGES OF THE SAME ROW BUT - ONLY 1 STITCH AT A TIME.
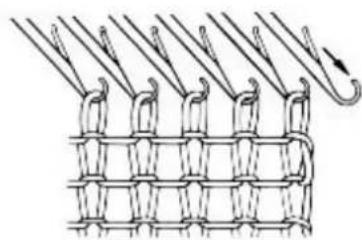
natural_image
Diagram of a woven mesh structure with curved hooks and a hook, no text or symbols presentBring 1 extra needle from 'A' to 'B' position on the side on which you wish to increase.
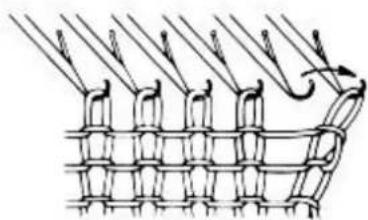
natural_image
Diagram of a woven textile or mesh structure with diagonal strands and a curved arrow indicating direction (no text or symbols)Transfer the end stitch outwards onto this new empty needle.
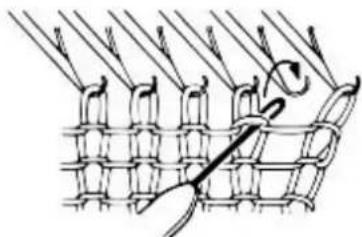
natural_image
Diagram of a woven textile or mesh structure with threads and fibers, no text or symbols presentPick up the bar of the row below the second stitch and place it onto the empty second needle.
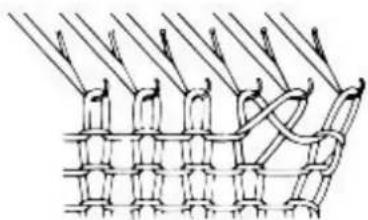
natural_image
Pure mechanical linkage diagram without any text, numbers, or symbolsYou have now increased one stitch fully fashioned.
VCREASING 1 STITCH FULLY FASHIONED WITH THE TRIPLE TRANSFER TOOL

natural_image
Illustration of a woman in a polka-dot dress and blouse, waving (no text or symbols)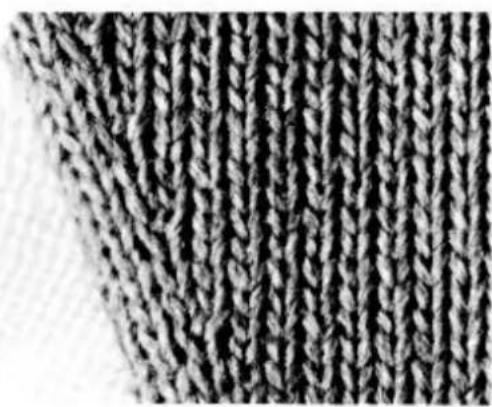
natural_image
Close-up of a knitted fabric texture with vertical ridges (no text or symbols)This type of increasing is usually used to make perfect Raglan shaping.
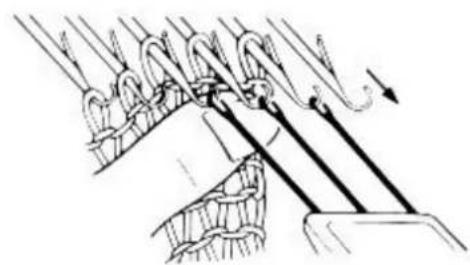
natural_image
Diagram of hanging cables with directional arrows indicating movement (no text or symbols)To increase 1 stitch on the RIGHT side, bring 1 more needle at the RIGHT from 'A' to 'B' position. Open the latches of the last 4 needles at the RIGHT.
Hang the Transfer Tool into the hooks of the last 3 needles with stitches. Pull these needles to 'D' position, push them back to 'A' position and then pull them up to 'B' position again.
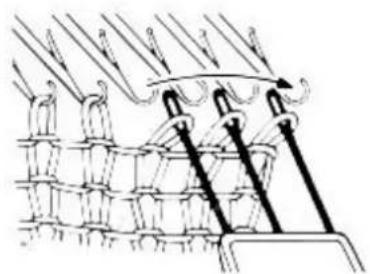
natural_image
Diagram of a mechanical or electrical component with multiple hanging pins and connecting rods (no text or symbols)Lift the Transfer Tool with the 3 stitches and transfer the stitches one needle outwards. The 4th needle INSIDE the knitting is EMPTY.
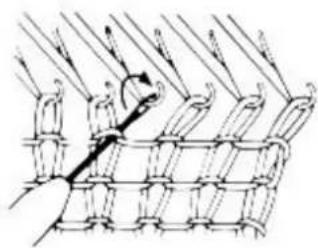
natural_image
Diagram of a mechanical or structural assembly with layered components and directional arrows (no text or symbols)Lift the bar of the 4th stitch of the previous row onto the empty needle. You have now increased 1 stitch, fully fashioned.
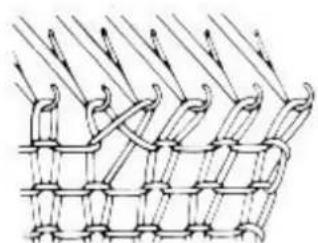
natural_image
Pure mechanical diagram showing interlocking gears or linkages without any text, numbers, or symbolsYOU CAN INCREASE THIS WAY ON BOTH SIDES OF THE SAME ROW - BUT ONLY 1 STITCH AT A TIME.
DECREASING 1 STITCH FULLY FASHIONED WI7
THE TRIPLE TRANSFER TOOL
natural_image
Close-up of a knitted fabric with visible weave pattern (no text or symbols)YOU MAY DECREASE ON BOTH SIDES OF THE SAME ROW.
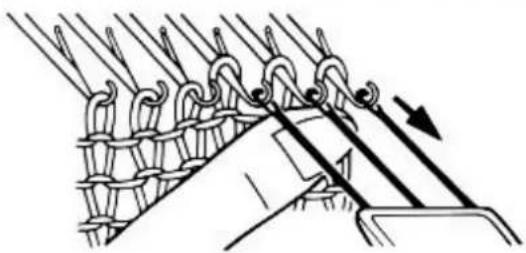
natural_image
Diagram of a rope or cable structure with hanging loops and a directional arrow (no text or symbols)Knit a few rows. Open the latches of the last 4 needles at the RIGHT.
Hang the Transfer Tool into the last 3 needles from the RIGHT. Pull the needles out to 'D' position.
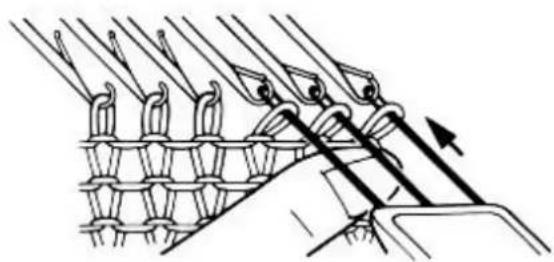
natural_image
Technical line drawing of a mechanical component with multiple blades and a handle, no text or symbols presentPush them BACK to 'A' position and then pull them slowly up to 'B' position.
Lift the Transfer Tool out of the needles with the stitches on it.
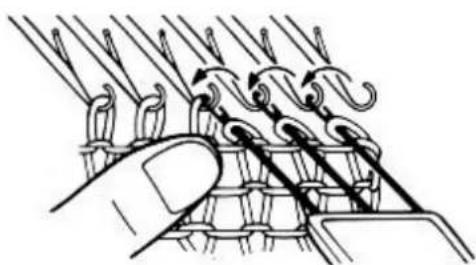
natural_image
Illustration of a hand pressing down on a metal structure with curved hook-like elements (no text or symbols)Move the Transfer Tool 1 more needle towards the LEFT. Let the 3 stitches slide into the needle hooks.
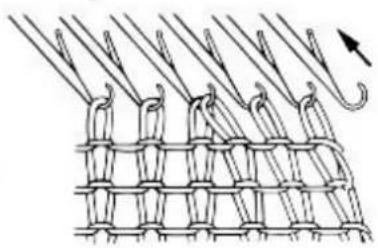
natural_image
Diagram of a mesh structure with curved and straight lines, no text or symbols presentThe 4th needle inside the knitting has 2 stitches and the first needle from the RIGHT is empty. Push the empty needle back to 'A' position.
When decreasing for a 'V' neck or Raglan shaping, this method of decreasing is very useful and most attractive.
HOW TO SHAPE A 'V' NECK
This method is suitable when doing plain knitting (stocking stitch). The 'V' neck for patterned fronts will be shown later in this book. Turn the Row Counter to 000. The carriage is at the RIGHT. Cast on open edge 40 stitches, 20 stitches on each side of centre. Knit 11 rows with Tension 7 finishing with the carriage at the RIGHT.
natural_image
Line drawing of a woman in a polka-dot dress waving (no text or symbols)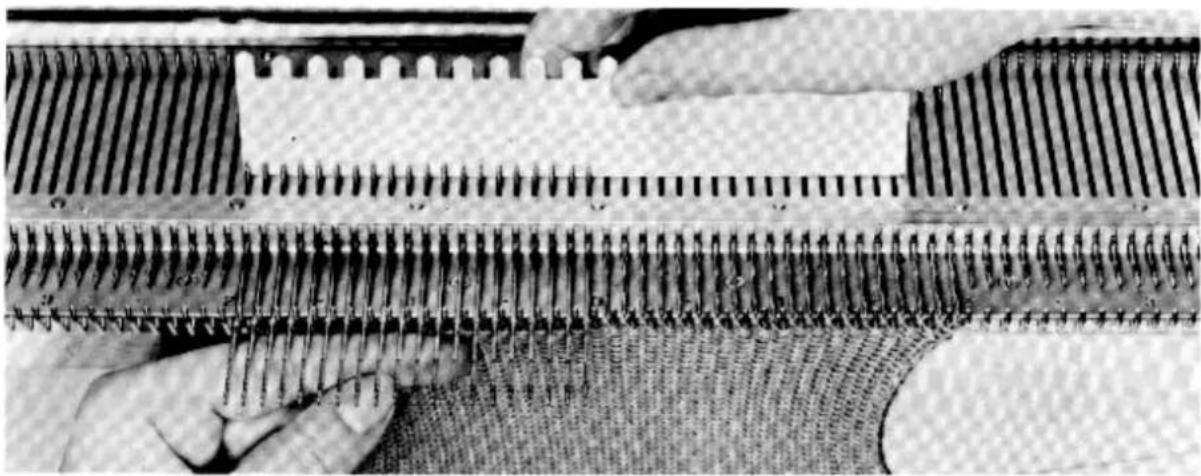
natural_image
Close-up of hands operating a mechanical loom with threads and a meshed fabric (no visible text or symbols)With the straight edge of the Needle Pusher raise the 20 needles LEFT of centre from 'B' to 'D' position. ALL buttons are UP and the Cam Lever is on centre 0.
While pushing the needles to 'D' position - always hold the knitting against the machine with your left hand (as shown in the photo) to ensure that all stitches slide well BEHIND the needle latches.
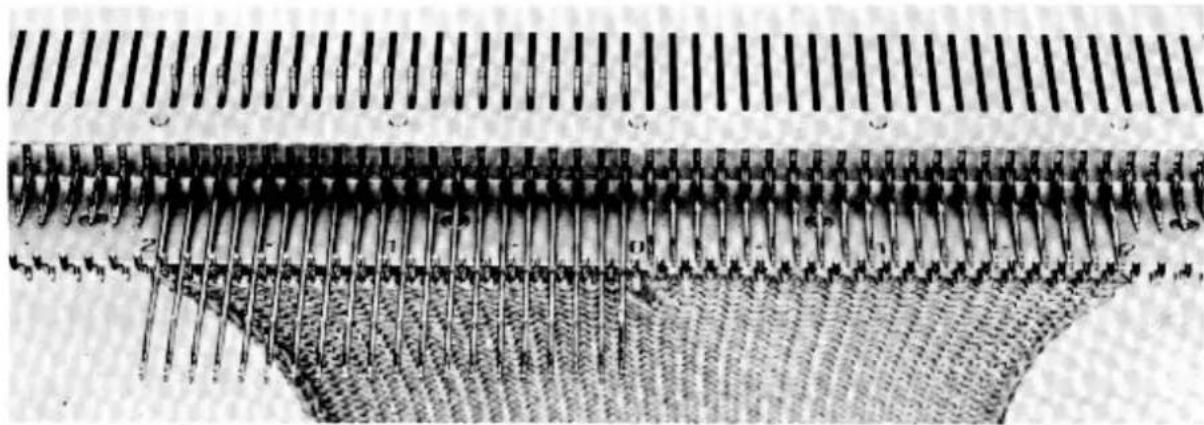
natural_image
Close-up of a mechanical component with parallel rods and textured surface (no visible text or symbols)The needles in 'D' position will NOT knit. Just move the carriage past the needles in knitting position - DO NOT move it past the needles in 'D' position at the LEFT as the yarn tension will become too loose and this could cause dropped stitches or LOOSE loops at the 'V' neck edge.
Knit 4 rows - you will notice that the carriage has knitted ONLY the stitches on the RIGHT side of centre which you left in 'B' position. The needles on the LEFT side have NOT been knitted, and in the centre of the knitting is the opening for the 'V' neck.
SHAPING A 'V' NECK
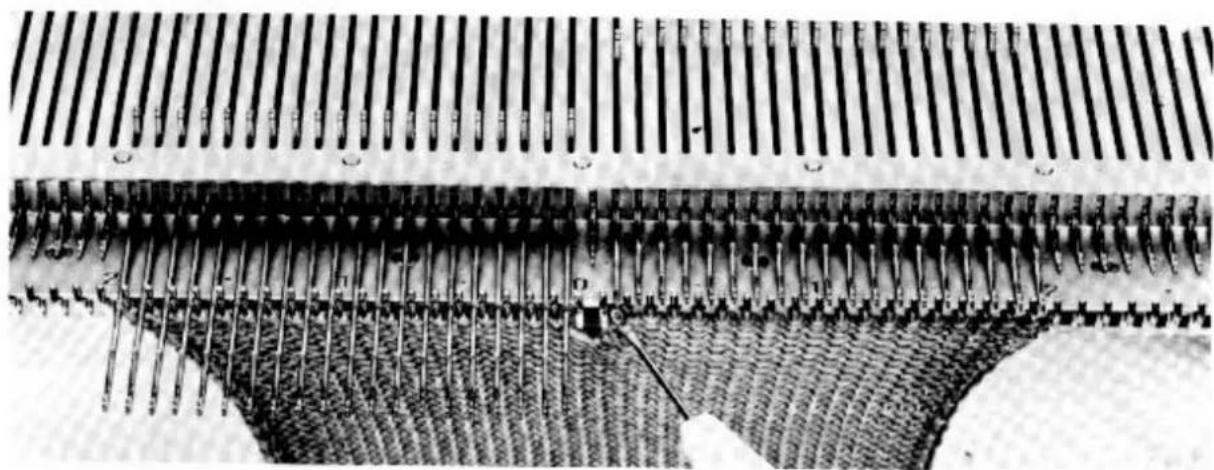
natural_image
Close-up of a mechanical component with parallel rods and grooves, no visible text or symbolsWe now start decreasing for the 'V' neck at the neck edge of the RIGHT side section.
Take the Transfer Tool and transfer the last stitch on the LEFT edge of the needles in 'B' position onto its adjacent needle to the RIGHT. You will then have 1 empty needle on the RIGHT of centre - push the empty needle back to 'A' position.
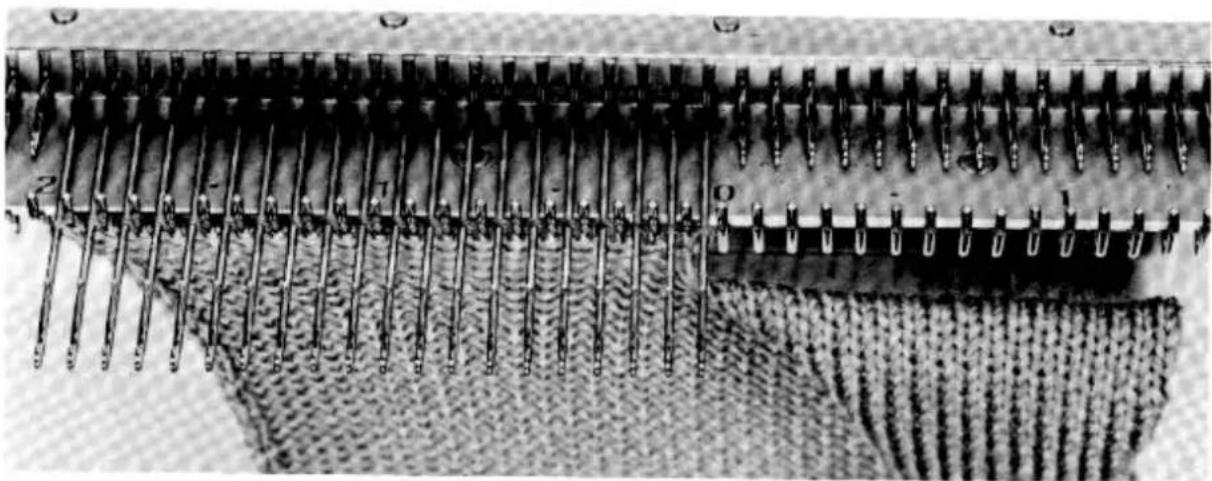
natural_image
Close-up of a mechanical component with multiple metal rods and textured surface (no visible text or symbols)Knit 4 rows. Again transfer 1 stitch in the centre of the knitting towards the right. Continue knitting 4 rows and transferring 1 stitch towards the RIGHT until you have 10 needles left with stitches at the RIGHT side of centre. Knit 4 more rows and bind off the remaining stitches. The Row Counter shows 56 - set it back to 12.
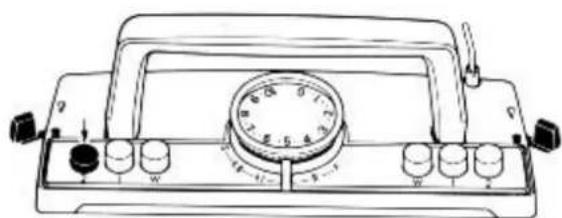
natural_image
Line drawing of a vintage analog voltmeter with dial and adjustment knobs (no text or symbols)Now we are ready to knit the LEFT section of the 'V' neck.
Push all empty needles back to 'A' position.
The carriage is at the RIGHT.
Check that the Row Counter shows 12.
Push DOWN button 2 on the LEFT.
SHAPING A 'V' NECK
natural_image
Close-up of a mechanical or textile component with parallel grooves and textured fabric (no visible text or symbols)Re-thread the yarn through the Yarn Feeder and fasten the end onto the RIGHT side Table Clamp.
Make sure button 2 at LEFT is DOWN. Check the yarn tension. Knit 4 rows.
natural_image
Close-up of a mechanical component with parallel grooves and mesh texture (no visible text or symbols)Transfer 1 stitch at the RIGHT edge onto its adjacent needle to the LEFT. Bring the empty needle back to 'A' position.
Knit 4 rows, again transfer 1 stitch at the RIGHT edge onto its adjacent needle to the LEFT.
Repeat knitting 4 rows and transferring 1 stitch at the RIGHT until you have 10 needles remaining in 'B' position. Knit 4 rows and bind off the last 10 stitches. The Row Counter shows 56.
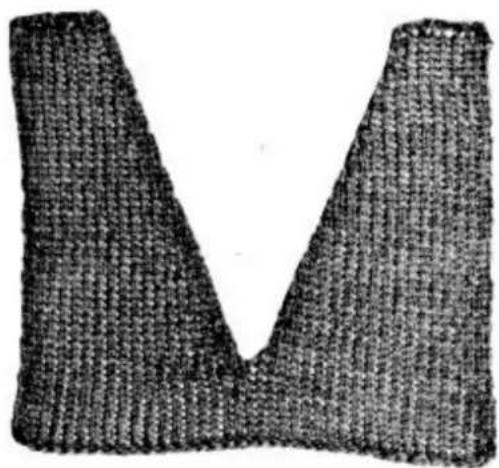
natural_image
Close-up of a knitted garment with two V-shaped bands (no text or symbols visible)This is your 'V' neck if it has been knitted according to the above instructions. If NOT please try it again until you have the right result.
Of course this 'V' neck is knitted in a very small size - but when knitting according to pattern instructions, you always get the required size. Each pattern tells you how many rows to knit and how many times to decrease for the 'V' neck.
Here you have learned the simple way of decreasing for the 'V' neck - later you can try the decreasing with the Triple head Transfer Tool - this method gives the fully fashioned shaping effect to your neckline.
KNITTING A ROUND NECKLINE
We will now knit a round neckline - which is also very easy to do. Set the Row Counter to 000. Make an open edge cast on over 40 needles and knit 29 rows with a suitable Tension.
The carriage is at the RIGHT and the Row Counter shows 30. Take a thread of the same quality yarn as you are knitting with, about 20 inches long, and we will start the round neckline by binding (or casting) off the centre 10 stitches.
natural_image
Line drawing of a woman in a polka-dot dress and turtleneck, gesturing with her hand (no text or symbols)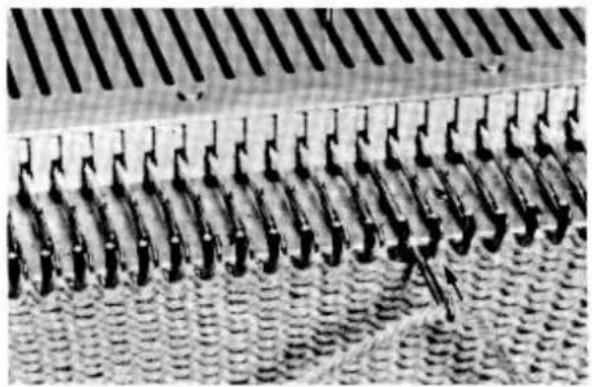
natural_image
Close-up of a patterned fabric or mesh structure with repeating vertical bars and a central rod (no text or symbols visible)Push the 6th needle RIGHT of centre from 'B' to 'D' position. The stitch is BEHIND the latch. Lay the centre of the thread across the EMPTY and OPEN needle hook of the 6th needle. Pull this needle back to 'B' position causing the thread to be knitted through the stitch.
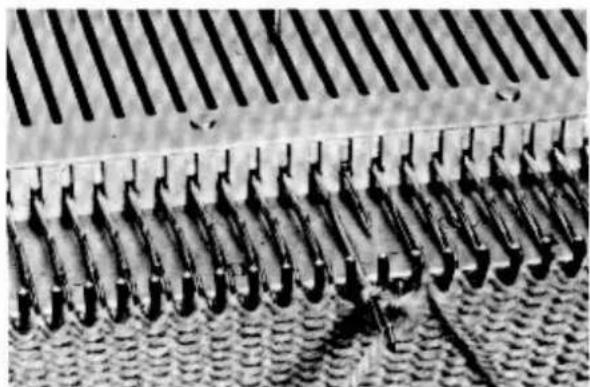
natural_image
Close-up of a perforated metal grate with evenly spaced vertical slots, no visible text or symbolsPush the 5th needle RIGHT of centre to 'D' position and lay the thread across the hook to be knitted in the same way as on needle 6.
Transfer the stitch from needle 5 onto needle 4 on the RIGHT of centre. Push needle 4 to 'D' position, causing both stitches to slide behind the latch. Lay the thread across the hook of needle 4 and pull the needle back to 'B' position. The thread will be knitted through both stitches.
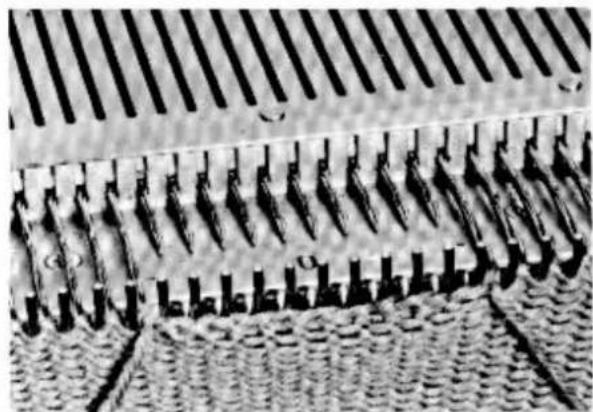
natural_image
Close-up of a perforated metal panel with vertical grooves and textured surface (no text or symbols visible)This way, cast or bind off the 10 centre stitches until you have 2 stitches on needle 6 on the LEFT of centre. Knit the thread through these 2 stitches but leave the new stitch IN the needle hook. Leave the rest of the thread hanging down from the knitting.
THE CENTRE OPENING FOR THE ROUND NECKLINE IS COMPLETED.
The carriage is at the RIGHT and the Row Counter shows 30. Bring the 10 empty needles back to 'A' position. ALL buttons are UP.
SHAPING A ROUND NECKLINE
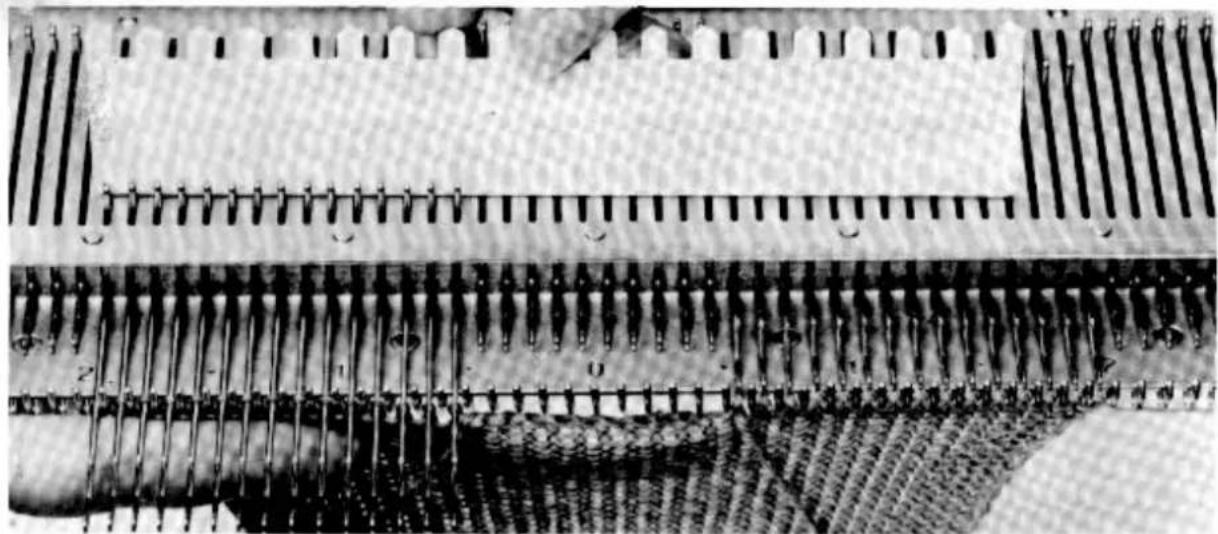
natural_image
Close-up of a mechanical component with multiple parallel rods and grooves, no visible text or symbolsUsing the straight edge of the Needle Pusher bring the 15 needles LEFT of centre from 'B' to 'D' position.
Again we will first knit the RIGHT section and then the LEFT section of the neckline and only move the carriage across the needles in knitting position.
Knit 1 row to the LEFT. The Row Counter shows 31 and only the needles on the RIGHT of centre have been knitted.
To shape the neckline - bind or cast off 2 stitches on the LEFT edge of the RIGHT section. Bring both empty needles back to 'A' position.
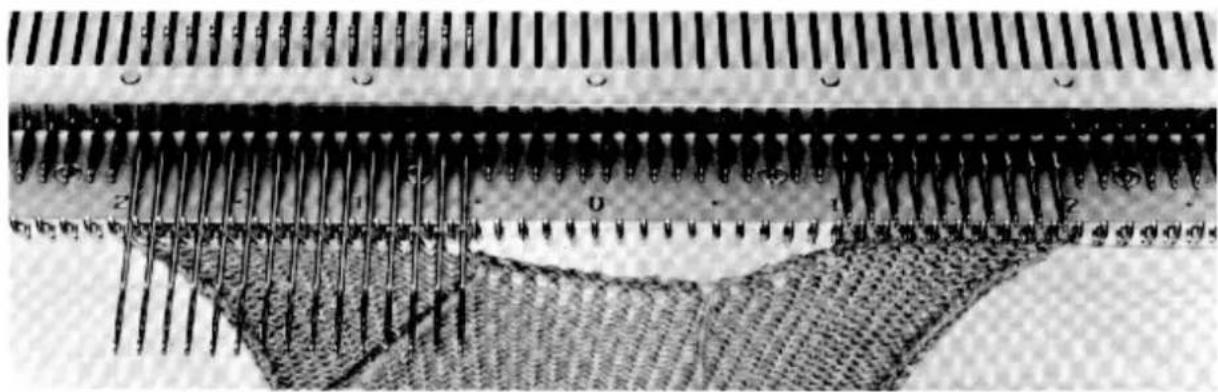
natural_image
Close-up of a mechanical component with parallel rods and a textured surface (no visible text or symbols)Knit 2 rows, the Row Counter shows 33.
Knit 2 rows, the Row Counter shows 35.
Knit 2 rows, the Row Counter shows 37.
Knit 2 rows, the Row Counter shows 39.
Knit 2 rows, the Row Counter shows 41.
Knit 4 rows, the Row Counter shows 45.
Knit 4 rows, the Row Counter shows 49.
Bind off 2 stitches for the neckline.
Decrease 1 stitch for the neckline.
Decrease 1 stitch for the neckline.
Decrease 1 stitch for the neckline.
Decrease 1 stitch for the neckline.
Decrease 1 stitch for the neckline.
Decrease 1 stitch for the neckline.
Knit 15 rows. Bind or cast off the remaining 5 stitches of the RIGHT side section at one time. With the straight edge of the Needle Pusher bring the empty needles clearly back to 'A' position.
SHAPING A ROUND NECKLINE
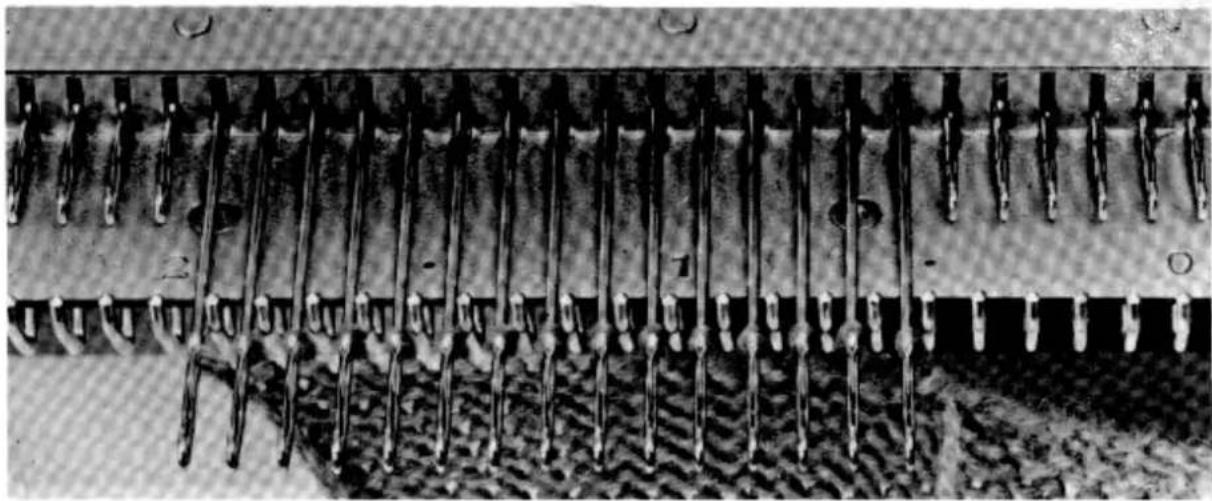
natural_image
Close-up of a mechanical component with multiple metallic rods and grooves (no visible text or symbols)Move the carriage towards the LEFT - well past ALL needles in 'D' position of the LEFT section. Re-thread the yarn through the Yarn Feeder and fasten the end to the LEFT side Table Clamp.
Set the Row Counter back to 30. Push DOWN button 2 on the RIGHT side of carriage. Check the yarn tension.
Knit 1 row, the Row Counter shows 31.
Knit 2 rows, the Row Counter shows 33.
Knit 2 rows, the Row Counter shows 35.
Knit 2 rows, the Row Counter shows 37.
Knit 2 rows, the Row Counter shows 39.
Knit 2 rows, the Row Counter shows 41.
Knit 4 rows, the Row Counter shows 45.
Knit 4 rows, the Row Counter shows 49.
Knit 15 rows - bind off all the remaining 15 stitches,
Bind off 2 stitches at the RIGHT side edge of the LEFT section.
Bind off 2 stitches for the neckline.
Decrease 1 stitch for the neckline.
Decrease 1 stitch for the neckline.
Decrease 1 stitch for the neckline.
Decrease 1 stitch for the neckline.
Decrease 1 stitch for the neckline.
Decrease 1 stitch for the neckline.
natural_image
Close-up of a textured fabric or garment with a U-shaped cutout (no visible text or symbols)Your first round neckline is now completed.
natural_image
Illustration of a woman in a polka-dot dress and dress, gesturing with one hand (no text or symbols)BUTTONHOLES FOR SMALL BUTTONS
If you are using a thin yarn, the buttonhole over 2 needles will be quite small. A thin yarn knitted on Tension 5 will give about 1/4 inch buttonhole. Thick yarn knitted on Tension 10 will give a buttonhole about 1/3 inch. Decide the position of the buttonhole.
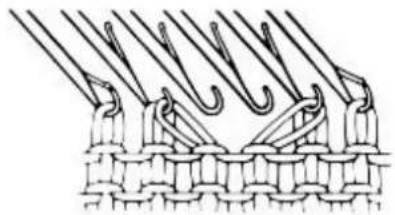
natural_image
Diagram of a knotted fabric structure with multiple hanging hooks (no text or symbols)Where a button hole is required - transfer 1 stitch to the adjacent needle on each LEFT and RIGHT side.
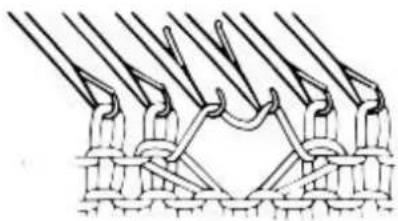
natural_image
Diagram of a mechanical linkage or clamping mechanism with multiple rods and connecting rods (no text or symbols)Knit 1 row - the yarn lies loosely over the 2 empty needle hooks.
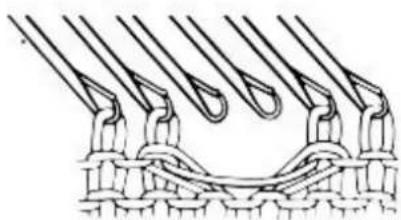
natural_image
Diagram of a mechanical or electrical component with multiple curved lines and connectors (no text or symbols)Bring these empty needles to 'D' position and then back to 'B' position - leaving the loose thread in front of the Sinker Gate.
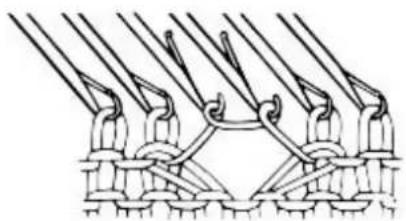
natural_image
Pure mechanical linkage diagram without any text, numbers, or symbolsBring the LEFT needle a little to the front, just out of the Sinker Gate, open the latch so that you are able to wind the thread in an anti-clockwise direction around it. Pull the needle back to 'B' position. Repeat the same with the second needle.
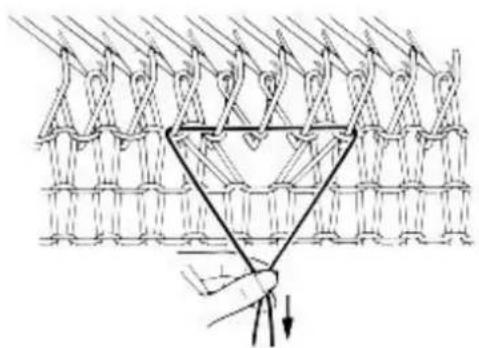
natural_image
Diagram of a mechanical or structural assembly with triangular components and a hand holding a tool, no visible text or symbols.Lay the Nylon Thread across the new loops and the stitches of the adjacent needles on each LEFT and RIGHT side - between the needle hooks and the Sinker Gate.
Pull both ends of the Nylon Thread down and knit 2 or 3 rows.
Pull the Nylon Thread out of the knitting. Continue knitting and repeat the buttonhole where required.
LARGE SINGLE BUTTONHOLE
natural_image
Line drawing of a woman in a polka-dot dress and holding a ribbon, gesturing with her hand (no text or symbols)To make this buttonhole you will need a thread about 10 inches long of the same yarn you are knitting with.
Decide the position of the buttonhole - you will knit it over 7 needles.
In the diagram they are numbered from 1 to 7.
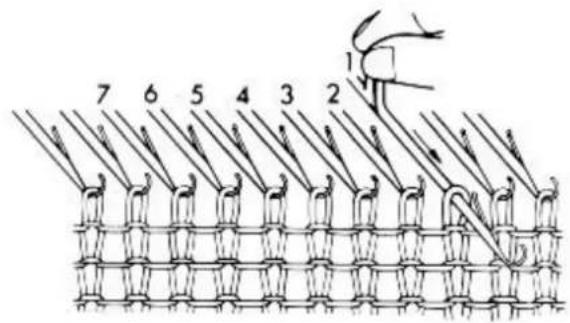
text_image
7 6 5 4 3 2 1Push needle 1 from 'B' to 'D' position. The stitch will slide behind the latch and the hook is empty.
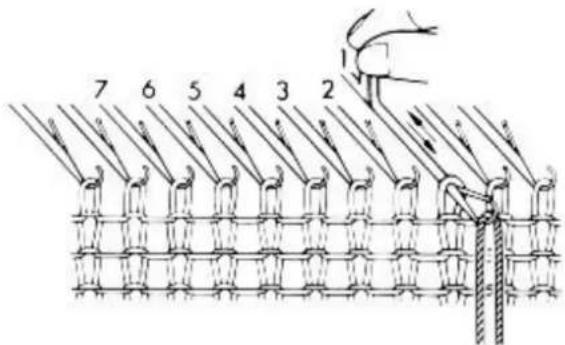
text_image
7 6 5 4 3 2Hang the loose thread of yarn across the empty hook and pull the needle back to 'B' position. You have now knitted 1 stitch by hand with needle 1.
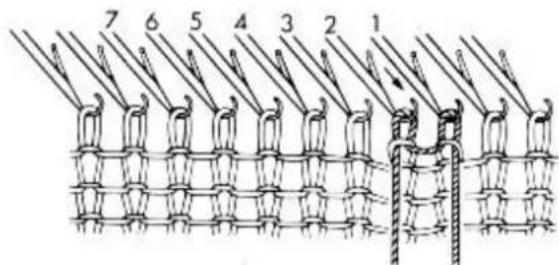
text_image
7 6 5 4 3 2 1Push needle 2 to 'D' position and knit-in the thread in the same way.
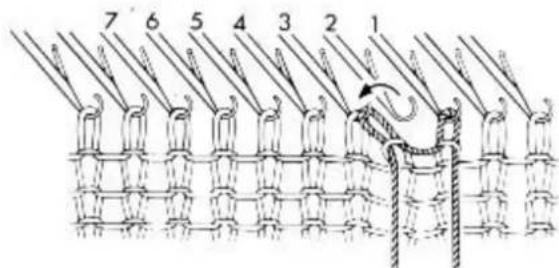
text_image
7 6 5 4 3 2 1Now transfer the stitch from needle 2 onto needle 3.
Push needle 3 (which has 2 stitches) up to 'D' position.
LARGE SINGLE BUTTONHOLE
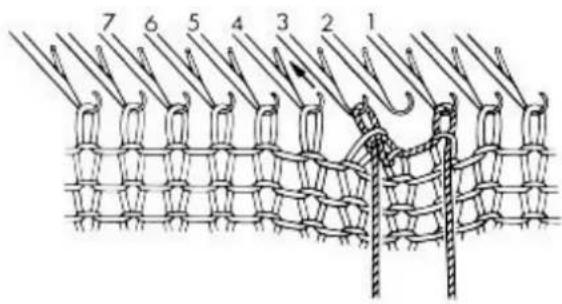
text_image
7 6 5 4 3 2 1Lay the yarn across the empty hook and pull needle 3 back to 'B' position. You have pulled the yarn through both stitches.
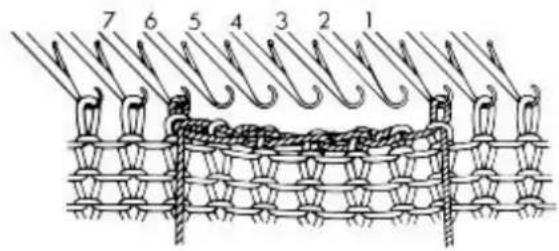
text_image
7 6 5 4 3 2 1Transfer the stitch of needle 3 onto needle 4, bring needle 4 up to 'D' position and continue binding off stitches until 5 needles are empty and a new stitch is on needle 7.
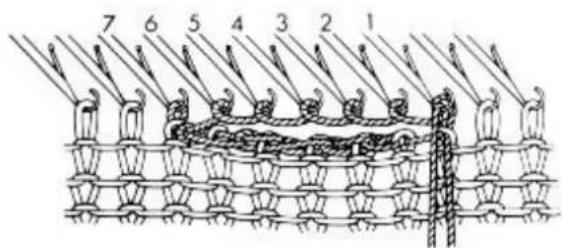
text_image
7 6 5 4 3 2 1 1The 5 empty needles are in 'B' position. Open the latches of these needles. Bring needle 6 a little to the front, just out of the Sinker Gate and wind the yarn in anticlockwise direction L O O S E L Y around it. Pull the needle back to 'B' position. Repeat with needle 5, 4, 3, 2 and 1. The needles with the new loops must be in line with all other needles.
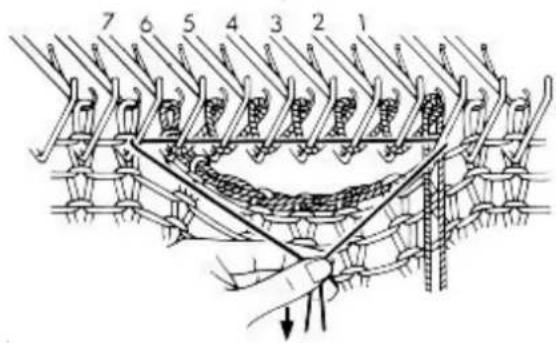
text_image
7 6 5 4 3 2 1 3 2 1Take the Nylon Thread and lay it across the loops of the 7 needles, between the needle hooks and the Sinker Gate. Pull the Nylon Thread down at both ends and knit 2 rows. Pull out the Nylon Thread. The buttonhole is now completed.
THE DOUBLE BUTTONHOLE BAND
This buttonhole can be knitted as wide as you wish - and it can be used for a separately knitted cardigan band.
For a jacket or cardigan band, cast on 22 needles closed or open edge and knit 20 rows.
natural_image
Line drawing of a woman in a polka-dot dress and dress, gesturing with her hand (no text or symbols)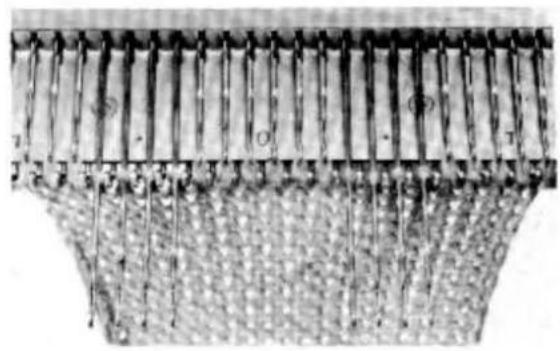
natural_image
Close-up of a mechanical component with parallel rods and textured surface (no visible text or symbols)Starting from the RIGHT - bring needles 6, 7, 8, 9, 16, 17, 18 and 19 from 'B' to 'D' position.
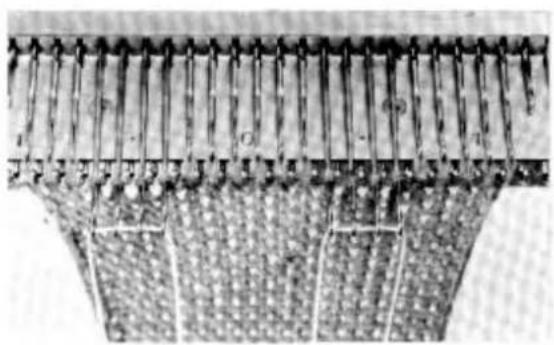
natural_image
Close-up of a mechanical component with threaded fasteners and textured base (no visible text or symbols)In the picture you see the Nylon Thread lying across the needles - but you should use a contrast colour or waste yarn.
Lay the contrasting thread over each block of 4 needles in 'D' position. Hold both threads down while carefully pushing the 2 groups of needles back to 'C' position until the latches close over the thread.
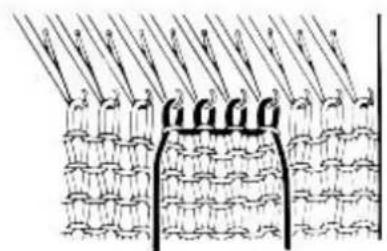
natural_image
Diagram of a mechanical or electrical component with multiple wires and a curved structure (no text or symbols)Now let the threads hang down and starting with the first needle from the RIGHT in 'C' position, push the needles back - one by one - until BOTH groups of 4 needles have hand knitted stitches and are in 'B' position.
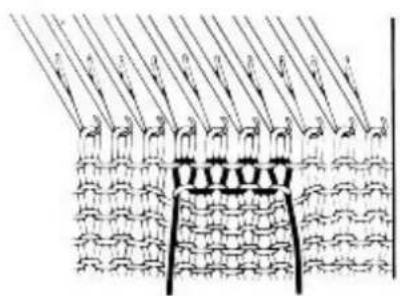
natural_image
Diagram of a mechanical or electrical component with multiple parallel rods and a central bracket (no text or symbols)Knit 1 complete row. The contrasting thread should now be knitted in as shown in this illustration. Knit the required number of rows and repeat the buttonhole.
FINISHING THE DOUBLE BUTTONHOLE BAND
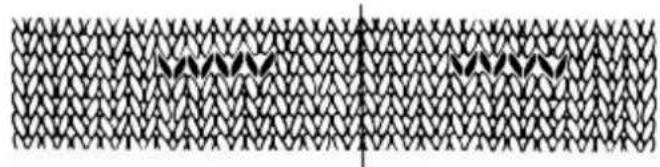
natural_image
Abstract geometric pattern composed of interlocking triangles and diamonds (no text or symbols)The line shows where the cardigan band will be folded back.
The stitches shown in black are those which you knitted in by hand as shown on the previous page.
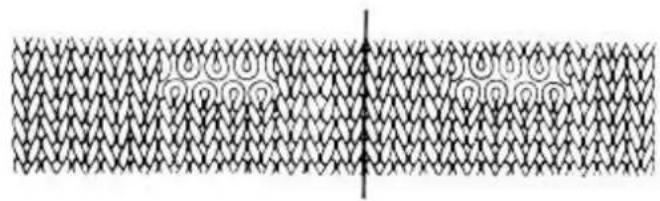
natural_image
Abstract geometric pattern with interlocking diamond shapes and a vertical line (no text or symbols)Steam the band lightly as this makes it much easier to sew up the button-hole and the stitches do not unravel so easily. Pull out the contrasting yarn from the band.
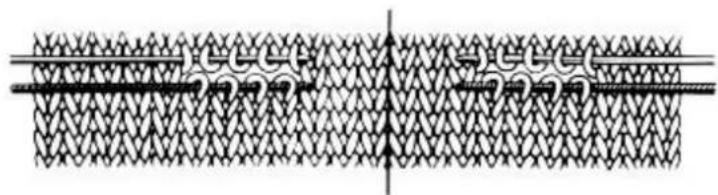
natural_image
Pure mechanical or structural diagram with no visible text, numbers, or symbolsInsert needles to hold the stitches.
natural_image
Diagram of a knitted fabric with rope and hook, no text or symbols present
natural_image
Diagram of a knotted rope or mesh structure with no visible text or symbolsFold the buttonhole band in the centre. With a thread of matching yarn, sew up the button-hole as shown in the diagram, starting at the lower edge.
natural_image
Diagram of a mechanical device embedded in a mesh structure (no text or symbols)
natural_image
Abstract pattern of interlocking diamond shapes with no text or symbolsWhen you have practised your buttonhole a few times, the result should look like the buttonhole in the diagram above. Steam the band and lay it onto the edge of the jacket. Backstitch 2 stitches from the edge - row by row - the buttonhole band onto the jacket. Catch down on inside. The above instruction is for a lady's jacket. For a man's jacket you must have the 5 stitches at the LEFT and 3 stitches at the RIGHT side edge while knitting.
PARTIAL KNITTING - DARTS
Partial knitting means knitting selected groups of needles while the remaining needles DO NOT knit. Partial knitting has a wide variety of practical uses - such as knitting darts, pockets, circular table mats, circular flared skirts, bonnets and many other things.
DARTS - IN PLAIN STOCKING STITCH GARMENTS
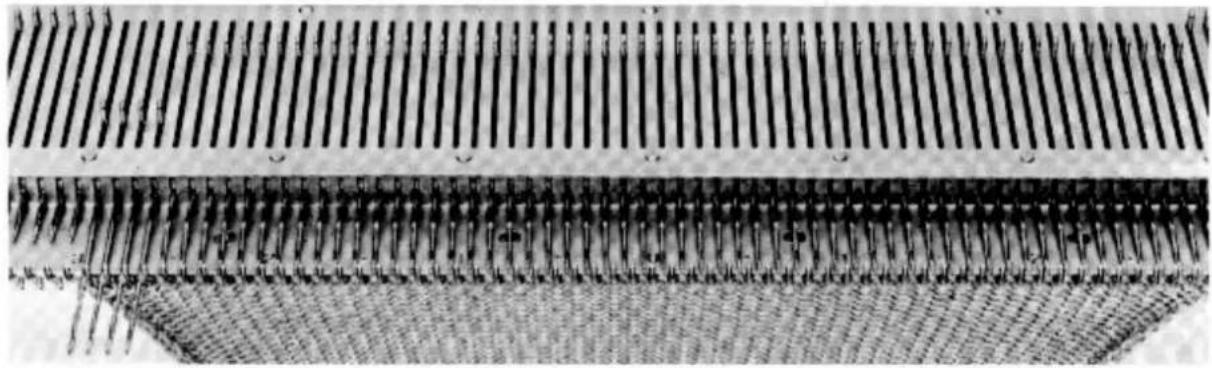
natural_image
Close-up of a textured surface with parallel grooves and ridges, no visible text or symbolsMake an open edge cast on over 60 needles and knit a few rows, finishing with the carriage at the RIGHT. ALL buttons are UP. Push 4 needles at LEFT edge of knitting from 'B' to 'D' position. Knit 1 row to the LEFT.
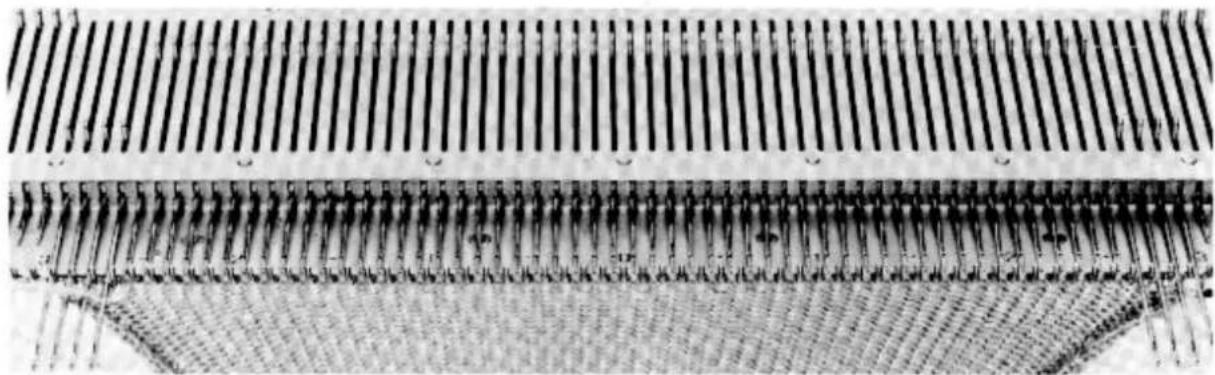
natural_image
Close-up of a metallic grid structure with parallel grooves and a textured base (no text or symbols visible)The 4 needles in 'D' position at the LEFT have NOT been knitted and the yarn lies on top of these needles. Take the yarn under the 4th needle INSIDE the knitting and lay it over the other 3 needles in 'D' position. Now push 4 needles at the RIGHT to 'D' position. Knit 1 row to the RIGHT.
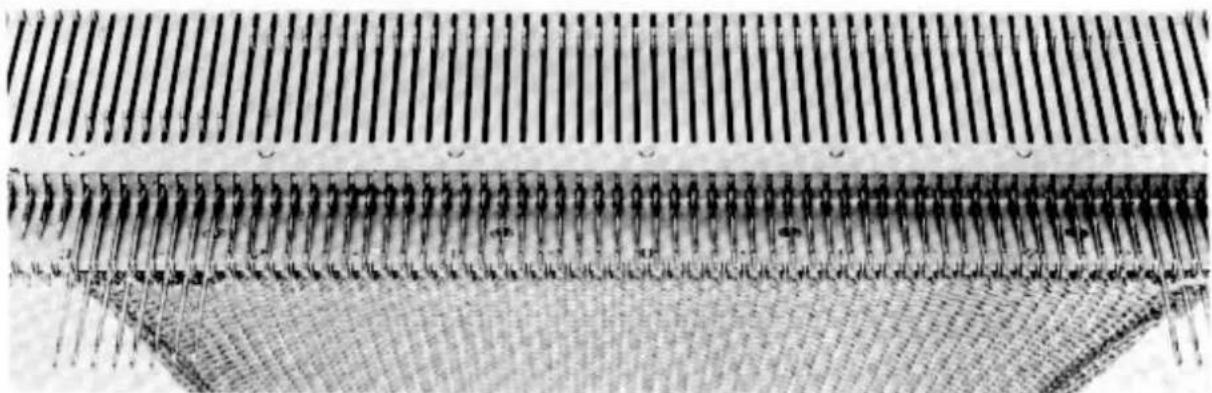
natural_image
Close-up of a textured surface with parallel grooves and a grid pattern (no text or symbols visible)Take the yarn under the 4th needle INSIDE the knitting at the RIGHT and on top of the other 3 needles in 'D' position. At the LEFT bring 4 more needles from 'B' to 'D' position.
PARTIAL KNITTING - DARTS
When doing Partial knitting, you do not need to move the carriage past all the knitting after each row - just past the needles knitting in :'B' position - otherwise the yarn tension becomes too loose and this could cause dropped stitches inside the knitting.
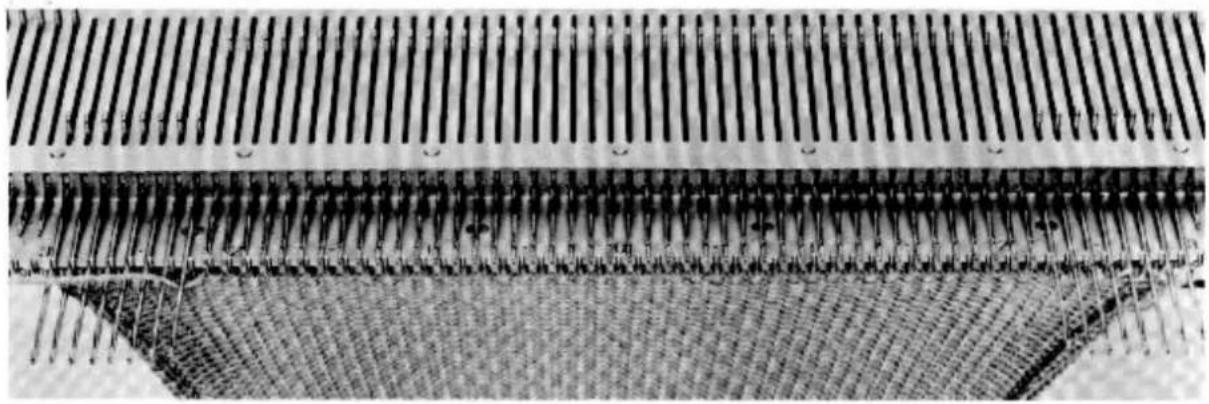
natural_image
Close-up of a traditional tiled roof with vertical slats and woven mat (no text or symbols visible)Knit 1 row towards the LEFT. Take the yarn UNDER the 8th needle inside the knitting in 'D' position and let it lie on top of the other 7 needles. Bring 4 more needles at the RIGHT into 'D' position. Knit 1 row. Take the yarn UNDER the 8th needle inside the knitting at the RIGHT.
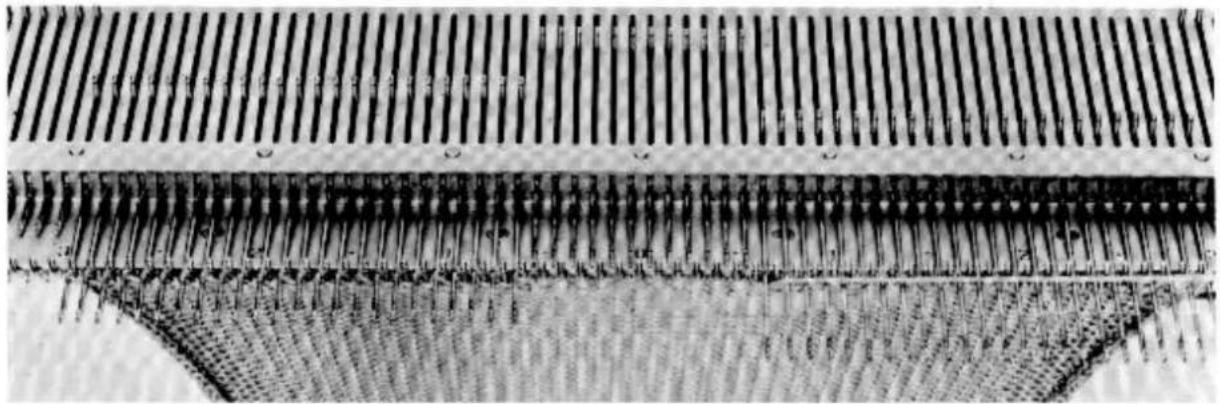
natural_image
Close-up of a mechanical component with parallel grooves and a meshed base (no visible text or symbols)Proceed as above until you have 12 needles in the centre of the knitting in 'B' position. The carriage is at the RIGHT and every 4th needle in 'D' position has two loops. Using the straight edge of the Needle Pusher, bring the needles at the LEFT from 'D' back to 'C' position. Knit 1 row towards the LEFT.
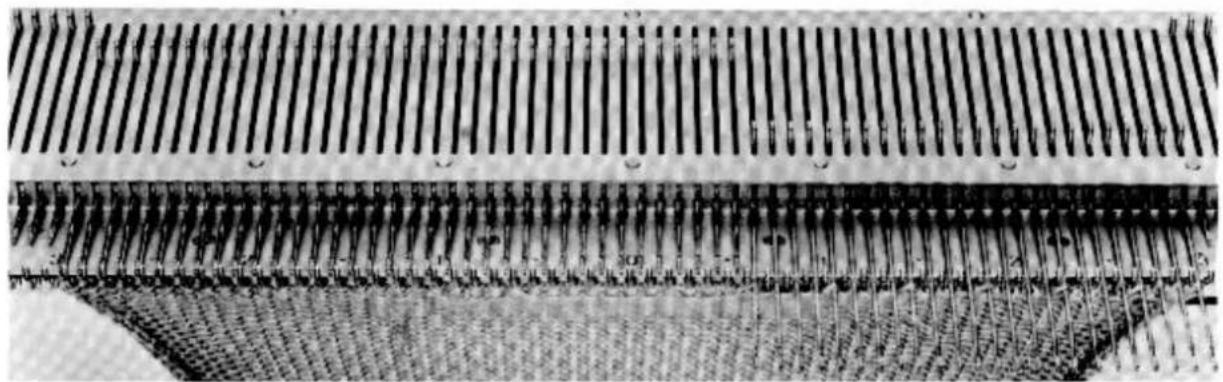
natural_image
Close-up of a mechanical component with parallel grooves and a textured base (no visible text or symbols)The needles from 'C' position are knitted back to 'B' position. Push the needles at the RIGHT from 'D' to 'C' position. Knit 1 row. These needles are also knitted back to 'B' position. Knit another 8 or 10 rows. You can see quite clearly where the darts have been knitted.
NOTE: When knitting darts in pattern knitting, the stitches will be held in 'A' position by the Nylon Thread. Each needle must then be brought back to 'A' position one by one. You learn this later.
PARTIAL KNITTING - POCKETS
Cast on 60 needles open edge. Knit 21 rows finishing with the carriage at the RIGHT. Both Levers are in front and ALL buttons are UP. Cam Lever set to centre 0.
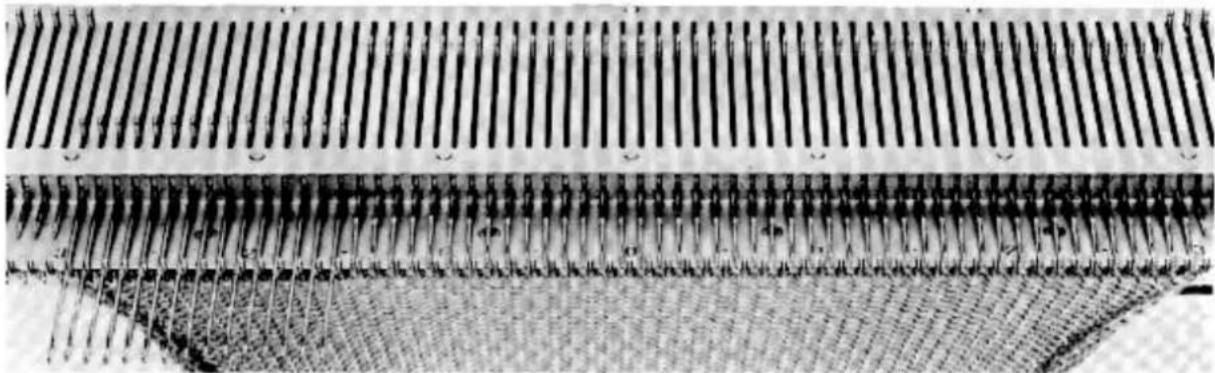
natural_image
Close-up of a textured surface with parallel grooves and ridges, no visible text or symbolsWith the straight edge of the Needle Pusher, bring 15 needles at the LEFT from 'B' to 'D' position. Set the Row Counter Tripper out of action by lifting it up and turning it sideways. Knit 1 row to the LEFT. The 15 needles on the LEFT side in 'D' position have not been knitted.
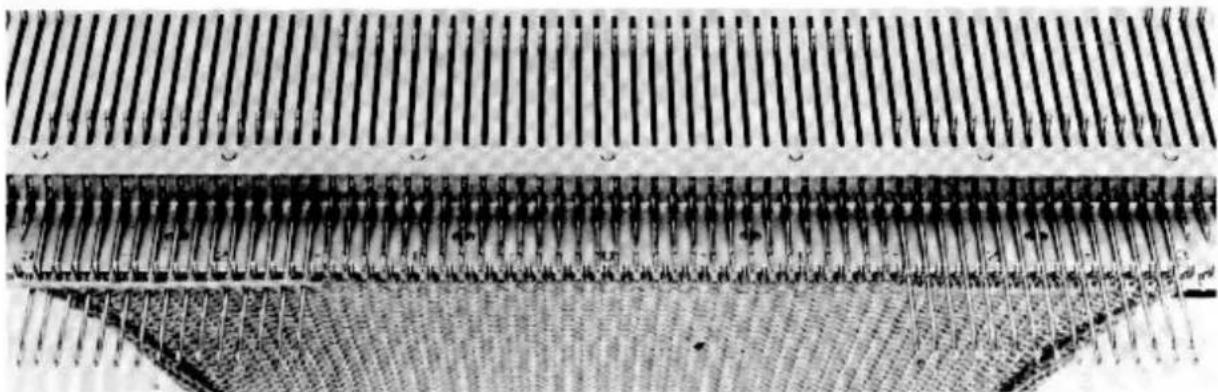
natural_image
Close-up of a mechanical component with parallel grooves and a textured surface (no visible text or symbols)The yarn lies on top of the 15 needles in 'D' position. Bring 15 needles at the RIGHT edge from 'B' to 'D' position. This will leave 30 needles in the centre of the knitting in 'B' position. These 30 needles will be the width of the pocket. If you wish the pocket to be narrower or wider, leave less needles or more needles in the centre in 'B' position.
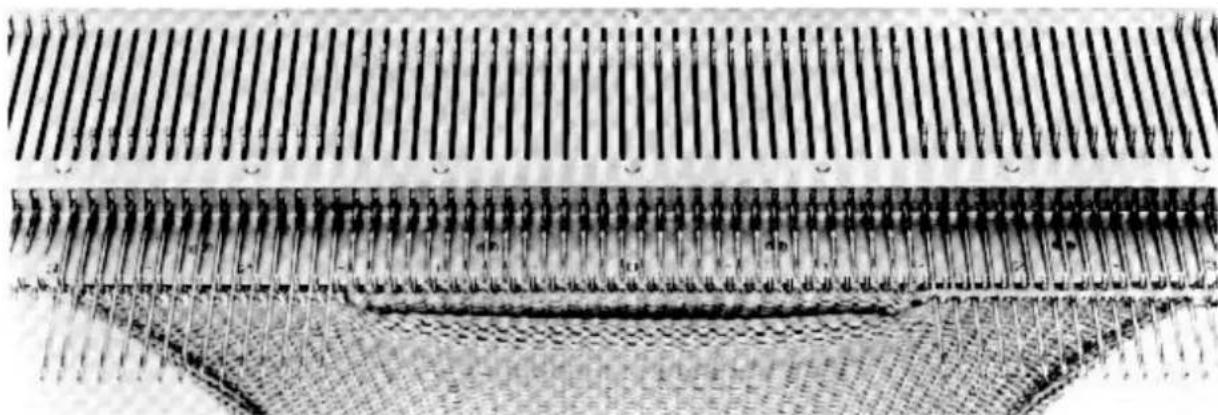
natural_image
Close-up of a perforated metal grate with parallel grooves and a meshed surface (no text or symbols visible)Knit 80 rows or more, depending on how deep you wish the pocket to be. You must finish with the carriage at the RIGHT. You will have to count the rows as the Row Counter is out of action. If you wish to count the rows using the Row Counter, then leave the Row Counter Tripper in action and turn back the Row Counter when the pocket is finished. But note and return to the row at which you started the pocket.
PARTIAL KNITTING - POCKETS
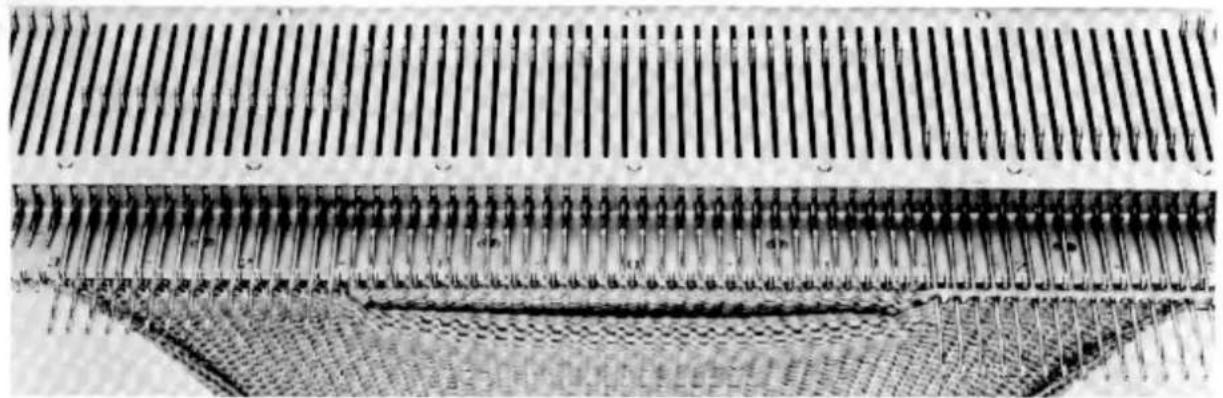
natural_image
Close-up of a mechanical component with parallel grooves and a meshed base (no visible text or symbols)The carriage is at the RIGHT. Using the straight edge of the Needle Pusher, push the 15 needles on the LEFT edge carefully back to 'C' position. Knit 1 row towards the LEFT.
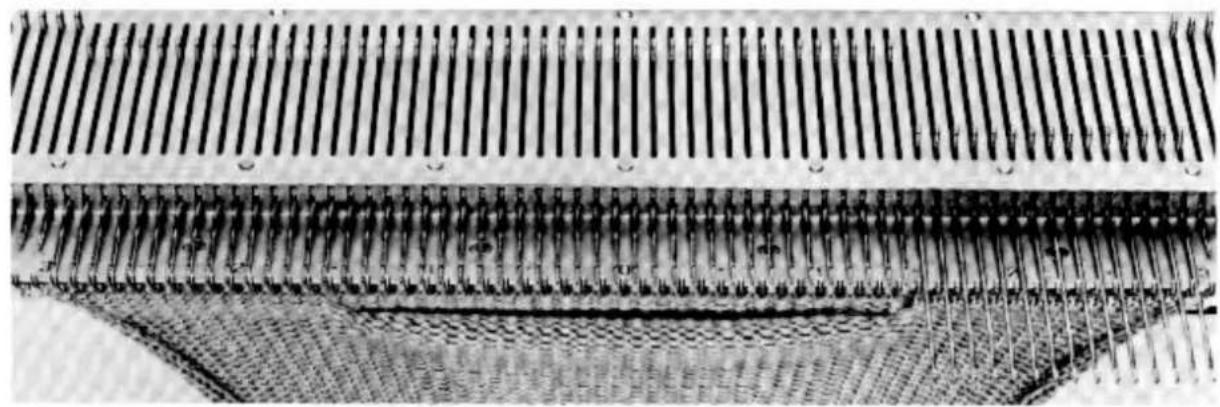
natural_image
Close-up of a perforated metal grate with parallel grooves and a meshed base (no text or symbols visible)The carriage is at the LEFT and the 15 needles on the LEFT side have been knitted back to 'B' position. Now push the 15 needles on the RIGHT edge back to 'C' position. Knit 1 row towards the RIGHT. All needles are now knitted back to 'B' position.
Set the Row Counter Tripper back into action if necessary, and knit a few more rows finishing with the carriage at the RIGHT.
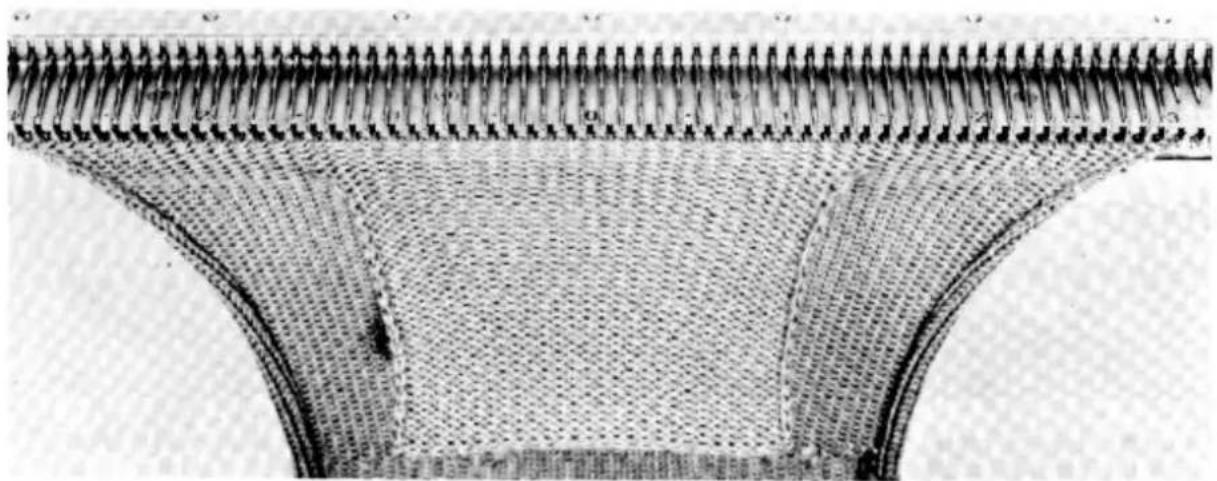
natural_image
Cross-sectional view of a mechanical or structural component with layered internal structure (no visible text or symbols)If you now look at your pocket, you will see that only the side edges will need to be sewn up to close the pocket completely.
THE PICOT EDGE HEM
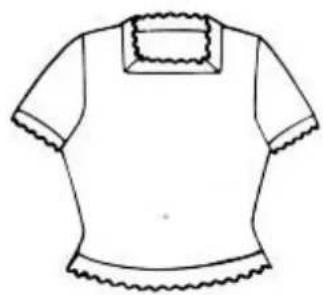
natural_image
Line drawing of a short-sleeve t-shirt with scalloped edges and collar (no text or symbols)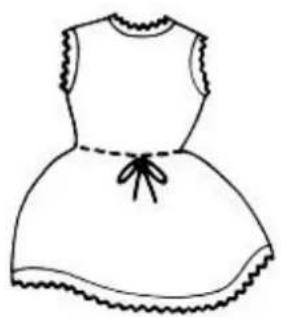
natural_image
Line drawing of a dress with scalloped sleeves and a bow tie (no text or symbols)The Picot edge hem is similar to the circular hem. The difference is that you do NOT knit the row with the larger stitch size, instead you transfer every second stitch onto its adjacent needle. Knit the same number of rows as for the first half of the hem and add one more row.
The transferring of the stitches gives you the attractive scalloped edge when you fold the hem.
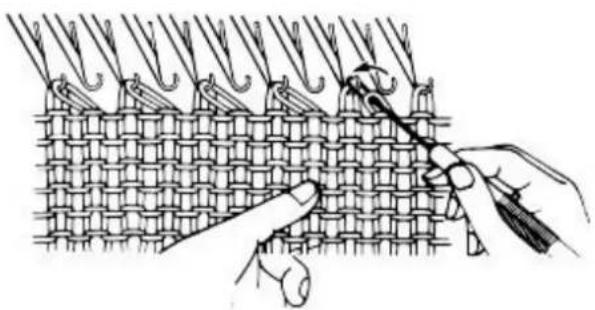
natural_image
Illustration of hands weaving a woven textile with threads and fabric (no text or symbols)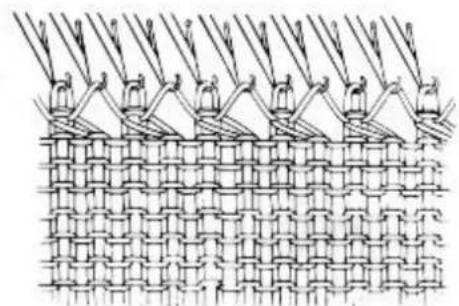
natural_image
Diagram of woven fabric pattern with repeating geometric shapes (no text or symbols)With waste yarn make an open edge cast on over 40 needles and knit a few rows finishing with the carriage at the LEFT. Knit in the Nylon Thread towards the RIGHT. Knit 7 rows with the main yarn. Open all needle latches and now transfer every second stitch onto its adjacent needle towards the LEFT. The EMPTY needles MUST REMAIN IN 'B' POSITION. Knit 1 row towards the RIGHT. The needles which had NO stitches now have a loose loop.
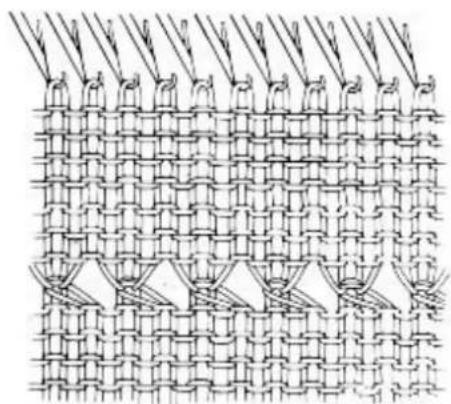
natural_image
Diagram of a woven textile with interwoven strands and triangular cutouts (no text or symbols)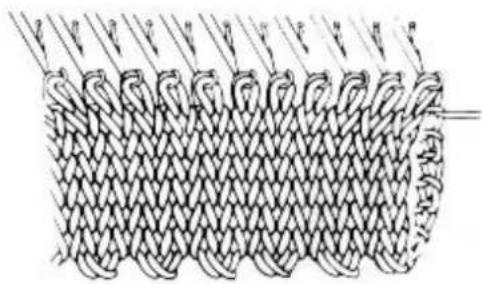
natural_image
Diagram of a knotted fabric or mesh structure with no visible text or symbolsKnit another 7 rows. Lift the stitches of the row knitted after the Nylon Thread to close the hem - as explained on page 45. Now pull the Nylon Thread out of the knitting. The last diagram shows how the completed Picot edge hem should look.
KNITTING A 'V' NECK IN A PATTERNED GARMENT
This method of knitting a 'V' neck is used when knitting garments using fancy stitch patterns. The ROUND neckline use the same method to bring the needles out of action as used for the 'V' neck.
Make a closed edge cast on over 40 needles and knit a few rows finishing with the carriage at the RIGHT.
Now when you are knitting stitch patterns, you must note with which pattern setting you start to knit the neckline so that you can start the second half with the same pattern setting.
Also, you MUST note the number of rows so that the Row Counter can be set back to count the same number of rows for the second half.
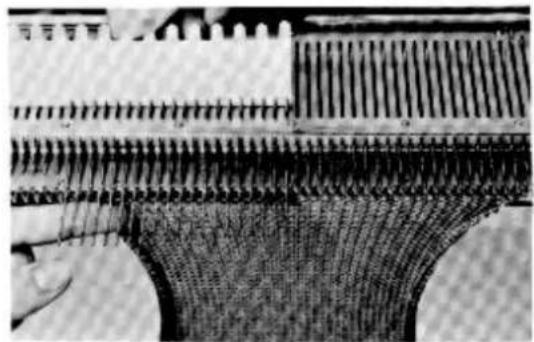
natural_image
Close-up of a mechanical component with threaded end and ribbed structure (no visible text or symbols)Hold the knitting against the machine with your LEFT hand. With the straight edge of the Needle Pusher, bring the 20 needles LEFT of centre from 'B' to 'D' position. Open the latches of ALL needles in 'D' position.
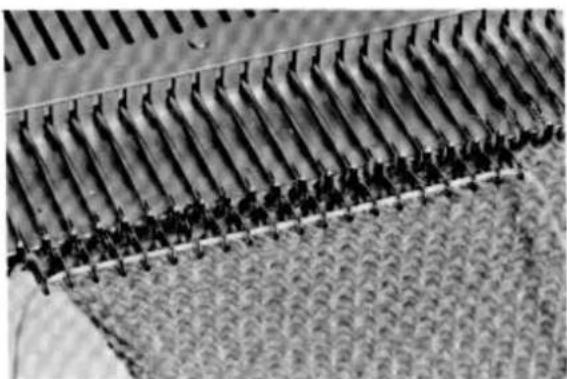
natural_image
Close-up of a woven fabric with parallel grooves and a textured surface (no text or symbols visible)Lay the Nylon Thread across the OPEN latches of the needles in 'D' position.
Use the straight edge of the Needle Pusher and move all needles carefully from 'D' to 'C' position JUST until ALL latches close over the Nylon Thread.
Pull the Nylon Thread towards the RIGHT until 3 or 4 inches are hanging down on the LEFT side of the needles in 'C' position.
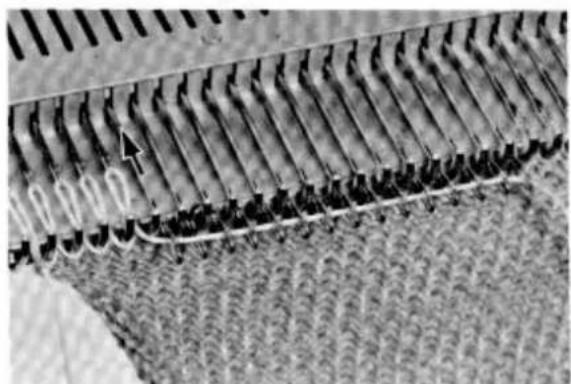
natural_image
Close-up of a textured surface with parallel grooves and a small arrow pointing to a feature (no text or symbols visible)Holding the needle by the butt and starting with the FIRST needle from the LEFT - pull the 20 needles ONE by ONE from 'C' position BACK to 'A' position.
This will cause a BIG LOOP of Nylon Thread in each needle.
The needles which you bring back to 'A' position this way are ALL out of action and in holding position.
KNITTING A 'V' NECK IN A PATTERNED GARMEN
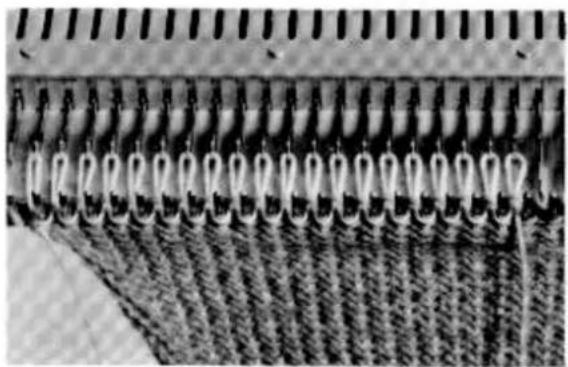
natural_image
Close-up of a woven fabric with repeating patterned threads and hanging loops (no text or symbols visible)Continue until all 20 needles LEFT of centre are in 'A' position. In this position, they will NOT knit and you can therefore knit the stitch pattern on the other needles.
The carriage is at the RIGHT. Pull down any slack yarn from behind the Yarn Brake.
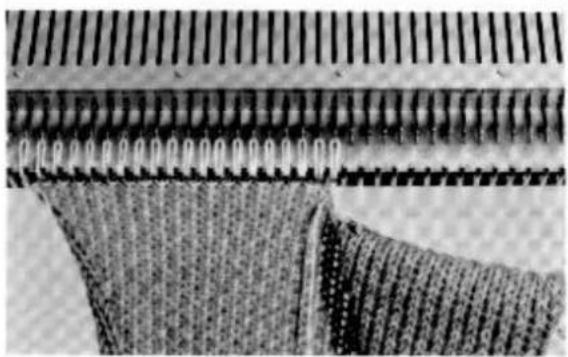
natural_image
Close-up of a textured fabric with vertical striped patterns and a small inset showing a patterned edge (no text or symbols)Knit 4 rows. Decrease 1 stitch from the centre towards the RIGHT for the 'V' neck. Bring the empty needle back to 'A' position. Knit 4 rows. Repeat the decreasing for the 'V' neck after every 4th row until 10 stitches remain on the RIGHT side. Bind off or cast off these 10 stitches. Bring ALL empty needles back to 'A' position.
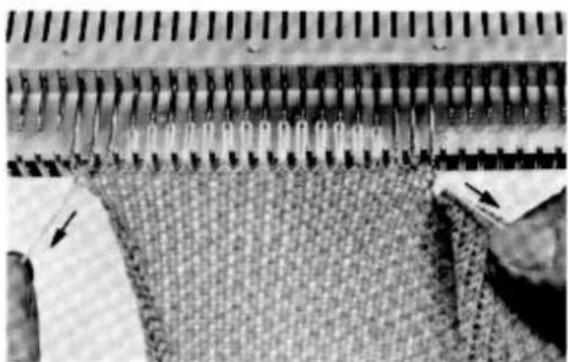
natural_image
Close-up of a woven fabric with vertical threads and a textured surface, no visible text or symbolsRe-thread the yarn through the Yarn Feeder and fasten the end onto the RIGHT side Table Clamp. Now you must bring the needles with the big loops from 'A' to 'B' position. Therefore pull the Nylon Thread outwards on both sides of the needles - they will automatically move from 'A' to 'B' position.
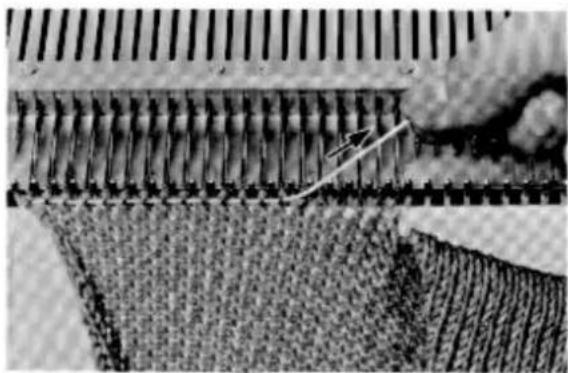
natural_image
Close-up of a textured fabric with vertical strips and a diagonal seam, no visible text or symbolsWhen all needles are in 'B' position, hold the Nylon Thread on the LEFT side and from the RIGHT side pull the Nylon Thread up and out of the needles, thus leaving the stitches of yarn in the needle hooks. Set the machine for the pattern, reset the Row Counter to the number noted before, and knit the second half of the 'V' neck.
When knitting a pocket or a dart in patterns - use the Nylon Thread to bring the needles back to 'A' position as shown above.
SLIT FOR A ZIP FASTENER
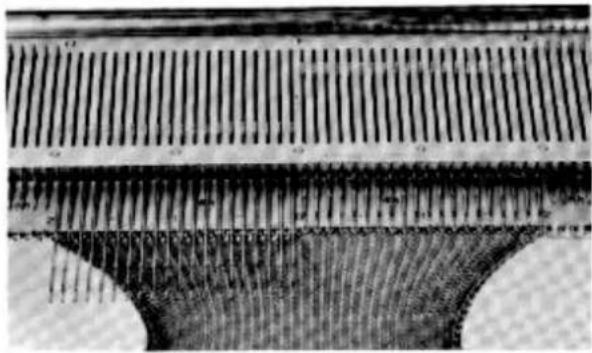
natural_image
Close-up of a mechanical component with parallel grooves and a curved base (no visible text or symbols)In case you wish to make a slit for a zip fastener, use the same method to separate the knitting in the centre as used for the 'V' neck.
Bring the needles of the LEFT side section to 'D' position when knitting stocking stitch and to 'A' position when knitting patterns.
The LEFT and RIGHT section are knitted without decreasing - only straight - until you reach the neckline.
KNITTING A POCKET IN A PATTERNED GARMENT
Cast on 60 stitches open edge, knit 21 rows, finishing with the carriage at the RIGHT.
Of course you will knit this pocket in plain stocking stitch as all the other things - just try it out before you knit it into a garment.
natural_image
Illustration of a woman in a polka-dot dress waving (no text or symbols)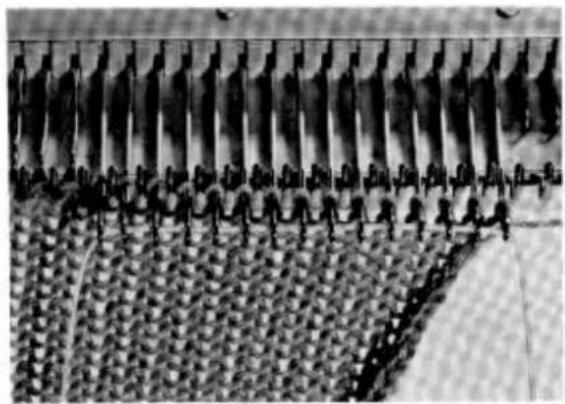
natural_image
Close-up of a patterned fabric with repeating dark vertical bands and a small white object on the right side (no text or symbols visible)Bring the first 15 needles on the RIGHT side from 'B' to 'D' position.
Open the latches of these needles. Lay the Nylon Thread across the needle hooks and with the straight edge of the Needle Pusher bring these 15 needles from 'D' to 'C' position, until the latches close over the Nylon Thread.
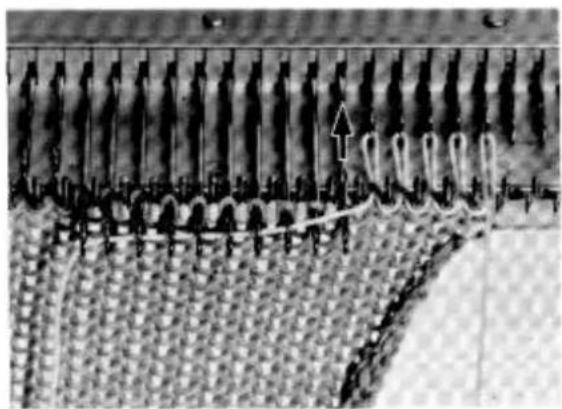
natural_image
Microscopic view of a microfabricated structure with repeating patterns and a white arrow indicating a specific feature (no text or symbols present)Pull the Nylon Thread towards the LEFT - leaving about 3 inches hanging down from the RIGHT side of the knitting.
Starting with the first needle from the RIGHT - push all 15 needles ONE by ONE from 'C' position back to 'A' position making a big loop with the Nylon Thread in each needle.
KNITTING A POCKET IN A PATTERNED GARMENT
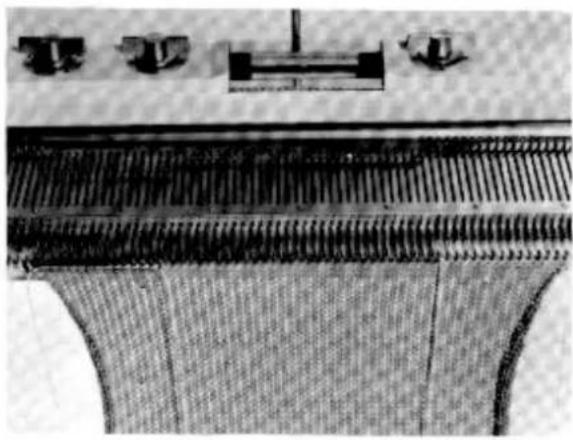
natural_image
Close-up of a textured fabric or metal component with no visible text or symbolsOnce the needles at the RIGHT are in 'A' position, bring the 15 needles at the LEFT side from 'B' to 'D' position and open the latches. Lay the Nylon Thread across the open hooks of the 15 needles in 'D' position.
With the straight edge of the Needle Pusher bring these 15 needles from 'D' to 'C' position until the latches close over the Nylon Thread. Pull the Nylon Thread towards the RIGHT side leaving 3 inches hanging down on the LEFT side of the knitting.
Starting with the first needle from the LEFT, push the needles ONE by ONE back to 'A' position. ALWAYS start pushing them back to 'A' position at the side of the knitting. Do not let more than 3 inches of Nylon Thread hang down at the sides of the knitting - this will leave enough Nylon Thread in front of the pocket. The Nylon Thread should NEVER be tight in front of the pocket - otherwise the needles which are in 'A' position, just at the edges of the pocket, could be pulled towards the front while knitting and there they could cause you trouble.
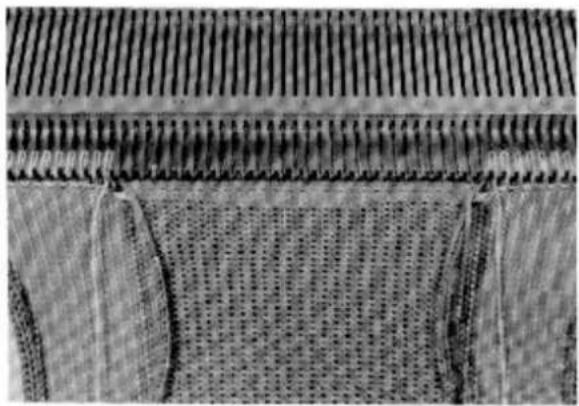
natural_image
Close-up of a textured fabric with vertical grooves and a patterned surface (no text or symbols visible)Set the Row Counter Tripper out of action and note the pattern setting of the next row. Break the yarn below the carriage and fasten the new end onto the RIGHT hand Table Clamp.
Knit about 80 rows finishing with the carriage at the RIGHT - past ALL 30 needles on the RIGHT of centre.
If you did not set the Row Counter Tripper out of action, set it back to the number you noted before starting the rows of the pocket.
While knitting the pocket - only move the carriage just past the needles in 'B' position otherwise your yarn tension is too loose and could cause loose loops or dropped stitches at the edges of the pocket. The pocket can always be knitted in plain stocking stitch as it does not show.
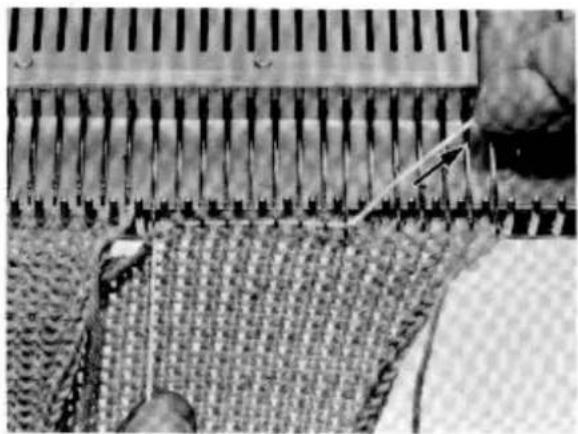
natural_image
Close-up of a knitted fabric with threads and stitching, showing a hand operating a tool (no text or symbols visible)Again break the yarn and leave 10 inches hanging down from the pocket. Now bring the 15 needles at the RIGHT from 'A' to 'B' position. To do this, pull the Nylon Thread to the LEFT and RIGHT until all 15 needles are in 'B' position - then upwards and slightly backwards and the stitches will slide back inside the needle hooks.
In the same way bring the stitches of the 15 needles at the LEFT of the pocket back to 'B' position.
THE 1 PLAIN - 1 PURL RIBBED WELT
This method of knitting Rib Welts is now very seldom used. It is not nearly as elastic as the new type of Double Welts shown previously and it is also inclined to 'fan' out of shape and breaks too easily at the edges.
It is suitable for Bulky yarns and with a little practice it is fun and quick to do.
With the straight edge of the Needle Pusher bring 21 needles on the LEFT and 21 needles on the RIGHT of centre from 'A' to 'B' position.
natural_image
Line drawing of a woman in a polka-dot dress waving (no text or symbols)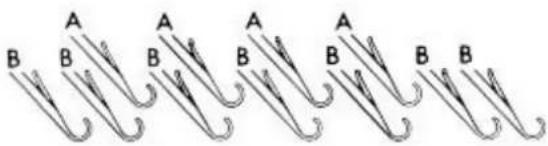
text_image
A B B A B A B A B B BStarting at the THIRD needle from the RIGHT, and using the 1 / 1 edge of the Needle Pusher, bring every SECOND needle back to 'A' position.
Push one EXTRA needle on the LEFT side from 'A' to 'B' position so that there are 2 needles in 'B' position on each side.
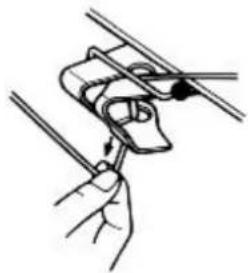
natural_image
Illustration of a hand holding a tool with a mechanical component, no text or symbols presentWith waste yarn make an open edge cast on and knit 10 rows finishing with the carriage at the LEFT. Break the yarn above the carriage and pull the rest downwards out of the Yarn Feeder. Remove the waste yarn from the Yarn Brake.
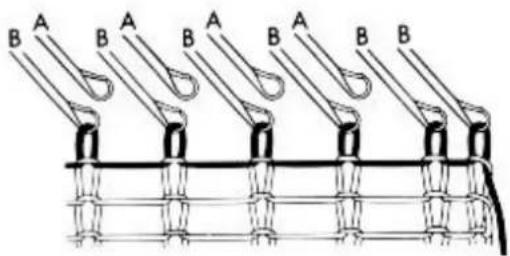
text_image
A B A B A B A B BThread the Nylon Thread through the Yarn Feeder and knit 1 row towards the RIGHT. Remove the Nylon Thread from the Yarn Feeder.
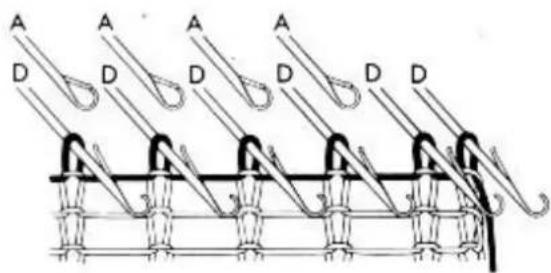
text_image
A A A A D D D D D DWhile holding the knitting against the machine with your left hand, bring the needles from 'B' to 'D' position, using the straight edge of the Needle Pusher.
THE 1 PLAIN - 1 PURL RIBBED WELT
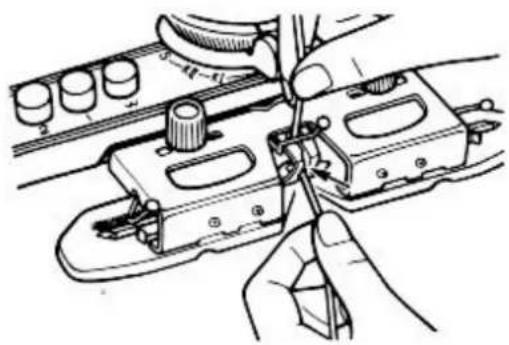
natural_image
Technical line drawing of a mechanical assembly with hands operating a tool (no text or symbols present)The carriage is at the RIGHT. Thread the main yarn through the Yarn Brake and the Yarn Feeder.
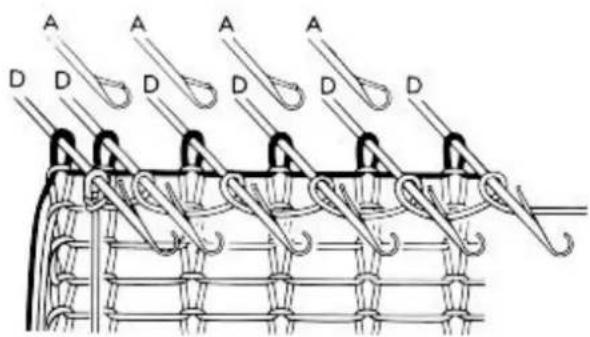
text_image
A D A D A D A D DPull a little yarn from below the Yarn Feeder and tie a loose knot around the LAST needle at the LEFT in 'D' position.
Wind the yarn LOOSELY in anti-clockwise direction around the needles in 'D' position. As you wind the loops, push them behind the latches at the same time.
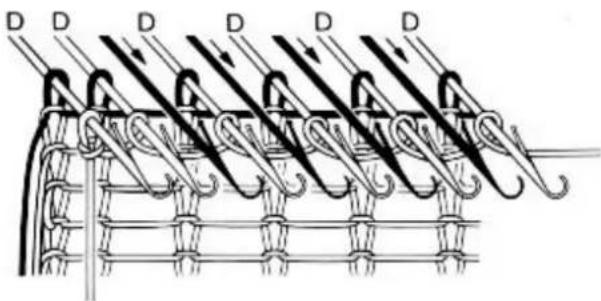
text_image
D D D D D DWhen all needles in 'D' position have a loop, pull the yarn down behind the Yarn Brake to avoid slack yarn. With the straight edge of the Needle Pusher bring the rest of the needles of the welt from 'A' to 'D' position. (The needles which you pushed back to 'A' position before.)
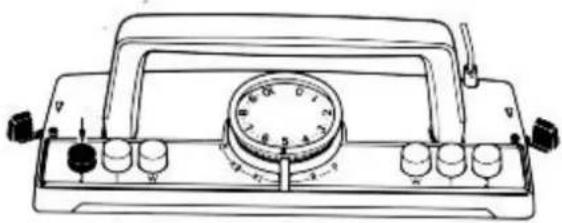
natural_image
Line drawing of a vintage analog voltmeter with dial and adjustment knobs (no text or symbols)Turn the Tension Dial to 5. Both levers should be in FRONT. Push DOWN button 2 on the LEFT of the carriage. Knit 1 row to the LEFT.
All needles are knitted back to 'B' position. Knit another 17 rows finishing with the carriage at the RIGHT side of the knitting.
THE 1 PLAIN - 1 PURL RIBBED WELT
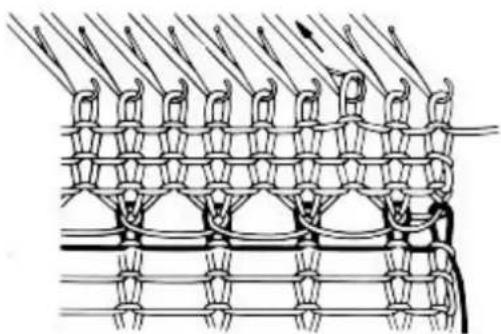
natural_image
Diagram of interwoven mesh structures with no visible text or symbolsYou are now ready to purl up the RIB. For this you will need the Latchet Hook.
Push the THIRD needle from the RIGHT up to 'D' position, back to 'A' position and up to 'B' position again, thus removing the stitch from its needle.
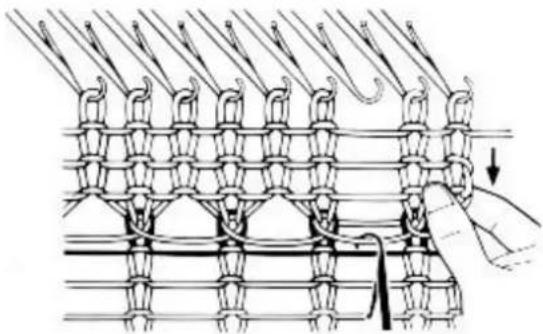
natural_image
Diagram of a knitted fabric pattern with rope routing and a hand adjusting the edge (no text or symbols)On the RIGHT side hang the Latchet Hook on the FIRST bar of yarn after the Nylon Thread.
Hold the knitting by the waste yarn below the third stitch from the RIGHT and pull down — this enables the third stitch to run down until it reaches the Latchet Hook.
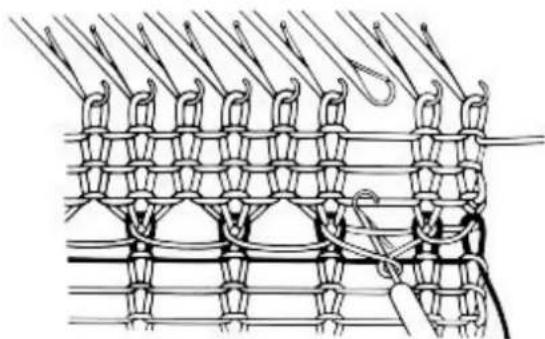
natural_image
Diagram of a knotted textile or mesh structure with interlocking loops and threads (no text or symbols)Twist the Latchet Hook until a loop is formed around the stem of the Hook.
Push the Latchet Hook upwards until the loop is behind the latch and the second bar of yarn lies INSIDE the hook.
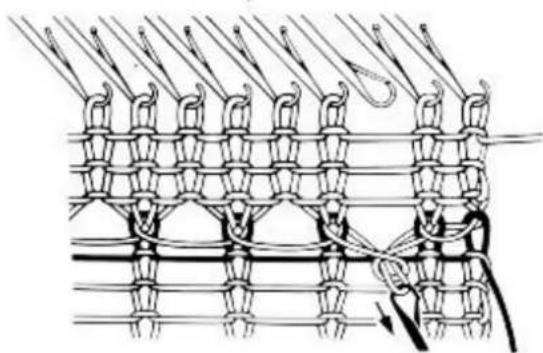
natural_image
Diagram of a knotted fabric structure with rope routing and a hook, no text or symbols presentPull the Latchet Hook down until the second bar is pulled through the loop which is behind the latch.
THE 1 PLAIN - 1 PURL RIBBED WELT
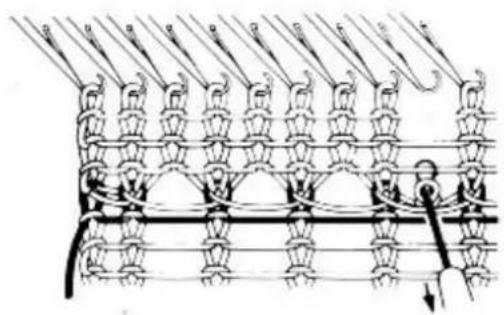
natural_image
Diagram of a mechanical or electrical assembly with multiple identical components arranged in rows, no visible text or symbols.Again push the Latchet Hook forward until the stitch is BEHIND the latch.
Catch the next bar of yarn and pull it through the loop.
Repeat this process until all bars of yarn have been knitted up and hang-the last loop back onto the empty needle.
Your first PURL Rib is now completed.
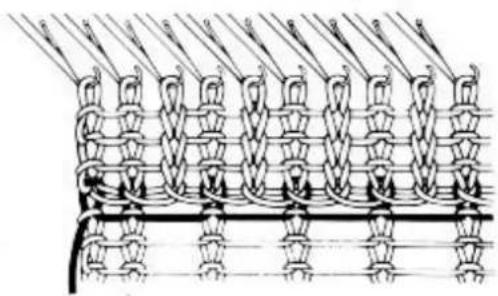
natural_image
Pure mechanical assembly diagram showing repeating gear-like components without any text or symbolsMiss 1 needle and lift the next stitch off its needle hook.
Repeat working up the stitches until every second stitch has been purled up.
DO NOT purl up the last stitch on the LEFT or RIGHT side edge as these stitches are sewn up to make the seam.
THE PLAIN AND PURL RIB
WHEN KNITTING BULKY YARNS
natural_image
Simple line drawing of a girl in a polka-dot dress, gesturing with her finger (no text or symbols)With waste yarn make an open edge cast on over every second needle. Knit a few rows, finishing with the carriage at the LEFT. Knit IN the Nylon Thread from LEFT to RIGHT.
Hold the knitting against the machine, bring up the needles from 'B' to 'D' position. Thread in the main yarn. Make a loose knot around the last needle on the LEFT in 'D' position and wind the yarn around the other needles in 'D' position.
DO NOT BRING THE REST OF THE NEEDLES FROM 'A' TO 'D' POSITION.
Both Side Levers can be in ● position. Push DOWN button 2 at the LEFT of the carriage and knit 20 rows or more in a suitable Tension for the yarn.
Take the stitch OFF the SECOND needle from the RIGHT in 'B' position. Pull a little on the knitting to enable the stitch to run down until it reaches the Nylon Thread. Hang the Latchet Hook in the first bar after the Nylon Thread. Purl up the stitch and hang it back onto the empty needle in 'B' position. Repeat with every SECOND needle in 'B' position.
HOW TO KNIT A DOUBLE 'V' NECKBAND
It is very easy to knit a DOUBLE 'V' NECKBAND. Of course, the first time you try one, the result may not be quite like the illustration, but it will not be long before you achieve a perfect result.
There are a few different methods of knitting 'V' neckbands and this illustration shows you how to make the one which is most often used and the easiest to do. At the same time it gives the neatest finish to the front of your garment.
Using waste yarn, make an open edge cast-on over 70 needles and knit a few rows finishing with the carriage at the RIGHT. Remove the waste yarn.
Thread up the main yarn. Bring the 70 needles from 'B' to 'D' position. Starting with the first needle from the LEFT, make a closed edge cast-on by hand.
Set Tension to 7, the Cam Lever to centre 0 and push DOWN button 2 at the LEFT. Set Row Counter to 000. Knit 30 rows. The carriage is at RIGHT. Release button 2 at the LEFT.
Bring 35 needles LEFT of centre to 'D' position. Knit 4 rows.
Now you start shaping your fully fashioned neckline. For this take the triple Transfer Tool and transfer the 3 stitches at the neck edge 1 more needle towards the RIGHT. Bring the empty needle back to 'A' position. Repeat knitting 4 rows and transferring the 3 stitches at the neck edge until the Row Counter shows 130 and 10 stitches remain in the needles. Knit 4 rows and cast-off the remaining stitches. Release all buttons. Set Row Counter back to 29.
Set Cam Lever to S, Side Levers are to FRONT and move the carriage to the LEFT across the needles in 'D' position. Set Cam Lever back to centre 0. Re-thread the yarn, push DOWN button 2 at the RIGHT. Knit 4 rows and transfer the last 3 stitches at the RIGHT 1 more needle towards the LEFT. Bring the empty needle back to 'A' position. Repeat knitting 4 rows and transferring the 3 stitches for shaping the neckline until the Row Counter shows 130. Knit 4 more rows and cast off the remaining stitches. Release all buttons.
For the BACK - cast-on open edge 70 stitches using waste yarn and knit several rows finishing with the carriage at RIGHT. Thread up main yarn and make a closed edge cast-on starting with the first needle on the LEFT. Push DOWN button 2 at the LEFT and knit 129 rows on Tension 7. Knit 1 row on Tension 10 and cast-off all stitches.
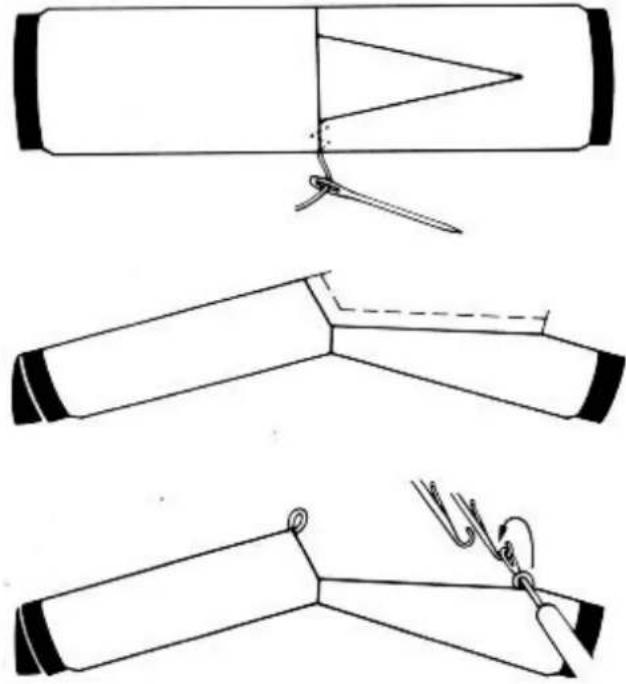
natural_image
Three-step line drawing showing a folding or cutting process with a tool, no text or symbols presentWhen FRONT and BACK are knitted and steamed, sew up the shoulder seam and steam lightly.
Fold knitting in half as shown, wrong side facing. Measure the length of the neck as shown by the dotted line. Let's say it is 16 inches long. To make out the length of the neck, we use the following Tension chart - 2 inches give 11 stitches and 15 rows.
For 16 inches you will need to cast-on 88 stitches. Bring 88 centre needles to 'B' position. Move the carriage to LEFT. Hang first stitch of 'V' neck point onto last needle at RIGHT and centre stitch of back onto last needle at LEFT in 'B' position.
Now hang all loops of the first half of the 'V' neck band onto the remaining 86 needles, dividing them evenly, so that the knitting is not stretched in one place and bunched up in another.
HOW TO KNIT A DOUBLE 'V' NECKBAND
Bring 1 extra needle on either side from 'A' to 'B' position. These TWO stitches will be used to sew up seams. Thread up the main yarn. Set Tension Dial to 6, Row Counter to 000, Cam Lever to centre 0 and ALL buttons are UP.
Knit 1 row towards the RIGHT. Turn the yarn around the extra needle at LEFT and RIGHT. Take the Double Transfer Tool and hang it in the hooks of the last 2 needles at the RIGHT. Transfer the 2 stitches 1 more needle towards the LEFT.
Hang the Nylon Thread across the loops of the last 2 needles at the RIGHT - if you do not, the loop of the last needle will not be knitted properly when doing the next row. Knit 1 row. Pull the Nylon Thread out of the knitting. Again transfer the 2 last stitches at the RIGHT 1 more needle towards the LEFT. Repeat knitting 1 row and transferring the 2 stitches until the Row Counter shows 12 and 12 stitches have been decreased. The carriage is at the LEFT. Knit 1 row towards the RIGHT.
You now start knitting the second half of the neckband. This will be folded in afterwards. 1. At the RIGHT - bring 1 extra needle from 'A' to 'B' position. Knit 1 row. 2. At the RIGHT - bring 1 extra needle from 'A' to 'B' position and transfer the LAST loop onto this new needle. Leave the empty second needle in 'B' position. Knit 1 row.
Repeat 1 and 2 until the Row Counter shows 25 and 12 stitches have been increased. Knit 1 row on Tension 10 and cast off all stitches.
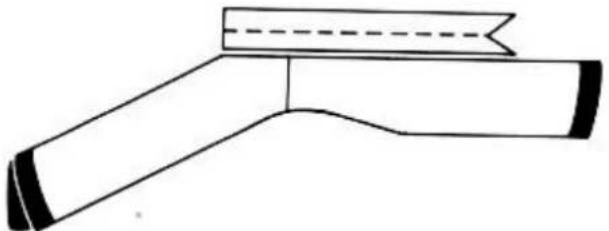
natural_image
Simple line drawing of a mechanical component with no text or symbolsYour knitting will now have this shape. At the RIGHT edge you have the point for the 'V' neck shaping.
Move the carriage to the RIGHT, turn Tension Dial to 6, set Row Counter to 000. Hang the second half of the neckband into needles - but this time the 'V' neck point is at the LEFT. You start knitting from the RIGHT.
Knit the second half the same way as the first half but reverse the instructions for the shaping of neck point - RIGHT is LEFT and LEFT is RIGHT now.
When both parts are knitted, steam them lightly. Start sewing up the neckband by closing the centre back. Sew the stitches at the edges together by using the mattress stitch. In the same way sew together the 'V' neck point by starting with the 2 bottom stitches. Turn the neckband to the inside and backstitch the cast off edge onto the cast on edge of the neckband.
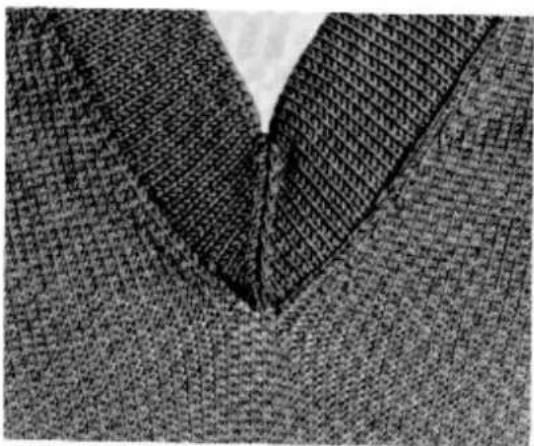
natural_image
Close-up of a textured fabric collar with a V-shaped indentation (no text or symbols visible)There are many different types of neckbands and also many different ways to shape a 'V' neck. The more you practice them, the quicker you will be able to give extra excitement to your garment.
natural_image
Illustration of a woman with short blonde hair and a thoughtful expression, hand on chin (no text or symbols)All beginners make mistakes. It is part of the process of learning, and not at all serious
BECAUSE
in the following STEP I show you how these mistakes could have happened- and I also tell you how you can easily overcome and repair them.
Halpful Hints
Stitch Sizes (Tension)
Knitting to measure
How to change a needle
Technical details of the carriage
Repacking
Maintenance of the machine
General Index
KNITTING
text_image
STEP 5
natural_image
Black-and-white sketch of a woman holding her hand, no text or symbols presentPAGE 93 - 100
101
102 - 104
105
106 - 108
109
110
111 - 112
USEFUL HINTS
natural_image
Line drawing of a woman in a polka-dot dress and skirt, waving (no text or symbols)CASTING ON PROBLEMS
When you cast on it is always better to cast on with a very loose Tension, i.e. 7 upwards.
This gives you a large loop between the Sinker Gate and the needle hook and when you lay the Nylon Thread across these loops, it is easy for you to pull the Thread well down below the needle hooks thus enabling the hooks to pass OVER the Nylon Thread when knitting the next row.
If the stitches of the first row are too tight or if you do not pull the Nylon Thread well DOWN, then when you knit the next row the needles will incorrectly pass UNDER the Nylon Thread causing it to be 'knitted in' thereby either jamming the carriage or spoiling the cast on. In this case you will have to restart the cast on.
STITCHES NOT KNITTED AT THE EDGES
If you return the carriage BEFORE IT HAS PASSED THE LAST NEEDLES IN 'B' POSITION BY 2 INCHES, it is possible that the first stitches in the row may NOT knit and sometimes the complete rows remains unknitted. If stitches are NOT knitted, unravel this row and start again - also set the Row Counter back. If a complete row is not knitted - slide the carriage completely OFF the needle bed in the direction that you were moving it and start from the other side - also set the Row Counter back.
DROPPED STITCHES AT THE EDGES
Dropped stitches will occur at the sides of the knitting if your Yarn Brake is not properly threaded and your Take-up Spring is NOT automatically taking up all slack yarn between the Feeder mouth and the needles. Loose loops may also form on the sides.
Dropped stitches or loose loops may occur at the sides of the knitting if you move the carriage TOO far past the knitting after knitting a row 0 then TOO MUCH yarn is pulled from the Yarn Brake and you have slack yarn between the carriage and the knitting.
This can be easily avoided if you just pull down any slack yarn from the Yarn Brake or by NOT moving the carriage TOO far away from the knitting.
DROPPED STITCHES IN THE KNITTING
Can be caused by:
Too loose or too tight a Tension.
A Tension unsuitable for the pattern.
Yarn not suitable for the pattern.
USEFUL HINTS
Inside the Sinker Arm Assembly are two rectangular black brushes. As you move the carriage, these brushes open and hold open the needle latches so that your Yarn Feeder can lay yarn into the hooks as the carriage passes the needles.
If these brushes are badly worn, or if the Sinker Arm has not been placed onto the carriage properly, then the brushes cannot serve their function and dropped stitches will result. Dropped stitches are easy to repair (see next page).
DROPPED STITCHES
These can be caused by a knot in the yarn, or by yarn which has been badly or too tightly wound, thus preventing the smooth flow of yarn from the ball to the knitting.
REPAIRING A DROPPED STITCH
Once you are accustomed to machine knitting, you will very seldom drop a stitch.
But as soon as you notice a dropped stitch, you should repair it at once. So let's try.
natural_image
Line drawing of a woman in a polka-dot dress and dress, waving (no text or symbols)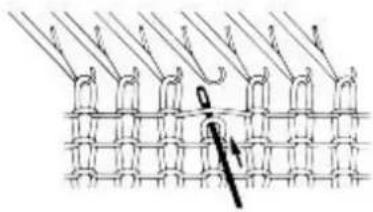
natural_image
Diagram of a mechanical or electrical component with multiple curved lines and a central rod, no text or symbols present.Insert the Transfer Tool inside the dropped stitch.
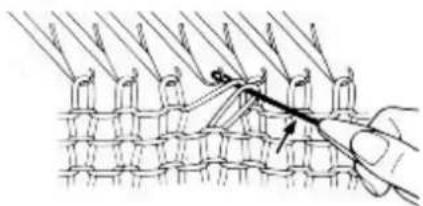
natural_image
Illustration of a hand tying a knot with a string (no text or symbols)Hook the Transfer Tool into the empty needle. Lift the loose bar of yarn and the stitch onto the empty needle.
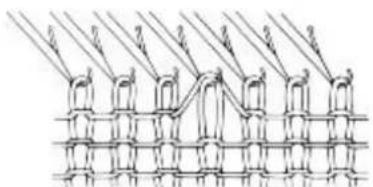
natural_image
Pure mechanical diagram showing a chain of connected components without any text, numbers, or symbolsThere is now 1 stitch and 1 bar on the empty needle.
USEFUL HINTS
REPAIRING A DROPPED STITCH
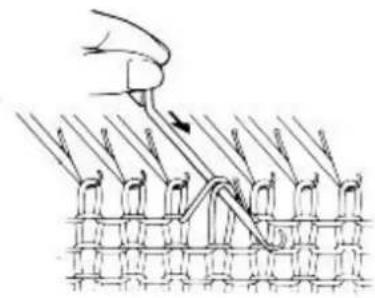
natural_image
Diagram of a hand using a tool to interact with a grid of mechanical components (no text or symbols present)First, push the needle up to 'D' position, then pull the needle slightly back - just until the bar and the stitch are behind the latch - then STOP.
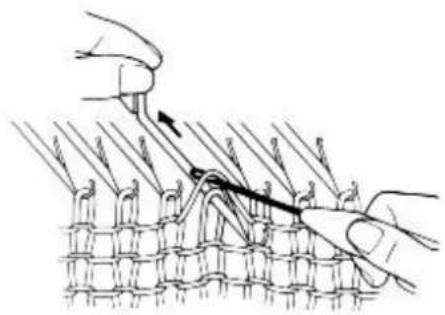
natural_image
Illustration of hands weaving a knitted fabric with a tool (no text or symbols)Lift the loose bar of yarn over the latch INTO the hook, and leave the stitch BEHIND the latch.
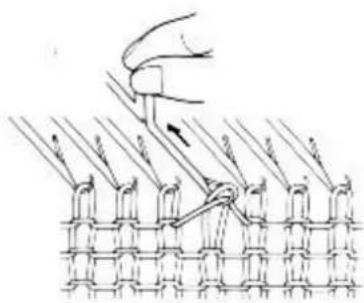
natural_image
Diagram of a hand using a tool to interact with a chain of knitted fabric or mesh structures (no text or symbols present)Pull the needle back down to 'B' position thus pulling the bar of yarn through the stitch.
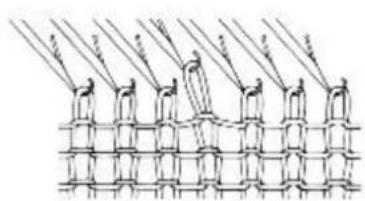
natural_image
Diagram of a woven textile or mesh structure with multiple threads and hanging fillets (no text or symbols)Push the needle further back to 'A' position to enable it to form a bigger stitch.
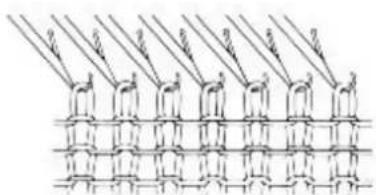
natural_image
Pure diagram of a grid pattern with diagonal lines and rounded shapes, no text or symbols presentPull your knitting down and sideways until gradually the newly repaired stitch assumes the same shape as all other stitches.
USEFUL HINTS
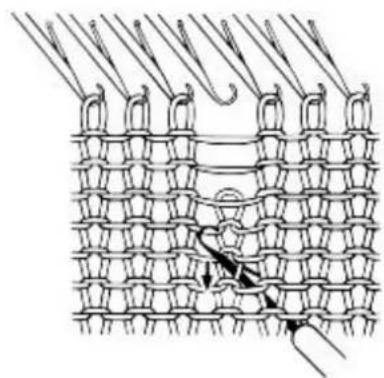
natural_image
Diagram of a woven textile or mesh structure with interlocking loops and hanging connectors (no text or symbols)REPAIRING A DROPPED STITCH
Insert the Latchet Hook from behind your knitting through a stitch a few rows below the dropped stitch.
Undo stitches down to the Latchet Hook by pulling down on the Latchet Hook.
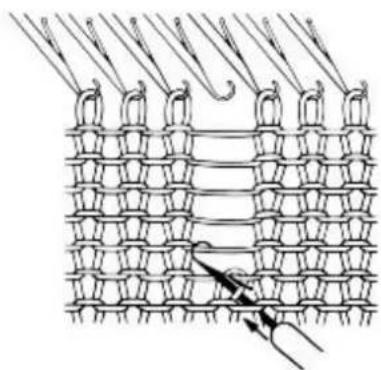
natural_image
Diagram of a knitted fabric pattern with interlocking loops and stitching details (no text or symbols)Push the Latchet Hook towards you so that the stitch comes behind the latch, and the hook catches the cross thread.
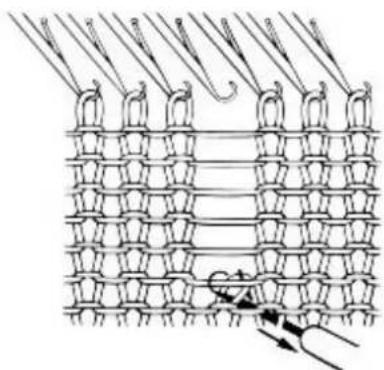
natural_image
Diagram of a woven textile structure with interwoven rings and hanging clips (no text or symbols)Draw back the Latchet Hook. The cross thread is trapped in the closed latch. Pull the cross thread through the loop thus forming a knitted stitch.
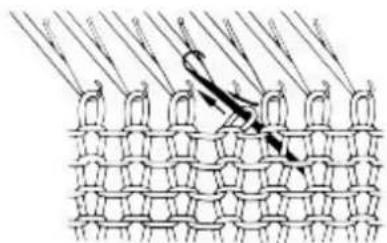
natural_image
Diagram of a woven mesh structure with diagonal lines and triangular supports (no text or symbols)Push the Latchet Hook towards you until the stitch is behind the latch. Catch the next cross thread in the hook and pull it through the stitch. Repeat until you reach the top.
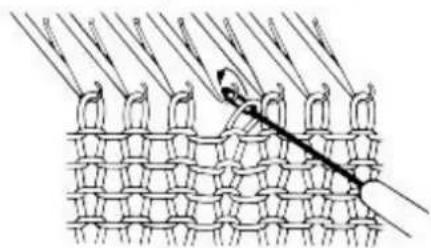
natural_image
Diagram of a knotted fabric pattern with a central rod and multiple arms (no text or symbols)Pull the last stitch rather tight to make a bigger loop. Insert the Transfer Tool into this loop from the front. Carefully remove this stitch from the Latchet Hook and place it on the needle with your Transfer Tool.
USEFUL HINTS
Unravelling is quick and very simple to do and may save quite a considerable amount of time.
IT MAY BE NECESSARY TO UNRAVEL -
If you have knitted too many rows.
If you have made a mistake in the knitting.
If your carriage jams and it is necessary to release the carriage and restart the row where the fault occurred.
If you have one or more dropped stitches in the middle of a row, it is much easier to unravel 2 or 3 rows and then just lift the dropped stitches back onto their respective needles.
TO PRACTICE UNRAVELLING -
Cast on 40 stitches in the normal way. Knit 20 rows finishing with the carriage at the RIGHT.
UNRAVELLING
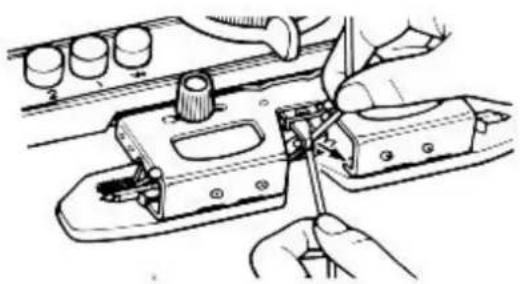
natural_image
Technical line drawing of hands using a tool to adjust or install a mechanical component (no text or symbols visible)TO UNRAVEL 4 ROWS PROCEED AS FOLLOWS:
Remove the yarn from the Yarn Feeder.

natural_image
Illustration of a hand weaving a knitted fabric with threads and a pencil (no text or symbols)Hold the knitting down with your left hand and with your right hand pull the yarn sideways, as illustrated.
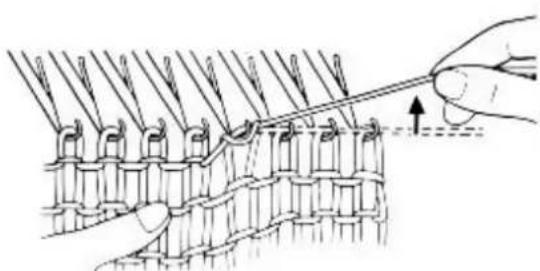
natural_image
Illustration of a hand using a tool to draw or mark a knitted fabric pattern (no text or symbols present)Lift the yarn upwards and very slightly backwards and you will notice that the stitches of the previous row automatically slide back into the needle hooks. Repeat pulling the yarn and lifting the stitches of the previous row into the needle hooks until you have unravelled 4 rows. When unravelling from the LEFT, you must pull the thread towards the LEFT.
After unravelling rows - bring all needles in a straight line in 'B' position and when knitting patterns you need to bring your needles into the correct pattern setting again.
natural_image
Line drawing of a woman in a polka-dot dress and turtleneck, gesturing with one hand (no text or symbols)UNRAVELLING
When you have unravelled a few rows, this will leave quite a considerable length of loose yarn. Thread the yarn back into the Yarn Feeder. Pull back all loose yarn down from the Yarn Brake onto the ball of yarn as shown on page 23. Move the carriage nearer the needles in 'B' position. Again pull down the slack yarn behind the Yarn Brake and proceed to knit.
DO NOT FORGET TO SET BACK THE ROW COUNTER FOR THE NUMBER OF ROWS UNRAVELLED.
YOU CAN ONLY UNRAVEL WHEN ALL YOUR STITCHES ARE INSIDE THE NEEDLE HOOKS.
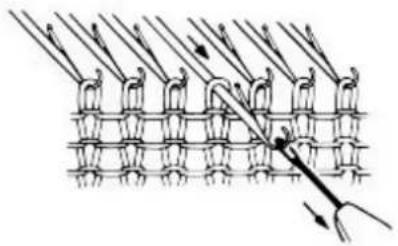
natural_image
Diagram of a mechanical or electrical component with multiple arms and chains, no visible text or symbolsIf, for any reason, one or more of the stitches are not in the needle hooks and are behind the latches, hang the Transfer Tool in the needle hook. Pull the needle into 'D' position.

natural_image
Diagram of a mesh structure with directional arrows indicating movement or force (no text or symbols)Push it back to 'A' position, the stitch is on the Transfer Tool. Pull the needle into 'B' position.
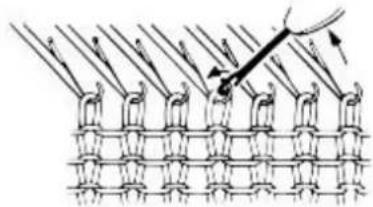
natural_image
Diagram of a mechanical or structural assembly with diagonal lines and arrows indicating force or movement (no text or symbols)Raise the Transfer Tool and let the stitch slide into the needle hook. When you have brought all needles to 'B' position this way, then you may start unravelling.
THE CARRIAGE IS HARD TO MOVE IF -
- The yarn is wound too tightly and does not flow easily into the needles.
The yarn you are using is too hard or too heavy.
The yarn is unsuitable for use on your machine.
The yarn is not suitable for the pattern which you are knitting.
-
The Tension (stitch size) is either too loose or too tight.
-
Your machine is dirty or needs oiling.
-
The Yarn Brake has been incorrectly threaded.
-
The yarn was tangled in the Yarn Brake during knitting.
natural_image
Line drawing of a woman in a polka-dot dress and blazer, making a peace sign (no text or symbols)USEFUL HINTS - IF THE CARRIAGE JAMS
SOMETIMES THE CARRIAGE MAY JAM IN THE MIDDLE OF A ROW. IF THIS HAPPENS - IT IS NOT SERIOUS AND NO CAUSE FOR WORRY. DO NOT FORCE OR HIT THE CARRIAGE TO GET IT LOOSE - PROCEED AS FOLLOWS:
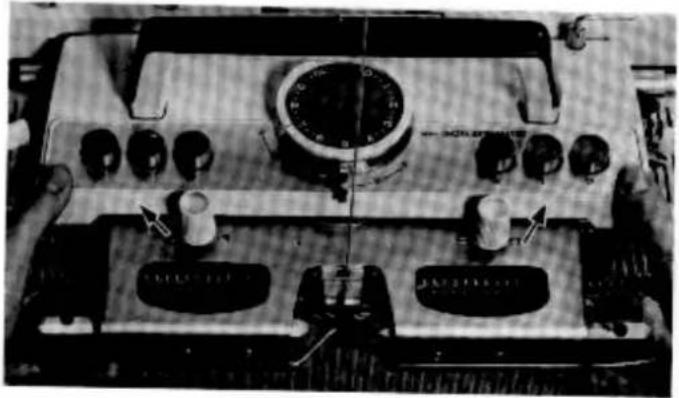
natural_image
Close-up of a vintage electronic device with multiple terminals and a central dial (no visible text or symbols)Set the Row Counter out of action. Loosen both knurled nuts which secure Sinker Arm onto carriage. With a thumb on each front corner of the carriage and the fingers below the Sinker Arm - push the Sinker Arm UPWARDS OUT OFF THE STUDS.
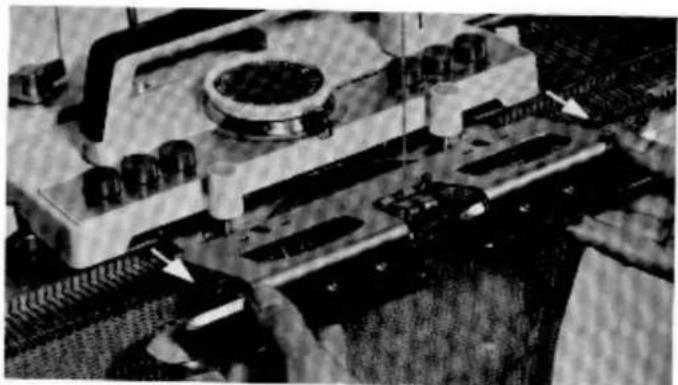
natural_image
Close-up of mechanical components with no visible text or symbolsPull the Sinker Arm towards you OFF the carriage. If necessary cut the yarn to separate the Sinker Arm from the carriage. Take care that there are NO needle hooks caught IN the Yarn Feeder.
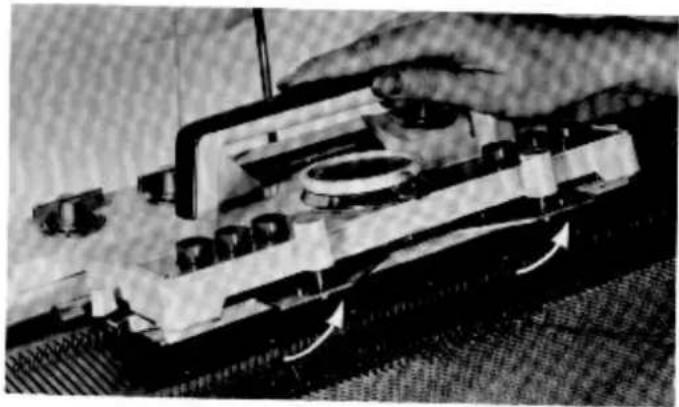
natural_image
Close-up of a hand using a tool to adjust or install electronic components on a circuit board (no visible text or symbols)You can now easily lift up the carriage from the needle bed and it will be held by the Guide Rail at the back of the needle bed.
Hold the carriage UP in its raised position and move it across the needle bed away from the knitting in the direction from which it came. Replace the carriage onto the needle bed.
Remove the yarn from the Yarn Feeder. Check that there is no yarn twisted around the brushes below the Sinker Arm Assembly. If there is, clear it and replace the Sinker Arm Assembly back onto the carriage.
Set the Row Counter back into action. Unravel the last row. If the last row has been counted, set the Row Counter back. Re-thread the yarn.
REASONS WHY THE CARRIAGE MAY JAM
THE YARN MUST ALWAYS FLOW SMOOTHLY AND EASILY INTO THE NEEDLES AS THE CARRIAGE IS MOVED ACROSS THE NEEDLE BED.
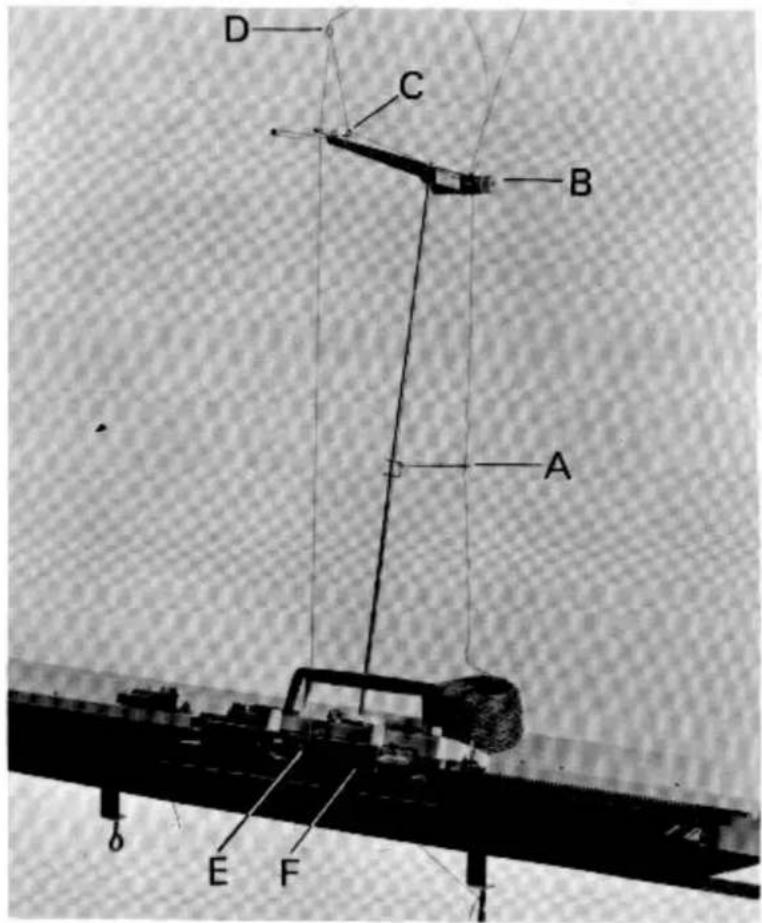
text_image
D C B A E F-
IF FOR ANY REASON THE YARN CANNOT FLOW INTO THE NEEDLES, THE CARRIAGE WILL JAM IMMEDIATELY.
-
It may be blocked at A.B.C.D or E, if it is not correctly threaded or if there is a large knot in the yarn or the yarn is twisted around the points just mentioned.
-
Underneath the Sinker Arm Assembly are 4 brushes F. The yarn may become caught in the brush wheels F if there is any slack yarn between the Yarn Feeder E and the needles.
It is easy to find out why your carriage jammed. Pull the yarn below the carriage down. If it does not flow smoothly then check all points mentioned above.
If the yarn does flow smoothly - the reason for the jamming is not above the carriage.
Check the brushes below the Sinker Arm Assembly 0 if there is yarn twisted around the brushes - move the carriage away from the knitting and replace the Sinker Arm Assembly back onto the carriage ensuring that both knurled nuts are properly tightened.
Unravel the last row - check the yarn tension and continue knitting.
TENSIONS AND STITCH SIZES
Just as in hand knitting, it is IMPORTANT to have the RIGHT STITCH SIZE for the YARN that you use. Because of the 31 STITCH SIZES you will find that you are able to use ALMOST ALL OF THE POPULAR HAND KNITTING YARNS.
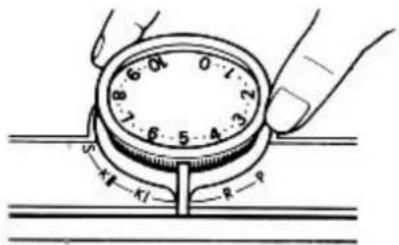
text_image
R P K LIn the centre of the carriage is the stitch Tension Dial. With the Tension Dial you can choose the size of stitch suitable for your yarn. Between the numbers you can see two little dots - these are also Tensions - this means you can select from 31 different Tension sizes to find the most suitable for nearly any type of yarn you wish to knit.
You will see that most stitch patterns look far better when knitted with the correct stitch size. It is quite impossible for me to tell you here which is the best Tension for your yarns there are too many different types and qualities.
It is very easy to find out yourself which of the 31 Tensions is the best one for you to use. Let's make a little test. Cast on open edge 60 stitches and knit a few rows on Tension 10. If using a thin to medium yarn, you will find the stitches are much too loose. Set the Tension to 9 and knit a few rows. Repeat setting the Tension to a smaller size and knitting a few rows until you find the right Tension for the yarn you are using.
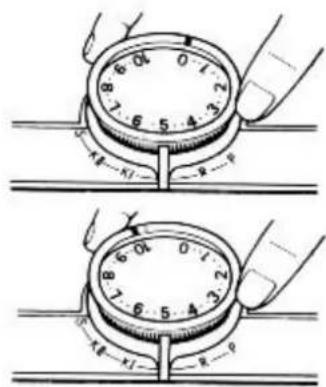
text_image
Diagram showing two hand positions on a dial with labeled degrees and measurements, likely illustrating a mechanical or electrical setup.When the Tension Dial is set to 0 - the tightest Tension is obtained (smallest stitch).
When the Tension Dial is set to 10 - the loosest Tension is obtained (largest stitch).
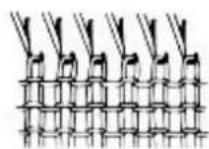
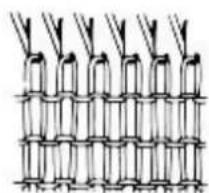
natural_image
Diagram of a woven basket structure with multiple rings and rods (no text or symbols)IF YOUR TENSION IS TOO TIGHT — it will be difficult, or even impossible to knit and you will use more yarn, thus wasting money and your knitwear will be hard and uncomfortable to wear.
IF YOUR TENSION IS TOO LOOSE – your knitted garment will either have no shape or will very soon lose its shape.
INCORRECT TENSION SETTING CAUSES
- JAMMING OF THE CARRIAGE
- VERY HARD KNITTING
-
WASTAGE OF YARN IF THE TENSION IS TOO TIGHT
-
FAULTY PATTERNS
- DROPPED STITCHES
- SHAPELESS GARMENT IF THE TENSION IS TOO LOOSE
KNITTING TO MEASURE
You do not need to be a dressmaker, nor have any special knowledge, to take the simple measurements you will need to make your knitwear fiit loosely and comfortably, yet fashionably.
A good hint is to give extra width to the measurements you take, as knitwear should not be skin tight.
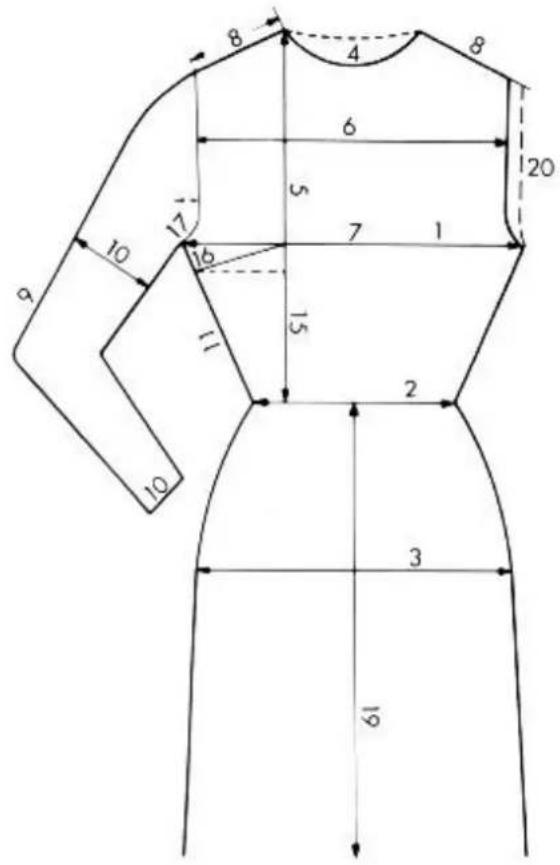
text_image
8 4 8 6 5 7 1 20 17 16 15 11 9 10 10 2 3 19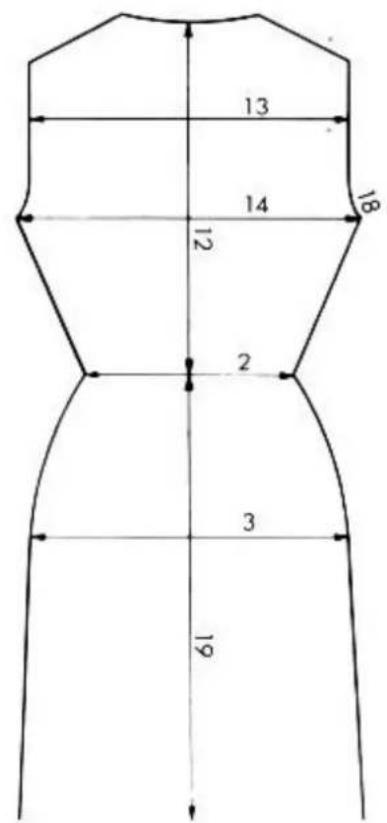
text_image
13 14 18 12 2 3 19KNITTING TO MEASURE
- Bust measurement ..... It is taken around the fullest part of the bust and shoulder blades.
- Waist measurement ..... To fit snugly around the waist
- Hip measurement .... Over the widest part of the hip.
- Neck measurement .... Round base of neck.
- Front length . . . . . . . . . . . . . From highest point of shoulder over the bust to the waistline.
- Front shoulder width ..... Above the bust from armhole to armhole,
- Front bust width .... Over the bust from side seam to side seam under the arm.
- Width of shoulder ..... From neckline to armhole.
- Sleeve length . . . . . . . . . . . From shoulder to the required point of the arm.
- Sleeve width ....Width on top around the upper arm, width at bottom around the wrist.
- Side length From the waist, about 1 inch below the armpit.
- Back length From nape of neck to waistline.
- Back shoulder width ..... Across the back from armhole to armhole.
- Back width .... Across the back from side seam to side seam.
- Length of dart . . . . . . . . . . . . . . . . . . . . . . . . . . . The front length minus back length (12) gives the required number of inches your dart needs to be knitted in rows.
- Width of dart From the side seam (2 inches before starting the shaping of the armhole) to the required point of the bust.
- Width of armhole Front ..... Front bust width (7) minus front shoulder width (6). The difference between measurement 7 and 6 must be divided by 2 so you have one half for the left and one half for the right armhole.
- Width of armhole Back ..... Back width (14) minus back shoulder width (13) divided by 2 as you need one half for each armhole.
- Skirt length From the waist to the point of the hem.
KNITTING TO MEASURE
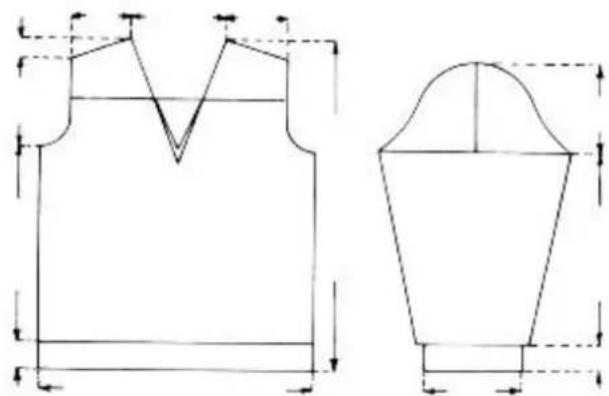
natural_image
Technical line drawing of a garment pattern piece with side and top views (no text or symbols)FOR SET-IN SLEEVES
FOR RAGLAN SHAPING
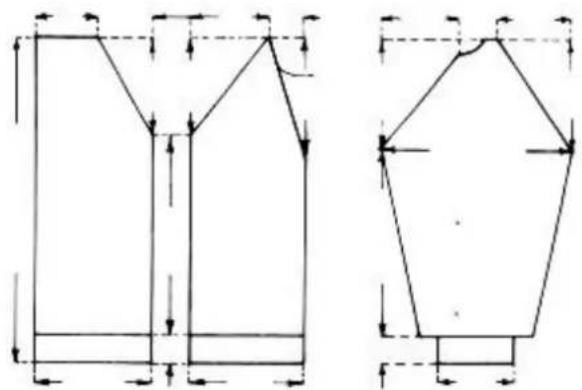
natural_image
Pure geometric line drawings of two symmetrical shapes with arrows indicating measurement or alignment (no text or symbols)TO OBTAIN A WELL FITTING GARMENT It is just as important to knit a Tension square as it is to take the right measurements. Always knit a Tension square before starting a new garment. This little extra trouble will be well worth your while.
WHETHER YOU HAVE A KNITTING PATTERN OR NOT, you will be able to copy any model you fancy if you make a Tension square of the stitch pattern and draw a diagram on which you enter the precise measurements you have taken. Always start by knitting your Tension square.
TAKE YOUR MEASUREMENTS — draw a sketch on a reduced scale, calculate the number of stitches you will need to cast on for the width you need, and how many rows are needed for the length required.
For shaping you also need to calculate the increasing and decreasing and divide the number of stitches you need to increase into the number of rows you must knit.
THE MORE CARE YOU TAKE PLANNING YOUR GARMENT, THE SOONER YOU WILL FINISH YOUR KNITTING AND THE BETTER THE GARMENT WILL FIT.
CHANGING A DAMAGED NEEDLE
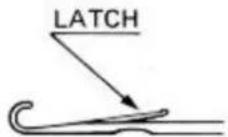
Needles with damaged latches will cause faulty knitting or dropped stitches and therefore must be changed.
The needle latch must move easily and lie flat over the needle hook.
natural_image
Line drawing of a woman in a polka-dot dress and dress, waving (no text or symbols)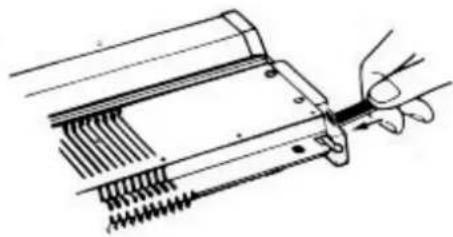
natural_image
Diagram of a hand using a tool to adjust or install a mechanical component (no text or symbols visible)At each side of the needle bed you can see the needle retaining bar - it can be pulled out of the needle bed either to the RIGHT or to the LEFT side.
If the damaged needle is at the RIGHT half of the centre - push the raised end of the copper plate into the needle bed at the RIGHT.
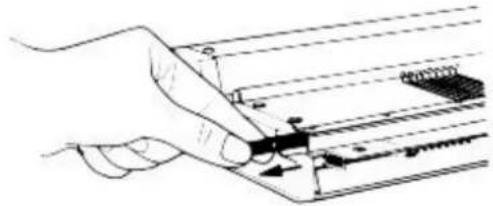
natural_image
Illustration of a hand using a tool to interact with a mechanical device (no text or symbols visible)The needle retaining bar is now pushed out of the needle bed at the LEFT and you can pull it out of the needle bed until the damaged needle lies free.
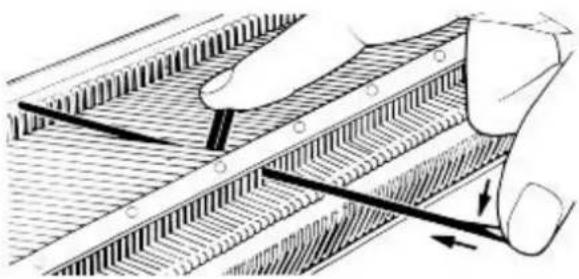
natural_image
Illustration of a hand using a tool to interact with a grid-patterned mechanical component (no text or symbols visible)Push the damaged needle by the butt up to 'D' position. With your thumb, push the needle hook down as shown, unless the needle is badly worn the heel will lift out of the needle bed. If NOT, use the work hook. Slide it inside the needle bed from the top and bring the shank of the needle below the opening of the needle bed to let it come out. Hold the heel of the damaged needle and pull it backwards out of the needle bed.
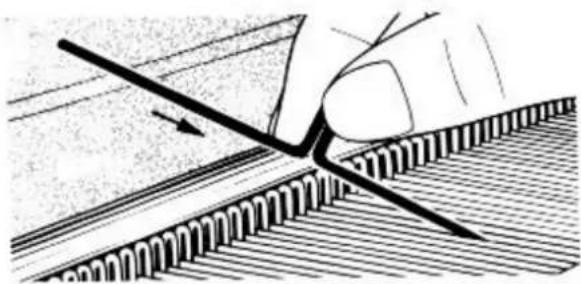
natural_image
Illustration of a hand holding a pen over a textured surface with an arrow indicating direction (no text or symbols)Open the latch of the new needle and slide it into the groove of the needle bed as shown by the arrow. The needle must come to 'D' position. Then you let the shank slide into the needle bed, move the needle backwards to 'A' position.
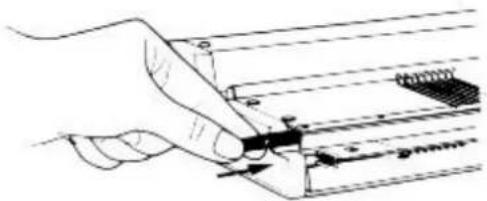
natural_image
Hand holding a tool interacting with a mechanical component (no visible text or symbols)Check that the needle slides smoothly in the needle bed from 'A' to 'D' position.
Now insert the needle retaining bar inside the needle bed as shown.
THE FUNCTION OF THE PUSH BUTTONS
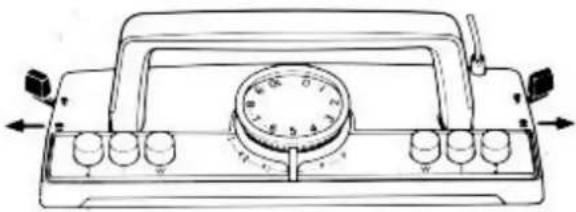
natural_image
Line drawing of a vintage analog device with rotary dial and control knobs (no text or symbols)SIDE LEVERS
For plain stocking stitch knitting they should be set in FRONT in ● position.
But for stitch pattern knitting - they must be set back to ▼ position, only then the carriage has contact with the automatic needle selector.
| Push Buttons | Directions of carriage | Needles in 'B' position | Needles in 'D' position | |
 |  | Knit | Remain in 'D' position | |
 |  | Needles shown in indicator as long lines move to 'D' position. | Remain in 'D' position | |
 |  | All needles knit to 'B' position | Knit back to 'B' position | |
 |  | Knit | Move to 'C' position without knitting | |
 |  | Move to 'D' then to 'C' position without knitting | Move to 'C' position without knitting | |
 |  | Knit | Move to 'D' then to 'C' position without knitting | |
 |  | Knit | Do not knit | |
 |  | Knit | Knit | |
 |  | |||
 | KKKT | |||
 |  | |||
 | ||||
 |  | |||
 |  | |||
 |  | |||
To release any button - push another one down HALF WAY ONLY.
THE CAM LEVER
The following instruction applies for the needles that show as SHORT lines in the indicator. When you knit Tuck Stitch Patterns using P on the Cam Lever these short line needles will knit the pattern.
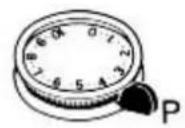
Knitting
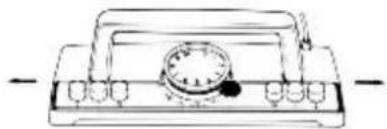
natural_image
Line drawing of a vintage typewriter with analog dial and control buttons (no text or symbols)not knitting holding yarn
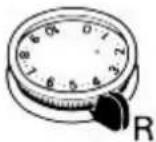
Not knitting
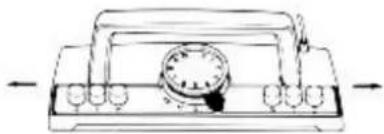
natural_image
Simple line drawing of a mechanical device with no text or symbolsNot knitting
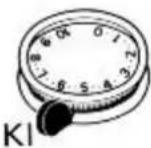
Knitting — after knitting needles come to 'C' position
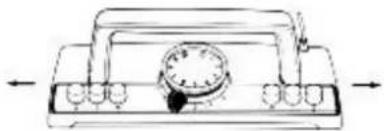
natural_image
Line drawing of a vintage typewriter with control knobs and dials (no text or symbols)Knitting — after knitting needles come to 'C' position.
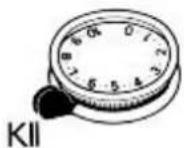
To knit Fair Isle patterns with different colours
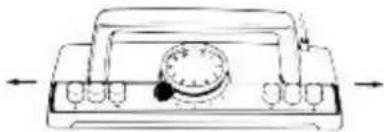
natural_image
Line drawing of a vintage typewriter with scroll wheel and indicator dial (no text or symbols)To knit Fair Isle patterns with different colours
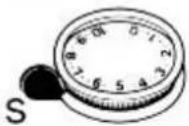
Not knitting
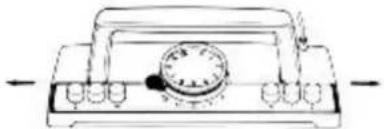
natural_image
Line drawing of a vintage rotary dial with control knobs and buttons (no text or symbols)Not knitting
THE ZIG-ZAG BUTTON
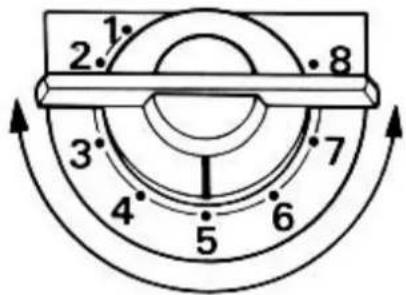
text_image
1 2 3 4 5 6 7 8With the ZIG-ZAG button you are able to move the stitch pattern onto any other needle or knit completely diagonal.
In this case you usually start the pattern from 1 to 8. When you have knitted the pattern on 8, you will start on 1 again.
When you knit back from 8 to 1 - you will then knit a ZIG-ZAG pattern.
You MUST ALWAYS turn the ZIG-ZAG button BACK from 8 to 1 - DO NOT TRY to turn it round completely - you will damage the pattern mechanism. When repacking the machine - set the ZIG-ZAG button to 5 and insert the copper Lock Plate into the RIGHT side of the Needle Bed. This way you protect the Pattern Panel from moving during transport.
By the little white triangle showing towards the needles, inside the Pattern Needle Indicator, you can control if you did move the pattern or not. Try this check by moving the ZIG-ZAG button as shown in the diagram at the LEFT.
Later, when you are more accustomed to pattern knitting, you will just count the pattern on the knitting.
THE NEEDLE SELECTOR BUTTONS
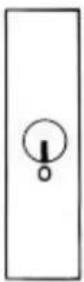
| 5 | ||
| 6 | ||
| 7 | ||
| 8 |
These are the 5 different positions of the LEFT side needle selector button.

| 1 | y y y y y y y y y y | 1111111 |
| 2 | y y y y y y y y y | 1111111 |
| 3 | y y y y y y y y y y | 11111111 |
| 4 | y y y y y y y y y | 11111111 |
These are the 5 different positions of the RIGHT side needle selector button.
Of course you can combine the settings of both Needle Selector buttons. You just cannot imagine the wide range of pattern possibilities they give you.
CAM LEVER AT CENTRE 0
When doing normal Tuck Stitch patterns using the Push Buttons on the carriage - then the needles that show as long lines will come to 'D' or 'C' position and gather the threads to knit the pattern.
CAM LEVER AT P
When knitting Tuck Stitch patterns using the Cam Lever on position P - then the needles that show as short lines will pick up the threads, go back to 'B' position with the thread in the hook and make the pattern.
CAM LEVER AT KII
When knitting Fair Isle patterns - the needles that show as short lines in the indicator will knit the contrasting colour which lies on top of the needles in 'C' position. So, remember - the short lines knit the second colour.
CAM LEVER AT CENTRE 0
When knitting Weaving patterns - the needles which show as long lines in the indicator will weave-in the weaving thread. The weaving thread is never knitted - the stitch is made around it.
MAINTENANCE OF THE MACHINE
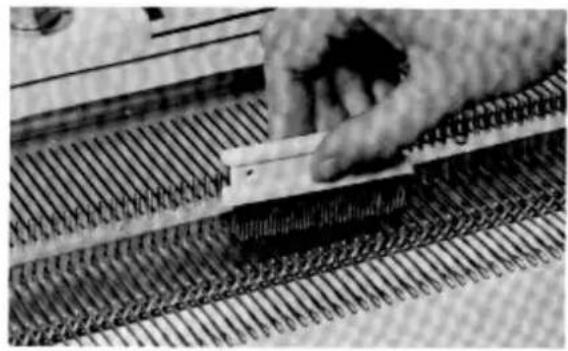
natural_image
Close-up of a hand using a tool to interact with a coiled metal mesh structure (no visible text or symbols)To clean the machine - remove the carriage from the needle bed completely. Bring all needles up to 'D' position and with the little brush remove all wool dust from the needle number plate.
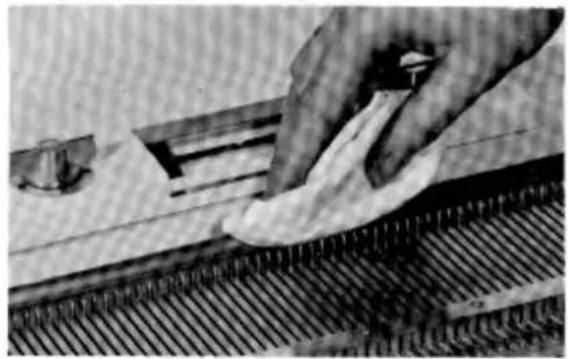
natural_image
Close-up of a hand using a tool to clean or fabricate material on a metal cutting board (no text or symbols visible)Remove any little wool hairs that may be around the brushes below the Sinker Arm Assembly.
With a paper tissue or a soft dry cloth remove oil from Guide Rail of machine and from below the carriage.
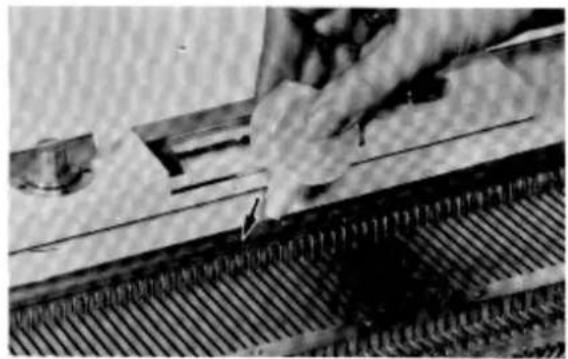
natural_image
Close-up of a hand using a tool to cut or mark a metal component on a striped surface (no visible text or symbols)When starting to knit - slide the oil bottle along the Guide Rail of the machine, the needle butts and the front guide of the needle bed.
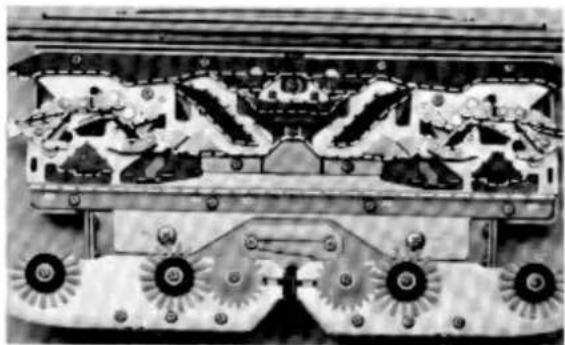
natural_image
Close-up of a mechanical assembly with gears and components (no visible text or symbols)The dotted line shows you where the parts below the carriage need oiling before knitting. Oil lightly.
REPACKING THE MACHINE
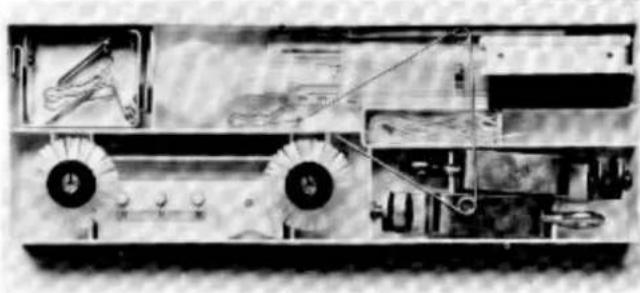
natural_image
Interior view of an electronic device with visible circuitry and components (no text or symbols)Remove the Yarn Brake and turn DOWN the Take-up Spring. Place it under Spring A in cover.
Remove Sinker Arm Assembly and place it below Spring A. Close Spring A.
If necessary, replace Rib Frame into cover. Insert Yarn Brake Rod from LEFT into holder then down into clip.
Remove both Table Clamps from machine, close them and place in Accessory Case. Place all other little accessories into case.
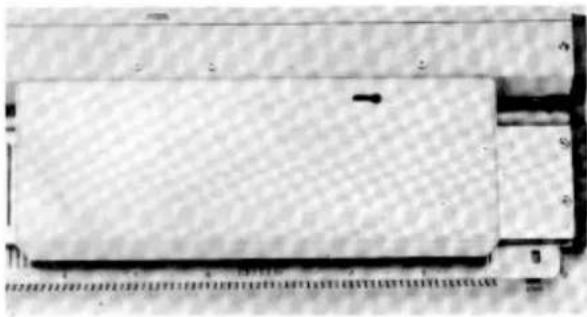
natural_image
Close-up of a rectangular electronic component with a textured surface and mounting holes (no visible text or symbols)Close the Accessory Case and place it onto needle bed as shown.
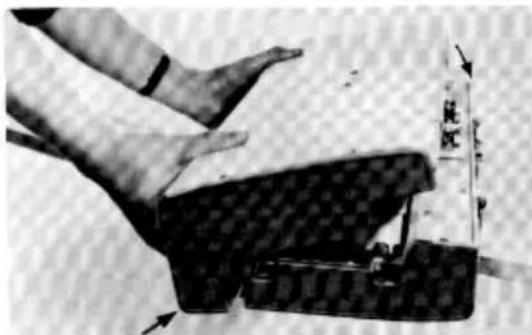
natural_image
Close-up of a person's foot pressing down on a checkered fabric or mechanical component (no visible text or symbols)Place cover over machine, short side towards the back of machine. Lower the longer end below the machine and close in direction of the arrow.
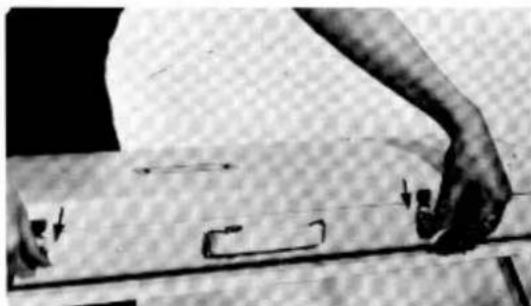
natural_image
Close-up of hands holding a ruler and a surface, with no visible text or symbolsClose both catch locks on rear cover of machine.
GENERAL INDEX
natural_image
Abstract sketch of a wavy line with no text or symbols| PAGE | ||
| ACCESSORIES | 2 | |
| ADVANCED GARMENTS | 60 | |
| BINDING OFF | Big loops | 30 |
| For decreasing | 49 | |
| BUTTONHOLES | Single | 73 |
| Small | 72 | |
| Double | 75 | |
| CARRIAGE JAMMING | 99 | |
| CASTING OFF | Big loops | 30 |
| For decreasing | 49 | |
| CASTING ON | Open edge | 22 |
| Closed edge automatic | 28 | |
| Closed edge by hand | 29 | |
| CHANGING NEEDLES | 105 | |
| CHANGING YARN | 31 | |
| CORD KNITTING | 33 | |
| DARTS | 77 | |
| DECREASING | One stitch | 49 |
| Many stitches | 49 | |
| Fully Fashioned | 65 | |
| DROPPED STITCHES | 94 | |
| ERRORS | 93 | |
| FRINGES | 33 | |
| HEMS | Simple double hem | 44 |
| Picot hem | 81 | |
| HINTS | Points to remember | 93 |
| Dropped stitches | 94 | |
| Unravelling | 97 | |
| Carriage jams | 99 | |
| Stitch sizes | 101 | |
| INCREASING | One stitch | 47 |
| Many stitches | 48 | |
| Fully Fashioned | 63 | |
| JOINING YARN | 31 | |
| KNITTING TO MEASURE | 102 |
GENERAL INDEX
| PAGE | ||
| LATCH, NEEDLE | 6 | |
| MAIN PARTS OF THE MACHINE | 7 | |
| MAINTENANCE OF THE MACHINE | 109 | |
| NECKLINES | 'V' neck plain | 66 |
| 'V' neck in pattern | 82 | |
| Round neckline | 69 | |
| NEEDLE POSITIONS | 14 | |
| PARTIAL KNITTING | Darts | 77 |
| Pockets - plain | 79 | |
| Pockets - in patterns | 84 | |
| REPACKING THE MACHINE | 110 | |
| RIBBINGS | 1 by 1 double welt | 50 |
| 2 by 1 double welt | 59 | |
| 3 by 1 double welt | 59 | |
| 1 plain 1 purl rib | 86 | |
| ROW COUNTER | 10 | |
| SETTING UP THE MACHINE | 10 | |
| SEWING UP METHODS | 32 | |
| SLITS FOR ZIP FASTENERS | 84 | |
| STARTER GARMENTS | 36 | |
| STEAMING | The fabric | 31 |
| The welts | 57 | |
| STITCH PATTERNS | 38 | |
| TECHNICAL INSTRUCTIONS | Pattern Panel and Carriage | 106 |
| TENSION GUIDE | 34 | |
| TENSION SWATCH | 35 | |
| THREADING UP | 21 | |
| TRANSFERRING STITCHES | 47 | |
| UNPACKING THE MACHINE | 8 | |
| 'V' NECK BAND | 90 | |
| WOOLS AND YARNS | 4 | |
| YARN BRAKE | 18 | |
| YARN FEEDER | 22 |