
PS50B556T3W - Fjernsyn SAMSUNG - Gratis brugsanvisning og manual
Find enhedens vejledning gratis PS50B556T3W SAMSUNG i PDF-format.

Brugerspørgsmål om PS50B556T3W SAMSUNG
0 spørgsmål om dette apparat. Besvar dem du kender, eller stil dit eget.
Stil et nyt spørgsmål om dette apparat
Download vejledningen til din Fjernsyn i PDF-format gratis! Find din vejledning PS50B556T3W - SAMSUNG og tag din elektroniske enhed tilbage i hånden. På denne side er alle dokumenter nødvendige for brugen af din enhed offentliggjort. PS50B556T3W af mærket SAMSUNG.
BRUGSANVISNING PS50B556T3W SAMSUNG
PDP TV
QUICK SETUP GUIDE
The Supplied Accessoris
Owner's Instructions Remote Control/

AAA Batteries (2ea)

Power Cord Cloth-Clean

Holder-Wire Cable Screw (4ea) Cover-Bottom Holder-Ring (4ea)


Ferrite Core for Power Cord

Ferrite Core for Headphone


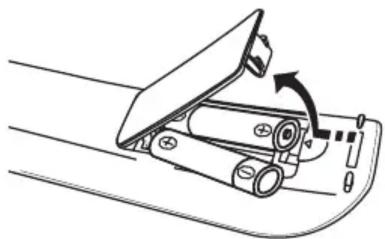
Installing Batteries in the Remote Control
natural_image
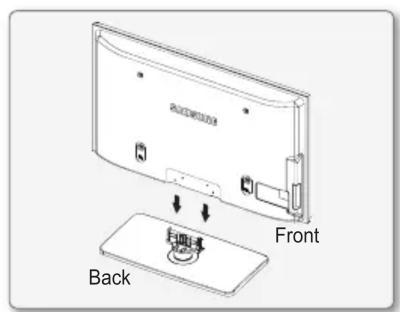
Diagram of a mechanical device with a rotating lever and adjustment knob (no text or symbols)Installing the Stand
Step 1 Step 2 Step 3

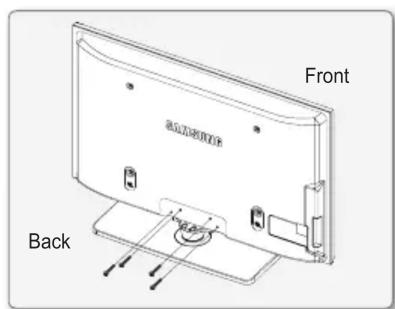

Step 1. Attach your PDP TV to the stand.
☑ Firmly secure the stand to the TV before moving it, as the stand may fall and could cause serious injury.
Two or more people should carry the TV. Never lay the TV on the floor because of possible damage to the screen. Always store the TV upright.
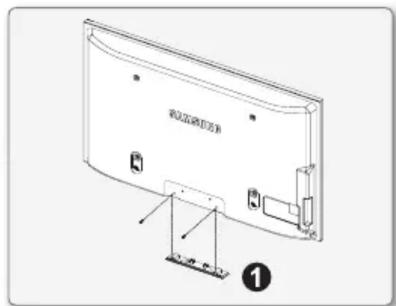
Step 1. Using the 4 screws for securing the stand base and the monitor, firmly attach the monitor to the stand base. (The exterior of the set may be different than the picture.)
Step 3. In case of installing your TV on the wall, close the cover ① on the stand-base connection part using two screws for hiding.
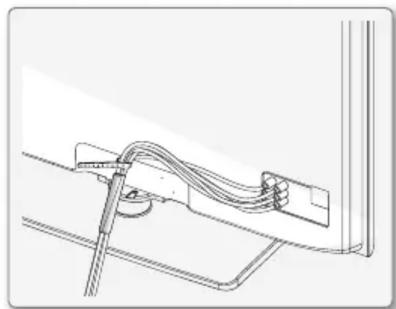
Assembling the Cables
Enclose the cables in the Holder-Wire Cable so that the cables are not visible through the transparent stand.
natural_image
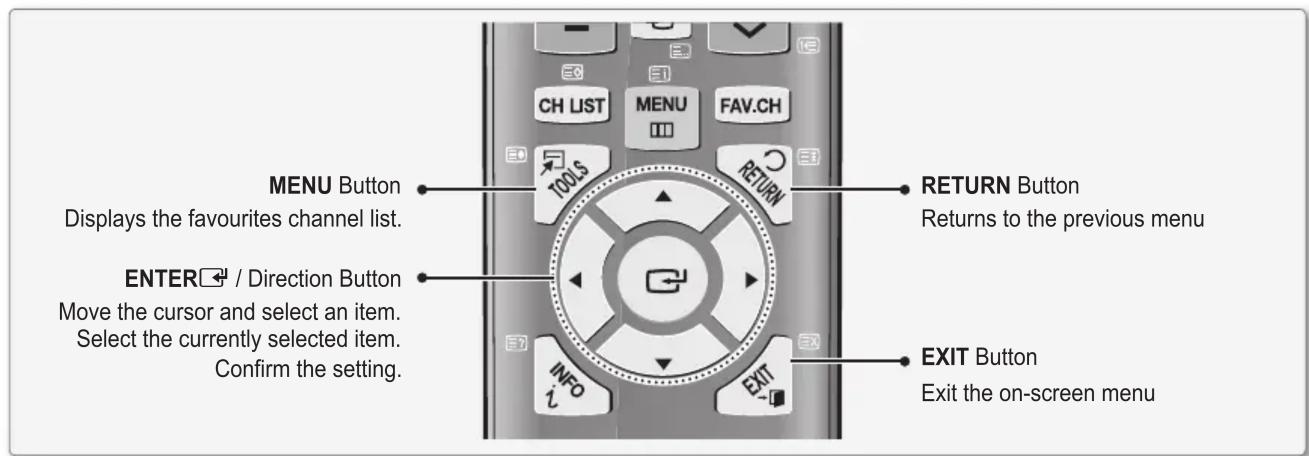
Technical line drawing of a mechanical assembly with a tool and cable (no text or symbols)Using the remote control buttons
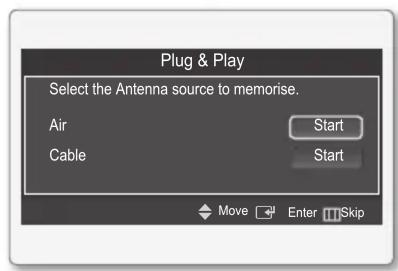
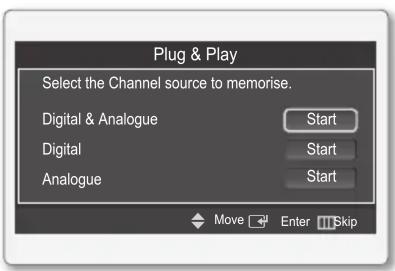
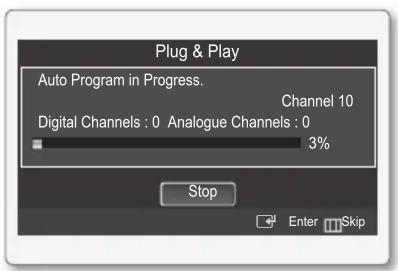
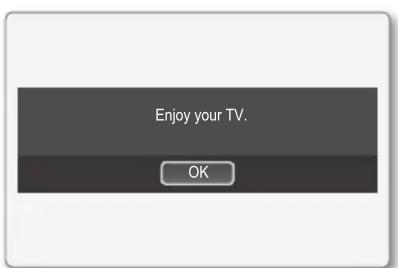
Plug & Play
When the TV is initially powered on, basic settings proceed automatically and subsequently.
If you want to reset this feature, press the MENU button to display menu.
You can set the Plug & Play by selecting Setup → Plug & Play.


On the screen, you can set as follows.
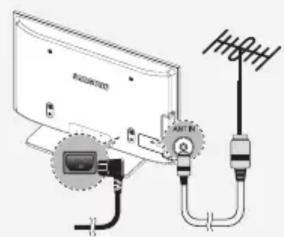
The each step may vary depending on the Antenna source.
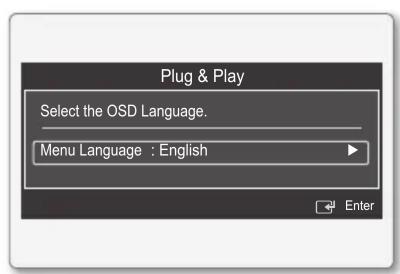
Step 1

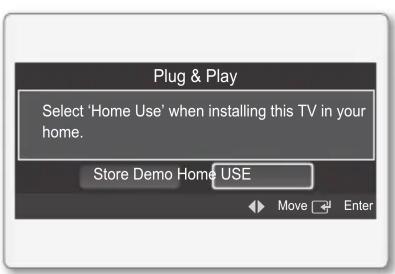
Step 2

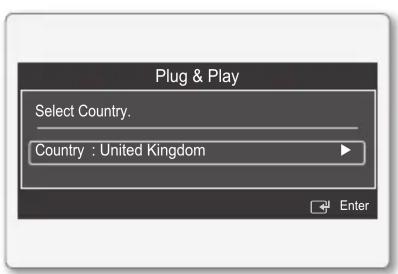
Step 3

Step 4

Step 5

Step 6

Step 7

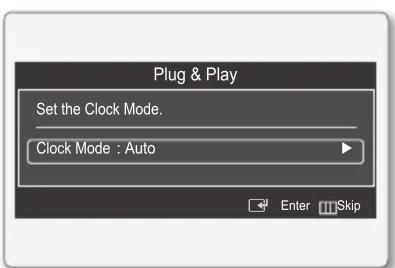
Step 8

Step 9
Connecting a AV device
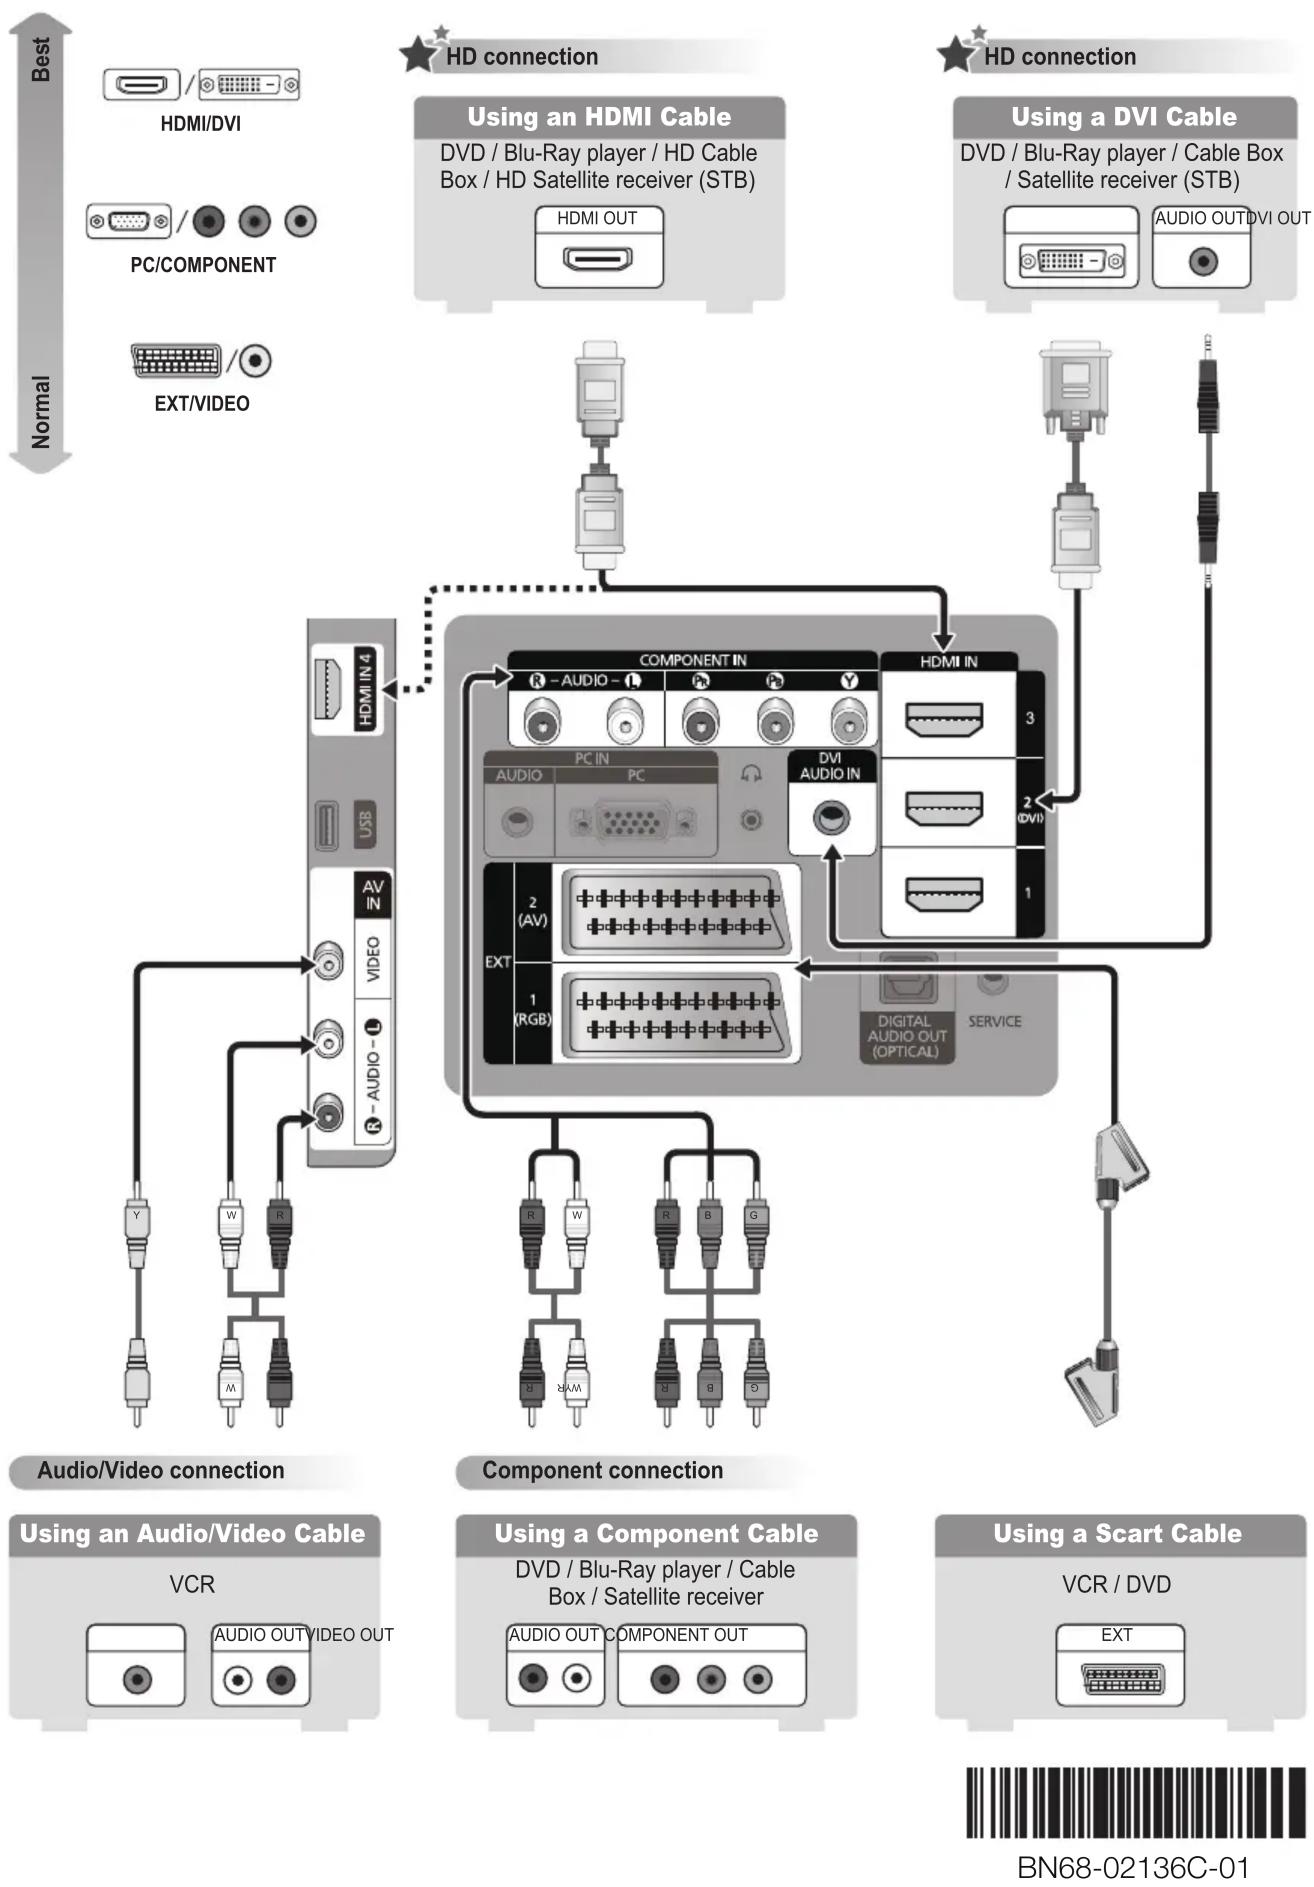
flowchart
graph TD
    A["Best"] --> B["HDMI/DVI"]
    B --> C["PC/COMPONENT"]
    C --> D["EXT/VIDEO"]
    E["Normal"] --> F["Audio/Video connection"]
    G["HD connection"] --> H["Using an HDMI Cable"]
    H --> I["DVD / Blu-Ray player / HD Cable Box / HD Satellite receiver (STB)"]
    J["HD connection"] --> K["Using a DVI Cable"]
    K --> L["DVD / Blu-Ray player / Cable Box / Satellite receiver (STB)"]
    M["HD connection"] --> N["AUDIO OUTDVI OUT"]
    O["Component connection"] --> P["Using an Audio/Video Cable"]
    P --> Q["VCR"]
    Q --> R["AUDIO OUTVIDEO OUT"]
    S["Component connection"] --> T["Using a Component Cable"]
    T --> U["VCR / DVD"]
    U --> V["EXT"]
    W["Digital Audio Out (OPTICAL)"] --> X["SERVICE"]
    X --> Y["2 (AV)"]
    X --> Z["1 (RGB)"]
    style A fill:#f9f,stroke:#333
    style G fill:#f9f,stroke:#333
    style J fill:#f9f,stroke:#333
    style M fill:#f9f,stroke:#333
    style O fill:#f9f,stroke:#333
Mærke : SAMSUNG
Model : PS50B556T3W
Kategori : Fjernsyn