LE32C535F1W - Fjernsyn SAMSUNG - Gratis brugsanvisning og manual
Find enhedens vejledning gratis LE32C535F1W SAMSUNG i PDF-format.

Brugerspørgsmål om LE32C535F1W SAMSUNG
0 spørgsmål om dette apparat. Besvar dem du kender, eller stil dit eget.
Stil et nyt spørgsmål om dette apparat
Download vejledningen til din Fjernsyn i PDF-format gratis! Find din vejledning LE32C535F1W - SAMSUNG og tag din elektroniske enhed tilbage i hånden. På denne side er alle dokumenter nødvendige for brugen af din enhed offentliggjort. LE32C535F1W af mærket SAMSUNG.
BRUGSANVISNING LE32C535F1W SAMSUNG
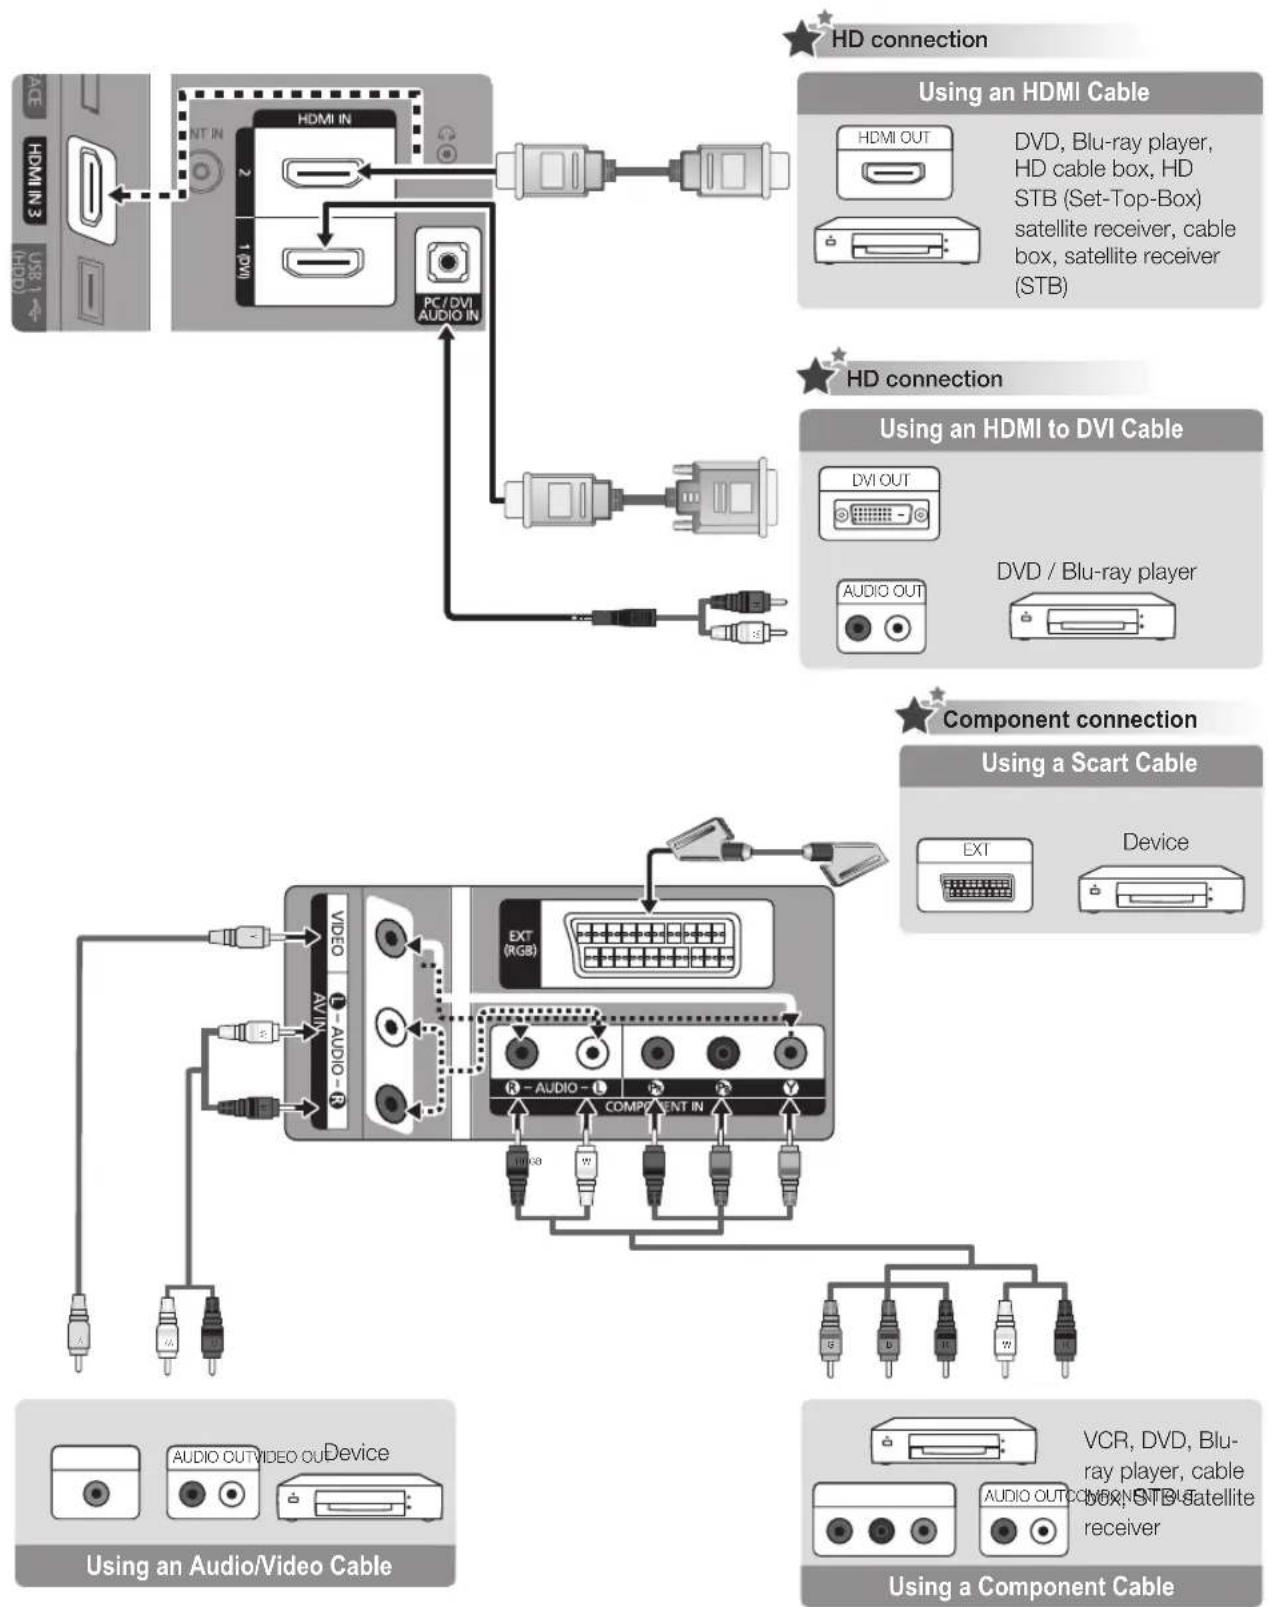
flowchart
graph TD
    A["ACI HDMI 3"] --> B["MT IN"]
    B --> C["HDMI IN"]
    C --> D["1"]
    D --> E["PC / DVI AUDIO IN"]
    E --> F["HD connection"]
    G["USB 1"] --> H["2"]
    H --> I["HDMI OUT"]
    I --> J["DVD, Blu-ray player, HD cable box, HD STB (Set-Top-Box) satellite receiver, cable box, satellite receiver (STB)"]
    K["HD connection"] --> L["HD/Blu-ray player"]
    M["Component connection"] --> N["Using a Scart Cable"]
    O["Device"] --> P["EXT"]
    Q["Device"] --> R["Device"]
    S["Device"] --> T["Device"]
    U["Device"] --> V["Device"]
    W["Device"] --> X["Device"]
    Y["Device"] --> Z["Device"]
LCD TV
QUICK SETUP GUIDE
The Supplied Accessories
• Remote Control & Batteries (AAA x 2)
- Owner's Instructions
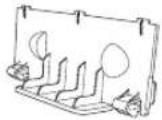
- Blanking Bracket
- Cleaning Cloth
See separate guide for installing the stand.
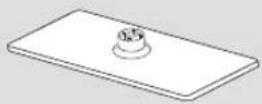
- Stand (1EA)
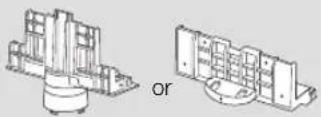
- Guide Stand (1EA)
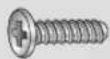
M4 X L12
- Screws (8EA)
(LE32C530: 7EA)
Preset Step 1 Step 2
text_image
Front Rear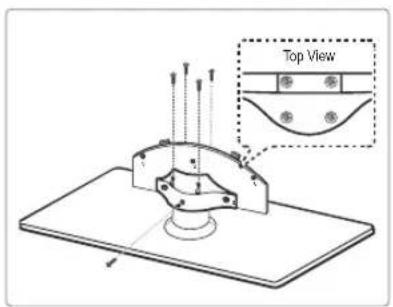
text_image
Top View
natural_image
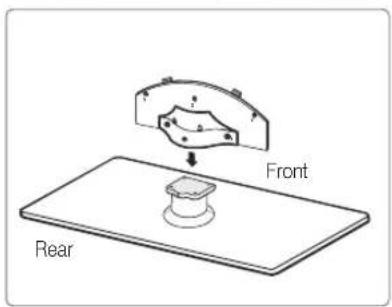
Technical diagram of a mechanical assembly with labeled components and motion indicators (no readable text or symbols)Preset: Place the Guide Stand and Cover Neck onto the stand and fasten it using the screws. Applicable to models (Depending on the model)
Step 1. Attach your LCD TV to the stand.
Two or more people should carry the TV.
Make sure to distinguish between the front and back of the stand when assembling them.
To make sure the TV is installed on the stand at a proper level, do not apply excess downward pressure to the upper left of right sides of the TV.
Step 2. Fasten two screws at position 1 and then fasten two screw at position 2.
Stand the product up and fasten the screws. If you fasten the screws with the LCD TV placed down, it may lean to one side.
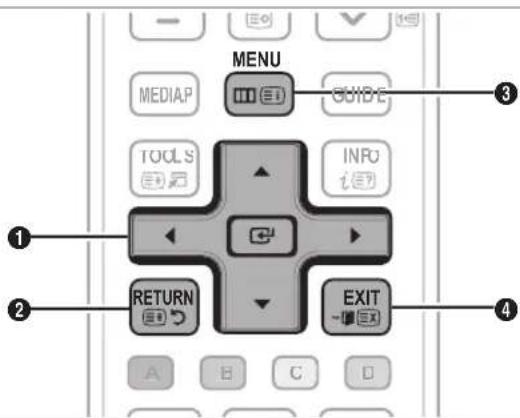
Using the remote control buttons
ENTER / DIRECTION Buttons
Move the cursor and select an item. Select the currently selected item. Confirm the setting.
RETURN Button Return to the previous menu.
text_image
MENU MEDIA GUIDE TOOLS INRU RETURN EXIT A B C DMENU Button Display the main on-screen menu.
EXIT Exit the on-screen menu.
Installing Batteries in the Remote Control
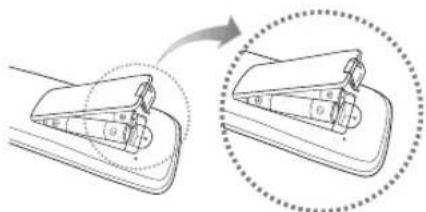
text_image
Diagram illustrating a mechanical device with labeled parts and directional arrows, showing a step and rotation process.NOTE
• Use the remote control within 23 feet from the TV.
- Bright light may affect the performance of the remote control. Avoid using nearby special fluorescent light or neon signs.
- The colour and shape may vary depending on the model.
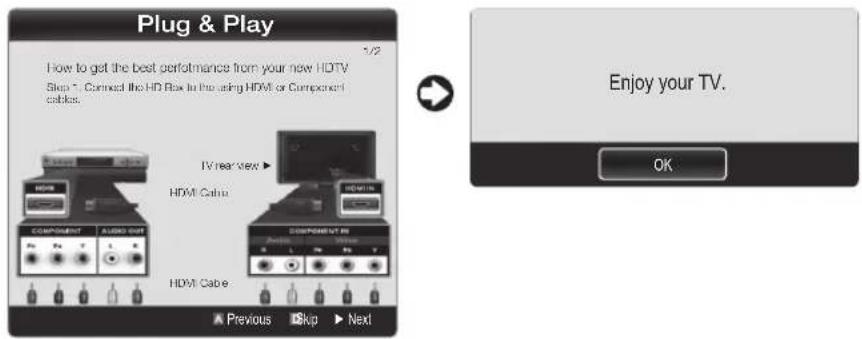
When the TV is initially powered on, basic settings proceed automatically and subsequently.
If you want to reset this feature, press the MENU button to display menu.
You can set the Plug & Play by selecting 'Setup → Plug & Play'.
flowchart
graph LR
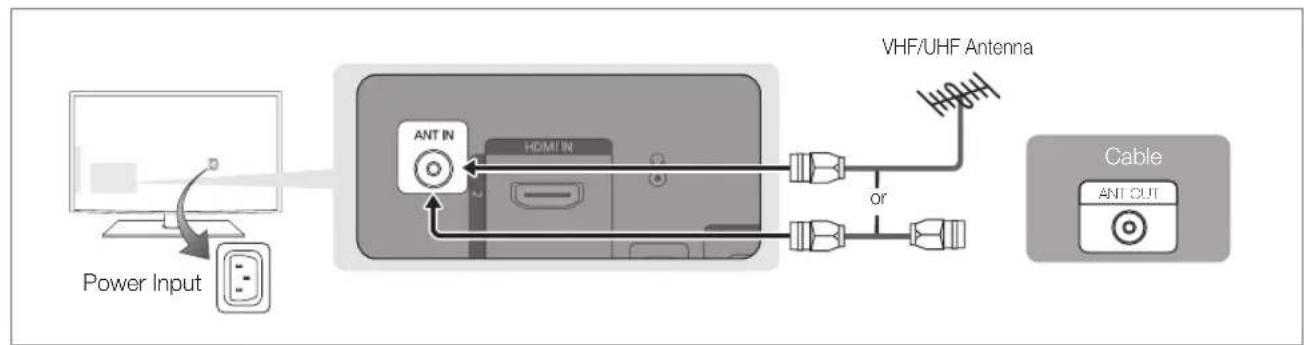
A["Power Input"] --> B["Ant In"]
B --> C["HDMI IN"]
C --> D["VHF/UHF Antenna"]
D --> E["Cable"]
E --> F["ANT OUT"]
On the screen, you can set as follows.
The each step may vary depending on the Antenna source.
flowchart
graph LR
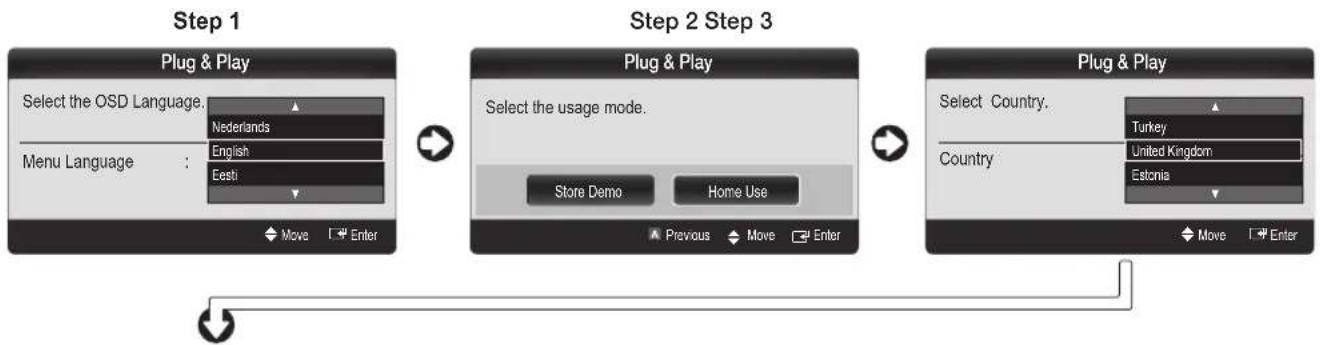
A["Step 1: Plug & Play\nSelect the OSD Language."] --> B["Step 2: Plug & Play\nSelect the usage mode."]
B --> C["Step 3: Plug & Play\nSelect Country."]
Step 4 Step 5 Step 6
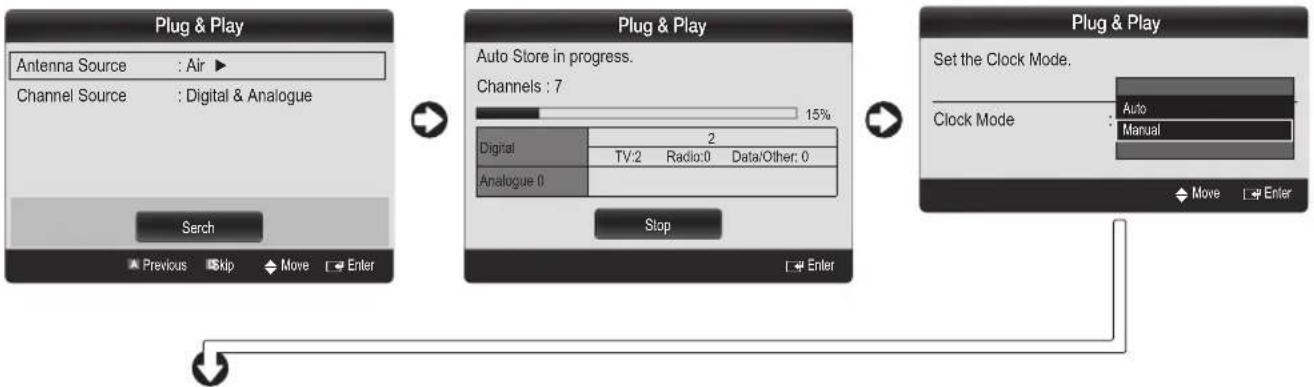
flowchart
graph LR
    A["Plug & Play"] --> B["Auto Store in progress. Channels: 7"]
    B --> C["Digital: 2"]
    B --> D["Analogue: 0"]
    C --> E["TV:2 Radio:0 Data/Other: 0"]
    D --> F["Stop"]
    G["Plug & Play"] --> H["Set the Clock Mode."]
    H --> I["Clock Mode: Auto Manual"]
Step 7 Step 8