
SX-KN501 - Tastatur TECHNICS - Gratis brugsanvisning og manual
Find enhedens vejledning gratis SX-KN501 TECHNICS i PDF-format.


Brugerspørgsmål om SX-KN501 TECHNICS
0 spørgsmål om dette apparat. Besvar dem du kender, eller stil dit eget.
Stil et nyt spørgsmål om dette apparat
Download vejledningen til din Tastatur i PDF-format gratis! Find din vejledning SX-KN501 - TECHNICS og tag din elektroniske enhed tilbage i hånden. På denne side er alle dokumenter nødvendige for brugen af din enhed offentliggjort. SX-KN501 af mærket TECHNICS.
BRUGSANVISNING SX-KN501 TECHNICS
Preliminary
Technics
KEYBOARD
sx-KN701
sx-KN501
natural_image
Black and white line drawing of a treble clef on lined paper (no text or symbols)
FOR YOUR SAFETY PLEASE READ THE FOLLOWING TEXT CAREFULLY. (for UNITED KINGDOM)
This appliance is supplied with a moulded three-pin mains plug for your safety and convenience.
A 5 amp fuse is fitted in this plug.
Should the fuse need to be replaced please ensure that the replacement fuse has a rating of 5 amps and that it is approved by ASTA or BSI to BS1362.
Check for the ASTA mark @ or the BSI mark @ on the body of the fuse.
If the plug contains a removable fuse cover you must ensure that it is refitted when the fuse is replaced.
If you lose the fuse cover the plug must not be used until a replacement cover is obtained.
A replacement fuse cover can be purchased from your local Panasonic/Technics Dealer.
IF THE FITTED MOULDED PLUG IS UNSUITABLE FOR THE SOCKET OUTLET IN YOUR HOME THEN THE FUSE SHOULD BE REMOVED AND THE PLUG CUT OFF AND DISPOSED OF SAFELY.
THERE IS A DANGER OF SEVERE ELECTRICAL SHOCK IF THE CUT-OFF PLUG IS INSERTED INTO ANY 13 AMP SOCKET.
If a new plug is to be fitted please observe the wiring code as shown below.
If in any doubt please consult a qualified electrician.
IMPORTANT: -The wires in this mains lead are coloured in accordance with the following code:—
Blue: Neutral
Brown: Live
As the colours of the wires in the mains lead of this appliance may not correspond with the coloured markings identifying the terminals in your plug, proceed as follows.
The wire which is coloured BLUE must be connected to the terminal in the plug which is marked with the letter N or coloured BLACK.
The wire which is coloured BROWN must be connected to the terminal in the plug which is marked with the letter L or coloured RED.
Under no circumstances should either of these wires be connected to the earth terminal of the three-pin plug, marked with the letter E or the Earth Symbol @.
How to replace the fuse. Open the fuse compartment with a screwdriver and replace the fuse and fuse cover.

KN)01/501 95/31
322 CHK x - 1.
OWNER'S MANUAL
WARNING: TO REDUCE THE RISK OF FIRE OR ELECTRICAL SHOCK, DO NOT EXPOSE THIS PRODUCT TO RAIN OR MOISTURE.
BEFORE YOU PLAY, PLEASE READ THE CAUTIONARY COPY APPEARING ON PAGE 2.
CAUTION
RISK OR ELECTRIC SHOCK DO NOT OPEN
CAUTION:
TO REDUCE THE RISK OF
ELECTRIC SHOCK, DO NOT
REMOVE SCREWS.
NO USER-SERVICEABLE
PARTS INSIDE.
REFER SERVICING TO QUALIFIED
SERVICE PERSONNEL.
The lightning flash with arrowhead symbol, within an equilateral triangle, is intended to alert the user to the presence of uninsulated "dangerous voltage" within the product's enclosure that may be of sufficient magnitude to constitute a risk of electric shock to persons.
The exclamation point within an equilateral triangle is intended to alert the user to the presence of important operating and maintenance (servicing) instructions in the literature accompanying the appliance.
Before you play
For long and pleasurable use of this instrument, and to gain a thorough understanding of your Keyboard, it is strongly recommended that you read through this Owner's Manual once.
The Owner's Manual is comprised of the following parts.
OWNER'S MANUAL
Contains explanations of the operation of the keyboard.
REFERENCE GUIDE (separate booklet)
Reference guide for the contents of the SOUND/RHYTHM select, MIDI data, etc.
Important Safety Instructions
WARNING!
When using this unit, basic precautions should always be followed, including the following:
• Children using this unit should be supervised.
- Do not use this unit near water—for example, in a wet basement, near a swimming pool, or the like.
- This unit should be used only with a stand that is recommended by the manufacturer.
Installation location
- Take care to use this unit in a place where it will receive sufficient ventilation. Do not permit the ventilation holes to be covered by curtains or any similar materials.
- Place it away from direct sunlight and excessive heat from heating equipment.
- Place it where humidity, vibration and dust are minimized.
Metal items inside the unit may result in electric shock or damage.
Do not permit metal articles to get inside the unit. Be especially careful with regard to this point if children are near this unit. They should be warned never to try to put anything inside.
If water gets into the unit...
Care should be taken so that liquids are not spilled in the unit. As a precaution, it is suggested that flower vases and other containers which hold liquids not be placed on the top of this unit.
Protect your hearing
This product, either alone or in combination with an amplifier and headphones or speakers, may be capable of producing sound levels that could cause a permanent hearing loss. Do not operate for a long period of time at a high volume level or at a level that is uncomfortable. If you experience any hearing loss or ringing in the ears, you should consult an audiologist.
When to request service
The product should be serviced by qualified service personnel when:
A. The power cord or the plug has been damaged; or
B. Objects have fallen, or liquid has been spilled into the unit; or
C. The product has been exposed to rain; or
D. The product does not appear to operate nor mally or exhibits a marked change in performance; or
E. The product has been dropped, or the enclosure damaged.
Service and repair
Never try to remove the top or back panels of this unit, or to touch inside parts by hand or with tools. All servicing beyond that described in the Maintenance section below should be referred to your dealer or qualified service personnel.
Maintenance
- Be sure to switch this unit off after use, and do not switch the unit on and off in quick succession, as this places an undue load on the electronic components.
- To maintain the luster of the keys and buttons, wipe with a clean, damp cloth, and polish with a soft, dry cloth. Polish may be used, but do not use thinners or petro-chemical-based polishes.
- A wax-based polish may be used on the cabinet, although you will find that rubbing with a soft cloth will suffice.
When using AC adaptor
Power source
- Use only a 120V AC power source.
- DC power cannot be used.
Handling the power cord
- Never touch the power cord, or its plug, with wet hands.
- Don't pull the power cord.
- The power cord of this unit should be unplugged from the outlet when the unit is left unused for a long period of time.
WARNING: TO REDUCE THE RISK OF FIRE OR ELECTRICAL SHOCK, DO NOT EXPOSE THIS PRODUCT TO RAIN OR MOISTURE.
SAVE THESE INSTRUCTIONS
Contents
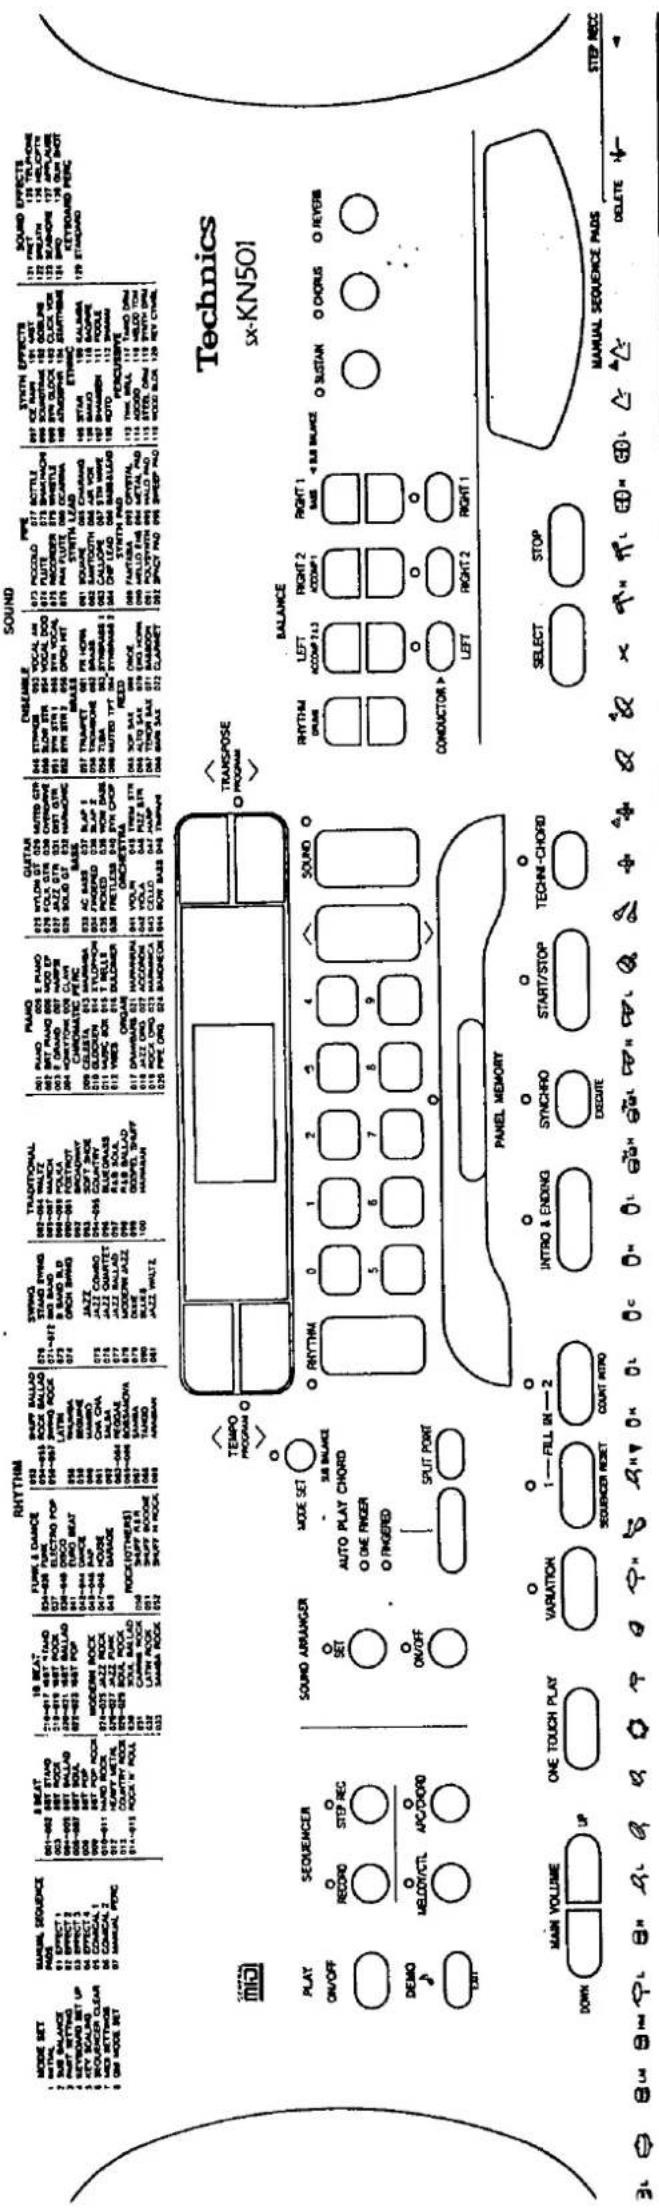
Controls and functions (KN501) 4
Controls and functions (KN701) 6
Getting started 8
Playing 9
Listen to the demonstration 9
Part I Sounds and effects
Selecting Sounds 10
Assigning parts to the keyboard 11
Eeffect....13
Transpose 15
Techni-chord 16
Key scaling 17
Part II Key scaling Manual Sequence Pads 18
Part J[ Playing the rhythm 太文字
3 Selecting rhythms 20
Playing the rhythm 21
Auto Play Chord 23
Sound Arranger 25
One Touch Play 26
Panel Memory 26
Part II Sequencer
^4 Outline of the Sequencer 27
Sequencer tracks 28
Realtime Record 29
Store a chord progression 30
Erasing the recorded performance 32
Part IV Composer (KN701)
5 Outline of the Composer 33
Setting up to create a rhythm pattern 34
Record your rhythm pattern 36
Creating your own intro, fill-in and ending patterns.... 37
Bend Range 38
Part,¥ Song memory (KN701)
^b Saving the recorded contents ..... 39
Loading the recorded contents 40
Part VI Setting the functions
7 Outline of the Mode Set 41
Adjusting the setting 42
Part VIII MIDI
8 What is MIDI? 46
Outline of MIDI functions 48
Setting the functions 50
GM MODE SET 55
Initialize 56
Options and connections 57
Error messages 58
Symptoms which appear to be signs of trouble 59
Index 61
Specifications 63
Controls and functions (KN701)
COMPOSER
Create and store original rhythm patterns.
(Refer to page 33.)
SEQUENCER
Record and play back your performance.
(Refer to pages 27.)
AUTO PLAY CHORD
Add an automatic accompaniment to your selected rhythm. (Refer to pages 23.)
DISPLAY
Displays performance information, function settings and other messages.
PITCH BEND
The PITCH BEND wheel allows a "sliding" change in the pitch. (Refer to page 15.)
ONE TOUCH PLAY
Sounds and effects matching the selected rhythm are automatically set. (Refer to pages 25.)
PANEL MEMORY
Store the panel settings, then recall them instantaneously just by pressing a button or two. (Refer to page 26.)
SOUND/RHYTHM select
Select the sounds and rhythms.
(Refer to pages 10, 20.)
CONDUCTOR
Assign a different sound to each part, then assign the desired parts to sections of the keyboard. (Refer to page 11.)
EFFECTS
Adds a variety of different effects to the sounds produced.
(Refer to pages 13.)
TECHNI-CHORD
Block chords are automatically added to the melody. (Refer to page 16.)
MANUAL SEQUENCE PADS
Add various phrases to your performance with the pad buttons. (Refer to page 18.)
IMAGE EXPANDER
Gives a feeling of width to the sound positioning. (Refer to pages 14.)
Backup memory
The various stored memories and function settings are preserved even if the PLAY button is turned off, as long as power is being supplied through the AC adaptor or the batteries.
- If the power supply to this instrument is discontinued (either through the AC adaptor or the batteries), the various memories and settings will be cleared after about 10 minutes.
SEQUENCER
Record and play back your performance. (Refer to pages XX, XX.)
AUTO PLAY CHORD
Add an automatic accompaniment to your selected rhythm. (Refer to pages XX, XX.)
DISPLAY
Displays performance information, function settings and other messages. (Refer to page XX.)
PITCH BEND
The PITCH BEND wheel allows a "sliding" change in the pitch. (Refer to page XX.)
ONE TOUCH PLAY
Sounds and effects matching the selected rhythm are automatically set. (Refer to pages XX, XX.)
PANEL MEMORY
Store the panel settings, then recall them instantaneously just by pressing a button or two. (Refer to page XX.)
SOUND/RHYTHM select
Select the sounds and rhythms.
(Refer to pages XX, XX.)
CONDUCTOR
Assign a different sound-to each part, then assign the desired parts to sections of the keyboard. (Refer to page XX.)
EFFECTS
Adds a variety of different effects to the sounds produced.
(Refer to pages XX, XX.)
TECHNI-CHORD
Block chords are automatically added to the melody. (Refer to page XX.)
MANUAL SEQUENCE PADS
Add various phrases to your performance with the pad buttons. (Refer to page XX.)
Getting started
Before you play
This Keyboard can use either dry cell batteries or ordinary household AC current. If using batteries, use six R20/LR20 batteries ("D" size, UM-1). To use AC current, an SY-AD6/AD6B/ADX AC adaptor (12V, 2A) is required. (Note: Use of an AC adaptor other than the SY-AD6/AD6B/ AD7 may cause damage to your instrument.)
- The AC adapter and battery are sold separately.
- The output power differs depending on whether the AC adaptor or batteries are being used.
When using batteries
Use six R20/LR20 batteries.
- Open the battery compartment cover, found on the rear of the instrument.
- Insert six R20/LR20 batteries, and replace the battery compartment cover.

- To insert the batteries correctly, follow the + and-polarity indications. (Batteries installed with incorrect polarities may leak and damage this unit. If the leaking electrolyte comes into contact with skin or clothes, flush with water immediately.)
- Do not mix batteries (old and new) or types (carbon and alkaline).
- Remove the batteries from the battery compartment and store separately when the instrument is not to be used for a long time.
- Never subject batteries to excessive heat or flame; do not attempt to disassemble them; and be sure they are not short-circuited.
- Do not attempt to recharge carbon or alkaline batteries.
- When battery power is low during a performance, [bAt] is shown on the display. In this case, replace the batteries as soon as possible.
When using the AC adaptor
Connect the SY-AD6/AD6B/AD7 AC adaptor.
- Do not disconnect and connect the AC adaptor when the power is on.
- Even when batteries are installed, if the AC adaptor is used, the battery circuit is bypassed and the power is supplied through the AC adaptor.
- When the AC adaptor is not connected and when batteries are not installed, the various storable memories and storable function settings of this instrument will be erased in about 10 minutes.
Music stand
Affix the music stand as shown.
Playing
Turn on the instrument and begin playing.
- Press the PLAY button to turn it on.

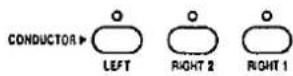
- In the CONDUCTOR section on the panel, press the RIGHT 1 button to turn it on.
- In the SOUND/RHYTHM select section, select SOUND.

- On the number pad, press 0, 0, 5.
- Touch any note on the keyboard. You will hear the E PIANO sound.
- Set the MAIN VOLUME to an appropriate level with the UP and DOWN buttons.

- Set to a level from 0 to 15. When set to 0, no sound is produced.
- The volume level is shown on the display while it is being set.
- Your Keyboard features Touch Response. You control the volume by playing the keys harder or softer.
- The pitch of this instrument can be adjusted for when playing with other instruments. (Refer to page 44.)
Listen to the demonstration
Demonstration performances to introduce the various sounds and functions are stored in this Keyboard.
DEMO
- Press the DEMO ♪ button.

-
Use the TRANSPOSE buttons to select the number.
-
Press the \$START/STOP button.
- The demonstration performance corresponding to your selection will begin.
- To end the demonstration before it has finished, press the START/STOP button again.
• To listen to other demonstration performances, repeat steps 2 and 3.
- When you are finished listening to the demonstration tunes, press the DEMO 🧑 button again.
- If you press and hold the DEMO J button for a few seconds, the medley demonstration performance will begin.
- The medley performance continues until the START/STOP button or the DEMO J button is pressed again.
- Some of the buttons do not function while the demonstration performances are being played.
Part I Sounds and effects
Selecting sounds
Select the sounds for the three parts you can assign to the keyboard—RIGHT 1, RIGHT 2 and LEFT. After first selecting a part, choose the desired sound by its number.
Select a sound
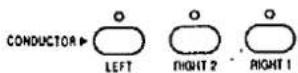
- In the CONDUCTOR, choose RIGHT 1 or RIGHT 2.
- To select the left sound, press the LEFT button in the CONDUCTOR section while making the selection.
- In the SOUND/RHYTHM select section, select SOUND.

-
On the SOUND/RHYTHM select number pad, press the buttons to specify the number of the desired sound 3 digits. (001 to 136)
-
The list of sounds and their numbers is found on the upper right of the operation panel.
- The selected sound number is shown on the display.
- For single-digit sound numbers: for example, for sound 003, press 0, 0 and 3 in that order.
- For double-digit sound numbers: for example, for sound 013, press 0, 1 and 3 in that order.
-
Do not take too long to press the number buttons. If you wait a few seconds before pressing the next button, the numbers you entered up to that point will be canceled.
-
Play the keyboard.
- You hear the sound that you selected.
■ ∧ or ∨ buttons

- Keep the ∧ or ∨ button pressed to scroll the numbers quickly.
■ Percussion sounds (KEYBOARD PERC)
Sound numbers 129 to 136 are percussion instrument sounds.
- Percussion instrument sounds are produced by the keyboard keys as indicated by the picture code above each key.
- For further information about the arrangement of percussion sounds, refer to the separate "REFERENCE GUIDE" provided.
Assigning parts to the keyboard
The CONDUCTOR buttons are used to assign sounds to the keyboard in many different ways. For example, you can assign two sounds to the entire keyboard so that playing one key will produce two sounds. You can even split the keyboard into right and left sections (SPLIT), and assign a different sound to each section.
CONDUCTOR
| CONDUCTOR settings | How sounds are assigned to the keyboard | |
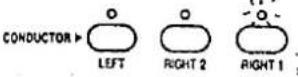 | All keys produce the RIGHT 1 sounds. | |
| RIGHT 1 | ||
 | All keys produce the RIGHT 2 sounds. | |
| RIGHT 2 | ||
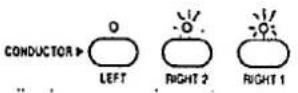 | All the keys play both RIGHT 1 and RIGHT 2 sounds at the same time. | |
| RIGHT 1 + RIGHT 2 | ||
 | The left keys produce the LEFT sound and the right keys produce the RIGHT 1 sound and the RIGHT 2 sound (SPLIT). | |
| LEFT | RIGHT 1 + RIGHT 2 | |
 | The left keys produce the LEFT sound and the right keys produce the RIGHT 1 sound (SPLIT): | |
| LEFT | RIGHT 1 | |
 | The left keys produce the LEFT sound and the right keys produce the RIGHT 2 sound (SPLIT). | |
| LEFT | RIGHT 2 | |
- To assign both the RIGHT 1 sound and the RIGHT 2 sound to the whole keyboard, press both of these CONDUCTOR buttons at the same time.
• The volume for each part can be adjusted. (Refer to page 12.)
- The following conditions are in effect when the AUTO PLAY CHORD (page 23) is used.
ONE FINGER, FINGERED mode: You cannot assign sounds to all the keys.
PIANIST mode: The keyboard cannot be split (KN701).
SPLIT POINT
When the keyboard is divided into left and right sections, the split point is C3.

- Each time the SPLIT POINT button is pressed, the current location of the split point (C3 or the key that you have selected) will appear in the display (see below).
■ Customized split point
Use the following procedure if you wish to store a split point at a location other than C3.
- Press and hold the SPLIT POINT button.
• The following display appears.

-
Press a key on the keyboard to specify the desired split point.
-
A split point is set at the location of the pressed key, and the note name is shown on the display.
- A sharp is indicated on the display as [5] and a flat as [4].
- The key at the split point is the lowest note of the right keyboard section.
- When the SPLIT POINT button is released, the display exits the setting mode.
BALANCE
The volume balance for the RIGHT 1, RIGHT 2 and LEFT sounds can be adjusted.
Adjust the volumes with the RIGHT 1, RIGHT 2 and LEFT buttons in the BALANCE section.

- Select a volume level from 0 (minimum sound) to 127 (loudest).
- While you are adjusting the volume, the volume levels are indicated on the display (0 to 127).

Effects
You can achieve even fuller and stirring sounds by adding various effects.
SUSTAIN
SUSTAIN is the gradual fading out of musical tones after the key is released.
-
In the CONDUCTOR, turn on the part to which this effect will be applied.
-
Press the SUSTAIN button to turn on.
O SUSTAIN

• The SUSTAIN can be set to on or off for each part.
• This effect does not work for some sounds.
- The length of the SUSTAIN can be adjusted. (Refer to page 43.)
- The sustain can also be turned on and off with the optional Foot Switch (sold separately). (Refer to page 43.)
CHORUS/FLANGER
(KN501: CHORUS only)
The CHORUS effect gives a natural fullness to the sound by adding a slightly off-pitch tone to the basic sound. The FLANGER effect adds an undulating characteristic to the sound.
- In the CONDUCTOR, turn on the part to which this effect will be applied.
- Press the CHORUS/FLANGER button to select the type of effect.
O CHORUS
© FLANGER

- This effect can be added to all of the parts of this instrument.
- This effect does not work for the KEYBOARD PERC sounds.
- The depth of these effects can be changed separately for each part. (Refer to page 43.)
■ CHORUS/FLANGER type and depth
- Press and hold the CHORUS/FLANGER button for a few seconds.
• The display looks similar to the following.

- Use the CHORUS/FLANGER button to select the effect that you would like to change.
- Use the TEMPO buttons to select the type.
- Select from the following:
(CHORUS)
1: CHORUS 1
2: CHORUS 2
3: CHORUS 3
(FLANGER)
1: FLANGER 1
2: FLANGER 2
3: FLANGER 3
-
Use the TRANSPOSE buttons to adjust the depth (1 to 9).
-
The higher the number, the more pronounced the effect.
- A few seconds after the setting is changed, the display returns to the previous display.
- The display will return to the standard display even if the EXIT button is pressed.
REVERB/PHASER
(KN501: REVERB only)
REVERB applies a reverberation effect to the sound. PHASER is a more distinct undulation effect than FLANGER.
Press the REVERB/PHASER button to select the type.

- This effect is applied to all the sounds of the keyboard.
- The depth of these effects can be changed separately for each part. (Refer to page 43.)
■ REVERB/PHASER type and depth
- Press and hold the REVERB/PHASER button for a few seconds.
• The display looks similar to the following.

- Use the REVERB/PHASER button to select the effect that you would like to change.
- Use the TEMPO buttons to select the type.
- Select from the following:
(REVERB)
(PHASER)
1: ROOM 1
4: HALL 2 .
1: PHASER 1
2: ROOM 2
5: HALL 3
2: PHASER 2
3: HALL 1
6: ECHO 1
7: ECHO 2
- Use the TRANSPOSE buttons to adjust the depth (1 to 9).
- The higher the number, the more pronounced the effect.
- A few seconds after the setting is changed, the display returns to the previous display.
- The display will return to the standard display even if the EXIT button is pressed.
IMAGE EXPANDER (KN701)
This effect gives a feeling of width to the sound positioning.
- Press either the IMAGE EXPANDER UP or DOWN button.

- "OFF" will appear on the display.
- Press the UP or DOWN button to adjust the level of the effect.
- This effect can be set to one of the following four levels: OFF, 1, 2, 3 OFF is the default setting. The higher the setting, the greater is the feeling of width.
PITCH BEND
The pitch of the instrument can be continuously changed with the PITCH BEND wheel, at the left end of the keyboard. Using this control, you can produce the effect of bending the strings on a guitar.
While pressing a key on the keyboard, move the wheel up and down to control the pitch.

- When you release your hand from the wheel, it returns automatically to the center position and the pitch bend effect is turned off.
- The pitch bend effect does not function for the AUTO PLAY CHORD accompaniment pattern or for the LEFT part sounds.
- The amount of pitch bend can be set. (Refer to page 43.)
Transpose
The TRANSPOSE buttons are used to change the key of the entire instrument in semitone steps across an entire octave.
Suppose you learn to play a song—in the key of C, for example—and decide you want to sing it, only to find that it's either too high or too low for your voice. Your choice is to either learn the song all over again in a different key, or to use the TRANSPOSE feature.
Adjust the key with the TRANSPOSE buttons.

- Each press of the upper button raises the key as follows (brackets [] indicate how the key is shown on the display): D [i|b] D [d] E [E b] E [E] F [F] F [F E] .
- Each press of the lower button lowers the key as follows: B [b] → B[bb] → A [A] → A[Ab] → G [G].
- When setting the key, the current key is shown on the display.
- If the two buttons are pressed at the same time, the key returns to C.
- When the PROGRAM indicator is flashing, these buttons are used for setting various functions and cannot be used to change the key.
Played keys

C major

Notes that sound

D major
Techni-chord
The TECHNI-CHORD feature expands the sound of your performance so that a harmony is produced for the notes played on the right part of a split keyboard.
- Split the keyboard into left and right sections. (Refer to page 11.)
- Press the TECHNI-CHORD button to turn it on.

Example: Left hand (chord)
Right hand (melody)
-
Play the keyboard.
-
A harmony based on the chords you play with your left hand is added to the notes you play with your right hand.
- This feature is very effective when used with the ONE FINGER mode or FINGERED mode of the AUTO PLAY CHORD. (The TECHNI-CHORD feature is not available for the PIANIST mode (KN701).)

TECHNI-CHORD harmony
You can choose the desired TECHNI-CHORD harmony style.
- Press and hold the TECHNI-CHORD button for a few seconds.
• The display looks similar to the following.

-
Use the TRANSPOSE buttons to select the desired harmony style.
-
Select from CLOSE [1], OPEN 1 [2], OPEN 2 [3], DUET [4], COUNTRY [5], THEATRE [6], HYMN [7], BLOCK [8], BIG BAND 1 [9], BIG BAND 2 [10], OCTAVE [11], HARD ROCK [12], FANFARE [13].
- When the OCTAVE, HARD ROCK or FANFARE style is selected, the TECHNI-CHORD functions even when the keyboard is not split.
- For a detailed explanation of the different harmony styles, refer to the separate "REFERENCE GUIDE" provided.
- A few seconds after the setting is changed, the display returns to the previous display.
Key Scaling
It is possible to change the temperament for this instrument. A variety of different temperaments can be applied in addition to the normal method of equal temperament.
- Press the MODE SET button.
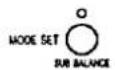
- Press 6 (key scaling) on the number pad.

• The display will change to the following.

- Use the TEMPO buttons to select the type.
| OFF [ ] | equal temperament |
| Preset 1 [ ] | |
| Preset 2 [ ] | |
| Preset 3 [ ] | |
| Preset 4 [ ] | |
| USER [ ] | User type (refer to the following) |
- Press the TRANSPOSE buttons to select the standard key.
(If a button is pressed once, the display will change from the preset display to the setting value display, and if it is pressed twice, the setting value can be changed.)

- Once the setting has been made, press the MODE SET button.
■ User type setting
- It is possible to set your own keyboard temperament by making fine adjustments to the pitch of each note in the octave.
-
At the Key Scaling display, press the TEMPO buttons to select a user [uSr] type, and then press the TRANSPOSE buttons to select the key that is to be used as the standard key.
-
Press the EXECUTE button.
• The display will change to the following.

-
Use the TEMPO buttons to select the key for which you would like to make pitch adjustments from the 12 notes in the octave. (C [c] \~ B [b])
-
Use the TRANSPOSE buttons to set the amount of pitch shift (-128 \~ 0 \~ 127).
- Setting larger than 0 will make the pitch higher than the standard key. Setting smaller than 0 will make the pitch lower than the standard key.
-
Repeat steps 3. and 4. as necessary.
-
Once the setting has been completed, press the MODE SET button.
Manual Sequence Pads
You can add phrases to your performance that represent percussion, guitar, piano or a variety of other effects by tapping the MANUAL SEQUENCE PAD buttons with your finger. You can also record and play back phrases that you create in this way (KN701).
- Press the SELECT button, and then press a number pads to select the phrase that you would like to play.

- The list of MANUAL SEQUENCE PADS and their number is found on the upper left of the operation panel.
- 11 (KN701) is the bank which is used to record original phrases. (Refer to the following page.)
-
If 7 (KN501) or 12 (KN701) is selected, the pad can then be used as a percussion instrument. (Refer to page 19.)
-
Tap the pad button of the manual sequence pad.

• Each pad button produces a different sound.
- Each time a pad is pressed, the resulting phrase will be played at the tempo which is currently set.
• To stop the phrase from playing, press the RECORD/STOP button.
- When using automatic accompaniment, the phrase which corresponds to the code setting at that time will be played.
Recording a phrase (KN701)
You can record your own phrases into the memory bank (11).
- Select the sound and effects for your phrase.
- Set the sound using the RIGHT 1 part.
- Press the SELECT button, and then select 11 (USER MEMORY) using the number pads.
- While pressing the RECORD/STOP button, press the pad for the phrase that you would like to record.


- The metronome will then start. Use the TEMPO button to adjust the metronome speed.
- Play the phrase on the keyboard.
-
Recording will start as soon as you start playing the phrase.
-
When you have finished playing the phrase, press the RECORD/STOP button to turn it off.
- Repeat steps 3. to 5. for any other pads that you would like to record.
- The following items can be recorded. Keyboard performances Sound settings and changes SUSTAIN, CHORUS/FLANGER on/off REVERB/PHASER on/off PITCH BEND etc.
- The total memory capacity that is available for recording phrases using the MANUAL SEQUENCE PADS is 600 notes. Once the memory is full, the message "FuL" will appear on the display, and further recording will not be possible.
Manual Percussion
You can add percussion sounds to your performance at any time by tapping MANUAL SEQUENCE PADS buttons.
- A different percussion sound has been preset in each of the pad buttons.
- The volume of the Manual Percussion is adjusted with the DRUMS balance buttons.
■ To assign different sounds to the pad buttons Follow this procedure to assign a different sound to each of the pad buttons.
- On the SOUND select number pad, select a KEYBOARD PERC KIT.
- While pressing one of the MANUAL SEQUENCE PADS buttons, select the desired percussion sound by pressing the appropriate key on the keyboard for about 2 seconds.

- When you hear the percussion sound of the pressed key, it means the sound has been assigned to the selected MANUAL SEQUENCE PADS button.
- You can enter other percussion sounds using the other MANUAL SEQUENCE PADS buttons too.
- Only one drum KIT can be specified at a time, and it is common to all the pad buttons.
Selecting rhythms
The rhythm section enhances the capabilities of your Keyboard with features such as automatic performance of the preset rhythm patterns and accompaniment patterns.
Select a rhythm
- In the SOUND/RHYTHM select section, select RHYTHM.

- On the number pad, press the buttons to specify the number of the desired rhythm (001 to 100).
- The list of rhythms and their numbers is found on the upper left of the operation panel.
- The selected rhythm number is shown on the display.
- For single-digit rhythm numbers: for example, for rhythm 003, press 0, 0 and 3 in that order.
- For double-digit rhythm numbers: for example, for rhythm 013, press 0, 1 and 3 in that order.
- Do not take too long to press the number buttons. If you wait a few seconds before pressing the next button, the numbers you entered up to that point will be canceled.
- Press the START/STOP button to start the rhythm.
- The selected rhythm pattern immediately begins to play.
- To stop the rhythm, press the START/STOP button again.
■ ∧ and ∨ buttons
- Keep the ∧ or ∨ button pressed to scroll the numbers quickly.
■ Beat
- While the rhythm is playing, the beat is shown on the display.

Synchronized start
With the synchronized start feature, the rhythm pattern starts when you play a key on the keyboard.
-
Select a rhythm.
-
Press the SYNCHRO button to turn it on.

- Play a key to the left of the keyboard split point.

• The rhythm pattern begins to play.
- You can use the synchronized start feature even when the keyboard is not divided into left and right sections. To start the rhythm, press a key to the left of the specified split point.
Adjust the tempo
The tempo of the rhythm pattern is adjusted with the TEMPO buttons.

- Each press of the ∧ button increases the tempo, and each press of the ∨ button decreases the tempo.
- While the tempo is being adjusted, it is shown on the display as a numerical value. (J=40 to 300).
- Keep the ∧ or ∨ button pressed to scroll the numbers quickly.
- if the two buttons are pressed at the same time, the tempo returns to the standard 120 setting.
- When the PROGRAM indicator is flashing, these buttons are used for setting various functions and cannot be used to adjust the tempo.
Adjust the volume
The volume of the automatic rhythm is adjusted with the RHYTHM buttons in the BALANCE section.

- Select a volume level from 0 (minimum sound) to 127 (loudest).
- While you are adjusting the volume, the volume level is indicated on the display (0 to 127).
- The volume of the automatic accompaniment also changes.
Playing the rhythm
Intro, fill-in and ending patterns fitting each different rhythm pattern are permanently recorded in your Keyboard, thus allowing a versatile rhythm performance.
INTRO
Begin the rhythm performance with an intro pattern.
- Press the INTRO & ENDING button to turn it on.
- Press the START/STOP button to start the rhythm.
- An intro pattern is played, after which the normal rhythm pattern begins.
COUNT INTRO
You can begin the rhythm performance with a one-measure count.
- Press the COUNT INTRO (FILL IN 2) button to turn it on.

- Press the START/STOP button to start the rhythm.
- A one-measure count is played, after which the normal rhythm pattern begins.
VARIATION
Each rhythm pattern also has a variation pattern. Add drama to your performance by switching to the variation pattern at climactic points in the melody.
-
Select a rhythm and press the START/STOP button.
-
Press the VARIATION button to turn it on.

• The rhythm changes to a flashier pattern.
- Press the VARIATION button again to turn it off and go back to the normal rhythm pattern.
FILL IN
You can insert a fill-in pattern any time during the rhythm performance. Choose from two different fill-in patterns.
-
Select a rhythm and press the START/STOP button.
-
Press the FILL IN 1 or FILL IN 2 button.

- A fill-in pattern is heard immediately for the remainder of the measure.
- When a FILL IN button is pressed on the last beat of the measure, the fill-in pattern continues to the end of the following measure.
ENDING
Finish the rhythm performance with an ending pattern.
-
Select a rhythm and press the START/STOP button.
-
Press the INTRO & ENDING button to turn it on.
- An ending pattern is produced, and then the rhythm performance stops.
- If you accidentally press the INTRO & ENDING button in the middle of the tune, you can press the FILL IN 1 or FILL IN 2 button. The ending pattern stops, and a fill-in pattern is produced, after which the normal rhythm performance continues.
Auto Play Chord
Simply by playing a chord on the keyboard, the AUTO PLAY CHORD function automatically plays an accompaniment pattern which matches perfectly the selected rhythm. With a real accompaniment as a background, you can concentrate on playing the melody.
How the AUTO PLAY CHORD works

When an AUTO PLAY CHORD mode is selected, an automatic accompaniment which matches the rhythm you have chosen is played in the chord which you specify with your left hand. The melody is played with your right hand.
- The accompaniment pattern of the AUTO PLAY CHORD is composed of five parts: DRUMS, BASS, ACCOMP 1, ACCOMP 2 and ACCOMP 3.
Sub balance
BALANCE buttons can be used to adjust the volumes of the ACCOMP 1 - 3, BASS and DRUM parts while the MODE SET button is being pressed. (SUB BALANCE adjustment)
- When adjustment is completed, press the MODE SET button to turn it off.
- The volumes for ACCOMP 2 and ACCOMP 3 change simultaneously when this button is used.
- You can also adjust the levels of the ACCOMP 1–3, BASS and DRUM parts which have been set previously. (Refer to page 42.)
Playing chords
Choose from three ways of playing chords.
AUTO PLAY CHORD
O ONE FINGER • O
ON BASS
Offices
O PAINST

■ ONE FINGER mode
In the ONE FINGER mode, a major chord can be played just by pressing the key for its root note.
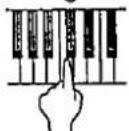
Minor, seventh and minor seventh chords are also easily produced.
| Minor | Seventh | Minor seventh |
| Play the root note plus a black key to the left of it. | Play the root note plus a white key to the left of it. | Play the root note plus a black key and a white key to the left of it. |
| Example: Cm | Example: C7 | Example: Cm7 |
■ FINGERED mode
In the FINGERED mode, you specify the chord by playing all the notes in the chord.

- The automatic accompaniment can recognize the following types of chords for each key (C is given as an example): C, C7, CM7, Caug, Caug7, Cm, Cm7, Cdim, Cm7 ^5 , CmM7, Csus4, C7sus4, C ^5 , C7 ^5 , Cm ^5 , C6, Cm6, CM7 ^5 , CM71 ^5 , CmM7 ^5 , etc.
■ PIANIST mode (KN701)
In the PIANIST mode, the entire keyboard can be used to specify chords (FINGERED mode) for the automatic accompaniment; a RIGHT part is assigned to all the keys, and the keyboard does not split. In addition to the chords in the FINGERED mode, the automatic accompaniment also recognizes 9th and 13th chords.
■ ON BASS (KN701)
If the ON BASS button is on while the FINGERED or PIANIST mode is selected, the BASS part is produced in the key of the lowest note of the played chord, thus making it possible to play chords such as D on C.
How to use the AUTO PLAY CHORD
- Select the desired rhythm and sound(s), and set the tempo.
- Select an AUTO PLAY CHORD mode (ONE FINGER, FINGERED or PIANIST).

- If the ONE FINGER or FINGERED mode was selected, the keyboard automatically splits into right and left sections.
-
Press the START/STOP button to turn it on.
-
For synchronized start (Refer to page 20.)
- Specify the chord on the keyboard section to the left of the split point.
- The split point is usually at the third C key from the left (C3), but you can specify a different split point. (Refer to page 12.)
- An accompaniment pattern in the specified chord is automatically played. Play the melody with your right hand.
Here is an example of how to play a ONE FINGER accompaniment.
Left hand
Play the melody with your right hand.
- When you use INTRO, FILL IN and ENDING, the automatic accompaniment is also used in these patterns.
- When the automatic rhythm is playing, you can specify the chord and then release the keys. The chord is memorized and the accompaniment continues to play in that chord until you specify another chord.
-
To stop the automatic accompaniment, press the START/STOP button.
-
To stop the accompaniment with an ending pattern, press the INTRO & ENDING button instead.
- In the ONE FINGER mode, the sounds you select for the left keyboard section are not produced.
- When the rhythm is off, if an AUTO PLAY CHORD mode is on and a chord is specified, the chord notes are produced in the accompaniment sounds of the selected rhythm.
- The volume of the automatic accompaniment can be adjusted. (Refer to page 44.)
Sound Arranger
The SOUND ARRANGER feature lets you select other sounds for the AUTO PLAY CHORD parts of each rhythm.
Setting the sounds
- Press the RHYTHM button, and then use the number pads to select the rhythm for which you would like to change the sound.
-
Do not select a COMPOSER rhythm.
-
In the SOUND ARRANGER, press the SET button to turn it on.

- Use the TRANSPOSE buttons to select the part for which you would like to change the sound.
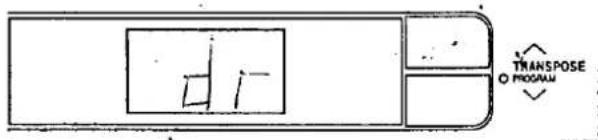
- Use the number pads to select the desired sound.
- The number of the sound currently assigned to the part is shown on the display.
- Set the DRUMS part to one of the KEYBOARD PERC settings. KEYBOARD PERC settings cannot be selected for parts other than the DRUMS part.
- Repeat steps 3. and 4. for the other parts as desired.
- When you have finished selecting the sounds, press the SET button to turn it off.
Playing back the sounds
- In the SOUND ARRANGER, press the ON/OFF button to turn it on.

- Start the rhythm (automatic accompaniment).
- When the ON/OFF button is off, the factory-preset sounds are produced.
One Touch Play
ONE TOUCH PLAY sets up your Keyboard with a suitable registration for your chosen rhythm style so that you can make a great sound straight away, even if you are playing the Keyboard for the first time.
- Select a rhythm.
- Do not select a COMPOSER rhythm.
- Press and hold the ONETOUCH PLAY button for a few seconds until the panel settings change.

- The AUTO PLAY CHORD and the SYNCHRO button turn on, and the sounds, effects and tempo perfect for the specified rhythm are automatically selected.
-
Play the keyboard.
-
When a key on the left section of the keyboard is pressed, the automatic accompaniment begins to play.
- Press the INTRO & ENDING button before you play for a professional-sounding introduction.
- Use the ONE TOUCH PLAY settings as a starting point for your own settings. Alter the sounds, volume and tempo to your own taste and store the new settings in the PANEL MEMORY for future use. (Refer to page 26.)
Panel Memory
PANEL MEMORY stores the panel set-up of your Keyboard, allowing you to make complex changes in seconds. Store up to 10 different panel set-ups.
How to store the panel settings
- Set up the desired panel settings (sounds, volumes, etc.)
- While pressing the PANEL MEMORY button, press a number button (0 - 9) for the setting to be recorded.

The panel settings will be recorded under the number button which was pressed.
- Memorized settings can be retrieved at any time by pressing the PANEL MEMORY button and then pressing the desired number key.
■ PANEL MEMORY mode
You can define which panel settings are stored when the PANEL MEMORY is used.
- Press and hold the PANEL MEMORY button for a few seconds.
• The display changes to the following.

- Use the TRANSPOSE buttons to select the mode.
[OFF]: Only the sound, effects and volume balance settings are stored.
[On]: All the settings are stored, including rhythm (except for the SOUND ARRANGER ON/OFF button status), TRANSPOSE and tempo.
• After a few seconds, the display exits the setting mode.
Part III Sequencer
Outline of the Sequencer
A sequencer records your performance in a similar way to a tape recorder. You may want to record your entire performance in one go, or to build up a complex arrangement with several different parts playing together, like an orchestral score.
SEQUENCER features
■ You can change the tempo without changing the pitch
When you record your performance at a slow tempo and play it back at a faster tempo, the pitch stays the same.
■ Consistent sound
Your performance is reproduced by a sound module as it reads digital data. So, unlike a recorded tape, the sound never deteriorates no matter how many times you play back your performance.
Recording methods
■ REALTIME RECORD (page 29)
Use the REALTIME RECORD function to record your performance and create your own orchestra or band.
■ STEP RECORD (page 30)
Use the STEP RECORD function to store the chord progression for the automatic accompaniment or the panel changes one-by-one.
Memory capacity
Expressed in terms of notes, the total number of notes which can be stored in all the SEQUENCER tracks is about 2,800.
- When the remaining memory capacity becomes 20% or less, it is shown as a percentage on the display.
- When the memory is full, [FuL] appears on the display, no more data can be stored in the SEQUENCER.
- The SEQUENCER contents are preserved even if the PLAY button is turned off, as long as power is being supplied through the AC adaptor or the batteries.
- Only one song can be stored in the SEQUENCER at a time. However, your instrument has 4 SONG memories in which you can save your SEQUENCER performances. (Refer to page 39.)
Sequencer tracks
The following summary explains what is stored in each SEQUENCER track.
| Track name | Used for | Recorded contents |
| MELODY/CTL | Recording the performance (REALTIME) | ·Your keyboard performance·Sound and volume settings·SUSTAIN on/off·PITCH BEND wheel operation |
| Recording changes in the panel button status (REALTIME) | ·Rhythm changes, volume settings·CHORUS/FLANGER REVERB/PHASER on/off·AUTO PLAY CHORD status·FILL IN 1, 2, INTRO & ENDING on·TEMPO setting·Rhythm START/STOP·PANEL MEMORY selection changes·TRANSPOSE status·CONDUCTOR changes·MANUAL SEQUENCE PADS | |
| APC/CHORD | Recording chords for the AUTO PLAY CHORD (REALTIME) | ·AUTO PLAY CHORD status·Sound and volume settings·FILL IN 1, 2, INTRO & ENDING on·Rhythm START/STOP |
| Recording chord progression for the AUTO PLAY CHORD (STEP) | ·Chord progression·Rhythm settings and selection changes·FILL IN 1, 2, INTRO & ENDING on·TEMPO setting·Volume settings for the BASS, ACCOMP and DRUMS parts·PANEL MEMORY selection changes·TRANSPOSE status |
Realtime Record
With REALTIME RECORD, your performance is recorded with the timing exactly as you played it on the keyboard. This mode lets you store a tune with all the subtle nuances just as you play them.
Recording procedure
- Set the sounds, effects, volumes, etc. for the tracks you are going to record.
- In the SEQUENCER section, press the RECORD button to turn it on.

- Use the track buttons to specify the track for the part you are going to record. (For details about the recording tracks, refer to page 28.)
- The indicator for the selected track button flashes slowly.
- You can select two tracks to record at one time.
-
When you select a track, the current panel settings are stored.
-
Use the TEMPO buttons to adjust the recording tempo.
- Play the keyboard.
- Recording begins as soon as you start the rhythm (START/STOP) or play the keyboard.
- If you wish to adjust the volume of each part during recording, press any balance button to recall the balance display.
- You can erase the recorded contents, for example, when you made a mistake in your performance while recording. (Refer to page 32.)
- When you have finished recording, press the RECORD button to turn it off.
Playback
- Turn on the track buttons for the parts you wish to play back.
- Tracks whose indicators are not lit will not be played back.
- Press the SEQUENCER RESET (FILL IN 1) button.

- The SEQUENCER returns to the beginning of the song and the beginning panel settings are recalled.
- Press the START/STOP button.

- The recorded performance is played back automatically.


- Technics
- FOR YOUR SAFETY PLEASE READ THE FOLLOWING TEXT CAREFULLY. (for UNITED KINGDOM)
- OWNER'S MANUAL
- CAUTION
- Before you play
- Important Safety Instructions
- WARNING!
- Installation location
- Metal items inside the unit may result in electric shock or damage.
- If water gets into the unit...
- Protect your hearing
- When to request service
- Service and repair
- Maintenance
- When using AC adaptor
- Power source
- Handling the power cord
- SAVE THESE INSTRUCTIONS
- Contents
- Part I Sounds and effects
- Part J[ Playing the rhythm 太文字
- Part II Sequencer
- Part IV Composer (KN701)
- Part,¥ Song memory (KN701)
- Part VI Setting the functions
- Part VIII MIDI
- Controls and functions (KN701)
- SOUND/RHYTHM select
- CONDUCTOR
- EFFECTS
- TECHNI-CHORD
- MANUAL SEQUENCE PADS
- IMAGE EXPANDER
- Backup memory
- SEQUENCER
- AUTO PLAY CHORD
- DISPLAY
- PITCH BEND
- ONE TOUCH PLAY
- PANEL MEMORY
- Getting started
- When using batteries
- When using the AC adaptor
- Music stand
- Playing
- Listen to the demonstration
- DEMO
- Selecting sounds
- Select a sound
- Assigning parts to the keyboard
- SPLIT POINT
- ■ Customized split point
- BALANCE
- SUSTAIN
- CHORUS/FLANGER
- (KN501: CHORUS only)
- ■ CHORUS/FLANGER type and depth
- REVERB/PHASER
- (KN501: REVERB only)
- ■ REVERB/PHASER type and depth
- IMAGE EXPANDER (KN701)
- Transpose
- TECHNI-CHORD harmony
- Key Scaling
- ■ User type setting
- Recording a phrase (KN701)
- Manual Percussion
- Selecting rhythms
- Select a rhythm
- Synchronized start
- Adjust the tempo
- Adjust the volume
- Playing the rhythm
- INTRO
- COUNT INTRO
- VARIATION
- FILL IN
- ENDING
- Sub balance
- Playing chords
- ■ ONE FINGER mode
- ■ FINGERED mode
- ■ PIANIST mode (KN701)
- ■ ON BASS (KN701)
- How to use the AUTO PLAY CHORD
- Sound Arranger
- Setting the sounds
- Playing back the sounds
- How to store the panel settings
- ■ PANEL MEMORY mode
- Part III Sequencer
- Outline of the Sequencer
- SEQUENCER features
- Recording methods
- Memory capacity
- Sequencer tracks
- Realtime Record
- Recording procedure
- Playback
Mærke : TECHNICS
Model : SX-KN501
Kategori : Tastatur