32LTC2100 - Fjernsyn SALORA - Gratis brugsanvisning og manual
Find enhedens vejledning gratis 32LTC2100 SALORA i PDF-format.

Brugerspørgsmål om 32LTC2100 SALORA
0 spørgsmål om dette apparat. Besvar dem du kender, eller stil dit eget.
Stil et nyt spørgsmål om dette apparat
Download vejledningen til din Fjernsyn i PDF-format gratis! Find din vejledning 32LTC2100 - SALORA og tag din elektroniske enhed tilbage i hånden. På denne side er alle dokumenter nødvendige for brugen af din enhed offentliggjort. 32LTC2100 af mærket SALORA.
BRUGSANVISNING 32LTC2100 SALORA
SALORA
32" HD LED TV
GEBRUIKERSHANDLEIDING
MODEL NR.:32LTC2100

text_image
BELAN Lees de installer Hou deBELANGRIJK
Lees deze gebruiksaanwijzing alvorens de TV te installeren en te gebruiken.
Hou de gebruiksaanwijzing bij voor latere referentie.
Inhoud
Voorbereiding
Veiligheid Informatie 2
Belangrijke veiligheidsvoorschriften 3
Installatie en aansluiten TV
Bevestigen van de TV aan de muur 5
Knoppen 6
Schema voor het aansluiten van Externe apparaten 7
Installatie en aansluiten van uw TV 8
Instructies installatie TV voet 8
TV Menu
Eerste Installatie 9
Kanaal Menu 11
Beeld Menu 16
Geluid Menu 18
Tijd Menu 20
Vergrendeling Menu 22
Hotel Menu 24
Set-up Menu 25
PC Menu
Beeldscherm Menu 28
Media Menu
Media bediening 30
Foto Menu 31
Muziek Menu 32
Film Menu 33
Tekst Menu 34
Overige Informatie
Problemen oplossen 35
Specificaties 36
Afstandsbediening 37
Deze handleiding is uitsluitend ter indicatie
Veiligheid Informatie
CAUTION
RISK OF ELECTRIC SHOCK DO NOT OPEN
Bij het gebruik van dit apparaat worden hoge voltages gebruikt. Om het risico op een elektrische schok te vermijden dient u de behuizing van het apparaat niet te openen en onderhoud aan het apparaat uitsluitend door gekwalificeerd personeel te laten uitvoeren.
Het openen of aanpassen van de TV kan leiden tot lichamelijk letsel. Probeer dit apparaat niet te openen, neem altijd contact op met de klantenservice voor assistentie.

natural_image
Warning symbol: black exclamation mark inside a triangle (no text or numbers)
natural_image
Warning symbol of a lightning bolt inside a triangle (no text or numbers)Het symbool van een uitroepteken in een driehoek waarschuwt de gebruiker op de aanwezigheid van belangrijke instructies, bijgesloten bij dit apparaat, met betrekking tot de bediening en onderhoud van dit apparaat.
Waarschuwing Het symbool van een bliksemschicht in een driehoek waarschuwt de gebruiker voor de aanwezigheid van niet-geïsoleerde "gevaarlijke voltage" in de behuizing van het apparaat die voldoende sterk kunnen zijn dat er een kans bestaat op een elektrische schok.
Voorbereiding
Belangrijke Veiligheidsvoorschriften
- Lees deze instructies.
- Bewaar deze instructies.
- Neem alle waarschuwingen in acht.
- Volg de instructies op.
- Gebruik dit apparaat niet in de buurt van water.
- Reinigen uitsluitend met een droge doek.
- Blokkeer de ventilatieopeningen niet. Installeer dit apparaat volgens de instructies van de fabrikant.
- Plaats dit apparaat niet in de buurt van een hittebron, zoals radiatoren, warmte generatoren, ovens of andere hitte producerende apparaten (incl. versterkers).
- De TV wordt geleverd met een geaarde stekker dit is speciaal voor uw veiligheid. Indien de Tv geen stekker heeft die overeenkomt met uw stopcontact, neemt u dan contact op met uw leverancier of een elektricien.
-
Bescherm het meegeleverde snoer, zorg ervoor dat men er niet op kan staan, gebogen wordt, in het bijzonder bij de stekker, het stopcontact en op het punt waar het snoer het apparaat verlaat.
-
Gebruik uitsluitend bevestigingen/accessoires die door de leverancier worden aanbevolen.
-
Gebruik uitsluitend meubels, standaards, driepoten, tv steunen, of TV tafels die worden aanbevolen door de fabrikant. Indien u een verrijdbaar meubel gebruikt, dient u extra op te letten tijdens het verplaatsen om te voorkomen dat de TV omkiept.

-
Haal de stekker uit het stopcontact bij bliksem en indien het apparaat langere tijd niet wordt gebruikt.
-
Om risico op brand of een elektrische schok te vermijden dient u dit apparaat niet bloot te stellen aan regen of vocht.
-
De stekker is voor de stroomvoorziening, daarom dient deze gemakkelijk toegankelijk te zijn.
-
Het stopcontact dient zich dicht bij het apparaat te bevinden en gemakkelijk toegankelijk te zijn.
-
Plaats dit apparaat nooit in een inbouwkast of boekenkast, tenzij er voldoende ventilatie is, zoals aangegeven door de fabrikant.
-
Dit apparaat niet blootstellen aan waterspetters of lekkage, plaats geen objecten gevuld met vloeistof (zoals vazen) op het apparaat.
-
Plaats geen objecten op het apparaat die een gevaar kunnen opleveren (met vloeistof gevulde objecten of kaarsen).
-
Muur of plafondbevestiging- de televisie kan worden bevestigd aan de muur of het plafond door middel van een door de fabrikant goedgekeurd systeem.
-
Plaats de open vuur tijde uit
-
De USB

Tv, de afstandsbediening of de batterijen in de buurt van of hittebronnen. Houd kaarsen en ander open vuur te allen de buurt van de TV, de afstandsbediening en de batterijen. poort levert 0.5A bij normaal gebruik.
Deze onderhoudsinstructies zijn bedoeld voor gekwalificeerd onderhoudspersoneel. Om het risico op een elektrische schok te vermijden dient u alle onderhoudswerkzaamheden te laten verrichten door gekwalificeerd personeel.
-
De batterijen niet blootstellen aan hoge temperaturen, zoals direct zonlicht, vuur of iets dergelijks.
-
Dit apparaat is een Klasse II, dubbel geïsoleerd elektrisch apparaat. Het zodanig ontworpen dat deze geen extra beveiliging nodig heeft met betrekking tot de aarding.
-
Voor een goede werking dient de omgevingstemperatuur niet hoger te zijn dan 45C° en op een maximale hoogte van 2000 meter.
Installatie en Aansluiten TV
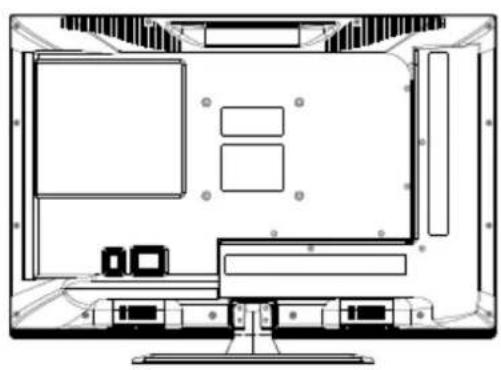
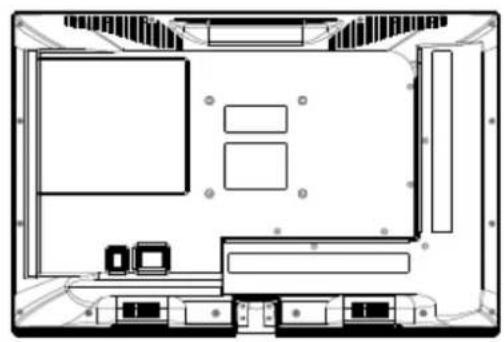
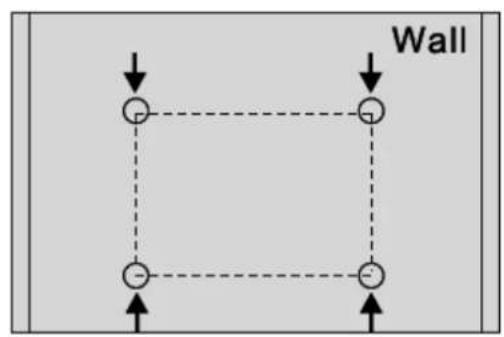
Bevestigen van de TV aan de muur
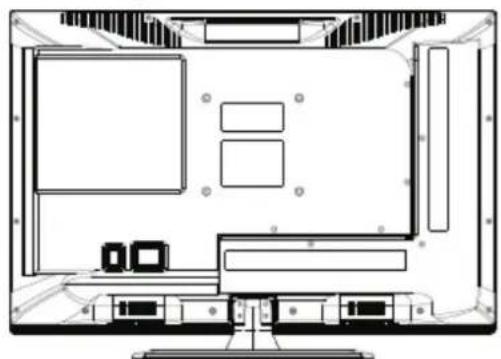
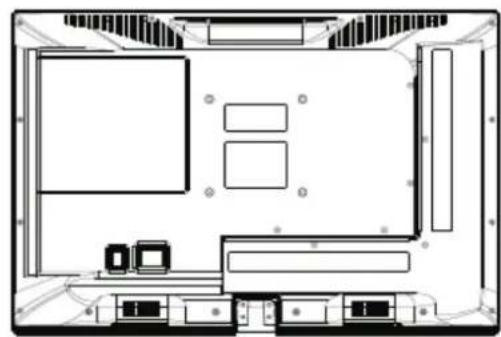
- Plaats de TV eerst op een zachte ondergrond om te voorkomen dat het scherm beschadigt.
- Gebruik een schroevendraaier om de schroeven, die aan de onderkant van de TV bevestigd zijn, los te maken (zie foto 1). Haal de schroeven en de voet voorzichtig van de TV.
- Gebruik een VESA TV beugel die goedgekeurd is door de fabrikant en die overeenkomt met de op de foto's aangegeven bevestigingen.
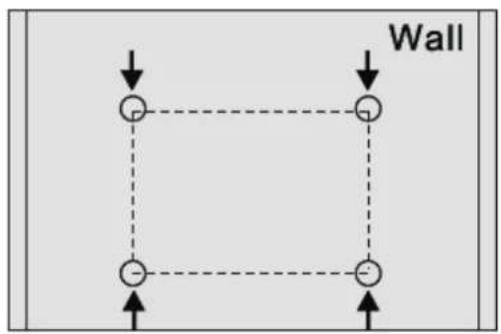
- Boor vier gaten en pluggen in de muur (niet inbegrepen) en volg de instructies die meegeleverd zijn met het ophangsysteem.
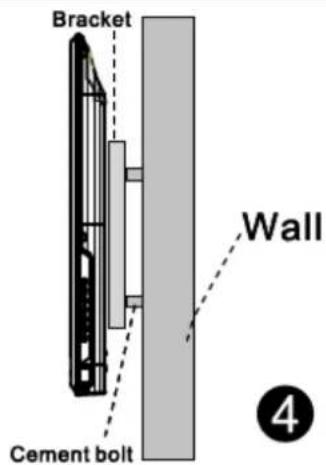
- Bevestig aan de achterkant van de televisie de schroeven en hang vervolgens de TV aan de beugel aan de muur.
natural_image
Top-down schematic of a computer monitor layout with labeled areas (no text or symbols)1
natural_image
Top-down architectural floor plan of a room with furniture layout (no text or labels)2
text_image
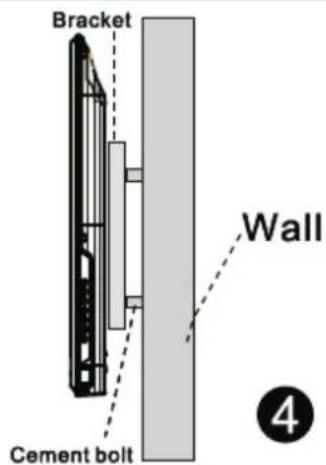
Wall3
text_image
Bracket Wall Cement bolt 4LET OP:
- De TV beugel is een extra accessoire die niet meegeleverd wordt.
- Wanneer u de TV beugel gaat bevestigen, let u dan op dat er zich geen losse voorwerpen rond de TV bevinden, deze zouden de TV kunnen beschadigen. Houd losse voorwerpen uit de buurt van het apparaat.
- Het ophangen van uw TV kunt u eventueel ook door een vakman laten doen.
- De afbeeldingen hierboven dienen uitsluitend ter indicatie.
- Volg de instructies van het door u gekochte ophangsysteem zorgvuldig op.
- Dit apparaat ondersteunt een VESA bevestiging.
Installatie en Aansluiten TV
TV knoppen
N.B.: Onderstaande afbeelding is een schematische weergave van de functieknoppen. De actuele positie en uitvoering kunnen per model verschillen.
| VOL+ | VOL- | CH+ | CH- | MENU | SOURCE |
q : Aan/Uit zetten
SOURCE : Invoer signaalbron.
MENU : Weergave Hoofd menu en bevestigen van een Menu item.
CH+/- :Selecteren van een kanaal
VOL +/- : Aanpassen van het volume.
Terminal Interface
N.B.: Deze schematische weergave dient uitsluitend ter indicatie, positie en uitvoering kunnen per model verschillen.
 | AV inputExtern AV signaal Ingang metcorresponderend rechter/linkergeluidskanaal | 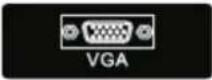 | VGA inputPC analoog signaal ingang |
 | CI SLOTKaartlezer van een CI (CommonInterface), hiervoor is een CAM(Conditional acces module) nodig,gebruikt bij betaal TV |  | PC Audio InputPC audio ingang met VGAaansluiting |
 | COAXIALAansluiting voor een SPDIFontvanger. |  | EARPHONE outputWanneer de koptelefoon isaangesloten, werken de speakersniet |
 | HDMI inputDigitaal signaal ingang van eenHDMI video aansluiting |  | USB inputAansluiting van een USB apparaatom media bestanden aft e spleenin de PVR functie |
| ANT 75Aansluiting van antenne/kabelingang (75/VHF/UHF) |
Installatie en Aansluiten TV
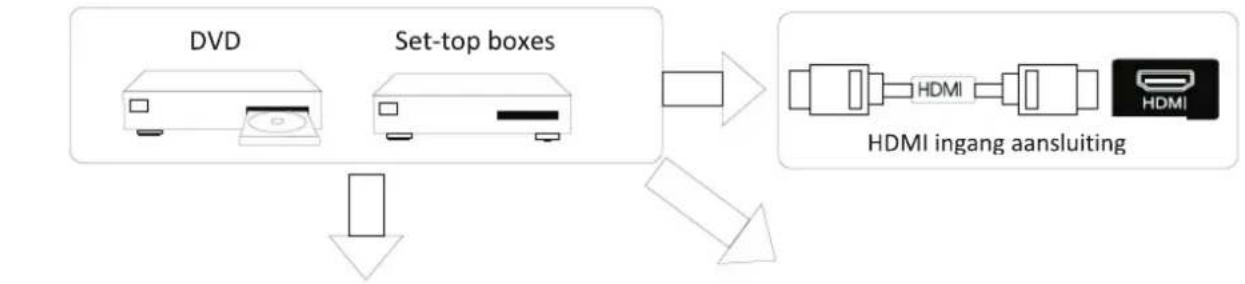
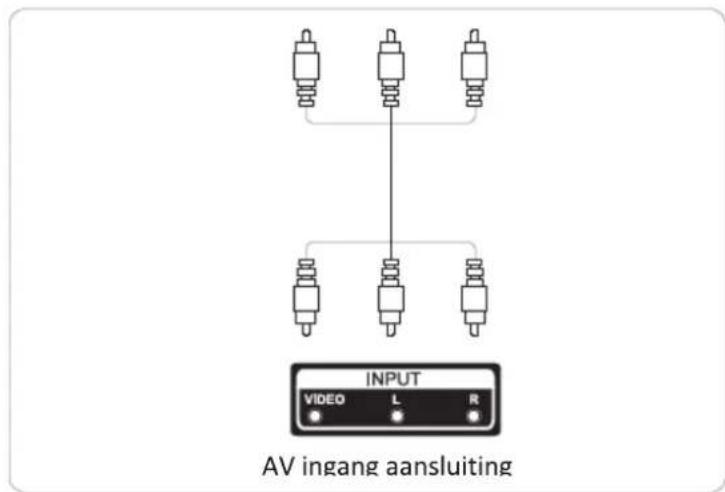
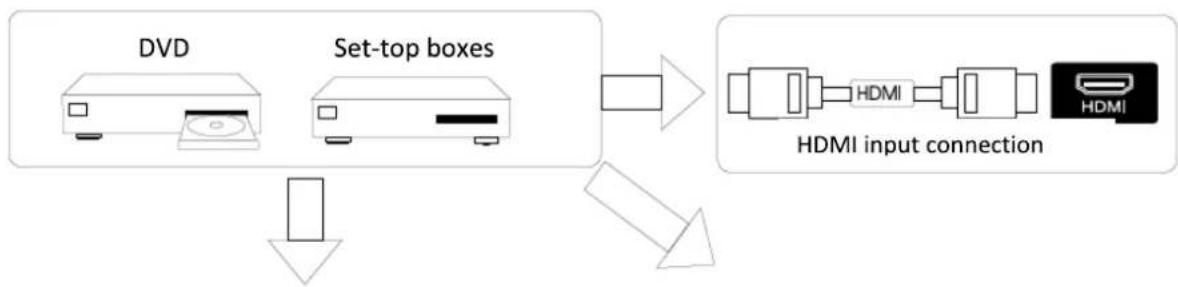
Schema voor het aansluiten van externe apparaten
flowchart
graph TD
    A[" DVD "] --> C[" Set-top boxes "]
    B[" HDMI "] --> C
    C --> D[" HDMI ingang aansluiting "]
    D --> E[" Inverter Unit "]
text_image
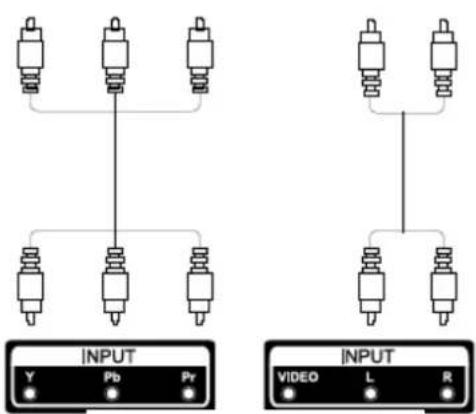
AV ingang aansluiting INPUT VIDEO L R ● ● ● ● ● ● ● ● ● ● ● ● ● ● ● ● ● ● ● ● ● ● ● ● ● ● ● ● ● ● ● ● ● ● ● ● ● ● ● ● ● ● ● ● ● ● ● ● ● ● ● ● ● ● ● ● ● ● ● ● ● ● ● ● ● ● ● ● ● ● ● ● ● ● ● ● ● ○ ● ○ ● ○ ● ○ ● ○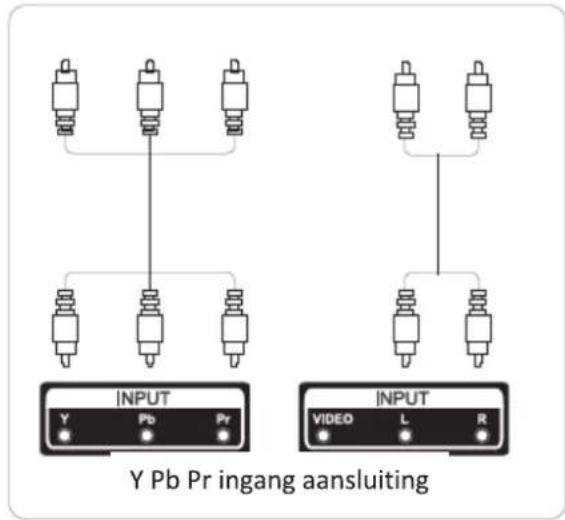
text_image
INPUT Y Pb Pr ingang aansluiting INPUT VIDEO L R Y Pb Pr ingang aansluiting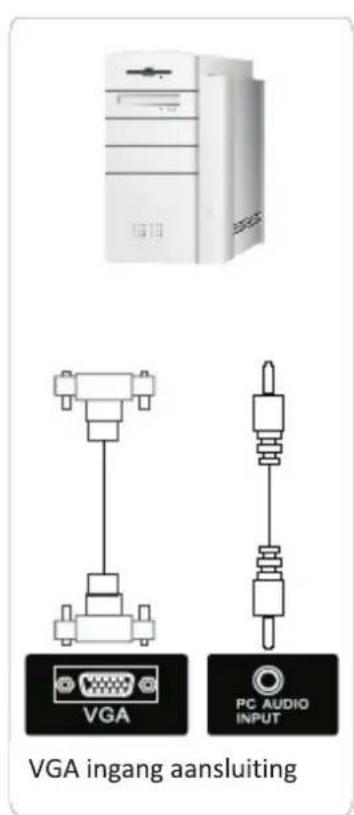
text_image
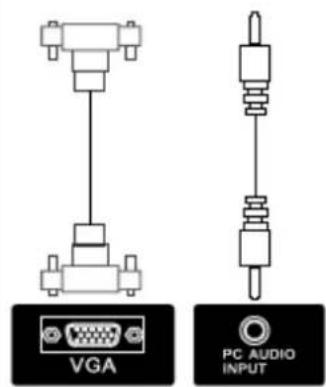
VGA ingang aansluiting PC AUDIO INPUT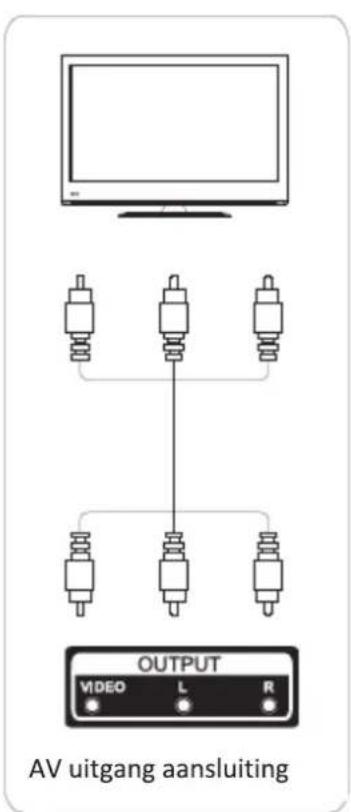
text_image
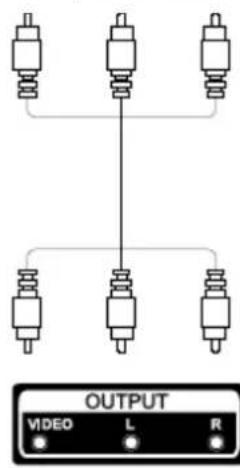
AV uitgang aansluiting OUTPUT VIDEO L R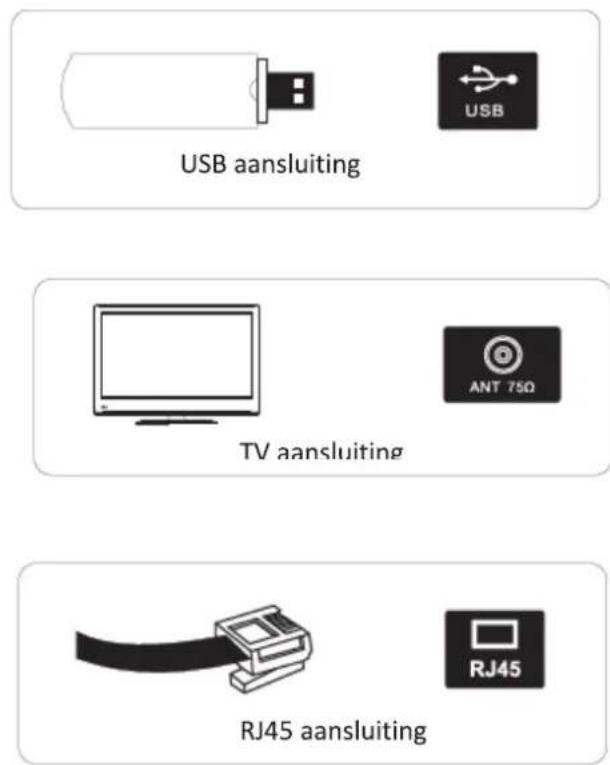
text_image
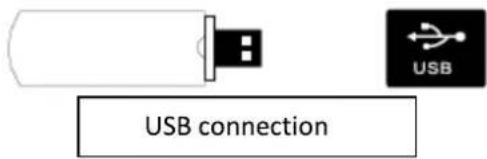
USB aansluiting TV aansluiting RJ45 aansluitingInstallatie en Aansluiten TV
text_image
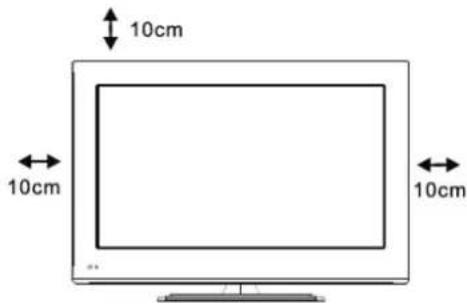
10cm 10cm 10cmInstalleren en aansluiten van uw televisie
installeren van uw televisie
plaats uw TV op een stevige ondergrond die het gewicht goed kan dragen.
Om gevaar te voorkomen, plaatst u de TV uit de buurt van water of hittebronnen (zoals zonlicht, kaarsen of hitteproducerend apparaten), blokkeer de ventilatieopeningen aan de achterkant van de TV niet.
text_image
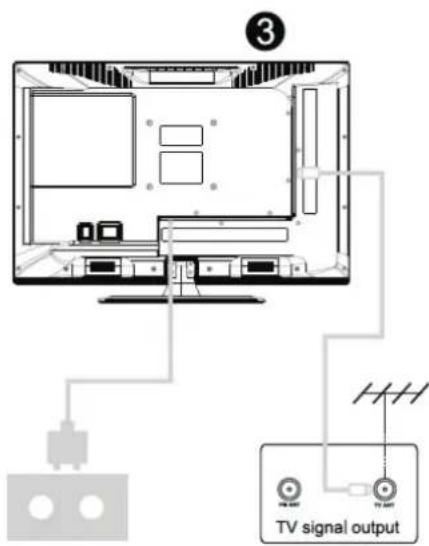
③ TV signal output2
Aansluiten van de antenne en stroomvoorziening
- Sluit de antenne kabel aan op de aansluiting aan de achterkant van de TV.
- Steek de stekker in het stopcontact.
Aanzetten van de televisie
- Druk op de Aan/Uit knop van de televisie, de indicator zal groen branden. Indien de TV op Standby (rode indicator) staat, drukt u dan op de aan/uit knop van de afstandsbediening om de TV aan te zetten.
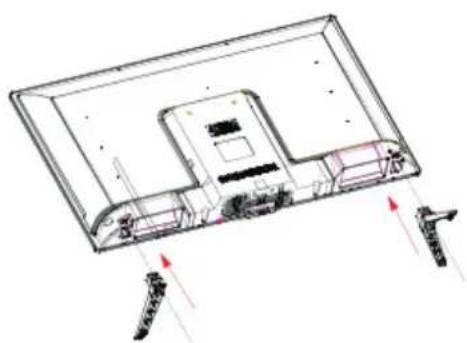
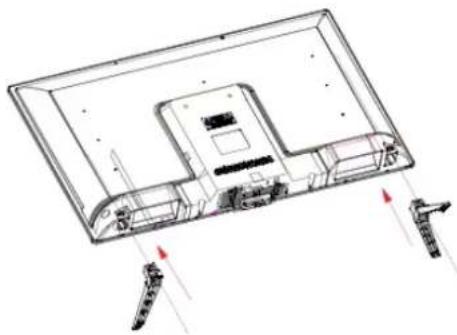
Instructies Installatie TV voet
- Open de verpakking en haal de Tv met accessoires uit de doos (sommige modellen hebben geen voet).
- Om beschadigingen te voorkomen adviseren wij u het scherm op een zachte ondergrond te leggen om de voet vast te maken, de basis dient te worden bevestigd door middel van schroeven.
- Klik de voet vast aan de TV in de richting van de pijlen.
- De installatie is voltooid.
natural_image
Technical line drawing of a flat-screen monitor with internal components and directional arrows indicating orientation (no text or symbols)N.B.: de afbeelding dient uitsluitend ter indicatie.
TV Menu
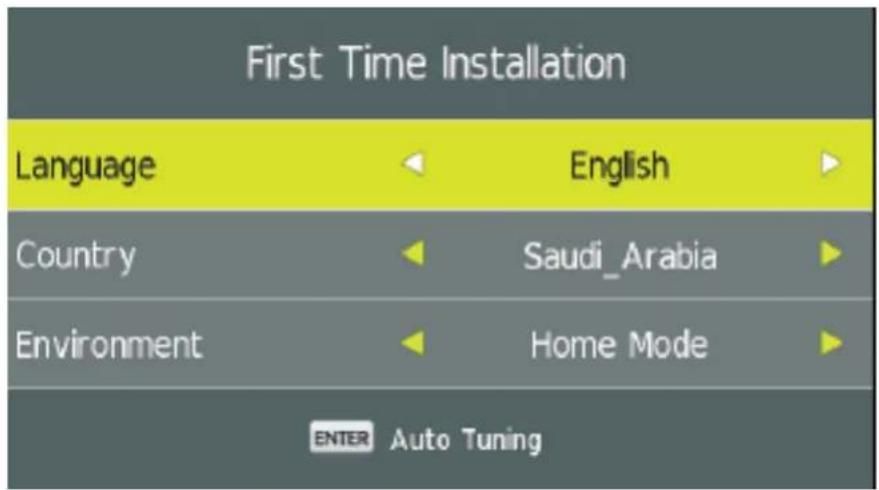
Eerste Installatie
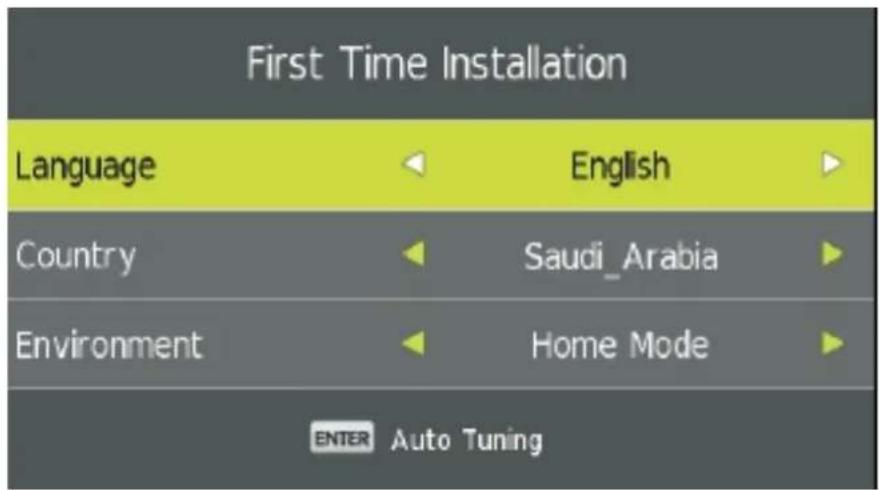
Sluit een RF kabel aan, aan de achterkant van de TV tussen de ingang RF-In en de antenne aansluiting in de muur.
Selecteer Taal
Druk op de a en d knoppen om de taal te selecteren voor de weergave van het menu en berichten.
Selecteer Land
Druk op de s en w knoppen om het landen menu te markeren.
Druk op de a en d knoppen om het land van uw keuze te selecteren.
text_image
First Time Installation Language English Country Saudi_Arabia Environment Home Mode ENTER Auto Tuning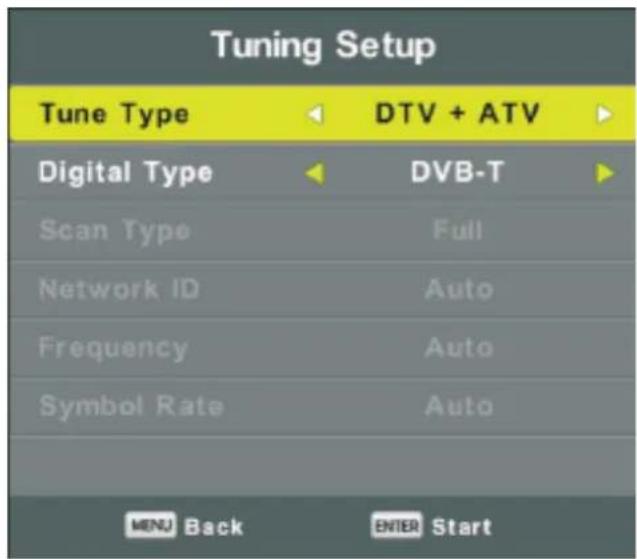
text_image
Tuning Setup Tune Type DTV + ATV Digital Type DVB-T Scan Type Full Network ID Auto Frequency Auto Symbol Rate Auto MENU Back ENTER StartTV Menu
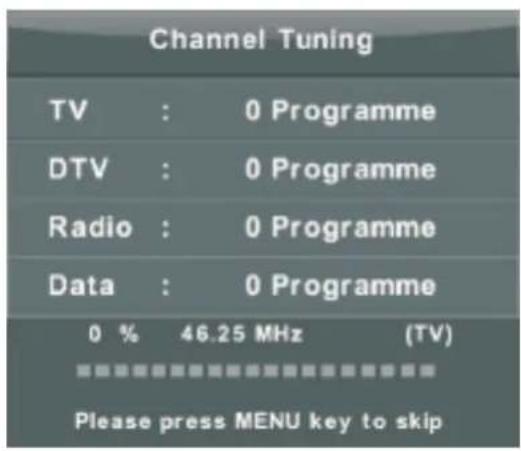
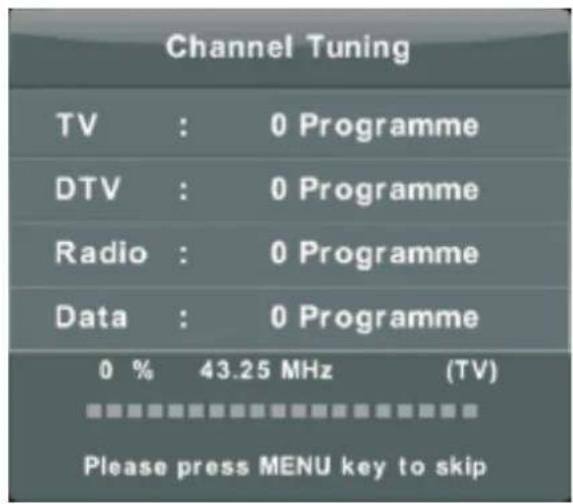
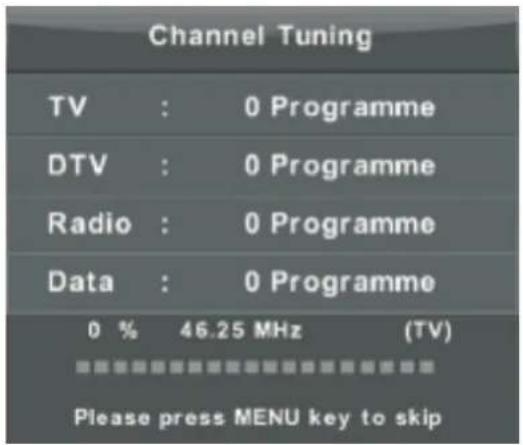
Automatisch afstemmen
Eerst ATV afstemming, druk op Menu, druk op de linker pijl ATV tuning over te slaan. Tweede DTV afstemming, druk op Menu, druk op de linker pijl DTV tuning over te slaan.
text_image
Channel Tuning TV : 0 Programme DTV : 0 Programme Radio : 0 Programme Data : 0 Programme 0 % 46.25 MHz (TV) Please press MENU key to skip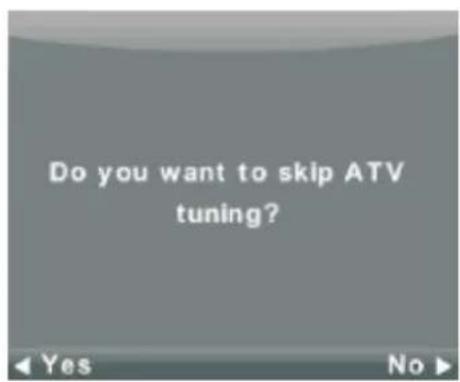
text_image
Do you want to skip ATV tuning?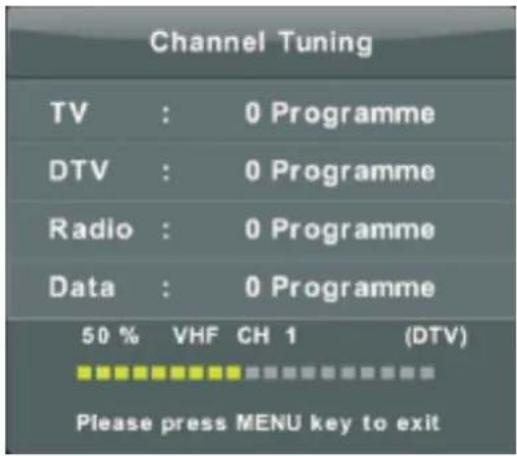
text_image
Channel Tuning TV : 0 Programme DTV : 0 Programme Radio : 0 Programme Data : 0 Programme 50 % VHF CH 1 (DTV) Please press MENU key to exit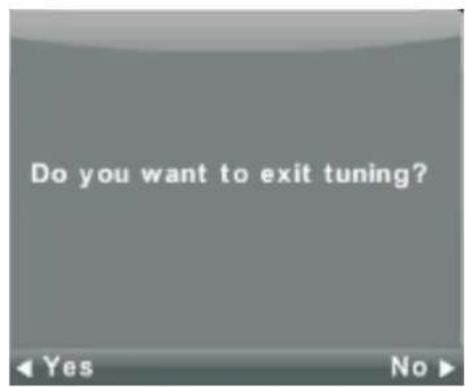
text_image
Do you want to exit tuning?TV Menu
Bediening Hoofd Menu
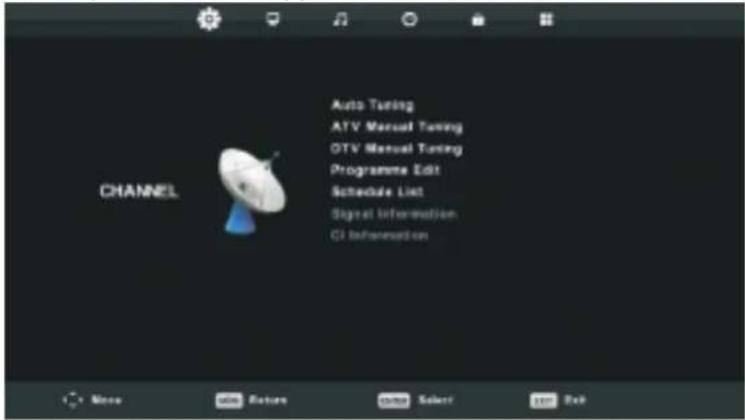
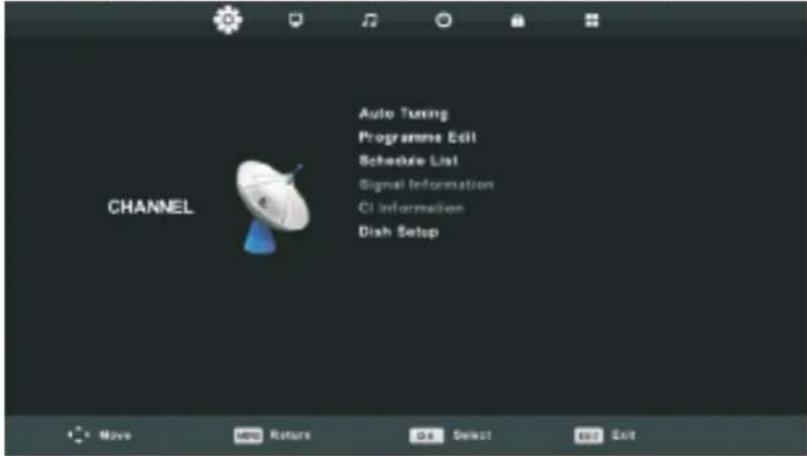
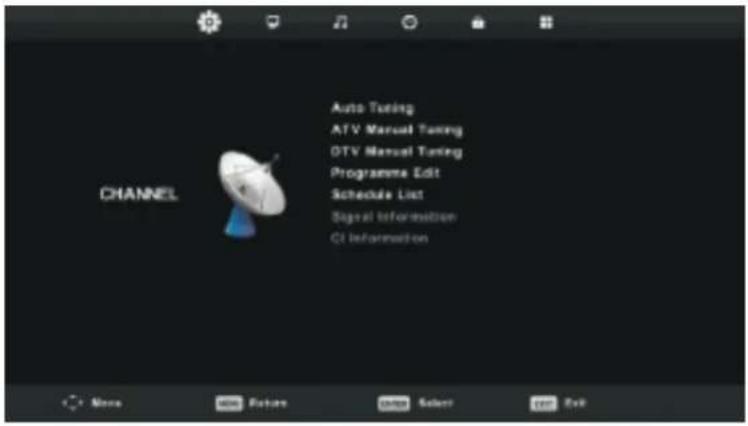
Kanaal Menu
Druk op de MENU knop om het hoofdmenu weer te geven.
Druk op de a en d knoppen om KANAAL te selecteren in het hoofdmenu.
text_image
Auto Tuning ATV Manual Tuning OTV Manual Tuning Programme Edit Schedule List Signal Information CI Information- Druk op de s en w knoppen om het item te selecteren in het menu KANAAL dat u wilt aanpassen.
- Druk op de Enter knop om te wijzigen.
- Nadat u het item heeft aangepast, drukt u op de Enter knop om op te slaan en terug te gaan naar het vorige menu.
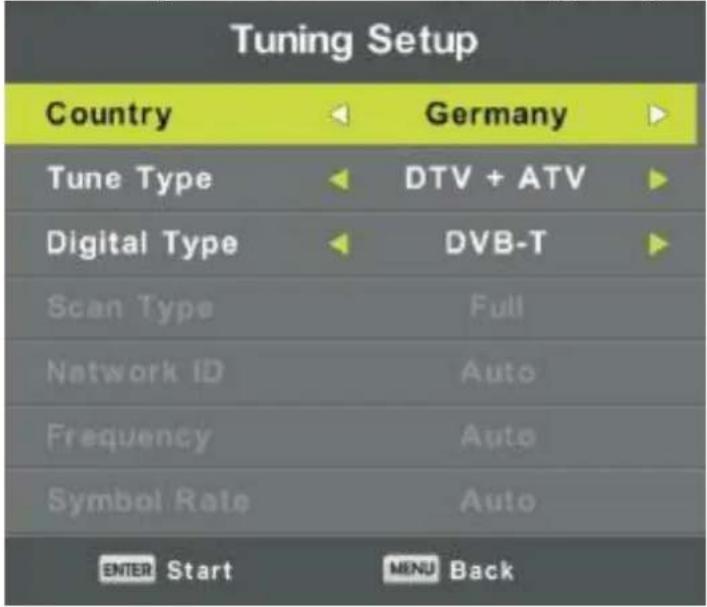
Automatisch afstemmen
Druk op de s en w knoppen om Auto Tune te selecteren, druk daarna op de Enter knop.

text_image
Tuning Setup Country Germany Tune Type DTV + ATV Digital Type DVB-T Scan Type Full Network ID Auto Frequency Auto Symbol Rate Auto ENTER Start MENU BackTV Menu
text_image
Channel Tuning TV : 0 Programme DTV : 0 Programme Radio : 0 Programme Data : 0 Programme 0 % 43.25 MHz (TV) Please press MENU key to skip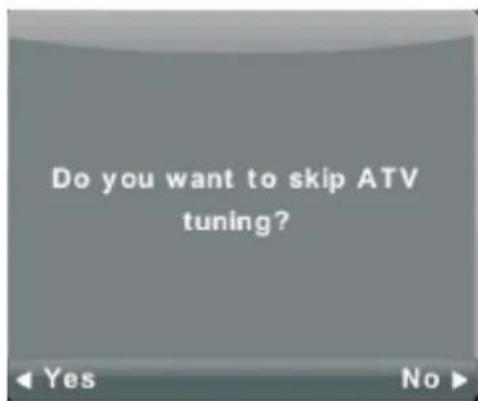
text_image
Do you want to skip ATV tuning?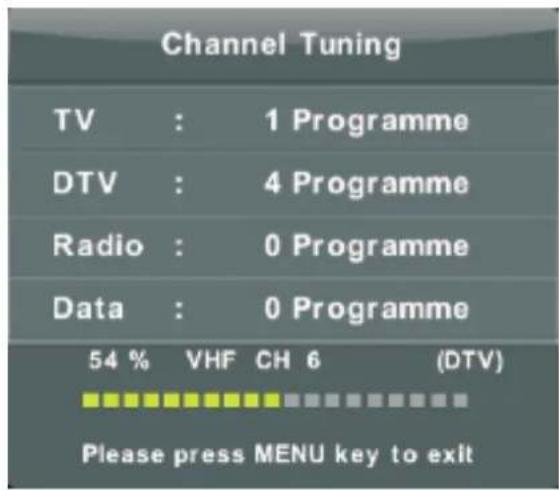
text_image
Channel Tuning TV : 1 Programme DTV : 4 Programme Radio : 0 Programme Data : 0 Programme 54 % VHF CH 6 (DTV) Please press MENU key to exit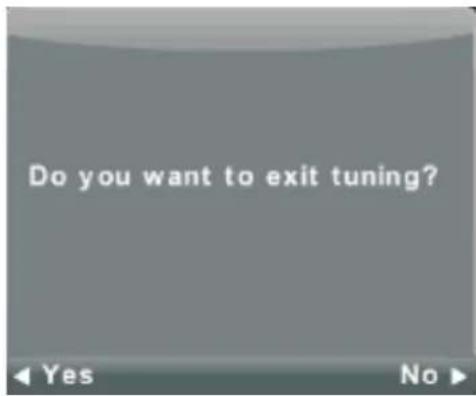
text_image
Do you want to exit tuning?ATV Handmatig Afstemmen
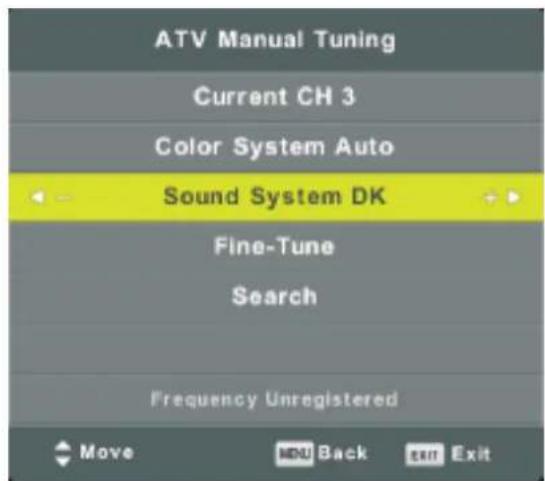
text_image
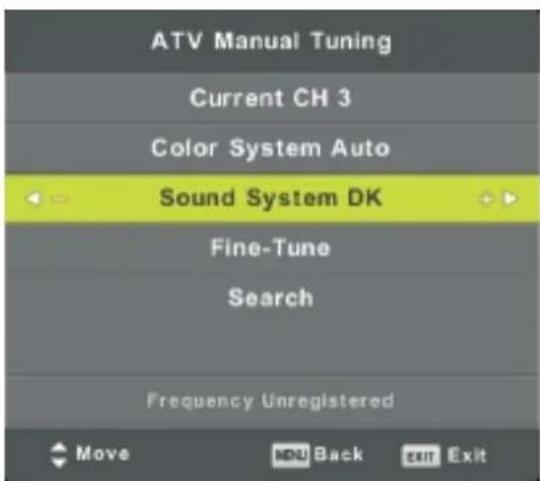
ATV Manual Tuning Current CH 3 Color System Auto Sound System DK Fine-Tune Search Frequency Unregistered Move NDU Back Enter ExitActuele Zender
Stel het kanaal nummer in.
Kleursysteem
Selecteer het kleursysteem
(beschikbaar: AUTO, PAL, SECAM)
Geluid Systeem
Selecteer het geluidsysteem
Fijn Afstemmen
Fijn afstemmen van de frequentie van het kanaal
Zoek
Start het zoeken naar een kanaal
TV Menu
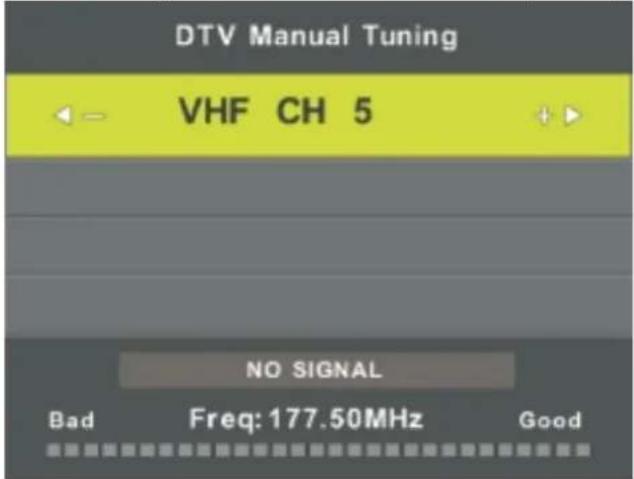
DTV Handmatig Afstemmen
Druk op de s en w knoppen om DTV Handmatig Afstemmen te selecteren, druk daarna op Enter om het submenu te openen.
Druk op de a en d knoppen om het kanaal te selecteren, druk daarna op Enter om het zoeken te starten.
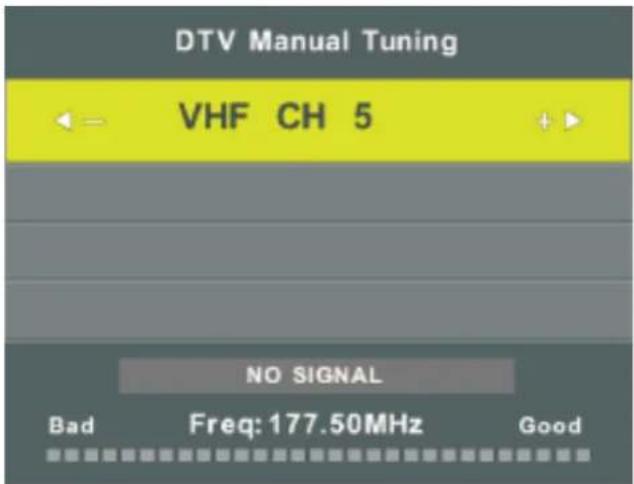
text_image
DTV Manual Tuning VHF CH 5 NO SIGNAL Bad Freq: 177.50MHz GoodProgramma aanpassing
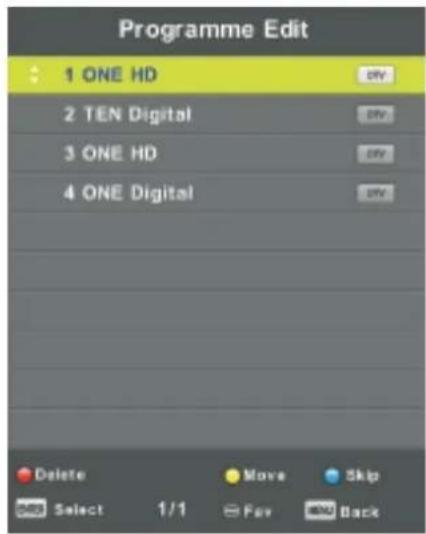
Druk op de s en w knoppen om Programma Aanpassen te selecteren, druk daarna op Enter om het submenu te openen.
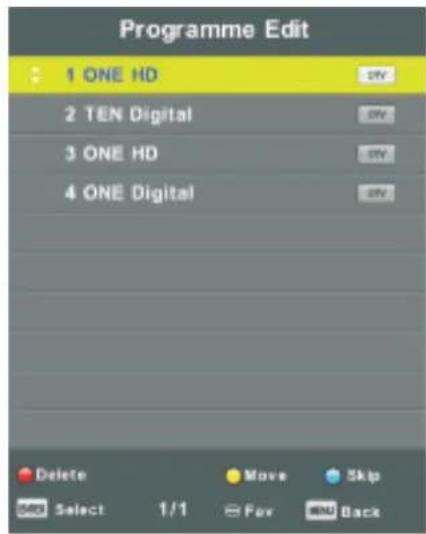
text_image
Programme Edit 1 ONE HD 2 TEN Digital 3 ONE HD 4 ONE Digital Delete Move Skip Select 1/1 Fav BackDrie voor


kleuren toetsen zijn sneltoetsen het programmeren van de kanalen.
Druk eerst op de s en w knoppen om het kanaal dat u wilt programmeren/aanpassen te markeren, daarna:
Drukt u op de Rode knop om een kanaal van de lijst te verwijderen.
Druk op de Gele knop om een kanaal in uw lijst te verplaatsen.
Druk op de Blauwe knop om een geselecteerd kanaal over te slaan.
Druk op FAV om een kanaal aan uw favorieten lijst toe te voegen of te verwijderen.
(Uw televisie zal automatisch een kanaal overslaan indien u CH+/CH- gebruikt om de kanalen te bekijken).
TV Menu
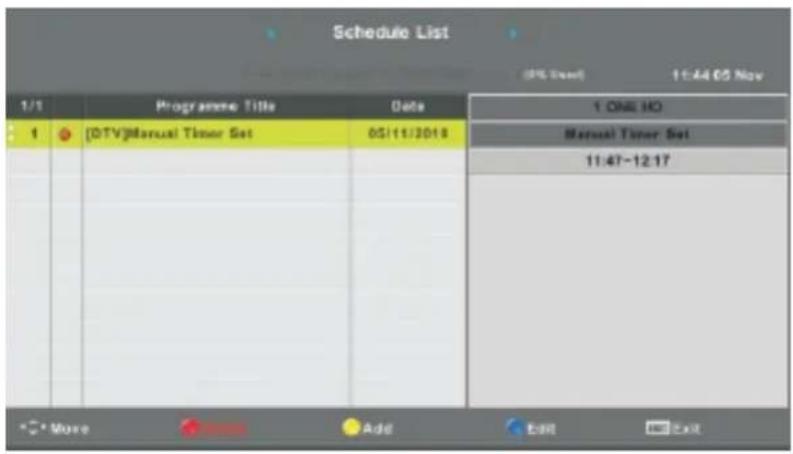
Programmering Lijst
Druk op de s en w knoppen om Programmering Lijst te selecteren, druk daarna op Enter om het submenu te openen.

text_image
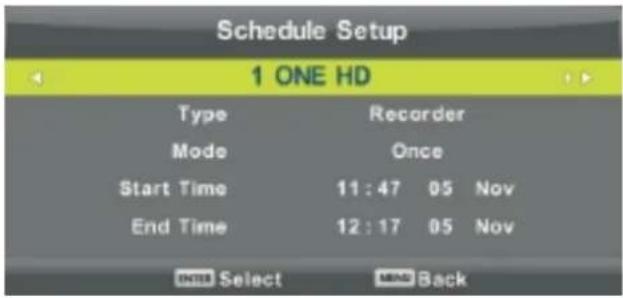
Schedule List (95.0mm) 11:44 05 Nov 1/1 Programme Title Date 1 ONE HD Manual Timer Set 11:47-12:17 More Add Edit CallDruk op de GELE toets om onderstaande interface te openen.
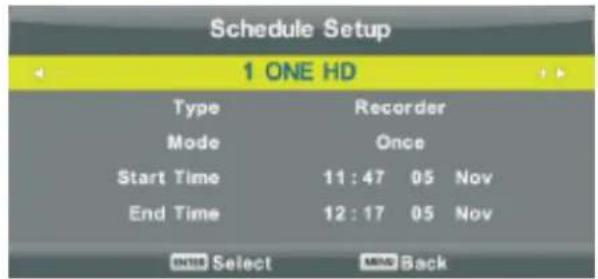
text_image
Schedule Setup 1 ONE HD Type Recorder Mode Once Start Time 11:47 05 Nov End Time 12:17 05 Nov Select BackIndien de programmering is gelukt, zult u onderstaande melding krijgen (Indien de tijd van het programmeren niet overeenkomt zult u een waarschuwingsmelding, tijdconflict, krijgen)
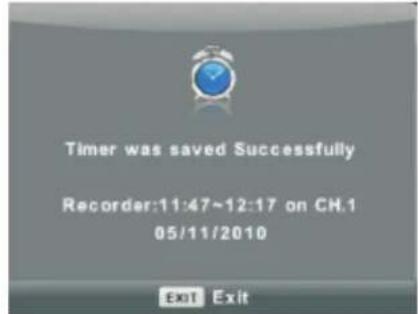
text_image
Timer was saved Successfully Recorder:11:47~12:17 on CH.1 05/11/2010 Exit ExitSignaal informatie
Druk op de s en w knoppen om Signaal Informatie te selecteren, druk daarna op de Enter knop om gedetailleerde informatie te krijgen met betrekking tot het signaal. Dit is uitsluitend beschikbaar indien er een DTV signaal is.
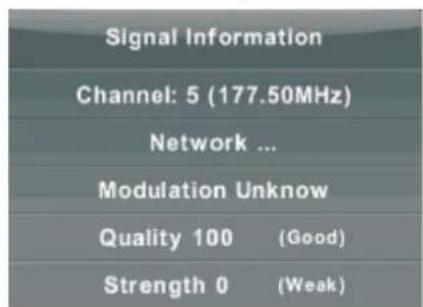
text_image
Signal Information Channel: 5 (177.50MHz) Network ... Modulation Unknow Quality 100 (Good) Strength 0 (Weak)CI Informatie (dient een CI functie te ondersteunen)
Druk op de s en w knoppen om CI Informatie te selecteren, druk daarna op de Enter knop om gedetailleerde informatie te krijgen, indien u een CI kaart heeft ingevoerd.
TV Menu
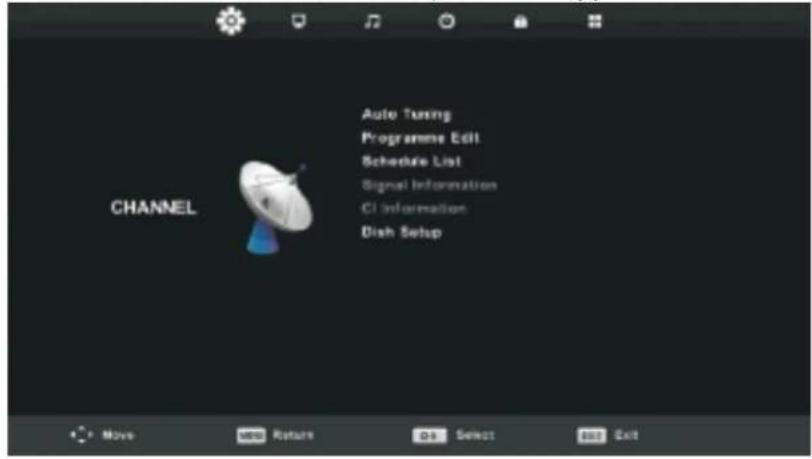
Kanaal lijst van de Satelliet ingangsbron (Dient de DVB-S2 functie te ondersteunen)
text_image
CHANNEL Auto Tuning Programme Edit Schedule List Signal Information CI Information Dish SetupAutomatisch afstemmen
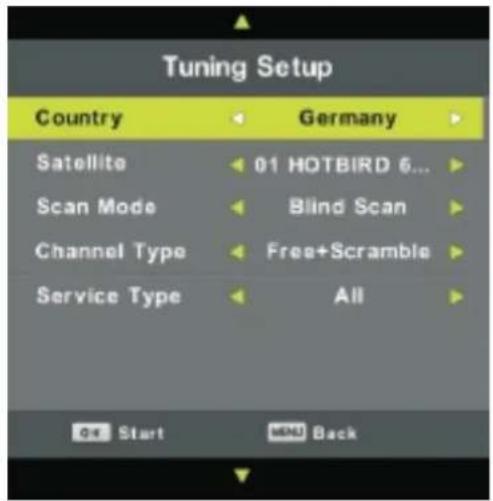
Druk op de s en w knoppen om Auto Afstemmen te selecteren, druk daarna op Enter om te openen.
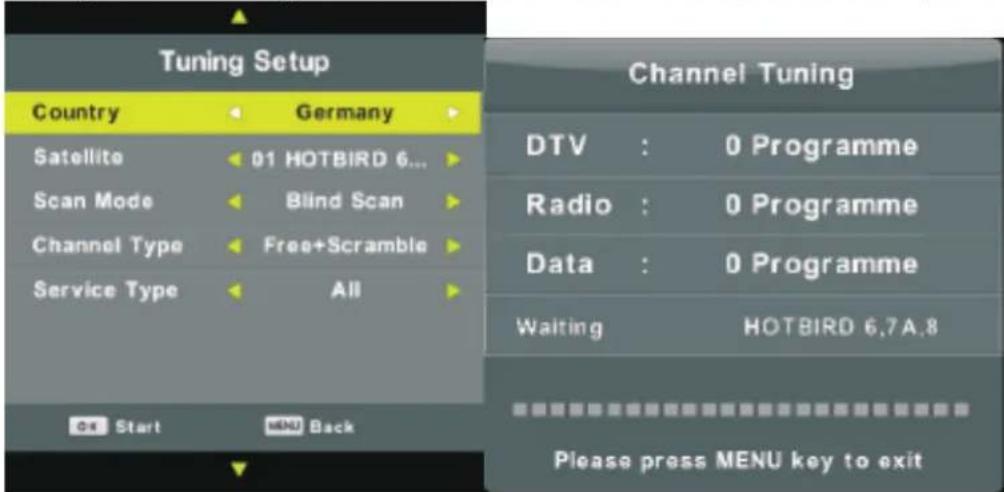
text_image
Tuning Setup Country Germany Satellite 01 HOTBIRD 6... Scan Mode Blind Scan Channel Type Free+Scramble Service Type All Channel Tuning DTV : 0 Programme Radio : 0 Programme Data : 0 Programme Waiting HOTBIRD 6.7A.8 Start Back Please press MENU key to exitSatelliet Configuratie
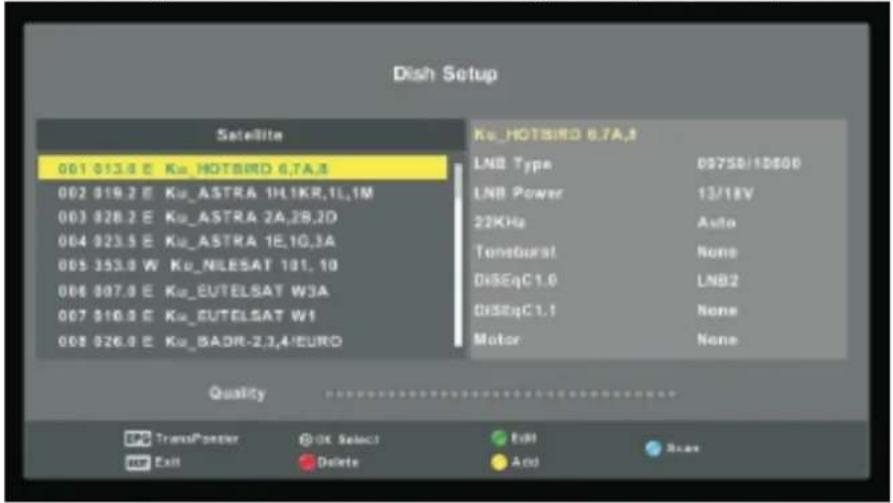
Druk op de s en w knoppen om Satelliet Configuratie te selecteren, druk daarna op Enter/1 om te openen.
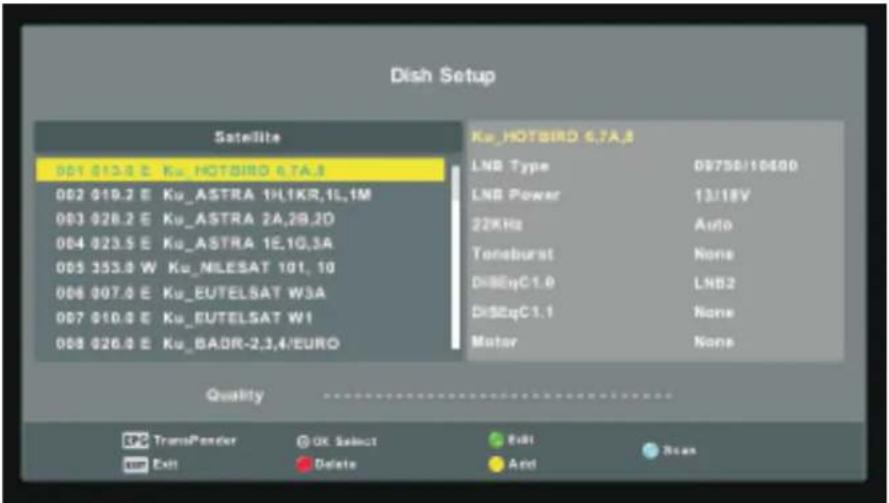
text_image
Dish Setup Satellite 001 013.9 E Ku_HOTBIRD 6.7A.8 002 019.2 E Ku_ASTRA 1H1KR,1L,1M 003 028.2 E Ku_ASTRA 2A,2B,2D 004 023.5 E Ku_ASTRA 1E,1G,3A 005 353.0 W Ku_MILESAT 101, 10 006 007.0 E Ku_EUTELSAT W3A 007 010.0 E Ku_EUTELSAT W1 008 026.0 E Ku_BADR-2,3,4/EURO Ku_HOTBIRD 6.7A.8 LNB Type 09758/10600 LNB Power 13/18V 22KHz Auto Tonsburst None DiBEqC1.0 LHB2 DiBEqC1.1 None Motor None Quality TransPonder OK Select Edit Scan Exit Delete AndBeeld Menu
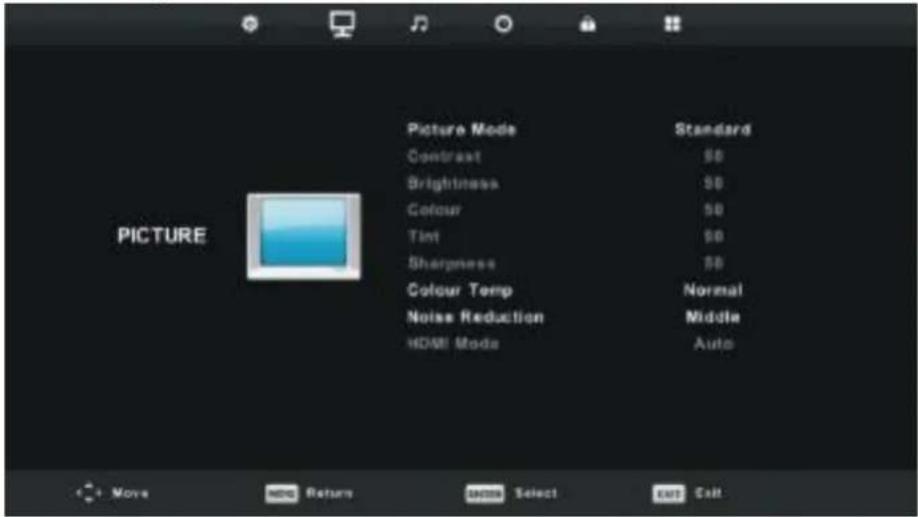
Druk op de MENU knop om het hoofdmenu weer te geven.
Druk op de a en d knoppen om BEELD te selecteren in het hoofdmenu.
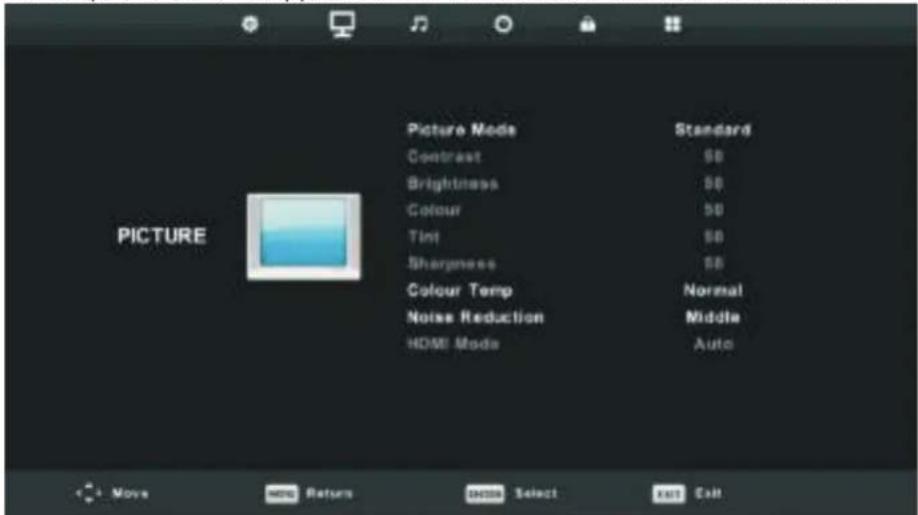
text_image
Picture Mode Contrast Brightness Colour Tint Sharpness Colour Temp Noise Reduction HDMI Mode Standard SB SB SB Normal Middle Auto PictureN.B.: de 120Hz modus wordt alleen ondersteund door een UHD TV.
- Druk op de s en w knoppen om het item te selecteren in het menu BEELD dat u wilt aanpassen.
- Druk op de OK knop om te wijzigen.
- Nadat u het item heeft aangepast, drukt u op de Enter knop om op te slaan en terug te gaan naar het vorige menu.
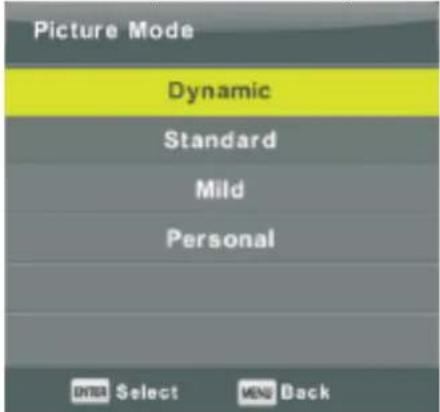
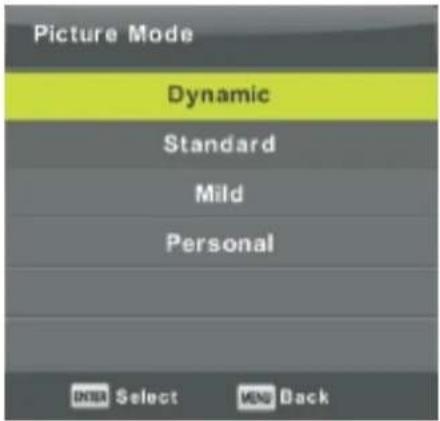
Beeld Modus
Druk op de s en w knoppen om Beeld Modus te selecteren, druk daarna op OK om het submenu te openen.
U kunt de waarden van het contrast, helderheid, kleur, scherpte en teint aanpassen in de Personal Modus.
TIPS: Door op de PMODE knop te drukken kunt u direct naar Beeld Modus gaan.
text_image
Picture Mode Dynamic Standard Mild Personal OK Select Help BackContrast/Helderheid/Kleur/Teint/Scherpte
Druk op de s en w knoppen om uw keuze te selecteren, druk daarna op het item dat u wilt aanpassen.
Contrast: Aanpassen van de contrast van het beeld, de schaduw van het beeld blijft hetzelfde.
Helderheid: Aanpassen van de zwartwaarden van uw beeld.
Kleur: Aanpassen van de kleurverzadiging.
Teint: Ter compensatie van de kleurverandering bij uitzending met NTSC systeem.
Scherpte: Aanpassen van de scherpte van het beeld.
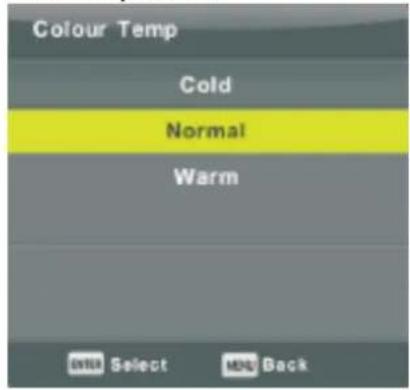
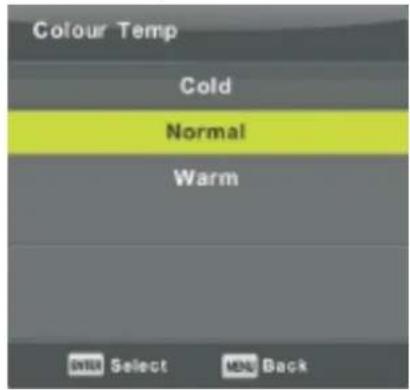
Kleurtemperatuur
text_image
Colour Temp Cold Normal Warm OK Select MND BackAanpassen van de algehele kleur van het beeld.
Druk op de s en w knoppen om Beeld Modus te selecteren, druk daarna op OK om het submenu te openen.
Druk op de a en d knoppen om uw keuze te selecteren (Koud, Medium, Warm)
U kunt de waarden van rood, groen en blauw aanpassen als de kleurtemperatuur in User Modus staat.
Koud: Geeft aan het wit een blauwe gloed.
Medium: Geeft aan het wit een neutrale gloed.
Warm: Geeft aan het wit een rode gloed.
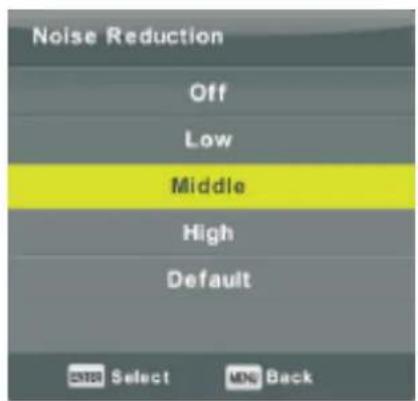
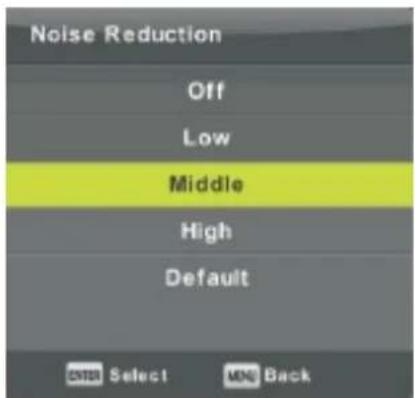
Ruisonderdrukking
text_image
Noise Reduction Off Low Middle High Default Select BackOm beeldruis weg te filteren en de beeldkwaliteit te verbeteren. Druk op de s en w knoppen om Ruisonderdrukking te selecteren, druk daarna op OK om het submenu te openen.
Uit: Ruisonderdrukking uitschakelen.
Laag: Lage ruisonderdrukking.
Midden: Gemiddelde ruisonderdrukking.
Hoog: Hoge ruisonderdrukking.
Default: Fabrieksinstelling.
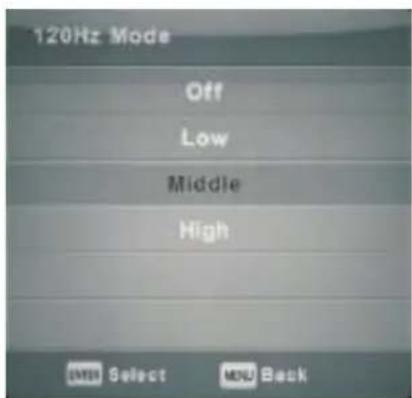
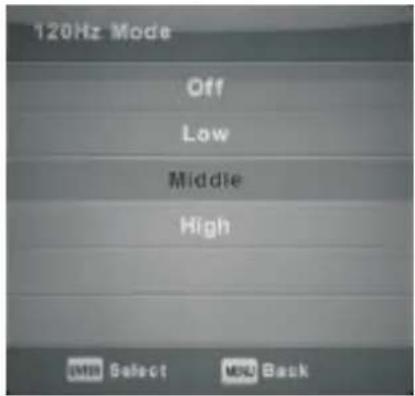
120Hz Modus (alleen bij UHD TV's)
text_image
120Hz Mode Off Low Middle High OK Select Forward BackAanpassen van de beweging compensatie.
Hoger instellen kan het beeld verbeteren van de bewegingen bij de uitzending van sporten of spellen.
Druk op de a en d knoppen om uw keuze te selecteren
(Uit/Laag/Midden/Hoog)
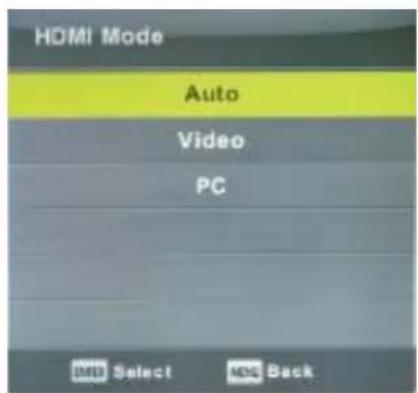
HDMI Modus
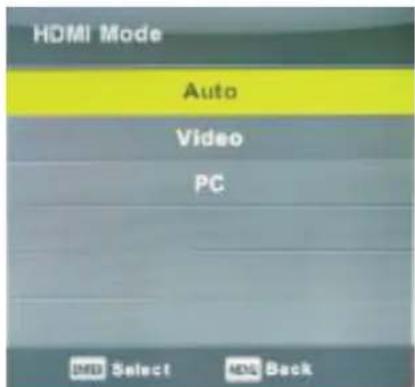
text_image
HDMI Mode Auto Video PC OK Select Next BackDruk op de s en w knoppen om HDMI Modus te selecteren, druk daarna op OK om het submenu te openen.
Druk op de a en d knoppen om uw keuze te selecteren Auto/Video/PC)
TV Menu
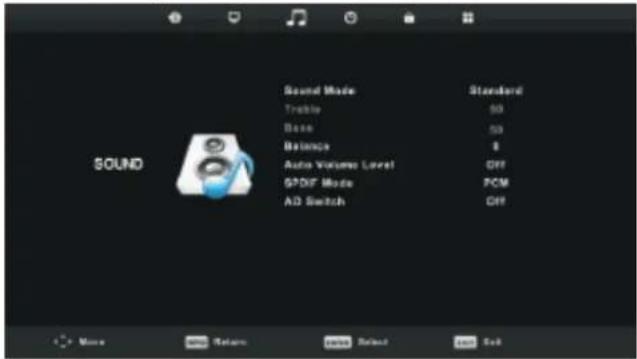
Geluid Menu
Druk op de MENU knop om het hoofdmenu weer te geven.
Druk op de a en d knoppen om GELUID te selecteren in het hoofdmenu.
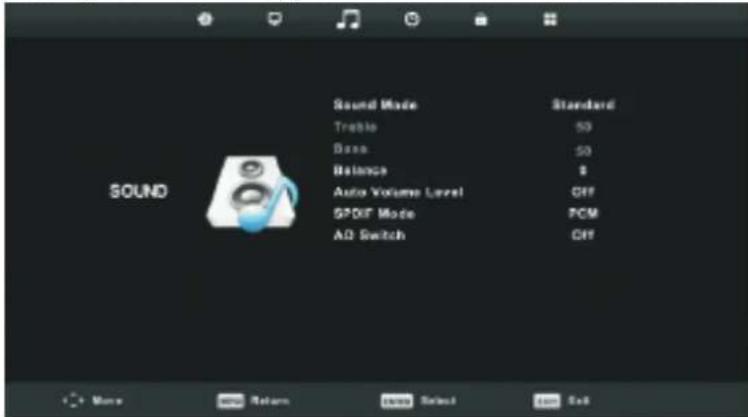
text_image
Sound Sound Mode Standard Treble 50 Base 50 Balance $ Auto Volume Level Off SPDIF Mode PCM AD Switch Off- Druk op de s en w knoppen om het item te selecteren in het menu GELUID dat u wilt aanpassen.
- Druk op de Enter knop om te wijzigen.
- Nadat u het item heeft aangepast, drukt u op de Enter knop om op te slaan en terug te gaan naar het vorige menu.
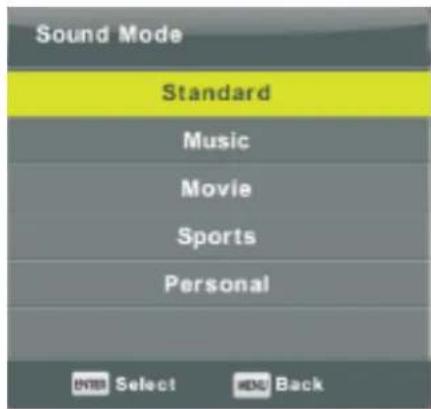
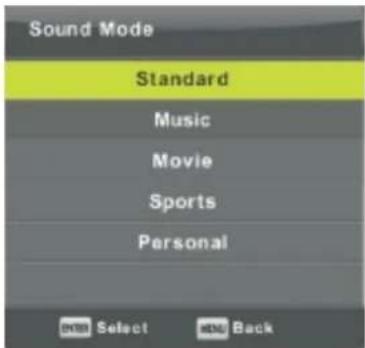
text_image
Sound Mode Standard Music Movie Sports Personal OK Select and BackGeluid Modus
Druk op de s en w knoppen om Geluid Modus te selecteren, druk daarna op Enter om het submenu te openen.
Druk op de a en d knoppen om te selecteren.
U kunt de Treble en Bass aanpassen in de Personal Modus.
TIP: Dor op de SMODE knop te drukken kunt u direct naar Geluid Modus gaan.
Standaard: Zorgt voor een uitgebalanceerd geluid.
Muziek: Behoudt het originele geluid. Geschikt voor muziekprogramma's.
Film: Optimaliseert de treble en bass voor een rijke geluidservaring.
Sport: Optimaliseert het geluid bij sportuitzendingen.
Personal: Aanpassen naar uw persoonlijke wens.
Balans
Druk op de s en w knoppen om uw keuze te selecteren. Druk op de a en d knoppen om aan te passen.
Auto Volume niveau
Druk op de s en w knoppen om Auto Volume niveau te selecteren. Druk op de a en d knoppen om Aan of Uit te selecteren.
SPDIF modus
Druk op de s en w knoppen om SPDIF modus te selecteren. Druk op de a en d knoppen om Uit/PCM/Auto te selecteren.
TV Menu
AD (=Audio Description) Schakelaar
Druk op de s en w knoppen om AD schakelaar te selecteren. Druk op de a en d knoppen om Aan of Uit te selecteren.
GOS= Gesproken Ondertiteling Slechtzienden.
Dient te worden ondersteunt door een codestream.
N.B.:
Balans: Hiermee kunt u de output van de luidsprekers aanpassen, voor een optimaal geluid.
Auto Volume: Hiermee vermindert u automatisch het verschil tussen het geluid van de programma's op verschillende kanalen.
TV Menu
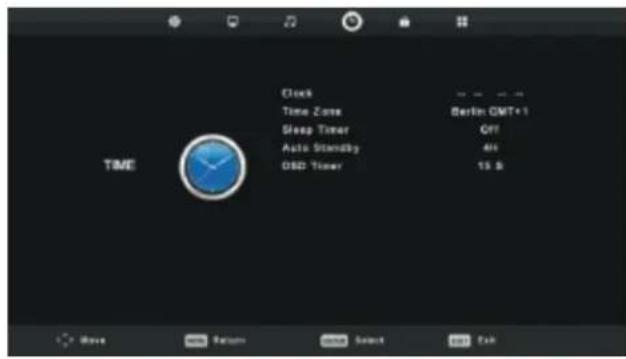
Tijd menu
Druk op de MENU knop om het hoofdmenu weer te geven.
Druk op de a en d knoppen om TIJD te selecteren in het hoofdmenu.
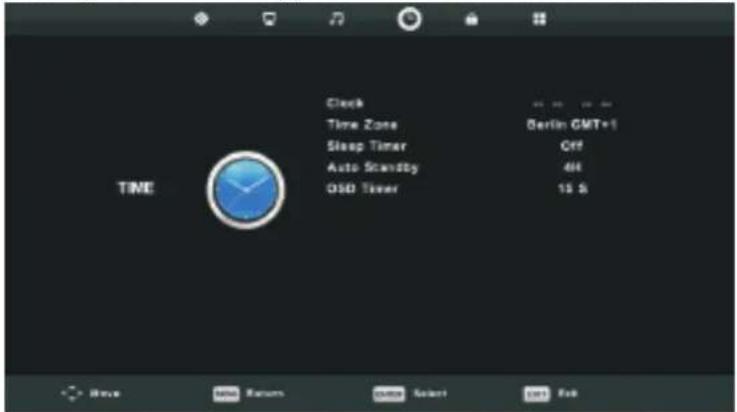
text_image
Clock Time Zone Sleep Timer Auto Standby OSD Timer Berlin GMT+1 Off 400 15 S Move Save Return Send Select Send Fail- Druk op de s en w knoppen om het item te selecteren in het menu TIJD dat u wilt aanpassen.
- Druk op de Enter knop om te wijzigen.
- Nadat u het item heeft aangepast, drukt u op de Enter knop om op te slaan en terug te gaan naar het vorige menu.
Tijd Zone
Druk op de s en w knoppen om Tijd Zone te selecteren, druk daarna op Enter om het submenu te openen.
Druk op de s en w / a en d knoppen om uw tijd zone te selecteren.
| Time Zone | ||
| Canary GMT | Rabat GMT | Berlin GMT+1 |
| Lisbon GMT | Amsterdam GMT+1 | Brussels GMT+1 |
| London GMT | Beograd GMT+1 | Budapest GMT+1 |
| Move | ENTER Select | MENU Back |
Sleep Timer
text_image
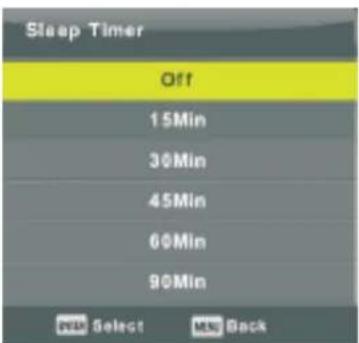
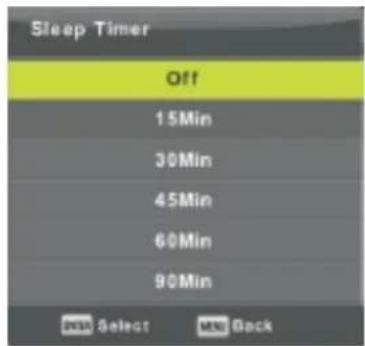
Sleep Timer Off 15Min 30Min 45Min 60Min 90Min OK Select MIN BackDruk op de s en w knoppen om Sleep Timer te selecteren, druk daarna op Enter om het submenu te openen.
Druk op de s en w knoppen om uw keuze te selecteren (Uit, 15min, 30min, 45min, 60min, 90min, 120min, 240min).
TV Menu
Auto Stand-by

text_image
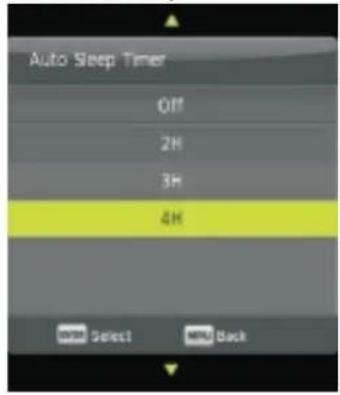
Auto Sleep Timer Off 3H 4H 5H OK Select OK BackDruk op de s en w knoppen om Auto Stand-by te selecteren, druk daarna op Enter om het submenu te openen.
Druk op de s en w knoppen om uw keuze te selecteren.
TIP: Indien u gedurende de ingestelde tijd de afstandsbediening niet gebruikt, zal de TV automatisch uitschakelen. Indien u de afstandsbediening wel gebruikt, zal de ingestelde tijd opnieuw ingaan.
OSD Timer
text_image
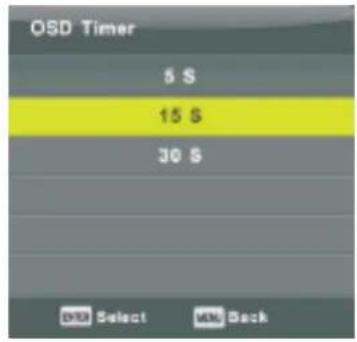
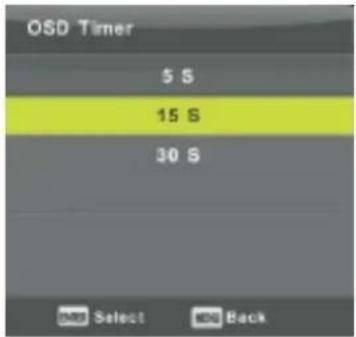
OSD Timer 5 S 15 S 30 S OK Select OK BackDruk op de s en w knoppen om OSD Timer te selecteren, druk daarna op Enter om het submenu te openen.
Druk op de s en w knoppen om uw keuze te selecteren.
TV Menu
Vergrendeling menu
Druk op de MENU knop om het hoofdmenu weer te geven.
Druk op de a en d knoppen om VERGRENDELING te selecteren in het hoofdmenu.
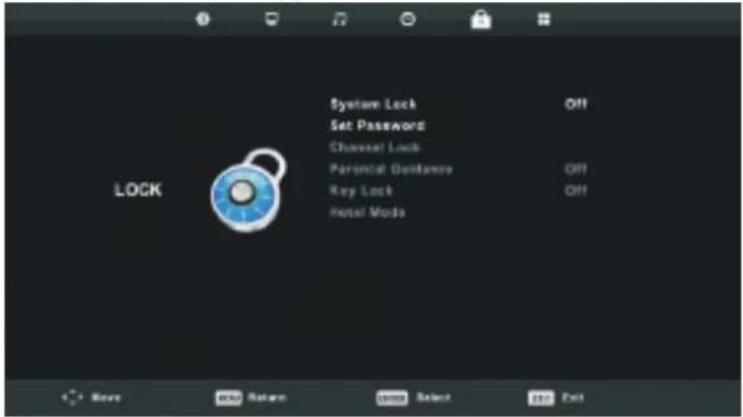
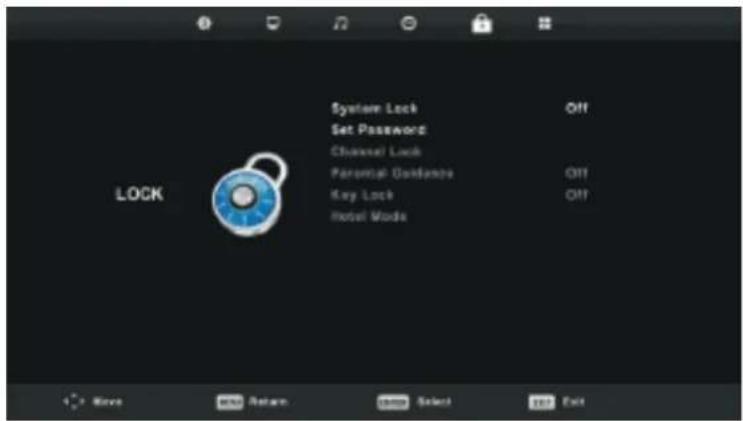
text_image
System Lock Set Password Channel Lock Parental Guidance Key Lock Hotel Mods OFF OFF OFF LOCK Next Buy Return Select Exit- Druk op de s en w knoppen om het item te selecteren in het menu VERGRENDELING dat u wilt aanpassen.
- Druk op de Enter knop om te wijzigen.
- Nadat u het item heeft aangepast, drukt u op de Enter knop om op te slaan en terug te gaan naar het vorige menu.
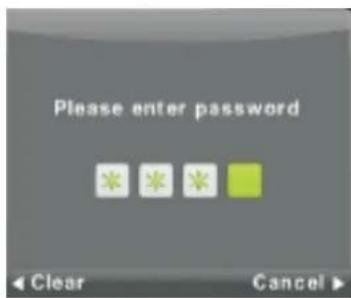
Vergrendelingssysteem
text_image
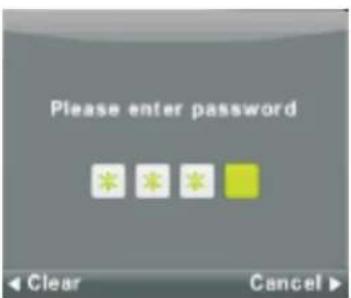
Please enter password Clear CancelDruk op de s en w knoppen om Vergrendelingsysteem te selecteren, druk daarna op Enter om het wachtwoord in te voeren.
Het door de fabriek ingestelde wachtwoord is "0000". Indien u het wachtwoord vergeten bent, neemt u dan contact op met het Service Center.
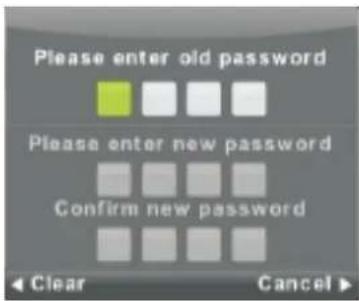
Instellen wachtwoord
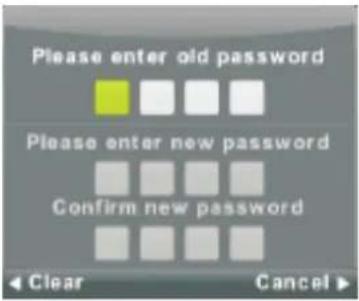
text_image
Please enter old password Please enter new password Confirm new password Clear CancelDruk op de s en w knoppen om het wachtwoord in te stellen, druk daarna op de Enter knop om het sub menu te openen en een nieuw wachtwoord te maken.
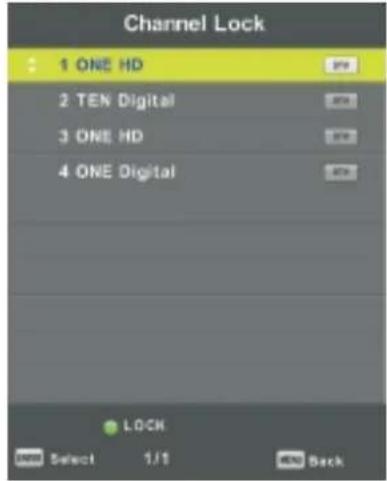
Kanaal vergrendeling
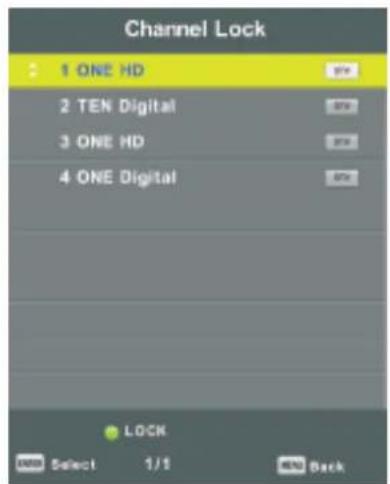
text_image
Channel Lock 1 ONE HD 2 TEN Digital 3 ONE HD 4 ONE Digital LOCK Select 1/1 END BackDruk op de s en w knoppen om Kanaal vergrendeling te selecteren, druk daarna op de Enter knop om het sub menu te openen.
Druk op de Groene knop om het kanaal te vergrendelen of te ontgrendelen.
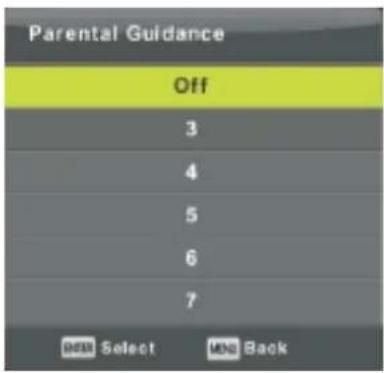
Ouderlijk Toezicht
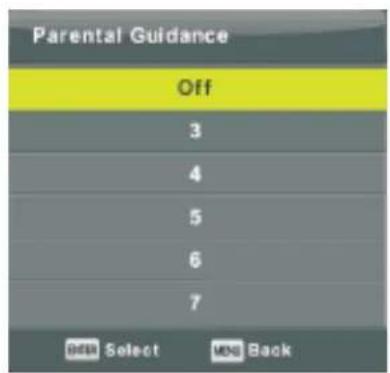
text_image
Parental Guidance Off 3 4 5 6 7 Edit Select MD BackDruk op de s en w knoppen om Ouderlijk Toezicht te selecteren, druk daarna op de Enter knop om het sub menu te openen en de leeftijd in te voeren.
Vergrendeling Toetsen
Druk op de s en w knoppen om Vergrendeling Toetsen te selecteren. Druk op de a end knoppen om Aan of Uit te selecteren.
Indien de vergrendeling is ingeschakeld kunt u de toetsen niet gebruiken.
Hotel Modus (dient de Hotel Modus te ondersteunen)
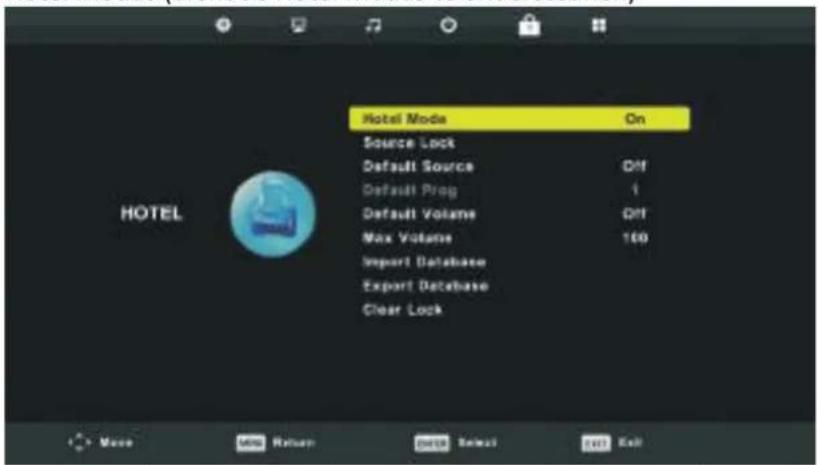
text_image
Hotel Mode On Source Lock Default Source Off Default Prog 1 Default Volume Off Max Volume 100 Import Database Export Database Clear Lock- Druk op de s en w knoppen om Hotel Modus te selecteren in het menu VERGRENDELING dat u wilt aanpassen.
- Druk op de Enter knop om te wijzigen.
- Nadat u het item heeft aangepast, drukt u op de Enter knop om op te slaan en terug te gaan naar het vorige menu.
Hotel Modus
Druk op de s en w knoppen om Hotel Modus te selecteren. Druk op de a en d knoppen om Aan of Uit te selecteren.
Bron Vergrendeling
Druk op de s en w knoppen om Bron Vergrendeling te selecteren, druk daarna op de Enter knop om het sub menu te openen en te selecteren.
Standaard bron
Druk op de s en w knoppen om Standaard Bron te selecteren, druk daarna op de Enter knop om het sub menu te openen en te selecteren.
Standaard programma
Druk op de s en w knoppen om Standaard Programma te selecteren. Druk op de a en d knoppen om aan te passen.
Deze functie is mogelijk indien de standaard bron TV is.
Maximum Volume
Druk op de s en w knoppen om Maximum Volume te selecteren. Druk op de a en d knoppen om aan te passen.
Ontgrendeling
Druk op de s en w knoppen om Ontgrendeling te selecteren, druk daarna op de Enter knop om al uw vergrendelingen ongedaan te maken.
TV Menu
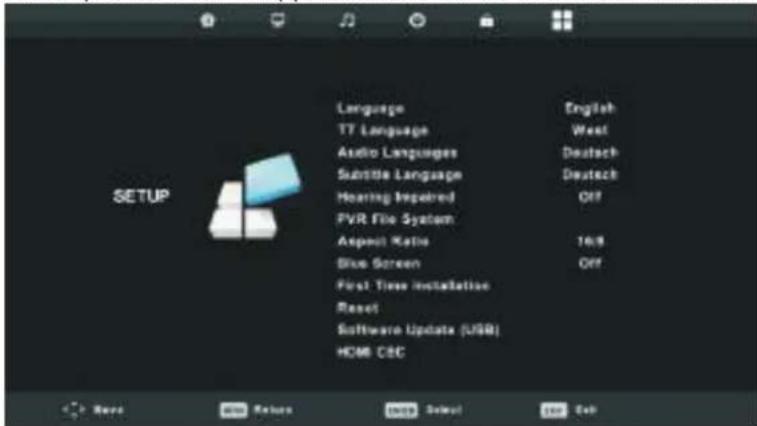
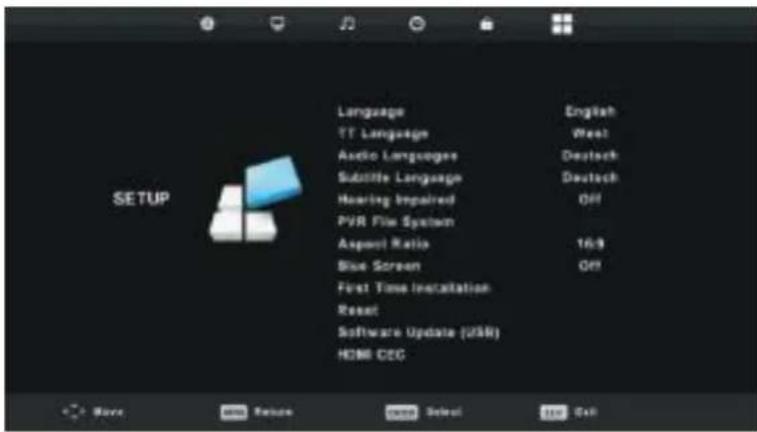
Set-up Menu
Druk op de MENU knop om het hoofdmenu weer te geven.
Druk op de a en d knoppen om SET-UP te selecteren in het hoofdmenu.
text_image
Language English TT Language West Audio Languages Deutsch Subtitle Language Deutsch Hearing Impaired Off PVR File System Aspect Ratio 16:9 Blue Screen Off First Time Installation Reset Software Update (USB) HCM C&C- Druk op de s en w knoppen om het item te selecteren in het menu SET-UP dat u wilt aanpassen.
- Druk op de Enter knop om te wijzigen.
- Nadat u het item heeft aangepast, drukt u op de Enter knop om op te slaan en terug te gaan naar het vorige menu.
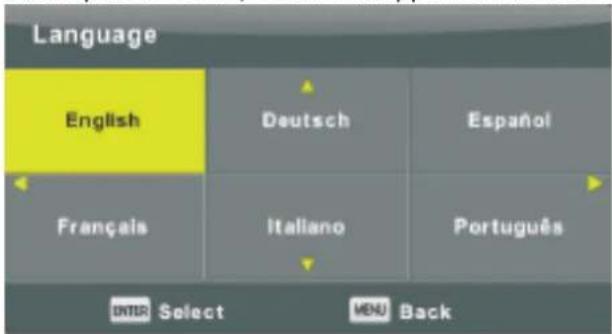
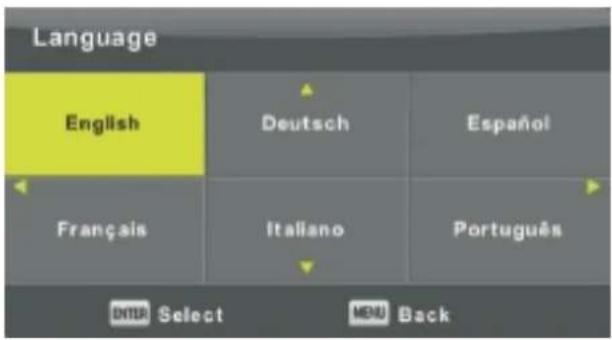
OSD Taal
Selecteer de taal van uw OSD menu zoals deze zal worden weergegeven. De standaard instelling is Engels.
Druk op de s en w / a en d knoppen om de Taal te selecteren.
text_image
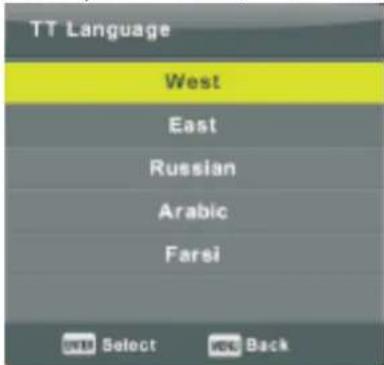
Language English Deutsch Español Français Italiano Português ENTER Select MENU BackTT Taal
Druk op de s en w knoppen om TT Taal te selecteren, druk daarna op de Enter knop om het sub menu te openen en te selecteren.
Druk op de s en w / a en d knoppen om de TT Taal te selecteren.
text_image
TT Language West East Russian Arabic Farsi Select BackTV Menu
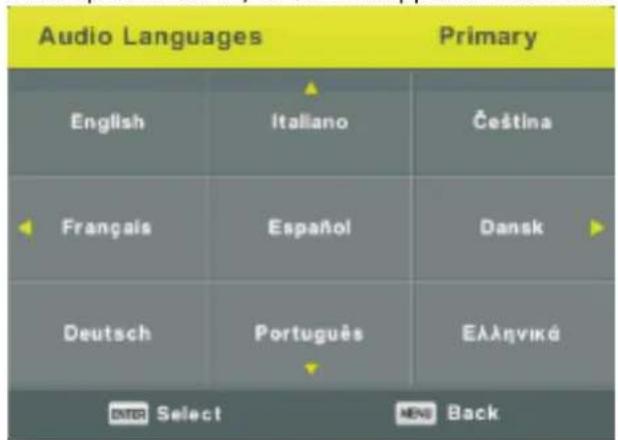
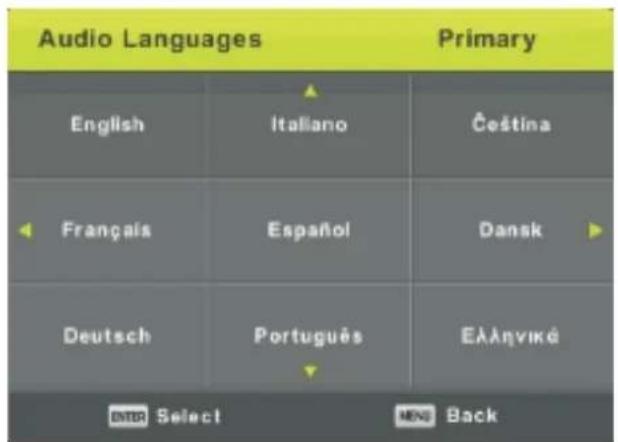
Audio Taal
Druk op de s en w knoppen om Audio Taal te selecteren, druk daarna op de Enter knop om het sub menu te openen en te selecteren.
Druk op de a en d knoppen om de primaire Audio Taal te selecteren.
Druk op de s en w / a en d knoppen om de Audio Taal te selecteren.
text_image
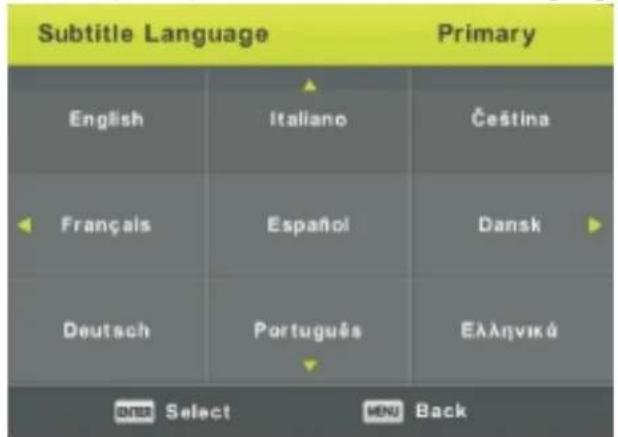
Audio Languages Primary English Italiano Čeština Français Español Dansk Deutsch Português Ελληνικό BTR Select MEN BackOndertiteling Taal
Druk op de s en w knoppen om Ondertiteling Taal te selecteren, druk daarna op de Enter knop om het sub menu te openen en te selecteren.
Druk op de a en d knoppen om de primaire Ondertiteling Taal te selecteren.
Druk op de s en w / a en d knoppen om de Ondertiteling Taal te selecteren.
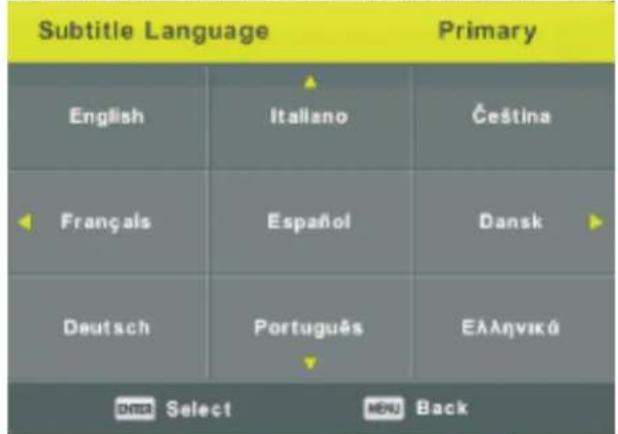
text_image
Subtitle Language Primary English Italiano Čeština Français Español Dansk Deutsch Português EÀÀnyvská Select BackSlechthorenden
Druk op de s en w knoppen om Slechthorenden te selecteren. Druk op de Enter Knop om Aan of Uit te selecteren.
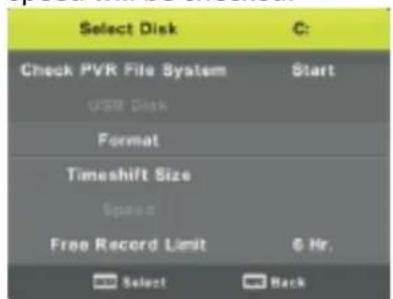
Systeem PVR Bestand
Druk op de s en w knoppen om Systeem PVR Bestand te selecteren, druk daarna op de Enter knop om het sub menu te openen.
Druk op de s en w knoppen om Controleer Systeem PVR Bestand te selecteren, druk daarna op de Enter knop. Het systeem zal de USB snelheid controleren.
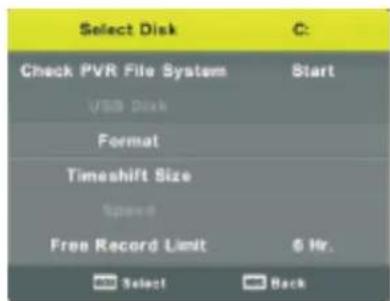
text_image
Select Disk C: Check PVR File System Start USB Disk Format Timeshift Size Speed Free Record Limit 6 Hr. OK Select BackTV Menu
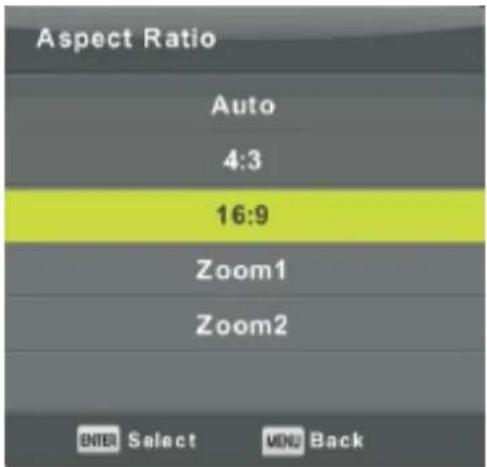
Beeldverhouding
Druk op de s en w knoppen om Beeldverhouding te selecteren, druk daarna op de Enter knop om het sub menu te openen en te selecteren: Auto, 4;3, 16:9, Zoom1, Zoom2.
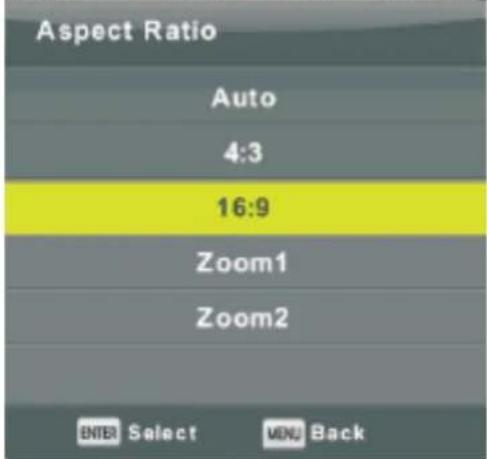
text_image
Aspect Ratio Auto 4:3 16:9 Zoom1 Zoom2 ENTER Select MOV BackBlauw Scherm
Druk op de s en w knoppen om Blauw Scherm te selecteren. Druk op de Enter Knop om Aan of Uit te selecteren.
Eerste Installatie
Druk op de s en w knoppen om Eerste Installatie te selecteren, druk daarna op de Enter knop om te openen.
Reset
Druk op de s en w knoppen om Reset te selecteren, druk daarna op de Enter knop om het sub menu te openen.
Software Update (USB)
Druk op de s en w knoppen om Software Update (USB) te selecteren, plaats uw USB apparaat in de USB aansluiting, druk daarna op de Enter knop om de juiste software te updaten.
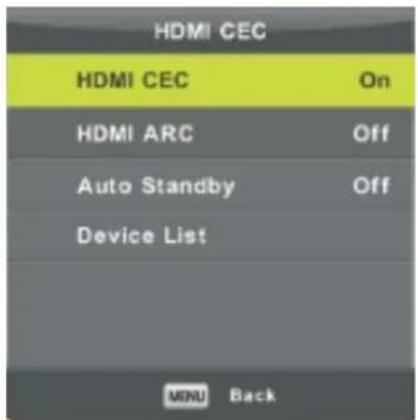
HDMI CEC (dient de HDMI CEC/ARC functie te ondersteunen)
Druk op de s en w knoppen om HDMI CEC te selecteren, druk daarna op de Enter knop om het sub menu te openen.

text_image
HDMI CEC HDMI CEC On HDMI ARC Off Auto Standby Off Device List MENU BackHDMI CEC Druk op de a en d knoppen om Aan/Uit te zetten. HDMI ARC Druk op de a en d knoppen om Aan/Uit te zetten. Auto Stand-by Druk op de a en d knoppen om Aan/Uit te zetten. App. lijst Druk Enter om hoofdmenu van apparaat te openen
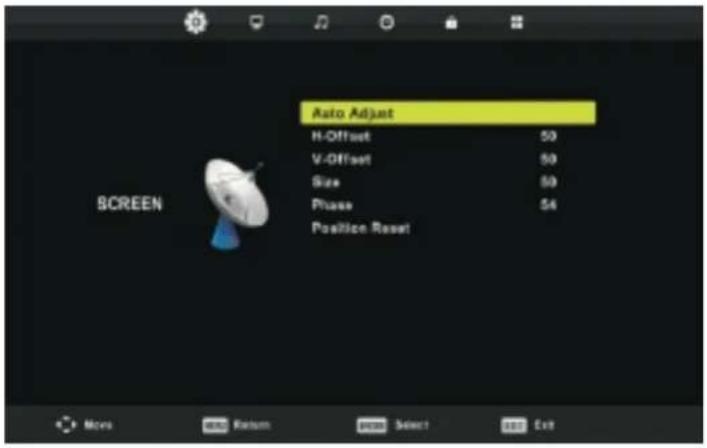
Beeldscherm Menu
Druk op de MENU knop om het hoofdmenu weer te geven.
Druk op de a en d knoppen om BEELDSCHERM te selecteren in het hoofdmenu.
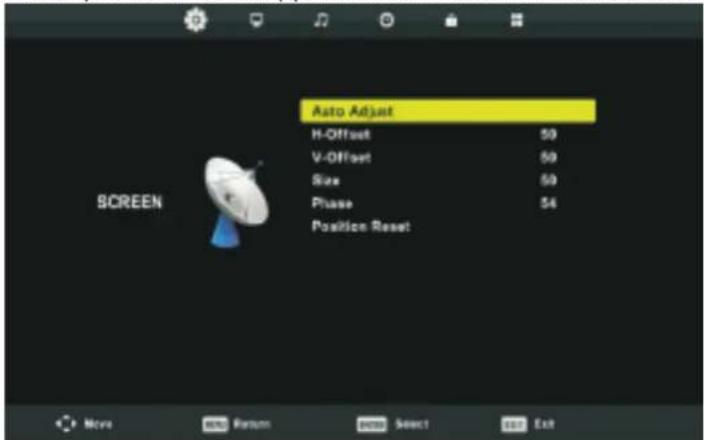
text_image
Auto Adjust H-Offset 50 V-Offset 50 Size 50 Phase 54 Position Reset SCREEN- Druk op de s en w knoppen om het item te selecteren in het menu BEELDSCHERM dat u wilt aanpassen.
- Druk op de Enter knop om te wijzigen.
- Nadat u het item heeft aangepast, drukt u op de Enter knop om op te slaan en terug te gaan naar het vorige menu.
Auto Aanpassen
Druk op de Enter knop om automatisch aan te passen: H-Offset/V-Offset/Schermgrootte/Fase.
H-Positie
Aanpassen van de horizontale positie van het beeld.
Druk op de s en w knoppen om H-Offset te selecteren, druk daarna op de Enter knop om het sub menu te openen.
V-Positie
Aanpassen van de verticale positie van het beeld.
Druk op de s en w knoppen om V-Offset te selecteren, druk daarna op de Enter knop om het sub menu te openen.
Schermgrootte
Aanpassen van de grootte van het scherm
Druk op de s en w knoppen om Schermgrootte te selecteren, druk daarna op de Enter knop om het sub menu te openen.
Fase
Aanpassen van de Fase van het beeld
Druk op de s en w knoppen om Fase te selecteren, druk daarna op de Enter knop om het sub menu te openen.
Positie resetten
Druk op de s en w knoppen om Positie reset te selecteren, druk daarna op de Enter knop om te openen.
N.B.:
- Ruisonderdrukking in de BEELD menu is ongeldig.
- AD schakelaar in GELUID menu is ongeldig.
PC Menu
- TIJD menu en omschrijving zijn hetzelfde als de AIR modus.
- Programma vergrendelen en Ouderlijk Toezicht in het VERGRENDELING menu zijn ongeldig.
- Audio Talen, Ondertiteling Talen, Slechthorenden en Systeem PVR Bestand in het SET-UP menu zijn ongeldig.
- PC modus heeft geen KANAAL menu.
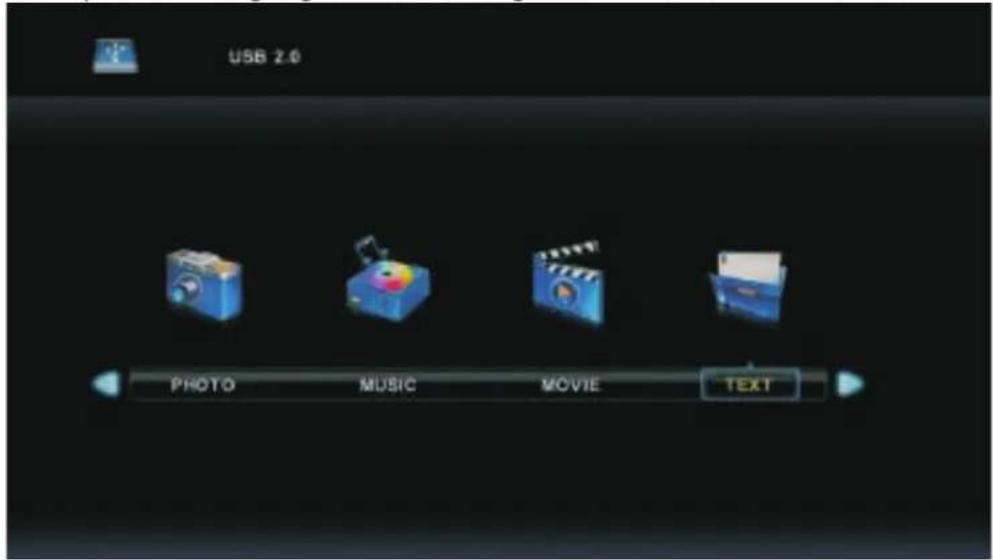
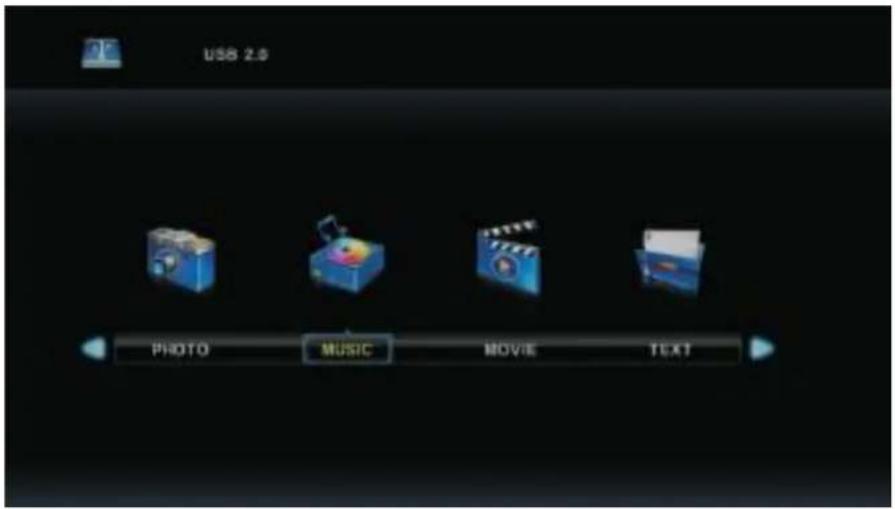
Media Bediening
Bediening MEDIA
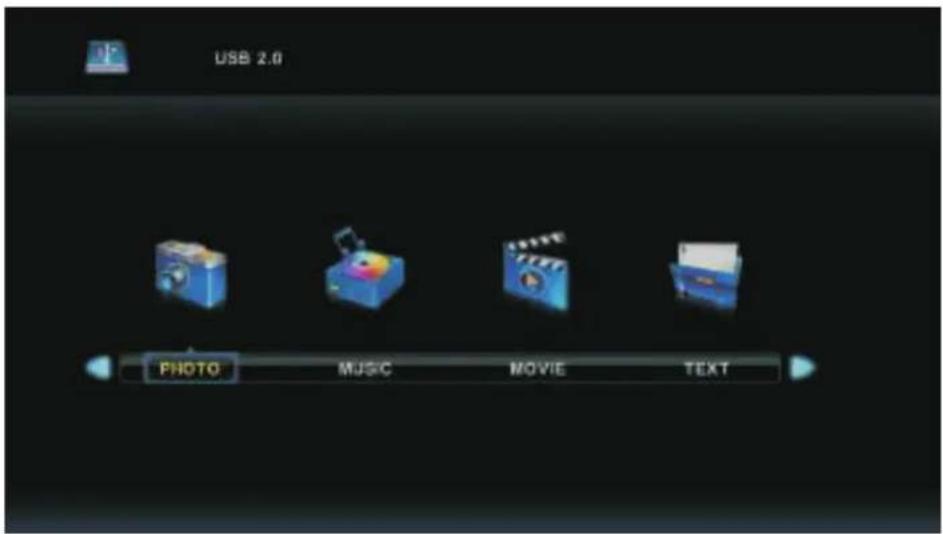
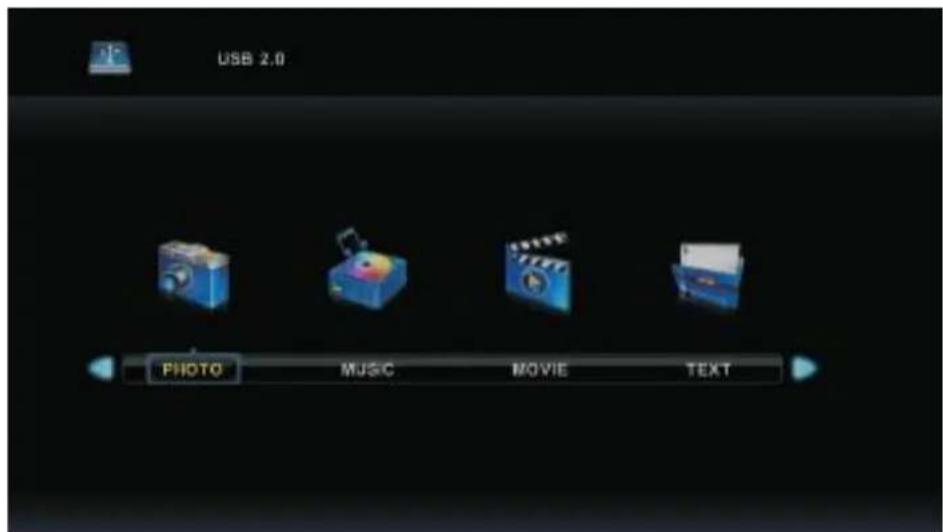
N.B.: Voordat u het Media menu wilt bedienen, dient u eerst het USB apparaat aan te sluiten en de invoerbron op Media te zetten.
Druk op de s en w knoppen om Media te selecteren in het Bron menu, druk daarna op Enter om te openen.
text_image
USB 2.0 PHOTO MUSIC MOVE TEXTDruk op de a en d knoppen om uw keuze te selecteren in het hoofdmenu van Media, druk daarna op Enter om te openen.
Media Bediening
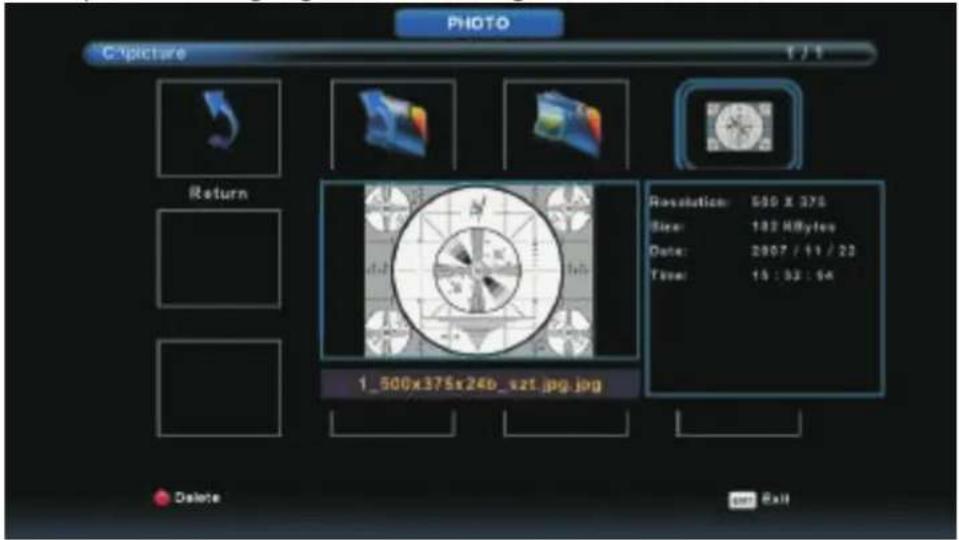
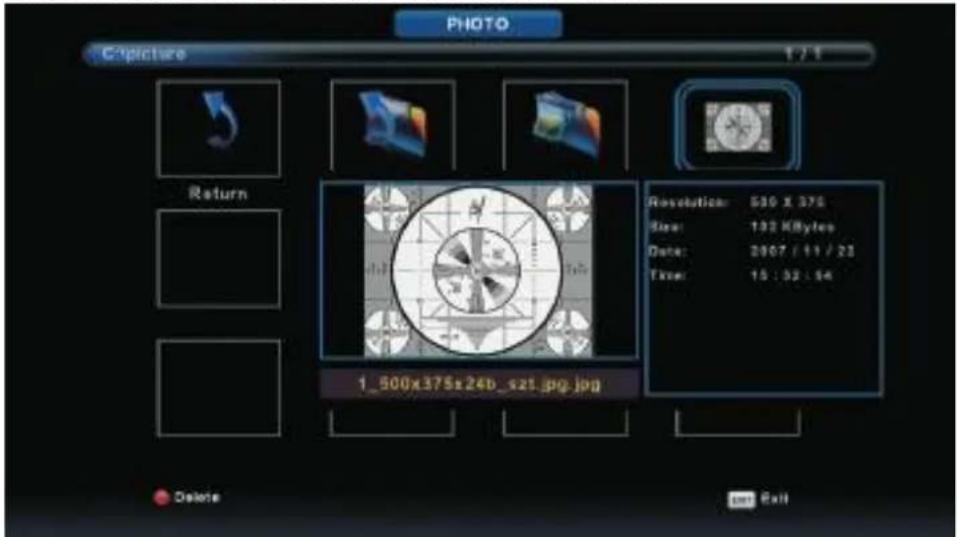
Foto menu
Druk op de a en d knoppen om Foto te selecteren in het hoofdmenu van Media, druk daarna op Enter om te openen.
Druk op Exit om terug te gaan naar het vorige menu en om het menu te verlaten.
text_image
PHOTO C:\picture 1 / 1 Return Resolution: 500 x 376 Size: 182 MBytes Date: 2007 / 11 / 23 Time: 15 : 33 : 54 1_500x375x24b_szt.jpg.jpg Delete callDruk op de a en d knoppen om het bestand te selecteren dat u wilt bekijken. Druk daarna op de media knop om weer te geven.
Indien uw keuze oplicht zal de informatie van het bestand aan de rechterkant worden weergegeven en een preview van het beeld zal in het midden verschijnen.
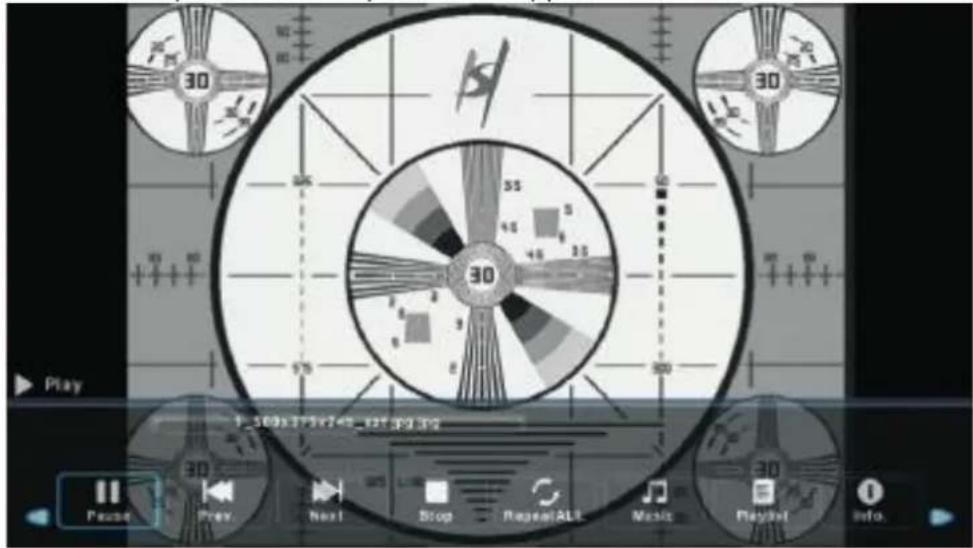
text_image
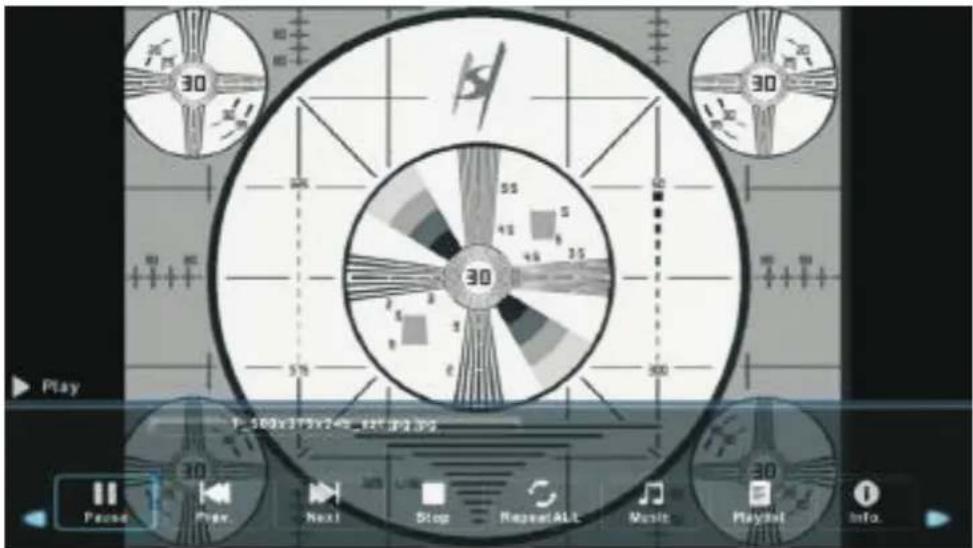
Play 50 30 55 48 5 46 35 30 57 300 P: 500x375x2=5_125*2.325 Pace Play Next Stop RepeatALL Music Playset Info.Media Bediening
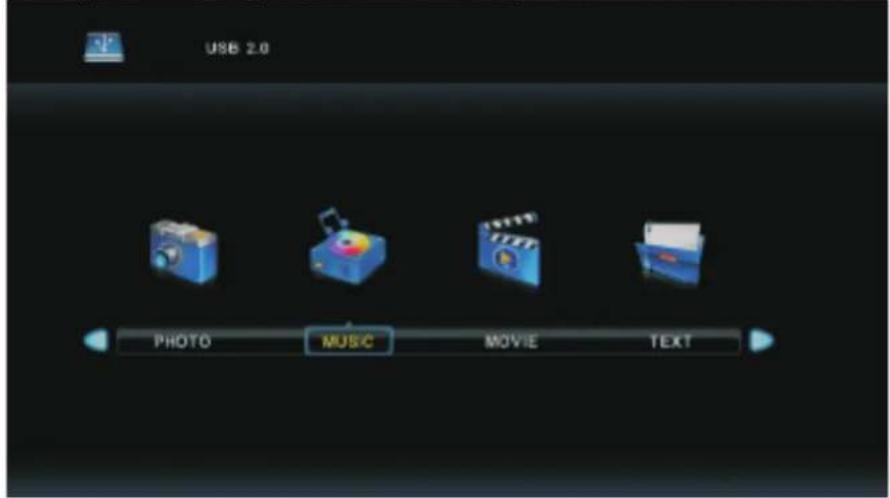
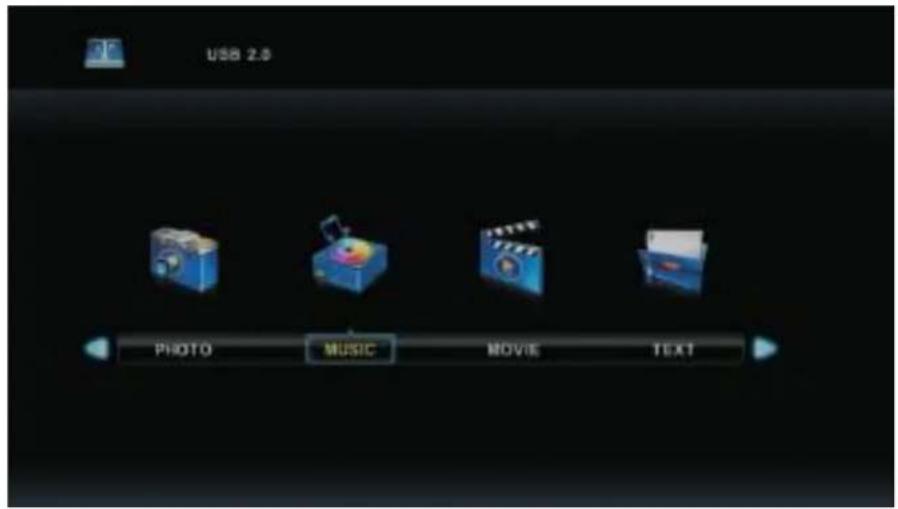
Muziek menu
Druk op de a en d knoppen om Muziek te selecteren in het hoofdmenu van Media, druk daarna op Enter om te openen.
Druk op Exit om terug te gaan naar het vorige menu en om het menu te verlaten.
text_image
USB 2.0 PHOTO MUSIC MOVIE TEXT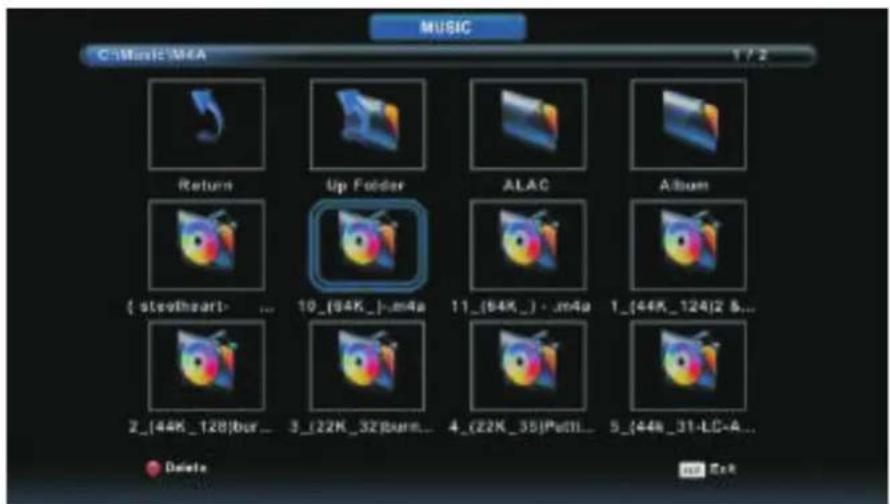
text_image
MUSIC CD Music M4A 1 / 2 Return Up Folder ALAC Album ( stevoheart- ... 10_(64K_)_m4a 11_(64K_) - m4a 1_(44K_124)2 &... 2_(44K_128)bur... 3_(22K_32)burn... 4_(22K_35)Puttl... 5_(44k_31-LC-A... Delete up EndDruk op de a en d knoppen om de diskdrive te selecteren die u wilt bekijken. Druk daarna op de Enter knop om te openen.
Druk op de a en d knoppen om terug te gaan naar het vorige menu.
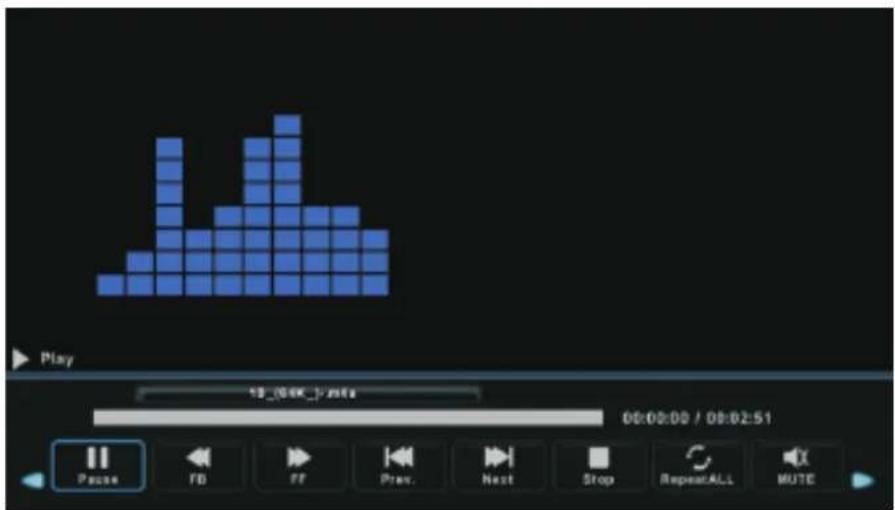
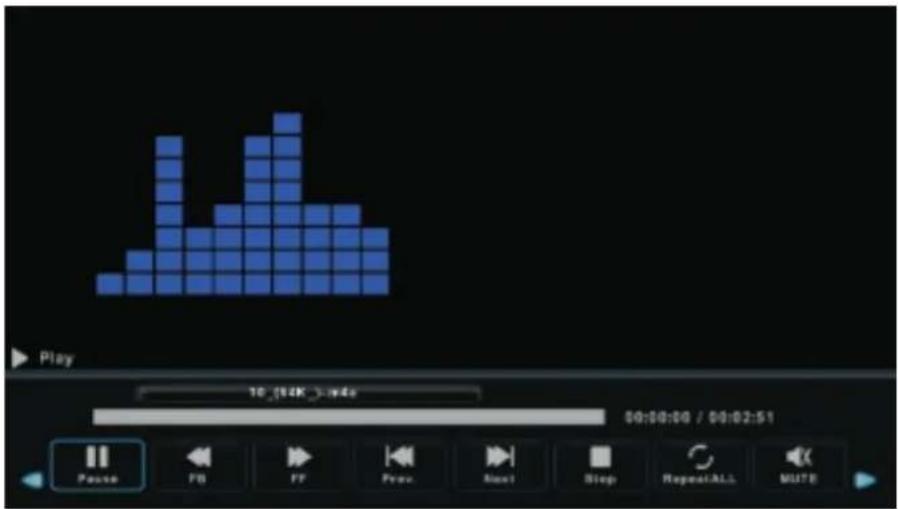
text_image
Play 13:00:51 00:00:00 / 00:02:51 Pause FB FF Prev. Next Stop RepeatALL MUTEMedia Bediening
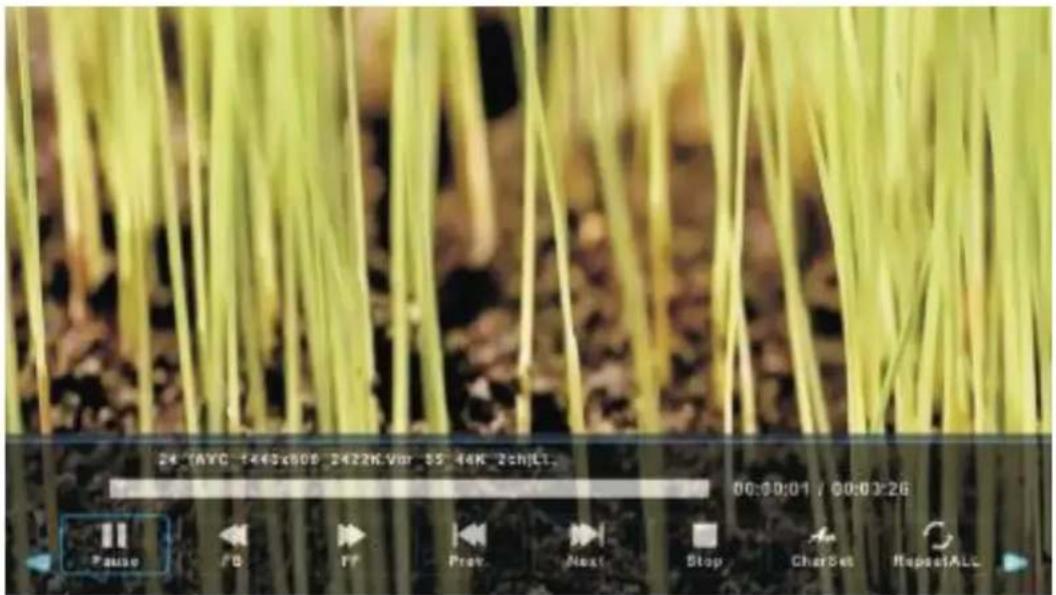
Film Menu
Druk op de a en d knoppen om Film te selecteren in het hoofdmenu van Media, druk daarna op Enter om te openen.
Druk op Exit om terug te gaan naar het vorige menu en om het menu te verlaten.

text_image
USB 2.0 PHOTO MUSIC MOVIE TEXTDruk op de a en d knoppen om de diskdrive te selecteren die u wilt bekijken. Druk daarna op de Enter knop om te openen.
Druk op de media knop om de film te bekijken.
Druk op de Display knop voor de weergave van het menu onderaan in beeld, druk op Enter om te bedienen.
Druk op Exit om terug te gaan naar het vorige menu en om het menu te verlaten.
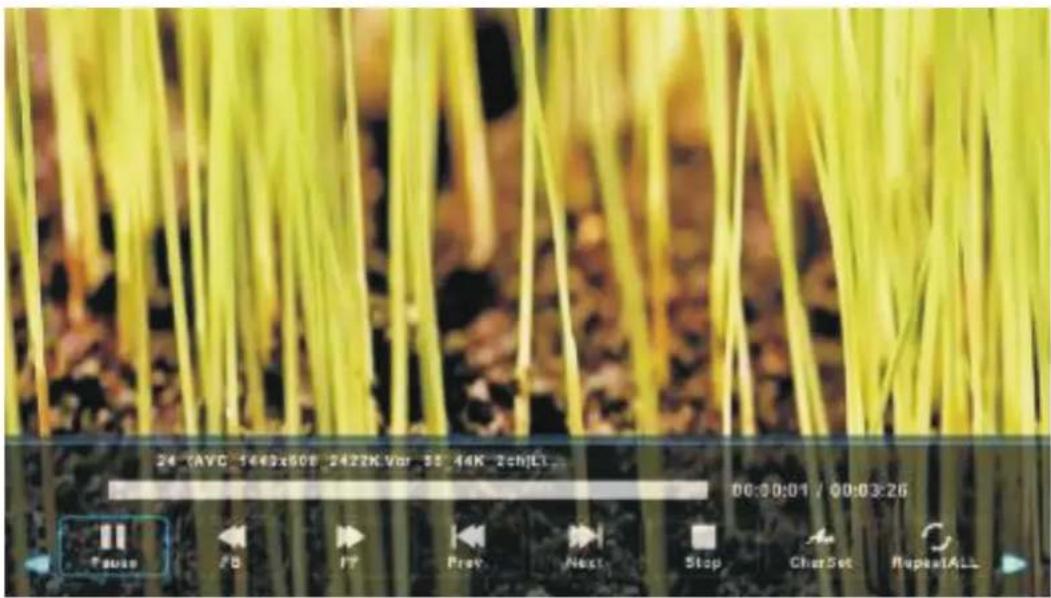
text_image
24 (AYC 1443x508 2422K.Vor 55 44K 2ch)Lt 00:00:01 / 00:03:26 Pause /B PP Prev Next Stop CharSet RepeatALLMedia Bediening
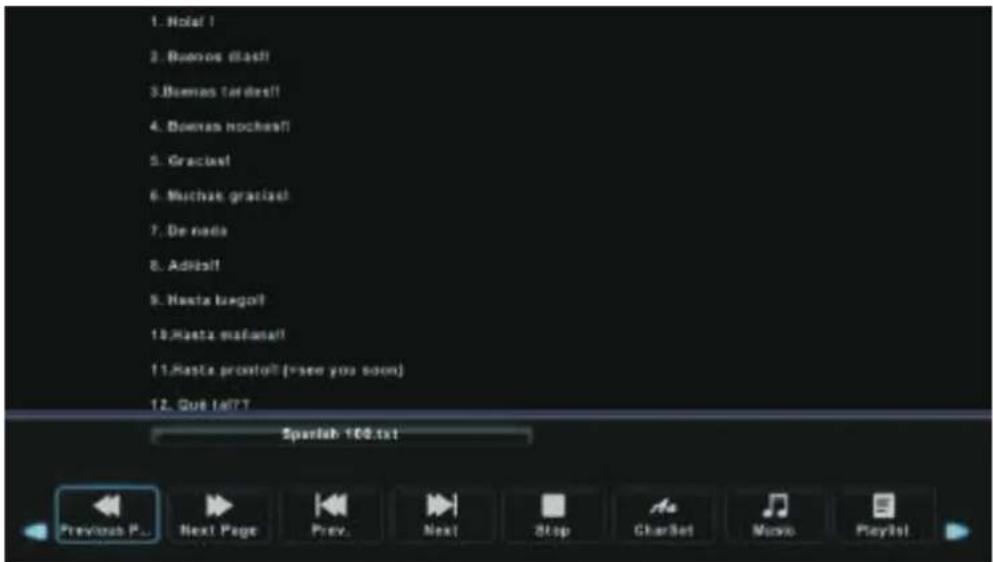
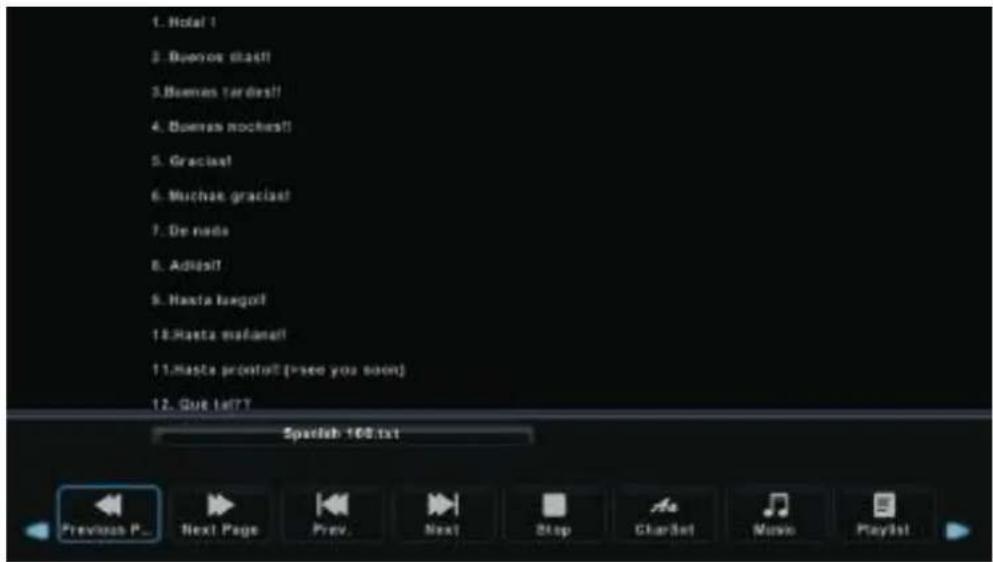
Tekst menu
Druk op de a en d knoppen om Tekst te selecteren in het hoofdmenu van Media, druk daarna op Enter om te openen.
Druk op Exit om terug te gaan naar het vorige menu en om het menu te verlaten.
text_image
USB 2.0 PHOTO MUSIC MOVIE TEXTDruk op de a en d knoppen om de diskdrive te selecteren die u wilt bekijken. D ruk daarna op de Enter knop om te openen.
Druk op de a en d knoppen om terug te gaan naar het vorige menu.
text_image
1. Notal ! 2. Buenos flash! 3. Buenos tardest! 4. Buenos hockes!! 5. Gracia! 6. Muchas gracias! 7. De nada 8. Adiess! 9. Hasta bagot! 10. Hasta maiaana! 11. Hasta pronto! (see you soon) 12. Gus IATT Spanish 100.txt Previous P... Next Page Prev. Next Stop CharSet Movie PlaylistProblemen Oplossen
| Geen Stroom | Controleer of de elektriciteitskabel van de Tv is aangesloten. Indien er nog steeds geen stroom is, haalt u de stekker uit het stopcontact en stopt deze na 60 seconden er weer in. Zet de TV opnieuw aan. |
| Slecht signaalontvangst | Dubbel beeld of "spookbeelden" kunnen zichtbaar zijn indien er zich hoge gebouwen of bergen in de omgeving bevinden. U kunt het beeld handmatig aanpassen: wijzig de richting van de externe antenne.Indien u een huisantenne gebruikt, kan de ontvangst onder sommige omstandigheden lastig zijn. Pas de positie van de antenne aan voor een optimale ontvangst, misschien dient u over te stappen naar een externe antenne. |
| Geen beeld | Controleer of de antenne aan de achterkant van de TV goed is aangesloten.Kijk of het probleem zich ook voordoet bij andere kanalen. |
| Wel beeld, geen geluid | Probeer het volume te verhogen.Controleer of de Mute functie niet aan staat. |
| Wel geluid, geen of slecht beeld | Probeer het contrast of de helderheid aan te passen. |
| Statisch geluid beïnvloedt beeld en geluid kwaliteit | Controleer of de antenne aan de achterkant van de TV goed is aangesloten. |
| Strepen over het beeld | Elektrische apparaten zoals een haardroger of stofzuiger kunnen het beeld van de TV storen. Zet deze apparaten uit. |
| Afstandsbediening werkt niet | Controleer of de plastic verpakking van de afstandsbediening af is.Probeer de afstand tussen de afstandsbediening en TV te verkleinen.Controleer of de batterijen goed zijn geplaatst, vernieuw evt. de batterijen.De TV gaat automatisch op Stand-by nadat deze gedurende een periode niet wordt gebruikt. |
| Geen Video (PC modus) | Controleer of de VGA kabel goed is aangesloten op de poorten of de kabel niet is geknakt. |
| Verticale flikkerende lijnen (PC Modus) | Ga naar het Hoofdmenu en pas de V-Positie aan in het Beeldscherm menu. |
| Horizontale flikkerende lijnen (PC Modus) | Ga naar het Hoofdmenu en pas de H-Positie aan in het Beeldscherm menu. |
| Scherm is te licht/donker | Pas de helderheid of contrast aan in het Beeld menu. |
| Geen signaal van de PC | Controleer of de resolutie van het beeldscherm compatible is met die van de TV. |
| Lijnen verschijnen zodra een apparaat is aangesloten op de RCA poort | Controleer of de kabel die u gebruikt van goede kwaliteit is. |
| Probleem niet opgelost | Haal de stekker uit het stopcontact, wacht 30 seconden en doe deze opnieuw in het stopcontact. Indien het probleem blijft bestaan, neemt u contact op met het Service Center en probeer niet zelf de TT te repareren. |
Laat uw TV niet aan staan met een statisch beeld, zoals een gepauzeerde film, weergave van een menu, enz. gedurende een langere periode. Dit kan inbranden van het beeld op het scherm veroorzaken en blijvend beschadigen.
Specifications
| Afmeting Scherm | Energieverbruik | Accessoires |
| 16" | 24W | Handleiding x1Afstandsbediening x1Netsnoer x1AAA Batterijen x2 |
| 19" | 36W | |
| 22" | 36W | |
| 24" | 36W | |
| 28" | 36W | |
| 32" | 56W/65W/100W | |
| 39"/40" | 60W/70W/76W | |
| 42" | 67W/70W/95W/100W | |
| 43" | 65W/80W | |
| 50" | 100W/108W/135W | |
| 55" | 100W/135W/140W/160W | |
| 65" | 159W/165W/195W |

Levensduur 60.000 uren
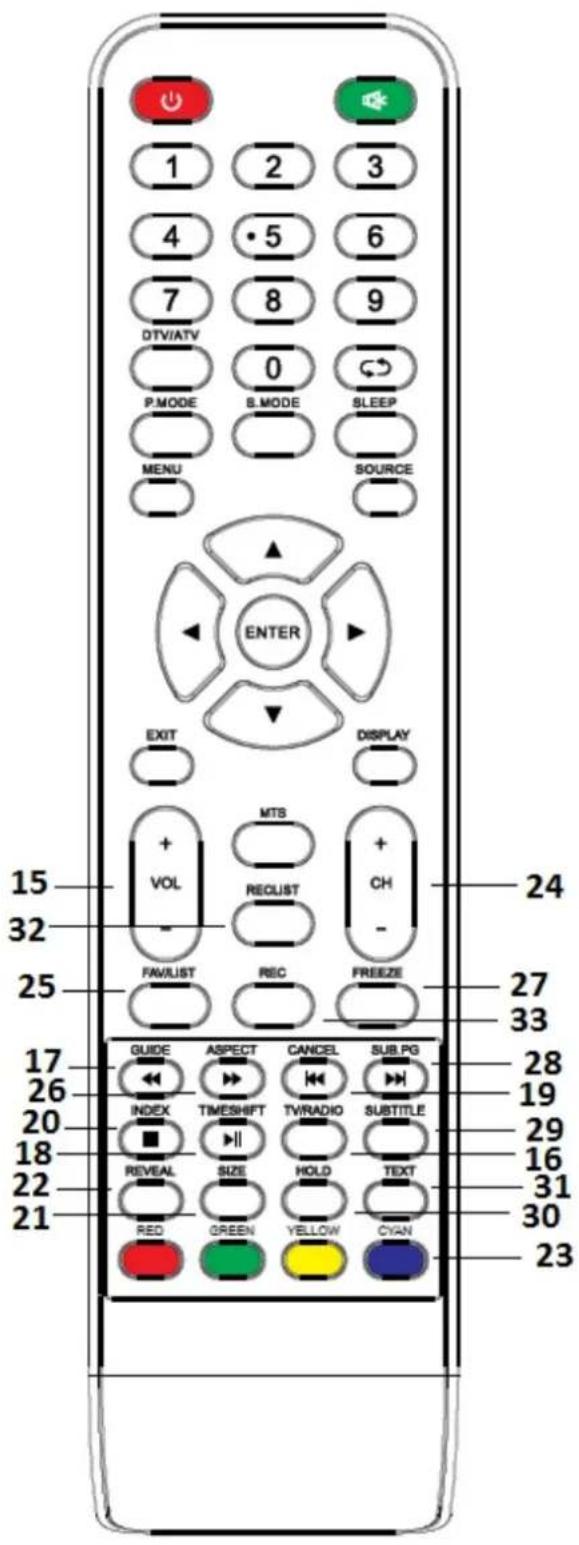
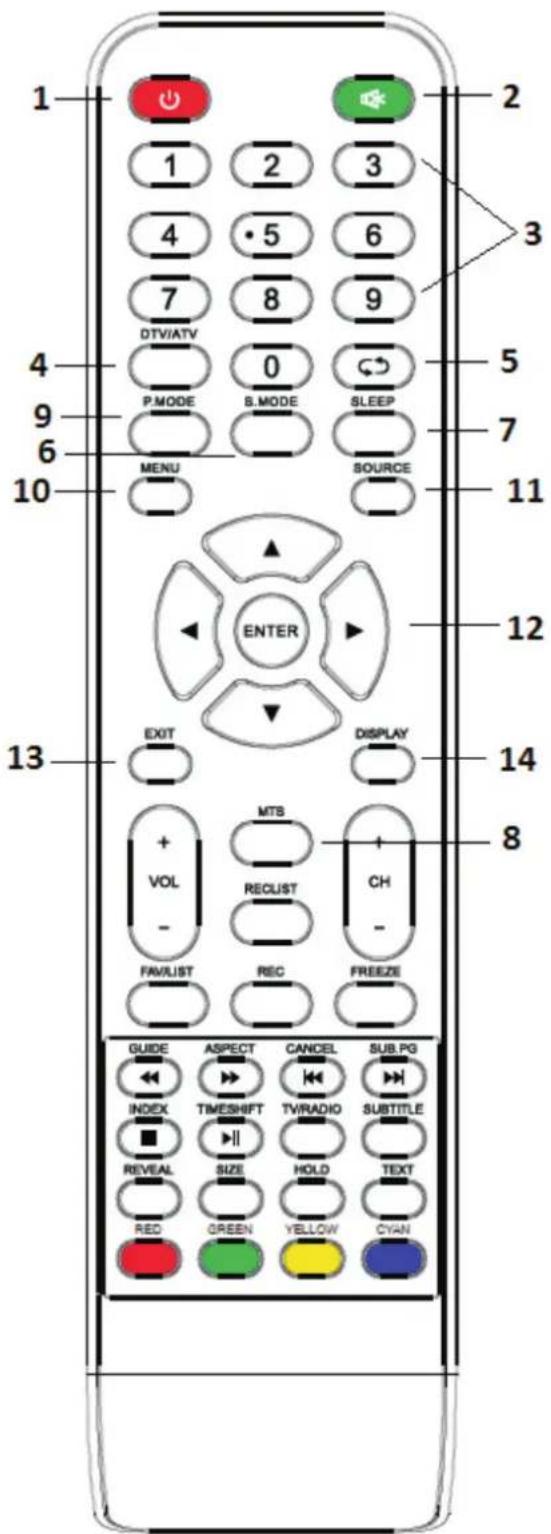
Afstandsbediening
-
POWER: Aan/Uit Standby modus
-
MUTE: Geluid onderdrukken, druk nogmaals om geluid te herstellen
- 0-9: Direct kanaal kiezen. Het kanaal verandert na ± 2 seconden. Invoeren pagina nummer van Teletekst
- DTV/ATV: Kiezen tussen Analoge en Digitale TV
- * : Terug naar het laatst bekeken programma
- S.MODE: Scrollen in de Geluid instellingen
- SLEEP: Instellen van tijd waarop de TV automatisch uitschakelt
- MTS: zoeken in verschillende NICAM modi
- P.MODE: Scrollen in de Beeld instellingen
- MENU: Navigeren in de weergegeven menu's
- SOURCE: opent het hoofdmenu en geeft de verschillende ingangsbronnen weer
- w s a d ENTER: navigeren in de weergegeven menu's en het aanpassen van uw instellingen naar eigen keuze
- EXIT: verlaten van het menu of sub-menu of annuleren van de instelling waar u mee bezig bent (indien van toepassing)
- DISPLAY: weergave van de ingangsbron en kanaal informatie
text_image
1 2 3 4 5 6 7 8 9 DTV/ATV 0 P.MODE B.MODE SLEEP 5 7 MENU SOURCE 10 11 12 13 EXIT DISPLAY 14 MTS + VOL - RECLUST + CH - FAVLIST REC FREEZE 8 GUIDE ASPECT CANCEL SUB.PG INDEX TIMESHIFT TV/RADIO SUBTITLE REVEAL SIZE HOLD TEXT RED GREEN YELLOW CYANInstallatie Batterijen:
Verwijder het klepje aan de achterkant van de afstandsbediening door deze naar beneden te schuiven. Plaats twee AAA batterijen overeenkomstig de in het vakje aangegeven polen (+/-). Gebruik geen oude en nieuwe batterijen tegelijk of verschillende type batterijen. Doe het klepje weer op het compartiment tot u een klik hoort.
Gebruik van de afstandsbediening:
Tenzij anders aangegeven, kunnen alle functies van de TV door de afstandsbediening worden bediend. Richt de afstandsbediening altijd direct op de sensor aan de voorkant van de TV.
- VOL+/VOL-: Volume verhogen/verlagen
- TV/RADIO: Schakel tijdens het kijken tussen TV en radio
- GUIDE: 1. Activeert de EPG (Electronic Program Guide) 2. Versneld achteruit in PVR of Media Speler modus
- TIME SHIFT: 1. DTV kanaal time shift functie
- Afspelen in PVR of Media Speler modus
- CANCEL: 1. Indien u een TT pagina oproept kan dat even duren, druk op deze knop en in de tussentijd kunt u naar de TV kijken. Zodra de pagina is gevonden verschijnt bovenin het beeld de pagina, druk nogmaals op CANCEL en u gaat terug naar de TT pagina. 2. Vorig hoofdstuk in PVR of Media Speler modus.
- INDEX: 1. Weergave Index Teletekst 2. Afspelen functie verlaten in PVR of Media Speler modus
- SIZE: Verander de afmeting van het beeldscherm in Teletekst modus
- REVEAL: Tonen of verbergen van verborgen woorden
- Gekleurde Knoppen: Kleuren corresponderen met TT items of de MHEG-5 in DVB menu
- CH+/CH-: zoeken naar kanalen
- FAV/LIST: open uw favorieten lijst en selecteer uw keuze
- ASPECT: 1. Selecteer beeldverhouding scherm
- Versneld vooruit in PVR of Media Speler modus
- FREEZE: Beeld vastzetten
- SUB.PG: 1.sub pagina openen 2. Volgend hoofdstuk in PVR of Media Speler modus
- SUBTITLE: weergave en instelling van DTV ondertiteling taal
- HOLD: Ver- ontgrendelen pagina
- TEXT: Teletekst AAN/UIT zetten
- RECLIST: weergave opname lijst
- REC: Opname starten in PVR modus

text_image
1 2 3 4 5 6 7 8 9 DTV/ATV 0 P.MODE S.MODE SLEEP MENU SOURCE ENTER EXIT DISPLAY + VOL MTS + RECLUST CH - FAV/LIST REC FREEZE GUIDE ASPECT CANCEL SUB.PG INDEX TIMESHIFT TV/RADIO SUBTITLE REVEAL SIZE HOLD TEXT RED GREEN YELLOW CYAN 24 27 33 28 19 29 16 31 30 23SALORA
32" HD LED TV
USER MANUAL
MODEL NO.:32LTC2100

text_image
IMPORT Please i and ope Keep thIMPORTANT
Please read this manual carefully before installing and operating the TV.
Keep this manual handy for further reference
Index
Preparations Guide
Safety Information 2
Important Safety Precautions 3
Installation and Connection of the TV
TV Mount 4
TV Buttons and Interface 5
External Device connection Diagram 6
TV Installation and connection 7
Installation Instructions TV Stand 7
TV Menu
First Time Installation 8
Channel Menu 10
Picture Menu 15
Sound Menu 17
Time Menu 18
Lock Menu 20
Hotel Mode 22
Setup Menu 23
PC Menu
Screen Menu 26
Media Menu
Media Operation 27
Photo Menu 28
Music Menu 29
Movie Menu 30
Text Menu 31
Other Information
Help 32
Specifications 33
Remote Control 34
CAUTION
RISK OF ELECTRIC SHOCK DO NOT OPEN
High voltages are used during the operation of this device. To reduce the risk of an electric shock, do not remove or open the cabinet, please refer to qualified personnel for servicing.
Opening or modifying the TV could lead to personal damage, caused by an electric shock, do not attempt to open the cabinet, contact the customer service for assistance.

natural_image
Warning symbol: black exclamation mark inside a triangle (no text or numbers)
natural_image
Warning symbol of a lightning bolt inside a triangle (no text or numbers)The exclamation point within an equilateral triangle is intended to alert the user to the presence of important operating information in the enclosed manual of the appliance.
Warning The lightning flash with arrowhead symbol within an equilateral triangle, is intended to alert the user to the presence of uninsulated dangerous voltage within the products enclosure that may be of sufficient magnitude to constitute a risk of electric shock to persons.
Important Safety Precautions
- Read these instructions.
- Keep these instructions.
- Heed all warnings.
-
Follow all instructions.
-
Do not use this apparatus near water.
-
Clean only with dry cloth.
-
Do not block any ventilation openings. Install in accordance with the manufacturer's instructions.
-
Do not install near any heat sources such as radiators, heat registers, stoves, or other apparatus (including amplifiers) that produce heat.
-
Do not defeat the safety purpose of the polarized or grounding-type plug. A polarized plug has two blades with one wider than the other. A grounding type plug has two blades and a third grounding prong. The wide blade or the third prong are provided for your safety, If the provided plug does not fit into your outlet, consult an electrician for replacement of the obsolete outlet.
-
Protect the power cord from being walked on or pinched particularly at Plugs, convenience receptacles, and the point where they exit from the apparatus.
-
Only use attachments /accessories specified by the manufacturer.
-
Use only with the cart, stand, tripod, bracket, or table specified by the manufacturer, or sold with the apparatus. When a cart is used caution when moving the cart/apparatus combination to avoid injury tip-over.
-
Unplug this apparatus during lightning storms or when unused for long periods of time. Caution:
-
To reduce the risk of fire or electric shock, do not expose this apparatus to rain or moisture.
-
The mains plug is used as disconnect device, the disconnect device shall remain readily operable.
-
The socket-out shall be installed near the equipment and shall be easily accessible.
-
This product should never be placed in a built-in installation such as a bookcase or rack unless proper ventilation is provided or the manufacturer's instructions have been adhered to.
-
The apparatus shall not be exposed to dripping or splashing and that no objects filled with liquid, such as vases, shall be placed on the apparatus.
-
Do not place any sources of danger on the apparatus (e.g. liquid filled objects, lighted candles).
-
Wall or Ceiling Mount - The appliance should be mounted to a wall or ceiling only as recommended by the manufacturer.

-
Never place the TV, remote control or batteries near naked flames or other heat sources, including direct sunlight. To prevent the spread of fire, keep candles or other flames away from the TV, remote control and batteries at all times.
-
The USB terminal should be loaded with 0.5 A under normal operation. These servicing instructions are for use by qualified service personnel only. To reduce the risk of electric shock do not perform any servicing other than that contained in the operating instructions, unless you are qualified to do so.
-
The battery shall not be exposed to excessive heat such as sunshine, fire or the like.
-
☐ This equipment is a Class II or double insulated electrical appliance. It has been designed in such a way that it does not require a safety connection to electrical earth
-
The maximum using environment temperature is 45 degrees. The Maximum using altitude is 2000 meters.

Fixing the TV on the wall
- Place a soft cloth on a table to avoid scratching the screen, then gently place the TV on the table.
- Remove the screws which are fixed on the bottom of the stand (Photo 1) by using a screwdriver. Take of the bottom stands and screws carefully.
- Choose a VESA standard TV mount that fits the dimensions of the TV.
- Fix the side brackets to the TV and the main wall bracket on the wall, following the instructions of the TV mount you've bought. (Photo 2 and 3).
- Fix the TV to the wall mount.
natural_image
Top-down schematic of a computer room layout with monitor, keyboard, and wall (no text or labels)1
natural_image
Top-down schematic of a room layout with furniture and fixtures (no text or labels)2
text_image
Wall3
text_image
Bracket Wall Cement bolt 4Note:
- The wall mount is not included and optional.
- Please take care there are no objects around the TV when you fix the wall mount. Remove any items away from the TV.
- You could hire a professional technician to install the wall mount.
- The picture shown is only for reference.
- Please follow the instructions in the manual of the mount bracket.
- Always use a VESA compliant wall mount.
TV Buttons and Interface
TV Buttons
Note: The following table provides indicative information. The actual position and arrangement may vary per model.
VOL+
VOL -
CH+
CH-
MENU
SOURCE

q : Turn ON/OFF Power.
SOURCE: External Signal Input Selection.
MENU: Display Main MENU And Confirm MENU Item Selection.
CH+/-: Selecting Channel.
VOL+/-: Adjusting Volume.
Interface
Note: The following table provides indicative information about the interface. The actual position and arrangement may vary per model.
 | AV inputExternal AV Signal Input And Relevant Right/Left Sound Channel |  | VGA inputPC Analog signal input |
 | CI SLOTThe card reader input CI (common interface) this requires CAM (conditional access module) used for pay TV. |  | PC Audio InputPC audio input with VGA connection |
 | COAXIALConnect the SPDIF receiver. |  | EARPHONE outputWhen earphones are plugged in, speakers are disabled |
 | HDMI inputDigital signal input from HDMI video connector. |  | USB inputConnect a USB device here to play its media files or to record programs via the PVR function. |
| ANT 75Connect the antennal/cable TV input (75/VHF/UHF) |
External Device Connection Diagram
flowchart
graph TD
    A[" DVD "] --> C[" HDMI "]
    B[" Set-top boxes "] --> C[" HDMI "]
    C --> D[" HDMI input connection "]
    D --> E[" Down arrow "]

text_image
INPUT VIDEO L RAV input connection
text_image
INPUT Y Pb Pr INPUT VIDEO L RY Pb Pr input conenction

text_image
VGA PC AUDIO INPUTVGA input connection
natural_image
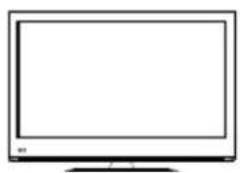
Line drawing of a flat-screen monitor with blank screen (no text or symbols)AV input connection
text_image
OUTPUT VIDEO L RAV output connection
text_image
USB connection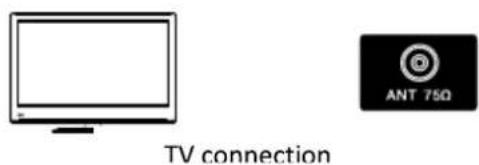
text_image
TV connection ANT 75Ω
natural_image
Pure electrical connector diagram without any text or symbolsRJ45 connection
Installation and Connection TV
text_image
10cm 10cm 10cmConnecting the antenna and power supply
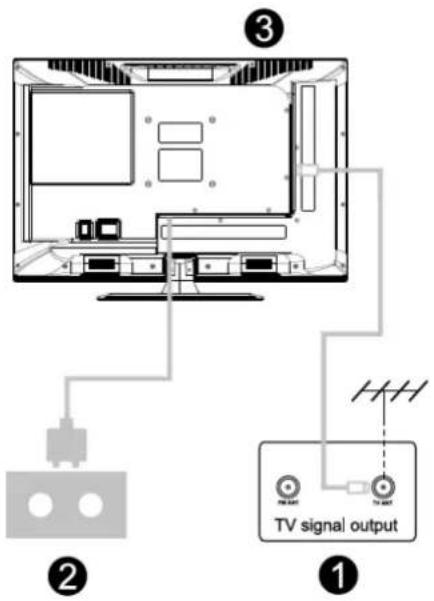
- Connect the antenna cable to the antenna socket on the back of the TV.
- Plug the power cord of the TV (AC 100 - 240V\~50/60 Hz) into the wall socket.
Turn on the TV
- Press the power button of the TV, the indication light will turn green. If the indication light is red, the TV is in standby mode. Press the power button of the remote control to turn on the TV.
Note:
The picture shown is for reference purposes only.
Installation of the TV
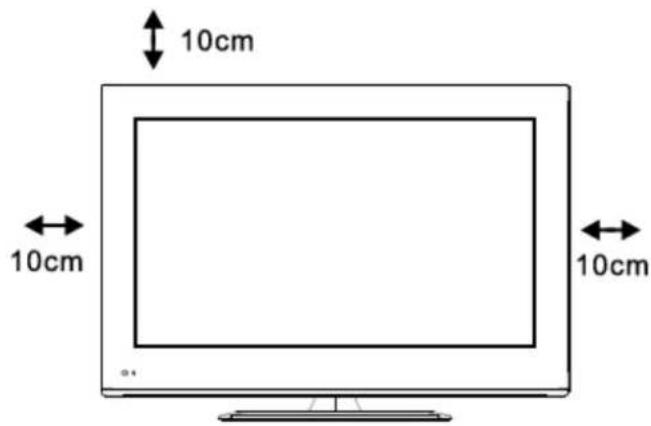
Place the TV on a flat and level surface, which can bear the weight of the device. To avoid any danger, please do not expose the TV to water or heat (such as direct sunlight, candles, heating devices, etc.). Do not block the ventilation openings at the back of the TV. Leave at least a 10cm space around the TV set.
text_image
TV signal output ① ② ③Installation Instructions TV Stand
- Open the box and remove the TV, the base and additional accessories (some models come without the base).
- In order to avoid damage to your TV set, place the TV on a soft surface, like a soft cloth, mattress, etc. The base can be fixed to the TV with screws.
- Tighten the screws and fix it to the TV.
- The installation is complete.
natural_image
Technical line drawing of a flat-screen monitor with ventilation grilles and indicator lights (no text or symbols)First Time Installation
Connect an RF cable from the TV's input "RF-in" to your TV Aerial socket.
Select Language
Press the a / d button to select the language for the display of the menu's and messages.
Select Country
Press the w / s button to highlight the country menu.
Press the a / d button to select the country of your choice.
text_image
First Time Installation Language English Country Saudi_Arabia Environment Home Mode ENTER Auto Tuning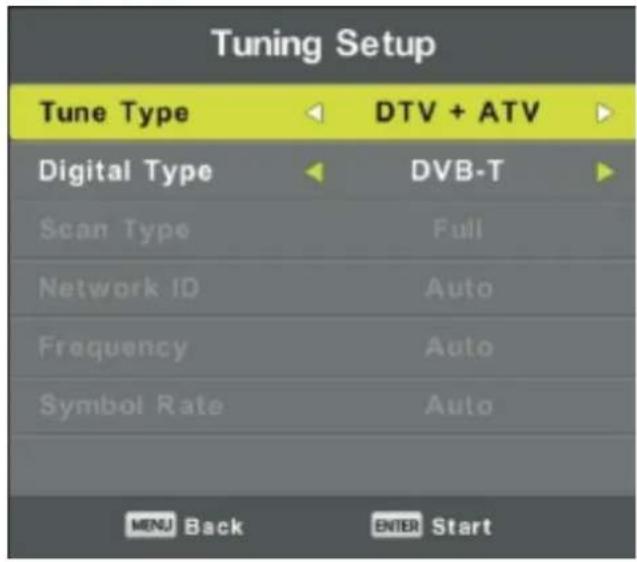
text_image
Tuning Setup Tune Type DTV + ATV Digital Type DVB-T Scan Type Full Network ID Auto Frequency Auto Symbol Rate Auto MENU Back ENTER StartFirst Time Installation
Auto Tuning
Automatic Tuning of ATV and DTV. If you would like to skip the auto-tuning, press the MENU button first, and then the left arrow button to confirm.
text_image
Channel Tuning TV : 0 Programme DTV : 0 Programme Radio : 0 Programme Data : 0 Programme 0 % 46.25 MHz (TV) Please press MENU key to skip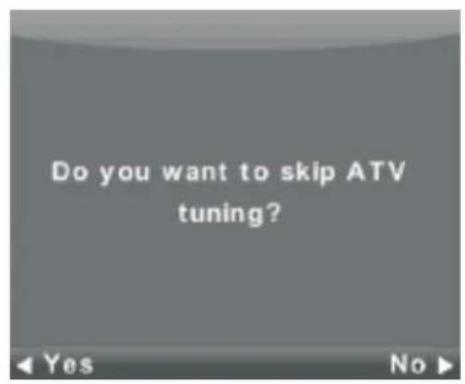
text_image
Do you want to skip ATV tuning?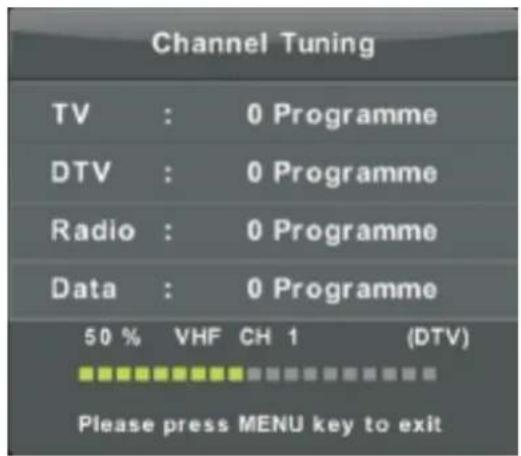
text_image
Channel Tuning TV : 0 Programme DTV : 0 Programme Radio : 0 Programme Data : 0 Programme 50 % VHF CH 1 (DTV) Please press MENU key to exit
text_image
Do you want to exit tuning?Channel Menu
Press the MENU button to display the main menu.
Press the a / d button to select CHANNEL in the main menu.
text_image
Auto Tuning ATV Manual Tuning DTV Manual Tuning Programma Edit Schedule List Signal Information CI Information- Press w / s button to select the option that you wish to adjust in the CHANNEL menu.
- Press ENTER to adjust.
- After finishing the adjustment, press Enter to confirm and save and return to the previous menu.
Auto tuning
Press the w / s button to select Auto Tuning, then press Enter to enter.
text_image
Tuning Setup Country Germany Tune Type DTV + ATV Digital Type DVB-T Scan Type Full Network ID Auto Frequency Auto Symbol Rate Auto ENTER Start MENU Back
text_image
Channel Tuning TV : 0 Programme DTV : 0 Programme Radio : 0 Programme Data : 0 Programme 0 % 43.25 MHz (TV) Please press MENU key to skip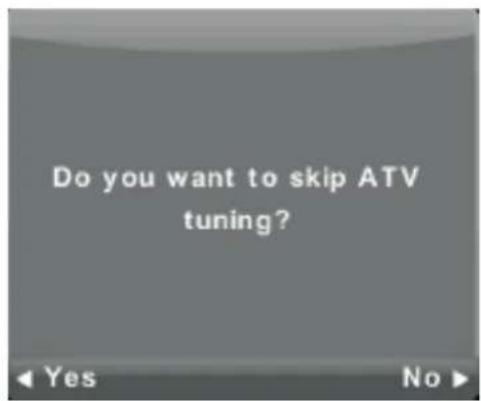
text_image
Do you want to skip ATV tuning?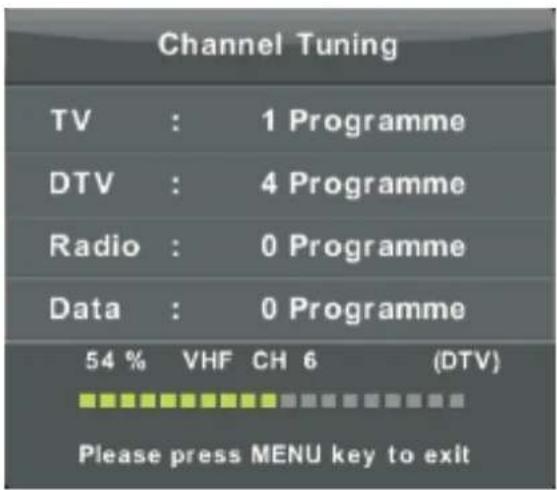
text_image
Channel Tuning TV : 1 Programme DTV : 4 Programme Radio : 0 Programme Data : 0 Programme 54 % VHF CH 6 (DTV) Please press MENU key to exit
text_image
Do you want to exit tuning?ATV Manual Tuning
text_image
ATV Manual Tuning Current CH 3 Color System Auto Sound System DK Fine-Tune Search Frequency Unregistered Move MDU Back exit Exit| Current CH | Set the channel number |
| Color System | Select the color system (AUTO, PAL, SECAM) |
| Sound System | Select the sound system |
| Fine-tune | Fine-tune the frequency of the channel |
| Search | Start searching the channel |
Main Menu Operation
DTV Manual Tuning
Press the w / s button to select DTV Manual Tuning, then press the Enter button to enter the sub-menu.
Press the a / d button to select channel, then press the Enter button to search the program.
text_image
DTV Manual Tuning VHF CH 5 NO SIGNAL Bad Freq: 177.50MHz GoodProgram Edit
Press the w / s button to select Program Edit, then press the Enter button to enter the submenu.
text_image
Programme Edit 1 ONE HD 2 TEN Digital 3 ONE HD 4 ONE Digital Delete Move Skip Select 1/1 Fav Back
The three colored keys are the shortcut keys for programming the channels.
First press the w / s button to highlight the channel you want to select, then:
Press the Red button to delete the program in the list.
Pres the Yellow button to move the channel in the favourite list.
Press the blue button to skip the selected channel.
Press the Fav. button to add or remove the channel to/from your favourite list.
(Your TV set will skip the channel automatically when you use the CH+/- button to view the channels)
Schedule List
Press the w / s button to select Schedule List, then press the Enter button to enter the submenu (if the actual
text_image
Schedule List 1/1 Programme Title Date 1 ONE NO Manual Timer Set 11:47-12:17 Move Add Exit Exitavailable in source).
Press the YELLOW button to enter the interface below
If the scheduled recording time doesn't correspond, it will display a warning message
text_image
Schedule Setup 1 ONE HD Type Recorder Mode Once Start Time 11:47 05 Nov End Time 12:17 05 Nov OK Select AND Back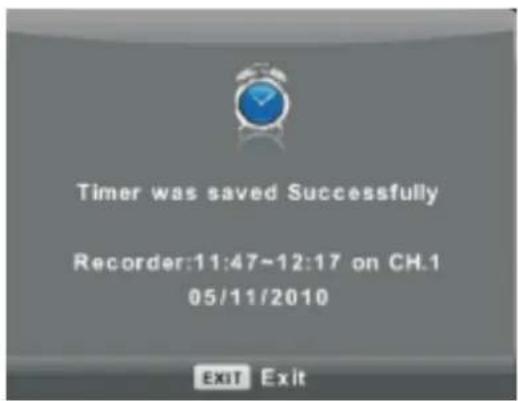
text_image
Timer was saved Successfully Recorder:11:47-12:17 on CH.1 05/11/2010 EXIT ExitSignal Information
Press the w / s button to select Signal Information, then press the Enter button to see the detailed signal information. Only available with a DTV signal.

text_image
Signal Information Channel: 5 (177.50MHz) Network ... Modulation Unknown Quality 100 (Good) Strength 0 (Weak)CI Information (TV must support the CI function)
Press the w / s button to select CI Information, then press the Enter button to display the information once you have inserted the CI card.
The channel List in Satellite Source (Needs to support the DVB-S2 function)
text_image
CHANNEL Auto Tuning Programme Edit Schedule List Signal Information CI Information Dish SetupAuto Tuning
Press the w / s button to select Auto Tuning, then press Enter/ d to enter.
text_image
Tuning Setup Country Germany Satellite 01 HOTBIRD 6... Scan Mode Blind Scan Channel Type Free+Scramble Service Type All Go Start MND Back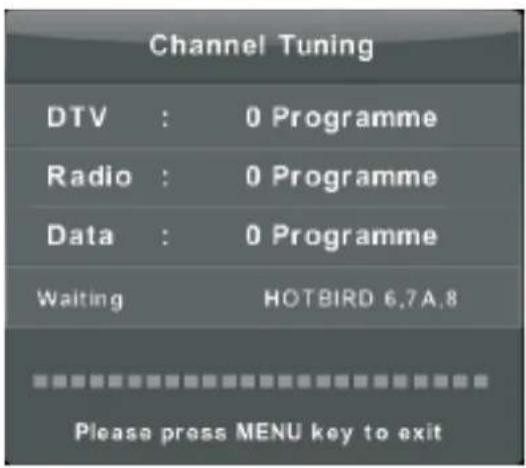
text_image
Channel Tuning DTV : 0 Programme Radio : 0 Programme Data : 0 Programme Waiting HOTBIRD 6.7A.8 Please press MENU key to exitDish Setup
Press the w/s button to select Dish Setup, then press Enter/ d to enter.
text_image
Dish Setup Satellite 001 013.0 E Ku_HOTBIRD 6,7A,8 002 019.2 E Ku_ASTRA 1H,1KR,1L,1M 003 028.2 E Ku_ASTRA 2A,2B,2D 004 023.5 E Ku_ASTRA 1E,1G,3A 005 353.0 W Ku_NILESAT 101,10 006 007.0 E Ku_EUTELSAT W3A 007 $16.0 E Ku_EUTELSAT W1 008 026.0 E Ku_BADR-2,3,4/EURO Ku_HOTBIRD 6,7A,8 LNB Type 09758/10806 LNB Power 13/18V 22KHz Auto Toneburst None DHSEqC1.0 LNB2 DHSEqC1.1 None Motor None Quality EPC TransPointer Out Select Edit Busx Add Delete AddPicture Menu
Press the MENU button to display the main menu.
Press the a / d button to select PICTURE in the main menu.
text_image
Picture Mode Contrast Brightness Colour Tint Sharpness Colour Temp Noise Reduction HDMI Mode Standard SB SB SB Normal Middle AutoNote: 120Hz MODE Function is only supported with an UHD TV
- Press w / s button to select the option that you wish to adjust in the PICTURE menu.
- Press OK to adjust.
- After finishing the adjustment, press Enter to confirm and save and return to the previous menu.
Picture mode
Press w / s button to select Picture Mode, then press the OK button to enter sub-menu. You can personalize the values of contrast, brightness, colour, sharpness and tint when Picture is in Personal mode.
TIP: Press PMODE on the remote control to access the Picture Mode directly.
text_image
Picture Mode Dynamic Standard Mild Personal OK Select Cancel BackContrast/Brightness/Colour/Tint/Sharpness
Press w / s button to select the option, then press OK button to adjust.
Contrast Adjust the highlight intensity of the picture, the shadow of the picture will be invariable.
Brightness Adjust the light output of the entire picture, this will affect the dark region of the picture.
Color Adjust the saturation of the colour based upon you own preference.
Main Menu Operation
Tint
Adjust the image colour density.
Sharpness
Adjust the image edge sharpness.
Colour Temp
text_image
Colour Temp Cold Normal Warm OK Select OK BackAdjust the overall colour of the image.
Press w / s button to select Colour Temp, then press OK to enter sub-menu.
Press a / d to select (Cool/Medium/Warm). Temperature is in User mode.
Cool Produces a gentle blue-hued image.
Normal Produces a vivid image.
Warm Produces a red-hued image.
Noise reduction
text_image
Noise Reduction Off Low Middle High Default OK Select OK BackAdjust the image noise. Press w / s button to select Noise reduction, then press OK to enter sub-menu. (Off/Low/Medium/High).
| Off | Turn off noise reduction |
| Low | Detect and reduce low video noise. |
| Middle | Detect and reduce moderate video noise. |
| High | Detect and reduce enhanced video noise. |
| Default | Set as default. |
120Hz MODE (only with UHD TV)
text_image
120Hz Mode Off Low Middle High OK Select MD BackAdjust the motion compensation.
Higher setting may improve the motion performance when watching sports or images with high motions.
Press a / d to select (Off/Low/Medium/High)
HDMI Mode
text_image
HDMI Mode Auto Video PC OK Select OK BackPress w / s button to select HDMI Mode, then press OK to enter sub-menu.
Press a / d to select (Auto, Video, PC)
Sound Menu
Press the MENU button to display the main menu.
Press the a / d button to select SOUND in the main menu.
text_image
Sound Sound Mode Standard Truffle 50 Base 50 Balance 0 Auto Volumes Level Off SPDIF Mode PCM AD Switch Off- Press w / s button to select the option that you wish to adjust in the SOUND menu.
- Press Enter to adjust.
- After finishing the adjustment, press Enter to confirm and save and return to the previous menu.
Sound Mode
text_image
Sound Mode Standard Music Movie Sports Personal DIN: Select HND: BackPress w / s button to select Sound Mode, then press Enter to enter sub-menu.
Press a / d to select.
You can change the Treble and Bass values when the sound is in Personal mode.
Note: Press SMODE on the remote control to access the Sound Mode directly.
Standard Produces a balanced sound in all environments.
Music Preserves the original sound. Good for musical programs.
Movie Enhances treble and bass for a rich sound experience.
Sports Enhances vocals during sports programs.
User Select to customize sound settings.
Balance
Press w / s to select the option, then press a / d to adjust.
Auto Volume Level
Press w / s to select Auto Volume Level, then press a / d to select On/Off.
SPDIF Mode
Press w / s to select SPDIF Mode, then press a / d to select Off/PCM/Auto.
AD Switch
Press w / s to select AD Switch, then press a / d to select On/Off. Audio Description, a voice guide will describe the display on the screen. Only for the models which support this function.
Note:
Balance: Adjust the left and right channel output balance.
Auto Volume: This option reduces the difference between the volume of different programs automatically.
Time Menu
Press the MENU button to display the main menu.
text_image
Clock Time Zone Sleep Timer Auto Standby GSD Timer Berlin GMT+1 Off 40 15 S Move Return Save Smart OK AskPress the a / d button to select TIME in the main menu.
- Press w / s button to select the option that you wish to adjust in the Time menu.
- Press Enter to adjust.
- After finishing the adjustment, press Enter to confirm and save and return to the previous menu.
Time Zone
Press w / s button to select Time Zone, then press Enter to enter sub-menu.

text_image
Time Zone Canary GMT Rabat GMT Berlin GMT+1 Lisbon GMT Amsterdam GMT+1 Brussels GMT+1 London GMT Beograd GMT+1 Budapest GMT+1 Move ENTER Select MENU BackPress w / s a / d to select the time zone.
Sleep Timer
text_image
Sleep Timer Off 15Min 30Min 45Min 60Min 90Min OK Select MIN BackPress w /s button to select Sleep Timer, then press Enter to enter sub-menu.
Press w / s to select.
(0ff/15min/30min/45min/60min/90min/120min/240min).
Main Menu Operation
Auto Stand-by
text_image
Auto Sleep Timer Off 2H 3H 4H OK Select Help BackPress w /s button to select Auto Standby, then press Enter to enter sub-menu.
Press w / s to select.
The TV will go in Standby mode if the TV is not operated for the set time.
OSD Timer
text_image
OSD Timer 5 S 15 S 30 S OK Select OK BackPress w /s button to select OSD Timer, then press Enter to enter submenu.
Press a / d to select.
Lock Menu
Press the MENU button to display the main menu.
Press the a / d button to select LOCK in the main menu.
text_image
System Lock Set Password Channel Lock Parental Guidance Key Lock Hotel Mode LOCK OFF OFF OFF Move Add Return Cancel Select Exit- Press w / s button to select the option that you wish to adjust in the LOCK SYSTEM menu.
- Press Enter/ a / d to adjust.
- After finishing the adjustment, press Menu to confirm and save and return to the previous menu.
Lock System
text_image
Please enter password Clear CancelPress w /s button to select Lock System, then press Enter to select the password.
The default password is 0000, if you have forgotten your password, contact our customer service.
Set password
text_image
Please enter old password Please enter new password Confirm new password Clear CancelPress w /s button to select Set Password. Then press Enter to enter the sub-menu to set a new password.
Main Menu Operation
Main Menu Operation
Channel Lock
text_image
Channel Lock 1 ONE HD 2 TEN Digital 3 ONE HD 4 ONE Digital LOCK Select 1/1 BackPress w /s button to select Channel Lock. Then press Enter to enter the sub-menu to select.
Press the Green button to lock or unlock the channel.
Parental Guidance
text_image
Parental Guidance Off 3 4 5 6 7 OK Select MNG BackPress w /s button to select Parental Guidance. Then press Enter to enter the sub-menu to select the age suitable for your children.
Key Lock
Press w / s to select Key Lock, then press a / d to select On/Off.
When you have activated the key lock function, it is not possible to use the key panel buttons.
Hotel Mode (If supported by your TV model)

text_image
Hotel Mode On Source Lock Default Source Off Default Prog 1 Default Volume Off Max Volume 100 Import Database Export Database Clear Lock- Press w / s button on the remote control to select Hotel Mode in the LOCK menu.
- Press Enter on the remote control to enter the sub-menu.
- After finishing the adjustment, press Menu to confirm and save and return to the previous menu.
Hotel Mode
Press w / s to select Hotel Mode, then press a / d to select On/Off.
Source Lock
Press w / s to select Source Lock, then press Enter to enter the sub-menu to select.
Default Source
Press w / s to select Default Source, then press Enter to enter the sub-menu to select.
Default Prog
Press w / s to select Default Prog, then press a / d to adjust. This function is only available when the default source is TV.
Max Volume
Press w / s to select Max Volume, then press a / d to adjust.
Clear Lock
Press w / s to select Clear Lock, then press Enter to delete all the Lock setting you have set.
Setup Menu
Press the MENU button to display the main menu.
Press the a / d button to select SETUP in the main menu.
text_image
Language TT Language Audio Languages Subtitle Language Hearing Impaired PVR File System Aspect Ratio Blue Screen First Time Installation Reset Software Update (USB) HOME CEC English West Deutsch Deutsch Off 16.9 Off Save Finish Select Help- Press w / s button to select the option that you wish to adjust in the SETUP menu.
- Press Enter/ a / d to adjust.
- After finishing the adjustment, press Enter to confirm and save and return to the previous menu.
OSD Language
Select the OSD menu language you wish to be displayed. The default OSD menu language is English. Press w / s a / d to select the OSD menu language.
text_image
Language English Deutsch Español Français Italiano Português ENTER Select MENU BackTT Language
Press w / s to select TT Language, then press Enter to enter the sub-menu.
Press w / s a / d to select the TT Language.

text_image
TT Language West East Russian Arabic Farsi Select BackMain Menu Operation
Audio Languages
Press w / s to select Audio Language, then press Enter to enter the sub-menu.
Press a / d to select the Primary Audio Language.
Press w / s a / d to select the Audio Language.
text_image
Audio Languages Primary English Italiano Čeština Français Español Dansk Deutsch Português Ελληνικό Select BackSubtitle Language
Press w / s to select Subtitle Language, then press Enter to enter the sub-menu.
Press a / d to select the Primary Subtitle Language.
Press w / s a / d to select the Subtitle Language.
text_image
Subtitle Language Primary English Italiano Čeština Français Español Dansk Deutsch Português Ελληνικύ Over Select MENU BackHearing Impaired
Press w / s to select Hearing Impaired, then press Enter to select On/Off.
PVR File System
Press w / s to select PVR File System, then press Enter to enter the sub-menu.
Press w/s to select the Check PVR File System, then press Enter to enter and the USB speed will be checked.
text_image
Select Disk C: Check PVR File System Start USB Disk Format Timeshift Size Speed Free Record Limit 6 Hr. Select BackMain Menu Operation
Aspect Ratio
Press w / s to select Aspect Ratio, then press Enter to enter the sub-menu. Press w / s to select Aspect Ratio (Auto, 4:3, 16:9, Zoom1, Zoom2).
text_image
Aspect Ratio Auto 4:3 16:9 Zoom1 Zoom2 ENTER Select MOV BackBlue Screen
Press w / s to select Blue Screen, then press Enter to select On/Off.
First Time Installation
Press w / s to select First Time Installation, then press Enter to enter.
Reset
Press w / s to select Reset, then press Enter to enter the sub-menu.
Software Update (USB)
Press w / s to select Software Update (USB), plug your USB device in the USB slot, then press Enter to start the update.
HDMI CEC (Only models which support HDMI CEC/ARC function)
Press w / s to select HDMI CEC, then press Enter to enter the sub-menu.
text_image
HDMI CEC HDMI CEC On HDMI ARC Off Auto Standby Off Device List MENU BackHDMI CEC Press a / d to turn HDMI CEC On/Off HDMI ARC Press a / d to turn HDMI ARC On/Off Auto Standby Press a / d to turn Auto Standby On/Off Device List Press Enter to open the main menu of the device.
Main Menu Operation
Screen Menu
Press the MENU button to display the main menu.
Press the a / d button to select SCREEN in the main menu.
text_image
Auto Adjust H-Offset 50 V-Offset 50 Size 50 Phase 54 Position Reset SCREEN More and Return press Select Exit- Press the w / s button to select the option that you wish to adjust in the SCREEN menu.
- Press Enter/ a / d to adjust.
- After finishing the adjustment, press Enter to confirm and save and return to the previous menu.
Auto Adjust
Press Enter to start adjusting H-Offset/V-Offset/Size/Phase automatically.
H-Offset
Adjust the horizontal position of the picture
Press the w / s button to select H-Offset, then press the Enter button to enter the sub-menu.
V-Offset
Adjust the vertical position of the picture
Press the w / s button to select V-Offset, then press the Enter button to enter the sub-menu.
Size
Adjust the display size
Press the w / s button to select Size, then press the Enter button to enter the sub-menu.
Phase
Adjust the horizontal interference lines
Press the w / s button to select Phase, then press the Enter button to enter the sub-menu.
Position Reset
Press the w / s button to select Position Reset, then press the Enter button to enter.
Media Operation
Note: Before operating the Media menu, plug in your USB device, press the SOURCE button on the remote control and set it on Media.
text_image
USB 2.0 PHOTO MUSIC MOVE TEXTPress the w / s button to select Media, then press the Enter button to enter.
Press the a /d button to select the option you wish to adjust in the main Media menu, then press Enter to enter.
Media Operation
Media Operation
Photo Menu
Press the w / s button to select PHOTO, then press the Enter button to enter. Press EXIT to return to the previous menu and exit.
text_image
PHOTO C:\picture 1 / 1 Return Resolution: 530 x 376 Size: 132 KBytes Date: 2007/11/23 Time: 15:32:54 1_500x375x24b_szt_pg.jpg Delete Image ExitPress the a /d button to select the file you want to watch in the file selecting menu, then press Media to display the file.
When you highlight the selected option, the file information will appear on the right of the screen and a preview of the picture will appear in the centre.
text_image
30 55 45 46 30 Play 1_500x1+3x2+5_12+3p3p2 Pcnon Prev. Next Stop Repeat Alt Music Playlist Info.Media Operation
Music Menu
Press the w / s button to select MUSIC, then press the Enter button to enter. Press EXIT to return to the previous menu and exit.
text_image
USB 2.5 PHOTO MUSIC MOVE TEXT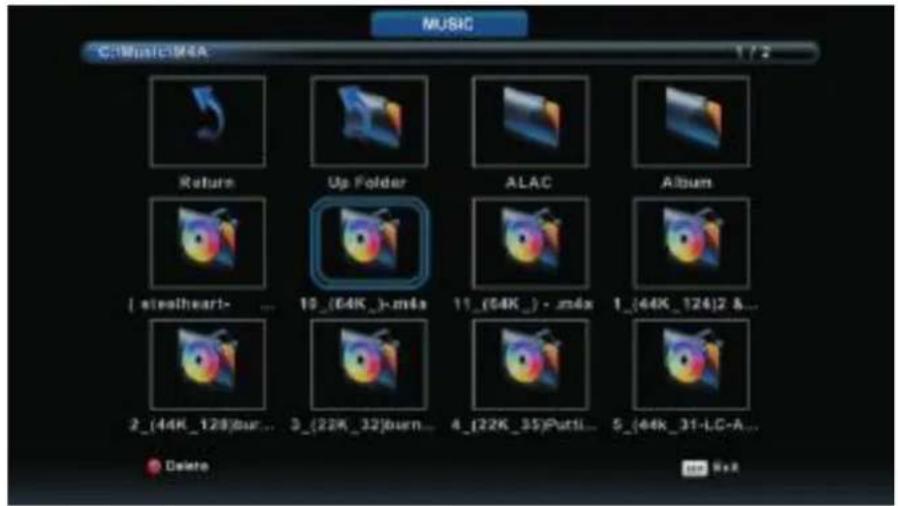
text_image
MUSIC C:\Music\MA 1 / 2 Return Up Folder ALAC Album [ steelheart- ... 10_(64K_) - m4x 11_(64K_) - zm4x 1_(44K_124)2 &... 2_(44K_128)bur... 3_(22K_32)burn... 4_(22K_35)Puttl... 5_(44K_31-LC-A... Delete Edit AddPress the a / d button to select the drive disk you want to watch, then press Enter to enter. Press the a / d button to select the previous/next file.
text_image
Play 10:42K 3 m4s 00:00:00 / 00:02:51 Pause FB FF Prev Next Stop RepeatALL MUTEMedia Operation
Movie Menu
Press the w / s button to select MOVIE, then press the Enter button to enter. Press EXIT to return to the previous menu and exit.
text_image
USB 2.0 PHOTO MUSIC MOVE TEXTPress the a /d button to select the drive disk you want to watch, then press Enter to enter. Press Media to display the selected movie.
Press the display button to display the menu you want to run at the bottom of the screen, then press Enter to operate.
Press EXIT to return to the previous menu and exit.
text_image
24 TAVC 1465x609 3422K.Vor 55 44K 2chLt. 00:00:01 / 00:03:26 Pause F8 FF Prev Next Stop CharSet RepeatALLMedia Operation
Text Menu
Press the w / s button to select TEXT, then press the Enter button to enter. Press EXIT to return to the previous menu and exit.

text_image
USB 2.0 PHOTO MUSIC MOVIE TEXTPress the a / d button to select the drive disk you want to watch, then press Enter to enter. Press the a / d button to return to the previous menu.
text_image
1. Notal! 2. Buenos diast! 3. Buenos terdest! 4. Buenos noches! 5. Gracias! 6. Muchas gracias! 7. De nada 8. Adidas! 9. Hasta taogol! 10. Hasta suflanet! 11. Hasta promul (Psee you soon) 12. Que lai? Spaclab 108.txt Previous P... Next Page Prev. Next Stop ClarSet Music Playlist| No power | Check if the AC power cord of the TV is plugged in. if the power cord is plugged in, remove it and plug it in again after 60 seconds and switch the TV on again. |
| No proper signal reception | Reception of the TV signal may be interfered due to high buildings or mountains in the vicinity. You can try to adjust the reception by tuning manually or change the direction of the outdoor antenna.If you use an indoor antenna, sometimes the reception can be of poor quality. Try to redirect the antenna or use an outdoor antenna instead. |
| No picture | Check if the cable of the antenna at the back of the TV set is plugged in correctlyTry different channels to check if it is a general reception problem or of a specific channel. |
| Video but no audio | Increase the volume.Check if the mute function is activated or not. Press the mute button on the remote control to resume the sound. |
| Audio but color error or no picture | Adjust contrast and brightness of the picture. |
| Display of "snow" and noise | Check if the antenna cable is plugged in correctly. |
| Power line interference | Some electrical devices, such as vacuum cleaners or hair dryers, can cause an interference of the image. Turn off these devices. |
| Poor image qualityTV doesn't respond to remote control | If you use an antenna, you need to reposition it.When using the remote control, direct it towards the sensor on the TV. Make sure the plastic label has been removed from the remote control. Check if the batteries are placed in the remote control correctly. If necessary, change the batteries.The TV will turn into Standby mode if the remote control hasn't been used for some time. |
| No video in PC mode | Check if the VGA cable is plugged in correctly.Check if the VGA cable is not damaged or pinched. |
| Flickering vertical lines in PC mode | Go to the Main Menu and adjust the V-position in the Picture menu |
| Horizontal tearing in PC Mode | Go to the Main Menu and adjust the H-position in the Picture menu |
| Screen too bright or too dark in PC mode | Adjust the contrast ratio or brightness in the main menu. |
| No response PC functions | Check the computer settings and the compatible display resolution. |
| Tearing lines with RCA connection | The cable can be of poor quality, try good quality connecting cables. |
| Problem persists | Unplug the TV set and wait 30 seconds, then reconnect. If the problem persists do not try to repair it yourself, but contact our customer service center. |
Note: When you are not using the TV, turn it off. Do not leave the TV on while displaying a static bright image (photo or teletext page, etc.), as this may burn into the screen permanently. Try to lower the brightness of the screen and turn off the TV when not in use.
Specifications
| Screen Size | power Consumption | Main accessories |
| 16" | 24W | User's manual x1Remote control x1AAA Batteries x2 |
| 19" | 36W | |
| 22" | 36W | |
| 24" | 36W | |
| 28" | 36W | |
| 32" | 56W/65W/100W | |
| 39"/40" | 60W/70W/76W | |
| 42" | 67W/70W/95W/100W | |
| 43" | 65W/80W | |
| 50" | 100W/108W/135W | |
| 55" | 100W/135W/140W/160W | |
| 65" | 159W/165W/195W |
- POWER: Power on or Standby mode
- MUTE: press to mute sound, press again or press VOL+ to unmute
- 0-9: press to select the TV channel you want to watch. The channel will change after 2 seconds. Press to select page number of teletext
- DTV/ATV: switch between analog and digital TV
- * : Return to the previous viewed program
- S.MODE: press to scroll through the different sound settings
- SLEEP: set the time before the TV will turn itself automatically off
- MTS: press to search the NICAM modes
- P.MODE: press to scroll through the different picture settings
- MENU: allows you to navigate the on-screen menus
- SOURCE: opens the main menu and press to view the source list
- w s a d ENTER: allows you to navigate the on-screen menus and adjust the system settings to your preference.
- EXIT: exit from the menus or sub-menus and cancel the function in progress (if applicable)
- DISPLAY: press to display the source and channel's info
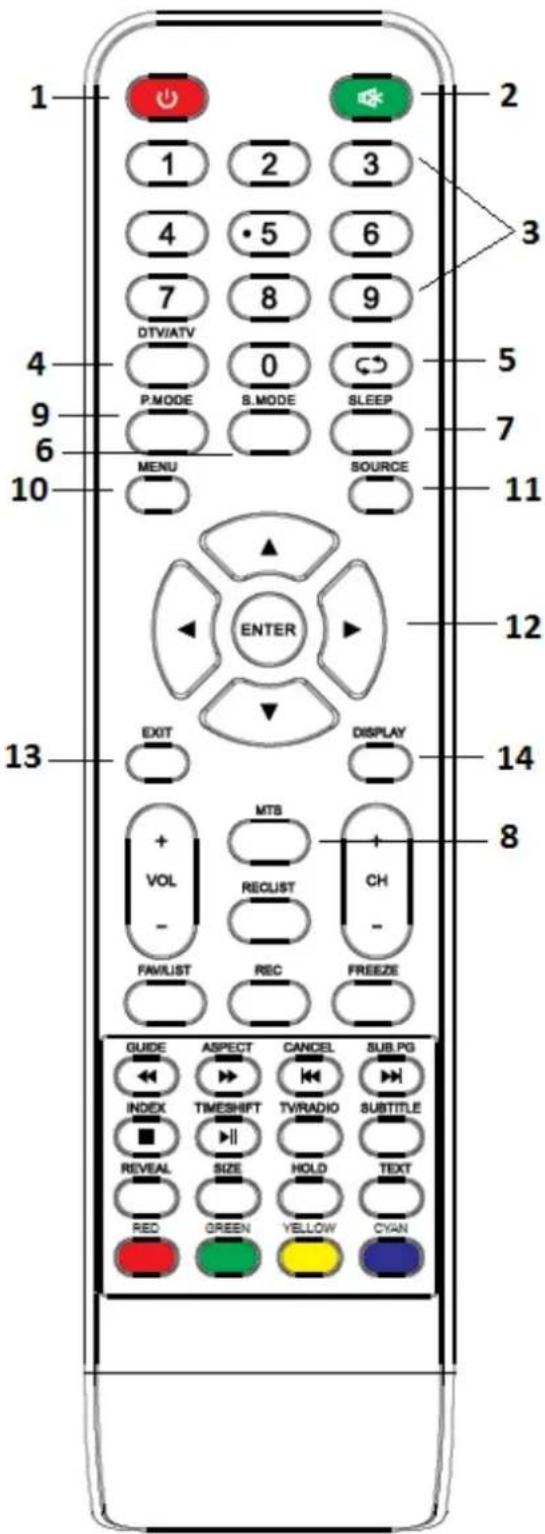
text_image
1 2 3 4 5 6 7 8 9 DTV/ATV 0 P.MODE B.MODE SLEEP 5 7 MENU SOURCE 10 11 ENTER 12 EXIT DISPLAY 13 MTS + VOL - RECLUST CH - FAVLIST REC FREEZE 14 8 GUIDE ASPECT CANCEL SUB.PG INDEX TIMESHIFT TV/RADIO SUBTITLE REVEAL SIZE HOLD TEXT RED GREEN YELLOW CYANBattery Installation:
Remove the battery compartment cover at the rear of the remote control by sliding it downward and take it off. Put the two AAA batteries in the compartment with their + and - ends aligned as indicated. Do not mix old and new batteries or different type of batteries. Place back the cover by sliding it until you hear a click.
Using the remote control:
Unless states otherwise, the remote control can operate all features of the TV. Always point the remote control directly at the sensor at the front of the TV. Don't expose batteries to excessive heat sources.
TV Buttons and Interface
- VOL+/VOL-: press to increase/decrease the sound level
- TV/RADIO: when watching this allows you to switch between radio and TV
- GUIDE: 1. Launches the EPG (Electronic Program Guide) 2. Fast reverse in PVR or Media Player mode
- TIME SHIFT: 1. DTV channel time shift function 2. Playback in PVR or Media Player mode
- CANCEL: 1. When you have selected a teletext page you can press CANCEL and while searching for the page it will return to the TV mode. When the page has been found, it will appear at the top of the screen, press cancel again and you can view the requested page 2. Previous chapter in the PVR and Media Player mode.
- INDEX: 1. Request the index page of Teletext mode 2. Exit the playing function in PVR or Media Player mode
- SIZE: change the size of the screen in Teletext mode
- REVEAL: reveal or hide the hidden words
- COLOR BUTTONS: Colors correspond to the items in Teletext mode and of MHEG-5 in DVB menu
- CH+/CH-: press to search channels
- FAV/LIST: open the favorite list and select favorite channel
- ASPECT: 1. Select aspect ratio of the screen 2. Fast forward in PVR or Media Player mode
- FREEZE: freeze the picture
- SUB.PG: 1.access the sub page 2. Next chapter in PVR or Media Player mode
- SUBTITLE: display and setting of the language of current DTV
- HOLD: activate/deactivate hold of current display
- TEXT: switch Teletext ON/OFF
- RECLIST: show the recorded list
- REC: start recording in PVR mode