
Black Bird 2.0 - Bilkamera Xblitz - Gratis brugsanvisning og manual
Find enhedens vejledning gratis Black Bird 2.0 Xblitz i PDF-format.


Brugerspørgsmål om Black Bird 2.0 Xblitz
0 spørgsmål om dette apparat. Besvar dem du kender, eller stil dit eget.
Stil et nyt spørgsmål om dette apparat
Download vejledningen til din Bilkamera i PDF-format gratis! Find din vejledning Black Bird 2.0 - Xblitz og tag din elektroniske enhed tilbage i hånden. På denne side er alle dokumenter nødvendige for brugen af din enhed offentliggjort. Black Bird 2.0 af mærket Xblitz.
BRUGSANVISNING Black Bird 2.0 Xblitz

USER MANUAL
Xblitz Black Bird 2.0 GPS

natural_image
Black HD 1080P camera with visible lens and control panel (no text or symbols on body)01. PACKAGE DETAILS
natural_image
Black cylindrical object with a lid and labeled 'FULL-NO GROUP' and 'blitz' on its body, placed on a flat surface (no readable text beyond branding)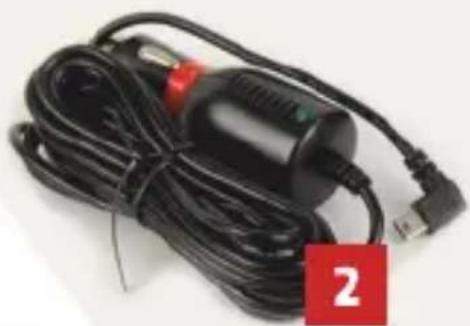
natural_image
Black and white photo of a handheld electronic device with coiled cable and connector (no visible text or symbols)
natural_image
Black rectangular electronic device with coiled cable and gold connector, labeled '6' in red square (no readable text or symbols beyond label)
natural_image
Coiled black cable with two USB connectors, labeled with number 3 (no text or symbols on the cable itself)
natural_image
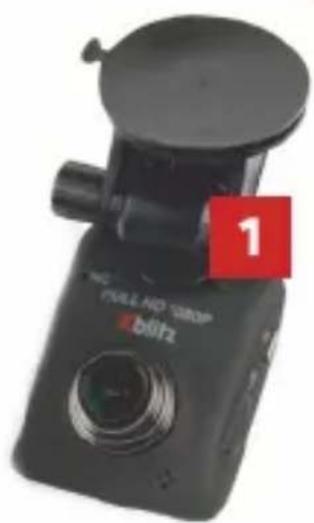
Close-up of a black USB flash drive with a red label showing the number 5 (no text or symbols on the device itself)- Car Recorder + Grip
- Car Charger
- Suction Cup
- User's Manual
- MicroSD card reader
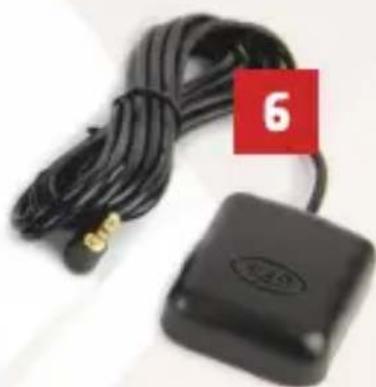
- GPS receiver
Before the first use:
- It is recommended to use high-quality class 10th microSD cards for this device (4 up to 128 GB).
- It is necessary to format the memory card to FAT32 format before inserting it into the recorder.
- Do not remove or insert the memory card while the device is powered on, as this may damage the memory card.
- The battery allows you to record for no more than 5 minutes without external power.
- When the memory card is full, the oldest unprotected video will be overwritten.
- It is recommended to use the device's functions in accordance with their intended purpose. Do not use the MOTION DETECTION or PARKING SURVEILLANCE mode while driving as this may cause automatic turning the device on and off, during a stop at the intersection. It is recommended to set the G - SENSOR sensitivity level at a minimum, in order to avoid securing unnecessary recordings and the loss of space on the memory card. The memory card must be formatted in FAT32 format first on the PC and then on the recorder.
- Sound: the device has a capacitive microphone, recording all the sounds from the environment. The sounds may overlap causing distortion.

When the camera is on, the GPS signal may take several minutes to start working properly. The detection of the satellite signal depends on the location and the surrounding factors, which may cause a delay in signal reception or occasional disappearance.
GPS module: It is recommended to mount it to the windscreen where it is not covered. Visibility of the driver. (Ideally in the upper right corner).
02. INSTALLATION OF THE CAMERA
A. INSTALLATION MANUAL CAMERA

- Select and then clear the place of the camera installation.
- Mount the camera bracket.
- Route the power cord.
- Insert the power adapter into the cigarette lighter socket.
- Insert the memory card into the camera.
- Attach the camera to the bracket.

- Microphone
- POWER Button
- MicroSD card slot
- Speaker
- Button "!"
- LED diode
-
DOWN Button
-
UP Button
- MENU/MODE Button
- OK Button
- Mini USB port (charging)
- GPS port
- Mini HDMI port
To download the route and parameters from the GPS module, download the program from: www.xblitz.pl in the Black Bird 2.0 tab.
03. MENU
A. VIDEO MODE
1. Resolution
Defines the quality of video recordings. The higher the resolution the better the quality of recordings, but such files take up more space on the memory card.
2. Loop recording
Length of the video recordings.
3. Wide Dynamic Range (WDR)
The function allows to dynamically change underexposed and overexposed areas in order to highlight underexposed elements.
4. Auto shutting down
Sets the time after which the camera turns off, once the engine shuts down (it only works when the camera is recording). It is possible to turn this option off.
5. Sound recording
Enables and disables audio in recordings. You can quickly turn it on/off (off the menu) by pressing the DOWN Button.
6. Date stamp
Enables and disables the date and time on the recording.
7. G-Sensor
Sets the sensitivity of the sensor or disables it. When the sensor is activated at the moment of impact, the recorded file is protected against being overwritten.
It is recommended to set one of the lower values (low or medium), because at a higher value (high) camera can capture shock at the car bumps.
B. PHOTO MODE
1. Resolution
This option allows you to change the resolution of the photos.
2. Photo Mode
Switching between following options: single photo/timer 2s/timer 5s/timer 10s
3. Sequence of photos
When you select this option, pressing the REC key takes a series of 3 pictures instead of just one.
4. Quality
Sets the quality of the pictures.
5. Sharpness
Sets the sharpness level of the pictures.
6. Color
Color settings.
7. Date stamp
Enables and disables the date and time on the photo.
C. PLAYBACK MODE
1. Delete
Deletes the selected file or files.
2. Protect
Makes the selected file or files protected/unprotected against being overwritten.
3. Slide Show
Displaying the files in increments of 2s / 5s / 8s
D. MAIN MENU
1. Date and Time
Sets the date and time for the camera.
2. Auto shutting down
Sets the time after which the camera turns off, once the engine shuts down (it only works when the camera is recording). It is possible to disable this option.
3. Button sounds
Enables and disables button sounds.
4. Language
Sets the language for the menu of the camera.
5. Frequency
Frequency settings of the camera: 50Hz/60Hz
6. Screen saver
Sets the time after which the display will turn off. (the camera will still record though). It is possible to disable this option.
7. Exposure
Exposure settings.
8. White Balance
White balance settings.
9. Park Mode
When this function is turned on, and the camera is left in the car, powered on, it captures the shock of the car (for example, when our car is hit by another car), turns on and starts recording.
10. Format
You can format the memory card in the camera. All files will be lost (including the protected ones).
11. Default settings
Sets the default settings of the device.
12. Software version
13. GPS configuration (available only when the module is plugged into the camera)
Turning on/off GPS location
14. GPS speed display (only available if the module is plugged into the camera)
Turn on /off speed recording and in which units (km / h or MPH) should be visible. When we disable this option on the camera during display in Registrator Viewer, the location will be available, but without the speed counter shown on the video.
04. BUTTONS
A. VIDEO MODE
We use the OK button to turn on/off the recording. Recording starts automatically, once the camera is powered on (provided there is a memory card in the camcorder).
We use the MENU/MODE button to enter the current mode settings (only when the camera is not recording). Double pressing it (in every mode) lets you enter the Main Menu.
We use the MENU/MODE button (press and hold) to navigate between different camera modes (only when the camera is not recording).
■ UP and DOWN buttons - press and hold to increase/decrease zoom (range from x1 to x4).
■ DOWN button – single pressing it turns on/off the microphone.
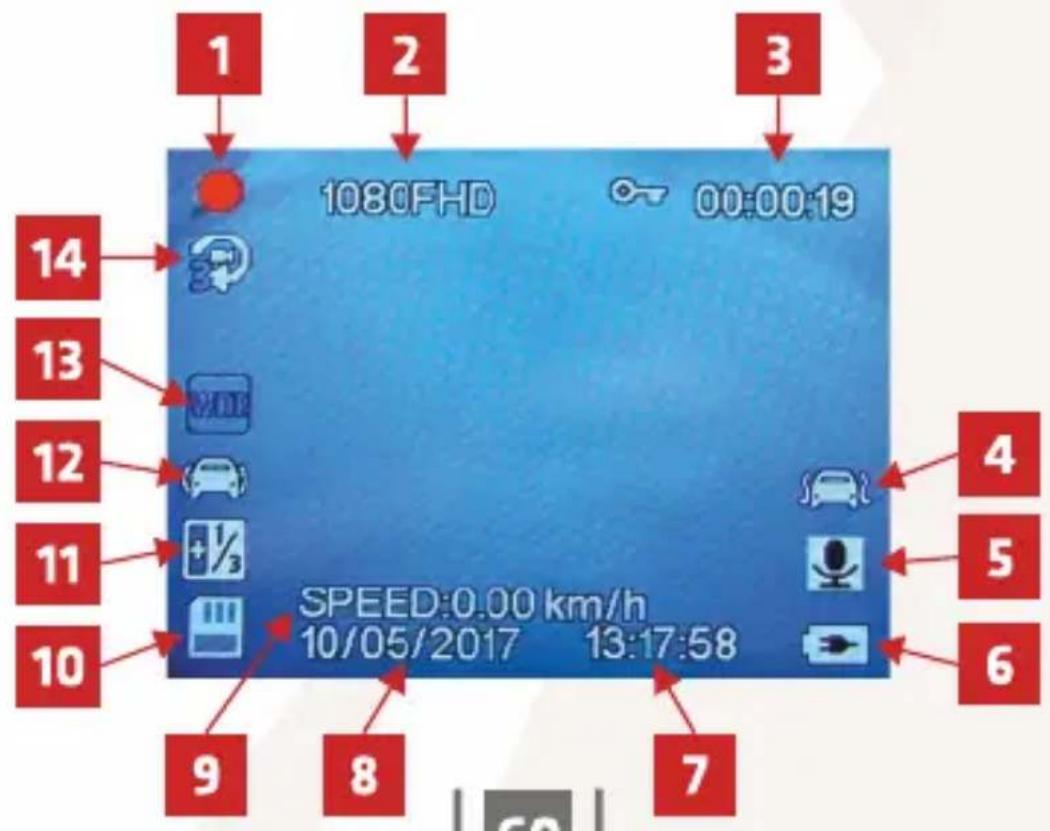
- Current Mode info / Camera recording mode info (red dot is blinking)
- Resolution
- Total remaining recording time (free space on the memory card) or current recording time (during recording)
- Park Mode info
- Audio recording status
- Battery status
- Time
- Date
- Current vehicle speed
- Memory card info
- Exposure info
- G-SENSOR info
- WDR Mode info
- Length of a single video file info
B. PHOTO MODE
■ OK button – single pressing it takes a picture.
We use the MENU/MODE button to enter the current mode settings. Double pressing it (in every mode) lets you enter the Main Menu.
We use the MENU/MODE button (press and hold) to navigate between different camera modes.
■ UP and DOWN buttons – press and hold to increase/decrease zoom (range from x1 to x4).

- Current Mode info
- Current Photo Mode setting
- Sequence of photos info
- Resolution
- Quality info
- Battery status
- The number of pictures possible to take (free space on the memory card)
- Memory card info
- White Balance info
- Exposure info
C. PLAYBACK MODE
We use the OK button to play a video file.
We use the UP and DOWN buttons to navigate between files.
We use the MENU/MODE button to enter the current mode settings. Double pressing it (in every mode) lets you enter the Main Menu.
We use the MENU/MODE button (press and hold) to navigate between different camera modes.
When playing a video:
We can use the OK button to activate Play/Pause command.
The UP button increases, and the DOWN button reduces the volume of the recording.
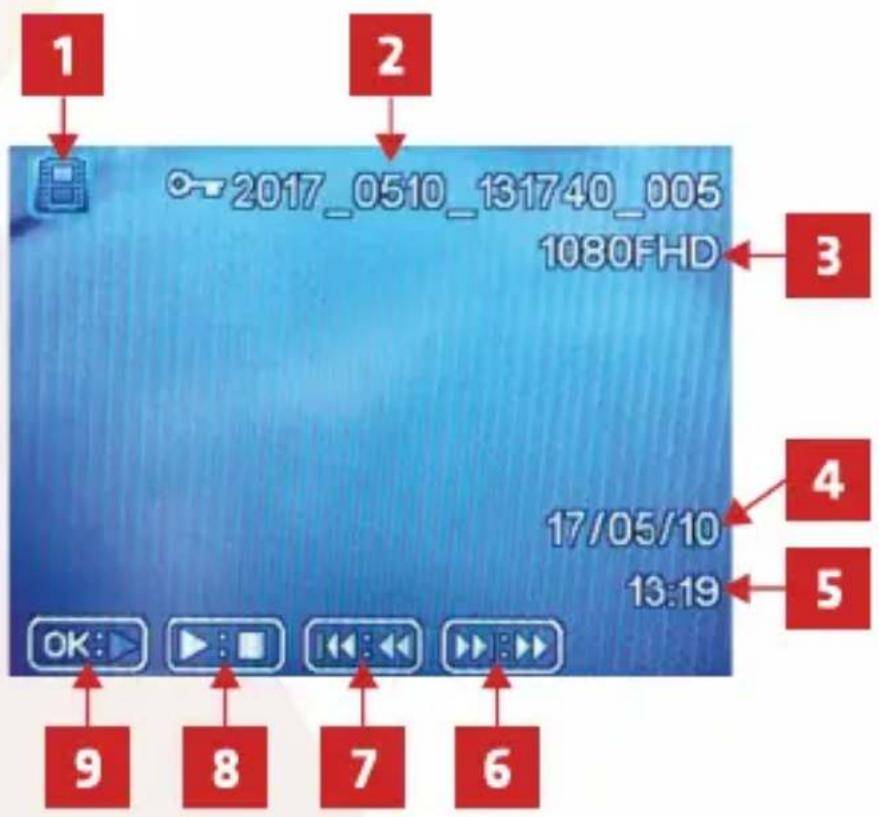
- File type info (photo/video)
- File Name
- Resolution
- Date
- Time
- Fast forward
- Fast rewind
- Play/Stop
- OK (Play)
05. FAQ
- The device does not turn on, the display is blinking.
- It is necessary to charge the device's battery before the first use.
- The device does not turn on/turns off automatically.
- The reason for this may be constant powering by the cigarette lighter socket.
- The device reboots while driving.
- Check the power source.
- Loop recording does not work (the device records randomly).
- Check the functions "Motion Detection" and "Park Mode". They both should be turned off while driving.
- The device displays the message "memory card full"
- Check the "G-sensor" and "Park Mode" sensitivity settings – both should be set at a minimum.
- The memory card must be formatted in FAT32 format first on the PC and then on the recorder.
6. The device records the noise and distorted, indistinct sound:
- The device has a very sensitive microphone, which records all the sounds from the environment. The sounds may overlap. Airflow windscreen effectively distorts the sound too.

WARNING: Use only chargers with charging current up to 1,5 A. (Do not connect directly to the 220 / 230V power outlet.) Failure to follow these instructions could result in damage to the camera or, in extreme cases, to ignition.

WARNING: Displaying files on a computer: The camcorder does not have a mass memory mode. To play files on the computer, remove the memory card from the camera and connect it using a computer reader.
06. WARRANTY / CLAIMS
The product comes with a 24-month manufacturer's warranty. The warranty does not cover defects or damage caused by the fault of the user, or as a result of improper use (or misuse). The guarantee does not cover mechanical damage and caused as a result of the use of accessories other than those included in the kit. The guarantee does not cover consumable items such as batteries, rechargeable batteries. The warranty on batteries is 6 months.
Complaints should be submitted with the complaint form on the website: http://reklamacje.kgktrade.pl/
Contact details and the address of the service you can find on website: www.xblitz.pl.
Importer:
KGK Trade sp. z o.o. sp.k
os. Teatralne 24
31-946 Kraków
Poland
www.xblitz.pl

natural_image
Blank white image with no visible content, text, or symbolsXblitz®
www.xblitz.pl

- Xblitz Black Bird 2.0 GPS
- PACKAGE DETAILS
- Before the first use:
- INSTALLATION OF THE CAMERA
- MENU
- VIDEO MODE
- Resolution
- Loop recording
- Wide Dynamic Range (WDR)
- Auto shutting down
- Sound recording
- Date stamp
- G-Sensor
- PHOTO MODE
- Photo Mode
- Sequence of photos
- Quality
- Sharpness
- Color
- Date stamp
- PLAYBACK MODE
- Delete
- Protect
- Slide Show
- MAIN MENU
- Date and Time
- Auto shutting down
- Button sounds
- Language
- Frequency
- Screen saver
- Exposure
- White Balance
- Park Mode
- Format
- Default settings
- Software version
- GPS configuration (available only when the module is plugged into the camera)
- GPS speed display (only available if the module is plugged into the camera)
- BUTTONS
- When playing a video:
- FAQ
- The device records the noise and distorted, indistinct sound:
- WARRANTY / CLAIMS
- Importer:
Mærke : Xblitz
Model : Black Bird 2.0
Kategori : Bilkamera