PMC4T/EN - Højttaler Penton - Gratis brugsanvisning og manual
Find enhedens vejledning gratis PMC4T/EN Penton i PDF-format.

Brugerspørgsmål om PMC4T/EN Penton
0 spørgsmål om dette apparat. Besvar dem du kender, eller stil dit eget.
Stil et nyt spørgsmål om dette apparat
Download vejledningen til din Højttaler i PDF-format gratis! Find din vejledning PMC4T/EN - Penton og tag din elektroniske enhed tilbage i hånden. På denne side er alle dokumenter nødvendige for brugen af din enhed offentliggjort. PMC4T/EN af mærket Penton.
BRUGSANVISNING PMC4T/EN Penton
MOULDED CABINET LOUDSPEAKERS
PMC4T/EN PMC4T/ENC
INSTALLATION INSTRUCTIONS
EN54-24:2008
Certificate No: 0359-CPR-00286 TYPE A
- LOUDSPEAKER ENCLOSURE
- REFERENCE AXIS
- HORIZONTAL PLANE
- REFERENCE PLANE
text_image
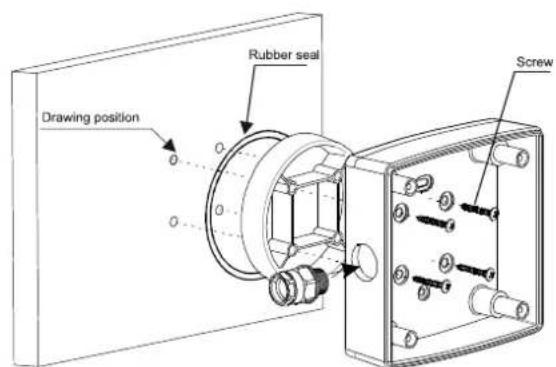
Drawing position Rubber seal Screw> STEP 1
Select a suitable position to mount the loudspeaker. Offer the speaker to the wall or ceiling and mark through the mounting holes to position the fixing points to be drilled. Use a spirit level to ensure that the speaker will be level when fixed. Drill 4 fixing holes as shown in the diagram. Ensure you use the fixing holes that sit inside the rubber seal. The speaker can also be mounted to a standard single gang or BESA type back box. Use suitable raw plugs to secure the fixings.
text_image
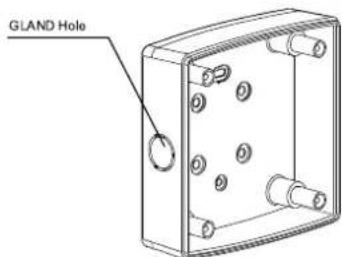
GLAND HoleSTEP 2
Before fixing the speaker ensure it is correctly orientated to take the incoming speaker cable. The speaker can now be positioned over the fixing holes made in the mounting surface at Step 1. Ensure that the rubber "0" ring gasket and spacer ring is fitted as shown in Step 1. Then use suitable fixings to hold the speaker securely to the surface.

text_image
EN54-24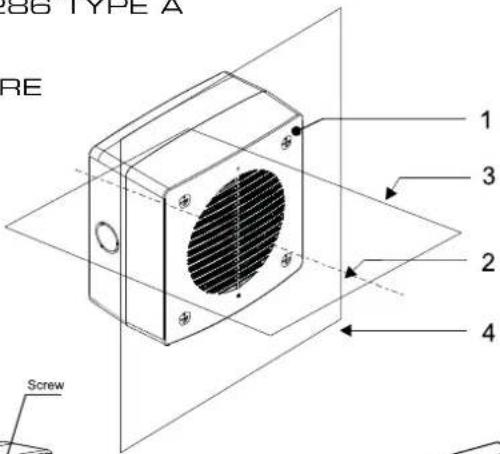
text_image
ABB TYPE A RE 1 3 2 4 ScrewCircuit Diagram
text_image
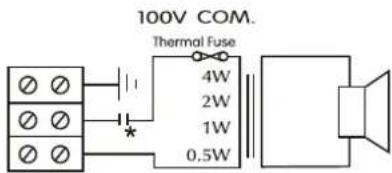
100V COM. Thermal Fuse 4W 2W 1W 0.5WPMC4T/ENC
*with capacitor
natural_image
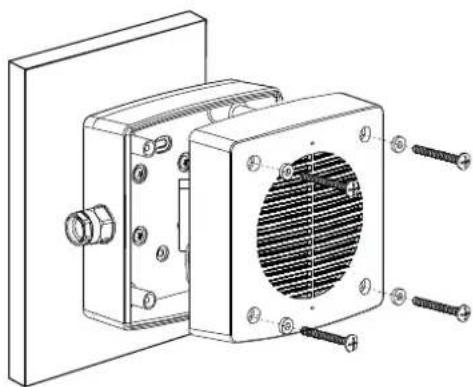
Technical line drawing of a mechanical assembly with screws and a vented fan (no text or symbols)> STEP 3
Terminate the speaker cabling into the terminal block via suitable cable glands. Select the correct tapping on the transformer located on the speaker front panel. Then fit the front panel to the back box making sure that the gasket is fitted correctly.
STEP 4
Once the speaker front panel has been fitted to the back box use the 4 screw fixings and washers supplied to secure the front panel. The speaker installation is now complete.