PC21 - Kontor Piranha - Gratis brugsanvisning og manual
Find enhedens vejledning gratis PC21 Piranha i PDF-format.


Brugerspørgsmål om PC21 Piranha
0 spørgsmål om dette apparat. Besvar dem du kender, eller stil dit eget.
Stil et nyt spørgsmål om dette apparat
Download vejledningen til din Kontor i PDF-format gratis! Find din vejledning PC21 - Piranha og tag din elektroniske enhed tilbage i hånden. På denne side er alle dokumenter nødvendige for brugen af din enhed offentliggjort. PC21 af mærket Piranha.
BRUGSANVISNING PC21 Piranha
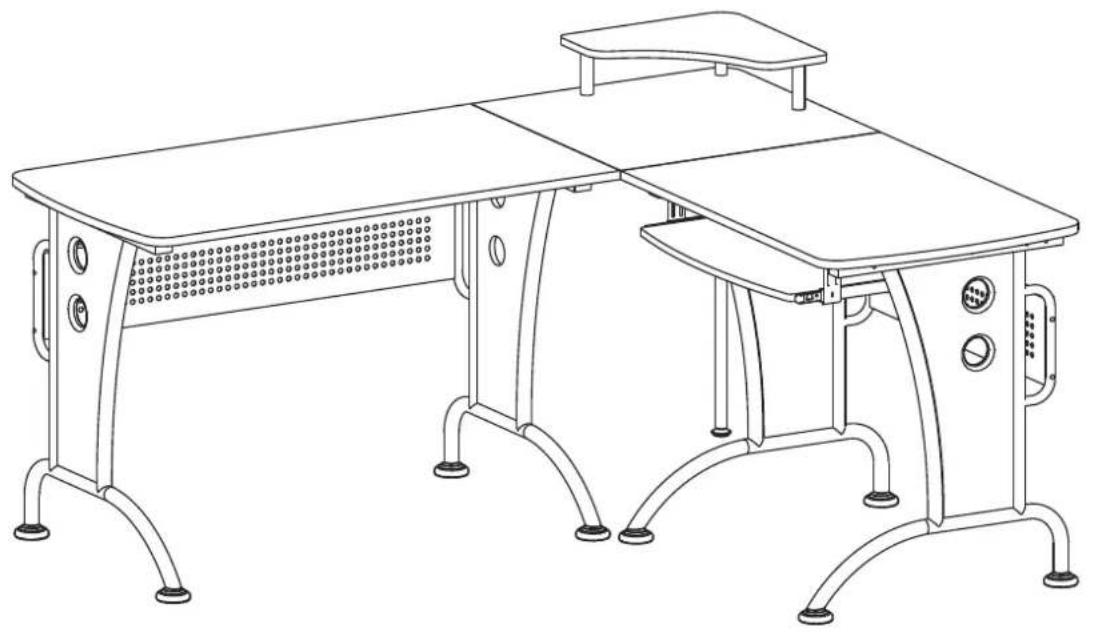
COMPUTER DESK ASSEMBLY INSTRUCTIONS
Thank you for choosing to purchase from Piranha Furniture We trust everything is as expected, however if there are ANY issues at all or you have further questions, please don't hesitate to email us and we will resolve the matter as quickly as possible:
United Kingdom: sales@piranhafurniture.com
Rest of EU: info@piranhaeurope.com
You can contact us through our website www.piranhafurniture.com where you will also find our full range of products.
Please read the assembly instructions carefully before the installation
Retain all packaging as, if required, goods must be returned packed in the original cartons.
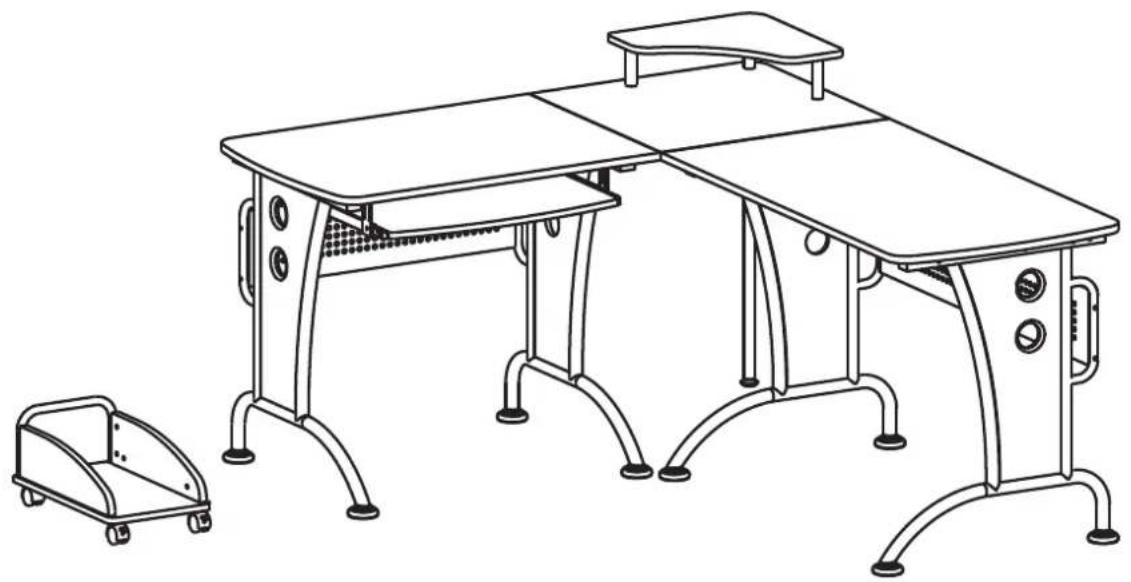
natural_image
Line drawing of a school desk setup with two main tables, one small cart, and a small tray (no text or symbols)
TWO PEOPLE REQUIRED
MODEL PC21
General Care:
Keep furniture out of direct sunlight. Use mats and coasters to protect surfaces.
Do not place hot or wet items directly onto unprotected surfaces.
Cleaning:
Wipe surfaces with a clean damp (not wet) cloth then dry with a clean lint free cotton cloth.
Glass surfaces may be polished with window or other glass cleaning liquids.
■PARTS LIST
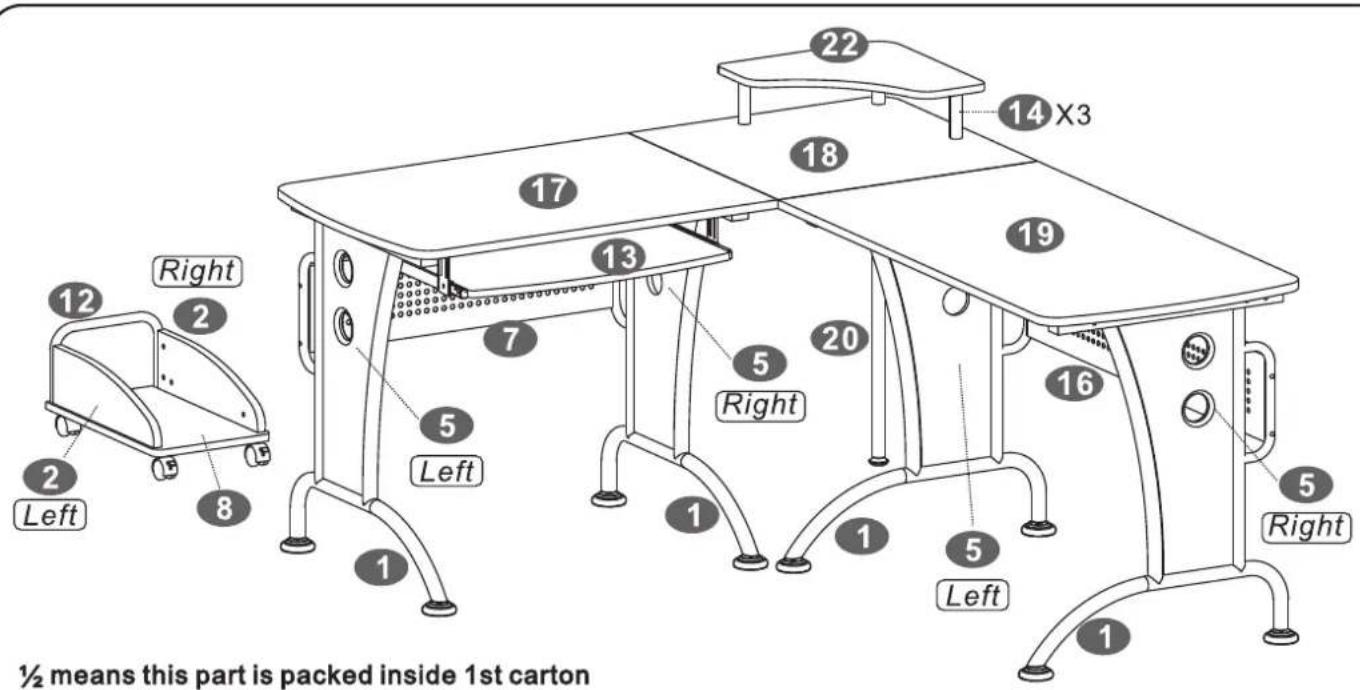
text_image
½ means this part is packed inside 1st carton12 means this part is packed inside 1st carton 32 means this part is packed inside 2nd carton
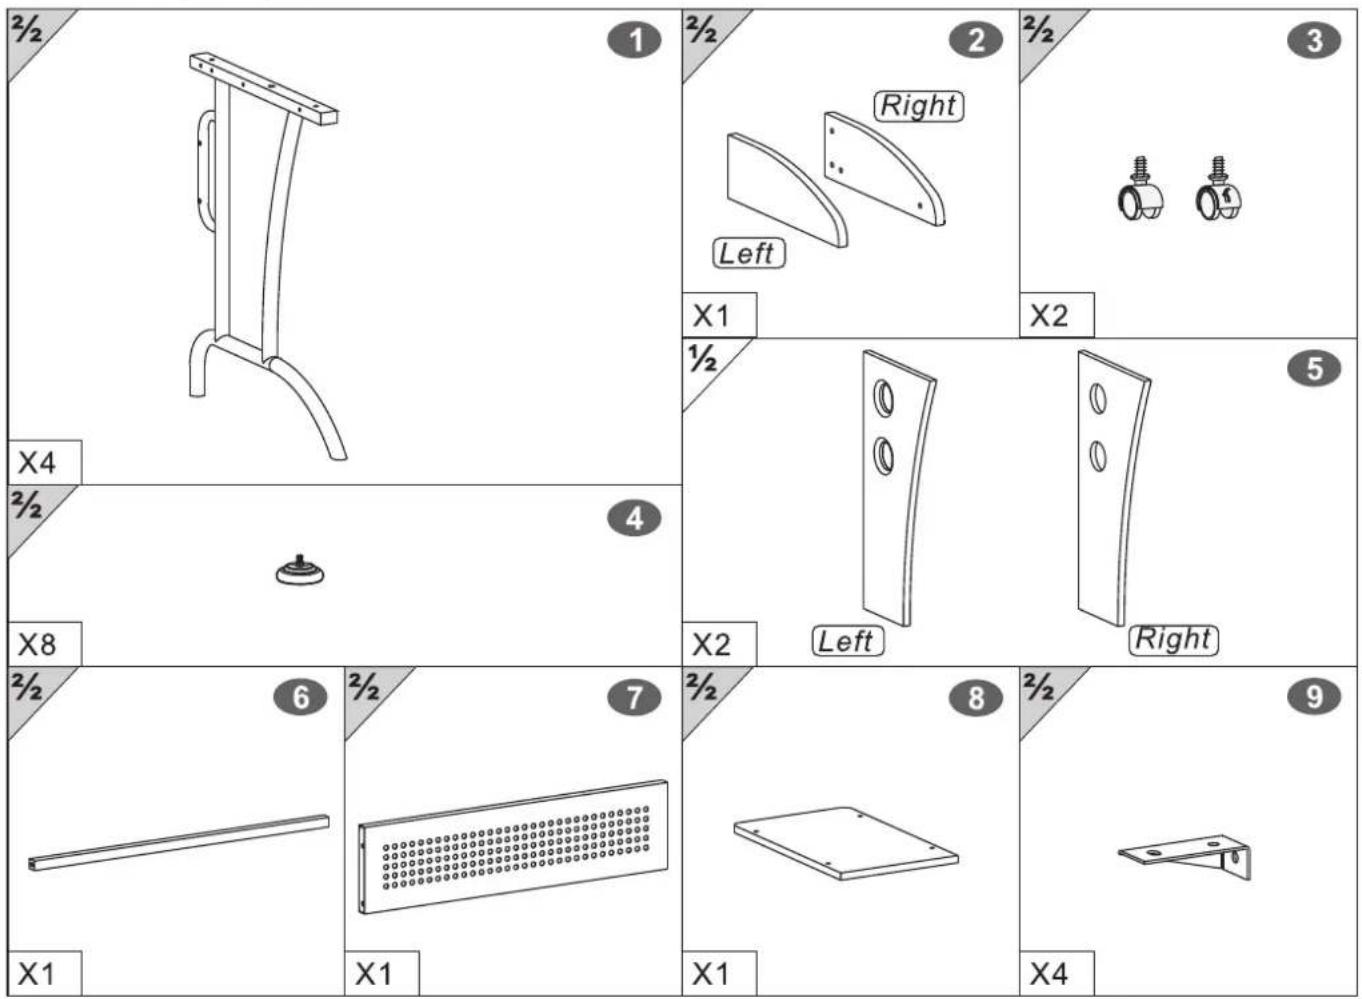
text_image
2½ X4 2½ X8 2½ X1 1 2½ Right Left X1 ½ X2 2½ Right X1 4 6 2½ 7 2½ 8 2½ 9 X1 X1 X1 X4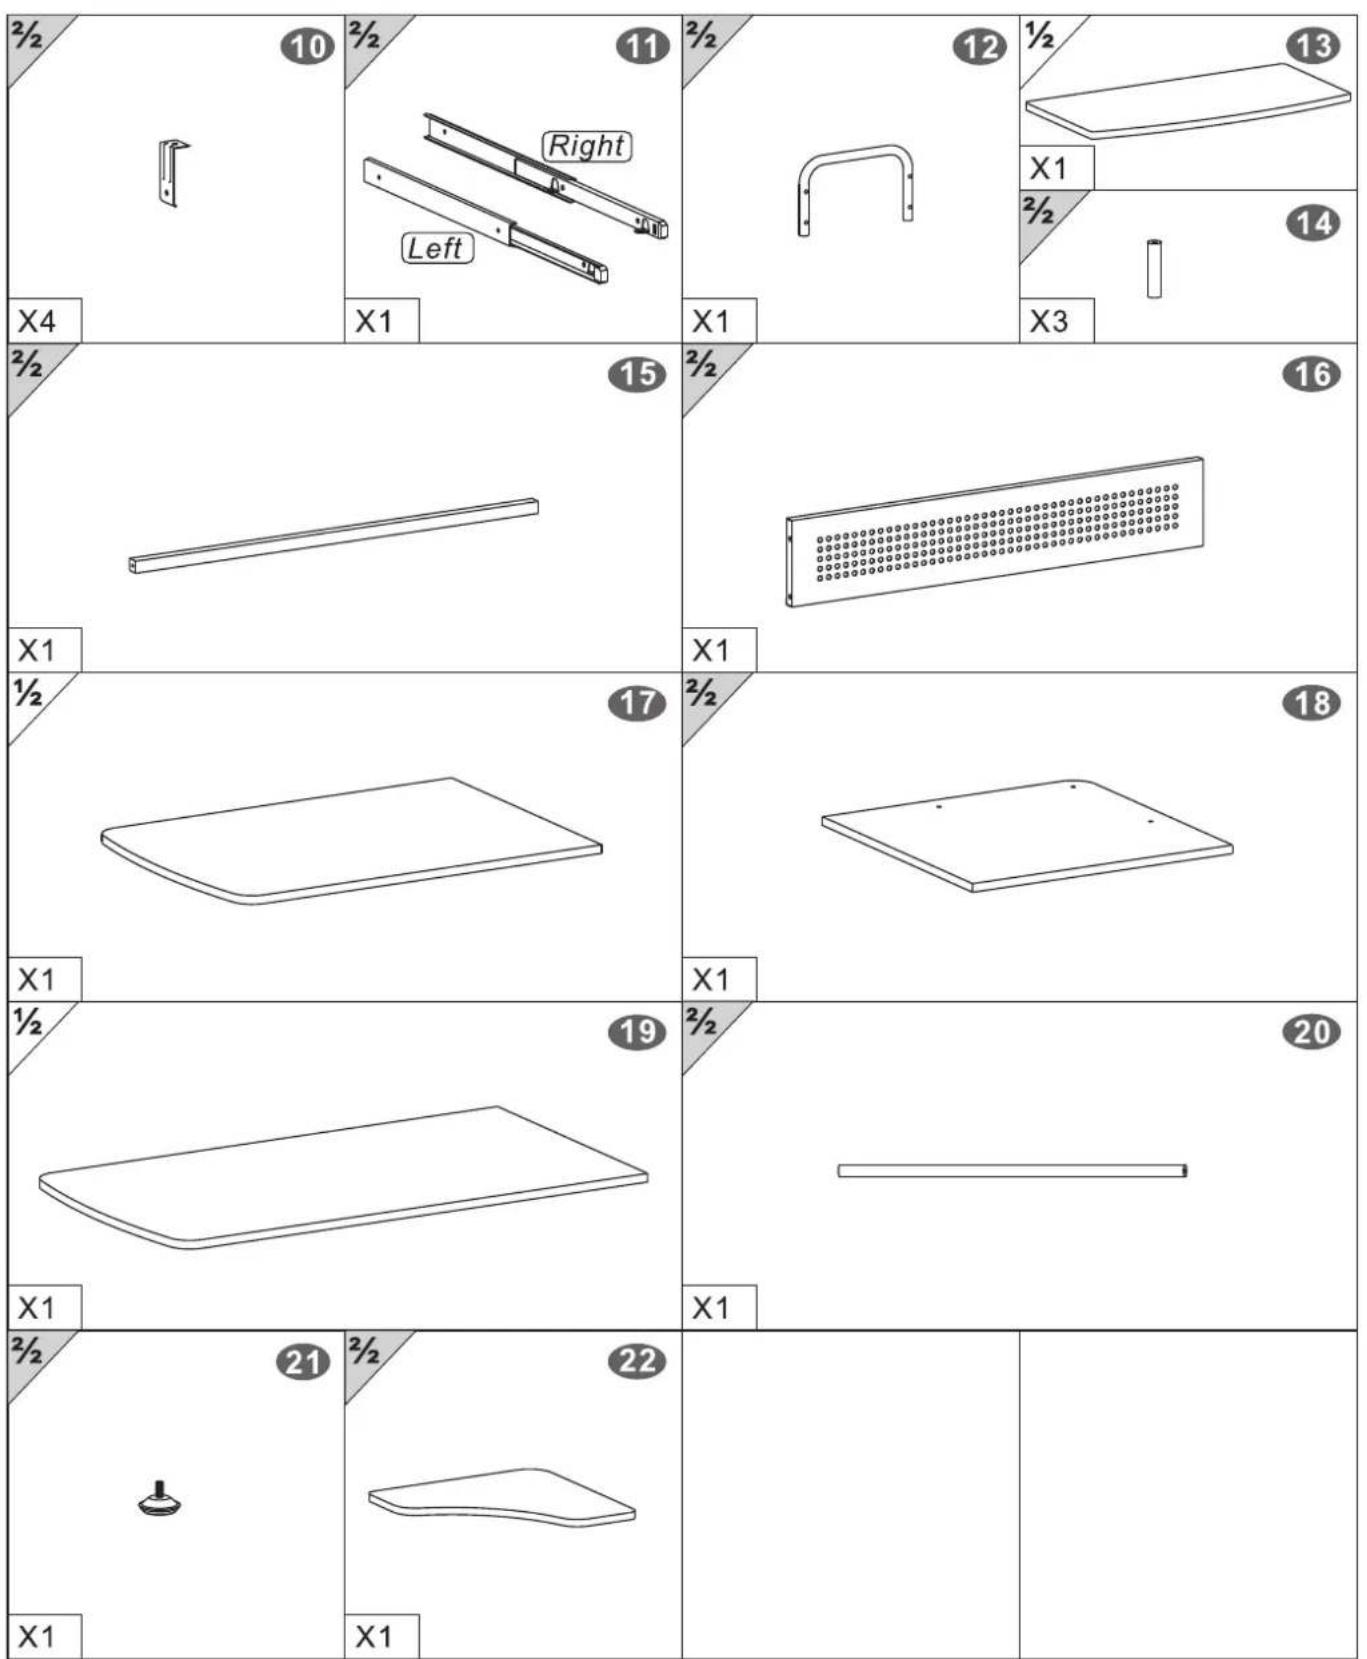
text_image
½ 10 ½ 11 ½ 12 ½ 13 Right Left X1 X4 X1 X1 ½ 15 ½ 16 X1 X1 ½ 17 ½ 18 X1 X1 ½ 19 ½ 20 X1 X1 ½ 21 ½ 22 X1 X1| PART | QTY. | ITEM | |
| A | 16 | 5X45 MM | 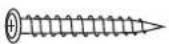 |
| B | 4 | 6X50 MM | 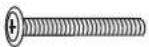 |
| C | 12 | 6X45 MM | 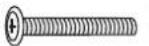 |
| D | 3 | 6X25 MM |  |
| E | 4 | 4X14 MM |  |
| F | 1 | 6X40 MM | 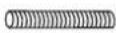 |
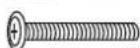
| G | 4 | 4X4 MM | [HX0A] |
| PART | QTY. | ITEM | |
| 12 | 6X12 MM |  | |
| 18 | 6X35 MM | 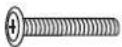 | |
| 1 | 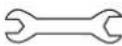 | ||
| 1 | 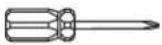 | ||
- ASSEMBLY STEPS:
1
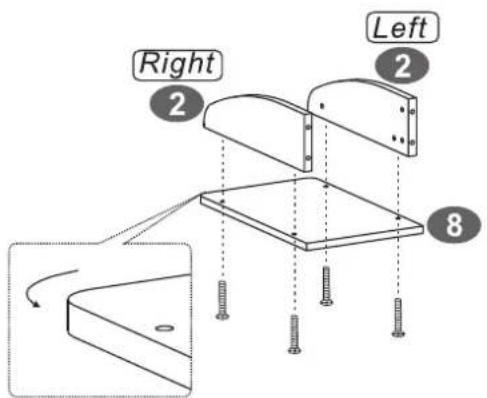
text_image
Right 2 Left 2 8■ SCREWS
6X35 MM
4PCS
2
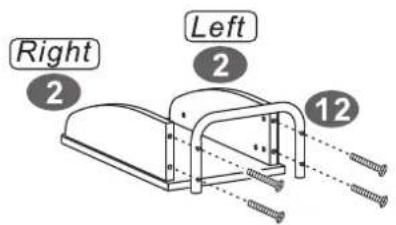
text_image
Right 2 Left 2 12■ SCREWS
6X35 MM
4PCS
3
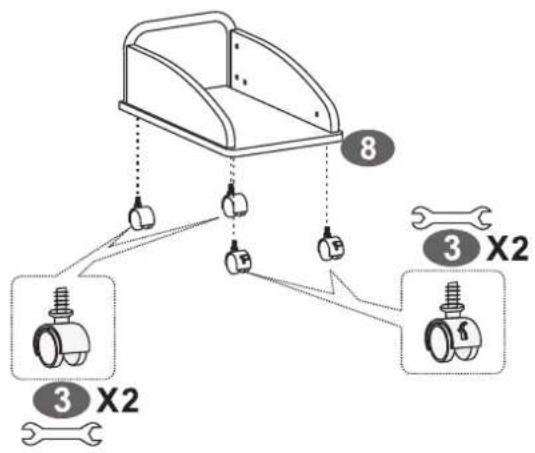
text_image
8 3 X2 3 X24
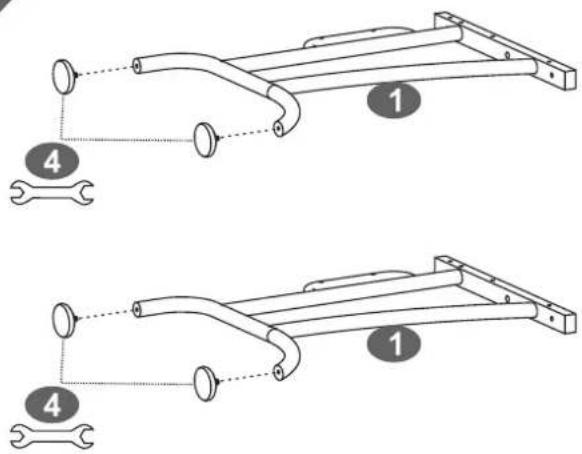
text_image
Technical diagram showing two mechanical assembly steps with labeled components and connection points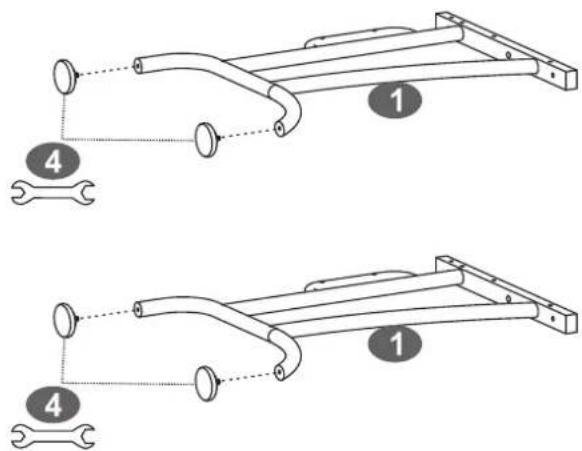
text_image
Technical diagram showing two mechanical assembly steps with labeled components and connection points5
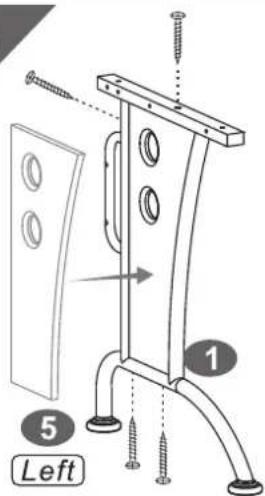
text_image
Left 1 5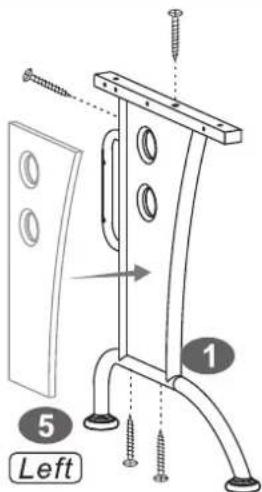
text_image
Left 1 2 3 4 5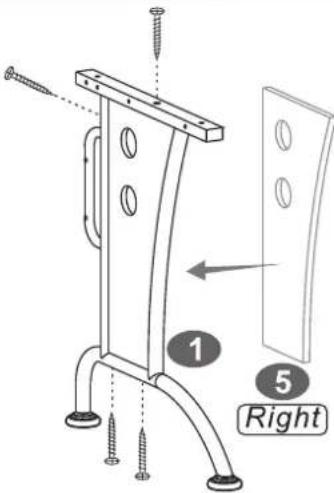
text_image
1 Right 5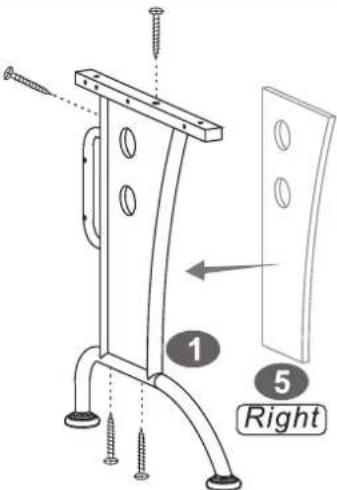
text_image
1 2 3 4 5 Right■ SCREWS
A 5X45 MM
16PCS

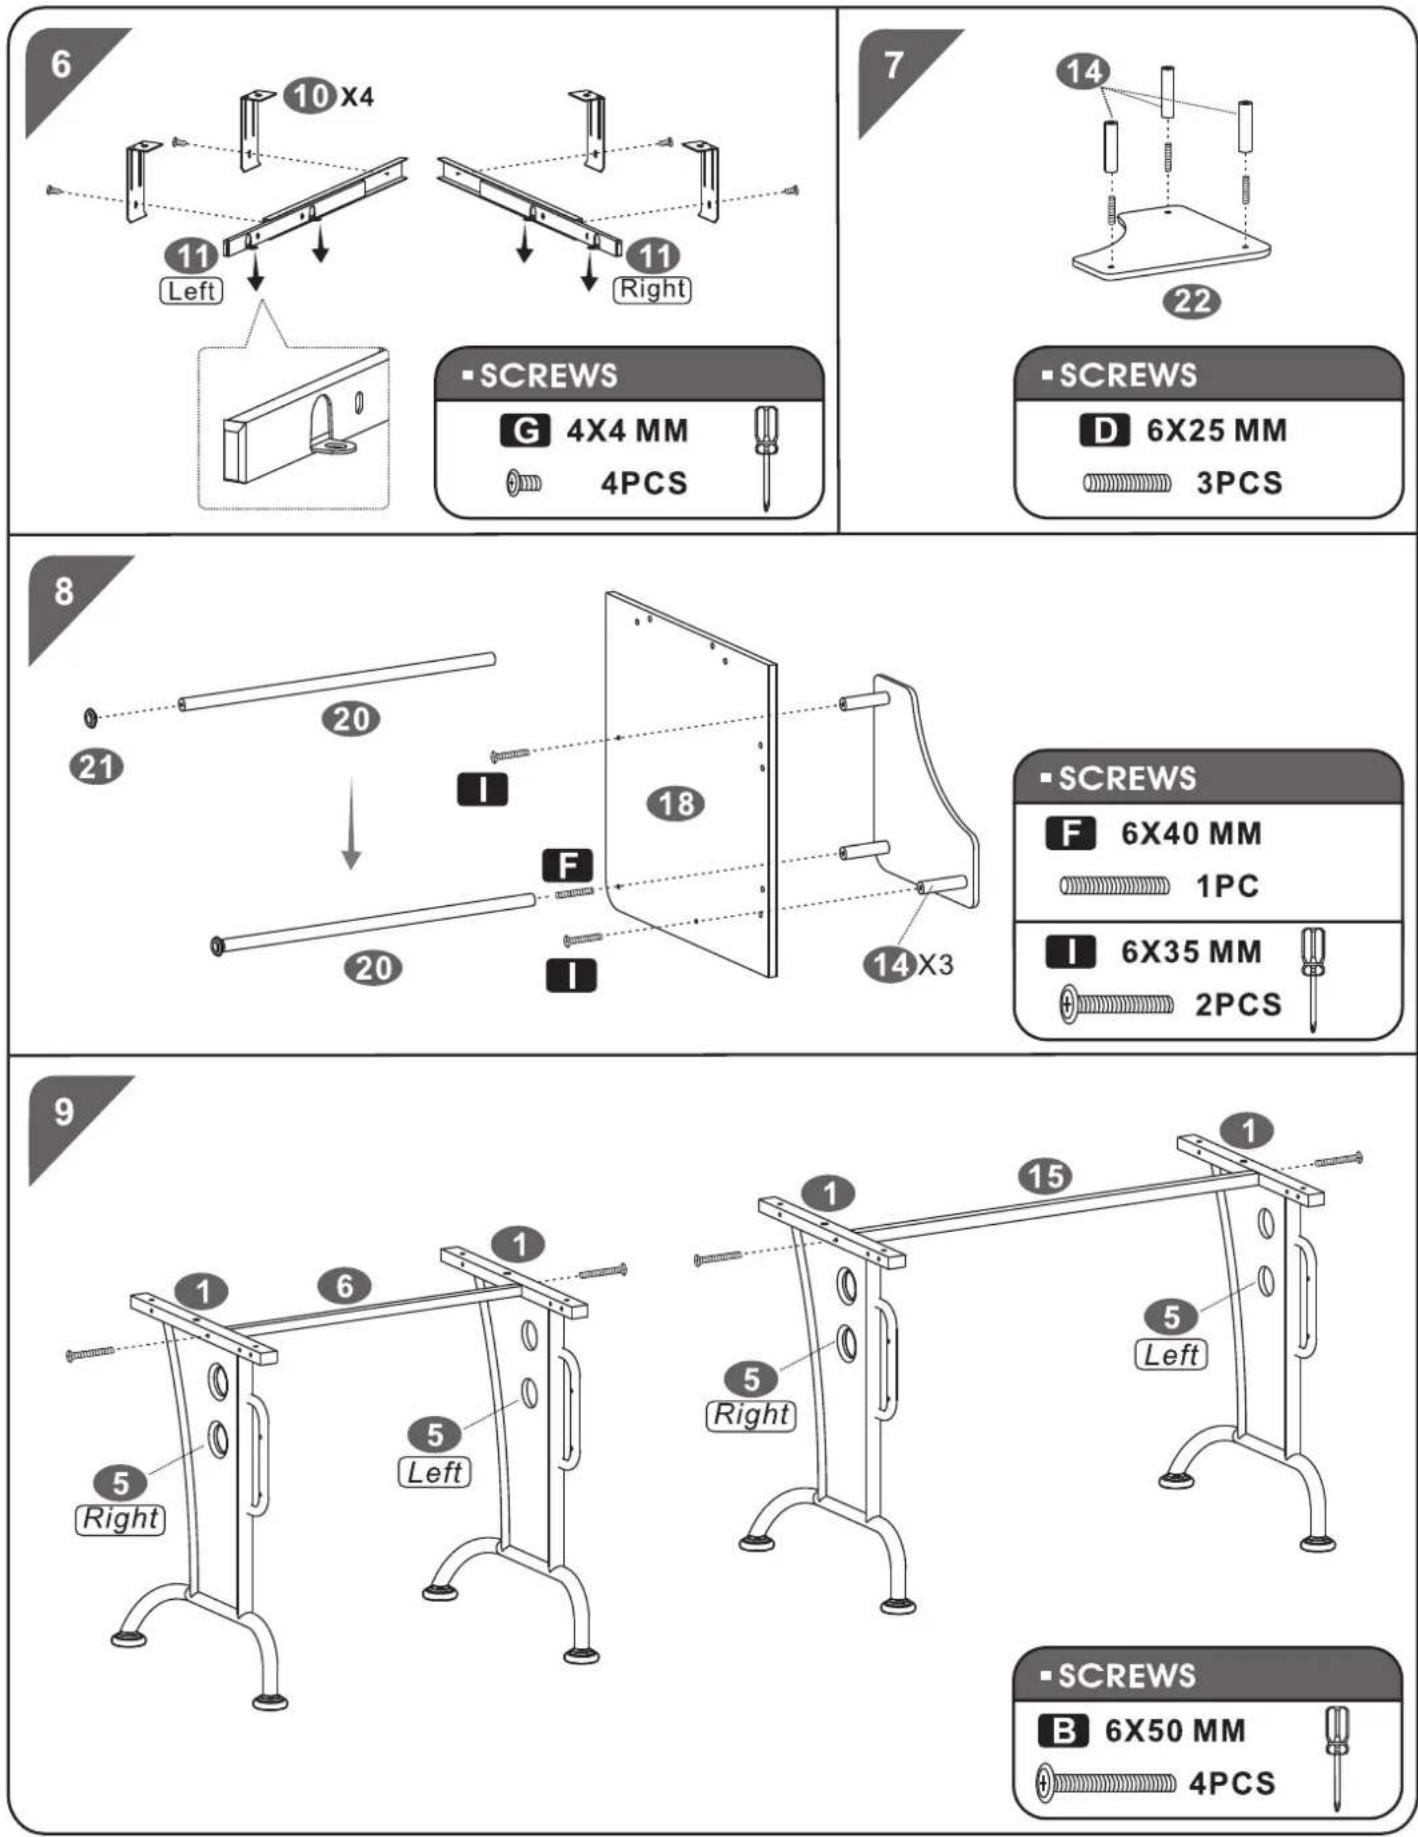
10
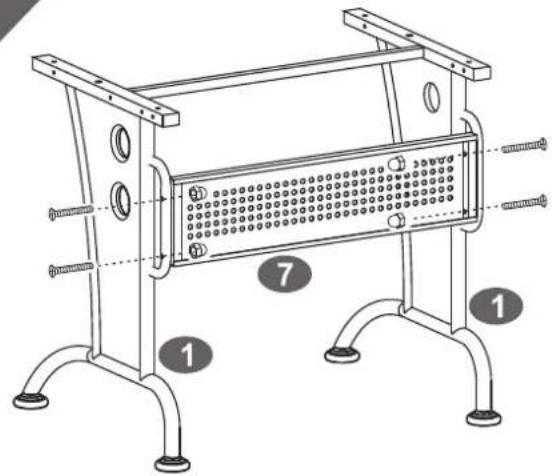
text_image
Technical diagram of a structural frame with numbered components and bolted connections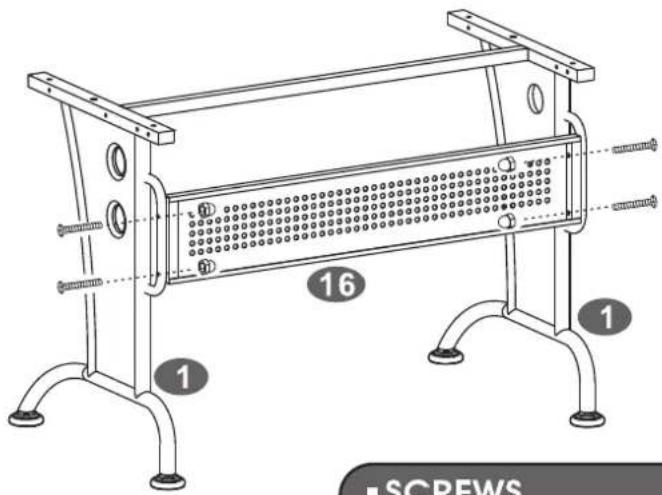
text_image
1 16 1 SCREWS■ SCREWS
C 6X45 MM

8PCS
** There are 4 options to assemble our desk, please choose it according to your preference.
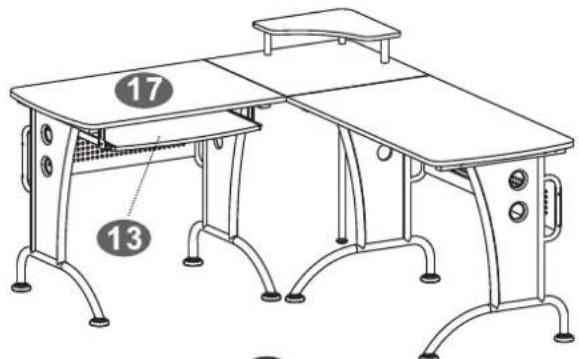
text_image
17 13A
A1-A6
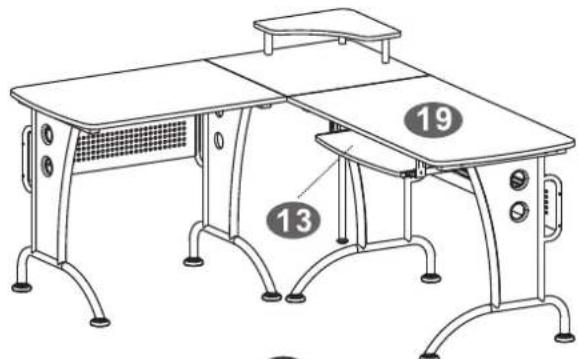
text_image
Technical line drawing of a two-week-old classroom desk with labeled componentsB
B1-B6
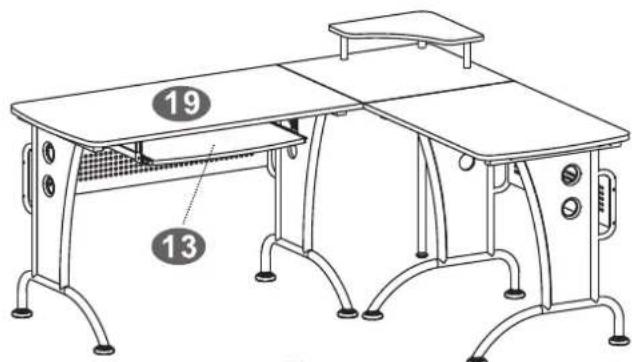
text_image
19 13©
C1-C6
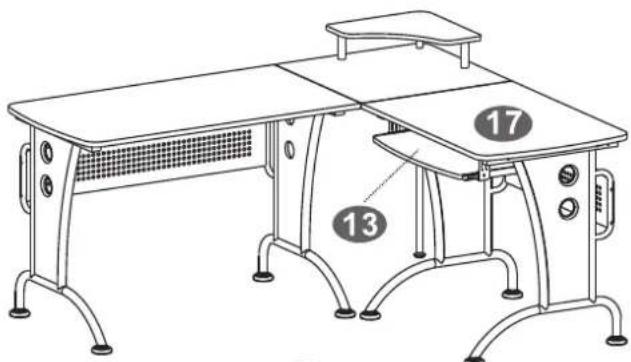
text_image
Technical line drawing of a two-week-old classroom desk with labeled componentsD
D1-D6
A1
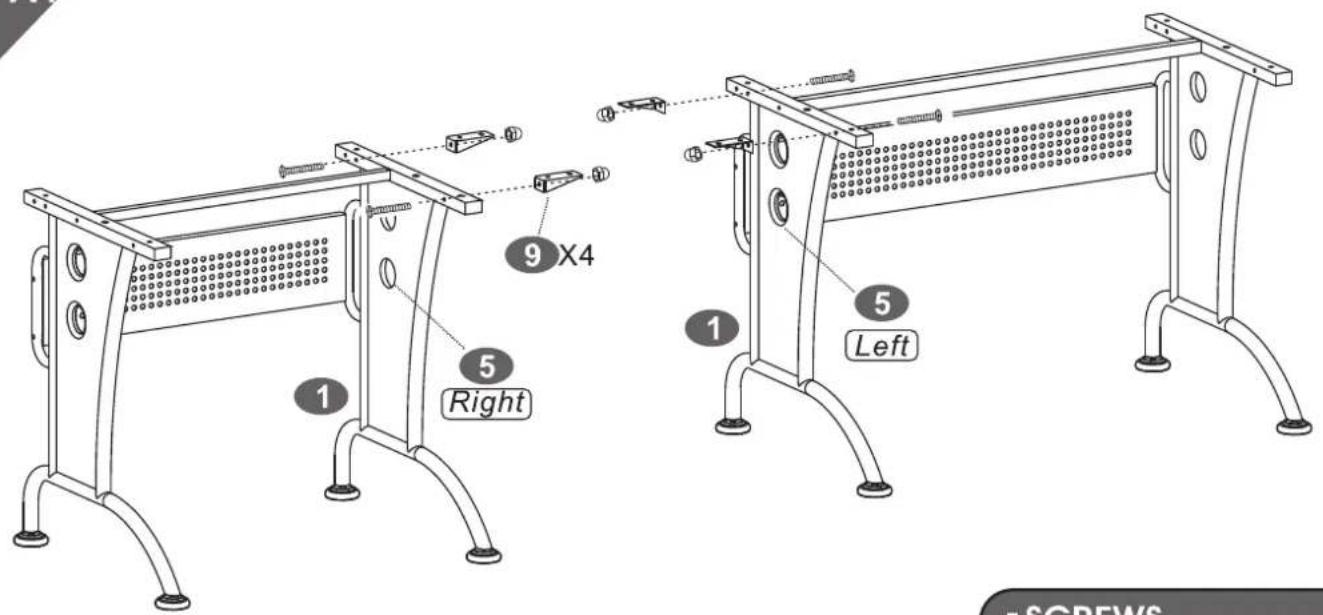
text_image
9 X4 5 Right 1 1 5 Left SCREWS■ SCREWS
C 6X45 MM

4PCS

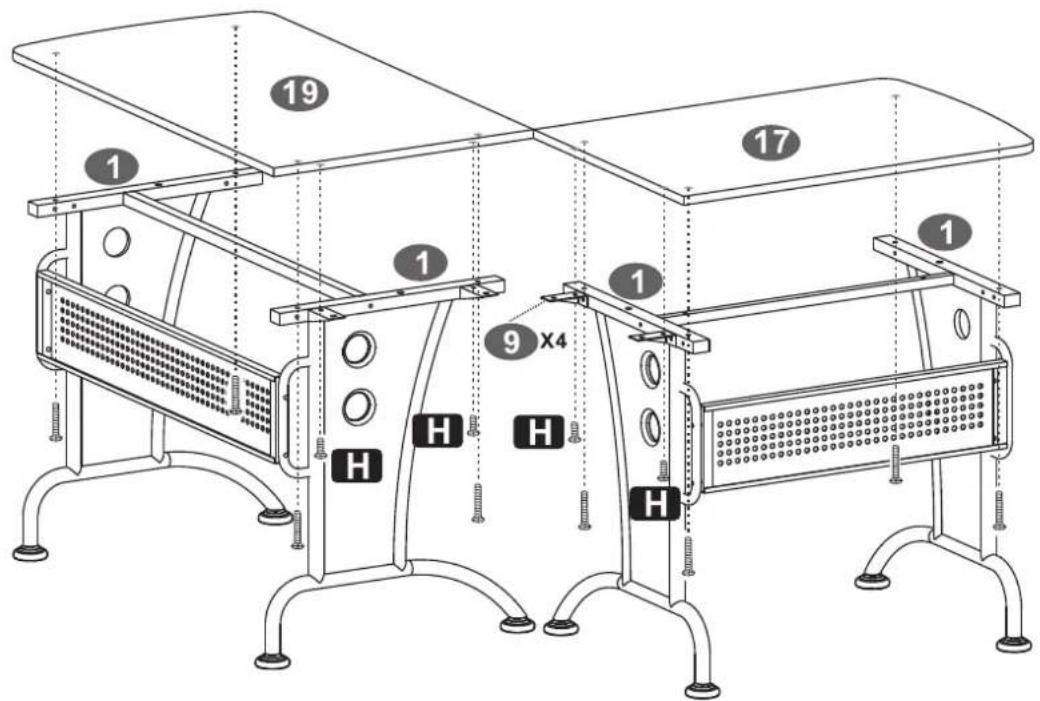
A2
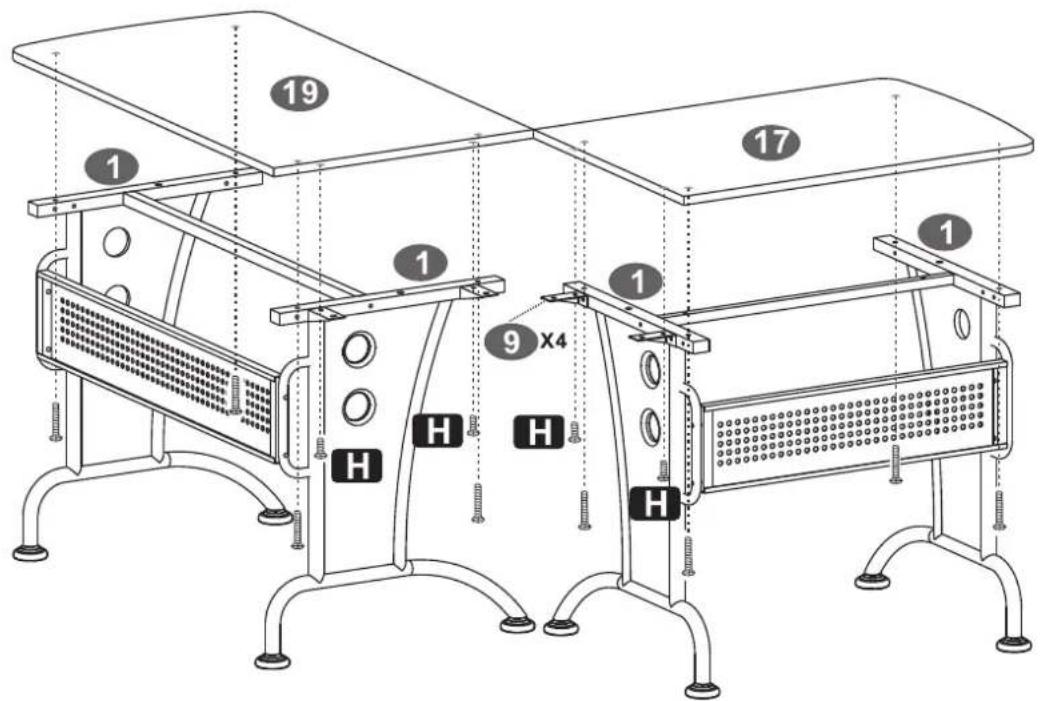
text_image
19 17 1 1 9 X4 1 H H H H■ SCREWS
H 6X12 MM
4PCS

■ SCREWS
I 6X35 MM
8PCS

A3
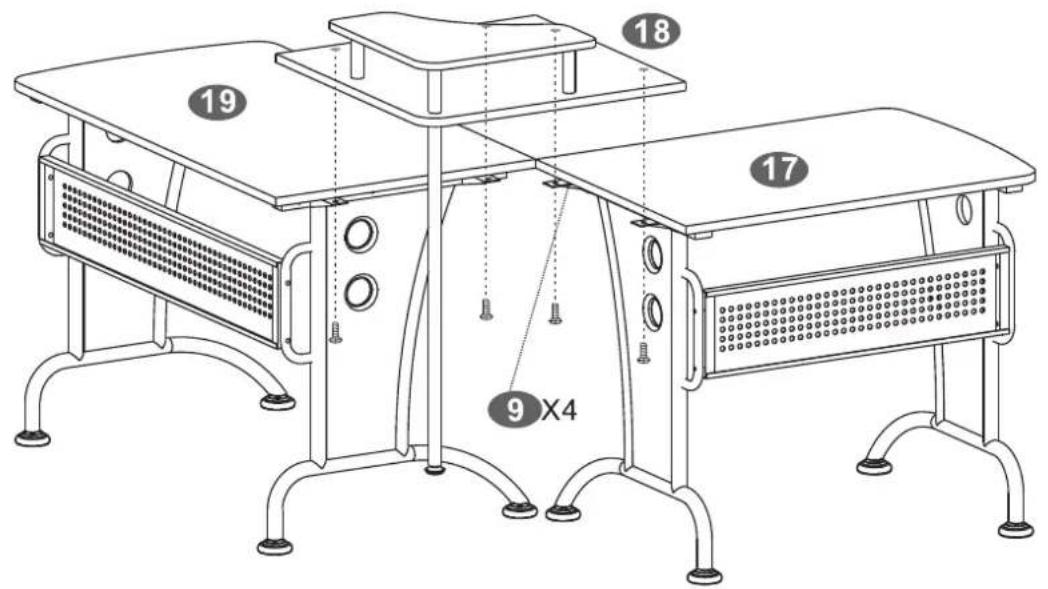
text_image
19 18 17 9 X4- SCREWS
H 6X12 MM
4PCS
A4
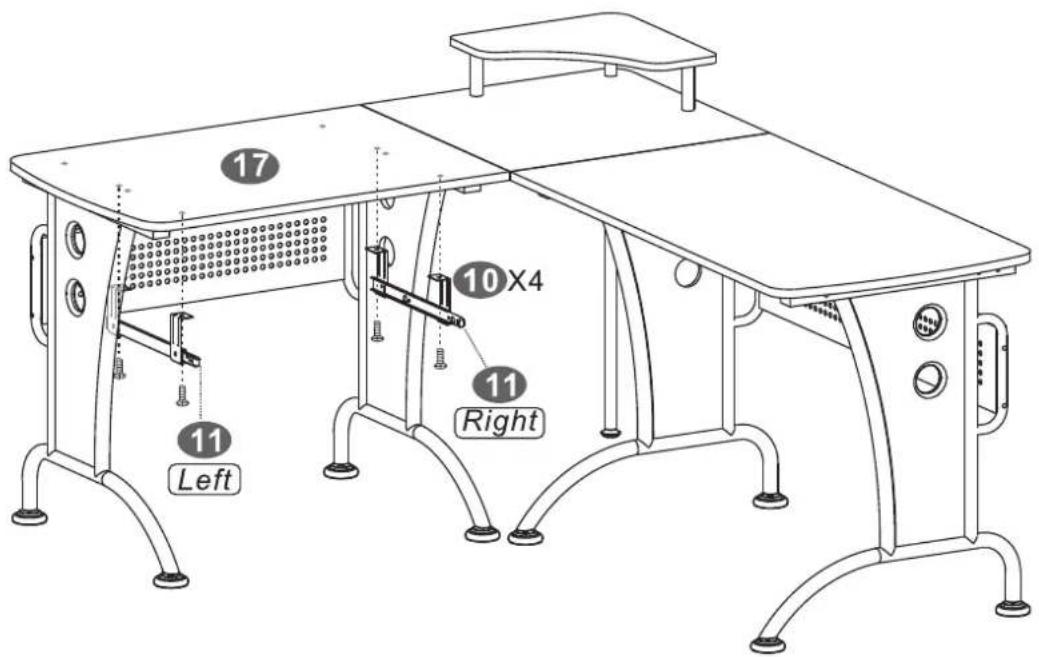
text_image
17 10X4 11 Right 11 Left■ SCREWS
H 6X12 MM
4PCS
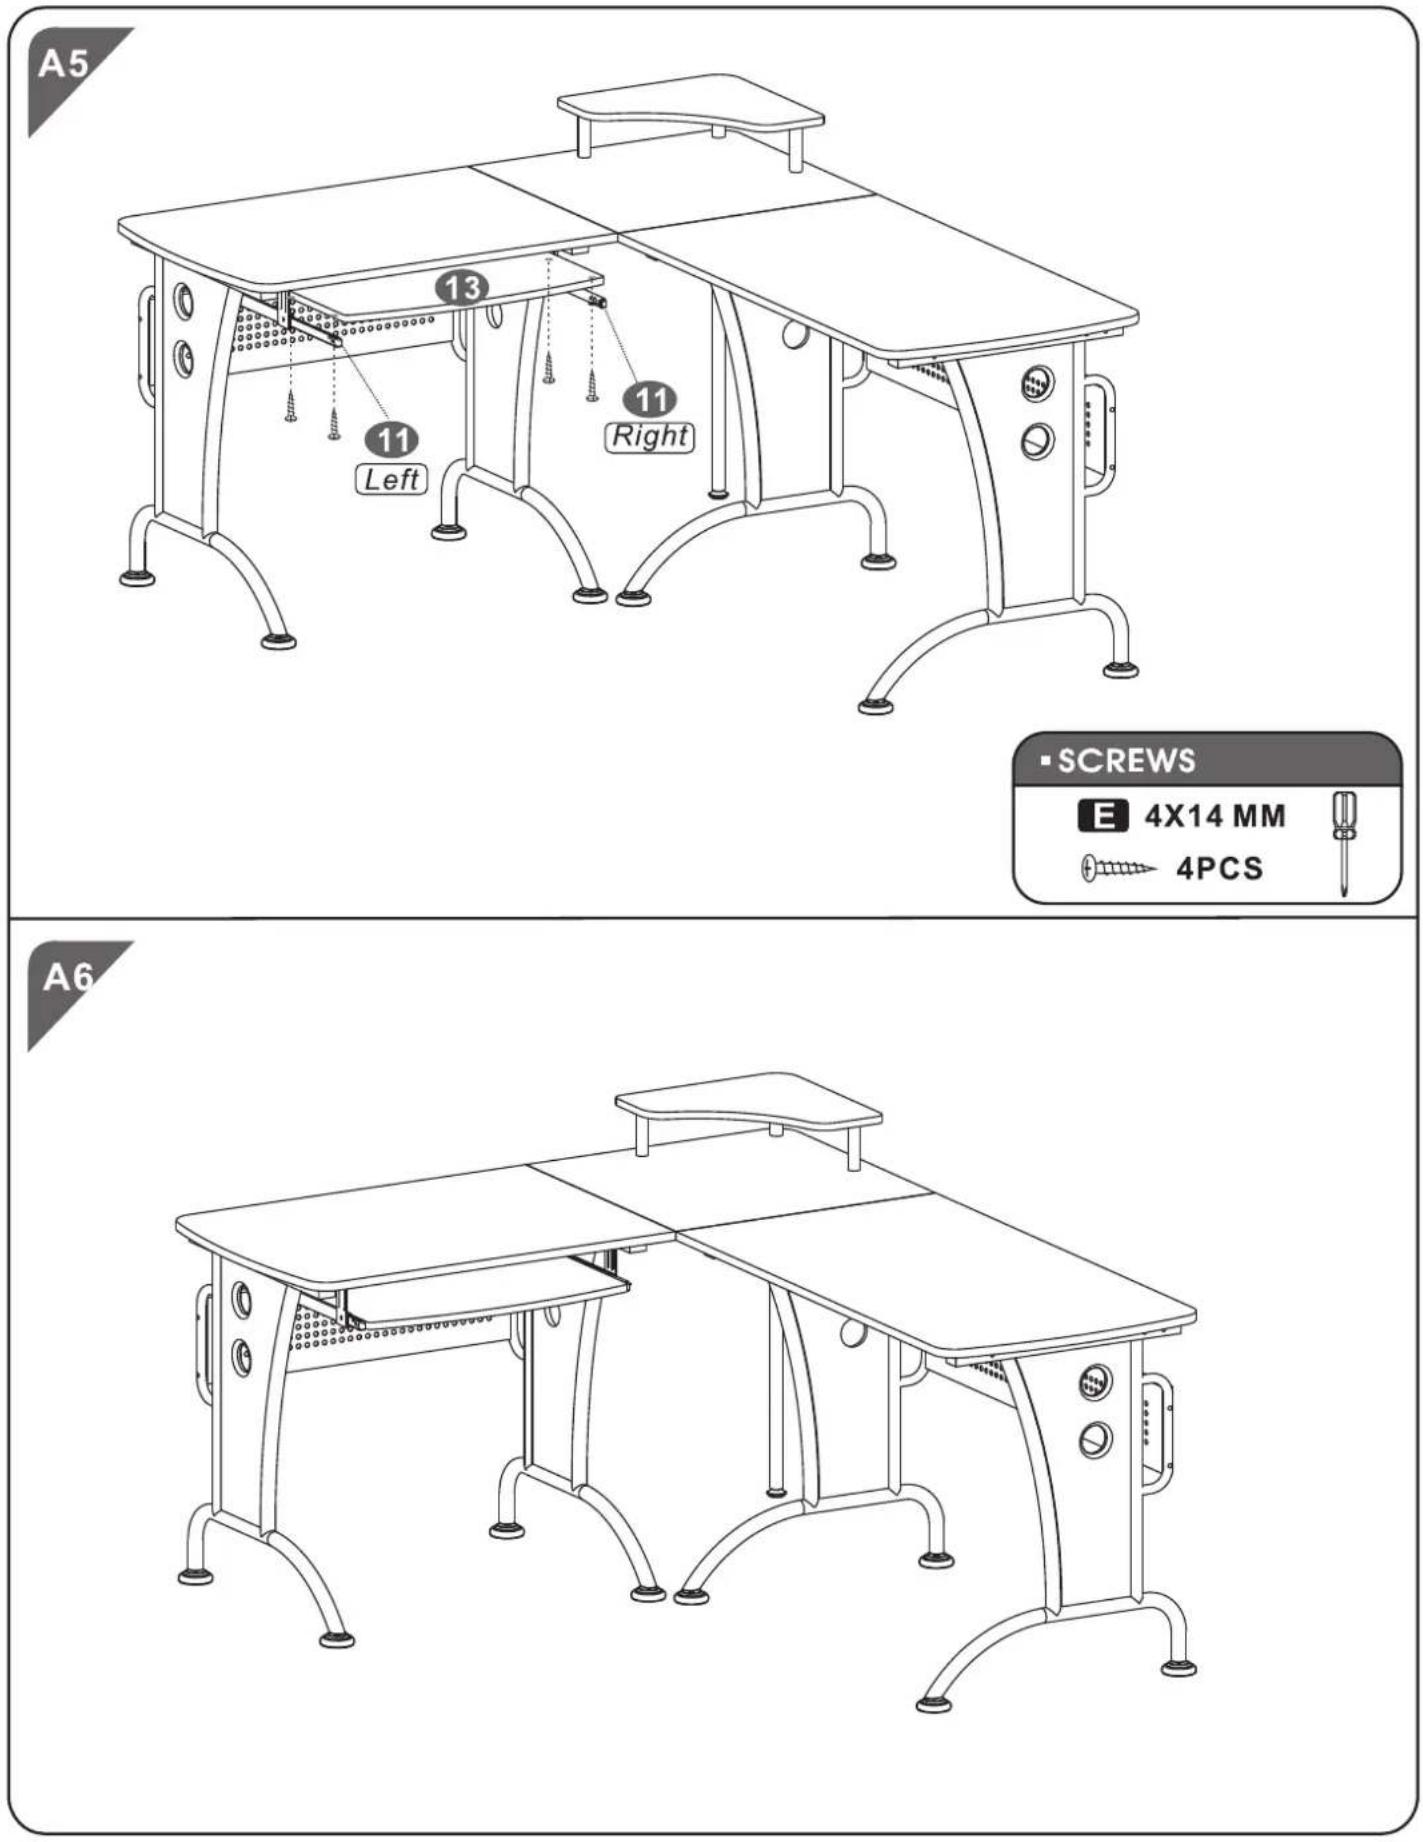
4X14 MM
4PCS
B1

text_image
9 X4 5 Right 1 1 5 Left SCREWS■ SCREWS
C 6X45 MM

4PCS

B2
text_image
19 17 1 1 9 X4 1 H H H H- SCREWS

■ SCREWS

B3

text_image
19 18 17 9 X4■ SCREWS
H 6X12 MM
4PCS
B4
text_image
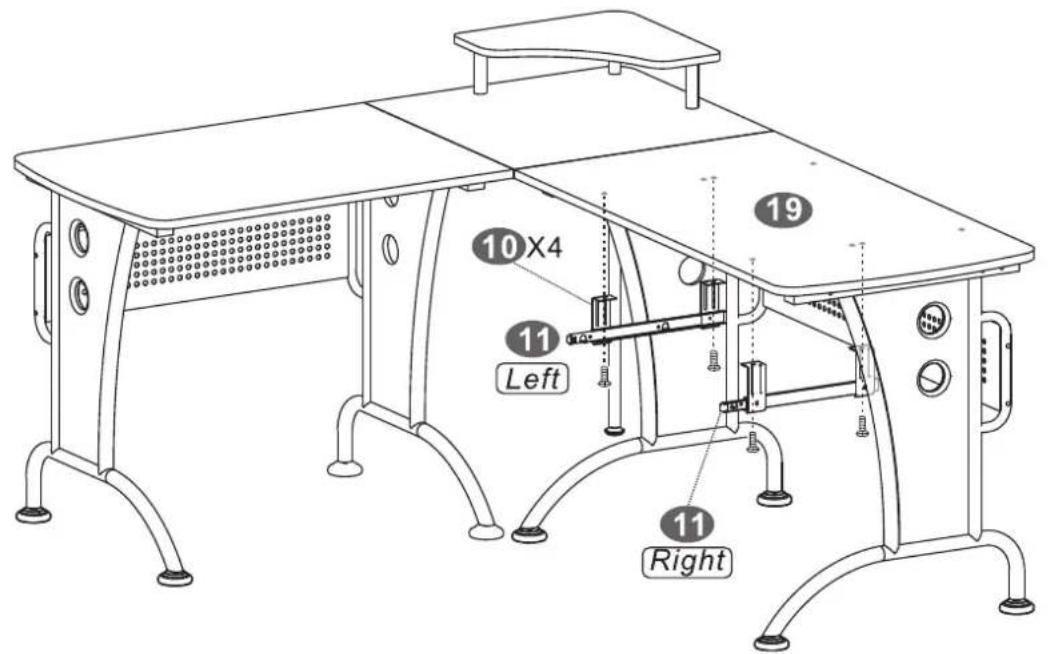
10X4 11 Left 19 11 Right■ SCREWS
H 6X12 MM
4PCS

B5
text_image
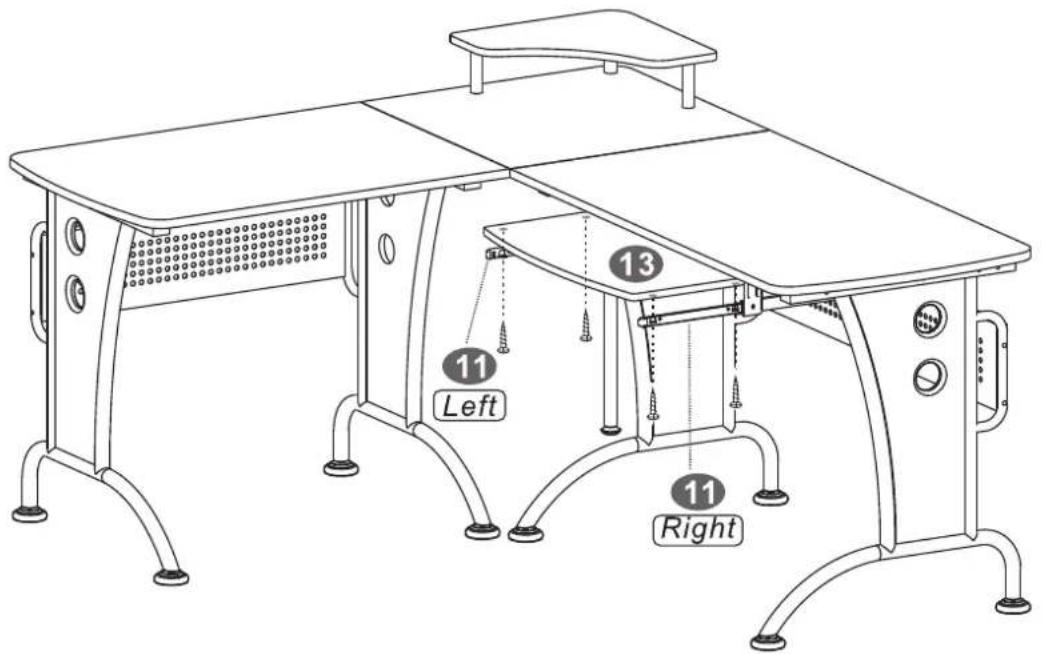
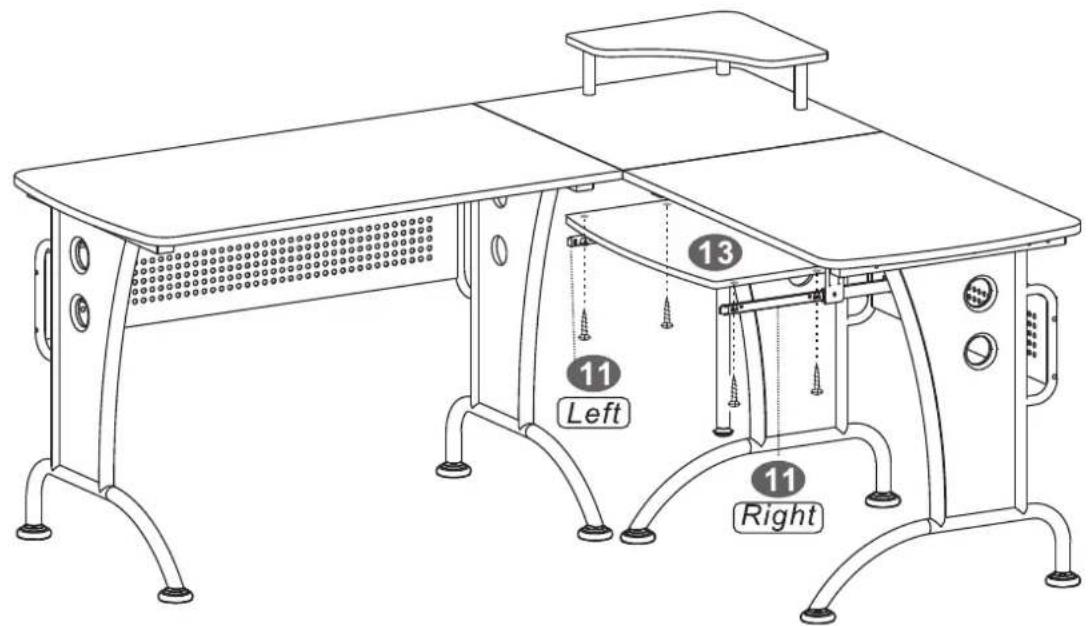
11 Left 13 11 Right- SCREWS

4X14 MM

4PCS

B6
natural_image
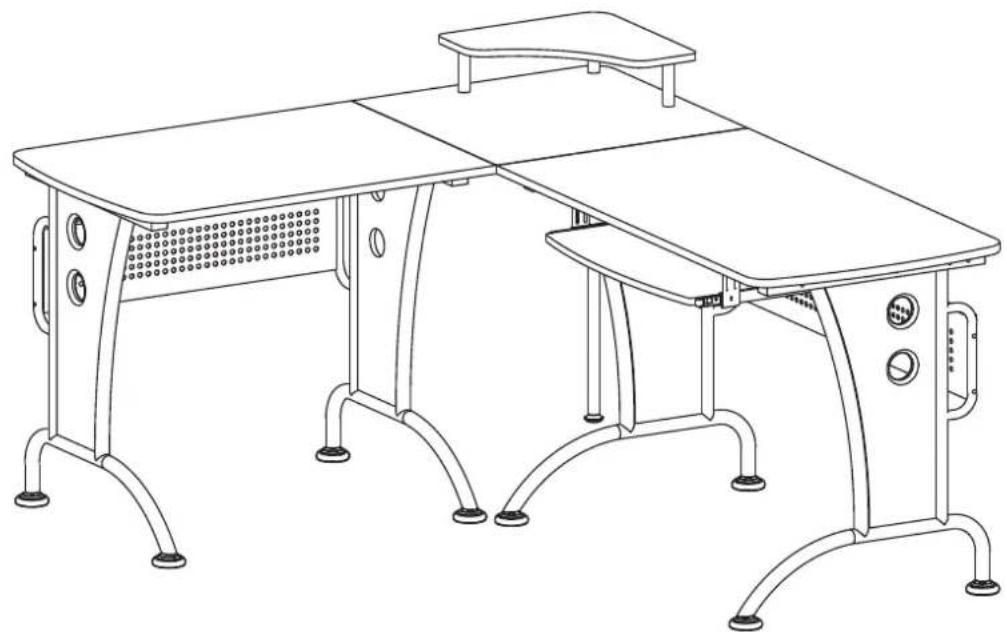
Line drawing of a school desks with adjustable armrests and control knobs (no text or symbols)
text_image
C1 9 X4 1 5 Left 5 Right ■ SCREWS C 6X45 MM 4PCS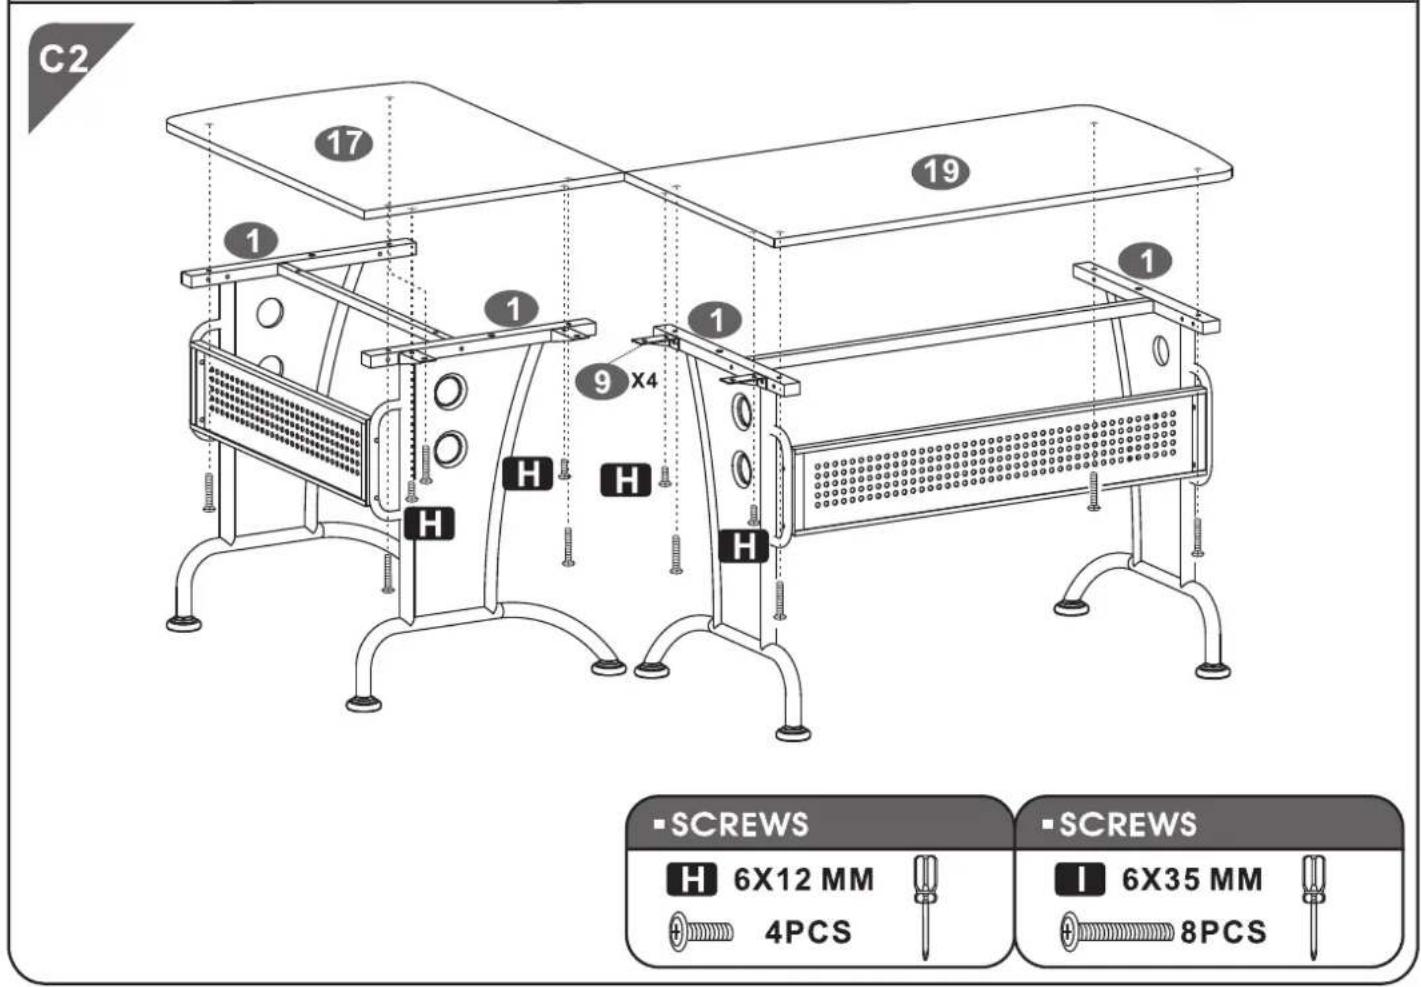
text_image
C2 17 19 1 1 9 X4 H H H H ■ SCREWS H 6X12 MM 4PCS ■ SCREWS I 6X35 MM 8PCSC3

text_image
17 18 9 X4 19■ SCREWS
H 6X12 MM


4PCS
C4
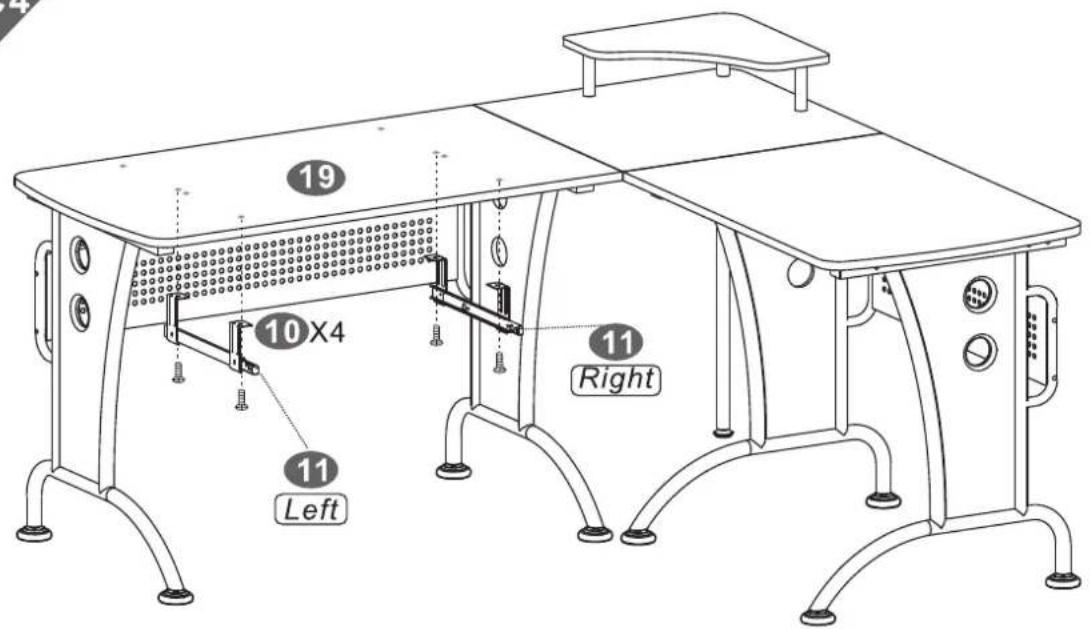
text_image
19 10X4 11 Left 11 Right■ SCREWS
H 6X12 MM


4PCS
C5
text_image
13 11 Left 11 Right■ SCREWS

4X14 MM

4PCS

C6
natural_image
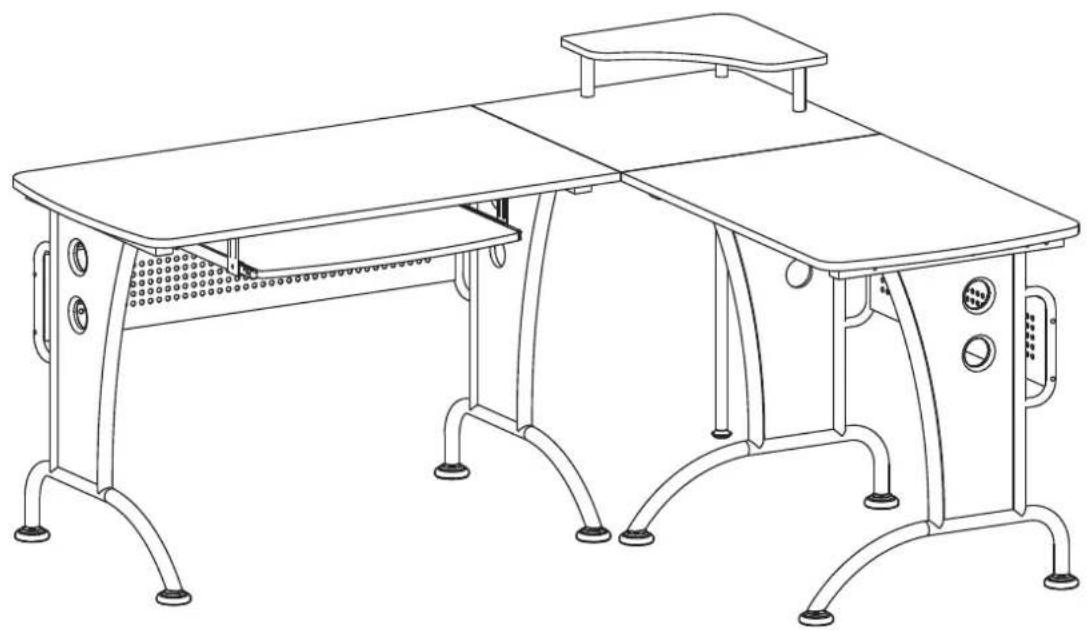
Line drawing of a dual-level computer setup with legs, front legs, and control panels (no text or symbols)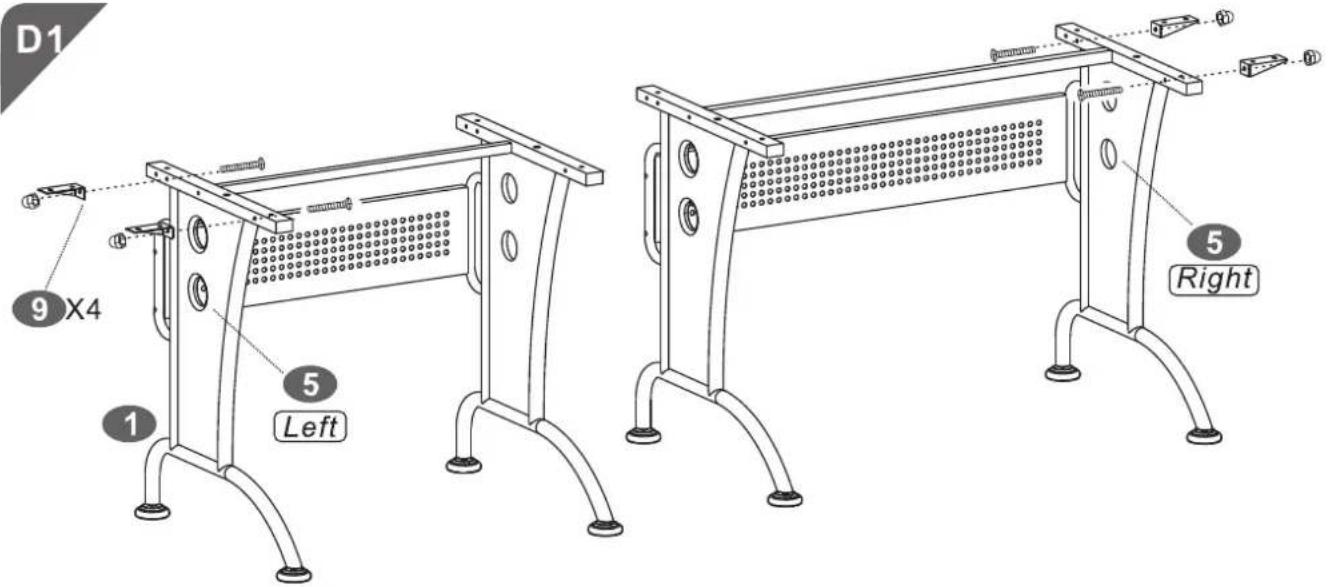
text_image
D1 9 X4 1 5 Left 5 Right- SCREWS
C 6X45 MM

4PCS
D2
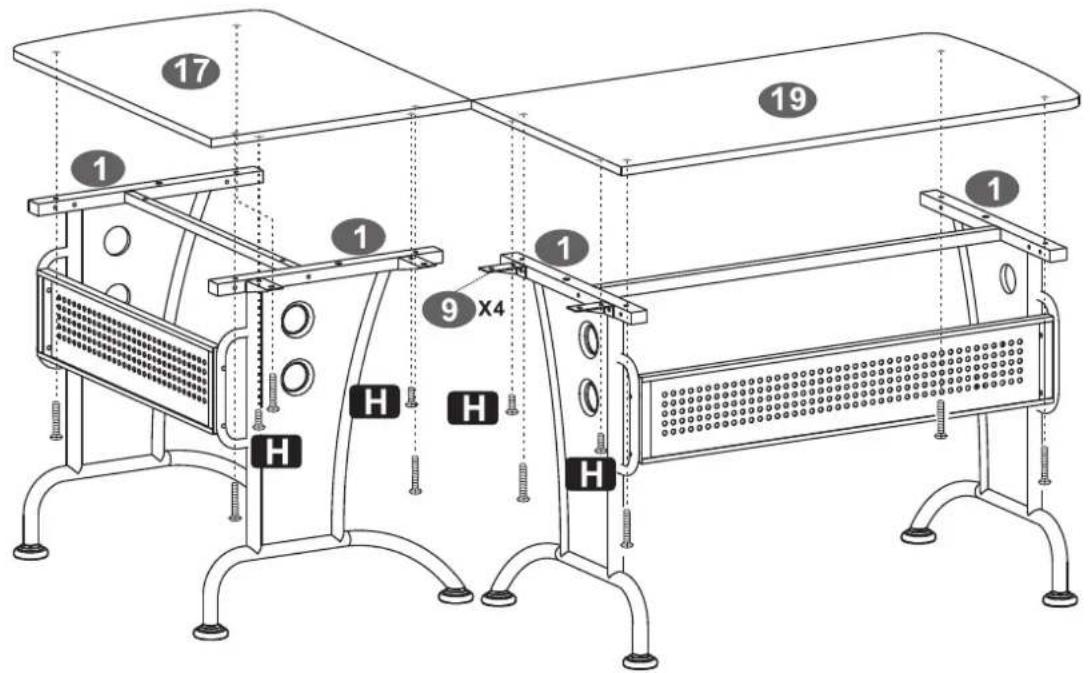
text_image
17 1 1 9 X4 19 1 H H H H H■ SCREWS
H 6X12 MM
4PCS
■ SCREWS
I 6X35 MM
8PCS

D3
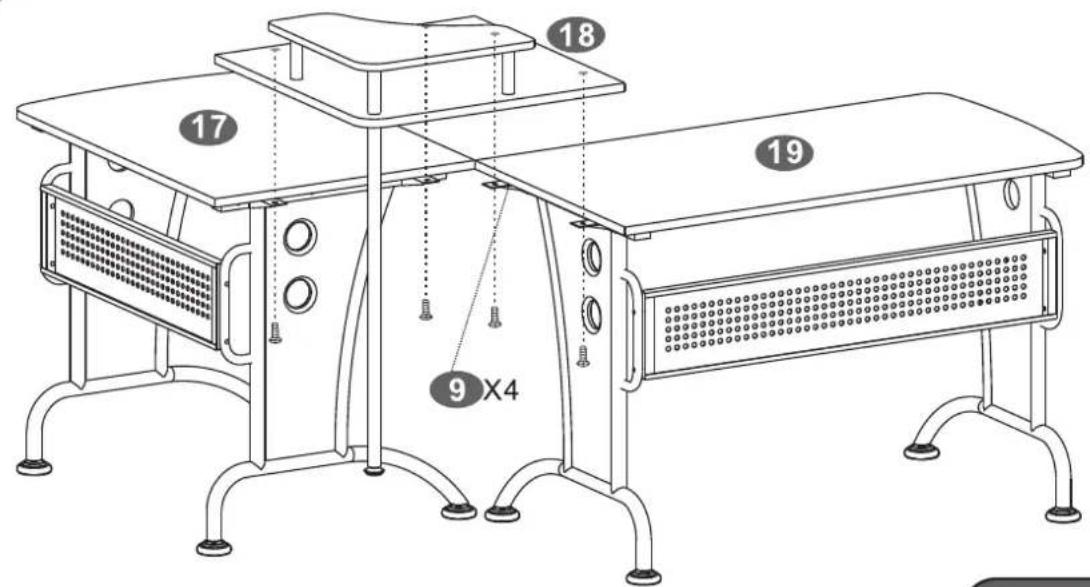
text_image
17 18 9 X4 19■ SCREWS
H 6X12 MM


4PCS
D4
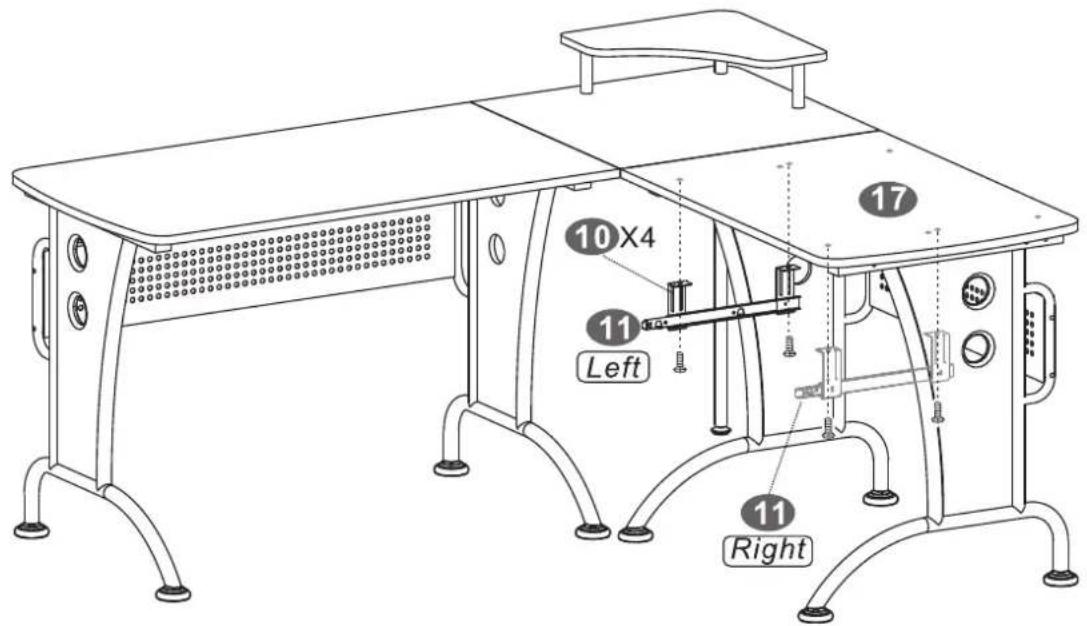
text_image
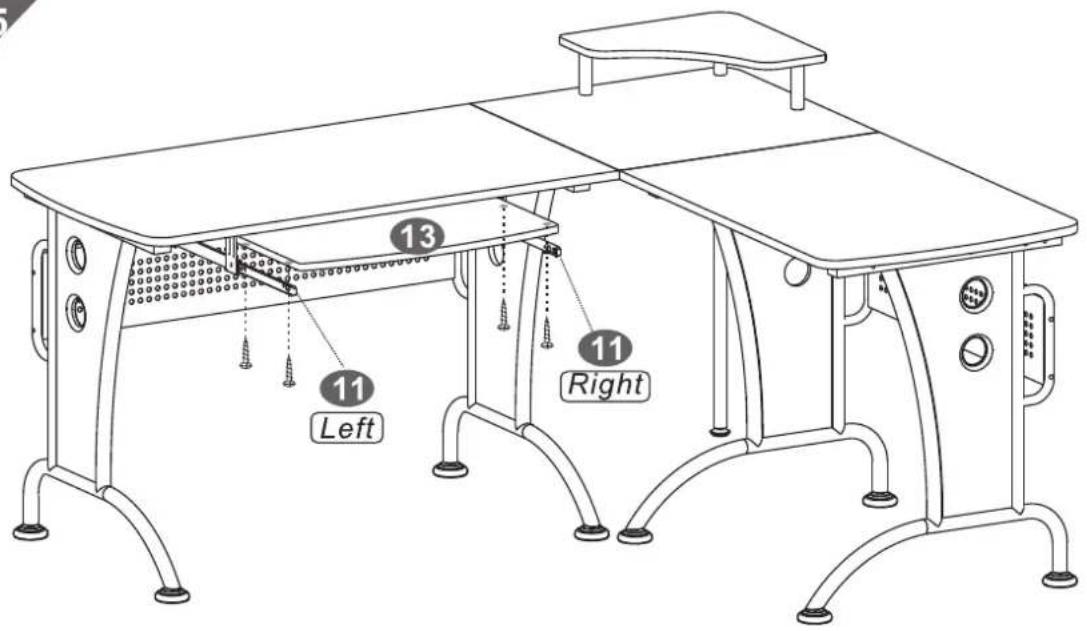
10 X4 11 Left 17 11 Right■ SCREWS
H 6X12 MM


4PCS
D5
text_image
11 Left 13 11 Right■ SCREWS

4X14 MM

4PCS
D6