GVC-7502 - Støvsuger GoldMaster - Gratis brugsanvisning og manual
Find enhedens vejledning gratis GVC-7502 GoldMaster i PDF-format.

Brugerspørgsmål om GVC-7502 GoldMaster
0 spørgsmål om dette apparat. Besvar dem du kender, eller stil dit eget.
Stil et nyt spørgsmål om dette apparat
Download vejledningen til din Støvsuger i PDF-format gratis! Find din vejledning GVC-7502 - GoldMaster og tag din elektroniske enhed tilbage i hånden. På denne side er alle dokumenter nødvendige for brugen af din enhed offentliggjort. GVC-7502 af mærket GoldMaster.
BRUGSANVISNING GVC-7502 GoldMaster

SEDA

Elektrik Süpürgesi Kullanım Kılavuzu
içİNDEKİLER
Önemli Uyarılar 2
Ürün Özellikleri 3
Ürün Görünümü 4
Ürünün Kullanıma Hazırlanması 5
Hortum 5
Teleskopik Boru 5
Zemine göre ayarlanabilen süpürme başlığı 5
Dar uçlu süpürme başlığı 5
Turbo Fırçası 6
Ürünün Kullanımı 7
Emiş Gücü Ayarlama 7
Toz Haznesinin Çıkartılması ve Boşaltılması 8
Filtrelerin Değişimi ve Temizliği 9
Hepa Filtrenin değişimi ve temizliği 9
Motor Koruma Filtresinin değişimi ve temizliği 11
Hava Çıkış Filtresinin değişimi ve temizliği 12
Ürünün Temizliği ve Saklanması 12
Pratik Çözümler 13
Teknik Özellikler 14
Goldmaster marka elektrikli süpürgeyi tercih ettiğiniz için teşekkür ederiz. Ürünü kullanmadan önce bu kullanım kılavuzunu dikkatlice okuyunuz.
Daha sonraki kullanımlarınıza referans olması için kılavuzu güvenli bir yere saklayınız. Bu cihaz ticari amaçlı ya da ağır şartlarda kullanım için uygun değildir. Hatalı kullanımdan dolayı meydana gelebilecek arızalar garanti kapsamı dışındadır.
ÖNEMLİ UYARILAR
- Ürünün üzerinde yazılı voltajın, bulunduğunuz yerin voltajına uygun olup olmadığına dikkat ediniz. Herhangi bir uyuşmazlık durumunda meydana gelebilecek arızalardan firmamız sorumlu tutulamaz ve bu arıza garanti kapsamı dışında işlem görür.
– Ürün sadece evlerde kullanım içindir. Ticari ya da sanayi amaçlı kullanılmamalıdır. Aksi takdirde, garanti kapsamı dışında işlem görecektir.
– Ürünü mutlaka topraklı bir prize takınız. Ürüne zarar vermemek için yetersiz akım sağlayan uzatma kabloları kullanmayınız.
– Ürünün fişini; kullanımdan sonra, aksesuarları takmadan, temizlik ve bakımdan önce mutlaka prizden çekiniz.
– Ürünü temizlemek için zararlı kimyasallar ve aşındırıcı temizleyiciler kullanmayınız.
– Ürünü ıslak zeminlerde, su vb. sıvıları emmek için kesinlikle kullanmayınız.
– Dikkat; Ürün ile yanan sigara, sigara külü veya kibrit çekmeyiniz.
– Dikkat; Ürünü benzin, tiner, alkol, gazyağı vb. yanıcı sıvılar ile aşındırıcı (asit vb) sıvıları emmek için kullanmayınız.
– Ürünü çalışır durumda iken kesinlikle temizlemeyiniz, filtreyi değiştirmeyiniz. -
Ürünü çocuklar, deneyim ve bilgi eksikliği olan kişiler, fiziksel (işitsel, görsel) veya zihinsel engelliler tarafından kullanıldığında, güvenliklerinden sorumlu bir kişinin gözetimi altında olmalıdır. Çocukların ürün ile oynamadıklarından emin olunmalıdır.
– Ürünü kablosundan çekerek taşımayınız.
– Ürünün fişini prizden çıkarırken kablosundan çekmeyiniz. Fışı prizden tutarak çıkartınız.
– Teleskopik boruyu ve hortumu kesinlikle suya daldırarak temizleyiniz. Hasarlı ise kesinlikle kullanmayınız.
– Ürünü kablosunun üzerinden geçirmeyiz, izolasyonuna zarar verebilirsiniz.
– Ürünü soba, fırın, ocak ve buna benzer ısı kaynaklarından uzak tutunuz. -
Ürünün gövdesini hiçbir zaman suya daldırmayınız ve ürünün üzerine su dökülmesini engelleyiniz. Eliniz ıslakken fişli kablosunu prizden çıkarmaya çalışmayınız.
– Kabloyu sararken fişi elinizle tutunuz ve fişin gövdeye çarpmasını engelleyiniz.
– Ürünle, cam ve diğer kesici cisimleri temizlemeye çalışmayınız. - Merdivenleri temizlerken özellikle dikkat ediniz. Fişli kablosunun, köşelere, kapı eşiklerine sıkışmamasına keskin yüzeyli cisimler tarafından kesilmemesine, sıvrılmamasına dikkat ediniz.
– Ürünün fişli kablosunu prize takarken veya prizden çıkarırken ürünün kapalı olduğuna emin olunuz.
– Ürünün kablosu ve fişi üzerinde herhangi bir hasar var ise ürünü çalıştırmayınız. Hasarlı fiş ve kabloyu değiştirmek üzere en yakın yetkili servisimize basvurunuz.
– Arızalı ürünü kullanmayınız ve kendiniz tamir etmeye çalışmayınız. En yakın yetkili servisimize başvurunuz. Sadece orjinal yedek parça kulanmaya özen gösteriniz.
– Banyo vb. ıslak ve nemli ortamlarda asla uzatma kablosu kullanmayınız. - Toner veya kurum gibi ince tozları süpürmeyiniz. Aksi takdirde bu, ürününüz üzerindeki filtrenin kapasitesini azaltacaktır. Ayrıca, ince tozları süpürmeyerek ürününüzün zarar görmesini engellersiniz.
– Daima elektrik süpürgenizi kullandıktan sonra Toz Haznesini bosaltınız.
– Elektrik süpürgenizi, tasarlandığı ve üretildiği kullanım alanları dışında, başka amaçlar doğrultusunda veya hatalı kullanmanızdan kaynaklanabilecek olası arızalarda, üretici firma herhangi bir sorumluluk kabul etmeyecektir.
ÜRÜN ÖZELLİKLERİ
- Nominal 2200W motor gücü
- 410W'lık mekanik emiş gücü ile bütün tozları rahatlıkla cekebilme
– %99,9 toz tutma kapasitesi ile maksimum toz tutma özelliği - 4 litre kapasiteli toz haznesi
- 4 metre uzayabilen hortumu ile küçük mekanlarda süpürgeyi çekmeden temizlik yapabilme
– Paket içeriğinde bulunan turbo fırçası ile halıları daha rahat ve kolay temizleyebilme
– Hafif alüminyum teleskopik borusu ile zorlanmadan temizlik yapabilme
– Ayarlanabilen hız kademesi ile gürültü oranını düşürme ve en düşük hız kademesinde bile yüksek emiş gücü sağlama
– Hava girişinde bulunan hepa filtrenin el ile dokunmadan mekanik bir düğme vasıtası ile rahat temizlenebilmesi ve toz haznesinin elle temas etmeden temizlenebilmesi
- 5 metre otomatik toplanabilir enerji kablosu
ÜRÜN GÖRÜNÜMÜ
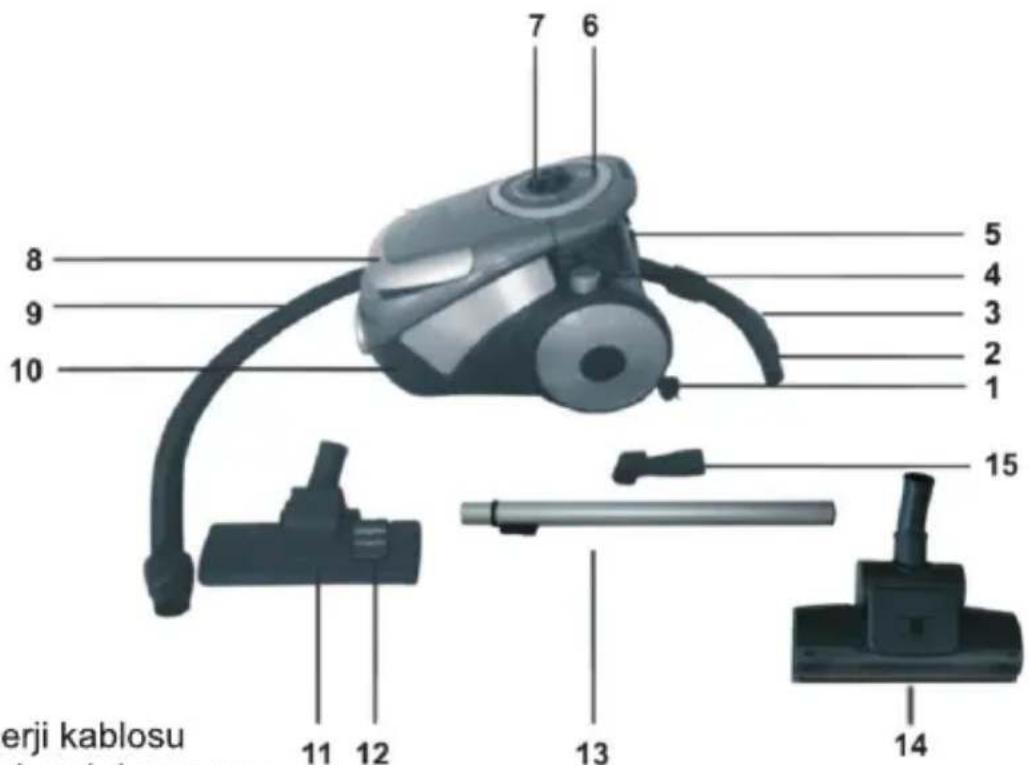
- Enerji kablosu
- Hortum tutma sapi
- Manuel emiş ayar surgusu
- Kablo sarma düğmesi
- Açma/kapatma düğmesi & emiş gücü ayarlama düğmesi
- Toz haznesi
- Hepa filtre temizleme düğmesi
- Ürün tutma sapı
- Esnek hortum
- Alt gövde
- Zemine göre ayarlanabilen süpürme başlığı
- Sert/yumuşak zemin ayarlama mandalı
- Alüminyum teleskopik boru
- Turbo fırçası
- Dar uçlu&fırçalı süpürme başlığı
ÜRÜNÜN KULLANIMA HAZIRLANMASI
Ürünün fişini; aksesuarları takmadan ya da çıkarmadan önce mutlaka prizden çekiniz!
Hortum
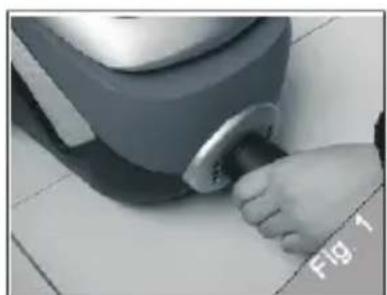
– Hortumu, hortum ucu giriş ağzındaki yuvasına saat yönünde çevirerek yerleştiriniz.(Şekil 1)
– Hortumu çıkarmak için öncelikle ürünün fişini prizden çıkarınız. Hortum başlığını saat yönünün tersine doğru çevirerek çekiniz. (Şekil 1)

natural_image
Close-up of a hand pressing down on a kitchen appliance (no visible text or symbols)Teleskopik Boru
– Teleskopik boruyu hortum ucunda bulunan tutma sapına yerleştiriniz.
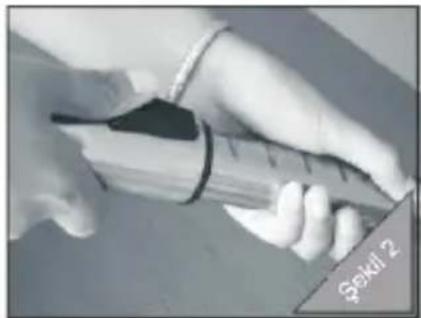
- Teleskopik borunun boyunu ayarlamak için Şekil 2'de gösterilen ayarlama sürgüsüne bastırarak ileriye doğru itiniz. İstediğiniz boya ayarlayınca sürgüyü bırakınız.
– Temizleyeceğiniz yere göre teleskopik borunun ucuna süpürme başlığını takınız.
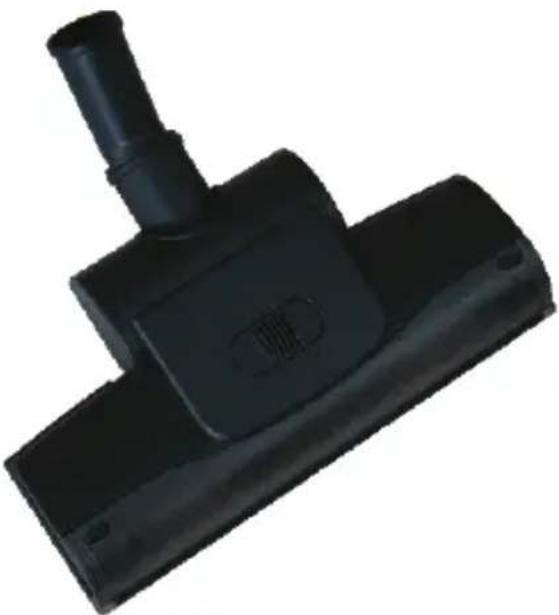
Zemine göre ayarlanabilen süpürme başlığı
Sert ve yumuşak yüzeylerin kuru olarak temizlenmesinde kullanılmaktadır. Fırça dışardayken sert zeminleri (parke, marley vb.), fırça içerdeyken yumuşak zeminleri (halı, kilim vb.) temizleyebilirsiniz.
Dar uçlu&fırçalı süpürme başlığı
Bu süpürme başlığını, teleskopik boru ya da hortum ucuna takarak kullanabilirsiniz. Koltuk köşeleri, radyatör vb. ulaşılması güç yerlerin temizliğinde kullanılır. Ayrıca bilgisayar, kitap rafı gibi yerlerin temizliği için de kullanılır.
Turbo Fırçası
– Sert ve yumuşak yüzeylerin kuru olarak temizlenmesinde kullanılmaktadır.
- Turbo fırça, hava akışı ile çalışan döner bir fırça sistemine sahiptir. Fırçanın dönme hareketi ile temizlediğiniz yüzeydeki parçalar kolaylıkla alınmaktadır. Ayrıca, halı veya zemin üzerinde yer alan iplik, lif gibi maddeler fırça sayesinde daha kolay temizlenmektedir.
- Turbo fırçasını belli bir alanın temizliğinde gereğinden fazla kullanmayınız. Turbo fırçayı kullanırken tüylerin akış yönüne doğru hareket ettiriniz, aksi takdirde halınız zarar görebilir.
– Küçük parçaların temizliği sırasında fırça ve kanalda herhangi bir tıkanma meydana geldiği takdirde, süpürgenizi derhal kapatınız ve tıkanıklığa yol açan parçaları temizleyiniz.
– Turbo fırçayı kullanırken dönen fırçaya asla dokunmayınız.
– Fırçadaki iplik, kıl ve parçaları düzenli olarak temizleyerek fırçanın performansını artırabilirsiniz. Öncelikle süpürgenizi kapatınız, fırçayı teleskopik borudan çıkarınız ve daha sonra turbo fırça başlığını temizleyiniz.
ÖNEMLİ: Turbo fırça; kıl, tüy, iplik gibi lifli parçaların temizlenmesinde etkinlik sağlamaktadır. Özellikle kedi, köpek beslenen evlerde halı veya mobilyalar üzerindeki tüyleri kolaylıkla derinlemesine temizlediği için tercih edilmektedir.
natural_image
Black plastic mechanical component with a protruding shaft and base (no visible text or symbols)ÜRÜN KULLANIMI
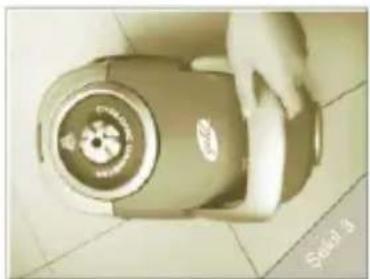
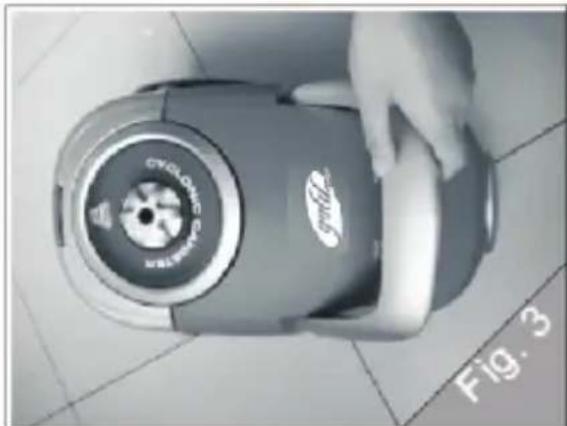
– Ürünü Şekil 3'deki gibi geniş taşıma sapından tutarak taşıyabilirsiniz.
– Ürünü kullanmadan önce, kablosunu dışarıya doğru çekip uygun uzunluğa getiriniz ve fisi uygun değerdeki prize takınız.
– Ürünü açma/kapatma düğmesine basarak çalıştırınız.
natural_image
Hand holding a beige cylindrical device with a circular logo on its side, placed on tiled floor (no visible text or symbols)Emiş Gücü Ayarlama
Ürünün emiş gücünü iki farklı yöntem ile ayarlayabilirsiniz:
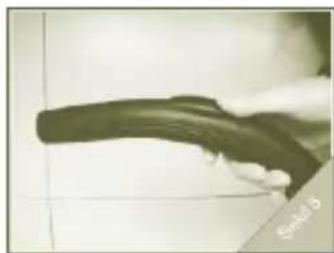
- Hortum tutma sapında yer alan hava ayar sürgüsü sayesinde hava ayarı yaparak tül, perde gibi yüzeyleri daha rahat temizleyebilirsiniz. (Şekil 5)
natural_image
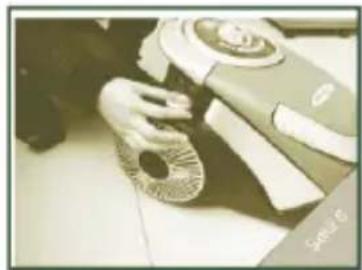
Close-up of a dark, elongated object with a white base, possibly a tool or device, against a plain background (no visible text or symbols)– Şekil 6'daki gibi emiş gücü ayar düğmesini sağa, sola çevirerek emiş gücünü ürünü kullandığınız zemine göre ayarlayabilirsiniz.
natural_image
Close-up of hands cleaning a small electronic device on tiled floor (no visible text or symbols)– Ürün ile işiniz bittikten sonra fişi prizden çıkarınız. Kablo sarma düğmesine basınız. Kablo sarma işlemi sırasında bir takılma söz konusu olursa, kabloyu çok az elinizle kendinize doğru çekerek kablo sarma düğmesine tekrar basınız.
Not: Her kullanımdan sonra toz haznesinde bulunan hepa filtrenin tozlardan arınıp hepa filtrenin daha uzun ömürlü kullanılması; ürünün daha verimli çalışması için ürünün üst kısmında bulunan hepa filtre temizleme düğmesini sağa sola çeviriniz.
TOZ HAZNESİNİN ÇIKARTILMASI VE BOŞALTILMASI
Daima elektrik süpürgenizi kullandıktan sonra Toz Haznesini boşaltınız. Bu işlemi yaparken ürünü kapalı konuma getiriniz ve fişi prizden çıkarınız. Hortum başlığını saat yönünün tersine doğru çevirerek çekiniz.
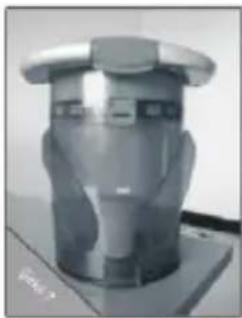
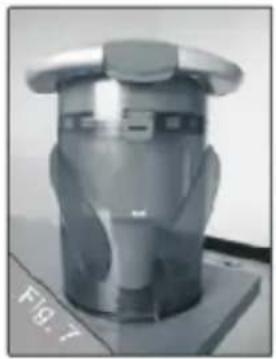
- Toz haznesi içerisinde bulunan tozlar maksimum seviyeye geldiğinde tozlar toz haznesinden boşaltılmalıdır. (Şekil 7)
natural_image
Close-up of a transparent cylindrical object with a flat top and internal structure, possibly a mechanical or electronic component (no visible text or symbols)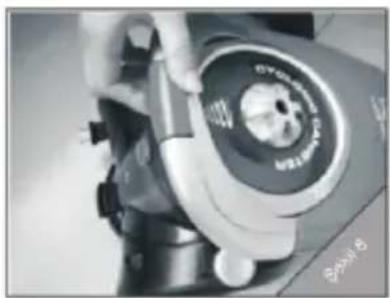
natural_image
Close-up of a hand adjusting a mechanical component with a circular dial and label (no readable text or symbols)- Toz haznesini çıkartmadan önce hepa filtrede bulunan tozlari toz haznesine boşaltmak için hepa filtre temizleme düğmesini sağa sola çeviriniz. Toz haznesini üründen çıkartmak için toz haznesi çıkarma mandalını hafifçe yukarı çekiniz.(Şekil 8)
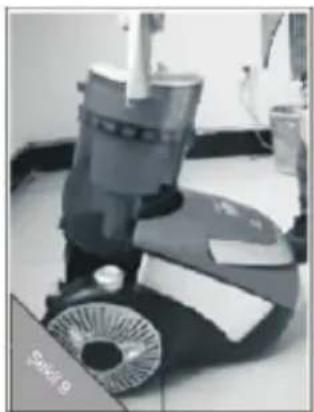
– Toz haznesi tutma sapını yukarı çekerek toz haznesini üründen çıkarınız. (Şekil 9)
natural_image
Close-up of a small industrial vacuum cleaner with wheels and a rotary knob (no visible text or symbols)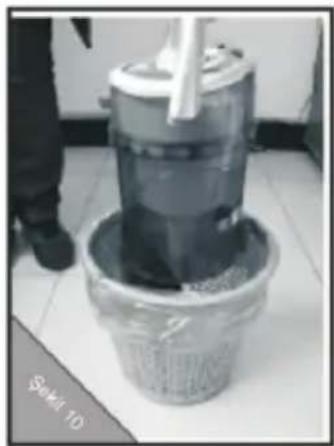
natural_image
Close-up of a cylindrical container with a lid and handle, placed on tiled floor (no visible text or symbols)- Çıkardığınız toz haznesini tozu boşaltacağını kovanın üstüne getiriniz. (Şekil 10)
– Toz boşaltma kapağını açarak toz haznesindeki tozları kovaya boşaltınız. (Şekil 11)
natural_image
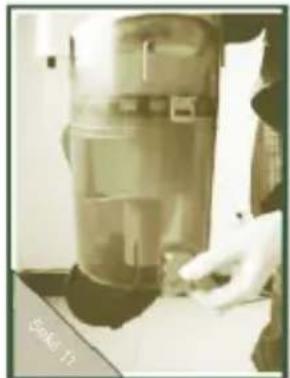
Close-up of a hand holding a transparent cylindrical device with a label 'SAR-13' visible (no other text or symbols)– Toz boşaltma işlemi bittikten sonra toz haznesinin kapağını kapalı konuma getiriniz. (Şekil 12)
- Toz haznesini ürünün toz haznesi bölümüne dikkatlice yerleştiriniz. Toz haznesinin yerine yerleştigine dair klik sesi duyana kadar toz haznesini yerine takınız.
FİLTRELERİN DEĞİŞİMİ VE TEMİZLIĞI
Üründe toz haznesinde bulunan Hepa filtre; motor kısmında bulunan koruma filtresi; hava çıkışında bulunan koruma filtresi olmak üzere üç adet filtre bulunmaktadır.
Süpürgenizin emiş gücünü düşük hissettiğiniz zaman filtreleri temizleyiniz. Bu işlemi yaparken ürünü kapalı konuma getiriniz ve fişi prizden çıkarınız. Hortum başlığını saat yönünün tersine doğru çevirerek çekiniz.
Hepa Filtrenin değişimi ve temizliği
– Hepa filtrede bulunan tozları toz haznesine boşaltmak için hepa filtre temizleme düğmesini sağa sola çeviriniz. Filtrenin temizliği ve değişimi için toz haznesini üründen çıkarınız.
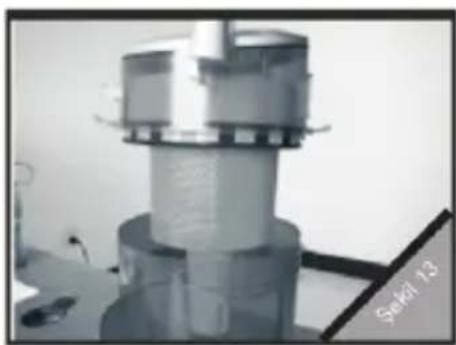
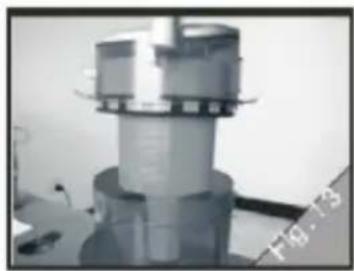
– Haznenin iki yanında bulunan mandalları yukarı kaldırarak filtrenin bulunduğu bölümü açınız. (Şekil 13)
natural_image
Close-up of a mechanical device with cylindrical components and a labeled section 'Sekri 13' (no readable text or symbols on the device itself)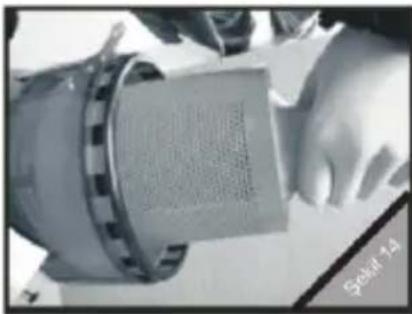
natural_image
Close-up of a mechanical component with a textured surface and a hand holding it (no visible text or symbols)– Şekil 14'deki gibi hepa filtreyi çevreleyen gözenekli koruma filtresini tutunuz ve saat yönünde çevirerek çıkarınız.
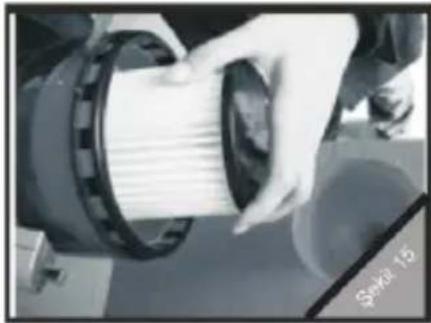
– Gözenekli filtreyi çıkardığınızda şekil 15'deki gibi hepa filtreyi göreceksiniz. Hepa filtreyi çıkarmak için şekildeki gibi tutunuz ve saat yönünde çevirerek çıkarınız.
natural_image
Close-up of hands handling a white cylindrical component, possibly a filter or filter array (no visible text or symbols)– Hepa filtreyi fırça yardımı ile suya tutarak temizleyiniz.
– Hepa filtreyi oda sıcaklığında, yaklaşık 15 saat kuruması için bekletiniz. Hepa filtre tamamen kurumadan yerine yerleştirmeyiniz.
– Eğer hepa filtre kullanılmayacak kadar kirli ise, ürüne yeni hepa filtre takınız.
– Filtre yerleştirme işlemleri çıkarma işleminin tersi olup;
1) Öncelikle hepa filtreyi toz haznesine yerleştiriniz ve tırnakların uygun şekilde kilitlenmesini sağlamak için hepa filtreyi saat yönünün tersine doğru çeviriniz. Hepa filtrenin yerine sabitlendiğinden emin olunuz.
2) Gözenekli koruma filtresini hepa filtrenin üzerine yerleştiriniz ve tırnakların uygun şekilde kilitlenmesini sağlamak için gözenekli koruma filtresini saat yönünün tersine doğru çeviriniz. Gözenekli koruma filtresinin yerine sabitlendiğinden emin olunuz.
3) Toz haznesinin alt ve üst bölümünü, mandal yerlerinin karşılıklı olarak gelecek şekilde birleştiriniz ve mandalları kilitli konuma getiriniz. Toz haznesinin tamamen kilitlendiğinden emin olunuz.
Not: Hepa filtre ve gözenekli koruma filtresini yerine yerleştirirme esnasında toz haznesinde bulunan montaj yuvalarına oturmasına dikkat ediniz. Aksi halde tırnaklar kırılabilir.
Motor Koruma Filtresinin değişimi ve temizliği
- Motor filtresi her 100 saat kullanımdan sonra yenisi ile değiştirilmelidir. Filtrenin temizliği ve değişimi için toz haznesini üründen çıkarınız.
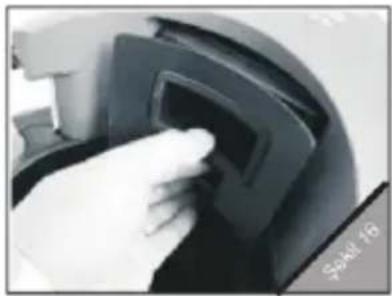
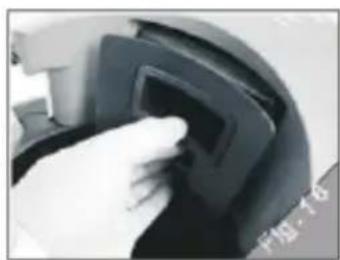
– Şekil 16'daki gibi filtre çıkartma düğmesine basarak filtre bölümünü üründen çıkartınız.
natural_image
Close-up of a gloved hand pressing a button on a black mechanical component (no visible text or symbols)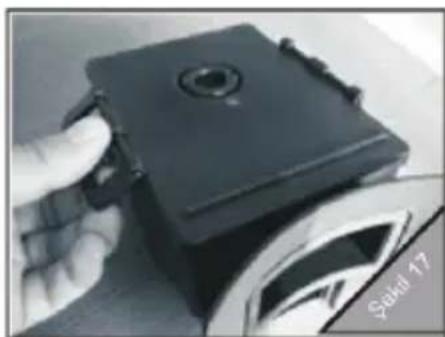
natural_image
Close-up of a hand holding a black electronic device with a circular lens, next to a circular component labeled 'Sekil 17' (no other text or symbols visible)– Şekil 17'deki gibi filtre kapağını yukarı kaldırarak açınız.
- Filtre kapağını açtığınızda şekil 18'deki gibi motor filtresini göreceksiniz.
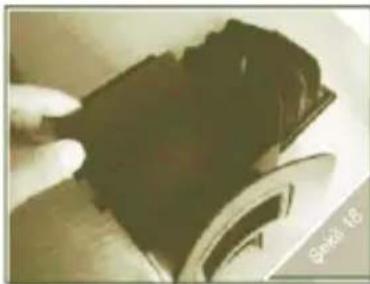
natural_image
Close-up of a hand holding a dark object with a circular inset showing a magnified view (no visible text or symbols)- Motor filtresini suya tutarak temizleyiniz.
- Motor filtresini tamamen kuruyuncaya kadar bekletiniz.
Motor filtresini tamamen kurumadan yerine yerleştirmeyiniz.
– Eğer motor filtresi kullanılmayacak kadar kirli ise, ürüne yeni motor filtresi takınız.
- Motor filtresini yerine yerleştirdikten sonra filtre kapağını kapatınız.
– Filtre bölümünü ürüne doğru bir şekilde yerleştiriniz.
– Toz haznesini ürünün toz haznesi bölümüne dikkatlice yerleştiriniz.
Toz haznesinin yerine yerleştigine dair klik sesi duyana kadar toz haznesini yerine takınız.
Hava Çıkış Filtresinin değişimi ve temizliği
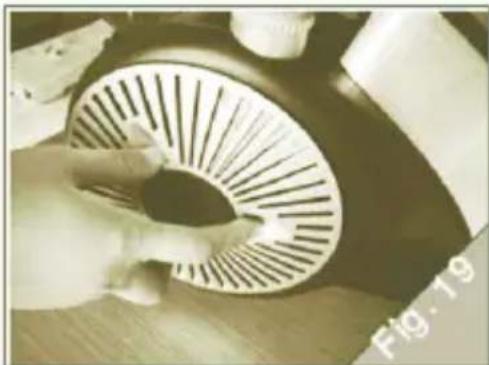
– Hava çıkış filtresi ürünün arka sağ tekerleğinde bulunmaktadır. Hava çıkış filtresini çıkartmak için, önce tekerlek kapağını saat yönünün tersine çeviriniz. (Şekil 19)
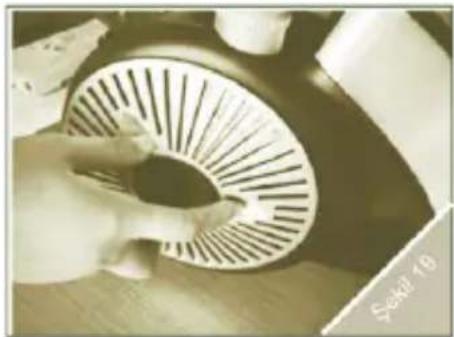
natural_image
Close-up of a hand holding a circular mechanical component with radial grooves (no visible text or symbols)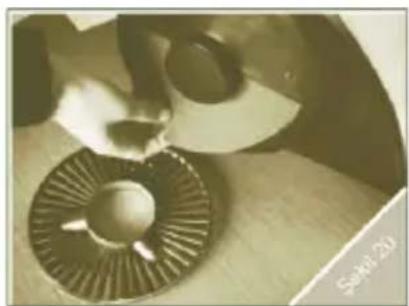
natural_image
Close-up of a mechanical component with a metallic flange and a pointed tip, no visible text or symbols- Tekerlek kapağını açtığınızda şekil 20'deki gibi hava çıkış filtresini göreceksiniz.
– Hava çıkış filtresini yerinden çıkartınız.
– Hava çıkış filtresini suya tutarak temizleyiniz.
– Hava çıkış filtresini tamamen kuruyuncaya kadar bekletiniz.
Hava çıkış filtresini tamamen kurumadan yerine yerleştirmeyiniz.
– Eğer hava çıkış filtresi kullanılmayacak kadar kirli ise, ürüne yeni hava çıkış filtresi takınız.
– Hava çıkış filtresini yerine yerleştirdikten sonra tekerlek kapağını takıp saat yönünde çevirerek yerine yerleştiriniz.
Not: Filtreler takılı olmadan ürünü kesinlikle çalıştırmayınız!
ÜRÜNÜN TEMİZLİĞİ VE SAKLANMASI
- Ürün ile işiniz bittikten sonra fişi prizden mutlaka çıkarınız. Kablo sarma düğmesine basınız. Kablo sarma işlemi sırasında bir takılma söz konusu olursa, kabloyu çok az elinizle kendinize doğru çekerek kablo sarma düğmesine tekrar basınız.
– Ürünün temizliğinden önce mutlaka bütün parçaları üründen çıkarınız.
- Ürünün mekanik parçalarını kesinlikle herhangi bir kimyasal madde ile yıkamayınız. Aksi halde ürüne zarar verebilir.
– Ürün ve parçalarının nemli bez ile silinmesi önerilir.
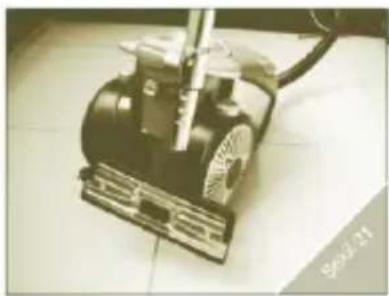
natural_image
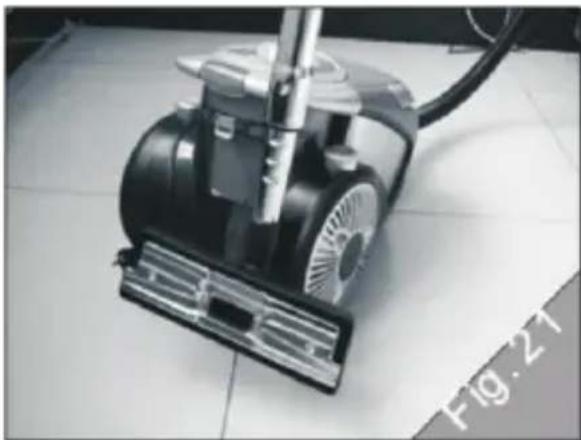
Close-up of a small electric motor on tiled floor (no visible text or symbols)- Ürünü yatay olarak Şekil 21'deki gibi muhafaza ediniz.
PRATİK ÇÖZÜMLER
| Problem | Olası Neden | Çözüm |
| Ürün çalışmıyor. | Ürünün kablosu prize bağlı değildir. | Ürünün fişini şebeke prizine takınız. |
| Priz ya da ürünün fişi arızalıdır. | Yetkili servisimize başvurunuz. | |
| Emiş Gücü yetersiz | Toz haznesi dolmuştur. | Toz haznesini temizleyiniz. |
| Filtreler tıkanmıştır. | Filtreleri temizleyiniz. | |
| Hortum tutma sapında bulunan hava ayar sürgüsü açık olabilir. | Hava ayar sürgüsünü kapatınız. | |
| Süpürme başlığı, teleskopik boru ya da hortum tıkalı olabilir. | Tıkalı olan bölgeyi temizleyiniz. | |
| Emiş Gücü ayar düğmesi minumun seviyede olabilir. | Emiş gücü seviyesini artırınız. |
TEKNİK ÖZELLİKLER
Motor Gücü: 2200W
Voltaj: 220V-240V AC, 50/60Hz
Mekanik Emiş Gücü: 410W
Toz Hazne Kapasitesi: 4L
Gürültü Oranı : ≤79dB
Kablo uzunluğu: 5m
natural_image
Simple line drawing of a trash bin with crossed lines indicating no waste or plastic discharge (no text or symbols)WEEE
Cihazı evsel atıklar aracılığıyla imha etmeyiniz. Cihazın kurallara uygun olarak imha edilmesi için lütfen yetkili ve sertifikalı elektronik çöp toplama yerine başvurunuz. Bu toplama yerlerinin adreslerini, çevre koruması yetkililerinden veya belediyeden öğrenebilirsiniz. Cihazın ambalajı (karton kutu ve karton içindeki destek parçaları) atık kağıt olarak imha edilebilir.
Cihazın Kullanım Ömrü 10 Yıldır.
NOT: Ürünün özellikleri ve tasarımı haber verilmeksizin değiştirilebilir.
EEE Yönetmeliğine uygundur.
EN-60335-2-2


SEDA
GVC-7502
GVC-7503
Elektrik Süpürgesi
Merkez Servis İletişim Bilgileri
AYYILDIZ ELEKTRİKLİ EV EŞYALARI İMALAT VE PAZARLAMA AŞ.
Bakır ve Pirinççiler Sanayi Sitesi Karanfil Sk. No:1 Beylikdüzü/İstanbul TÜRKİYE
Fax:0212 693 02 24
Web:www.goldmaster.com.tr
E-mail:info@goldmaster.com.tr

CONTENTS
Important Safeguards 2
Product and accessories 3
Preparing for use 4
Hose 4
Telescopic tube 4
Floor brush 5
Integrated brush & nozzle 5
Using the appliance 5
Adjusting suction power 6
Emptying the dust container 6
Cleaning the filter and replacement 7
Cleaning or Replacing the HEPA filter 7
Cleaning or Replacing the per motor protection filter 8
Cleaning or Replacing the post motor filter 9
Cleaning 9
Storage 9
Troubleshooting 10
Specification 10
Thank you for purchasing this Vacuum Cleaner. Before using this product, it is important to read this instruction manual carefully.
Keep this manual in a safe place. If you hand this product onto anyone else, ensure to pass on along all the documentations relating to this product.
To ensure the safe use of the product, please familiarize yourself with the product using for the first time.
IMPORTANT SAFEGUARDS
- Do not leave appliance when plugged in. Unplug from outlet when not in use.
- Do not use outdoors or on wet surfaces.
- Do not allow to be used as a toy. Close attention is necessary when used by or near children.
- Use only as described in this manual. Use only manufacturer's recommended attachments.
- Do not use with damaged cord or plug. Do not use vacuum if it has been dropped, damaged, left outdoors, or dropped in water. Return it to an authorized service center.
- Do not pull or carry by cord, use cord as a handle, close a door on cord, or pull cord around sharp edges or corners.
- Do not run appliance over cord. Keep cord away from heated surfaces.
- Do not unplug by pulling on cord. To unplug, grasp the plug, not the cord.
- Do not handle plug or appliance with wet hands.
- Do not put any object into openings. Do not use with any opening blocked; keep free of dust, lint, hair and anything that may reduce air flow.
- Keep hair, loose clothing, fingers, and all parts of body away from openings and moving parts.
- Do not pick up anything that is burning or smoking, such as cigarettes, matches, or got ashes.
– Turn off the control before unplugging. - Use extra care when cleaning on stairs.
- Do not use to pick up flammable or combustible liquids such as gasoline or use in areas where they may be present.
- Look on your vacuum cleaner and follow all label and marking instructions.
- Keep end of hose, wands and other openings away from your face and body.
- Do not use the vacuum cleaner without filters in place.
- Always unplug this appliance before connecting or disconnecting hand
vacuum hose.
- Store the vacuum indoors. Put the vacuum away after us to prevent tripping accidents.
- Using improper voltage may result in damage to the motor and possible injury to the user. Correct voltage is listed on the rating label.
- Use only on dry, indoor surfaces.
- Do not use for any purpose other than described in this user's guide.
- If the cleaner is damaged, it must be repaired by the manufacturer or its service agent or a similarly qualified person in order to avoid a hazard.
Product and accessories
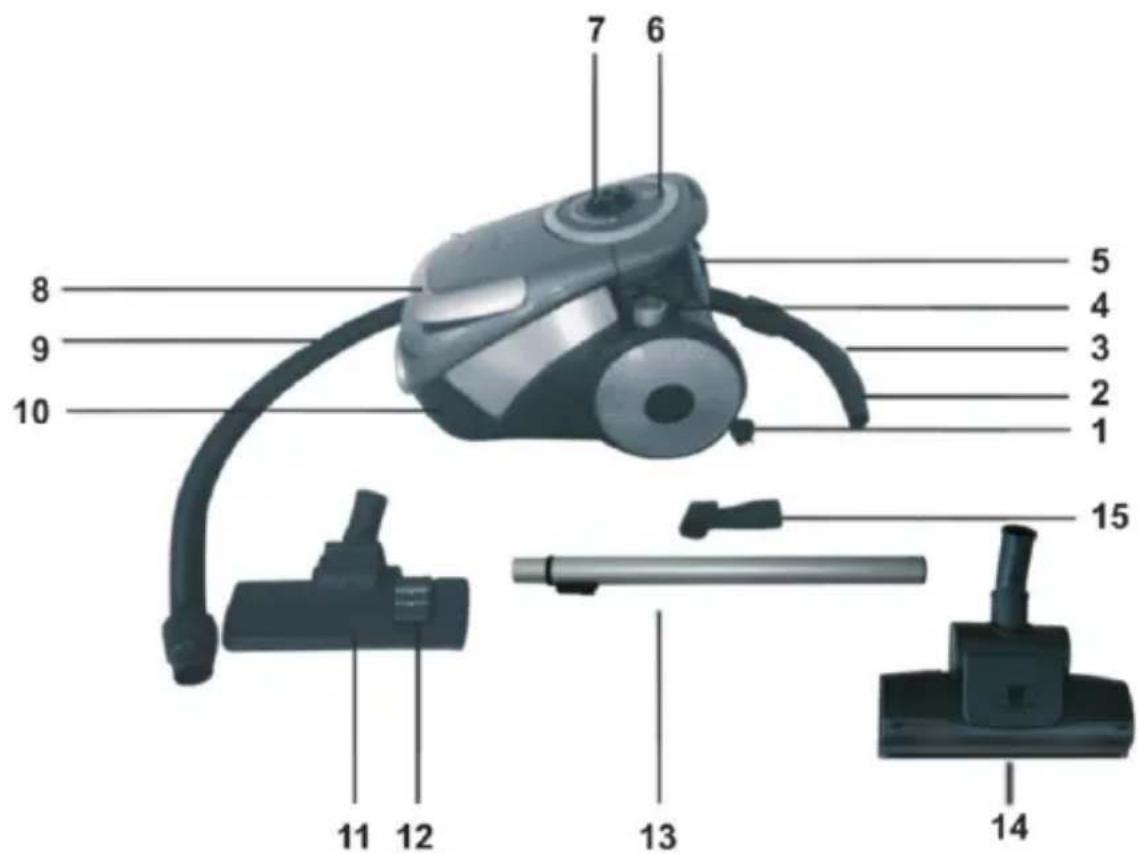
- Power cord
- Hand grip
- Suction power slider
- Cord rewinder release button
- On/off switch & suction power adjustment knob
- Dust container
- Dust knocking knob
- Carry handle
- Flexible Hose
- Lower house
- Metal floor brush
- Hard floors/carpet selector
- Aluminum telescopic tube
- Turbo brush
- Integrated brush and nozzle
Preparing for use
Hose
To connect the hose, push it into the appliance and turn it clockwise.
To disconnect the hose, turn it anticlockwise and pull it out of the appliance.
See Fig.1
Telescopic tube
Press the spring loaded lock button on the telescopic tube part and slide the lock button into the opening in the other tube part.
-Connect the telescopic tube part to the handgrip of the hose. Insert the narrow section into the wider section and turn a little. Adjust the telescopic tube to the desired length.
Push the slide on the tube upwards and push the lower tube part downwards or pull it up-wards.see Fig.2
natural_image
Close-up of a hand pressing down on a surface with a device component (no visible text or symbols)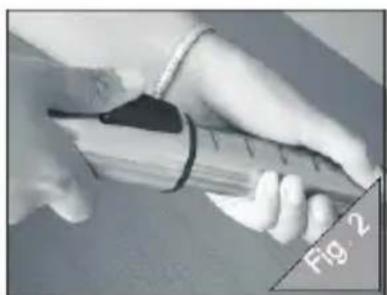
natural_image
Close-up of a hand holding a syringe with a pointed tip, no visible text or symbolsFloor brush
-You can use the floor brush on the carpet or on the hard floors.
-To clean hard floors, push the rocker switch on top of the floor brush with your foot to make the brush strips come out of the brush housing.
-To clean carpets, push the rocker switch on the other side to make the brush strips disappear into the housing.
Integrated brush & nozzle
-The product Includes the brush & nozzle accessories.
-Connect the brush and nozzle directly to the handgrip or to the tube.
-
Use the crevice nozzle to vacuum the small area or clean narrow corners or hard-to-reach places.
-
Use the brush nozzle to clean computers, bookshelves etc.
Using the appliance
Vacuum Cleaning
-You can carry the vacuum cleaner by the handle on the top front of the appliance.see Fig.3
- Pull the cord out of the appliance and insert the mains plug into the wall socket.
- Press the On/Off button on top of the appliance with your foot or switch on the appliance. See Fig.4
natural_image
Top-down view of a car with visible branding and 'CYCLONE' logo on tiled floor (no readable text or symbols beyond branding)Adusting suction power
You can adjust the suction power by
-The suction power slider on the handgrip of the hose. See Fig.5
-With the suction power control on the vacuum cleaner.
( only specified models).see Fig.6

natural_image
Close-up of a hand holding a black flexible hose, labeled 'Fig. 5' (no other text or symbols visible)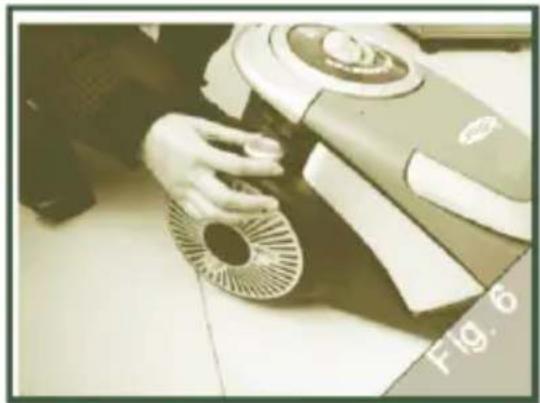
natural_image
Person using a vacuum cleaner on tiled floor (no visible text or symbols)Emptying the dust container
Empty the dust container as soon as the sucked in quantity of dirt in the dust container has reached the MAX mark or suction power has dropped. See Fig.7
- Release the dust container by lifting up the Dust release button on the dust container lift handle. see Fig.8
2.Lift the dust container backwards out of the vacuum cleaner. See Fig.9
3.When emptying the dust container, hold it lower over a dust bin. See Fig.10
4.Pull the open button, the base opens up and the dust will run into the dust bin. See Fig.11
5.Slightly twist the dust knocking knob on to top of the dust container. Knock the remaining dust loose.see Fig.12
- Close the base and place the dust container on the vacuum cleaner. Press the dust container firmly into its bracket until it audibly clicks into place. Check wether the dust container is securely seated.
natural_image
3D rendered object resembling a mechanical or electronic component with no visible text or symbols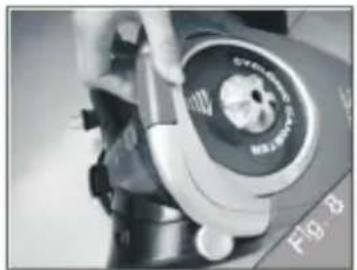
natural_image
Close-up of a mechanical device with a circular dial and handle, no visible text or symbols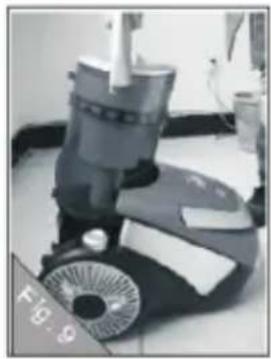
natural_image
Close-up of a mechanical vacuum cleaner with visible blades and mounting bracket (no text or symbols)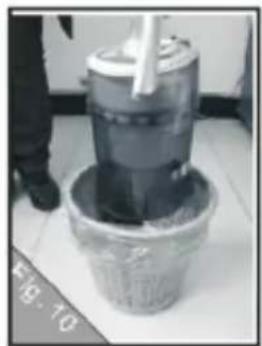
natural_image
Top-down view of a cylindrical container with liquid, placed on a tiled floor with a person standing nearby (no visible text or symbols)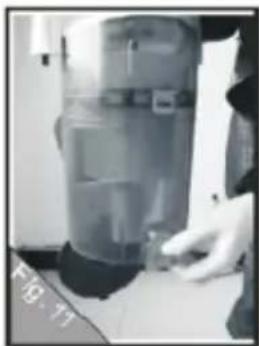
natural_image
Person holding a transparent cylindrical device with a small object on the surface (no visible text or symbols)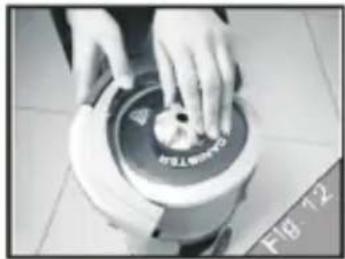
natural_image
Close-up of hands cleaning a white circular device with a textured lid (no visible text or symbols)Cleaning the filter and replacement
The vacuum cleaner has the following filter: HEPA filter; per motor protecting filter and post motor filters.
The filters can become blocked after some time and can thereby reduce the suction power. It is therefore important that the above mentioned filter is replaced.
Cleaning or Replacing the HEPA filter
Always unplug the appliance before you replace the filter. Lift out the dust container from the vacuum cleaner.
- Open the dust container holder from both the sides. Detach the upper and lower part of the dust container. See Fig.13
- Hold the mesh protection cover and turn it clockwise. Then release the mesh protection cover. See Fig.14
- Hold the HEPA filter and turn it clockwise. Then remove the HEPA filter from the upper part. see Fig.15
-
If the HEPA filter is very dirty, rinse it thoroughly with a shower head and use a brush to clean the dirt on the HEPA filter.
-
Leave the filter to dry (approx 15 hours at room temperature). Use it only once it is completely dry.
- If the dirt can not be removed, insert a new HEPA filter.
- Place the HEPA Filter and mesh protection cover back to the dust upper cover.
- Place the dust container on the vacuum cleaner. Press the dust container firmly into its bracket until it audibly clicks into place. Check wether the dust container is securely seated.
natural_image
Close-up of a mechanical device with cylindrical components and mounting brackets (no visible text or symbols)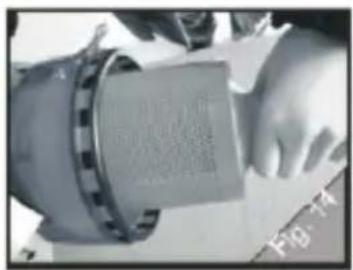
natural_image
Close-up of a mechanical component with a textured surface and flange (no visible text or symbols)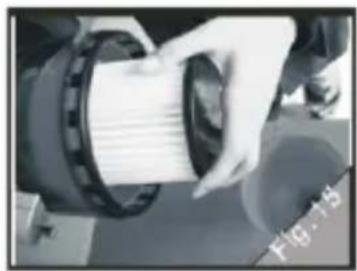
natural_image
Close-up of a hand holding a cylindrical object with a mesh-like pattern, no visible text or symbolsCleaning or Replacing the per motor protection filter
Always unplug the appliance before you replace the filter. Lift out the dust container from the vacuum cleaner.
Your vacuum cleaner is equipped with the per motor protection filter. Replace the filter once 100 hours.
- Lift the dust container from the vacuum cleaner.
- Press the button as shown below. Pull out the filter holder out of the appliance. See Fig.16
3.Open the filter holder by lifting up the two wings on both sides.See Fig.17 -
Remove the filter and Insert a new filter into the holder and click the 2 wings into its position. See Fig.18.
-
insert the holder by pulling and press firmly the unit until you hear a click.
Note: the per motor protection filter is not washalbe, thus we recommend you to replace the filter regularly.
natural_image
Close-up of a hand pressing a small black plastic component on a dark surface (no visible text or symbols)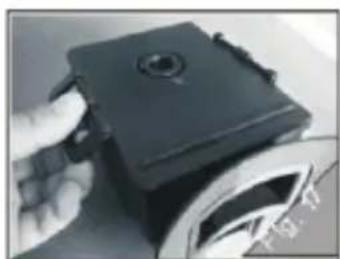
natural_image
Close-up of a hand holding a black rectangular object with a circular top, next to a metallic wheel (no visible text or symbols)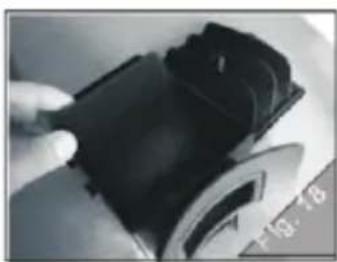
natural_image
Close-up of a black mechanical component being held by gloved hands (no visible text or symbols)Cleaning or Replacing the post motor filter
Always unplug the appliance before you replace the filter.
- Turn anti-clockwise the exhaust grill and remove the filter from the vacuum cleaner. See Fig.19
- Remove the filter and Insert a new filter into the filter frame.see Fig.20
- Place the exhaust grill into the vacuum cleaner by turning clockwise.
natural_image
Close-up of hands holding a circular mechanical component with radial lines (no visible text or symbols)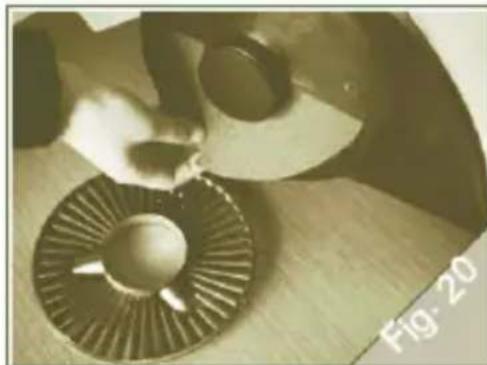
natural_image
Close-up of hands operating a mechanical component with a circular base and radial blades (no visible text or symbols)Cleaning
Always switch off and unplug the appliance before you clean any parts. Do not clean any part of the vacuum cleaner in the dishwasher, if necessary, Clean the parts with a moist cloth. -Clean the appliance with a moist cloth.
Storage
- Switch off the appliance and remove the mains plug from the wall socket.
- Press the cord rewind button to rewind the cord.
- You can store the appliance in horizontal position. See Fig21
natural_image
Close-up of a black vacuum cleaner on tiled floor, no visible text or symbolsTroubleshooting
The suction power is insufficient
-Perhaps the HEPA filter or per motor protecting filter is too dirty and blocked. If necessary, clean or replace the HEPA filter or per motor protection filter.
-Perhaps the suction power slide on the handgrip is open.
Close the slide.
-Perhaps the electronic suction power control(only specified models) has been set to a low setting.
Set the control to a higher setting.
-Perhaps the floor brush, nozzle tube or hose is blocked up.
To remove the obstruction, disconnect the unit and try cleaning it.
Specification
Motor Power: 2200W
Voltage: 220V-240V AC, 50/60Hz
Mechanic Suction Power: 410W
Capacity of the tank: 4L
Sound : ≤79dB
Cable length: 5 Meter
EN-60335-2-2
natural_image
Symbol of a trash bin crossed with two crossed lines, no text or numbers presentWEEE
This product contains recyclable materials. Do not dispose this product as unstorted municipal waste.
Please contact your local municipality for the nearest collection point.
10 years lifetime.


- Elektrik Süpürgesi Kullanım Kılavuzu
- içİNDEKİLER
- ÖNEMLİ UYARILAR
- ÜRÜN ÖZELLİKLERİ
- ÜRÜNÜN KULLANIMA HAZIRLANMASI
- Hortum
- Teleskopik Boru
- Zemine göre ayarlanabilen süpürme başlığı
- Dar uçlu&fırçalı süpürme başlığı
- Turbo Fırçası
- ÜRÜN KULLANIMI
- Emiş Gücü Ayarlama
- TOZ HAZNESİNİN ÇIKARTILMASI VE BOŞALTILMASI
- FİLTRELERİN DEĞİŞİMİ VE TEMİZLIĞI
- Hepa Filtrenin değişimi ve temizliği
- Motor Koruma Filtresinin değişimi ve temizliği
- Hava Çıkış Filtresinin değişimi ve temizliği
- Not: Filtreler takılı olmadan ürünü kesinlikle çalıştırmayınız!
- ÜRÜNÜN TEMİZLİĞİ VE SAKLANMASI
- TEKNİK ÖZELLİKLER
- WEEE
- Cihazın Kullanım Ömrü 10 Yıldır.
- Elektrik Süpürgesi
- Merkez Servis İletişim Bilgileri
- CONTENTS
- IMPORTANT SAFEGUARDS
- Product and accessories
- Preparing for use
- Hose
- Telescopic tube
- Floor brush
- Integrated brush & nozzle
- Using the appliance
- Vacuum Cleaning
- Adusting suction power
- Emptying the dust container
- Cleaning the filter and replacement
- Cleaning or Replacing the HEPA filter
- Cleaning or Replacing the per motor protection filter
- Cleaning or Replacing the post motor filter
- Cleaning
- Storage
- Troubleshooting
- Specification
Mærke : GoldMaster
Model : GVC-7502
Kategori : Støvsuger