
904.005 - Stikkontakt Bachmann - Gratis brugsanvisning og manual
Find enhedens vejledning gratis 904.005 Bachmann i PDF-format.


Brugerspørgsmål om 904.005 Bachmann
0 spørgsmål om dette apparat. Besvar dem du kender, eller stil dit eget.
Stil et nyt spørgsmål om dette apparat
Download vejledningen til din Stikkontakt i PDF-format gratis! Find din vejledning 904.005 - Bachmann og tag din elektroniske enhed tilbage i hånden. På denne side er alle dokumenter nødvendige for brugen af din enhed offentliggjort. 904.005 af mærket Bachmann.
BRUGSANVISNING 904.005 Bachmann
Sehr geehrter Kunde,
vielen Dank für den Erwerb unseres LIFT Steckdosenturms für Schreibtische, Schulungsräume, Konferenztische oder Küchen. LIFT ist die rundum funktionelle Kombination von anspruchsvollem Design und präziser Mechanik. Nachfolgend möchten wir Ihnen die einfachen Montageschritte darstellen.
Ihre Bachmann GmbH

natural_image
Laboratory setup with a cylindrical device on a desk, tools, and a laptop in the background (no visible text or symbols)Maße der LIFT und 1 Montageschritt
LIFT Abmessungen:
Einbaumaß: 0 140mm
Einbautiefe: ca. 195mm
Plattenstärke: ...... ab 10mm
Für den Einbau des LIFT Steckdosenturms ist zunächst notwendig ein rundes Loch an der gewünschten Position in der Tischplatte vorzunehmen. Das Loch sollte ein Durchmesser von 140mm haben. Für die Bohrung kann eine passende Lochsäge zusätzlich bestellt werden (Artikelnr. 904.900).

2 Montageschritt
Packen Sie den LIFT Steckdosenturm sorgfältig aus der Verpackung um Kratzer an der Oberfläche zu vermeiden.
Stecken Sie anschliessend den Steckdosenturm in das entsprechende Loch in die Tischplatte. Die Leitungen werden dabei zuerst durch das Loch geführt.

natural_image
3D rendered mechanical component with cylindrical body and flange (no visible text or symbols)3 Montageschritt
Schrauben Sie den Schraubring auf das Gehäuse.
Beachten Sie bitte, dass der Schraubring am Gewinde des Gehäuses nicht verkantet und somit schräg aufgeschraubt wird. Schrauben Sie den Schraubring soweit die Tischplattenstärke erlaubt ohne jedoch das Gewinde zu überdrehen.
Um den Turm zu benützen drücken Sie leicht auf den inneren Deckel bis zum Anschlag. Der Steckdosenturm fährt automatisch raus. Sobald der Steckdosenturm nicht mehr benötigt wird, stecken Sie bitte alle eingesteckten Stecker aus und drücken Sie den inneren Deckel nach unten bis zum Anschlag. Der Steckdosenturm verrastet und bleibt bündig zum äusseren Ring geschlossen

natural_image
3D rendering of a mechanical component with a cylindrical base and flange, no visible text or symbolsAnschluss
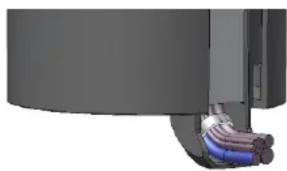
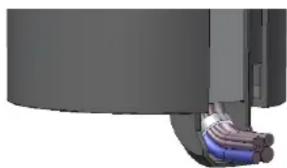
In der Regel werden die LIFT Steckdosentürme mit fest angeschlossener Leitung ausgeliefert. Die Leitungen sind am Ausgang aus dem Steckdosenturm zugentlastet. Eine Kabelführung unterhalb der Tischplatte kann mittels unterschiedlicher Bachmann Kabelführungssysteme erfolgen (siehe Katalog).
Die Anschlussleitungen sind in der Regel bereits mit Stecker / Steckverbindungen versehen. Schliessen Sie diese Leitungen an die dafür vorgesehene Anschlüsse an.
Hinweis: Installationen im Hauptstromnetz dürfen nur durch Fachpersonal vorgenommen werden!
natural_image
3D rendering of a mechanical component with colored wires and a curved base (no text or symbols visible)Funktion LIFT

natural_image
Office desk with a laptop and a circular dark object on paper, no visible text or symbols
natural_image
Office desk with a black cylindrical device and a laptop in the background (no visible text or symbols)
natural_image
Office desk with a black cylindrical device and a laptop in the background (no visible text or symbols)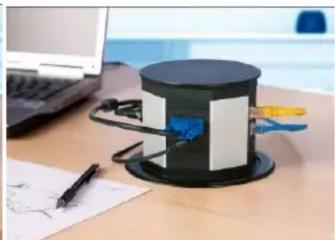
natural_image
Laboratory setup with a cylindrical device on a desk, a laptop in the background, and a pen writing on paper (no visible text or symbols)Dear customer,
thank you for buying our LIFT power tower for desks, trainingcentres, conference tables or kitchen.
We would like to present you herewith the simple assembly steps.
Your Bachmann GmbH

natural_image
Laboratory setup with a cylindrical device mounted on a black base, connected by wires and tools, with a laptop in the background (no visible text or symbols)Dimensions of LIFT and first mounting step
LIFT dimensions:
Built-in dimension: ....0 140mm Built-in depth: .... approx. 195mm
Table thickness: .... approx. 10mm
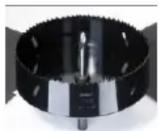
For the mounting of the LIFT power tower it is necessary to make a round hole in the table at the position you need. The round hole should have a diameter of 140mm.
For the drill hole we offer additional a hole saw. (Ref. 904.900)

∅ = 140 mm
Second mounting step
Please pack the LIFT tower out of the packaging and beware of scratches on the surface of the tower.
Insert the body of the tower into the hole. The cables have to be insert carefully before the body in that hole.

natural_image
3D rendered mechanical component with cylindrical body and flange (no visible text or symbols)3 mounting step
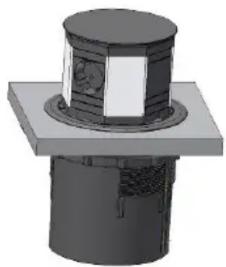
Screw on the ring to the body of the tower till to the underside of the table.
Please screw the ring carefully and take care that the ring is not sloping to the body. Screw the ring not to hard and don't damage thread. To use the tower press the inner lid down. The tower will get out automatically and the outlets are available. When the tower is not used anymore please put the plugs out of the outlets and press the inner lid till down. The tower is blocked in the body and the inner lid is plan to the outer ring of the tower body.
natural_image
3D rendering of a mechanical component with a cylindrical base and rectangular housing (no visible text or symbols)Connection
In general the LIFT tower is delivered with fixed connected cable.
The cables have at the output from the tower a strain relief.
In general the cables have allready connectors at the end of the cable and can be connected easily.
Notice:
The electrical installation should be done by a qualified electrician.
natural_image
3D rendering of a mechanical component with layered internal structure (no visible text or symbols)Function LIFT

natural_image
Office desk with a laptop and a black circular object, no visible text or symbols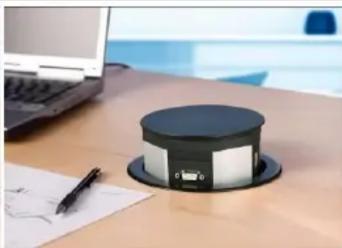
natural_image
Office desk with a black octagonal device and a laptop, no visible text or symbols on the device or background.
natural_image
Exterior view of a modern office desk with a black cylindrical device and a laptop in the background (no visible text or symbols)
natural_image
Laboratory setup with a cylindrical device on a desk, a laptop, and a pen nearby (no visible text or symbols)
Mærke : Bachmann
Model : 904.005
Kategori : Stikkontakt