S1222 - Vægbeslag Ricoo - Gratis brugsanvisning og manual
Find enhedens vejledning gratis S1222 Ricoo i PDF-format.

Brugerspørgsmål om S1222 Ricoo
0 spørgsmål om dette apparat. Besvar dem du kender, eller stil dit eget.
Stil et nyt spørgsmål om dette apparat
Download vejledningen til din Vægbeslag i PDF-format gratis! Find din vejledning S1222 - Ricoo og tag din elektroniske enhed tilbage i hånden. På denne side er alle dokumenter nødvendige for brugen af din enhed offentliggjort. S1222 af mærket Ricoo.
BRUGSANVISNING S1222 Ricoo
Typ: S1222
natural_image
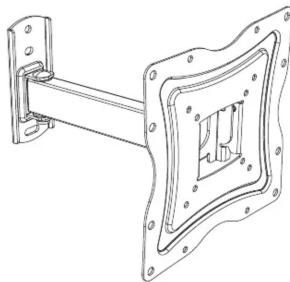
Technical line drawing of a mechanical assembly with mounting flanges and a central internal component (no text or symbols)Scope of the delivery
Lieferumfang


STEP 2 B
SCHRITT 2 B
Wood stud mounting
Befestigung an der Holzbalkenwand
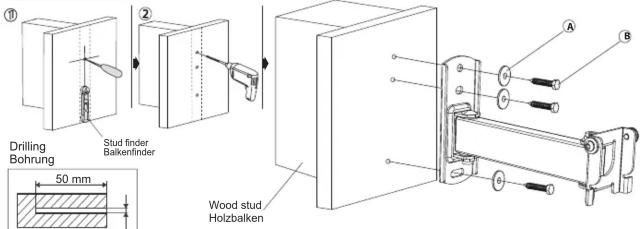
STEP 1
SCHRITT 1
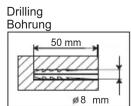
Please measure distance between mounting holes.
Bitte den Lochabstand vor der Montage nachmessen.
Mounting holes
Befestigungslöcher
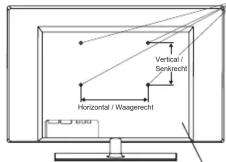
IV / monitor back
TV / Monitor Rückseite
Please check BEFORE installation distance between mounting holes on your TV / monitor!
Bitte überprüfen Sie VOR der Montage
den Lochabstand zwischen den Befestigungslöchern an Ihrem TV / Monitor!
This wall mount supports the following distance between holes / VESA:
Diese Wandhalterung unterstützt folgende VESA / Lochabstände:
Horizontal / Waagerecht: 75mm, 100mm, 200mm
Vertical / Senkrecht : 75mm, 100mm, 200mm
STEP 3 A
SCHRITT 3 A
Attaching wall bracket to screen For TVs with a flat back
Anbringung der Halterung an den Bildschirm
Für TV/Monitore mit
flacher Rückseite
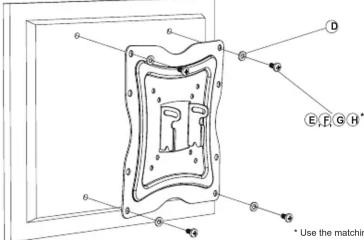
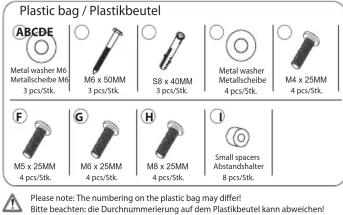
If screws "E,F,G,H" are too long, small spacers "I" can be used.
Wenn Schrauben "E,F,G,H" zu lang sind, können Abstandshalter "I" verwendet werden.
STEP 3 B
SCHRITT 3 B
Attaching wall bracket to screen For TVs with a curved back
Anbringung der Halterung an den Bildschirm
Für TV/Monitore mit
gewölbter Rückseite
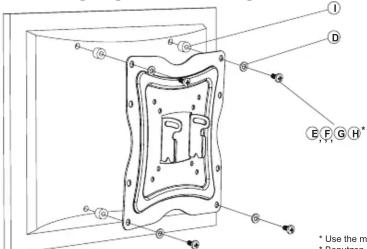
* Use the matching screws for your TV model.
* Benutzen Sie die für Ihr TV-Modell passende Schrauben.
STEP 2A
SCHRITT 2 A
Solid concrete mounting
Befestigung an der Massivbetonwand
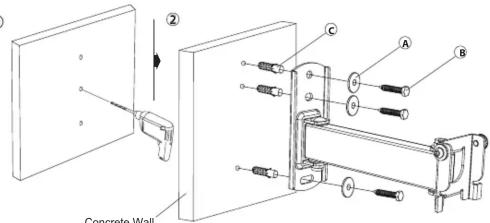
Concrete Wall
Betonwand
STEP 2 A
SCHRITT 2 A

Concrete W Betonwand
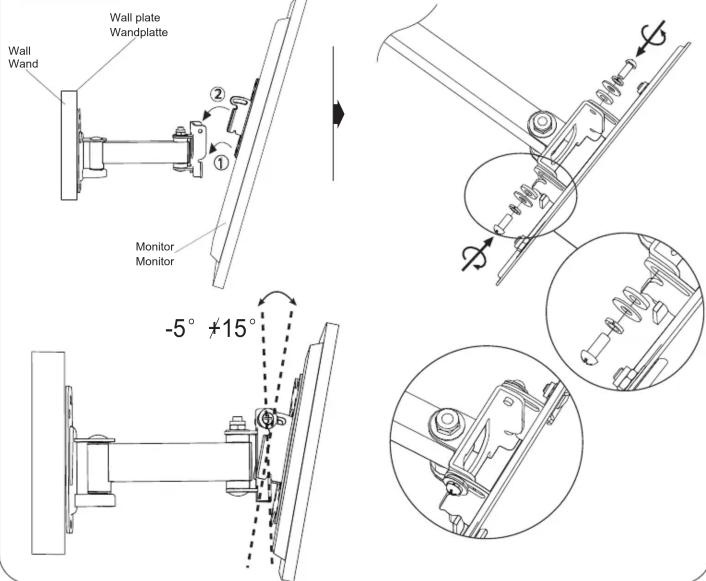
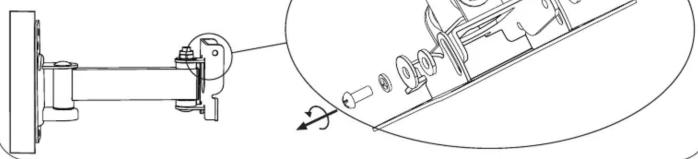
STEP 4
SCHRITT 4
Preparing front panel mounting.
Vorbereitung der Frontplattenaufhängung.
Loosen the fixing screws on front panel mounting. (entirely)
Lösen Sie die Fixierungsschrauben an der Frontplattenaufhängung. (komplett)
natural_image
Technical line drawing of a mechanical assembly with a close-up inset showing internal components (no text or symbols)STEP 5
SCHRITT 5
Hanging TV to wall plate
Aufhängung des TV-Geräts an die Wandhalterung