
NR 911 - Pladespiller Soundmaster - Gratis brugsanvisning og manual
Find enhedens vejledning gratis NR 911 Soundmaster i PDF-format.

Brugerspørgsmål om NR 911 Soundmaster
0 spørgsmål om dette apparat. Besvar dem du kender, eller stil dit eget.
Stil et nyt spørgsmål om dette apparat
Download vejledningen til din Pladespiller i PDF-format gratis! Find din vejledning NR 911 - Soundmaster og tag din elektroniske enhed tilbage i hånden. På denne side er alle dokumenter nødvendige for brugen af din enhed offentliggjort. NR 911 af mærket Soundmaster.
BRUGSANVISNING NR 911 Soundmaster
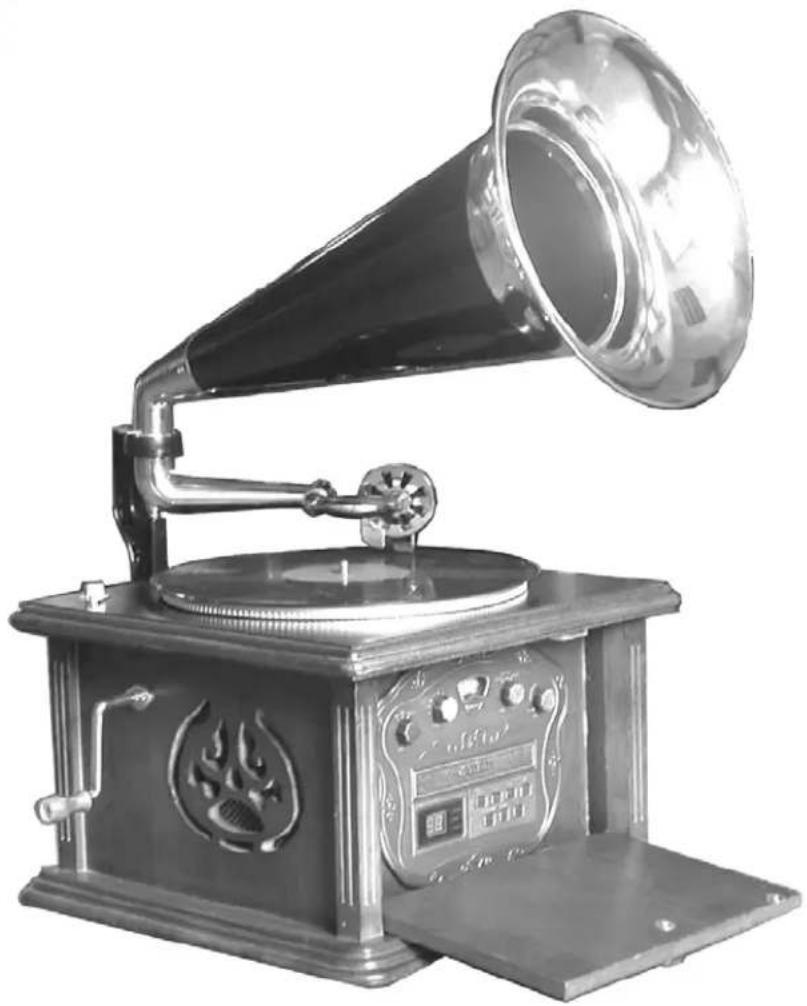
natural_image
Vintage gramophone with horn and open base (no visible text or symbols)DEUTSCH
ENGLISH
FRANÇAIS
NEDERLANDS
E S P A
ENVIRONMENTAL PROTECTION

Do not dispose of this product with the normal household waste at the end of its life cycle. Return it to a collection point for the recycling of electrical and electronic devices. This is indicated by the symbol on the product, user manual or packaging.
The materials are reusable according to their markings. By reusing, recycling or other forms of utilization of old devices you make an important contribution to the protection of our environment.
Please contact your local authorities for details about collection points.
CLASS 1 LASER PRODUCT KLASSE 1 LASER PRODUKT LUOKAN 1 LASER LAITE KLASS 1 LASER APPARAT PRODUCTO LASER CLASE 1
CAUTION - INVISIBLE LASER RADIATION WHEN OPENING THE COVER OR PRESSING THE SAFETY INTERLOCK. AVOID EXPOSURE TO THE LASER BEAM.

WARNING
Risk of electric shock Do not open!

Caution: To reduce the risk of electric shock, do not remove the cover (or back). There are no user serviceable parts inside. Refer servicing to qualified service personnel.

This symbol indicates the presence of dangerous voltage inside the enclosure, sufficient enough to cause electric shock.

This symbol indicates the presence of important operating and maintenance instructions for the device.
Safety, Environmental and Setup Instructions
- Use the device in dry indoor environments only.
- Protect the device from humidity.
- Do not open the device. RISK OF ELECTRIC SHOCK! Refer opening and servicing to qualified personnel.
- Connect this device to a properly installed and earthed wall outlet only. Make sure the mains voltage corresponds with the specifications on the rating plate.
• Make sure the mains cable stays dry during operation. Do not pinch or damage the mains cable in any way. - A damaged mains cable or plug must immediately be replaced by an authorized service center.
• In case of lightning, immediately disconnect the device from the mains supply. - Children should be supervised by parents when using the device.
- Clean the device with a dry cloth only.
Do NOT use CLEANING AGENTS or ABRASIVE CLOTHS!
- Do not expose the device to direct sunlight or other heat sources.
• Install the device at a location with sufficient ventilation in order to prevent heat accumulation. - Do not cover the ventilation openings!
• Install the device at a safe and vibration-free location. - Install the device as far away as possible from computers and microwave units; otherwise radio reception may be disturbed.
- Do not open or repair the enclosure. It is not safe to do so and will void your warranty. Repairs only by authorized service/ customer center.
- The device is equipped with a "Class 1 Laser". Avoid exposure to the laser beam as this could cause eye injuries.
Technical specifications
FM Frequency 87,5 - 108MHz
AM Frequency 530 – 1710KHz
Power supply AC 230V\~50Hz
Power consumption 18 W
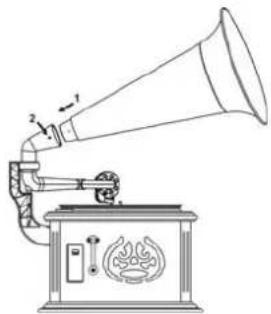
Installation of Classical Speaker
1、First pull out of the RJ45 socket located the bearing of the classical speaker carefully. And insert it on the back of wooden case. (Reference Installation drawing one)
2、After Inserting the bearing of the speaker on the back of the wooden case, tight the M6 screw to be steady.(Reference Installation drawing two)
3、Insert the front cover into the horn tube .(Reference Installation drawing three)
4、Connect the bearing and the horn tube with the front cover in two 3*6KA screws. (Reference Installation drawing four)

natural_image
Line drawing of a portable induction cooktop with a flame and cord, no text or symbols presentInstallation drawing one

natural_image
Technical line drawing of a mechanical device with no visible text or symbolsInstallation drawing two

natural_image
Simple line drawing of a conical object with an arrow indicating compression or deformation (no text or symbols)Installation drawing three
natural_image
Line drawing of a vintage gramophone with sound waves and a speaker (no text or symbols)Installation drawing four
FUNCTIONS AND CONTROLS
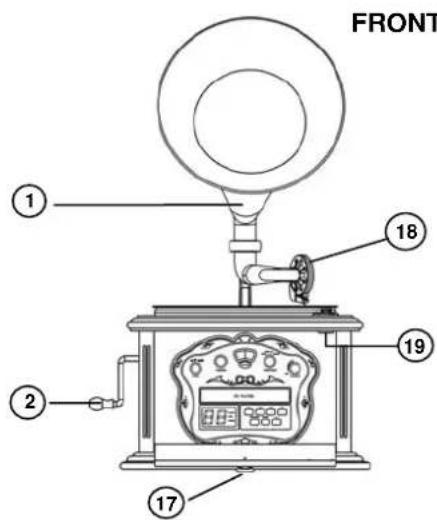
FRONT PANEL
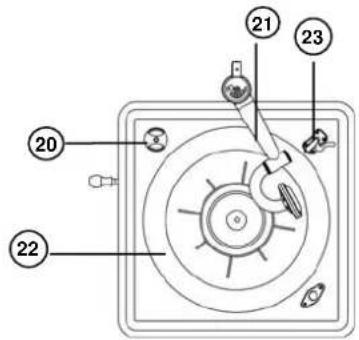
TURNTABLE/PHONO
LEFT PANEL
RIGHT、REAR PANEL


- ARCHAIZE LOUDHAILER
- ROCKER
- RADIO DIAL LENS
- TUNING CONTROL
- BAND SWITCH
- FUNCTION SELECTOR (RADIO/TAPE/CD/PHONO)
- VOLUME CONTROL
- CD DRAWER
- CD TRACK DISPLAY
- CD REWI
- CD F.FWD.
- CD PLAY/PAUSE
- CD OPEN BUTTON
-
CD PROGRAM
-
CD REPEAT
- CD STOP
- HANDLE
- STYLI
- MAGNET
- 45 RPM ADAPTOR
- TONE ARM
- TURNTABLE
- ORNAMENT PIECE
- SPEED SELECTOR (33 ^1/3 /45/78 RPM)
- SPEAKERS
- CASSETTE EJECT/F.FWD
- CASSETTE SLOT
- AC POWER CORD
- *FM WIRE ANTENNA
- MAINPOWER SWITCH ON/OFF
AC OPERATION
This OLD FASHION TURNTABLE AM/FM CASSETTE PLAYER operates from AC 230V\~50Hz line power. Insert the plug of the AC power cord into a wall outlet with AC power supply.
TURN ON/OFF THE UNIT
Turn on the unit:
Press the mainpower switch (backside of unit) to pos. "I"
Turn off the unit:
Press the mainpower switch (backside of unit) to pso. "O"
RADIO RECEPTION
- Set the FUNCTION SWITCH to "RADIO" position.
- Select required receiving band with BAND SWITH.
- Turn the TUNING CONTROL to select the desired radio station.
- When you are listening to the program with the frequency modulation stereo, The indicator light will be on. The blue indicator light will be change into pick color.
- Adjust the VOLUME CONTROL to obtain the desired sound level from the Speaker
TIPS FOR GOOD RADIO RECEPTION
- To insure maximum FM tuner sensitivity, the FM WIRE ANTENNA should be fully extended to obtain the best possible reception.
- To insure best AM sensitivity, try repositioning the unit until the best reception is obtained.
CASSETTE PLAYER OPERATION
PLAY
- Set the FUNCTION SWITCH to "TAPE" position.
- Insert the cassette fully into the cassette slot (No.27). Play starts automatically.
To F.FWD the cassette, press F.FWD/EJECT button (No.26) half way in until it locks, press button - Press F.FWD/EJECT button (No.26) full in to eject the cassette.
COMPACT DISC OPERATION
A. NORMAL DISC PLAYBACK
- Set the FUNCTION SWITCH to "CD" position.
- Press EJECT button to open the CD drawer. Place a compact disc with the label facing up. Then press EJECT button again to close.
- The number of total tracks is displayed.
- Press the CD PLAY/PAUSE ▶ button once. Play start from the first track. When all tracks have been played, it will stop automatically and the total number of tracks will be displayed again.
- To stop playing, simply press the CD STOP ■ button.
- For short pauses while playing the disc, it can be stopped temporarily by pressing. The CD PLAY/PAUSE▶II button once. The CD LED display will flash. Though the sound stops. The disc continues to spin. To re-start play, press the CD PLAY/PAUSE▶II button once again. play will start from the exact position where it was interrupted, and the CD LED display will stop flashing.
B. SKIP FUNCTION
To skip to the beginning of the current track or skip to another desired track, press "TRACK FORWARD▶▶" or "TRACK BACKWARD◀◀. When track 3 is being played, for example, press "TRACK BACKWARD◀◀", then track 3 will be played from the beginning again. To skip to the previous track, i.e. Track 2, press the "TRACK FORWARD▶▶" to skip to track 7 when track 3 is being played, for example, press the "track forward" key 4 times.
C. VARIOUS PLAYING MODES
- Normal play mode
In the normal playback condition play will star at track No.1
- Repeat play mode
This function allows all the tracks on a disc or the same track to be played repeatedly.
A. To repeat the same track:
Press the REPEAT button before play or during play. The REPEAT ONE / ALL LED indicator will flash.
B. To repeat the entire disc:
Press the REPEAT button two times; REPEAT ONE / ALL LED indicator lights up.
C. To release the repeat play function.
Press the REPEAT button again. (The REPEAT indicator is goes off).
- Program Mode.
A. Press the PROGRAM button in the stop mode. The program LED will flash. B. Press the Reverse Skip Button or the Forward Skip ◀◀◀▶▶ button to select a track number, the select track number will be shown.
C. Press the PROGRAM button, the first selected track is now programmed. The PROGRAM LED will flash.
D. Repeat step 2 and 3 to enter other tracks into the program up to a maximum of 20.
E. After entering a program, press the PROGRAM button to check the program content. The PROGRAM LED will flash and the track numbers in order of the programmed tracks will be shown. At last, the PROGRAM LED will stop flashing and the total track number on the disc will be shown. After the program is played, press the PROGRAM button twice in the stop mode to check the program contents. (Up to 20 tracks can be entered into the program memory, for play in any order desired. If you try to enter more tracks, the track can not be selected.)
F. After entering a program, press the PLAY/PAUSE ▶II button, Program play starts from the beginning of the first programmed track. The PROGRAM and PLAY/PAUSE LED will light, and the track number which is currently playing will be shown.
G. Note: A program can not be entered during play. After entering a program, if the STOP button is pressed twice, all of the programmed tracks will be clear. The program can not be changed. Clear the program and enter tracks into the program again. The programmed tracks can not be played at random.
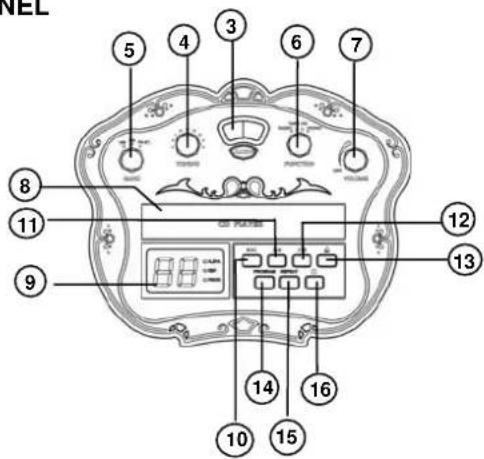
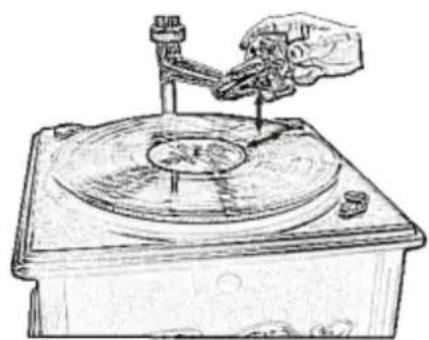
PHONO OPERATION
-
Set FUNCTION SWITCH to "PHONO" POSITION.
-
Put the record on the turntable flat.
Note: First insert the 45 rpm adaptor in the center of the turntable then place the record.
-
Set the SPEED SELECTOR to 33 13 , 45 or 78 RPM according to the size of the record you are playing.
-
Taking out the stylus guard of the tone arm first, then place the electric tone arm on the record carefully.
natural_image
Hand operating a mechanical device on a circular base (no visible text or symbols)-
Adjust the VOLUME CONTROL to obtain the desired sound level from the Speakers.
-
To stop operation, carefully lift up the TONE ARM and return it to TONE ARM-REST.
Copyrights by Woerlein GmbH, D-90556 Cadolzburg, Germany Any technical changes without any further announcement


- ENVIRONMENTAL PROTECTION
- WARNING
- Safety, Environmental and Setup Instructions
- Technical specifications
- Installation of Classical Speaker
- FUNCTIONS AND CONTROLS
- AC OPERATION
- TURN ON/OFF THE UNIT
- RADIO RECEPTION
- TIPS FOR GOOD RADIO RECEPTION
- CASSETTE PLAYER OPERATION
- PLAY
- COMPACT DISC OPERATION
- NORMAL DISC PLAYBACK
- SKIP FUNCTION
- VARIOUS PLAYING MODES
- PHONO OPERATION
Mærke : Soundmaster
Model : NR 911
Kategori : Pladespiller