
LBW148DE - Vaskemaskine SMEG - Gratis brugsanvisning og manual
Find enhedens vejledning gratis LBW148DE SMEG i PDF-format.


Brugerspørgsmål om LBW148DE SMEG
0 spørgsmål om dette apparat. Besvar dem du kender, eller stil dit eget.
Stil et nyt spørgsmål om dette apparat
Download vejledningen til din Vaskemaskine i PDF-format gratis! Find din vejledning LBW148DE - SMEG og tag din elektroniske enhed tilbage i hånden. På denne side er alle dokumenter nødvendige for brugen af din enhed offentliggjort. LBW148DE af mærket SMEG.
BRUGSANVISNING LBW148DE SMEG
WASHING MACHINE
User
Manual
LBW148DE

natural_image
Blank white image with no visible content, text, or symbols
natural_image
Blank white image with no visible content, text, or symbolsCHAPTER-1: BEFORE USING THE APPLIANCE
- Correct .... Usage.... 6-7
• General warnings 8-9-10-11
• Safety warnings 12-13-14-15-16-17
• Packaging and Environment 18
• Savings Information 19
CHAPTER-2: OVERVIEW OF YOUR DEVICE
• General Appearance 20-21
• Technical Specifications 22......
CHAPTER-3: INSTALLATION
• Removing transportation safety screws 23-24-25...
• Adjusting Adjustable Stays 26-27
• Electrical connection 28
• Water inlet hose connection 29-30
• Water discharge connection .....31.....
CHAPTER-4: INTRODUCTION OF CONTROL PANEL ..32
• Detergent drawer 33-34
• Programme knob ....35....
Electronic display 36-37
CHAPTER-5: PRELIMINARY PREPARATION FOR LAUNDERING
• Separating laundries 38-39
- Putting laundries in the machine 40
- Adding detergent into machine 41
• Operating your machine 42-43-44
• Auxiliary functions 45-46-47-48-49-50
• Child lock 51
• Cancelling programme 52
• Finishing programme 53
CHAPTER-6: PROGRAM TABLE ..... 54-55-56-57-58-59-60-61
CHAPTER-7: MAINTENANCE AND CLEANING OF YOUR MACHINE
- Warning 62
• Water inlet filters 63 - Pump filter 64-65
• Detergent drawer 66
CHAPTER-8: FLUSH STOPPER / BODY / DRUM 67
CHAPTER-9: TROUBLESHOOTING 68-69-70-71-72
CHAPTER-10: AUTOMATIC FAULT WARNINGS AND WHAT TO BE DONE...73
CHAPTER-11: PRACTICAL INFORMATION....74-75-76-77
• How to read the energy label and saving energy.....78-79
• Disposal of your old machine 80
- Definitely read the user's manual.
- Your machine is designed to be used domestically. Commercial use will cause your warranty to be cancelled.
- Keep your pets away from your machine
- Please check the packaging of your machine before installation, and the outer surface after the package is opened. Do not operate damaged machines or machines with opened package.
- Have your machine installed only by authorized service. Any interference to your machine by anyone other than authorized services shall cause your warranty to be void.
- The appliance is not intended for use by people (including children) with reduced physical, sensory or mental capabilities, or lack of experience and knowledge unless they have been given supervision or instruction concerning use of the appliance by a person responsible for their safety. Children should be supervised to ensure that they do not play with the appliance.

natural_image
Simple line drawing of an open book with no text or symbols visible- Use your machine only for laundries that have been specified as suitable for washing by the manufacturer.
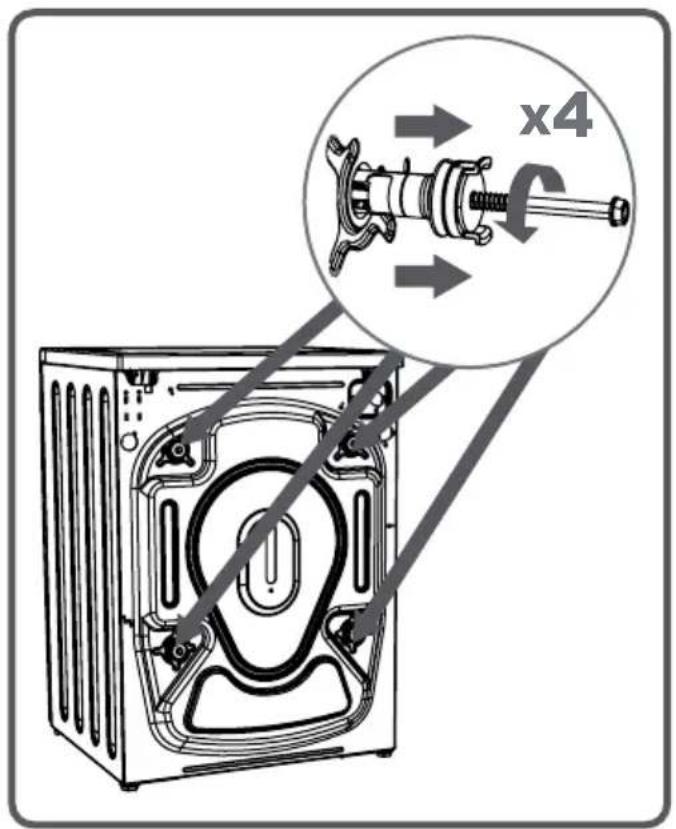
- Before operating the washing machine, remove the 4 transportation screws and rubber spacers from the back of the machine. If the screws are not removed, it may cause heavy vibration, noise and product malfunction, (voiding the guarantee).
- Your machine is not covered under warranty for faults caused by any kind of external factors (pesticides, fire, etc.).
- Please do not throw away this user manual; keep it for future reference. You or somebody else might need it in the future.
Note: Machinery specifications may vary depending on the product purchased.
- The necessary ambient temperature for your machine’s ideal operation is 15-25°.
- Frozen hoses can tear and explode. In regions where temperature is below zero, ambient temperature might endanger the safe operation of electronic card.
- Please ensure that the clothes you will place in your machine do not contain any foreign substances (nail, needle, coins, lighter, matches, clip etc.) in their pockets. These foreign substances can damage your machine.
- Before starting to use your machine, you may call the nearest authorized service and request free-of-charge help for installation, operation and use of your machine.
-
It is recommended to perform the first washing operation in 90° Cotton programme and without laundry by inserting 12 scale of detergent in 2nd compartment of the detergent drawer.
-
As detergent or softener exposed to air for a long time may cause residues, put your detergent or softener in the detergent drawer at the beginning of every washing.
- It is advised that you unplug your machine and close the water inlet tap if you will not use your machine for a long time.
Also, leaving the door of your machine will prevent the formation of bad odors due to humidity.
- Some water might be left in your machine after the trials and tests conducted due to Quality Control procedures.
This will not damage your machine.
- Remember that packaging materials of your machine may be dangerous for children. Keep the packaging materials in a place where children cannot reach or dispose of them appropriately.
- Keep the small parts found in the document part away from the reach of children and babies.
- Use pre-wash programs only for very dirty laundry.
- Never open the detergent compartment when the appliance is running.

- In case of any breakdown, unplug the appliance first and then turn the tap off. Do not attempt to repair by yourself, always contact for authorized service advice.

natural_image
Line drawing of a washing machine with front panel and side buttons (no text or symbols)- The amount of laundry you put in your washing machine should not exceed the maximum amount indicated.
- Never force the door to open when the machine is running.
- Washing floury clothes in your machine damages the machine. Do not wash floury clothes in your machine.

natural_image
Line drawing of a washing machine with no visible text or symbols- Please adhere to detergent/fabric conditioner manufacturers' advice regarding the use of fabric conditioner or similar products in your machine.
- Set up your machine in a place where its door can be completely opened. (Do not set up your machine in places where its door cannot be fully opened.)
- Set up your machine at locations that can be fully ventilated and could have constant air circulation.
You must read these warnings. You can thus protect yourself and your beloved ones against fatal injuries and risks.

DANGER OF GETTING BURNT!

Do not touch discharging hose and water during discharging as the appliance may reach high temperatures when running.
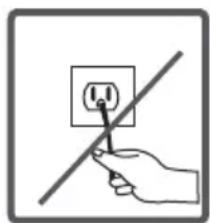
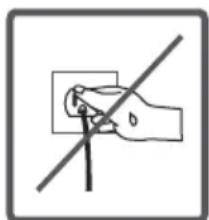
DEATH RISK DUE TO ELECTRICAL CURRENT!
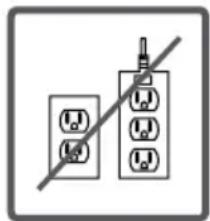
- Do not use multiple receptacles or extension cord.
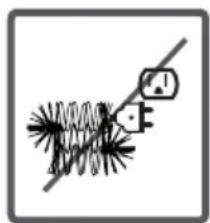
- Do not plug in damaged or torn plugs.
- Never pull the cable when unplugging – always grip the plug itself.
- Do not plug-in or out the plug from the receptacle with wet hands to prevent electrocution!
- Never touch the machine with wet hands or feet.
- Call the nearest authorized service for a replacement if the power cord malfunctions.

natural_image
Two electrical socket symbols with a diagonal line crossing them, no text or labels present.
natural_image
Simple line drawing of a mechanical or electrical component with no text or symbols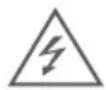
natural_image
Hand holding a power outlet with a diagonal line crossing it (no text or symbols)
natural_image
Simple line drawing of a hand holding a square with a diagonal line crossing through it (no text or symbols)
Flooding risk!

- Check whether the water runs fast or not before placing the discharge hose on the sink.
• Take necessary measures to prevent the slipping of your hose. - The backfiring force of a hose that is not placed appropriately can displace the hose. Prevent the stopper inside your sink from blocking the sink hole.

natural_image
Illustration of a hand using a tool to clean or inspect a funnel-shaped object (no text or symbols present)
natural_image
Illustration of a hand using a tool to clean or inspect a surface with a funnel and spiral tube (no text or symbols)Danger of Fire!

- Do not keep inflammable liquids near your machine..
- The sulphure content of paint removers might cause corrosion. For this reason, never use paint-removing materials in your machine.
- Never use products that contain solvent material (like washing gas) in your machine.
- Remove all the objects in the pockets of your laundries (needle, paperclip, lighter, matches etc.) when placing them your machine.

Fire and Explosion risk may occur.
Fall and injury hazard!

- Do not climb on your machine. The upper table of your machine may break and you might get injured.
- Tidy the hose, cable and packaging of your machine during installation. You might trip over and fall.
- Do not turn your machine upside down, or on its side.
- Do not lift your machine by holding it from extruding parts (detergent drawer, door). These parts might break and cause you to get injured.
- There’s the risk of tripping and injury if the materials like hose and cables are not properly stored after your machine is installed.
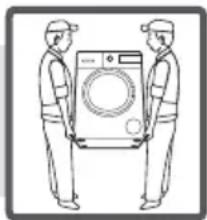
Machine must be carried by 2 people or more.

natural_image
Line drawing of two workers standing beside a large washing machine (no text or symbols)Child safety!

- Do not leave children unattended near the machine. Children might lock themselves up into the machine and death risk might occur.
- Door glass and surface might be extremely hot while your machine operates. Thus, especially touching the machine might give damage to the skins of children.

natural_image
Line drawing of a hand holding a bandage or tape (no text or symbols)- Keep packaging material away from children.
- Poisoning might occur if the detergent and maintenance materials are consumed, and eyes or the skin might be irritated if they come into contact with the skin. Keep the cleaning materials away from the reach of children.
Removal of packaging materials
Packaging materials protect your machine from any damage that might occur during transportation. Packaging materials are environment friendly as they are recyclable. Recycling material provides both raw material savings and decreases waste production.
Disposal of old machine
Electrical or electronical old devices might still contain salvagable parts. So, never throw away your old devices that you do not use into the waste.

Ensure that the parts of your old electronic or electrical devices are reused by giving them to the gathering centres foreseen by related authorities.
Please ensure your old appliances are kept in an appropriate place for the safety of children until they are taken outside the house.
Some important information to get more efficiency out of your machine:
- The amount of laundry you put in your washing machine should not exceed the maximum amount indicated.
By this way, your machine shall run in saving mode.
- Not using the pre-wash feature for little and normal-dirty laundry shall save electricity and water.
Electronic Display
Program Knob
Upper Tray
Detergent Drawer
Door
Pump Filter Cover

natural_image
Line drawing of a washing machine with control panel and circular base (no text or symbols)CHAPTER -2: OVERVIEW OF YOUR DEVICE GENERAL APPEARANCE
Transportation Safety
Screw
Water Inlet Valve
Discharging Hose
Power Cable
Transportation Safety
Screw
Transportation Safety
Screw
Transportation Safety
Screw
CHAPTER -2: OVERVIEW OF YOUR DEVICE TECHNICAL SPECIFICATIONS
| Operating voltage / frequency (V/Hz) | (220-240) V~/50Hz |
| Total current (A) | 10 |
| Water pressure | Maximum: 1 MpaMinimum : 0.1 Mpa |
| Total power (W) | 2200 |
| Maximum dry laundry capacity (kg) | 8 |
| Spinning revolution (rev / min) | 1400 |
| Programme number | 15 |
| Dimensions (Height x Width x Depth) (mm) | 845 x 597 x 557 |
Before operating the washing machine, remove the 4 transportation screws and rubber spacers from the back of the machine. If the screws are not removed, it may cause heavy vibration, noise and product malfunction, (voiding the guarantee).


For this reason, transportation safety screws shall be loosened by being rotated in counter-clockwise using an appropriate wrench.

Transportation screws shall be removed by pulling out.
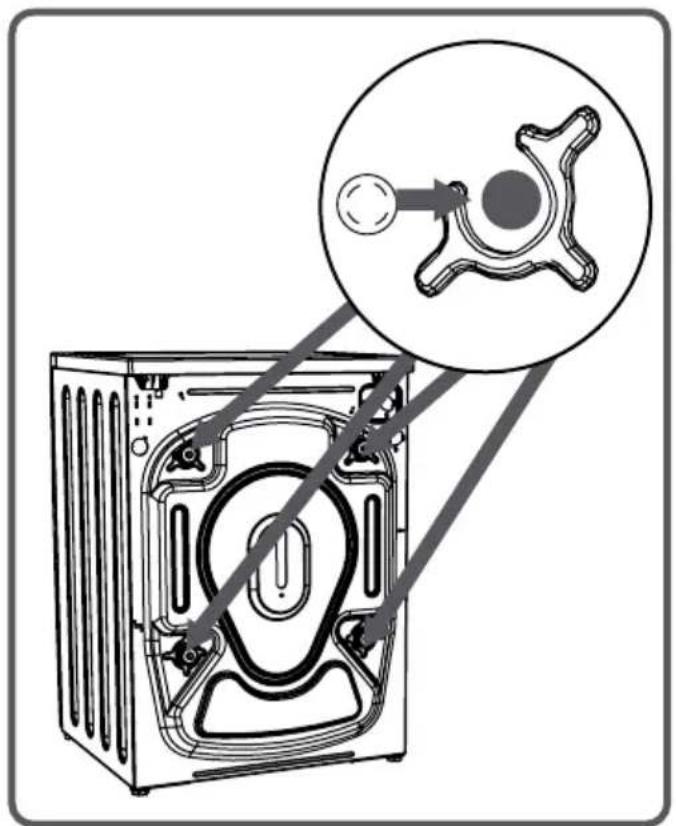
Fit the plastic transportation screw taps delivered in accessories bag to the palces where transportation screws have been removed.
The transportation safety screws should be stored to be used in case of transportation.
NOTE: You should absolutely remove the transportation screws of your machine before the first usage. Faults occurring in the machines operated with transportation screw fitted shall be out of scope of warranty.
natural_image
Diagram of a washing machine showing internal components and a close-up view of the internal structure (no text or symbols present)Adjusting Adjustable Stays
- Do not install your machine on a carpet or such grounds that would prevent the ventilation of its base.
- To ensure silent and vibration-free operation of your machine, it should be deployed on a non-sliding and firm ground.
- You can adjust the balance of your machine through the stays.
- Loosen the plastic adjustment nut.

- Adjust the stays upward and downward by rotating them.
• After maintaining the balance, compress the plastic adjustment nut upward again.

- Never put cardboard, wood or suchlike materials under your machine if you are intending to stabilize the distortions on the ground.

- When cleaning the ground, on which your machine rests, be careful not to disorder stays stabilization.


natural_image
Line drawing of a washing machine with circular vent and control panel (no text or symbols)- Your washing machine is set to 220-240V and 50Hz.
- The mains cord of your washing machine is equipped with a specific earthed plug. This plug should always be inserted to a earthed socket of 10 amps. The current value of the fuse should be 10 amps.

natural_image
Diagram showing two electrical plugs with a power outlet, one being inserted and the other holding a socket (no text or symbols present)Fuse current value of the power line connected to this plug should also be 10 amperes. If you don't have such a receptacle and fuse confirming with this, please have it done by a qualified electrician.
- We do not take the responsibility of the damages that occur due to ungrounded usage.
NOTE: Operating your machine under low voltage will cause the life cycle of your machine to be reduced and its performance to be restricted.
- Your machine may have either a single inlet (cold) or double water inlets (cold/hot) based on its specifications.
White-capped hose should be connected to cold water inlet and red-capped hose to hot water inlet (applicable for machines with double water inlets).
- To eliminate water leakages in points of contact, 1 or 2 nuts are provided in the hose package (applicable for machines with double water inlets). Fit these nuts to the ends of new water inlet hoses on the side of faucet.
- Mount new water inlet hoses to a 34 ", threaded faucet.
- Connect the white-elbow end of the water inlet hoses to the white-filtered water inlet valve on the rear side of the machine and the red-elbow end to red-filtered one (applicable for machines with double water inlets).
Tighten plastic parts of the junctions using your hand.
In uncertain conditions, have the connection works be done by a qualified plumber.
- Flow of water with pressure of 0,1-1 Mpa will allow your machine to operate more efficiently.) (0,1 Mpa pressure means that more than 8 litres of water will flow through a fully-tapped faucet per one minute.)
- Ensure that points of contact do not leak by tapping the faucet completely after carrying making the connections.

natural_image
Line drawing of a coiled hose with two connectors (no text or symbols)

natural_image
Diagram of a car fuel pump assembly with valve and valve components (no text or labels)
natural_image
Illustration of a hand adjusting a wall-mounted pipe fitting with a valve, showing mechanical components and a circular motion indicator (no text or symbols)- Ensure that the new water inlet hoses are not bent, broken, crushed and resized.
- If your machine has double hot water inlets, the temperature of hot water inlet should be maximum 70^ .
Note: Use only the new water inlet hose coming with your machine while making Water inlet hose connections of your machine. Never use old, used or damaged water inlet hoses.
- The end of water discharge hose can be fitted to a specific apparatus directly attached to dirty water discharge hole or outlet joint of the basin elbow.
- Never attempt to extend the water discharge hose by jointing.
- Do not put discharging hose of your machine in a vessel, bucket or sink.
- Make sure that the water discharge hose does not bend, buckle, be crushed or extended. Please note:
- The water drain hose should be mounted at a height of minimum 60 cm, maximum 100 cm from the ground.

natural_image
Diagram of a pipe fitting with a bulb attached to a sink (no text or symbols)
natural_image
Diagram showing a pipe installation with an inset illustrating the curved structure (no text or symbols present)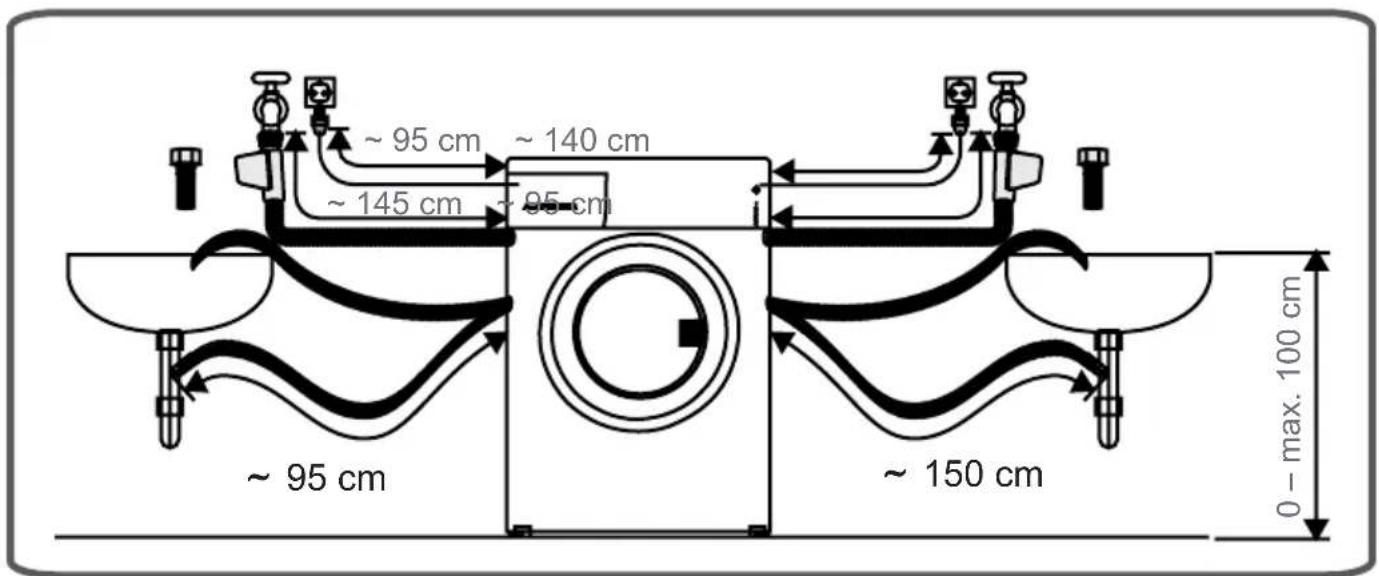
You can use the liquid level determination plate when you want to wash your laundry with liquid detergent. You can use your liquid detergents in all programs without prewashing. Place the liquid detergent aparatus in the second compartment (which is available inside the machine) of the detergent drawer (*) and set the detergent amount. (Use the recommended amount of liquid detergent by detergent producers).
Do not exceed the MAX level, use only for liquid detergent, do not use this aparatus for powder detergent and take it out.)

natural_image
Line drawing of a washing machine with an inset showing internal components (no text or symbols)
(*) Machinery specifications may vary depending on the product purchased.
SECTIONS
Main wash detergent compartment:
In this compartment, only materials like detergent (liquid or powder), lime preventer and such can be used.
You can find the liquid detergent aparatus inside your machine at first installation. (*)
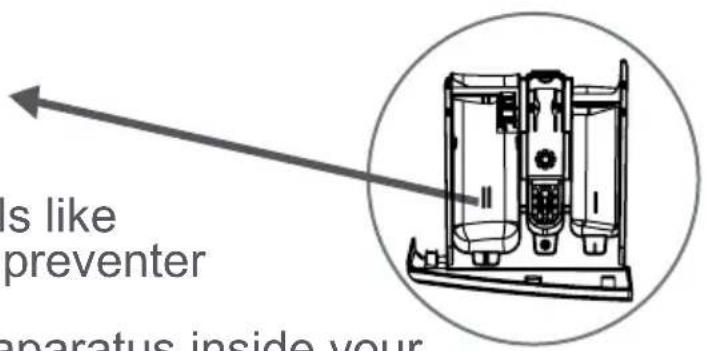
Fabric conditioner, starch, detergent compartment:
You can use softener for your laundry (recommended amount and type by the producer is recommended). Sometimes the fabric conditioners you use for your laundry mar remain in this compartment. The reason for this is that the conditioner is not viscous. To prevent this situation, more viscous liquid softeners are recommended to be used or the softener could be thinned and then used.

natural_image
Technical line drawing of a mechanical device inside a circular frame (no text or symbols)Pre-wash detergent compartment:
This compartment must only be used when the pre-wash feature is selected.
Pre-wash feature is recommended for very dirty laundry.

natural_image
Technical line drawing of a mechanical device inside a circular frame (no text or symbols)(*) Machinery specifications may vary depending on the product purchased.
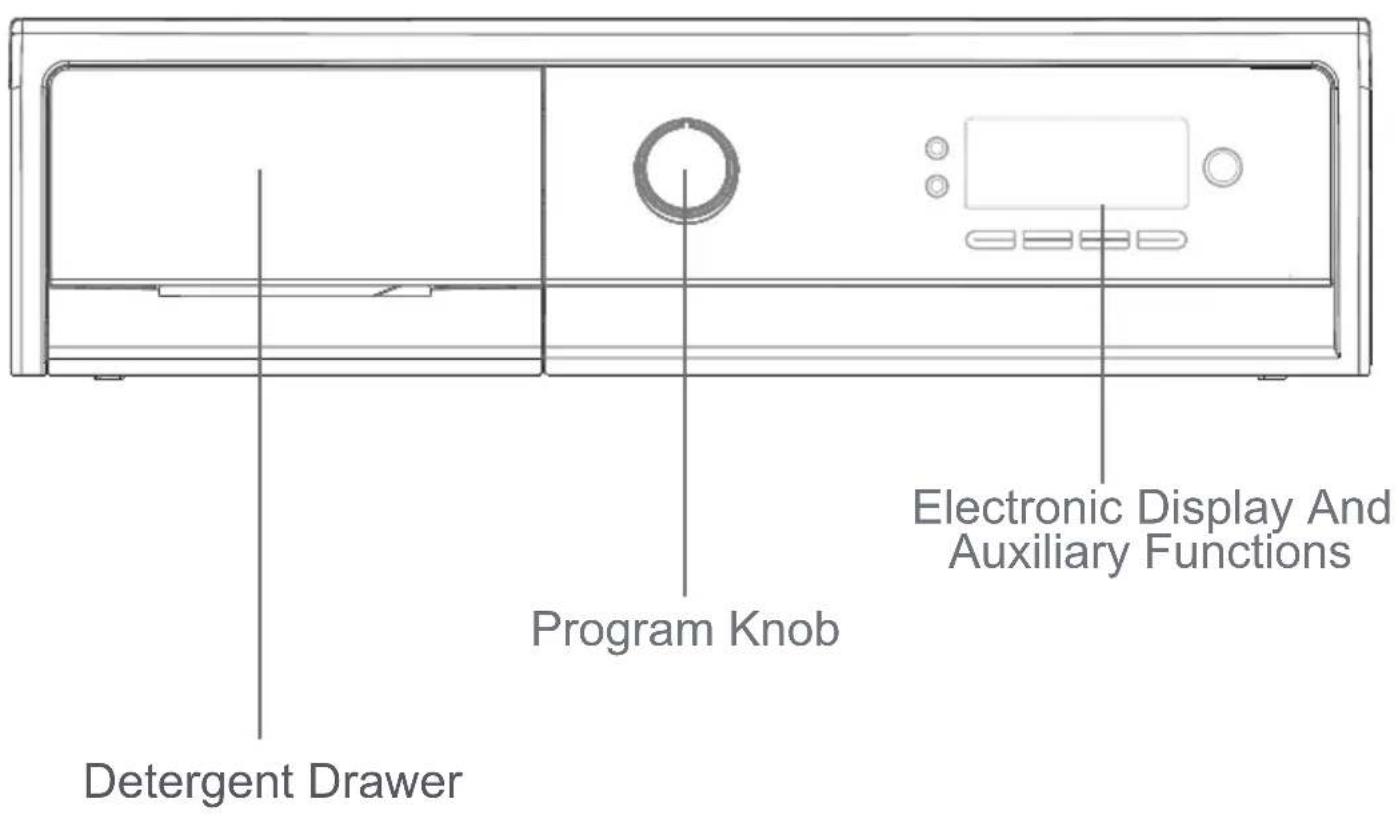
You may select the programme you like to wash your laundries through programme knob. You may set the programme selection operation by rotating the programme knob in both direction. Ensure that the programme knob is exactly on the programme you want to select.


On the electronic display, you may view washing water temperature, wringing revolution speed of your machine, the amount time your machine will continue washing, the auxiliary functions you have selected and whether the door of your machine is locked or not. Furthermore, electronic display will warn you by means of fault symbols on the display when a fault occurs on your machine and notify you of the completion of the washing programme by revealing expression of “END” on the display as soon as the washing programme you have selected has finished as well.
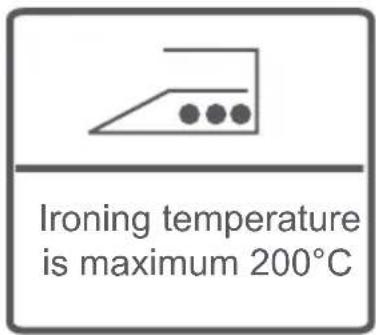
- Your laundry has product labels on them that specify their specifications. Wash or dry your laundry according to the specifications on the product label.
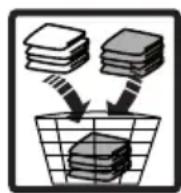
- Separate your laundries according to their types (cotton, synthetic, sensitive, wool etc.), their temperatures (cold, 30^ , 40^ , 60^ , 90^ ) and degree of contamination (slightly stained, stained, highly stained).
- Never wash your coloured and white laundry together.
- Wash your coloured laundries separately in the first washing as they may bleed.
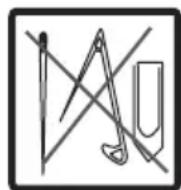
- Ensure that there are no metallic materials on your laundries or in the pockets; if so, take them up.
CAUTION: WARNING: Faults that will emerge in case of penetration of foreign substances into your machine are not included within the scope of warranty.
- Zip up and button up your laundries.
- Remove the metallic or plastic hooks of tulle curtains or curtains or place them in a washing net or bag and then muzzle them.
- Reverse textiles such as pants, knitwear, t-shirt and sweat suit.
- Wash socks, handkerchief and suchlike small laundries in a washing net.





- Open the door of your machine.
- Spread your laundries in your machine.

natural_image
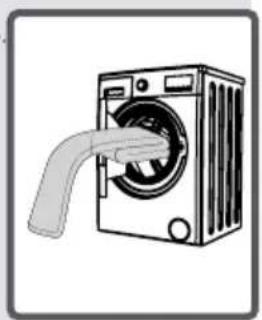
Line drawing of a washing machine with front door and side vent (no text or symbols)NOTE: Note: Maximum loading capacity may vary based on the laundry type you will wash, degree of contamination and the programme you have chosen. Do not exceed maximum dry loading capacity indicated in the programme table for washing programmes.
natural_image
Illustration of a washing machine with a handle inserting into it (no text or symbols)You can take the following table of weights as an example.
| LAUNDRY TYPE WEIGHT (gr) | |
| Towel | 200 |
| Linen | 500 |
| Bathrobe | 1200 |
| Quilt cover | 700 |
| Pillow slip | 200 |
| Underwear | 100 |
| Tablecloth | 250 |
- Put each item of laundry separately.
- Ensure that no laundry is stuck between the cover and bellow seal when closing the door of your machine.
- Push the door of your machine until hearing the locking sound to close it.
- Close the door of your machine properly, otherwise your machine will not start the washing operation.

natural_image
Line drawing of a washing machine with a circular button and 'click' label (no other text or symbols)The amount of detergent you will put in your machine will depend on the following criteria:
- Your detergent utilization will be based on the degree of contamination of your laundries. Do not prewash your less stained laundries and put your slight amount of detergent in the 2nd compartment of the detergent drawer.
- For your much stained laundries, select a programme including prewashing, and put 14 of the detergent you will put in the detergent drawer in the 1st compartment of the detergent drawer while putting the remaining 34 of it into 2nd compartment.
- Use detergents produced for automatic washing machine in your machine. The amount of detergent you will use for your laundries is printed on the detergent package.
- The higher the degree of hardness of the water the more detergent you will use.
- The amount of the detergent you will use will increase as the amount of your laundries increase.
- Put the softener in the softener compartment in the detergent drawer. Do not exceed the MAX level. Otherwise, softener will flow into washing water through flushing.
- Softeners with high density are required to be thinned to a degree before being put in the drawer. Because high-density softener will clog the flush and avoid the flow of the softener.
-
You can use your liquid detergents in all programs without prewashing. For this, fit liquid detergent level plate in the accessories bag or the liquid detergent apparatus (*) into 2nd compartment of the detergent drawer and set the amount of liquid detergent according to the levels on this plate. Remember to detach the liquid detergent plate.
-
Plug your machine in.
- Open the water faucet.
- Open the machine door.
- Spread your laundries in your machine.
- Push the door of your machine until hearing the locking sound to close it.

natural_image
Simple line drawing of an electric plug with a cable, no text or symbols present
natural_image
Illustration of a hand using a tool to adjust or install a mechanical component (no text or symbols visible)Selecting programme
Select the convenient programme for your laundries on the programme table.
AUXILIARY FUNCTIONS
Before starting the programme, you can optionally select an auxiliary function.
- Press on the button of auxiliary function you would like to select.
- If auxiliary function symbol on electronic display flashes continuously, the auxiliary function you have selected will be activated.
- If auxiliary function symbol on electronic display blinks, the auxiliary function you have selected will not be activated.
Reason for non-activation:
- The auxiliary function you want to use in the washing programme you have selected is not applicable.
- Your machine has passed over the stage, during which the auxiliary function you would like to select would be implemented.
- It is not compatible with an auxiliary function you have selected previously.
HALF-LOAD DETECTION SYSTEM
Your machine features a half-load detection system.
In case yuo put approximately half or less amount of launderies of maximum laundry capacity in your machine, your machine will run so as to save washing time, water consumption and energy in some programmes. When the half-load function is active, the machine can complete the programme you have set in a shorter time.
TWINJET SYSTEM
Detergent water in your machine will be circulated with 2 water injection mechanisms and a mixing system via twinjet system.
Circulated detergent water will be injected over your laundries, which allows a better washing performance.
Twinjet system will help you wash higher amount of laundries in a shorter time with a better washing performance, guaranteeing less energy and water consumption.
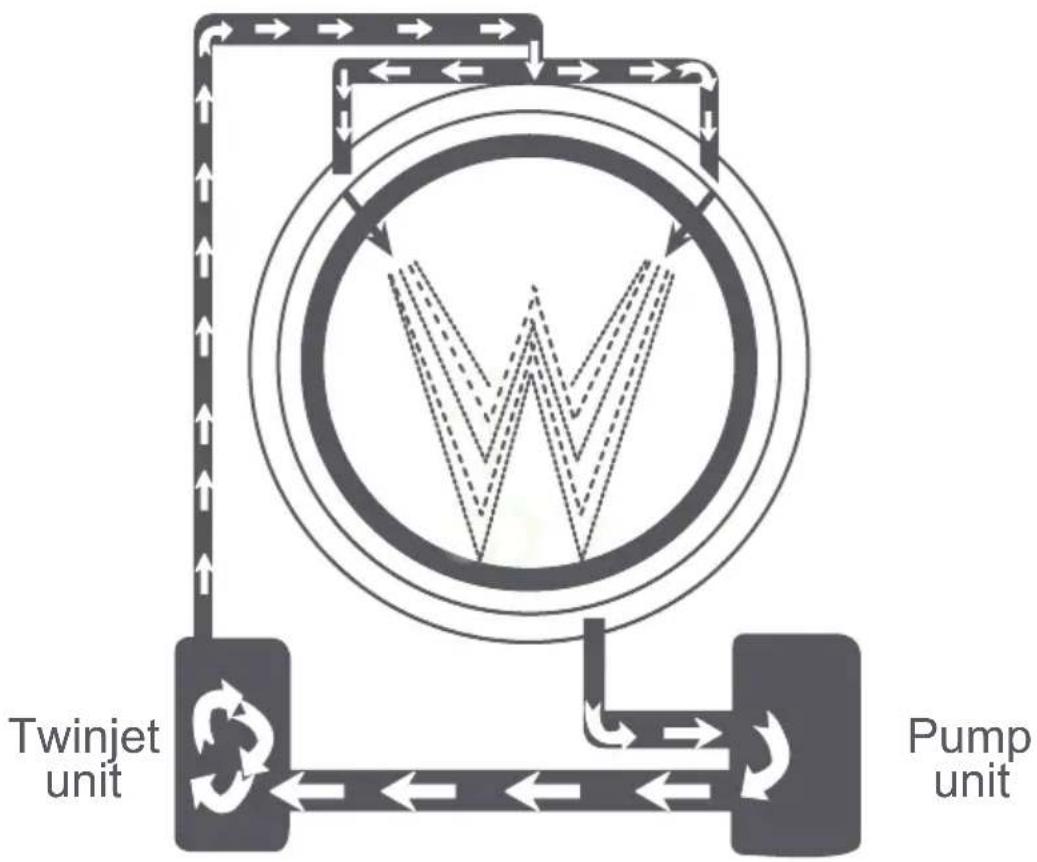
flowchart
graph TD
    A["Twinjet unit"] --> B["Pump unit"]
    B --> C["Vessel"]
    C --> D["Flow path"]
    D --> E["Return to Twinjet unit"]
    style A fill:#f9f,stroke:#333
    style B fill:#bbf,stroke:#333
    style C fill:#dfd,stroke:#333
    style D fill:#dfd,stroke:#333
    style E fill:#dfd,stroke:#333
1- Revolution speed selection and auxiliary function of soaking
You can set the wringing revolution for your laundries via revolution speed setting button.
When you select a new programme, the maximum wringing revolution speed of the programme you have selected will be viewed on the display of revolution speed.
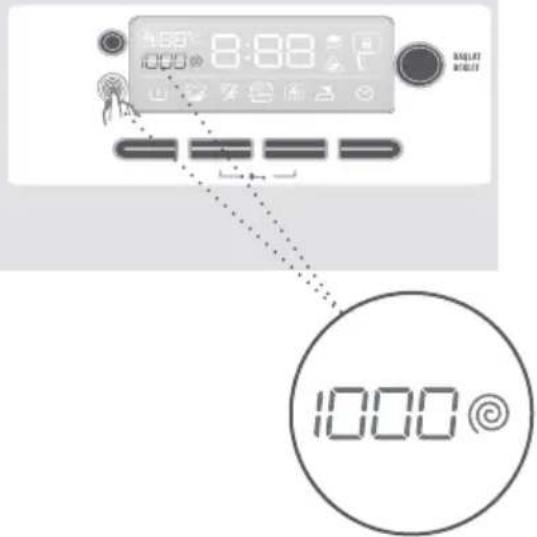
You can gradually reduce the revolution speed between cancel wringing (--) options through the maximum wringing revolution of the programme selected by pressing revolution speed setting button.

If you have skipped the wringing revolution you want to set, you can re-switch to the revolution by keeping the revolution setting button pressed.
If you will not unload your laundries upon completion of the programme and you want them not wrinkle in your machine, you can use the auxiliary function of soaking.
CHAPTER -5: OPERATING YOUR MACHINE AUXILIARY FUNCTIONS
In programmes where auxiliary function of soaking is applicable, it may be activated by pressing on revolution speed setting button once more pursuant to stage of cancel wringing (--). You can conceive that it is active when symbol flashes on electronic display.

If this function is selected, your laundries will be soaked in the latest rinsing water. When your machine soaks your laundries in the latest rinsing water, symbol 🏠 will blink on electronic display.
If you want to take your laundries out, press on “Start / Pause” button. Your machine will empty the water in it and finish the programme without wringing.
If you like to wring your laundries:
a) You can select wringing revolution by using the revolution speed setting button when your machine is soaking your laundries in the latest rinsing water. If you want to take your laundries out, press on “Start / Pause” button. Your machine will empty the water in it and finish the programme after wringing your laundries through the wringing revolution you have selected.
b) Switch the programme knob to 0. Select wringing programme on programme knob. You can optionally reduce the revolution speed. You can start your machine by pressing on Start/Pause button. Your machine will finish the programme after wringing your laundries in the wringing revolution you have selected.
2- Washing water temperature selection
You can select the washing water temperature with the washing water temperature adjustment button.
Whenever you select a new programme, the maximum washing water temperature is shown on the washing water temperature display.

You can gradually decrease the washing water temperature between the maximum temperature and cold washing (--) by pressing washing water temperature adjustment button.

If you have missed the washing water temperature you wanted, you can return to the intended temperature by continuously pressing the washing water temperature adjustment button.
3- Auxiliary function prewash
You can expose your very dirty laundries to prewashing operation prior to main washing by using this auxiliary function. When using this function, you should put detergent in front washing compartment of the detergent drawer.

4- Auxiliary function for rapid wash
This auxiliary function will enable the washing duration of your laundries that are not very dirty to be shortened. In case you put half of or less than half of the laundry capacity of the washing programme you have selected in your machine, your machine will detect this event thanks to automatic Half-load detection system, and the programme you have selected will wash your laundries in a shorter time to consume less energy and water. If your machine detects half load, symbol will automatically flash on electronic display. To cancel it, pressing on the auxiliary function of quick washing for once will be enough. However, selection of auxiliary function of quick washing is not possible in course of the same washing operation.

5- Auxiliary function for easy ironing
You can enable your laundries to be taken out less wrinkled as the washing operation is completed by employing this auxiliary function.

6- Auxiliary function for delay timer
By using this auxiliary function, you can let your machine start washing after half an hour to 23 hours.

To use auxiliary function of delay timer:
- Press time delay button once.
- Expression of "0.5h" will appear on the display.
- Press on time delay button until the time, on which you want washing operation to be started.
- To activate the time delay you have selected in the programme, you may press on any auxiliary function button you like except "Start/Pause" button.
Intervals of delay timer is half an hour for the first 2 hours, 1 hour for 3 hours to 23 hours.
If you have skipped the time delay you want to set, you can go back to the time desired by keeping pressed on delay timer button.
If you want to cancel the delay timer, you are required to press the delay timer button once.
To run delay timer function, your machine is required to be operated by pressing on Start/Pause button. As soon as you start your machine, the count down process will start on the electronic display based on the delay period you have selected.
7- Anti-Allergic auxiliary function
In the programmes where this auxiliary function is active, your machine will perform an extra rinsing operation on your laundries prior to latest rinsing operation.
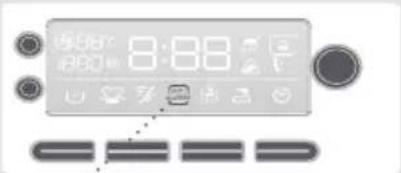

Note: Anti-Allergic auxiliary function is selected automatically only in Hygiene programme
Start/Pause button
By pressing on Start/Pause button, you may start the programme you have selected, suspend a running programme. If you switch your machine to pause mode, electronic display will blink.
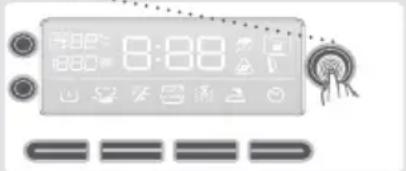
When you start your machine, the following symbols for the programmes you have selected will be available on electronic display.
- Temperature of washing water
- Revolution speed
- If you have selected, symbols of auxiliary functions
- Programme ending time or programme delay time based on your selection
- Symbol of open or locked door
Note: Symbol for open door flashing on electronic display will go off and symbol for locked door will flash approximately 1 minute after you start your machine by pressing Start/pause button.

Laundry adding to / removing from the machine
If you want to add or remove laundries when your machine is running:
- Switch your machine to pause mode by pressing on Start/Pause button.
- After a while, if you realize that symbol ☐ moves over electronic display, this means that the door of your machine will be convenient for opening. When you see symbol ☐ on electronic display, you can either add or remove laundries after opening the machine door.
Note: If symbol 🔒 blinks on the electronic display, it means that your machine cannot carry out the operation of laundry adding or removing as your machine has passed the steps in question.
- Upon completion of laundry adding or removing function, close the door of your machine and press on Start/Pause button.
- Your machine will continue to wash after locking the door of your machine.
- Symbol will flash on electronic display.

natural_image
Simple icon of a laptop with a padlock symbol on top, enclosed in a square frame (no text or labels)Child Lock
To avoid programme flow from being affected if programme knobs are pressed or programme knob is turned when performing washing operation in your machine, child lock is available. Child lock will be activated in case pressed on both auxiliary functions of quick washing and wrinkle removing at the same time in excess of 3 seconds.

Symbol 🙏 will flash on the electronic display when activated.
If pressed any button while child lock is active, symbol will blink on the electronic display.

When any of the programmes is running and child lock is active, if another programme is selected after programme knob is switched to 0 position, the programme already running will resume.
To deactivate it, it will be sufficient to press on the same buttons for more than 3 seconds. When child lock is deactivated, symbol 📄 on the electronic display will go off.

Cancelling programme
If you want to cancel any programme running:
- Switch the programme knob to 0.
- Your machine will stop the washing operation and the programme will be cancelled.
- To get rid of the water accumulated in the machine switch the programme knob to any programme.
- Your machine will perform the necessary discharge operation and cancel the programme.
- You can run your machine by selecting a new programme.

Finishing programme
- Your machine will stop by itself as soon as the programme you have selected finishes.
-Expression of "END" will flash on the electronic display.

Note: Within 2 minutes after the programme has finished, your machine will extinguish the electronic display to save energy. It will re-flash when pressed on a button of any auxiliary function.
- If you see that the symbol indicating that the door can be opened flashes on the electronic display, you can open the door of your machine and remove the laundries.
- Leave the door of your machine open to allow the inner part of your machine to dry after removing your laundries.
- Switch the programme knob to 0.
- Unplug your machine.
- Turn the water faucet off.

natural_image
Simple line drawing of a computer monitor and mouse (no text or symbols)If symbol flashes on the electronic display:
- Water faucet may be closed. Check.
- Mains water may be cut-off. Check. If so, switch the programme knob to position 0. You can select a programme and run your machine after the mains water is supplied.
- Mains water pressure may be low. Check.
- Water inlet hose may be twisted. Check.
- Water inlet hose may be clogged. Clean water inlet hose filters. (*)
- Valve inlet filter may be clogged. Clean the valve inlet filters. (*)

natural_image
Simple icon of a camera with no text or symbolsIf symbol flashes on the electronic display:
- Pump filter may be clogged. Clean the pump filter. (*)
- Discharging hose may be clogged or twisted. Check the discharging hose.

natural_image
Warning symbol with a triangle and stylized number 5 inside (no text or numbers)(*) See the chapter regarding maintenance and cleaning of your machine.
COTTON 95°
| Washing temperature (°C) | 95° |
| Maximum dry laundry amount (kg) | 8,0 |
| Detergent compartment | 2 |
| Programme duration (Min.) | 190 |
| Laundry type / Descriptions | Very dirty cotton and flax textiles. (Underwears, linen, tablecloth, towel (maximum 4,0 kg), bedclothes, etc. |
| COTTON ECO 60 C° | |
| Washing temperature (°C) | 60° |
| Maximum dry laundry amount (kg) | 8,0 |
| Detergent compartment | 2 |
| Programme duration (Min.) | 200 |
| Laundry type / Descriptions | Dirty cotton and flax textiles. (Underwears, linen, tablecloth, towel (maximum 4,0 kg), bedclothes, etc. |
| COTTON 40 C° | |
| Washing temperature (°C) | 40° |
| Maximum dry laundry amount (kg) | 8,0 |
| Detergent compartment | 2 |
| Programme duration (Min.) | 195 |
| Laundry type / Descriptions | Dirty cotton and flax textiles. (Underwears, linen, tablecloth, towel (maximum 4,0 kg), bedclothes, etc. |
NOTE: PROGRAM DURATION MIGHT CHANGE ACCORDING TO THE AMOUNT OF LAUNDRY, TAP WATER, AMBIENT TEMPERATURE AND SELECTED ADDITIONAL FUNCTIONS.
SYNTHETIC 60°
| Yıkama sıcaklığı (°C) | 60° |
| Maximum dry laundry amount (kg) | 3,5 |
| Detergent compartment | 2 |
| Programme duration | 101 |
| Laundry type / Descriptions | Very dirty synthetic or synthetic-mixed textiles. (Nylon socks, shirts, blouses, synthetic-including trousers etc.) |
SILK
| Yıkama sıcaklığı (°C) | 30° |
| Maximum dry laundry amount (kg) | 2,5 |
| Detergent compartment | 2 |
| Programme duration | 90 |
| Laundry type / Descriptions | Less dirty silk-mixed laundries with machine wash labels. |
NOTE: PROGRAM DURATION MIGHT CHANGE ACCORDING TO THE AMOUNT OF LAUNDRY, TAP WATER, AMBIENT TEMPERATURE AND SELECTED ADDITIONAL FUNCTIONS.
WOOL 40°
| Washing temperature (°C) | 40° |
| Maximum dry laundry amount (kg) | 2,5 |
| Detergent compartment | 2 |
| Programme duration | 78 |
| Laundry type / Descriptions | Woollen laundries with machine wash labels. |
RINSE
| Maximum dry laundry amount (kg) | 8,0 |
| Programme duration (Min.) | 42 |
| Laundry type / Descriptions | If you want to additionally rinse your laundries upon completion of washing operation, you may use this programme for any kind of laundries. |
SPIN
| Maximum dry laundry amount (kg) | 8,0 |
| Programme duration (Min.) | 17 |
| Laundry type / Descriptions | If you want to additionally wring your laundries upon completion of washing operation, you may use this programme for any kind of laundries. |
NOTE: PROGRAM DURATION MIGHT CHANGE ACCORDING TO THE AMOUNT OF LAUNDRY, TAP WATER, AMBIENT TEMPERATURE AND SELECTED ADDITIONAL FUNCTIONS.
ECO 20°
| Washing temperature (°C) | 20° |
| Maximum dry laundry amount (kg) | 4,0 |
| Detergent compartment | 2 |
| Programme duration (Min.) | 94 |
| Laundry type / Descrip-tions | Less dirty, cotton and linen textiles. (Underwear, bedsheet, tablecloth, towel (max. 2 kg) bedcloth, etc. |
SPORTS WEAR
| Washing temperature (°C) | 30° |
| Maximum dry laundry amount (kg) | 3,5 |
| Detergent compartment | 2 |
| Programme duration | 82 |
| Laundry type / Descriptions | Sportswear. |
NOTE: PROGRAM DURATION MIGHT CHANGE ACCORDING TO THE AMOUNT OF LAUNDRY, TAP WATER, AMBIENT TEMPERATURE AND SELECTED ADDITIONAL FUNCTIONS.
MIX WASH
| Washing temperature (°C) | 30° |
| Maximum dry laundry amount (kg) | 3,5 |
| Detergent compartment | 2 |
| Programme duration | 105 |
| Laundry type / Descriptions | Dirty cotton, synthetic, colour and flax textiles can be washed together. |
NOTE: PROGRAM DURATION MIGHT CHANGE ACCORDING TO THE AMOUNT OF LAUNDRY, TAP WATER, AMBIENT TEMPERATURE AND SELECTED ADDITIONAL FUNCTIONS.
SHIRTS/ BLOUSES
| Washing temperature (°C) | 60° |
| Maximum dry laundry amount (kg) | 4,0 |
| Detergent compartment | 2 |
| Programme duration | 124 |
| Laundry type / Descriptions | Dirty cotton, synthetic and synthetic-mixed shirts and blouses can be washed together. |
HYGIENE
| Washing temperature (°C) | 30° |
| Maximum dry laundry amount (kg) | 5,0 |
| Detergent compartment | 2 |
| Programme duration | 181 |
| Laundry type / Descriptions | You can use this programme which eliminates bacteria on your laundries at a low temperature such as 30°C for less dirty colour, flax textiles and for baby clothes. |
DAILY 60 min.
| Washing temperature (°C) | 60° |
| Maximum dry laundry amount (kg) | 4,0 |
| Detergent compartment | 2 |
| Programme duration | 60 |
| Laundry type / Descriptions | You can wash your dirty cotton, colour and flax textiles at 60°C in 60 minutes. |
NOTE: PROGRAM DURATION MIGHT CHANGE ACCORDING TO THE AMOUNT OF LAUNDRY, TAP WATER, AMBIENT TEMPERATURE AND SELECTED ADDITIONAL FUNCTIONS.
SUPER RAPID 12 MIN.
| Washing temperature (°C) | 30° |
| Maximum dry laundry amount (kg) | 2 |
| Detergent compartment | 2 |
| Programme duration | 12 |
| Laundry type / Descriptions | You can wash your dirty cotton, colour and flax textiles in 12 minutes that is a short period.Note: As the washing period is short, less amount of detergent is required to be used compared to other programmes. The programme period will increase if your machine detects instable loading. You can open the door of your machine 2 minutes after the completion of washing operation. (The duration of 2 minutes required to open the door of your machine is not included in the washing period.) |
NOTE: PROGRAM DURATION MIGHT CHANGE ACCORDING TO THE AMOUNT OF LAUNDRY, TAP WATER, AMBIENT TEMPERATURE AND SELECTED ADDITIONAL FUNCTIONS.
Unplug your machine before starting the maintenance and cleaning of your machine.
Turn the tap water off before starting the maintenance cand cleaning of your machine.

natural_image
Simple line drawing of an electrical outlet with a plug and socket (no text or symbols)
natural_image
Illustration of a hand using a tool to adjust or install a mechanical component (no text or symbols visible)CAUTION: Your machine's parts might be damaged if cleaners with solvent agents are used.
Do not use cleaning materials with solvent agents.
On the tap part of your machine's water inlet hose and at the ends of water inlet valves, there are filters to prevent entrance of the dirt and foreign materials in the water to the machine. If the machine is unable to receive sufficient water although your water tap is opened, these filters should be cleaned.
- Remove the water inlet hose.
- Remove the filters found on the water inlet valves by using a pincer and wash thoroughly with a brush.
- Clean the filters of the water inlet hoses located on the tap side by removing manually together with the seal.
• After you clean the filters, you can fit them the same way as you have removed.

natural_image
Technical line drawing of a mechanical component with no visible text or symbols
natural_image
Line drawing of hands holding a tool over a mechanical component (no text or symbols)CAUTION:

Filters of water inlet valves may be clogged due to contaminated water faucet or lack of necessary maintenance or valves may be broken down, causing water leaking into your machine continuously.
The breakdowns that may arise due to these reasons are out of the scope of warranty.
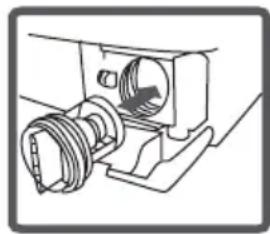
The pump filter system elongates the life of your pump, which is used to drain the dirty water. It prevents lint to enter the pump. Cleaning of your pump filter in every 2-3 months is recommended. To clean your pump filter:
- Open the kickplate's cover, by pulling the handle.
- Before opening the filter cover, place a cup in front of the filter cover to prevent flow of the remaining water in the machine.
- Loosen the filter cover by rotating it counter clockwise and drain the water.
- Remove the foreign materials from the filter.

CHAPTER -7: MAINTENANCE AND CLEANING OF YOUR MACHINE (PUMP FILTER)
- Check for the rotation of the pump manually.
• After you have cleaned the pump, fit the filter cover by rotating clockwise.
- Put the kickplate cover into the place.
- Do not forget that if you do not fit in the filter cover properly, it will leak water.
natural_image
Technical line drawing of a mechanical assembly with no visible text or symbols
natural_image
Mechanical diagram showing a rotating component with directional arrows (no text or symbols)
natural_image
Simple geometric diagram with concentric circles and horizontal lines, no text or symbols presentWARNING!
As water in the pump may be hot, wait until it cools down.
(*) Machinery specifications may vary depending on the product purchased.
CHAPTER -7: MAINTENANCE AND CLEANING OF YOUR MACHINE (DETERGENT DRAWER)
Your detergents may deposit residue in detergent drawer and housing of detergent drawer over time.
To clean the residue formed, disassemble the detergent drawer in particular periods. It is recommended that you clean your pump filter every 2 months.
To eject the detergent drawer:
- Pull the detergent drawer up to the end
- Keep on pulling by depressing on the section shown below in the detergent drawer and keep pulling and then unsettle the detergent drawer.

natural_image
Illustration of a hand inserting a printer into a rack, with a black arrow indicating the process (no text or symbols present)
natural_image
Illustration of hands inserting a device into a rack with a magnified inset showing internal components (no text or symbols)
natural_image
Architectural line drawing showing a window with a black arrow pointing to a window (no text or symbols)- Flsuh it using a brush.
- Collect residues in the housing of the detergent drawer without dropping them inside the machine.
- Assemble the detergent drawer after drying it using a towel or dry cloth.
- Do not wash your detergent drawer in dishwasher.

Flush stopper
Disassemble the detergent drawer. Disassemble the flush stopper and clean the softener residues completely. Refit the flush stopper after cleaning it. Check whether it has settled properly.
Body
Clean the outer body of your machine with warm water and a non-inflammable cleaning agent that will not abrade the body of your machine. After rinsing with some water, dry it using a soft and dry cloth.
Drum
Do not leave metallic objects such as needles, paper clips, coins etc. in your machine. This objects lead to formation of rust stains in the drum. To clean such rust stains, use a non-chlorine cleaning agent and follow the instructions of manufacturers of the cleaning agent. Never use wire wool or similar hard objects for cleaning rust stains.

natural_image
Line drawing of a mechanical device with an arrow indicating direction (no text or symbols)
natural_image
Technical line drawing of a structural panel with internal compartments and mounting holes (no text or symbols)
natural_image
Technical line drawing of a cylindrical mechanical component with internal grooves and mounting flanges (no text or symbols)All repairing operations required for your machine should be carried out by our authorised service. If your machine requires a repair or if you cannot remove the fault by the help of the information provided as follows:
• Unplug your machine.
• Turn the water faucet off.
| FAULT | POSSIBLE CAUSE | TROUBLE-SHOOTING |
| Your machine does not start. | It is not plugged. Plug it. | |
| Fuse blown. | Replace the fuses. | |
| Electricity cut-off. | Check mains power. | |
| Start/pause button not pressed. | Press on Start/Pause button | |
| Programme dial ‘stop’ position. | Switch the programme button to the desired position. | |
| The machine door is not completely closed. | Close the machine door. | |
| Your machine does not intake water. | Water tap is turned off. | Turn your faucet on. |
| Water inlet hose may be twisted. | Check water inlet hose and untwist. | |
| Water inlet hose clogged. | Clean water inlet hose filters. (*) | |
| Valve inlet filter clogged. | Clean the valve inlet filters. (*) | |
| The machine door not completely closed. | Close the machine door. |
(*) See the chapter regarding maintenance and cleaning of your machine.
| FAULT | POSSIBLE CAUSE | TROUBLE-SHOOTING |
| Your machine does not discharge water. | Discharging hose clogged or twisted. | Check the discharging hose, then either clean or untwist. |
| Pump filter clogged. | Clean the pump filter. (*) | |
| Laundry settled in the machine unevenly. | Spread your laundry in the machine evenly. | |
| Your machine vibrates. | The feet of your machine have not been adjusted. | Adjust the feet on your machine. (**) |
| Safety stays fitted for transportation not disassembled. | Disassemble the safety stays of your machine. (**) | |
| Less amount of laundry in the appliance. | This will not block operation of your machine. | |
| Your machine is overloaded with laundry or laundry settled unevenly. | Do not put in laundry more than the amount recommended and settle the laundry in the machine evenly. | |
| Your machine rests on a hard surface. | Prevent your machine from resting on hard surfaces. |
(*) See the chapter regarding maintenance and cleaning of your machine.
(**) See the chapter regarding installation of your machine.
| FAULT | POSSIBLE CAUSE | TROUBLE-SHOOTING |
| Excessive foam is formed in the detergent drawer. | Excessive amount of detergent used. | Press on Start/Pause button To eliminate foam formation, mix a spoon of softener with half litres of water, and pour the mixture in the detergent drawer. After 5-10 minutes, press on Start/Pause button again. In your next washing operation, Adjust the detergent dose accordingly. |
| Wrong deter-gent used. | Use detergents produced only for automatic washing machines in your machine. | |
| Unsatisfactory washing result. | The contamination degree of your laundries does not match the programme you have chosen. | Select the programme appropriate for the contamination degree of your laundries. (See programme table) |
| Amount of detergent used insufficient. | Adjust the amount of detergent based on the amount and contami-nation degree of your laundries. | |
| Laundries in ex-cess of maximum capacity put in your machine. | Load your machine with laundries, amount of which will not exceed maximum laundry ca-pacity. | |
| Unsatisfactory washing result. | Water being hard. (Contaminated, lime water etc.) | Adjust the amount of detergent based on the instruction of detergent manufacturer. |
| Laundries distributed in your machine non-homogenously. | Spread your laun-dries in the ma-chine properly and homogeneously. | |
| As soon as the ma-chine is loaded with water, water dis-charges. | The end of water discharging hose is too low for the machine. | Set the water dis-charging hose on appropriate height. (**) (**) |
| No water appears in the drum during washing. | No fault. Water is in the unseen part of the drum. | —— |
| Laundries have detergent residues on them. | Non-dissolving particles of some detergents may stick to your laundries as white spots. | Perform an extra rinsing by setting your machine to “Rinsing” programme, or clean the spots using a brush after your laun-dries dry. |
| Grey spots appear on the laundries. | The reason for such spots may be oil, cream or ointment. | Apply the maximum amount of detergent instructed by the deter-gent manufacturer in the next washing operation. |
(**) See the chapter regarding installation of your machine.
| FAULT | POSSIBLE CAUSE | TROUBLE-SHOOTING |
| Spinning operation is not performed or runs late. | No fault. Unbalanced load control system has been activated. | Unbalanced load control system will try to spread your laundries homogeneously.Wringling operation will begin after your laundry is spread. Place the laundry in the machine in a balanced fashion the next time. |
Your machine is equipped with the systems which are capable of both taking necessary precautions and warning you in case of any breakdown by means of continuous self-checking during washing operations.
| TROUBLE CODE | POSSIBLE FAULT | WHAT TO DO |
| E01 | The door of your machine is left open. | Close the machine door. If your machine persists to indicate fault, turn off your machine, unplug it and contact the nearest authorised service immediately. |
| E02 | The pump is faulty or pump filter is clogged or electrical connection of the pump is faulty. | Turn on the faucet. Mains water may be cut-off. If the problem still continues, your machine will stop after a while automatically. Unplug the machine, turn off your faucet and contact the nearest authorised service. |
| E03 | The water pressure or the water level inside the machine is low. | Clean the pump filter. If the problem persists, contact the nearest authorised service. (*) |
| E04 | Your machine has excessive amount of water. | Your machine will discharge water by itself. Pursuant to discharging operation, turn off your machine and unplug it. Turn off your faucet and contact the nearest authorised service. |
(*) See the chapter regarding maintenance and cleaning of your machine.
Alcoholic drinks: Spotted area should initially be washed using cold water, and then be wiped with glycerine and water and rinsed with vinegar-mixed water.
Shoe shine: Spot should be rubbed out gently without damaging the cloth and be scrubbed and rinsed with detergent. If not removed, it should be scrubbed using the mixture obtained by adding 1 scale of alcohol (96°) into 2 scales of water, and then be washed with warm water.
Tea and coffee: Stretch the spotted area of your laundry throughout the opening of a vessel, and pour hot water as much as the type of your laundry can resist.
In case the type of your laundry permits, wash with bleacher.
Chocolate and cocoa: After submerging your laundries in cold water and rubbing it using soap or detergent, wash it in temperature that fabric type of your laundry can resist. In case the oil stain is still visible, wipe with oxygen water (3%).

natural_image
Simple line drawing of a wine bottle with no text or symbols
natural_image
Simple line drawing of a boots (no text or symbols)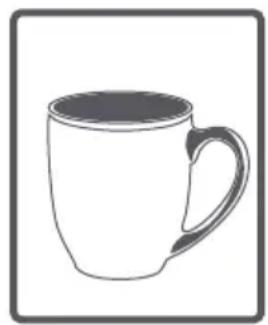
natural_image
Simple line drawing of a mug with handle and side rim, no text or symbols present
natural_image
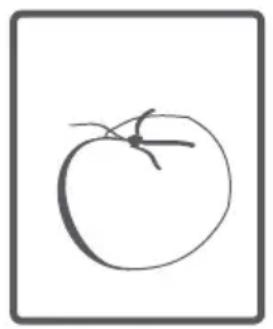
Simple line drawing of a steaming cup (no text or symbols)Tomato paste: After rubbing out the dried substances without damaging your laundry, submerge it in water for 30 minutes, and then scrub and wash it with detergent.
Bouillon-Egg: Remove dried spot residues on your laundry, and then wipe it with a sponge or soft cloth submerged in cold water previously. Scrub with detergent, wash with diluted bleacher.
Grease and oil stains: Firstly, wie the residues. Scrub the spot with detergent and wash it with warm soapy water.
Mustard: Apply glycerine on spotted area. Scrub with detergent and wash. If the spot cannot be removed, wipe with alcohol. (For synthetic and colour fabrics, a mixture of 1 scale of alcohol and 2 scales of water should be used)
natural_image
Simple line drawing of a tomato (no text or symbols)
natural_image
Simple line drawing of an egg with a gear inside, no text or symbols present
natural_image
Simple line drawing of a pitcher with liquid and handle (no text or symbols)
natural_image
Simple icon of a trash bin with a lid, no text or symbols presentFruit: Stretch the spotted area of your laundry throughout the opening of a vessel, and pour cold water on it. Do not pour hot water on the spot. Wipe with cold water and apply glycerine. Allow 1-2 hours, wipe with a few drops of white vinegar, and rinse it.
Grass stain: Wipe the stained part with detergent. If the type of your cloth permits bleacher using, wash with bleacher. Wipe your woollen laundries with alcohol. (For colour fabrics, a mixture of 1 scale of pure alcohol and 2 scales of water)
Oil paint: Spot should be removed by applying thinner before drying. Then it should be wiped with detergent and washed.
Burn stain: If your laundry is suitable for applying bleacher, you can add bleacher into washing water. For wool fabric, a cloth previously submerged in oxygen water should be covered over the stain and it should be ironed after putting a dry cloth on this cloth. It should be washed after being rinsed properly.

natural_image
Abstract black-and-white illustration of a splint or splash with droplets and central core (no text or symbols)
natural_image
Illustration of a waffle ice cream cone with swirl frosting (no text or symbols)
natural_image
Simple line drawing of a mushroom with a base (no text or symbols)
natural_image
Line drawing of a pen with a handle and eraser, enclosed in a square frame (no text or symbols)Blood stain: Submerge your laundries in cold water for 30 minutes. If the stain is not removed, then submerge in a mixture of water and ammoniac (3 spoons of ammoniac in 4 litres of water) for 30 minutes.
Crema, ice cream and milk: Submerge your laundries in cold water and scrub the spotted area with detergent. If the spot is not removed, apply bleacher to the extent suitable for your laundries. (Do not use bleacher for colour laundries.)
Muff: Muff stains should be cleaned as soon as possible. Stain should be washed with detergent water, nevertheless if it cannot be removed, it should be wiped with oxygen water (3%).
Ink: Subject the spotted area to running water and wait until the flow of inked water ends. Then wipe it with lemon-added water and detergent, and wash it after allowing 5 minutes.

natural_image
Simple line drawing of a peach with a leaf, enclosed in a square frame (no text or symbols)
natural_image
Simple line drawing of three curved lines inside a square frame (no text or symbols)
natural_image
Line drawing of a paintbrush with bristles and handle, enclosed in a square frame (no text or symbols)
natural_image
Simple flame icon illustration inside a square frame (no text or symbols)
flowchart
graph TD
    A["Model"] --> B["A+++"]
    B --> C["A++"]
    C --> D["A+"]
    D --> E["A"]
    E --> F["B"]
    F --> G["C"]
    G --> H["D"]
    H --> I["A+++"]
    I --> J["Brand"]
    J --> K["Energy Class"]
    K --> L["Energy Consumption"]
    L --> M["kWh/annum"]
    M --> N["L/annum"]
    M --> O["kg"]
    M --> P["dB"]
    P --> Q["dB"]
    Q --> R["Noise Value While Washing"]
    R --> S["Noise Value While Spinning"]
    S --> T["Spinning Performance Class"]
    T --> U["Dry Laundry Capacity"]
    U --> V["Annual Water Consumption"]
Energy and water consumption may vary based on water pressure, water hardness, water temperature, ambient temperature, laundry amount, additional function selection, voltage fluctuations. It will reduce energy and water consumption to use your machine with the laundry capacity proposed for the selected programme, wash your laundries less dirty or daily laundries in short programmes, carry out cleaning and maintenance periodically, use your machine in convenient time intervals specified by electricity vendor.
This symbol on the product or package implies that the product should not be treated as domestic waste. Instead, it should be delivered to applicable waste collection places recycling electrical and electronic equipment.
You will contribute to avoid potential negative results regarding environment and human health, which will arise due to wrong waste procedure for the product by ensuring that this product is annihilated properly.
Recycling materials will help natural resources be preserved.
For more detailed information regarding recycling of this product, please contact local municipality, domestic waste annihilation service or the shop you have purchased the product.


natural_image
Blank image with no visible content, text, or symbols
natural_image
Blank white image with no visible content, text, or symbolsCE


- CHAPTER-1: BEFORE USING THE APPLIANCE
- CHAPTER-2: OVERVIEW OF YOUR DEVICE
- CHAPTER-3: INSTALLATION
- CHAPTER-4: INTRODUCTION OF CONTROL PANEL ..32
- CHAPTER-5: PRELIMINARY PREPARATION FOR LAUNDERING
- CHAPTER-7: MAINTENANCE AND CLEANING OF YOUR MACHINE
- DANGER OF GETTING BURNT!
- DEATH RISK DUE TO ELECTRICAL CURRENT!
- Flooding risk!
- Danger of Fire!
- Fall and injury hazard!
- Child safety!
- Removal of packaging materials
- Disposal of old machine
- CHAPTER -2: OVERVIEW OF YOUR DEVICE GENERAL APPEARANCE
- CHAPTER -2: OVERVIEW OF YOUR DEVICE TECHNICAL SPECIFICATIONS
- Adjusting Adjustable Stays
- SECTIONS
- Main wash detergent compartment:
- Fabric conditioner, starch, detergent compartment:
- Pre-wash detergent compartment:
- CAUTION: WARNING: Faults that will emerge in case of penetration of foreign substances into your machine are not included within the scope of warranty.
- NOTE: Note: Maximum loading capacity may vary based on the laundry type you will wash, degree of contamination and the programme you have chosen. Do not exceed maximum dry loading capacity indicated in the programme table for washing programmes.
- Selecting programme
- AUXILIARY FUNCTIONS
- Reason for non-activation:
- HALF-LOAD DETECTION SYSTEM
- TWINJET SYSTEM
- 1- Revolution speed selection and auxiliary function of soaking
- CHAPTER -5: OPERATING YOUR MACHINE AUXILIARY FUNCTIONS
- 2- Washing water temperature selection
- 3- Auxiliary function prewash
- 4- Auxiliary function for rapid wash
- 5- Auxiliary function for easy ironing
- 6- Auxiliary function for delay timer
- 7- Anti-Allergic auxiliary function
- Start/Pause button
- Laundry adding to / removing from the machine
- Note: If symbol 🔒 blinks on the electronic display, it means that your machine cannot carry out the operation of laundry adding or removing as your machine has passed the steps in question.
- Child Lock
- Cancelling programme
- Finishing programme
- Note: Within 2 minutes after the programme has finished, your machine will extinguish the electronic display to save energy. It will re-flash when pressed on a button of any auxiliary function.
- CAUTION:
- CHAPTER -7: MAINTENANCE AND CLEANING OF YOUR MACHINE (PUMP FILTER)
- WARNING!
- CHAPTER -7: MAINTENANCE AND CLEANING OF YOUR MACHINE (DETERGENT DRAWER)
- Flush stopper
- Body
- Drum
Mærke : SMEG
Model : LBW148DE
Kategori : Vaskemaskine