JBM-4355 - Løbebånd JETstream - Gratis brugsanvisning og manual
Find enhedens vejledning gratis JBM-4355 JETstream i PDF-format.

Brugerspørgsmål om JBM-4355 JETstream
0 spørgsmål om dette apparat. Besvar dem du kender, eller stil dit eget.
Stil et nyt spørgsmål om dette apparat
Download vejledningen til din Løbebånd i PDF-format gratis! Find din vejledning JBM-4355 - JETstream og tag din elektroniske enhed tilbage i hånden. På denne side er alle dokumenter nødvendige for brugen af din enhed offentliggjort. JBM-4355 af mærket JETstream.
BRUGSANVISNING JBM-4355 JETstream
DC MOTORIZED PROGRAMMABLE
TREADMILL JBM-4355
JETstream®
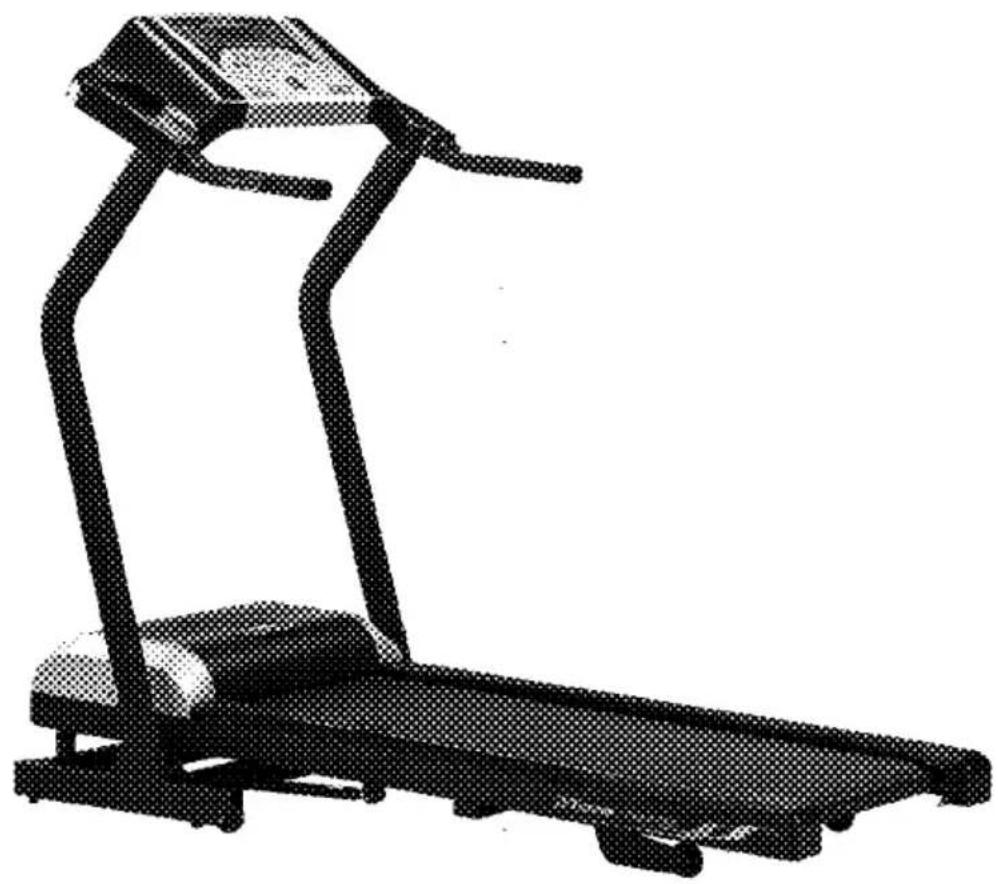
natural_image
Black-and-white illustration of a treadmill with extended legs and seat (no text or symbols)| Index | Introduction / Safety guideline | 01 |
| Maintenance | 01~02 | |
| Information | 02 | |
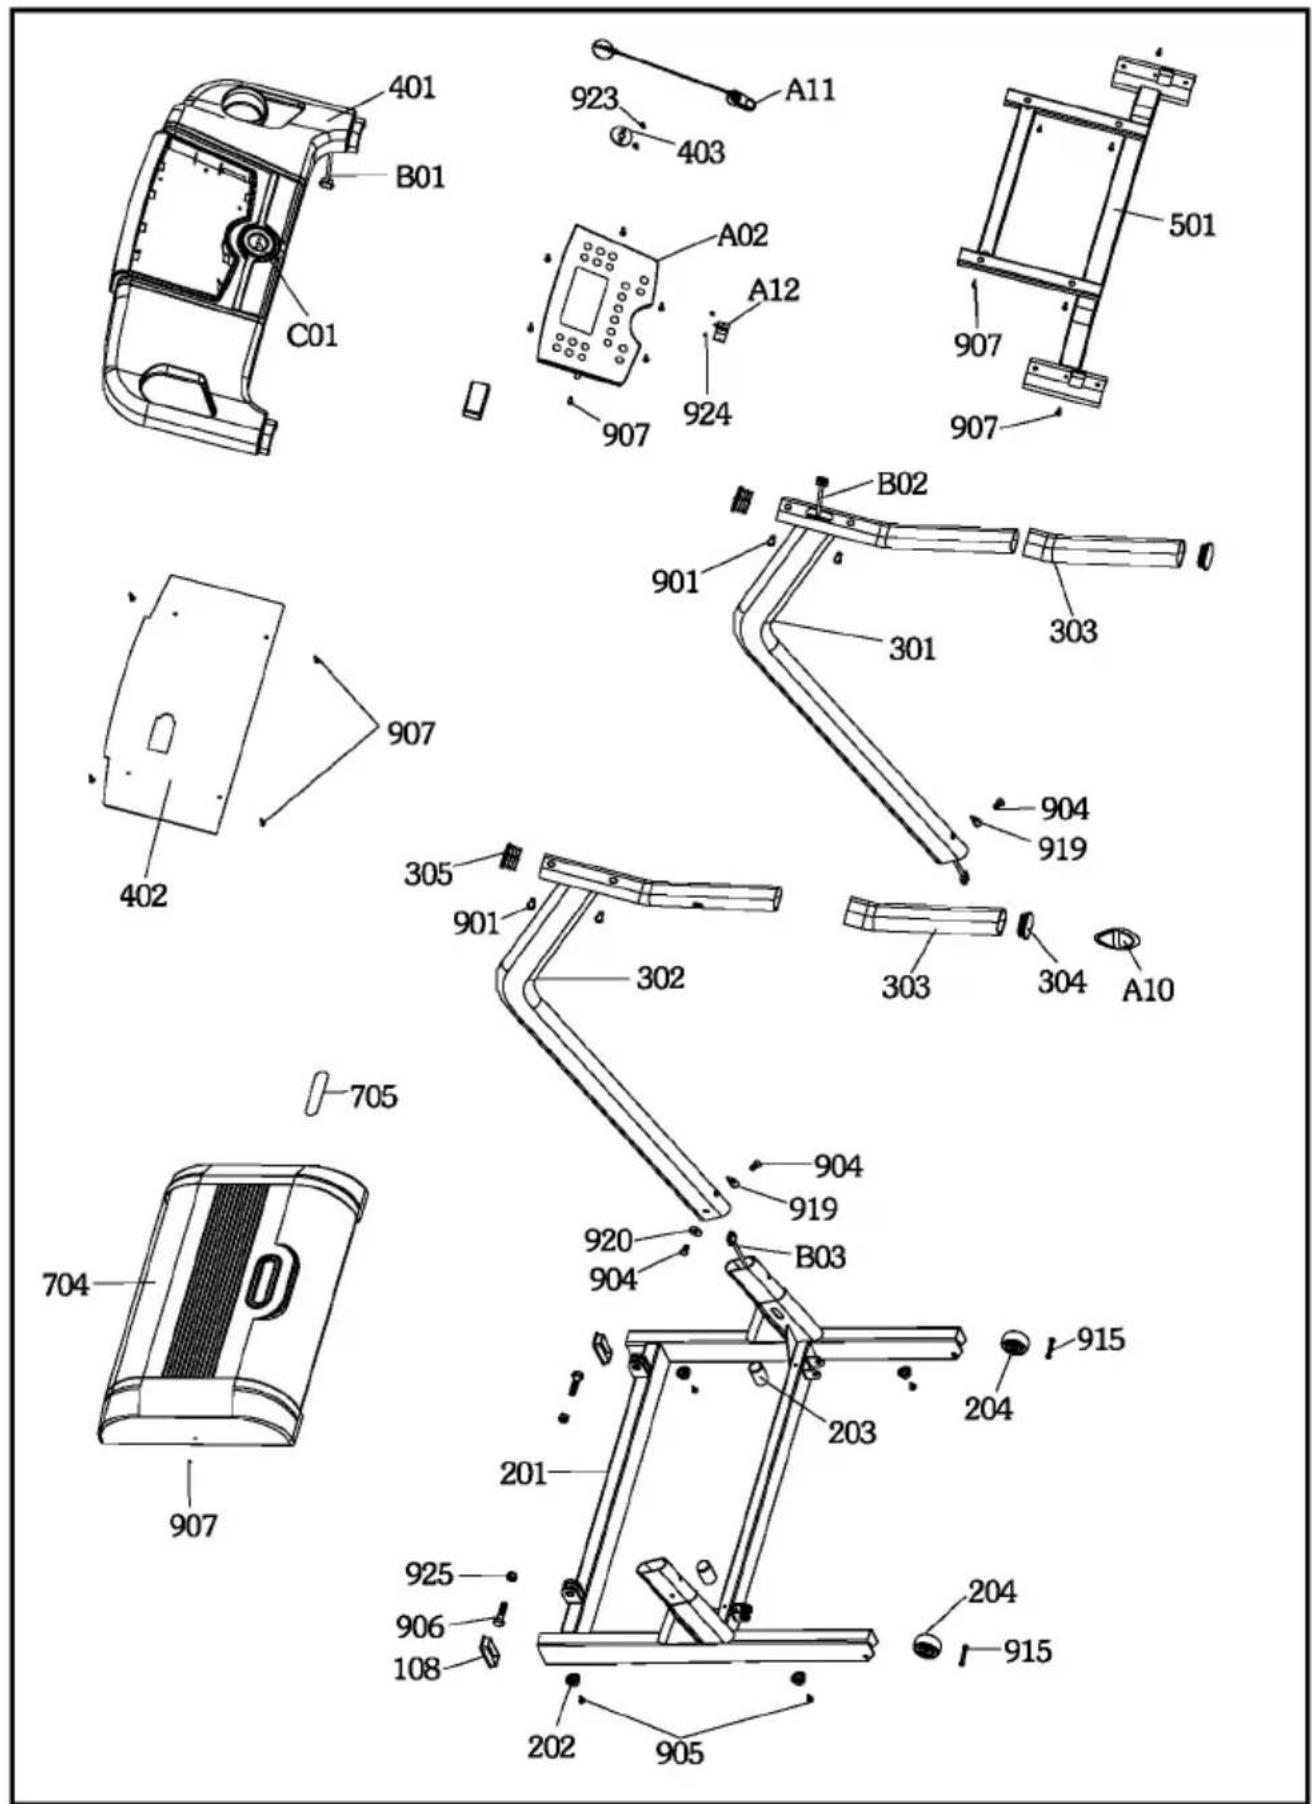
| Parts list | 03~05 | |
| Accessories | 05 | |
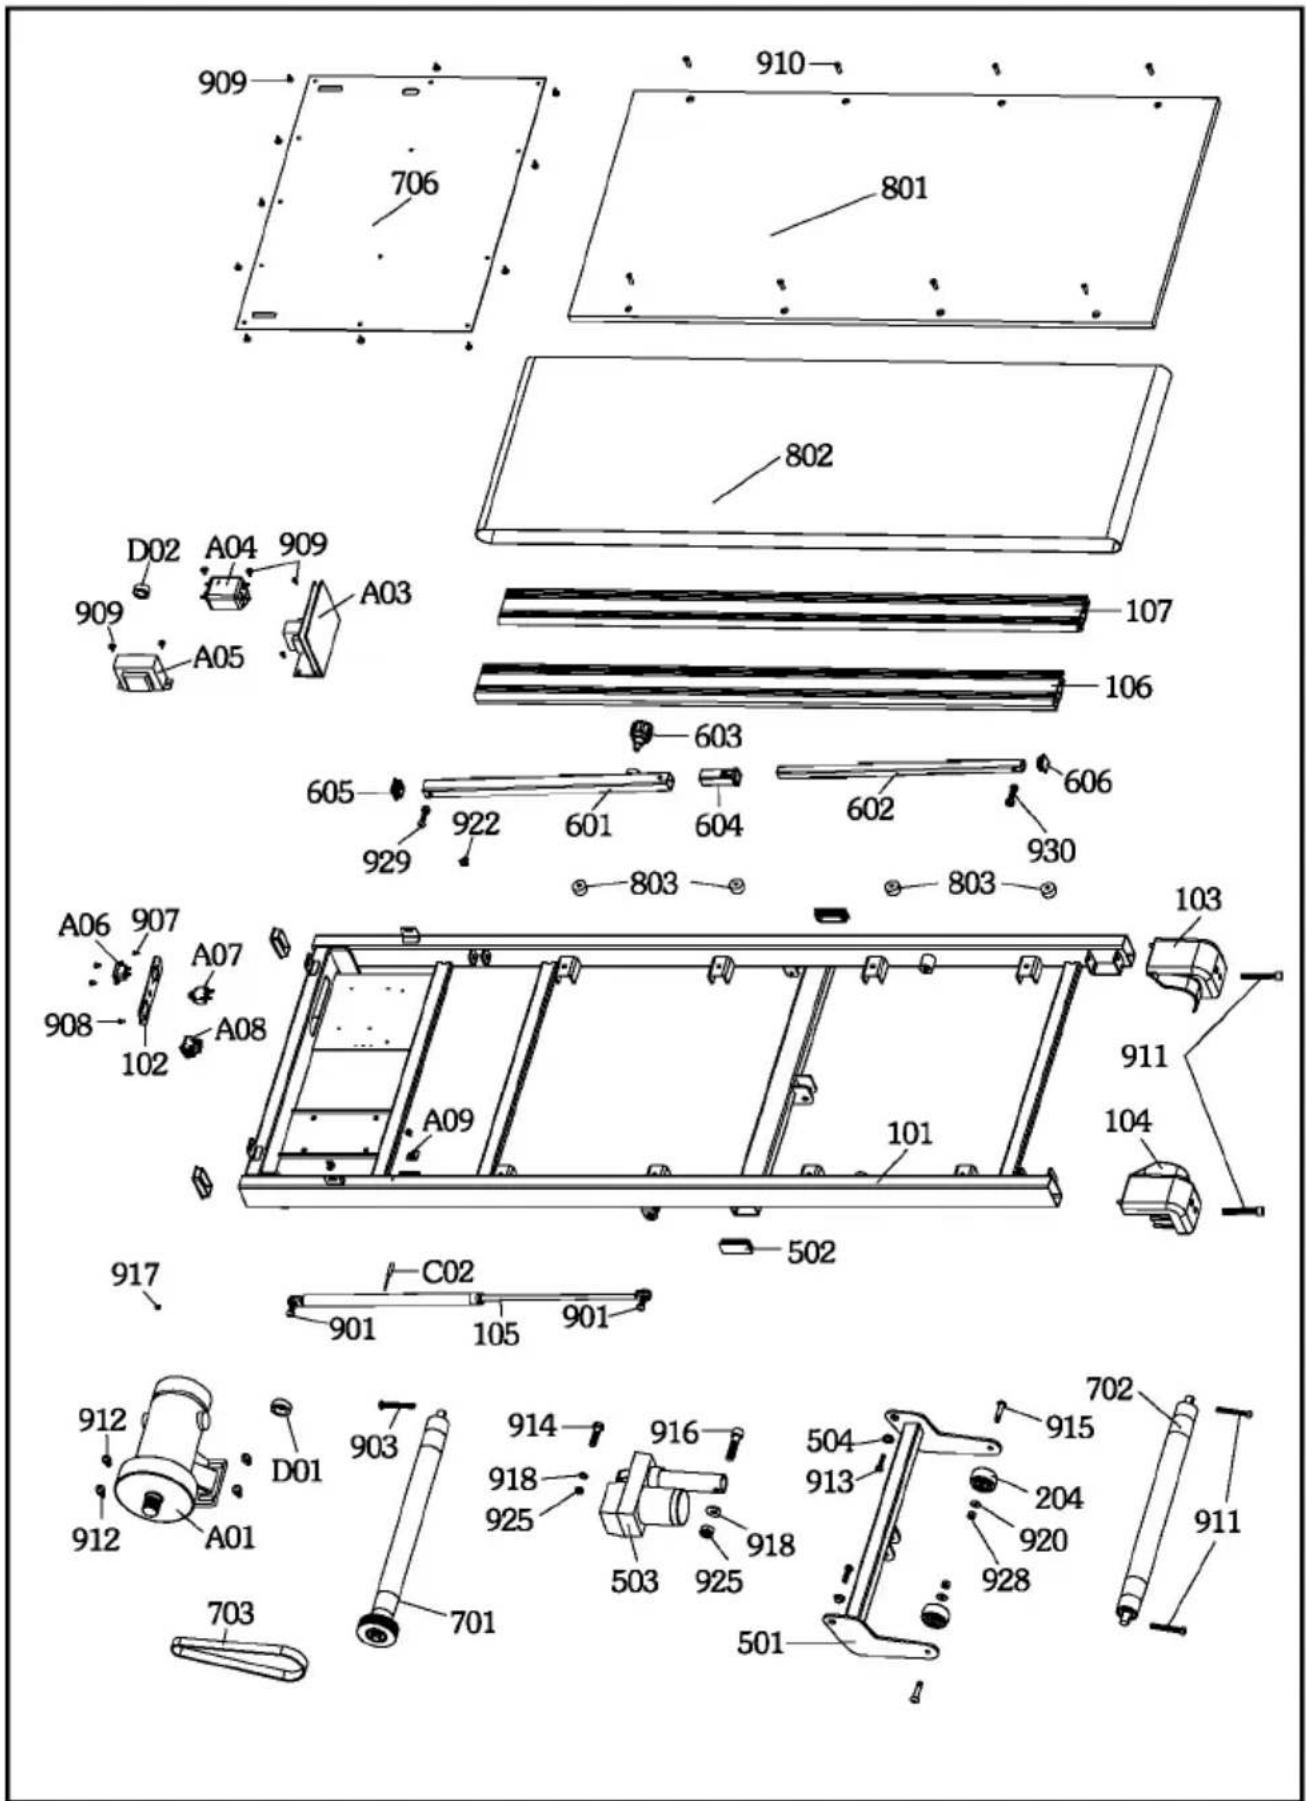
| Exploded drawing | 06~07 | |
| Assembly - base | 08 | |
| Upright tube assembly | 08 | |
| Assembly - monitor | 09 | |
| Folding and unfolding | 09 | |
| Adjust the tension | 10 | |
| Mat alignment | 10 | |
| Incline adjustment | 11 | |
| Instruction of power key and pulse | 11 | |
| Warm - up | 12 |

Testing specification :
Low Voltage Directive - EN 60335-1.
E&E Directive - EN 50366
EMC Directive - EN 55014 - 1,
EN 55014 - 2,
EN 61000 - 3 - 2,
EN 61000 - 3 - 3.
WEEE WARNING :
Do not dispose of electrical appliances as unsorted municipal waste, use separate collection facilities.
Contact your local government for information regarding the collection systems available.
If electrical appliances are disposed of in landfills or dumps, hazardous substances can leak into the groundwater and get into the food chain, damaging your health and well-being.
When replacing old appliances with new once, the retailer is legally obligated to take back your old appliance for disposal at least for free of charge.
1. INTRODUCTION
Thank you very much for choosing this product. To secure the safety, please read the manual and all suggestions carefully before using this product. While you read through the manual, we believe that you can enjoy the fun of exercise and have a healthy life.
2. SAFETY GUIDELINE
* Consult your physician before start any exercise.
* Read through users manual carefully and follow the instructions.
* Do not allow children to play on the treadmill.
* Keep the safety key out of reach of children.
* Inspect the treadmill before use and ensure the power cord is not damaged.
* Place the treadmill on a solid level surface with the rear and side away from any objects.
* Keep hands away from moving parts.
* Do not place any liquids on or near the treadmill.
* Wear appropriate clothing and shoes for exercise.
* Do not wear shoes that damages the mat.
* Stop exercise if you feel any pain or discomfort and consult your Physician immediately.
* Place both feet on the foot rails while start the treadmill.
* Do not start the treadmill while you stand on the mat.
* If you have any questions or concerns, contact dealer.
* Make sure the ground-wire installed, before assemble the machine.
* This is a home fitness equipment, not suitable for other places.
* Power key clip has to clip on the cloth during running.
* It has to keep the safe zone 1000mm x 2000mm behind the motorized treadmill.
* In emergency case, please hold on handlebar, step on side rail, or run away from running board.
This appliance is not intended for use by persons (including children) with reduced physical, sensory or mental capabilities, or lack of experience and knowledge, unless they have been given supervision or instruction concerning use of the appliance by a person responsible for their safety. Children should be supervised to ensure that they do not play with the appliance.
3. MAINTENANCE
a. Maintenance
- Clean and lubricate the bed of the treadmill every 20 hours of use or monthly, which ever comes first (SEE TREADMILL LUBRICATION INSTRUCTIONS). Clean sides of the running mat daily will prevent dirt from getting underneath the mat.
- To prevent dust from stack up beneath motor cover and under the treadmill body (any work involving the removal of the motor cover should be carried out by a qualified technician), the surface around and beneath the treadmill should be cleaned weekly. Select floor covering that prevent gathering dust and also protects the original floor surface.
- Ensure that fluids are not spilt on the treadmill console or running mat.
- Contact your dealer for assistance if you need to have the treadmill serviced.
b. Treadmill clean and lubrication instruction
- Use a clean towel, slide it between the running mat and platform of the treadmill at the motor end, so that one end of the towel hangs over each side of the machine.
- Hold each end of the towel and gradually pull it back towards the rear of the machine. (make sure the mat does not move).
- When you reach the rear roller, hold the MAT and towel to the motor end and pull both back near the motor cover. Repeat steps 2 and 3 twice. This action cleans the mat and platform of the treadmill.
- Take the lubricant and apply to the treadmill bed.
-
Walk on the treadmill for two minutes at about 5 km/h in order to spread the lubricant evenly.
-
Mat slippage may occurred for a short time. If it persists, adjust the running mat tension as per direction in the owner's manual (adjust belt tension). Do not over-tighten, as this will decrease the life of the mat and place undue pressure upon the roller bearings.
- If you are not certain of any procedure or lack of correct tools, please contact your dealer. We recommend a qualified technician carry out work involving removal of the motor cover.
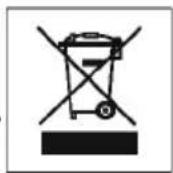
natural_image
Pure mechanical diagram showing a rectangular frame with two side supports and a diagonal dashed line indicating alignment or displacement (no text or symbols)(clean)
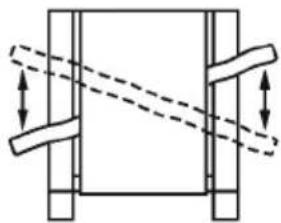
natural_image
Simple line drawing of a hand using a tool to lift or adjust a component inside a rectangular frame (no text or symbols)(instruction)
c. Silicon
Silicon spray warning
KEEP OUT OF REACH OF CHILDREN!
If swallowed or sprayed directly on face, seek medical advice immediately.
If spilt, clean up immediately, as slippage hazard may result.
- Apply 2 cc of silicon lubricant on each lubrication point (the lubrication point situated under the running mat, which is 10 cm from sides of the mat and 30 cm from the near end of motor cover). Apply on both left and right sides of the mat.
- Adjust treadmill speed to 5 km/h, walk on the machine for 5 minutes to evenly spread the lubricant.
Note : This product may cause danger if used otherwise than strictly in accordance with the directions for its use.
In case user purchase lubricant from other sources it is used solely at the purchaser's own risk and the manufacturers and distributors hereby exclude themselves from all liability in relation to that product howsoever arising.
- INFORMATION:
| Basic spec: | |
| Machine size | 180*76*136 (cm) |
| Folded size | 88*76*165 (cm) |
| Running surface | 43*120 (cm) |
| Thickness of running belt | 1.6mm |
| Thickness of running deck | 15mm |
| Machine base section | Square tube (30*60*1.5) |
| Upright tube section | Oval tube (30*70*1.5) |
| Painting | Black powder-body |
| Electric spec (1) | AC 100V-120V / 50Hz-60Hz |
| Electric spec (2) | AC 220V-240V / 50Hz-60Hz |
| Speed range | 1km/h~16 km/h |
| Motor | 2.0HP (Treadmill duty) |
| Elevation type | Elevation motor (level 16) |
| Elevation angle | 0°~2.5° |
| Max. user weight | 110 kg |
| Folding | Foldable |
| Weight | 60 kg |
| NO. | Description | Q'ty |
| 101 | Main frame | 1 |
| 102 | Power supply post | 1 |
| 103 | Rear cover (right) | 1 |
| 104 | Rear cover (left) | 1 |
| 105 | Air Pressure shaft | 1 |
| 106 | Side rail | 2 |
| 107 | Anti-slip mat | 2 |
| 108 | Square tube cap | 2 |
| 201 | Base assembly | 1 |
| 202 | Rubber foot-pad | 4 |
| 203 | Cushion | 2 |
| 204 | Wheel | 2 |
| 301 | Upright tube unit (right) | 1 |
| 302 | Upright tube unit (left) | 1 |
| 303 | Foam grip | 2 |
| 304 | Handlebar end cap | 2 |
| 305 | Handlebar end cap | 2 |
| 401 | Monitor case | 1 |
| 402 | PS monitor back cover | 1 |
| 403 | Power key plate | 1 |
| 404 | Monitor frame unit | 1 |
| 501 | Incline socket set | 1 |
| 502 | Inner cap for square tube | 2 |
| 503 | Elevation motor | 1 |
| 504 | Axis cap | 2 |
| 601 | Retractable outer tube | 1 |
| 602 | Retractable inner tube | 1 |
| 603 | Spring pin | 1 |
| 604 | Hollow cap | 1 |
| 605 | Square tube cap | 1 |
| 606 | Square tube cap | 2 |
| 701 | Front roller set | 1 |
| 702 | Rear roller set | 1 |
| 703 | Belt | 1 |
| 704 | Motor cover | 1 |
| 705 | JETstream plate | 1 |
| 706 | PS main frame cover | 1 |
| 801 | Running board | 1 |
| 802 | Running belt | 1 |
| 803 | Cushion | 8 |
| 901 | Semicircle Hex. Screw | 6 |
| 903 | Semicircle Hex. Screw | 1 |
| 904 | Semicircle Hex. Screw | 8 |
| 905 | Tapping screw | 4 |
| 906 | Hex. Screw | 2 |
| 907 | Tapping screw | 16 |
| 908 | Round-headed screw | 9 |
| 909 | Big flat spider screw | 20 |
| 910 | Cross recessed flat countersunk head screw | 8 |
| 911 | socket head cap screw | 2 |
| 912 | Semicircle Hex. Screw | 4 |
| 913 | Hex. Screw | 2 |
| 914 | Hex. Screw | 2 |
| 915 | Semicircle Hex. Screw | 4 |
| 916 | Socket head cap screw | 2 |
| 917 | Washer | 3 |
| 918 | Washer | 4 |
| 919 | Arc washer | 6 |
| 920 | Washer | 12 |
| 922 | Clip | 4 |
| 923 | Drywall screw | 2 |
| 924 | Tapping screw | 2 |
| 925 | Nylon anti-loose nut | 4 |
| 926 | Custom made wrench | 1 |
| 927 | Hex wrench | 1 |
| 928 | Nylon anti-loose nut | 8 |
| 929 | Semicircle Hex. Screw | 1 |
| A01 | Motor | 1 |
| A02 | Monitor | 1 |
| A03 | Control board | 1 |
| A04 | Wave filter | 1 |
| A05 | Inductor | 1 |
| A06 | Power socket | 1 |
| A07 | Thermo switch | 1 |
| A08 | Power switch | 1 |
| A09 | Sensor post | 1 |
| A10 | Hand pulse sensor | 2 |
| A11 | Power key | 1 |
| A12 | Power switch | 1 |
| B01 | Control wire on monitor | 1 |
| B02 | Control wire in upright tube | 1 |
| B03 | Control wire on MCB | 1 |
| C01 | Safety sensor | 1 |
| C02 | Speed sensor | 1 |
| D01 | Core (L) | 1 |
| D02 | Core (S) | 1 |
Accessories
Parts box / Tools
| Description | Q'ty | Part no. | |
| 1 | Semicircle Hex. Screw | 8 | 904 |
| 2 | Arc washer | 6 | 919 |
| 3 | washer | 2 | 920 |
| 4 | Custom made wrench | 1 | 926 |
| 5 | Hex wrench | 1 | 927 |
| 6 | Semicircle Hex. Screw | 4 | 901 |
5. ASSEMBLY:
SHALL BE INSTALLED ON A STABLE BASE AND PROPERLY LEVELED.
a. Note :
DO NOT FULLY TIGHTEN ALL FASTENERS UNTIL ASSEMBLY IS DONE. DO NOT PLUG IN POWER SUPPLY UNTIL ASSEMBLY IS COMPLETED. DO MAKE SURE ALL FASTENERS WELL TIGHTENED BEFORE USE.
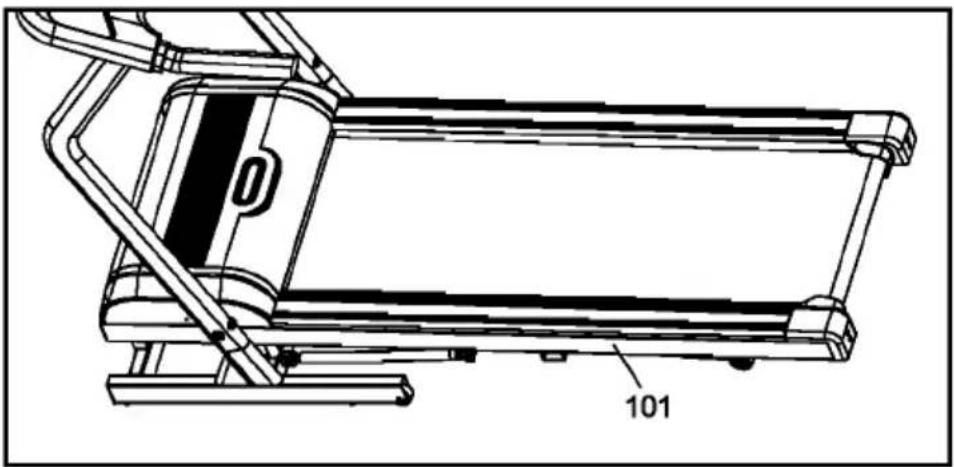
b. Machine base
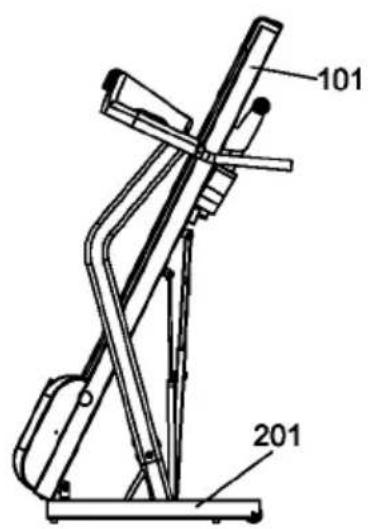
Locate the main frame (101) on level floor. This can steady the machine and stop wobble.
natural_image
Technical line drawing of a treadmill with labeled component '101' (no text or symbols beyond label)c. Upright tube assembly
Place upright tube unit (right) (301) besides the main frame (101), connect the frame control wire (B03) to upright tube control wire (B02). Assemble Upright tube unit (301) onto base assembly (201), pre-fix with screws (904), screws must be fitted with washers (920 & 919). Then assemble upright tube unit(left) (302) onto base assembly (201), pre-fix with screws (904) and washers (920 & 919) but not fully tighten before complete assembly. Tighten the screws (904) after complete assembly.

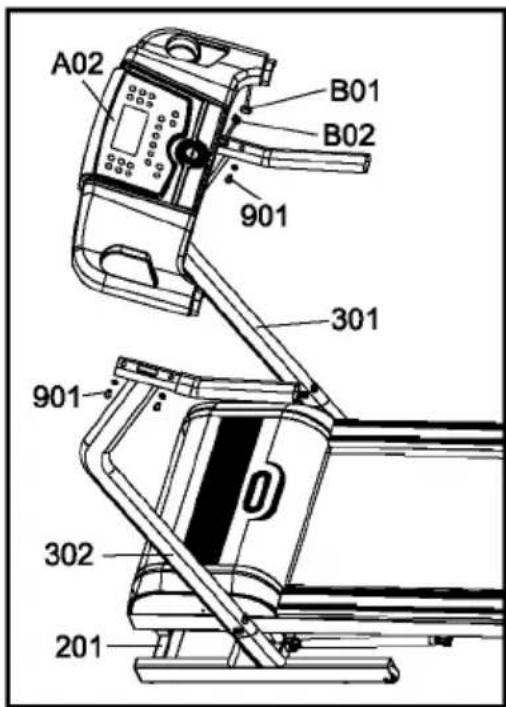
d. Assemble Monitor
Connect the upright tube (right) control wire (B02) (inside the upright tube assembly) onto monitor control wire (B01) (on monitor assembly).
Place monitor (A02) between upright tube units (301,302), pre-fix upright tube (right) (301) with screws (901) but not fully tighten, and then repeat same action on upright tube (left) (302)(If the screw can't reach the tube, push the upright tube unit (301,302) slightly inward to fasten). After screws (901) on both sides are fixed, then fully tighten all screws.
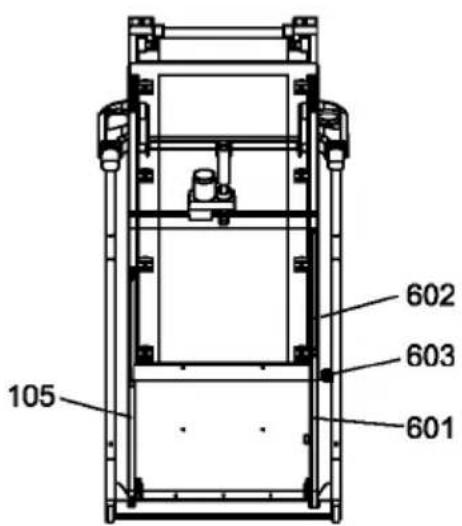
6. FOLDING AND UNFOLDING :
CAUTION: Before folding and unfolding the treadmill, the safety key should be pulled away and the spring pin lock into support shaft.
a. Folding
Pull spring pin (603) out, hold the back end of the machine, fold the machine up till the spring pin lock into support shaft (602).
b. Unfolding
Pull spring pin (603) out and pull main frame (101) down gently. Let go of your hands and the main frame (101) will descend slowly due to work of air pressure shaft (105). The action will be done with a "click" sound when spring pin (603) lock onto retractable tube.
7. TUNE-UP THE TREADMILL
a. ADJUST MAT TENSION
Factors that affect mat alignment:
-
The treadmill must be on a level surface.
-
Due to uneven force applied on the mat surface, it usually loses alignment after certain time of use. Everytime you finish exercise, keep the power on and let the mat running for a while, it'll helps correct the alignment.
-
Maintain correct mat tension.
* Normally the mat tension was adjusted by turning the adjusting screws located at the end of machine. If any adjustment of front roller required, please contact your local distributor for further assistance.
natural_image
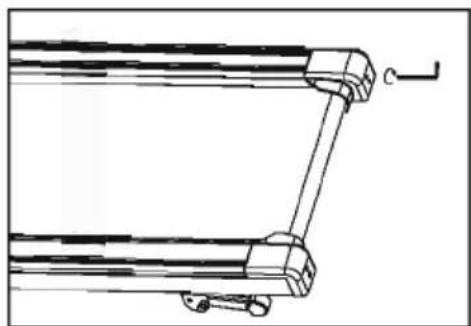
Technical line drawing of a mechanical linkage or frame assembly (no text or symbols)HOW TO ADJUST MAT TENSION:
Pay attention to the belt tension in order to make sure the machine works smoothly and to avoid short life of parts. If there is any slippage of mat, it needs to be manually adjusted. To increase mat tension: adjust the left and right adjusting screw clockwise with one turn each time.
To decrease mat tension: adjust the left and right adjusting screw counterclockwise with one turn each time.
Warning: Do not adjust the matt too tight. Otherwise, it will be worn out easily.
If the above procedure could not improve the mat tention, tension motor drive belt may need to be adjusted. Please contact your distributor for assistance.
Again, please do not adjust the mat tension too tight. Otherwise, not only the mat will be worn out but also the roller bearing will be damaged due to extra tension pressure.
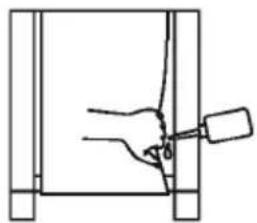
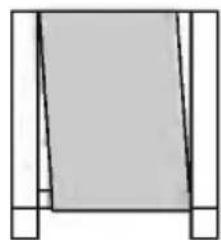
b. MAT ALIGNMENT:
NOTE: THE ALIGNMENT OF THE TREADMILL MAT MUST BE CORRECTLY ADJUSTED TO ENSURE SMOOTH OPERATION AND TO PREVENT DAMAGE.
The mat must run on the true center of running board; if the gaps between mat and side panels are different, the mat need to be adjusted with alignment adjustment:
SET THE SPEED OF THE MACHINE TO 4 - 6 km/h, IF THE TREADMILL MAT MOVED TO LEFT HAND SIDE:
- Turn the left mat adjustment bolt clockwise 1/2 round.
- If more adjustment is necessary, turn the right hand adjustment bolt counter-clockwise 1/2 round.
- If more adjustment is required, repeat steps 1 and 2. Any final adjustments should be made with 1/4 of a round.
SET THE SPEED OF THE MACHINE TO 4 - 6 km/h, IF THE TREADMILL MAT MOVED TO RIGHT HAND SIDE :
- Turn the right mat adjustment bolt clockwise 1/2 round.
- If more adjustment is necessary, turn the left hand adjustment bolt counter-clockwise 1/2 round.
- If more adjustment is required, repeat steps 1 and 2. Any final adjustments should be made with 1/4 of a round.
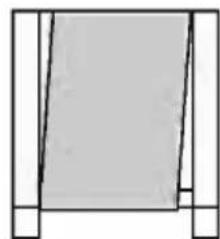
natural_image
Simple line drawing of a rectangular frame with a shaded bottom section (no text or symbols)(CW)
natural_image
Simple line drawing of a rectangular frame with a shaded central area (no text or symbols)(CW)

c. Incline adjustment
To increase incline: press incline switch ⬆ to incline level.
To decrease incline: press incline switch ⬤ to decline level.

INCLINE
Note: The incline device needs to be off for 20 minutes after 5 minutes continuous use.
This is to prevent incline device motor from overheat. If the temperature inside incline motor is too high, the power supply of incline motor will be cut off. After the temperature drops to normal level, then it can be use again.
d. Instruction of power key and pulse
The machine works only the power key (A13) attached to the monitor (A02). For safety purpose, pull out the power key while not using the machine.
While using pulse equipment and hold the pulse sensor, stay calm and quiet. Do not run and measure pulse at the same time. Otherwise, the figure will not be accurate due to hands moved.
Before exercising, stand on the side rail and hold the pulse sensor for five seconds. The icon "♥" shows on the screen, the monitor will show the heart beat/min in real time. Hold the pulse sensor for five seconds. After exercise, stand on the side rail for five seconds "♥" shows on the screen, the monitor will show the heart beat/min in real time.
*** While using hand pulse, the hands should be without too much moisture, so dry your hands before doing exercise. Otherwise, it will affect the accuracy of heart rate. Also, while using pulse, user should leave running belt and stand at safe area.
Attention: Please do warm-up exercise (refer to later chapter) before using treadmill in order to prevent injury.
WARM - UP GUIDELINES
Warming up is an important part of every workout. Warming up prepares the body for more strenuous exercise by increase circulation, deliver more oxygen to the muscles, and raise the body temperature.
SUGGESTED STRETCHES
The following stretches provide a good warm-up, or cool-down. Move slowly as you stretch-never bounce.
natural_image
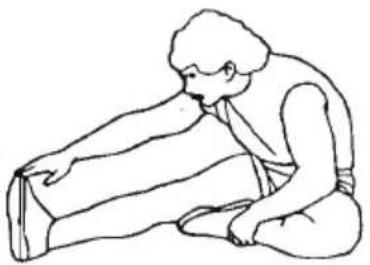
Line drawing of a person kneeling and stretching their back (no text or symbols)HAM STRING STRETCH
Sit with one leg extended. Bring the sole of the opposite foot toward you, resting it against the extended leg's inner thigh. Stretch toward your toe as far as possible, hold for 15 counts, then relax. Repeat three times for both legs.
Stretches : Hamstrings, lower Back and Groin
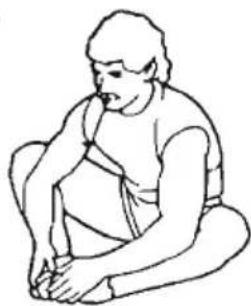
INNER THIGH STRETCH
Sit with the soles of your feet together and knees pointing outward. Pull your feet as colse into the groin area as possible. Hold for 15 counts, then relax. Repeat three times.
Stretches : Quadriceps, Hip Muscles
natural_image
Line drawing of a seated person in profile, no text or symbols present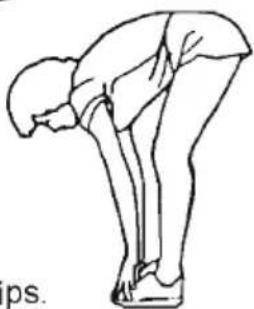
natural_image
Line drawing of a person in a forward bend yoga pose (no text or symbols)TOE TOUCHES
Standing with your knees bend slightly, slowly bend forward from the hips. Allow your back and shoulders to relax as you stretch down toward your toes. Go as far as you can and hold for 15 counts, then relax. Repeat three times.
Stretches : Hamstrings, Back of Knees, Back
QUADRICEPS STRETCH
With one hand against a wall for balance, reach behind you and pull up your foot. Bring your heel as close to your bottom as possible. Hold for 15 counts. Repeat.
Stretches : Quadriceps, Hip Muscles.

natural_image
Line drawing of a person in a dynamic pose, possibly dancing or stretching (no text or symbols)
natural_image
Line drawing of a person in motion, viewed from behind with one arm raised (no text or symbols)CALF / ACHILLES STRETCH
With one leg in front of the other and arms out, lean against the wall. Keep your back leg straight and back foot flat on the ground; then bend the front leg and lean forward by moving your hips toward the wall. Hold, then repeat on the other side. To cause even further stretching of the. Achilles tendons, slightly bend back leg as well.
Stretches : Calves, Achilles Tendons, and Ankles.
Without our authorization, any contents of this manual are not allowed to be copied, saved or transferred.
We reserve rights to revise specification, equipment, and maintenance information for our R&D team keeps improving our product quality.
We have done the best efforts on this manual to be more comprehensible for all users. However, if it is found mistyping or wrong location of part on somewhere in the manual, please feel free to contact with the shop where you purchased this machine.
Enjoy your fitness workout with our machine and having a healthy life.