Roomplayer I - Medieafspiller Simple Audio - Gratis brugsanvisning og manual
Find enhedens vejledning gratis Roomplayer I Simple Audio i PDF-format.

Brugerspørgsmål om Roomplayer I Simple Audio
0 spørgsmål om dette apparat. Besvar dem du kender, eller stil dit eget.
Stil et nyt spørgsmål om dette apparat
Download vejledningen til din Medieafspiller i PDF-format gratis! Find din vejledning Roomplayer I - Simple Audio og tag din elektroniske enhed tilbage i hånden. På denne side er alle dokumenter nødvendige for brugen af din enhed offentliggjort. Roomplayer I af mærket Simple Audio.
BRUGSANVISNING Roomplayer I Simple Audio
Quick Start Guide Roomplayer I
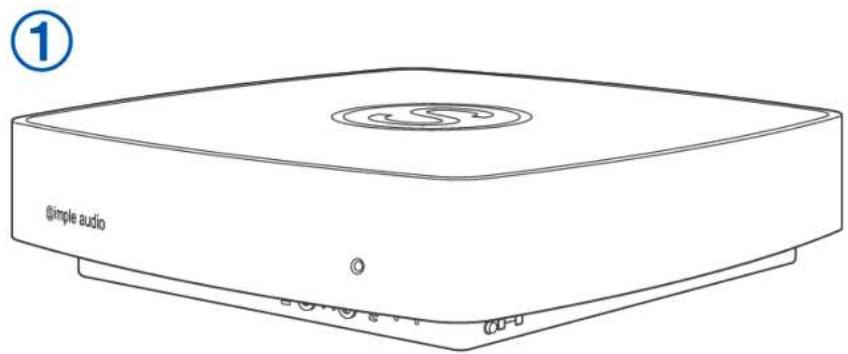
Step 1 Unpack your Simple Audio Roomplayer
natural_image
Line drawing of a simple audio device with no text or symbols on the body, showing a top panel and control buttons (no readable text beyond label)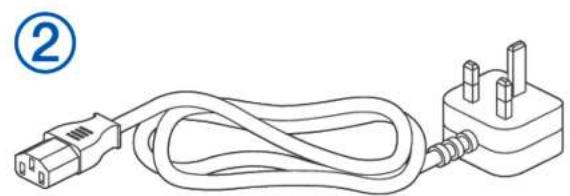
natural_image
Line drawing of a cable and plug connection (no text or symbols)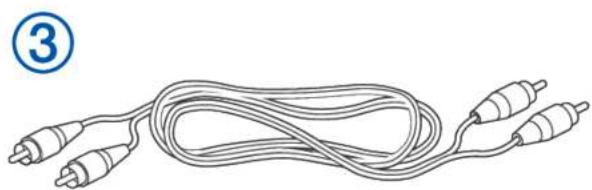
natural_image
Line drawing of a coiled cable with two connectors and a pin (no text or symbols)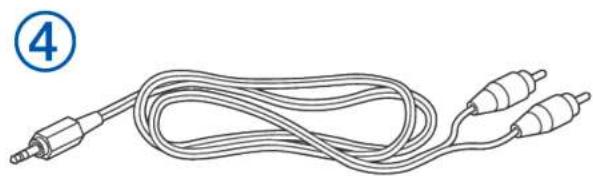
natural_image
Line drawing of a multi-pin audio cable with two leads (no text or symbols)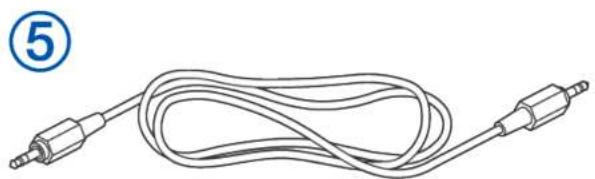
natural_image
Line drawing of a cord with two connectors, labeled with number 5 (no text or symbols on the cable itself)
natural_image
Line drawing of a coiled cable with connectors, no text or symbols present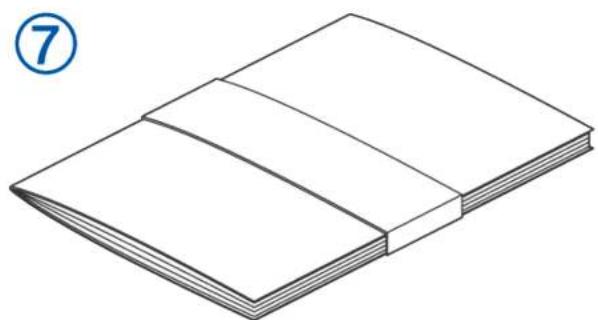
natural_image
Line drawing of an open book with visible pages and cover (no text or symbols)1 Simple Audio Roomplayer
2 UK Mains Lead OR European Mains Lead
3 Phono to Phono Cable
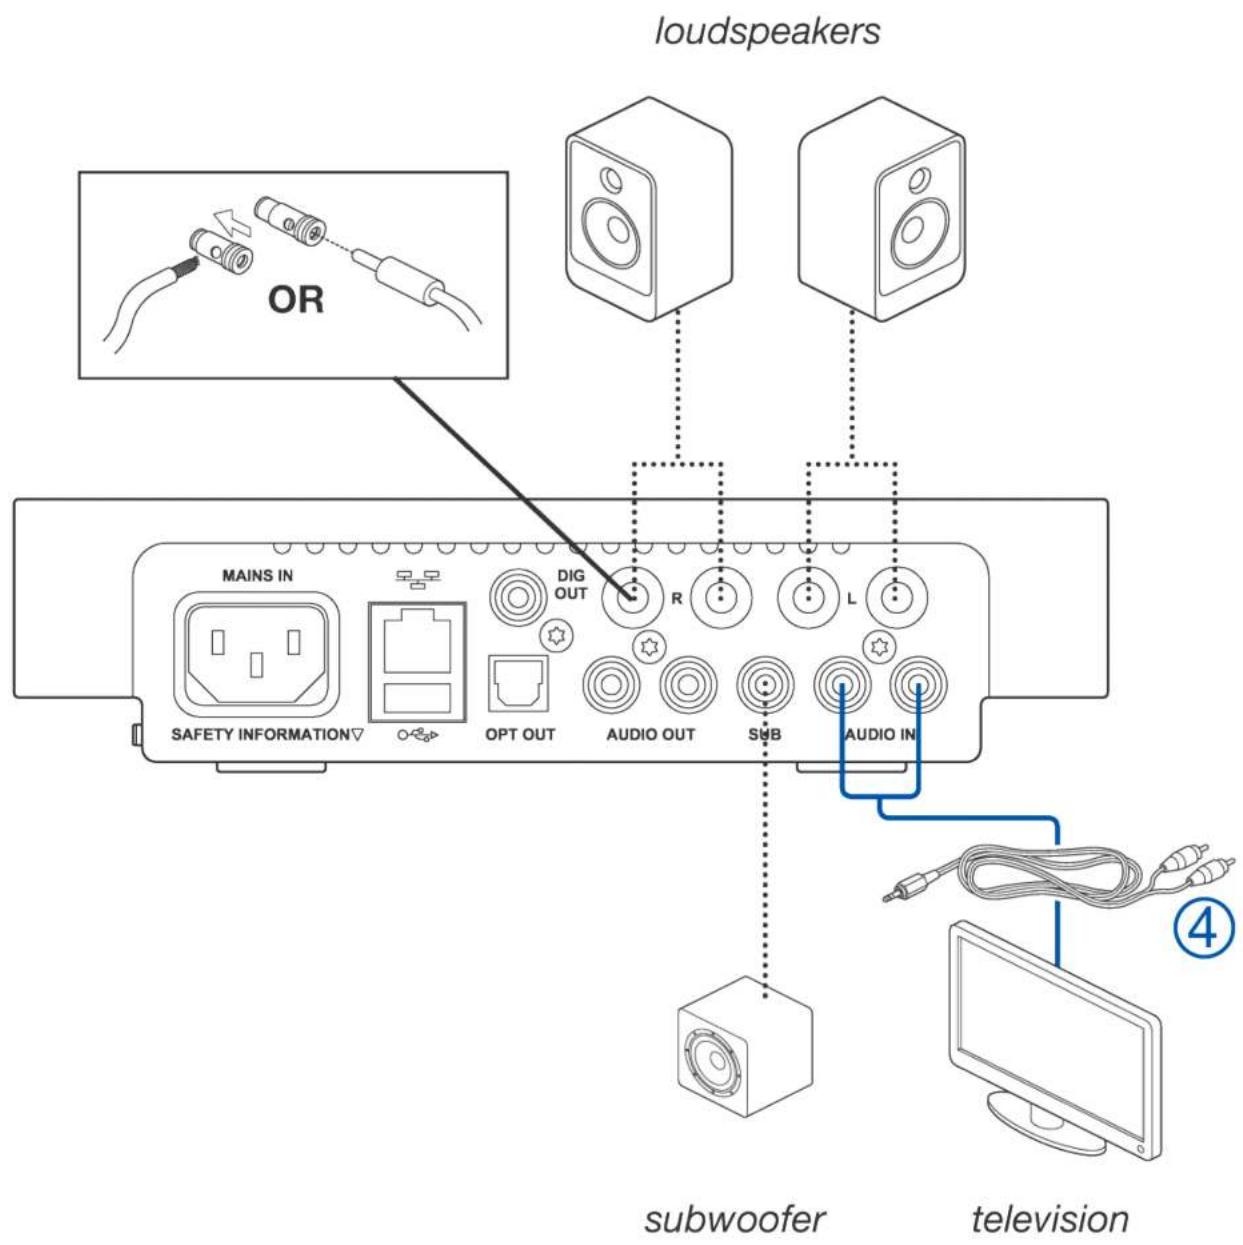
4 Phono to 3.5mm Jack Lead
5 3.5mm Jack to 3.5mm Jack Lead
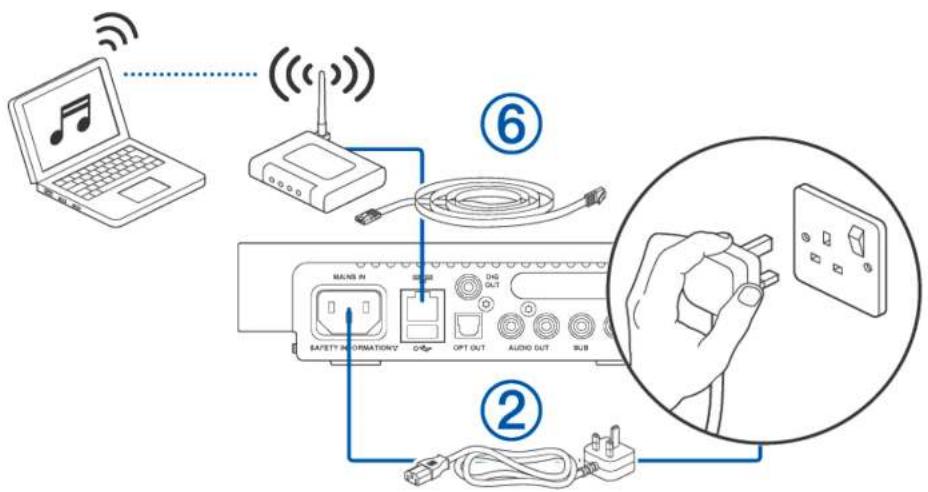
6 Ethernet Cable
7 Product Documentation
Step 2 Connect your loudspeakers to your new Roomplayer along with any audio inputs or outputs
Note: Do not apply power to your Roomplayer until you have made all the connections you require.
Use the bare wire terminals or 4.0mm plugs to connect to your loudspeakers. Keep positive to positive and negative to negative.
Step 3 Connect to the network
You have 2 options Option A OR Option B:
Option A Connect using the Ethernet cable
If your Roomplayer is close to your router simply connect it directly to your router using the Ethernet cable then apply power
Option B Connect using a Powerline HomePlug module
If your Roomplayer is not close to your router use a Simple Audio Powerline HomePlug module (sold separately), or any alternative 200 Mbps module, and connect it to your router using the Ethernet cable. Insert the HomePlug into the mains socket and apply power.

flowchart
graph LR
    A["Laptop with musical note"] -->|Wireless Signal| B["Router"]
    B --> C["Switch"]
    C --> D["Cable cable"]
    D --> E["Switch"]
    style A fill:#f9f,stroke:#333
    style B fill:#ccf,stroke:#333
    style C fill:#cfc,stroke:#333
    style D fill:#fcc,stroke:#333
    style E fill:#cff,stroke:#333
Option B Continued
Preparing the Powerline HomePlug module for pairing to your Roomplayer
-
Apply power to your Roomplayer using the mains lead supplied.
-
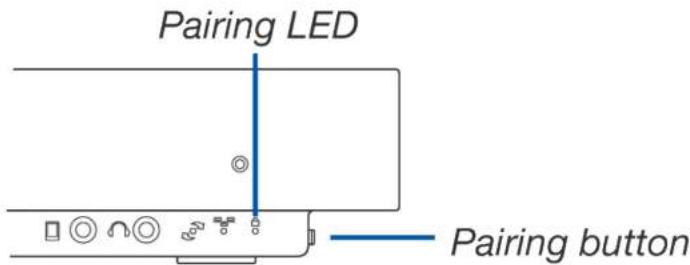
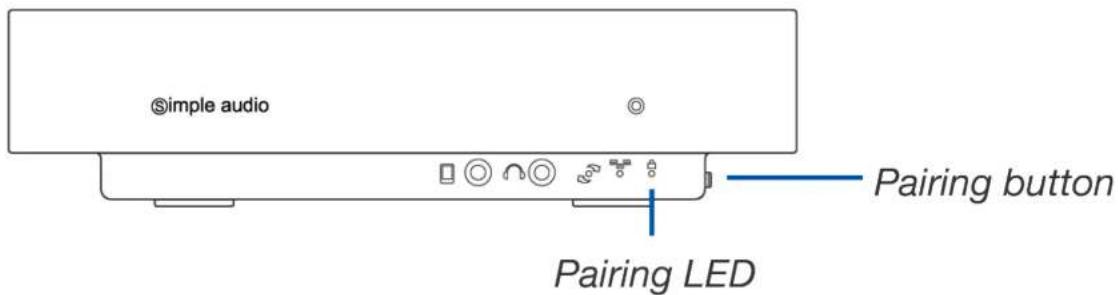
Press and hold the pairing button on the side of your Roomplayer for approximately 10 seconds. When the green pairing
LED flashes on the Roomplayer, release the button, the light will go out.
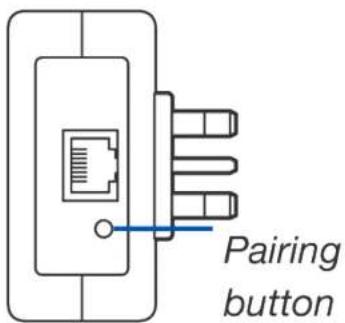
- Press and hold the pairing button on the Powerline HomePlug module for approximately 10 seconds. When the pairing LED flashes on the HomePlug release the button.
Pairing to your Roomplayer
-
Press the pairing button on the Roomplayer for 2 seconds and release. The green pairing LED will now flash for 2 minutes.
-
During these 2 minutes, press the pairing button on the Powerline HomePlug module for 2 seconds and release.
-
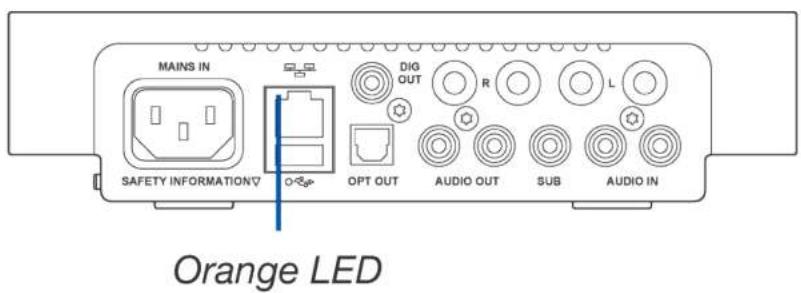
When paired, the green pairing LED on the Roomplayer will turn off and the orange LED on the rear of the Roomplayer will show activity.
Note: Power must always be applied to the HomePlug before the Roomplayer.
If you wish to add another Roomplayer go to Step 4 or, if not, skip to Step 5.
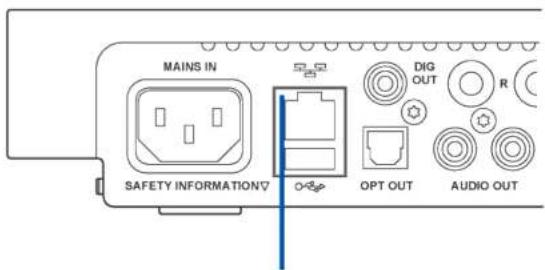
Orange LED
Step 4 Adding another Roomplayer
Connect using the Roomplayer's internal Powerline communication technology
Connect any inputs and outputs to your NEW Roomplayer before applying power using the mains lead provided.
DO NOT connect an Ethernet cable.
You now need to pair the NEW Roomplayer with one of the EXISTING units.
- Press and hold the pairing button on the NEW Roomplayer for 10 seconds. When the green pairing LED flashes release the button.
- Press the pairing button for 2 seconds on any EXISTING Roomplayer and release. The green LED on the EXISTING Roomplayer will now flash for 2 minutes.
- During these 2 minutes press the pairing button on the NEW Roomplayer for 2 seconds and release.
- When the NEW Roomplayer is paired, the green pairing LED on the NEW Roomplayer will turn off and the orange LED on the rear will show activity.
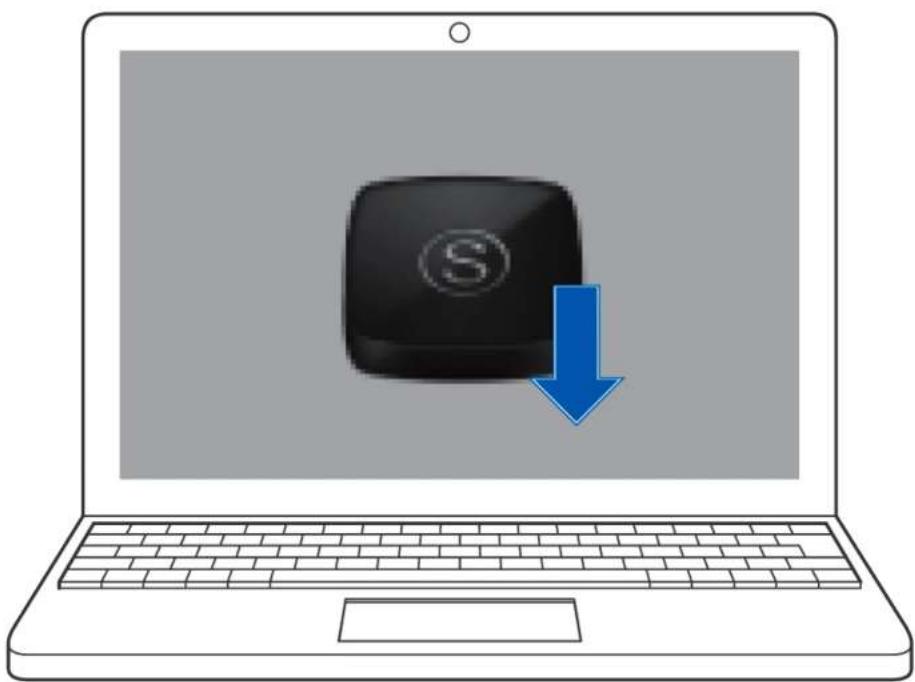
Step 5 Install the Simple Audio software on your computer
Go to www.simpleaudio.com/support/software to download the Simple Audio desktop client for your computer. Once installed follow the on screen instructions to complete the setup.
natural_image
Illustration of a laptop with a black computer icon and a blue downward arrow, symbolizing download or download (no text or symbols present)Once set-up is complete you can use the Desktop Client to access and listen to a world of music throughout your home.
Step 6 Download the Simple Audio iPod/iPhone app [optional]
You can now control the music playing on any Roomplayer around your home using your iPhone or iPod Touch. The app is available free from the App Store and can be easily accessed by visiting www.simpleaudio.com/support/software
For more assistance with the setup of your Simple Audio system or for any other queries, visit the support section of the Simple Audio website.
www.simpleaudio.com/support
Version 1.0 Part number: MECH 078
www.simpleaudio.com
© Copyright Simple Audio 2012