
Mavica MVC-FD87 - Kamera SONY - Gratis brugsanvisning og manual
Find enhedens vejledning gratis Mavica MVC-FD87 SONY i PDF-format.


Brugerspørgsmål om Mavica MVC-FD87 SONY
0 spørgsmål om dette apparat. Besvar dem du kender, eller stil dit eget.
Stil et nyt spørgsmål om dette apparat
Download vejledningen til din Kamera i PDF-format gratis! Find din vejledning Mavica MVC-FD87 - SONY og tag din elektroniske enhed tilbage i hånden. På denne side er alle dokumenter nødvendige for brugen af din enhed offentliggjort. Mavica MVC-FD87 af mærket SONY.
BRUGSANVISNING Mavica MVC-FD87 SONY
Digital Still Camera
Operating Instructions
Before operating the unit, please read this manual thoroughly, and retain it for future reference.
Owner's Record
The model and serial numbers are located on the bottom. Record the serial number in the space provided below. Refer to these numbers whenever you call upon your Sony dealer regarding this product.
Model No. ____
Serial No.

natural_image
Line drawing of a digital camera with lens and control panel (no text or symbols)FD Mavica

MVC-FD87
WARNING
To prevent fire or shock hazard, do not expose the unit to rain or moisture.
For the Customers in the U.S.A.
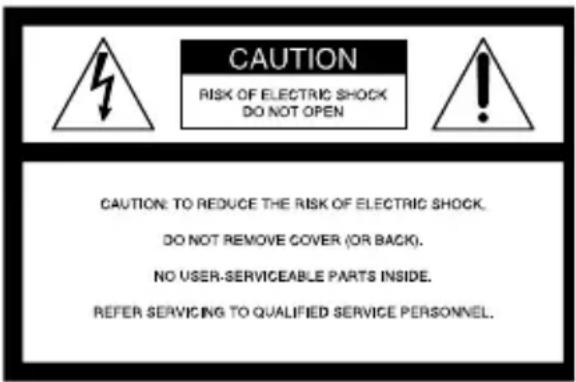

This symbol is intended to alert the user to the presence of uninsulated “dangerous voltage” within the product’s enclosure that may be of sufficient magnitude to constitute a risk of electric shock to persons.

This symbol is intended to alert the user to the presence of important operating and maintenance (servicing) instructions in the literature accompanying the appliance.
CAUTION
You are cautioned that any changes or modifications not expressly approved in this manual could void your authority to operate this equipment.
Note:
This equipment has been tested and found to comply with the limits for a Class B digital device, pursuant to Part 15 of the FCC Rules. These limits are designed to provide reasonable protection against harmful interference in a residential installation. This equipment generates, uses, and can radiate radio frequency energy and, if not installed and used in accordance with the instructions, may cause harmful interference to radio communications. However, there is no guarantee that interference will not occur in a particular installation. If this equipment does cause harmful interference to radio or television reception, which can be determined by turning the equipment off and on, the user is encouraged to try to correct the interference by one or more of the following measures:
—Reorient or relocate the receiving antenna.
—Increase the separation between the equipment and receiver.
—1Connect the equipment into an outlet on a circuit different from that to which the receiver is connected.
—Consult the dealer or an experienced radio/TV technician for help.
For the Customers in the U.S.A. and Canada
DISPOSAL OF LITHIUM ION BATTERY.
LITHIUM ION BATTERY. DISPOSE OF PROPERLY.
You can return your unwanted lithium ion batteries to your nearest Sony Service Center or Factory Service Center.
Note:
In some areas the disposal of lithium ion batteries in household or business trash may be prohibited.
For the Sony Service Center nearest you call 1-800-222-SONY (United States only) For the Sony Factory Service Center nearest you call 416-499-SONY (Canada only)
Caution:
Do not handle damaged or leaking lithium ion battery.
For the Customers in Canada
CAUTION
TO PREVENT ELECTRIC SHOCK, DO NOT USE THIS POLARIZED AC PLUG WITH AN EXTENSION CORD, RECEPTACLE OR OTHER OUTLET UNLESS THE BLADES CAN BE FULLY INSERTED TO PREVENT BLADE EXPOSURE.
NOTICE FOR THE CUSTOMERS IN THE UNITED KINGDOM
A moulded plug complying with BS 1363 is fitted to this equipment for your safety and convenience.
Should the fuse in the plug supplied need to be replaced, a 5 AMP fuse approved by ASTA or BSI to BS 1362, (i.e. marked with 🧑 or I mark) must be used.
If the plug supplied with this equipment has a detachable fuse cover, be sure to attach the fuse cover after you change the fuse. Never use the plug without the fuse cover. If you should lose the fuse cover, please contact your nearest Sony service station.
For the Customers in Germany
Directive: EMC Directive 89/336/EEC.92/31/EEC
This equipment complies with the EMC regulations when used under the following circumstances:
- Residential area
- Business district
• Light-industry district
(This equipment complies with the EMC standard regulations EN55022 Class B.)
Attention
The electromagnetic fields at the specific frequencies may influence the picture and sound of this camera.
Be sure to read the following before using your camera
Operating instructions
Before operating the unit, please read this manual thoroughly, and retain it for future reference.
As you read through this manual, buttons and settings on the camera are shown in capital letters.
e.g. Press DISPLAY.
Trial recording
Before you record one-time events, you may want to make a trial recording to make sure that the camera is working correctly.
No compensation for contents of the recording
Contents of the recording cannot be compensated for if recording or playback is not possible due to a malfunction of your camera or recording medium, etc.
Precaution on copyright
Television programs, films, video tapes, and other materials may be copyrighted.
Unauthorized recording of such materials may be contrary to the provision of the copyright laws.
Do not shake or strike the camera
In addition to malfunctions and inability to record images, this may render the floppy disks unusable or image data breakdown, damage or loss may occur.
LCD screen, finder (only models with a finder) and lens
- The LCD screen and the finder are manufactured using extremely high-precision technology, so over 99.99% of the pixels are operational for effective use. However, there may be some tiny black points and/or bright points (white, red, blue or green in color) that constantly appear on the LCD screen and the finder. These points are normal in the manufacturing process and do not affect the recording in any way.
- Be careful when placing the camera near a window or outdoors. Exposing the LCD screen, the finder or the lens to direct sunlight for long periods may cause malfunctions.
Do not get the camera wet
When taking pictures outdoors in the rain or under similar conditions, be careful not to get the camera wet. If moisture condensation occurs, refer to page151 and follow the instructions on how to remove it before using the camera.
Back up recommendation
To avoid the potential risk of data loss, always copy (back up) data to a disk.
When the camera is used for long periods
Note that the camera body may become hot.
Table of contents
Introduction 1....6
Getting started
Identifying the parts ....7
Preparing the power supply .....9
Setting the date and time 1......13
Inserting a floppy disk ....15
Basic operations
▶ Recording
Recording images 1......16
▶ Playback
Playing back images 1......21
Viewing images using a computer 22
Image file storage destinations and image file names 1....24
Advanced operations
Before performing advanced operations
How to use the PLAY/ STILL selector 1....26
How to use the control button 1......26
How to change the menu settings ..28
▶ Various recording
Setting the image size (IMAGE SIZE) 1....33
Recording images for e-mail (E-MAIL) 34
Recording text documents (TEXT) 34
Recording images in macro 1......35
Setting the distance to the subject ....35
Using the PROGRAM AE function ....36
Adjusting the exposure (EXPOSURE) 1....38
Adjusting the white balance (WHITE BALANCE) 1......39
Recording the date and time on the image (DATE/TIME) ......40
Enjoying picture effects (PICTURE EFFECT) ....40
▶ Various playback
Playing back six images at once (INDEX) 41
Enlarging a part of the image (Zoom and trimming) .....42
Playing back the images in order (SLIDE SHOW) 1....43
▶ Editing
Preventing accidental erasure (PROTECT) 1....44
Deleting images (DELETE) 1......45
Changing the recorded image size (RESIZE) 1....46
Copying images (COPY) ......46
Copying all the information on your floppy disk (DISK COPY) .....48
Selecting images to print (PRINT MARK) 1......49
Format 50
Additional information
Precautions 1....51
On "Memory Sticks" 1......53
Using your camera abroad .....53
About "InfoLITHIUM" battery pack 1....54
Troubleshooting ....56
Warning and notice messages 1......60
Self-diagnosis display ....62
Specifications 1....63
LCD screen indicators 1......64
Index 1....66
Introduction
Deletes undesired images right away, checking the image after shooting
The digital still camera is able to play back the image and delete it right away.
Recording images:
page116
Playing back images:
page121
Deleting images
(DELETE): page145

natural_image
Illustration showing a child using a camera to interact with a digital camera (no text or symbols present)Captures images with your computer
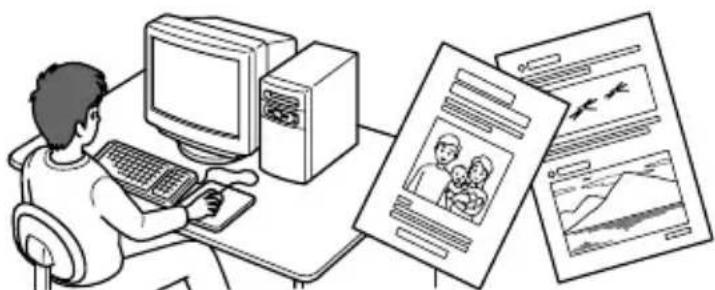
You can easily copy images onto your computer using a floppy disk, and view and modify images on your computer using application software.
Viewing images using a computer: page122
natural_image
Illustration of a person using a desktop computer with multiple document boards showing various content (no text or symbols visible)Selects the recording mode from various types of recordings for your situation
Recording images for e-mail (E-MAIL): page134
Recording text documents (TEXT): page134
Identifying the parts
See the pages in parentheses for details of operation.

1 Self-timer lamp (19)
2 Flash (20)
3 Shutter button (16)
4 Zoom lever (18)
5 Photocell window for flash
Do not block while recording.
6 Tripod receptacle (bottom surface)
Use a tripod with a screw length of less than 6.5 mm (7/32 inch). You cannot firmly secure the camera to tripods having longer screws, and may damage the camera.
7 Lens
8 Lens cap (supplied)
9 DC IN cover/DC IN jack (10, 12)
7 Lens
8 Lens cap (supplied)
9 DC IN cover/DC IN jack (10, 12)
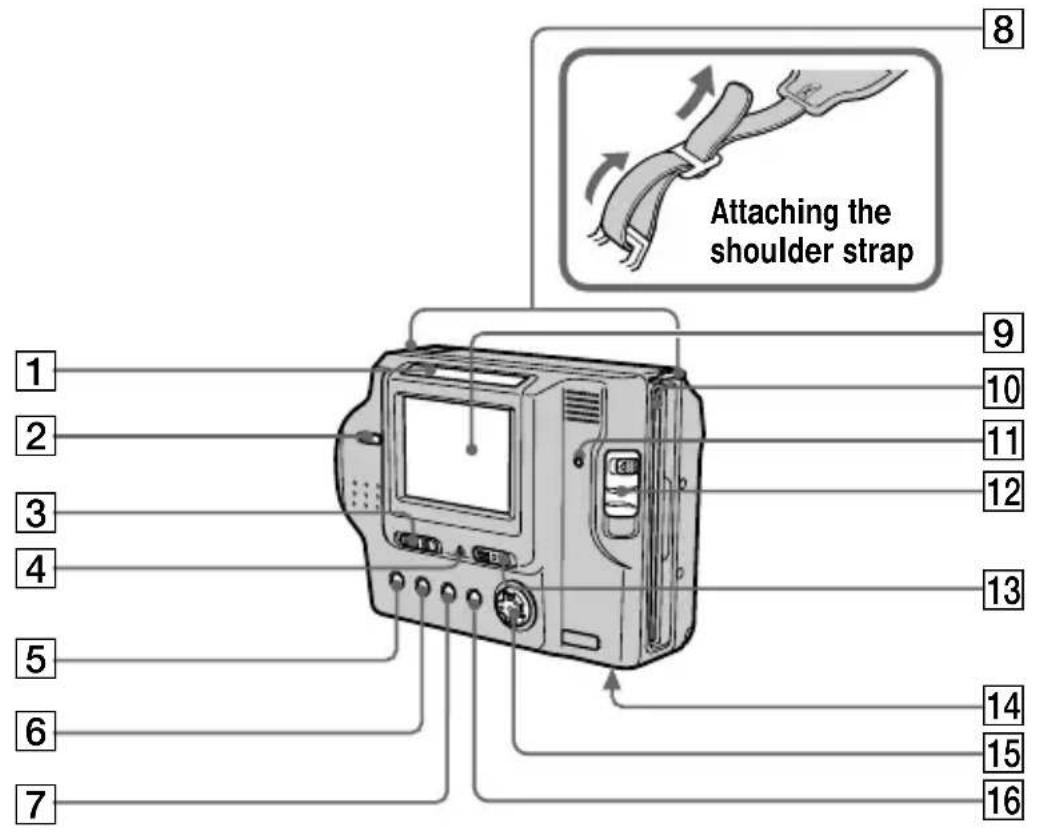
1 Photocell window for LCD screen
The LCD screen becomes brighter when exposed to sunlight.
2 LCD BACKLIGHT switch (18)
3 PLAY/ STILL selector (16, 21, 26)
4 POWER ON/OFF (CHG) (Charge) lamp (10, 13)
5 (Flash) button/ (Flash) lamp (20)
6 FOCUS button (35)
7 PROGRAM AE button (36)
8 Hooks for strap
9 LCD screen
10 Floppy disk slot (15)
11 Access lamp (16, 17)
12 DISK EJECT lever (15)
13 POWER switch (13)
14 Battery cover (9)
15 Control button (13, 26)
16 DISPLAY button (19)
Preparing the power supply
Installing the battery pack
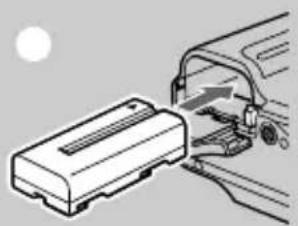
Your camera operates only with the NP-F330 (supplied)/F550 (not supplied) "InfoLITHIUM" battery pack* (L series). See page 54 for more information about "InfoLITHIUM" battery pack.

natural_image
Diagram showing a battery pack entering a car with an arrow indicating direction (no text or symbols)
1 Open the battery cover.
Slide the battery cover in the direction of the arrow.
2 Install the battery pack.
Insert the battery pack with the ▲ mark facing toward the battery compartment as illustrated.
③ Close the battery cover.
To remove the battery pack
Open the battery cover. Slide the battery eject lever rightward, and remove the battery pack.
Be careful not to drop the battery pack when removing it.

natural_image
Diagram of a printer's door with paper being inserted, showing the paper inside (no text or symbols)Battery eject lever
* What is "InfoLITHIUM"?
“InfoLITHIUM” is a lithium ion battery pack which can exchange information such as battery consumption with compatible video equipment. “InfoLITHIUM” L series battery packs have the
InfoLITHIUM mark. "InfoLITHIUM" is a trademark of Sony Corporation.
Charging the battery pack
When the camera is turned on, you cannot charge the battery pack. Be sure to turn off the power of the camera.

1 Insert the battery pack into your camera.
② Open the DC IN cover and connect the AC power adaptor to the DC IN jack of your camera with the ▲ mark facing up.
3 Connect the power cord (mains lead) to the AC power adaptor and then to a wall outlet (mains).
The POWER ON/OFF (CHG) lamp (orange) below the LCD screen lights up when charging begins. When the POWER ON/OFF (CHG) lamp goes off, full charge is completed.
After charging the battery pack
Disconnect the AC power adaptor from the DC IN jack on your camera.
Battery remaining indicator
The LCD screen on the camera shows the remaining time for which you can still record or play back images.
This indication may not be entirely accurate depending on the conditions of use and the operating environment.
Charging at a room temperature of 10^ C to 30^ C ( 50^ F to 86^ F) is recommended.
NP-F330 (supplied)/F550 (not supplied) battery pack
When you record images in an extremely cold location or using the LCD screen, the operating time becomes short. When using the camera in an extremely cold location, place the battery pack in your pocket or other place to keep it warm, then insert the battery pack into the camera just before recording. When using a pocket heater, take care not to let the heater directly contact the battery.
Auto power-off function
If you do not operate the camera for about three minutes during recording, the camera turns off automatically to prevent wearing down the battery pack. To use the camera again, slide the POWER switch to the right to turn on the camera again.
Note on the POWER ON/OFF (CHG) lamp during charging
The POWER ON/OFF (CHG) lamp may flash:
- When a malfunction occurs in the battery pack (page159).
The POWER ON/OFF (CHG) lamp does not light up: - When the battery pack is not installed properly.
Charging time
| Battery pack Full charge (min.) | |
| NP-F330 (supplied)1Approx. 150 | |
| NP-F550 1Approx. 210 | |
Approximate time to charge a completely discharged battery pack at a temperature of 25^ C ( 77^ F).
Battery life and number of images that can be recorded/played back
STILL mode recording/playback
| NP-F330 (supplied) NP-F550 | ||||
| Battery life (min.) | Number of images | Battery life (min.) | Number of images | |
| Continuous recording* | Approx. 701A | Approx. 7501App | rox. 1501Approx. | 1600 |
| Continuous playback** | Approx. 801A | Approx. 22001App | prox. 1701Approx. | 4800 |
Approximate battery life and number of images that can be recorded/played back at a temperature of 25^ C ( 77^ F) with a fully charged battery pack, 640 × 480 image size and in NORMAL recording mode.
*Recording at about 5-second intervals
**Playing back single images continuously at about 2-second intervals
Notes
- The battery life and number of images will be decreased when using at low temperature, using the flash, turning the power on/off frequently, or using the zoom.
- The capacity of the floppy disk is limited. The above figures are as a guide when you continuously record/play back by replacing the floppy disk.
- If sufficient battery remaining time is indicated but the power runs out soon, fully charge the battery so that the correct battery remaining time appears.
- Do not short the DC plug of the AC power adaptor with a metallic object, as this may cause a malfunction.
Using the AC power adaptor

① Open the DC IN cover and connect the AC power adaptor to the DC IN jack of your camera with the ▲ mark facing up.
2 Connect the power cord (mains lead) to the AC power adaptor and then to a wall outlet (mains).
Using a car battery
Use Sony DC adaptor/charger.
Using your camera abroad
For details, see page 53.
When using the AC power adaptor
Be sure to use it near a wall outlet. If a malfunction occurs, disconnect the plug from the wall outlet.
Setting the date and time
When you first use your camera, set the date and time. If these are not set, the CLOCK SET screen appears whenever you turn on your camera.

1 Slide the POWER switch to the right to turn on the power.
The POWER ON/OFF (CHG) (green) lamp lights up.
2 Press ▲ on the control button.
The menu bar appears on the LCD screen.

3 Select [SETUP] with ▶ on the control button, then press the center ●.

4 Select [CLOCK SET] with ▲/▼ on the control button, then press the center ●.

5 Select the desired date display format with ▲/▼ on the control button, then press the center ●.
Select from [Y/M/D] (year/month/day), [M/D/Y] (month/day/year), or [D/M/Y] (day/month/year).

6 Select the year, month, day, hour or minute item you want to set with ◀/▶ on the control button.
The item to be set is indicated with▲/▼.

7 Set the numeric value with ▲/▼ on the control button, then press the center ● to enter it.
After entering the number,▲/▼ moves to the next item. If you selected [D/M/Y] in step⑤, set the time on a 24-hour cycle.

8 Select [ENTER] with ▶ on the control button, then press the center ● at the desired moment to begin clock movement.
The date and time are entered.
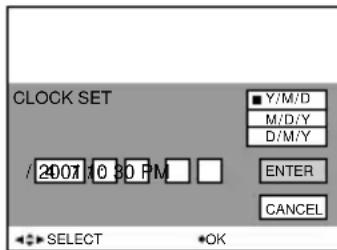
To cancel the date and time setting
Select [CANCEL] with ▲/▼/◄/► on the control button, then press the center ●.
Inserting a floppy disk

Check that the write protect tab is set to the recordable position for recording.

② Insert the floppy disk until it clicks.
Usable floppy disks
- Size: 3.5 inch
- Type: 2HD (1.44 MB)
- Format: MS-DOS format (512 bytes × 18 sectors)
You can use the “Memory Stick”* (not supplied) with inserting it into the MSAC-FD2M/FD2MA Floppy Disk Adaptor for Memory Stick (not supplied), other than floppy disks mentioned above.
*“Memory Stick” and 1. are trademarks of Sony Corporation.
Notes
- Do not insert the media other than the floppy disks described above.
- Never remove the floppy disk or turn off the power while the access lamp is lit up.
Removing the floppy disk
While sliding the EJECT lock to the left, slide down the DISK EJECT lever.
Recording images
Images are recorded in JPEG format.
To record images, slide the POWER switch to the right to turn on the power and insert a floppy disk.
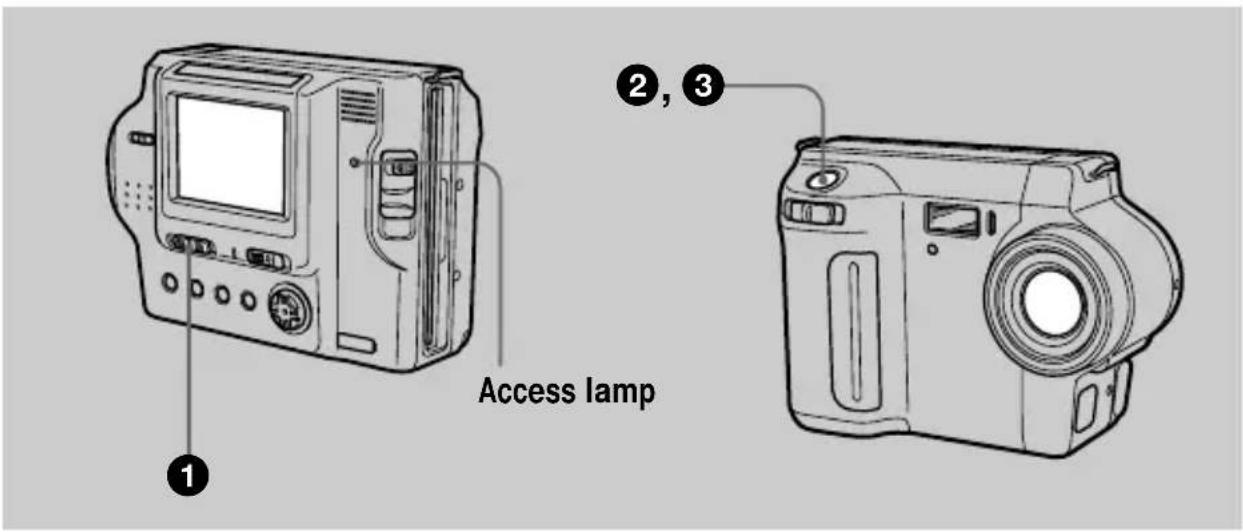
1 Set the PLAY/ STILL selector to STILL.
2 Press and hold the shutter button halfway down.
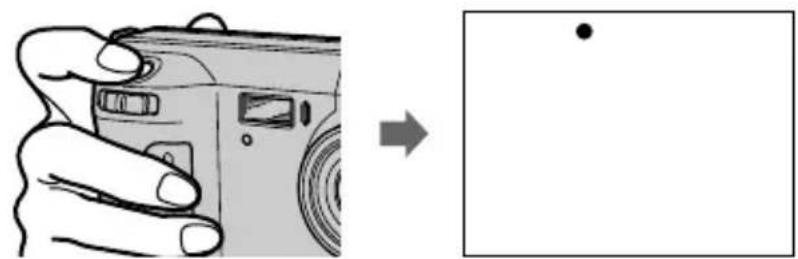
The beeps sound and the image is frozen, however, the image has not been recorded yet. While the AE lock indicator is flashing, the camera automatically adjusts the exposure and focus of the captured image. When the camera finishes the automatic adjustments, the AE lock indicator stops flashing, then lights up, and the camera is ready for recording. If you release the shutter button, the recording will be canceled.
AE lock indicator (green) flashes → lights up
natural_image
Illustration of a hand holding a camera with an arrow pointing to a blank square (no text or symbols)3 Press the shutter button fully down.
The shutter beeps sound. “RECORDING” appears on the LCD screen, and the image will be recorded on the floppy disk. When “RECORDING” disappears from the LCD screen, you can start the next recording.

For the number of images you can record on a floppy disk
See page133.
Notes
- When using a “Memory Stick,” writing and reading images take about twice times than using a floppy disk.
- When recording bright subjects, the color of the LCD screen may change after the AE is locked, however, this will not affect the recorded image.
- While the image is being recorded on a floppy disk, the access lamp lights. When this lamp is lit, do not shake or strike the camera. Also, do not turn the power off, or not remove the battery pack/floppy disk. Otherwise, an image data breakdown may occur and the floppy disk may become unusable.
- When you press the shutter button fully down at once, the camera starts recording after the automatic adjustment is complete. However, the recording cannot be carried out while the lamp (page18) is flashing. (During this time, the camera is charging the flash.)
Checking the last recorded image (Quick Review)
You can check the last recorded image by clearing the menu bar from the screen (page127) and pressing ◀ on the control button.
To return to the normal recording mode: press the shutter button lightly, or select [RETURN] with ◀/▶ on the control button and then press the center ●.
To delete the image: first select [DELETE] on the Quick Review screen with ◀/▶ on the control button and press the center ●, and then select [OK] with ▲/▼ on the control button and press the center●.
Adjusting the brightness of the LCD screen

Adjust the brightness with the [LCD BRIGHT] item in the menu settings (page232). This adjustment does not affect the brightness of the images recorded on the floppy disk.
To turn off the LCD backlight
Set the LCD BACKLIGHT switch to OFF to save the battery.
Using the zoom feature

If you cannot get a sharp focus on a close subject
Slide the zoom lever to the W side and move closer to the subject until the focus is sharp (page135).
Minimum focal distance to the subject
W side: 1 About 25 cm (9 7/8 inches)
T side: 1 About 60 cm (23 5/8 inches)
To record even closer subjects, see page135.
Digital zoom function
This camera has a digital zoom function.
Digital zoom enlarges the image by digital processing, and it starts to function when the zoom exceeds 3× .

Using digital zoom
- The maximum zoom magnification is 6 × .
- Digital zooming deteriorates the picture quality. When digital zoom is not necessary, set [DIGITAL ZOOM] to [OFF] in the menu settings (page130).
The indicators on the LCD screen during recording
Press DISPLAY to turn on/off the indicators on the LCD screen. See page164 for a detailed description of the indicators.
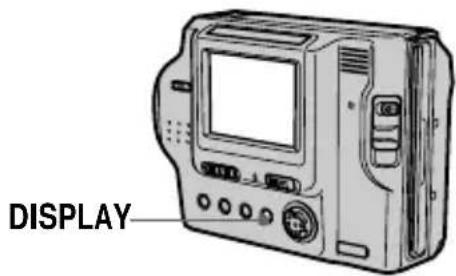
Notes
- You cannot turn off the ⚙ (self-timer) indicator and some of the indicators used in advanced operations.
- The indicators on the LCD screen are not recorded.
Using the self-timer
When you use the self-timer function, the subject is recorded 10 seconds after you press the shutter button.

Select 1 on the LCD screen with ◀/▶/▲/▼ on the control button, then press the center ●. The 1 (self-timer) indicator appears on the LCD screen, and the subject is recorded 10 seconds after you press the shutter button. The self-timer lamp flashes after you press the shutter button until the image is recorded.
Recording images with the flash
The initial setting is AUTO (no indication). In this mode, the flash automatically strobes when the surroundings become dark. To change the flash mode, press 1¢ (Flash) repeatedly so that the flash mode indicator appears on the LCD screen.
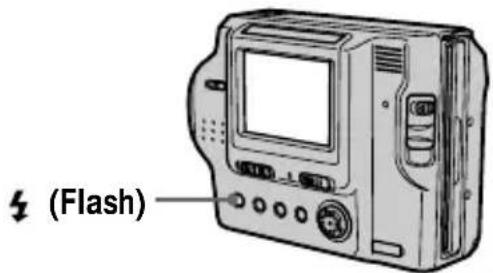
Each time you press the button, the indicator changes as follows.
(No indication)→ O → 4 → Ⓢ → (No indication)
Auto red-eye reduction : The flash strobes before recording to reduce the red-eye phenomenon.
Forced flash : The flash strobes regardless of the surrounding brightness.
No flash : The flash does not strobe.
You can change the amount of the flash light with [FLASH LEVEL] in the menu settings (page131).
Notes
- The recommended shooting distance is 0.3 to 2.5m (1 to 8 1/3 feet).
- Attaching a conversion lens (not supplied) may block the light from the flash and the recorded image may be eclipsed.
- Auto red-eye reduction may not produce the desired red-eye reduction effects depending on individual differences, the distance to the subject, if the subject does not see the pre-strobe, or other conditions.
• The flash effect is not obtained easily when you use forced flash in a bright location.
Playing back images

1 Set the PLAY/ STILL selector to PLAY.
The last recorded image appears on the LCD screen.
2 Press ▲ on the control button to display the menu bar on the LCD screen.
3 Select the desired image with the control button.
Press ▲/▼/◄/► on the control button to select ◀/► on the LCD screen, then press
◀/
◀: To display the preceding image.
▶: To display the next image.

When the menu bar is not displayed
You can directly select and play back the image with ◀/▶ on the control button.
Notes
- You might not be able to correctly play back images recorded with this camera on other equipment.
- You may not be able to play back images whose image sizes are larger than the maximum image size that can be used with this camera for recording.
LCD screen indicators during playback
Press DISPLAY to turn on/off the indicators on the LCD screen.
See page 65 for a detailed description of the indicators.
Viewing images using a computer
You can view image data recorded with your camera on a computer, process it using application software, and attach it to an e-mail. This section describes the general method for viewing images on a computer. Be sure to also see the operation manuals for your computer and application software.
Note
Data recorded with your camera is stored in the following formats. Make sure that applications that support these file formats are installed on your computer.
• Image (except TEXT mode) : JPEG format
- Image in TEXT mode : GIF format.
Recommended OS/applications
os
Windows 3.1, Windows 95, Windows 98, Windows 98SE, Windows Me, Windows 2000 Professional, Windows NT 3.51, Windows NT 4.0, etc.
Applications
Microsoft Internet Explorer 4.0 or higher, Netscape Navigator, etc.
To display the image list, double-click [Mavica.htm] in the floppy disk used with this camera as a medium for recording if you have installed a browser such as Microsoft Internet Explorer on your computer.
Notes
- For Macintosh, you can use the floppy disk recorded with this camera using PC Exchange with Mac OS system 7.5 or higher. A viewing application for Macintosh is also necessary for viewing images.
-
When using the MSAC-FD2M/FD2MA Floppy Disk Adaptor for Memory Stick (not supplied), the recommended OS is Windows 95, Windows 98, Windows 98SE, Windows Me, Windows NT 4.0, Windows 2000 Professional or Mac OS 7.6.1 – 8.6.
-
Microsoft and Windows, Windows NT are either registered trademarks or trademarks of Microsoft Corporation in the United States and/or other countries.
• Macintosh and Mac OS are either registered trademarks or trademarks of Apple Computer, Inc. - All other product names mentioned herein may be the trademarks or registered trademarks of their respective companies.
Furthermore, “TM” and “®” are not mentioned in each case in this manual.
Viewing images
For Windows 98 users
1 Start up your computer and insert the floppy disk into the disk drive of your computer.
2 Open [: My Computer] and double-click [:3 1/2-Floppy (A:)].
3 Double-click the desired data file.
Image file storage destinations and image file names
Image files recorded with your camera are grouped in folders by recording mode.
Images in a floppy disk and ones in a “Memory Stick” have different file names. The meanings of the file names are as follows.
When using floppy disks
□□□ stands for any number within the range from 001 to 999.
stands for one of the following characters below.
S: Image file recorded at 640×480 size
F: Image file of more than 640×480 size
For Windows 98 users (The drive recognizing the floppy disk is [A].)

| Location File Meaning | ||
| 3 1/2 Floppy [A:] | MVC-□□□△.JPG1• I | Image file recorded normally• Image file recorded in E-MAIL mode (page134) |
| MVC-□□□△.4111• IN | INDEX display fileThis file can only be played back on your camera. | |
| MVC-□□□T.GIF | • Image file recorded in TEXT mode (page134) | |
| E-mail folder1M | MVC- □□□E.JPG | • Small-size image file recorded in E-MAIL mode (page134) |
- The numerical portions of the following files are the same.
—An image file recorded in E-MAIL mode and its corresponding small-size image file - INDEX display files cannot be played back on other equipment.
When using "Memory Stick"s
□□□□ stands for any number within the range from 0001 to 9999.
For Windows 98 users (The drive recognizing the Floppy Disk Adaptor for Memory Stick is [A].)

| Folder File | Meaning | |
| 100msdcf1DSC0 | □□□□.JPG1• Image file recorded normally• Image file recorded in E-MAIL mode (page134) | |
| TXT0□□□□.GIF | • Image file recorded in TEXT mode (page134) | |
| Imcif 1001DSC0 | □□□□.JPG | • Small-size image file recorded in E-MAIL mode (page134) |
The numerical portions of the following files are the same.
—An image file recorded in E-MAIL mode and its corresponding small-size image file
Tips
The digital still camera saves recorded images as digital data. The format of the saved data is called as the file format. The formats that can be used with this camera are as follows:
JPEG format
Most digital still cameras, operating systems of computers, and browser software adopt this format. This format is able to compress files without appreciable deterioration. However, if the image is compressed and saved on repeated occasions, the image will deteriorate. This camera records still images using the JPEG format for normal recording.
GIF format
Using this format, the image will not deteriorate even if the image is compressed and saved on repeated occasions. This format limits the number of colors to 256 colors. This camera records still images using the GIF format in TEXT mode (page134).
Advanced operations
Before performing advanced operations
This section describes the basic control methods that are frequently used for “Advanced operations.”
How to use the PLAY/ STILL selector
The PLAY/ STILL selector selects whether you can use your camera to record or play back and edit images. Set the selector as follows before starting to operate your camera.

How to use the control button
The control button is used to select the buttons, images and menus displayed on the LCD screen of your camera and modify the settings. The operation methods that are frequently used for “Advanced operations” are described below.

Turning on/off the operation buttons (menu bar) on the LCD screen

natural_image
Simple line drawing of a circular object with a star-like pattern inside, no text or symbols present.Press ▲ to display the menu bar on the LCD screen.
Press ▼ to clear the menu bar from the LCD screen.

Note
You cannot clear the menu bar on the INDEX screen (page141).
Selecting items or images on the LCD screen
1 Press ▲/▼/◄/► on the control button to select the item you want to set or the image you want to display.
The color of the selected item or the frame of the selected image changes from blue to yellow.


2 Press the center ● to enter the item.
Repeat steps ① and ② to execute each function.
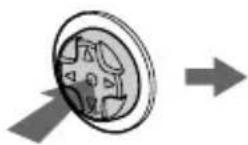
The “Advanced operations” section of this manual refers to selecting and entering items by the above procedure as “Select [item name].”
How to change the menu settings
Some of the advanced operations for your camera are executed by selecting menu items displayed on the LCD screen with the control button.

1 Press ▲ on the control button to display the menu bar.
The menu bar appears as follows according to the position of the PLAY/ STILL selector.
STILL

PLAY (single mode)

PLAY (INDEX mode)
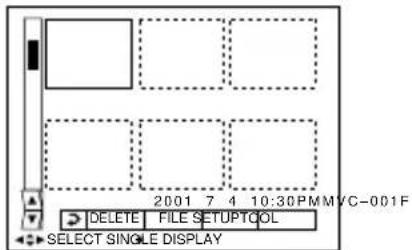
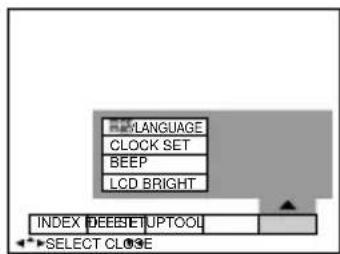
② Select the desired item with ▲/▼/◄/► on the control button, then press the center ●.
The color of the selected item changes from blue to yellow, and when you press the center ●, the settings that can be set for its item are displayed.

3 Select the desired setting with ▲/▼/◄/► on the control button, then press the center ●.
To cancel the setup
Press ▼ on the control button repeatedly until the LCD screen returns to the menu bar display in step ①. To clear the menu bar, press ▼ again.
Menu settings
Menu items that can be modified differ depending on the position of the PLAY/ STILL selector. The LCD screen shows only the items you can operate at the moment. Initial settings are indicated with ■.
(self-timer)
Records with the self-timer (page119).
EFFECT
| Item Setting Description | PLAY/STILL | selector | |
| P. EFFECT1 | SOLARIZEB&WSEPIANEG.ART■OFF | Sets the image special effects (page140). | 1STILL |
| DATE/TIME | DAY &TIMEDATEDAFF | Sets whether to insert the date and time into the image (page140). | STILL |
FILE
| Item-1 Item-2 Setting | Description | PLAY/STILL | selector | |
| DISK TOOL | FORMAT1 | OK | Formats a floppy disk (page150). Once you format a floppy disk, all of the data, including protected images are deleted. Be sure to check for images before you format a floppy disk. | PLAY STILL |
| CANCEL | Cancels formatting of a floppy disk. | |||
| DISK COPY | OK | Copies all data stored in a floppy disk to another disk (page148). Cancels the disk copy. | ||
| CANCEL | ||||
| CANCEL | Goes back to the [DISK TOOL] item. | |||
| Item Setting Description | PLAY/STILL | selector | |
| FILENAME NUMBER | SERIES1Assigns numbers to files in sequence even if the floppy disk is changed.NORMAL1Resets the file number that starts from 001 each time the floppy disk is changed. | STILL | |
| IMAGE SIZE | ■ 1280×9601280(3:2)1024×768640×480 | Selects the image size when recording images. | STILL |
| REC MODE1 | TEXT1RecordsE-MAIL1Re | a GIF file in black-and-white.1STILLCords a small-size (320×240) JPEG file in addition to the selected image size.NORMAL1Records an image using the normal recording mode. | |
| SLIDE SHOW(Only in PLAY(single)mode) | INTERVALEREPEAT1ASTART1StartCANCEL | Sets the slide show interval.■ 3 sec/5 sec/10 sec/30 sec/1 minslide show can be repeated for up to approx. 20 minutes.ON/OFFStarts the slide show.Cancels the slide show settings or execution. | PLAY |
| PRINT MARK | ON■ OFF | Marks the images to be printed(page 49).Unmarks the print mark of the images. | PLAY |
| PROTECT | ON■ OFF | Protects images against accidental erasure (page 44).Releases protection of images. | PLAY |
CAMERA
| Item Setting Description | PLAY/STILL | selector | |
| DIGITAL ZOOM | ■ ON OFF | Uses digital zoom.Does not use digital zoom. | STILL |
| SHARPNESS | +2 to -2 | Adjusts the sharpness of the image.The □ indicator appears (except when the setting is 0). | STILL |
| WHITE BALANCE | IN DOOR OUT DOOR HOLD■AUTO | Sets the white balance (page139). 1STILL | |
| FLASH LEVEL | HIGH1Makes■NORMAL1NLOW1Makes | the flash level higher than normal.Normal setting.the flash level lower than normal. | STILL |
| EXPOSURE | +2.0EV to -2.0EV | Adjusts the exposure before recording.1S | TILL |
TOOL
| Item Setting Description | PLAY/STILL | selector | |
| COPY1OK | CANCEL | Copies the images (page146). Cancels copying of the image. | PLAY |
| RESIZE(Only in PLAY(single)mode) | 1280×9601024×768640×480CANCEL | Changes the recorded image size (page146). | PLAY |
SETUP
| Item Setting Description | PLAY/STILL | selector | |
| DEMO | ■STBY/ON OFF | Displayed only when you use the AC power adaptor in STILL mode. When [ON] is selected, a demonstration will start if you do not operate your camera for about 10 minutes. To stop the demonstration, turn off your camera. | STILL |
| 言語 / LANGUAGE | ■ENGLISH日本語 /JPN | Displays the menu items in English.Displays the menu items in Japanese. | PLAY STILL |
| CLOCK SET | — | Sets the date and time (page113).1PLAY | STILL |
BEEP 1SHUTTER1Turns on  | on all the beeps (when you press the control button/shutter button). | the shutter beeps only. (The shutter beeps are heard when you press the shutter button.) | PLAY STILL |
| LCD BRIGHT | Adjusts the LCD screen brightness using +/- on the LCD screen. | PLAY STILL | |
INDEX (Only in PLAY (single) mode)
Displays six images at a time (PLAY (INDEX) mode).
DELETE (Only in PLAY (single) mode)
| Setting Description PLAY/STILL | selector | |
| OK1Deletes the displayed image.1PLAY | ||
| CANCEL1Cancels deleting of the image. | ||
▷ (Return) (Only in PLAY (INDEX) mode)
Returns to PLAY (single) mode.
▶ Various recording
Setting the image size (IMAGE SIZE)

1 Set the PLAY/ STILL selector to STILL.
2 Select [FILE] and then [IMAGE SIZE] from the menu.
3 Select the desired image size.
1280×960, 1280 (3:2)*, 1024×768, 640×480
*The image is recorded in the ratio of three to two to fit the printing paper size. Using this image size, the margin of an image is not printed out. However, the slight amount of the upper and lower of the image being displayed on the LCD screen is not recorded.
The number of images that you can record on a floppy disk
| Image size Number of images* |
| 1280×9601Approx. 6 (32) |
| 1280 (3:2)1Approx. 6 (32) |
| 1024×7681Approx. 10 (52) |
| 640×4801Approx. 30 (159) |
Numbers in parentheses indicate the numbers when you use the “Memory Stick” (8 MB) (not supplied).
*When REC MODE is set to NORMAL.
Note
If you try to record 55 images or more on a floppy disk, even if the remaining disk capacity is sufficient, "DISK FULL" appears on the LCD screen and you cannot record any more images.
Tips
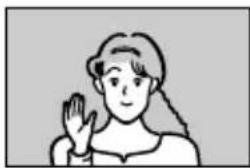
The size of the image is indicated by the pixel unit. The higher number of pixels, the more information is included. So, an image that is saved using a large number of pixels is suitable for a large-format print and one that is saved using a smaller number of pixels is suitable for attaching to an E-mail. Normally, an image is recorded in the ratio of four to three to fit the monitor ratio. This camera can also record the image in the ratio of three to two to accommodate the most common printing paper size. This is the same ratio as the one used in photo-developing shops.

natural_image
Simple line drawing of a person waving (no text or symbols)1280×960
natural_image
Simple line drawing of a person waving (no text or symbols)1280 (3:2)
Recording images for e-mail (E-MAIL)
The E-MAIL mode records a small-size (320×240) image at the same time as a image. Small-size images are convenient for e-mail transmission, etc. Images in E-MAIL mode are recorded in the JPEG format.

1 Set the PLAY/ STILL selector to STILL.
2 Select [FILE], [REC MODE], and then [E-MAIL] from the menu.
3 Record the image.
The number of images that you can record on a floppy disk in E-MAIL mode
| Image size Number of images |
| 1280×9601Approx. 5 (30) |
| 1280 (3:2)1Approx. 5 (30) |
| 1024×7681Approx. 8 (47) |
| 640×4801Approx. 22 (120) |
Numbers in parentheses indicate the numbers when you use the “Memory Stick” (8 MB) (not supplied).
To return to normal recording mode
Select [NORMAL] in step 2.
Recording text documents (TEXT)
Text is recorded in GIF format to provide a clear image.

1 Set the PLAY/ STILL selector to STILL.
2 Select [FILE], [REC MODE], and then [TEXT] from the menu.
3 Record the image.
The number of images that you can record on a floppy disk in TEXT mode
| Image size Number of images* |
| 1280×9601 Minimum 7 (40) |
| 1280 (3:2)1 Minimum 8 (44) |
| 1024×7681 Minimum 11 (61) |
| 640×4801 Minimum 28 (160) |
Numbers in parentheses indicate the numbers when you use the “Memory Stick” (8 MB) (not supplied).
*The maximum number of recordable images depends on the document condition, such as the amount of text portions.
To return to normal recording mode
Select [NORMAL] in step 2.
Notes
- If the subject is not evenly illuminated, you may be unable to record a clear image.
- Writing and reading data take more time than normal recording.
Recording images in macro
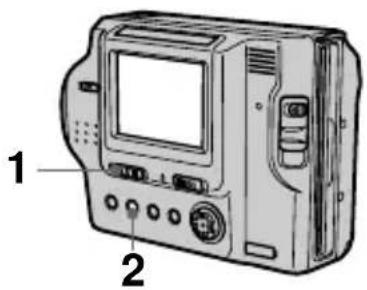
1 Set the PLAY/ STILL selector to STILL.
2 Press FOCUS repeatedly until the ⚡macro) indicator appears on the LCD screen.
With the zoom lever set to the W side, you can shoot a subject that is about 3 cm (1 3/16 inch) away from the lens surface in macro mode.
To return to normal recording mode
Press FOCUS repeatedly until both the and indicators disappear.
Notes
- You cannot record images in macro with the following PROGRAM AE modes: —Landscape mode —Panfocus mode
- You cannot record images in macro if the indicator appears.
Setting the distance to the subject
Normally the focus is automatically adjusted. This function is useful when the auto focus does not work well such as in dark places.
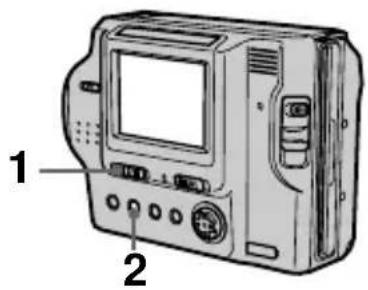
1 Set the PLAY/STILL selector to STILL.
2 Press FOCUS repeatedly until a sharp focus is achieved.
The Ⓗ (manual focus) indicator appears on the LCD screen. You can select from six focus settings:
(macro), 0.5 m, 1.0 m, 3.0 m, 7.0 m, and ∞ (infinity)
To reactivate auto focusing
Press FOCUS repeatedly until both the ⬇ and Ⓕ indicators disappear.
Notes
- Focal point information may not completely show the correct distance. Use the information as a guide.
- Focal point information does not show the correct distance when attaching the conversion lens.
- If you shoot a subject within 0.6 m (23 5/8 inches) while the zoom lever is set to T side, you cannot get a clear focus. In such cases, the focal point information flashes. Move the zoom lever to the W side until the indicator stops flashing.
- You cannot use this function if you have selected the Panfocus mode in the PROGRAM AE function.
Using the PROGRAM AE function

1 Set the PLAY/ STILL selector to STILL.
2 Press PROGRAM AE repeatedly to select the desired PROGRAM AE mode.
Twilight mode
Suppresses the blurring of colors of a bright subject in a dark place so that you can record the subject without losing the dark atmosphere of the surroundings.
+ Twilight plus mode
Increases the effectiveness of the twilight mode function.
Landscape mode
Focuses only on a distant subject to record landscapes, etc.
Panfocus mode
Changes the focus quickly and simply from a close subject to a distant subject.
Spot light-metering mode
Select this mode when there is backlight or when there is strong contrast between the subject and the background, etc. Position the point you want to record at the spot light-metering cross hair.

To cancel PROGRAM AE
Press PROGRAM AE repeatedly until the indicator on the LCD screen goes out.
Notes
- You can focus only on distant subjects in Landscape mode.
- In Panfocus mode, the zoom position is set to the W side and focus is fixed.
- When you record in Twilight plus mode, we recommend that you use a tripod to prevent shaking.
- Set the forced flash when you use the flash in the following modes:
— Twilight mode
— Twilight plus mode
— Landscape mode - You cannot use the PROGRAM AE function when [REC MODE] is set to [TEXT].
Tips
Under normal recording conditions, the camera automatically makes various adjustments, such as those for the focus, iris, exposure, and white balance, as it shoots. However, you may not be able to carry out your desired shooting depending on shooting conditions. The program AE function provides you with near-optimum adjustments to suit your shooting situation.

natural_image
Illustration of a person holding a camera under a crescent moon and stars, with night sky and silhouettes in background (no text or symbols)Adjusting the exposure (EXPOSURE)

1 Set the PLAY/ STILL selector to STILL.
2 Select [CAMERA] and then [EXPOSURE] from the menu.
3 Select the desired exposure value.
Adjust the exposure value while checking the brightness of the background. You can select values ranging from +2.0 EV to -2.0 EV in steps of 1/3 EV.
Note
If a subject is under extremely bright or dark situations, or the flash is used, the exposure adjustment may not be effective.
Tips
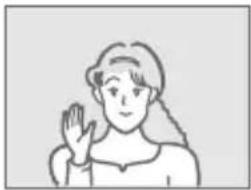
Normally, the camera automatically adjusts the exposure. If the color of the image is too dark or bright as illustrated below, we recommend that you adjust the exposure manually. When the color of the image is too dark, set it toward +, and when it is too bright, set it toward −.
Set the exposure toward +

natural_image
Illustration of a person waving (no text or symbols present)Set the exposure toward –
natural_image
Simple line drawing of a person waving (no text or symbols)Adjusting the white balance (WHITE BALANCE)
Normally the white balance is automatically adjusted.

1 Set the PLAY/ STILL selector to STILL.
2 Select [CAMERA] and then [WHITE BALANCE] from the menu.
3 Select the desired white balance setting.
IN DOOR (☀️)
- Places where the lighting condition changes quickly
• Under bright lighting such as photography studios
• Under sodium or mercury lamps
OUT DOOR (
Recording a sunrise/sunset, night scenes, neon signs, or fireworks
HOLD (HOLD)
Retains the adjusted white balance value
AUTO (No indicator)
Adjusts the white balance automatically
To reactivate auto adjustment
Select [AUTO] in step 3.
Note
Select [AUTO] when shooting with fluorescent lighting.
Tips
The image is susceptible to lighting conditions. The image looks white under sunlight in the summer, and looks red under mercury lamps. Human eyes can resolve these problems. However, the camera cannot resolve the problem by making adjustments. Normally, the camera adjusts it automatically, but, if the image appears in strange colors, we recommend that you change the white balance mode.

natural_image
Illustration of a person sitting at a table with a coffee cup and a phone, while another person looks confused (no text or symbols present)Recording the date and time on the image (DATE/TIME)
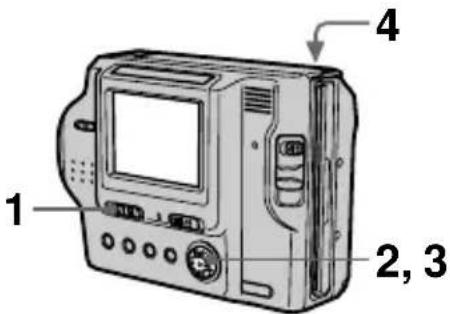
1 Set the PLAY/ STILL selector to STILL.
2 Select [EFFECT] and then [DATE/TIME] from the menu.
3 Select the date and time.
DAY & TIME
Imposes the date, hour, and minute.
DATE
Imposes the year, month, and day.
OFF
Does not impose the date and time.
4 Record the image.
The date and time do not appear on the LCD screen during shooting.
These appear during playback only.
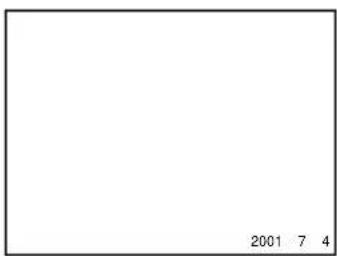
Note
When [DATE] is selected in step 3, the date is imposed in the order set by the CLOCK SET item (page113).
Enjoying picture effects (PICTURE EFFECT)

1 Set the PLAY/ STILL selector to STILL.
2 Select [EFFECT] and then [P. EFFECT] from the menu.
3 Select the desired mode.
SOLARIZE
The light contrast is clearer and the picture looks like an illustration.
B&W
The picture is monochrome (black and white).
SEPIA
The picture is sepia-toned like an old photograph.
NEG.ART
The color and brightness of the picture are reversed as in a negative.
OFF
Does not use the picture effect function.
To cancel picture effect
Select [OFF] in step 3.
▶ Various playback
Playing back six images at once (INDEX)
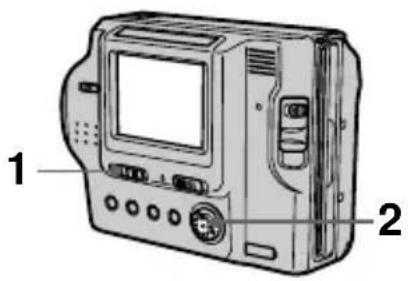
1 Set the PLAY/ STILL selector to PLAY.
2 Select [INDEX] on the LCD screen.
Six images are displayed at once (index screen).

This shows the position of the currently displayed images relative to all the recorded images.
The following marks are displayed on each image according to the image type and settings.
: E-mail file : Print mark : Protect mark
TEXT: TEXT file (No mark): Normal recording (no settings)
To display the next (previous) index screen
Select ▲/▼ at the lower-left on the LCD screen.
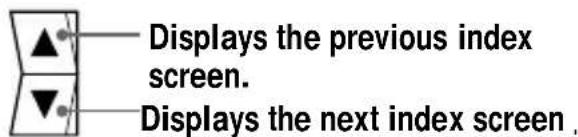
To return to normal playback (single image)
- Select the desired image with the control button.
- Select 1 (Return).
Note
Images shot in TEXT mode cannot be displayed on the INDEX screen.
Enlarging a part of the image (Zoom and trimming)

1 Set the PLAY/ STILL selector to PLAY.
2 Display the image to be enlarged.
3 Zoom in/out the image with the zoom lever.
The zoom scaling indicator appears on the LCD screen.
4 Press the control button repeatedly to select the desired portion of the image.
v : The image moves downward
V: The image moves upward
b : The image moves rightward
B: The image moves leftward
To return to the normal size
Zoom out with the zoom lever until the zoom scaling indicator (1×1.1)
disappears from the screen, or simply press the center z.
To record an enlarged image (trimming)
① Enlarge the image.
② Press the shutter button. The image is recorded at 640×480 size and the image on the LCD screen returns to the normal size after recording.
Notes
- You cannot trim the TEXT mode images.
- Zoom scaling is up to 5 × regardless of the original image size.
- The quality of enlarged images may be deteriorated.
- The original data is left even if you enlarge the image.
- The enlarged image is recorded as the newest file.
Playing back the images in order (SLIDE SHOW)
This function is useful for checking the recorded images or for presentations, etc.

1 Set the PLAY/ STILL selector to PLAY.
2 Select [FILE] and then [SLIDE SHOW] from the menu.
Set the following items.
INTERVAL
You can select from 1 min (one minute), 30 sec (30 seconds), 101 sec (10 seconds), 5 sec (51 seconds), or 3 sec (3 seconds).
REPEAT
ON: Plays back images in a continuous loop (approximately 20 minutes) until [RETURN] is selected.
OFF: After all images have been played back, the slide show ends.
3 Select [START].
The slide show begins.
To cancel the slide show
Select [CANCEL] in step 2 or 3.
To skip to the next/previous image during the slide show
Select ◀/▶ at the lower-left on the LCD screen.
Notes
- The interval setting time may vary depending on the image size.
- When [REPEAT] is set to [ON], the slide show does not end until all the images are played back, even if it takes more than 20 minutes.
▶ Editing
Preventing accidental erasure (PROTECT)
The ⬆n (protect) indicator appears on protected images.

In single mode
1 Set the PLAY/STILL selector to PLAY, then display the image to be protected.
2 Select [FILE], [PROTECT], and then [ON] from the menu.
The displayed image is protected and the ○— indicator appears.
To release protection
Select [OFF] in step 2.
In INDEX mode
1 Set the PLAY/ STILL selector to PLAY, then display the INDEX screen.
2 Select [FILE], [PROTECT], and then [ALL] or [SELECT] from the menu.
3 When you select [ALL]
Select [ON].
All the images in the floppy disk are protected.
When you select [SELECT]
Select all the images to be protected with the control button, then select [ENTER]. The selected images are protected.
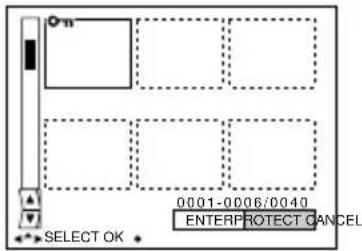
To release protection
If you selected [ALL] in step 2, select [OFF]. If you selected [SELECT] in step 2, select the images to be unprotected with the control button, then select [ENTER].
Deleting images (DELETE)
Protected images cannot be deleted.

In single mode
1 Set the PLAY/STILL selector to PLAY, then display the image to be deleted.
2 Select [DELETE] and then [OK] from the menu.
The image is deleted.
In INDEX mode
1 Set the PLAY/ STILL selector to PLAY, then display the INDEX screen.
2 Select [DELETE] and then [ALL] or [SELECT] from the menu.
3 When you select [ALL]
Select [ENTER].
All the unprotected images are deleted.
When you select [SELECT]
Select all the images to be deleted with the control button, then select [ENTER]. The Ⓞ(delete) indicator appears on the selected images and these images are deleted.

To cancel deleting
Select [CANCEL] in step 2 or 3.
Changing the recorded image size (RESIZE)
Use this function when you need a small-size image to attach it to an E-mail. The original image is retained even after resizing. The resized image is recorded as the newest file.

1 Set the PLAY/ STILL selector to PLAY, then display the image of which you want to change the size.
2 Select [TOOL] and then [RESIZE] from the menu.
3 Select the desired size.
1280×960, 1024×768, 640×480.
The resized image is recorded,
then the display returns to the
image display before resizing.
To cancel changing the size
Select [CANCEL] in step 3.
Notes
- You cannot change the size of images recorded in TEXT mode.
- When you change from a small size to a large size, the picture quality deteriorates.
Copying images (COPY)
Copies images to another floppy disk.
In single mode

1 Set the PLAY/ STILL selector to PLAY, then display the image to be copied.
2 Select [TOOL], [COPY], and then [OK] from the menu.
"DISK ACCESS" appears.
3 When "CHANGE FLOPPY DISK" appears, eject the floppy disk. "INSERT FLOPPY DISK" appears.
4 Insert another floppy disk.
"RECORDING" appears. When copying is completed,
"COMPLETE" appears.
To end copying, select [EXIT].
To continue copying the image to other floppy disks
After "COMPLETE" appears in step 4, select [CONTINUE] and repeat steps 3 and 4 above.
In INDEX mode
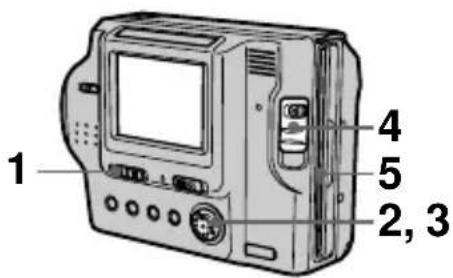
1 Set the PLAY/ STILL selector to PLAY, then display the INDEX screen.
2 Select [TOOL], [COPY], and then [ALL] or [SELECT] from the menu.
3 When you select [ALL]
Select [OK].
All the images are copied.
When you select [SELECT]
Select the images to be copied with the control button.
The √ mark appears on the images.
Select all the images to be copied, then select [ENTER].
“DISK ACCESS” appears.
4 When "CHANGE FLOPPY DISK" appears, eject the floppy disk.
"INSERT FLOPPY DISK" appears.
5 Insert another floppy disk.
"RECORDING" appears. When copying is completed,
"COMPLETE" appears.
To end copying, select [EXIT].
To continue copying the image to other floppy disks
After “COMPLETE” appears in step 5, select [CONTINUE] and repeat steps 4 and 5 above.
To cancel copying partway
Change the PLAY/ STILL selector position or turn off the power.
Note
If you eject and insert the floppy disk without selecting [EXIT] after "COMPLETE" appears, the image will be copied to the floppy disk.
Notes on the Floppy Disk Adaptor for Memory Stick (not supplied)
- You cannot select [ALL] when copying images in the “Memory Stick.”
- You cannot copy images from a floppy disk to a “Memory Stick.”
- When copying from a "Memory Stick" to a floppy disk, the file information (Exif tag) is not copied.
Copying all the information on your floppy disk (DISK COPY)
You can copy to another disk not only the images you have recorded with your camera but also various files you have created in other software with your computer.
Notes
- Once you carry out DISK COPY, all information saved on the recipient floppy disk is erased to be replaced by newly written data including the protected image data. Check the contents of the recipient disk before copying the disk.
- Be sure to use the floppy disk that has been formatted by this camera to carry out DISK COPY (page150).

1 Insert the floppy disk to be copied.
2 Select [FILE], [DISK TOOL], [DISK COPY], and then [OK] from the menu.
“DISK ACCESS” appears.
3 When "CHANGE FLOPPY DISK" is displayed, eject the floppy disk.
"INSERT FLOPPY DISK" appears.
4 Insert another floppy disk.
"RECORDING" appears. When copying is completed, "COMPLETE" appears. To end copying, select [EXIT].
To continue copying to other floppy disks
After “COMPLETE” appears in step 4, select [CONTINUE] and repeat steps 3 and 4 above.
To cancel copying partway
Change the PLAY/ STILL selector position or turn off the power.
Note
If you eject and insert the floppy disk without selecting [EXIT] after “COMPLETE” appears, DISK COPY will be carried out onto the floppy disk.
Note on the Floppy Disk Adaptor for Memory Stick (not supplied)
You cannot do DISK COPY between "Memory Stick"s and floppy disks.
Selecting images to print (PRINT MARK)
You can mark a print mark on images recorded with your camera. This mark is convenient when you have images printed at a shop that conforms with the DPOF (Digital Print Order Format) standard.

In single mode
1 Set the PLAY/ STILL selector to PLAY and display the image you want to print.
2 Select [FILE], [PRINT MARK], and then [ON] from the menu.
The [print) mark is marked on the displayed image.
To unmark the print mark
Select [OFF] in step 2.
In INDEX mode
1 Set the PLAY/ STILL selector to PLAY, then display the INDEX screen.
2 Select [FILE], [PRINT MARK], and then [SELECT] from the menu.
3 Select the images to be marked with the control button.
4 Select [ENTER].
The 📁 marks on the selected images change from green to white.

To unmark selected print marks
Select the images to be unmarked in step 3 with the control button, then select [ENTER].
To unmark all the print marks
Select [FILE], [PRINT MARK], [ALL], and then [OFF] from the menu. The 1 marks on all images are removed.
To print out using the FVP-1 Mavica Printer
Set PRESET SELECT SW to PC on the printer.
Note
You cannot mark a print mark on TEXT mode images.
Format
When you format a floppy disk, all data stored on the floppy disk will be deleted. Check the contents of the floppy disk before formatting.
Note
Even if images are protected, these images will be deleted.
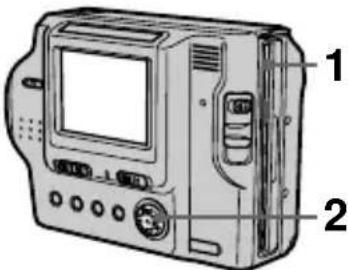
1 Insert the floppy disk you want to format.
2 Select [FILE], [DISK TOOL], [FORMAT], and then [OK] from the menu.
To cancel formatting
Select [CANCEL] in step 2.
Notes
- When you format the disk, be sure to use a fully charged battery pack or the AC power adaptor as the power source.
- If you use the Floppy Disk Adaptor for Memory Stick (not supplied), you can format "Memory Stick"s.
Additional information
Precautions
On cleaning
Cleaning the LCD screen
Wipe the screen surface with a cleaning cloth (not supplied) or an LCD cleaning kit (not supplied) to remove fingerprints, dust, etc.
Cleaning the camera surface
Clean the camera surface with a soft cloth slightly moistened with water, then wipe the surface dry. Do not use any type of solvent such as thinner, alcohol or benzene as this may damage the finish or the casing.
After using your camera at the seashore or other dusty locations
Clean your camera carefully. Otherwise, the salty air may corrode the metal fittings or dust may enter the inside of your camera, causing a malfunction.
On floppy disks
To protect data recorded on floppy disks, note the following:
- Avoid storing floppy disks near magnets or magnetic fields such as those of speakers and televisions. Otherwise, permanent erasure of disk data may result.
- Avoid storing floppy disks in areas subject to direct sunlight or sources of high temperature, such as a heating device. Floppy disk warping or damage may result, rendering the disk useless.
-
Avoid contact with the disk's surface by opening the disk shutter plate. If the disk's surface becomes blemished, data may be rendered unreadable.
-
Avoid getting liquids on the floppy disk.
- Be sure to use a floppy disk case to ensure protection of important data.
- Even when you use a 3.5 inch 2HD floppy disk, image data may not be recorded and/or displayed depending on the using environment. In this case, use a disk of other brand.
On operating temperature
Your camera is designed for use between the temperatures of 0^ C to 40^ C ( 32^ F to 104^ F). Recording in extremely cold or hot places that exceed this range is not recommended.
On moisture condensation
If the camera is brought directly from a cold to a warm location, or is placed in a very damp room, moisture may condense inside or outside the camera. Should this occur, the camera will not operate properly.
Moisture condensation occurs easily when:
- The camera is brought from a cold location such as a ski slope into a warmly heated room.
- The camera is taken from an air-conditioned room or car interior to the hot outdoors, etc.
How to prevent moisture condensation
When bringing the camera from a cold place to a warm place, seal the camera in a plastic bag and allow it to adapt to conditions at the new location over a period of time (about an hour).
If moisture condensation occurs
Immediately eject the floppy disk, then turn off the camera and wait about an hour for the moisture to evaporate.
Note that if you attempt to record with moisture remaining inside the lens, you will be unable to record clear images.
On AC power adaptor
- Unplug the unit from the wall outlet (mains) when you are not using the unit for a long time. To disconnect the power cord (mains lead), pull it out by the plug. Never pull the power cord (mains lead) itself.
- Do not operate the unit with a damaged cord (mains lead) or if the unit has been dropped or damaged.
- Do not bend the power cord (mains lead) forcibly, or place a heavy object on it. This will damage the cord (mains lead) and may cause fire or electrical shock.
- Prevent metallic objects from coming into contact with the metal parts of the connecting section. If this happens, a short may occur and the unit may be damaged.
• Always keep metal contacts clean. - Do not disassemble the unit.
- Do not apply mechanical shock or drop the unit.
- While the unit is in use, particularly during charging, keep it away from AM receivers and video equipment. AM receivers and video equipment disturb AM reception and video operation.
- The unit becomes warm during use. This is not a malfunction.
- Do not place the unit in locations that are:
—1 Extremely hot or cold
— Dusty or dirty
—1 Very humid
—1 Vibrating
On battery pack
- Use only the specified charger with the charging function.
- To prevent accident from a short circuit, do not allow metal objects to come into contact with the battery terminals.
- Keep the battery pack away from fire.
- Never expose the battery pack to temperatures above 60°C (140°F), such as in a car parked in the sun or under direct sunlight.
- Keep the battery pack dry.
- Do not expose the battery pack to any mechanical shock.
- Do not disassemble nor modify the battery pack.
- Attach the battery pack to the camera securely.
- Charging while some capacity remains does not affect the original battery capacity.
On the built-in rechargeable lithium battery
Your camera is supplied with a built-in rechargeable lithium battery installed so as to retain the date and time, etc., regardless of the setting of the POWER switch. The built-in rechargeable lithium battery is always charged as long as you are using your camera. The battery, however, will get discharged gradually if you do not use your camera. It will be completely discharged in about six months if you do not use your camera at all. Even if the built-in rechargeable lithium battery is not charged, it will not affect the camera operation. To retain the date and time, etc., charge the battery if the battery is discharged.
Charging the built-in rechargeable lithium battery:
- Connect your camera to house current (mains) using the AC power adaptor supplied with your camera, and leave your camera with the power turned off for more than 24 hours.
- Or install the fully charged battery pack in your camera, and leave your camera with the power turned off for more than 24 hours.
If any problem occurs, unplug your camera and contact your nearest Sony dealer.
On "Memory Sticks"
“Memory Stick” is a new compact, portable and versatile IC recording medium with a data capacity that exceeds a floppy disk. “Memory Stick” is specially designed for exchanging and sharing digital data among “Memory Stick” compatible products. Because it is removable, “Memory Stick” can also be used for external data storage.
There are two types of “Memory Sticks”: general “Memory Sticks” and “MagicGate Memory Sticks” that are equipped with the MagicGate* copyright protection technology. You can use both types of “Memory Stick” with your camera. However, because your camera does not support the MagicGate standards, data recorded with your camera is not subject to MagicGate copyright protection.
*MagicGate is copyright protection technology that uses encryption technology.
Notes
- :Do not remove the “Memory Stick” while reading or writing data.
•:Data may be damaged if:
—you remove the “Memory Stick” or turn off your camera while reading or writing data.
—you use the “Memory Stick” in a location subject to the effects of static electricity or noise. - :Do not attach any other material than the supplied label on the labeling position.
- When you carry or store the “Memory Stick,” put it in its supplied case.
- :Do not touch the terminals of a “Memory Stick” with your hand or a metal object.
- :Do not strike, bend or drop the “Memory Stick.”
- :Do not disassemble or modify the "Memory Stick."
- :Do not allow the “Memory Stick” to get wet.
"Memory Stick", 1, "MagicGate Memory Stick" and 1 are trademarks of Sony Corporation.
"MagicGate" and MAGICGATE trademarks of Sony Corporation.
Using your camera abroad
Power sources
You can use your camera in any country or area with the supplied battery charger within 100 V to 240 V AC, 50/60 Hz. Use a commercially available AC plug adaptor [a], if necessary, depending on the design of the wall outlet (mains) [b].
![AC-L10A/L10B/L10C [a] [b]](/content/2026/05/1015889/images/909e4cc5da268e9e7047efc5b887955d22be509b273db900b5850446013794be.jpg)
About "InfoLITHIUM" battery pack
What is the "InfoLITHIUM" battery pack?
The “InfoLITHIUM” battery pack is a lithium-ion battery pack that has functions for communicating information related to operating conditions between your camera and the AC power adaptor.
The “InfoLITHIUM” battery pack calculates the power consumption according to the operating conditions of your camera, and displays the remaining battery time in minutes.
Charging the battery pack
- Be sure to charge the battery pack before you start using your camera.
- We recommend charging the battery pack in an ambient temperature of between 10^ to 30^ (50°F to 86°F) until the POWER ON/OFF (CHG) lamp goes out, indicating that the battery pack is fully charged. If you charge the battery pack outside of this temperature range, you may not be able to efficiently charge the battery pack.
- After charging is completed, either disconnect the AC power adaptor from the DC IN jack on your camera or remove the battery pack.
Effective use of the battery pack
- Battery performance decreases in low-temperature surroundings. So, the time that the battery pack can be used is shorter in cold places. We recommend the following to use the battery pack longer:
—1 Put the battery pack in a pocket close to your body to warm it up, and insert it in your camera immediately before you start taking shots.
—1Use the large capacity battery pack (NP-F550, optional).
- Frequently using the LCD panel or frequently operating the zoom wears out the battery pack faster. We recommend using the large capacity battery pack (NP-F550, optional).
- Be certain to turn the POWER switch to off when not taking shots or playing back on your camera.
- We recommend have spare batteries handy for two or three times the expected shooting time, and make a trial shots before taking the actual shots.
- Do not expose the battery pack to water. The battery pack is not water-resistant.
Remaining battery time indicator
- If the power goes off although the battery remaining indicator indicates that the battery pack has enough power to operate, charge the battery pack fully again so that the indication on the battery remaining indicator is correct. Note, however, that the correct battery indication sometimes will not be restored if it is used in high temperatures for a long time or left in a fully charged state, or the battery pack is frequently used. Regard the remaining battery time indication as the approximate shooting time.
- The mark indicating there is little remaining battery time sometimes flashes depending on the operating conditions or ambient temperature and environment even if the remaining battery time is 5 to 10 minutes.
How to store the battery pack
- Even if the battery pack is not used for a long time, store it in a dry, cool place after fully charging it once per year and then using the battery pack up on your camera. This is to maintain the battery pack's functions.
- To use the battery pack up on your camera, leave the POWER switch to on in PLAY mode until the power goes off without a floppy disk or a “Memory Stick” inserted.
Battery life
- The battery life is limited. Battery capacity decreases little by little as you use it more and more, and as time passes. When the battery operating time is shortened considerably, a probable cause is that the battery pack has reached the end of its life. Please buy a new battery pack.
- The battery life varies according to how it is stored and operating conditions and environment for each battery pack.
Troubleshooting
If you experience trouble with your camera, first check the following items. Should your camera still not operate properly after you have made these checks, consult your Sony dealer or local authorized Sony service facility. If code displays (C: □□: □□) appear on the LCD screen, the self-diagnosis display function is working (page 62).
| Symptom Cause and/or Solution | |
| Your camera does not work. | You are not using an “InfoLITHIUM” battery pack → Use an “InfoLITHIUM” battery pack (page19).The floppy disk is not inserted properly.→ Eject the disk, and insert it again (page115).The battery level is too low. (The indicator appears.)→ Charge the battery pack fully (page110).The AC power adaptor is not connected securely.→ Connect it securely to the DC IN jack and a wall outlet (mains) (page110, 12).The malfunction occurs inside the camera.→ Turn off the power, and turn on after one minute, then check that the camera works properly. |
| Your camera cannot record images. | The PLAY/STILL selector is set to PLAY.→ Set it to STILL (page116).No floppy disk is inserted into your camera.→ Insert a floppy disk (page115).The tab on the disk is set to the unrecordable position.→ Set it to the recording position (page115). |
| The picture is out of focus. | Your camera is not in macro recording mode when you shoot a subject that is about 3 to 25 cm (1 3/16 to 9 7/8 inches) away from the lens.→ Set the macro recording mode (page135).→ Move the zoom lever to the W side. |
| The picture is noisy. | Your camera is placed near a TV or other equipment that uses strong magnets.→ Move your camera away from the TV, etc. |
| The picture is too dark. | You are shooting a subject with a light source behind the subject.Adjust the exposure (page138).The brightness of the LCD screen is too low.Adjust the brightness of the LCD screen (page118). |
| The flash does not work. | The flash is set toSet the flash to (no indication), Or 1 (page120).The camera is in one of the following PROGRAM AE modes: Twilight, Twilight plus, or Landscape.→Cancel the PROGRAM AE function or set the flash to (page120, 36). |
| The date and time are recorded incorrectly. | The date and time are not set correctly.→Set the correct date and time (page113). |
| Vertical streaks appear when you are shooting a very bright subject. | This is called the smear phenomenon.→This is not a malfunction. |
| The read/write time is slow when using a “Memory Stick.” | When using the Floppy Disk Adaptor for Memory Stick, writing and reading images take about twice times than using a floppy disk.→This is not a malfunction. |
| The zoom does not work. | PROGRAM AE is set to the Panfocus mode.→Cancel the Panfocus mode (page136). |
| Digital zoom does not function. | Digital zoom is set to [OFF].→Set digital zoom to [ON] at the menu. |
| The image is in monochrome. | You shot the image in TEXT mode.→Cancel the TEXT mode (page134).The picture effect is set to B&W.→Cancel the B&W mode (page140). |
| The image cannot be played back on a computer. | Consult the computer or software manufacturer. |
| Your camera cannot delete an image. | The image is protected.→Cancel the protection (page144). |
| The power turns off suddenly. | With the PLAY/STILL selector set to STILL, if you do not operate the camera for about three minutes while the power is on, the camera turns off automatically to prevent wearing down the battery pack.Turn on the camera.The battery pack is discharged.Replace it with a fully charged battery pack. |
| The slide show function stops automatically. | The slide show function stops after about 201minutes.To continue the slide show, select [START] again (page143). |
| You cannot use the PROGRAM AE function. | The camera is set to TEXT mode.Cancel the TEXT mode (page134). |
| The macro function does not work. | PROGRAM AE is set to the Panfocus mode.Cancel the Panfocus mode (page136). |
| You cannot resize the image. | This function does not work on a TEXT image. |
| You cannot mark an image with the print mark. | The print mark cannot be marked on a TEXT image. |
Battery packs
| Symptom Cause and/or Solution | |
| The battery pack cannot be charged. | · The power of the camera is turned on.→Turn off the power of the camera (page110). |
| The battery life is short. | · You are recording/playing back images under extremely cold temperatures.· The battery pack is not charged enough.→Charge the battery pack fully.· The battery pack is dead.→Replace the battery pack with a new one. |
| The indication of the battery remaining time is not proper, or the power is immediately turned off even if the battery remaining indicator indicates that the battery level is sufficient. | You are using the camera for many hours under extremely hot or cold temperatures.The battery pack is dead.→Replace the battery pack with a new one (page19).The battery level is too low.→Install the fully charged battery pack (page19, 10)A deviation has occurred in the remaining battery time.→Charge the battery pack fully (page110). |
| The POWER ON/OFF (CHG) lamp flashes when charging a battery pack. | A malfunction has occurred in the battery pack.→Contact your Sony dealer or local authorized Sony service facility. |
| The POWER ON/OFF (CHG) lamp does not light up when charging a battery pack. | The AC power adaptor is not connected.→Connect the power cord firmly to a wall outlet (page110).The battery pack is not installed properly.→Install it properly (page19).Charging of the battery pack is complete. |
Warning and notice messages
Various messages appear on the LCD screen. Check the corresponding descriptions in the following list.
| Message Meaning | |
| DRIVE ERROR1There is trouble with the disk drive. | |
| NO DISK1No disk is inserted. | |
| FORMAT ERROR | The floppy disk loaded is not MS-DOS formatted (512 bytes ×18 sectors).The battery level of the Floppy Disk Adaptor for Memory Stick is low. |
| DISK PROTECT1The tab on the disk is set to the unrecordable position. | |
| DISK FULL1The disk is full. | |
| NO FILE1No image is recorded on the disk. | |
| FILE ERROR1Trouble has occurred during playback. | |
| FILE PROTECT1The image is protected. | |
| DISK ERROR1A 2DD floppy disk is inserted, or there is trouble with the disk. | |
| NOT ENOUGH MEMORY1The remaining capacity of the floppy disk is not enough to copy the image. | |
| IMAGE SIZE OVER | You tried to play back images with an image size larger than the maximum playback size of this camera. |
| INVALID OPERATION | You attempted to carry out DISK COPY when using the Floppy Disk Adaptor for Memory Stick.You select [ALL] from [COPY] when using the Floppy Disk Adaptor for Memory Stick. |
| for “InfoLITHIUM” battery only | The battery is not the “InfoLITHIUM” type. |
| [13T4] | The image is protected. |
| The battery level is too low. When the remaining time is about 5 to 10 minutes, may flash depending on the battery pack used, operating conditions, or the environment. | |
| NOT ENOUGH FD ADAPTOR’S BATTERY | The battery level of the Floppy Disk Adaptor for Memory Stick is low. |
| COULDN'T RECORD1The battery level of the Floppy DiskAdaptor for Memory Stick is too low to shoot. | |
| INVALID OPERATION1The battery level of the Floppy DiskAdaptor for Memory Stick is too low to do some operations. | |
| DISK ERROR | The battery level of the Floppy DiskAdaptor for Memory Stick is too low to operate.Trouble has occurred on the Floppy Disk Adaptor for Memory Stick. |
Self-diagnosis display
Your camera has a self-diagnosis display. This function displays the camera condition on the LCD screen with a combination of a letter and four digits of numbers. If this appears, check the following code chart. The code informs you of the camera's current condition. The last two digits (indicated by □□) will differ depending on the state of the camera.
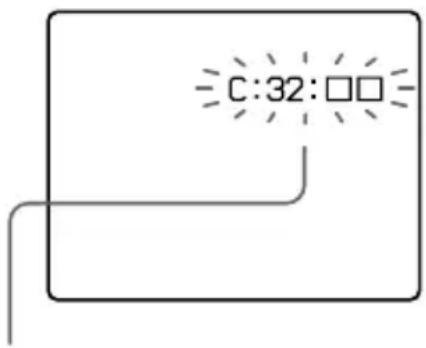
Self-diagnosis display
•:C: □□: □□
You can repair the camera yourself.
•:E: □□: □□
Contact your Sony dealer or local authorized Sony service facility.
| Code Cause and/or Corrective Action | |
| C:32:□□ | There is trouble with the disk drive.→Turn the power off and on again. |
| C:13:□□ | An unformatted floppy disk is inserted.→Format the floppy disk. (page150)A disk not compatible with this camera is inserted.→Change the disk. (page115)The battery level of the Floppy Disk Adaptor for Memory Stick is too low.→Replace the battery with a new one. |
| E:61:□□E:91:□□ | A camera malfunction that you cannot repair has occurred.→Contact your Sony dealer or local authorized Sony service facility and inform them of the 5-digit indication. (example: E:61:10) |
If you are unable to rectify the problem even if you try corrective actions a few times when C:□□:□□ is indicated, contact your Sony dealer or local authorized Sony service facility.
Specifications
System
Image device
6.64 mm (1/2.7 type) color CCD
Lens
3× zoom lens
f = 6.1 - 18.3 ~mm (1/4 -
3/4 inches)
(39 - 117 mm (1 9/16 -
4 5/8 inches) when converted into a 35 mm still camera)
F = 2.8 - 2.9
Exposure control
Automatic exposure
White balance
Automatic, Indoor, Outdoor, Hold
Data compression system
GIF (in TEXT mode)
Floppy disk: JPEG (JFIF)
"Memory Stick": JPEG (Exif2.1)
Recording medium
Floppy disk:
3.5 inch 2HD MS-DOS
format (1.44 MB)
"Memory Stick" (When
using with the MSAC-
FD2M/FD2MA Floppy Disk
Adaptor for Memory Stick): DCF format
Flash
Recommended recording distance:
0.3 m to 2.5 m (11 7/8 inches to 8 1/3 feet)
LCD screen
LCD panel
TFT (Thin Film Transistor active matrix) drive
Total number of dots
123 200 (560×220) dots
General
Application
Sony battery pack NP-F330
(supplied)/F550
Power requirements
8.4 V
Power consumption (During shooting)
3.5 W
Operating temperature
0^ to 40^ (32°F to 104°F)
Storage temperature
-20^ to +60^ (-4^ to
+140°F)
Dimensions (Approx.)
143×103×75 mm
(5 3/4×4 1/8×3 inches) (w/h/d)
Mass (Approx.)
630 g (1 lb 6 oz) (including
NP-F330 battery pack,
floppy disk and lens cap, etc.)
AC-L10A/L10B/L10C
AC power adaptor
Power requirements
100 to 240 V AC, 50/601Hz
Rated output voltage
DC 8.4 V, 1.5 A in operating mode
Operating temperature
0^ to 40^ (32°F to 104°F)
Storage temperature
-20^ to +60^ (-4^ to
+140°F)
Dimensions (Approx.)
125×39×62 mm (5×1 9/16×
2 1/2 inches) (w/h/d)
Mass (Approx.)
280 g (10 oz)
NP-F330 battery pack
Battery type
Lithium ion
Maximum output voltage
DC 8.4 V
Mean output voltage
DC 7.2 V
Capacity
5.0 Wh (700 mAh)
Operating temperature
0^ to 40^ (32°F to 104°F)
Dimension (Approx.)
38.4×20.6×70.8 mm
(1 9/16×13/16×2 7/8 inches)
(w/h/d)
Mass (Approx.)
70 g (2 oz)
Accessories
AC-L10A/L10B/L10C
AC power adaptor (1)
Power cord (mains lead) (1)
NP-F330 battery pack (1)
Shoulder strap (1)
CD-ROM (1)
Lens cap (1)
Lens cap strap (1)
Operating instructions (1)
Design and specifications are subject to change without notice.
LCD screen indicators
The indicators during recording

1 AE lock indicator/Focus lock indicator
2 Sharpness indicator
3 Focus mode indicator/Macro indicator
4 Battery remaining indicator
5 Flash level indicator/Flash mode indicator
6 PROGRAM AE indicator/Zoom indicator
7 White balance indicator
8 DATE/TIME indicator
9 Picture effect indicator
10 EV level indicator
11 Menu bar and guide menu
They appear by pressing ▲ on the control button and disappear by pressing ▼.
12 Recording mode indicator
13 Image size indicator
14 Number of recorded images
15 Remaining disk capacity indicator
16 Self-diagnosis function indicator
17 Self-timer indicator
18 Spot light-metering indicator
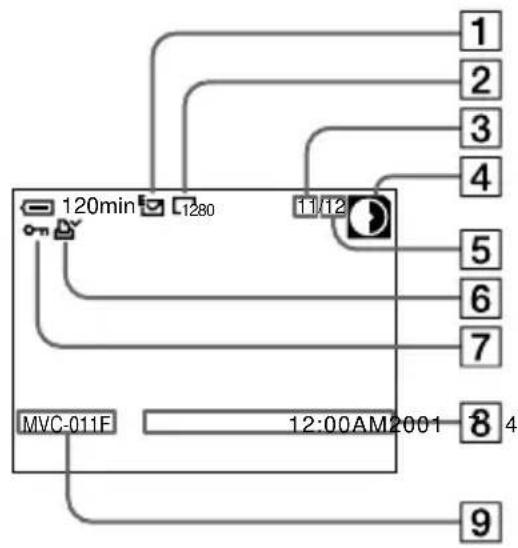
flowchart
graph TD
    A["120min"] --> B["MVC-011F"]
    C["1280"] --> B
    D["11/12"] --> B
    E["1"] --> F["12:00AM2001"]
    G["2"] --> F
    H["3"] --> F
    I["4"] --> F
    J["5"] --> F
    K["6"] --> F
    L["7"] --> F
    M["8"] --> F
    N["4"] --> F
    O["9"] --> F
1 Recording mode indicator
2 Image size indicator
3 Image number
4 Remaining disk capacity indicator
5 Number of stored images on a floppy disk
6 Print mark indicator
7 Protect indicator/Zoom scaling indicator
8 Recording date of the playback image*
9 File name*
Index
A
AC power adaptor..110, 12
Adjusting brightness Image....38 LCD screen....18
AE (auto exposure)1......16
Auto power-off function 11
B
Battery pack Charging.....10 Installing.....9 Remaining time1.....10 Usable time.....11
BEEP....32
C
Charging1....10
Cleaning....51
CLOCK SET......13
Control button......26
COPY......46
D
DELETE1......45
DEMO....31
DIGITAL ZOOM1..119 30
DISK COPY1......48
DISK TOOL1......29
DPOF1....49
E
Editing COPY......46 DELETE......45 PROTECT......44
E-MAIL1....34
F
FILE NUMBER......30
FLASH LEVEL......31
Floppy disk Copying.....48 Format1.....50 Inserting.....15 Number of recordable images1.....13,3 34 Usable type.....15
FORMAT......50
Full charge1....10
G
GIF....22, 25, 34
|
Image Copying1.....46 Deleting1.....45 File name.....24 Playback1.....21 Print mark.....49 Protect1.....44 Recording1.....16 Size.....33
INDEX screen....41 Indicators on the LCD screen....64 "InfoLITHIUM" battery pack1....54
J
JPEG 16, 22, 25
M
Macro recording....35 Manual focusing1....35 Menu1....28 Moisture condensation...51
N
Number of recordable images Battery pack1.....11 E-mail model.....34 Image size.....33 TEXT mode.....34
P
PICTURE EFFECT1.....40 PLAY/STILL selector1...26 Playing back Images1.....21 INDEX screen1.....41 Slide show1.....43 Viewing images on a computer.....22
Power source AC power adaptor1.....12 Battery pack1.....9
PRINT MARK....49 PROGRAM AE1....36 PROTECT....44
R
REC MODE....30 Recording E-mail mode1....34 Image....16 In macro1....35 TEXT mode....34 With flash....20 RESIZE....46
S
Self timer1....19
Self-diagnosis display....62 Setting the date and time ....13 Single display....41 SLIDE SHOW1....43
T
TEXT model......34
U
Using flash1....20 Using your camera abroad ....53
V
Viewing images using a computer....22
W
Warning messages1......60 WHITE BALANCE......39
Z
Zoom....18
Sony online
http://www.world.sony.com/
Printed on recycled paper
Printed using vegetable oil ink with less than 1% VOC (Volatile Organic Compound).
Sony Corporation Printed in Japan


- Digital Still Camera
- Operating Instructions
- Owner's Record
- FD Mavica
- WARNING
- CAUTION
- Note:
- For the Customers in the U.S.A. and Canada
- DISPOSAL OF LITHIUM ION BATTERY.
- LITHIUM ION BATTERY. DISPOSE OF PROPERLY.
- Caution:
- For the Customers in Canada
- NOTICE FOR THE CUSTOMERS IN THE UNITED KINGDOM
- For the Customers in Germany
- Attention
- Be sure to read the following before using your camera
- Trial recording
- No compensation for contents of the recording
- Precaution on copyright
- Do not shake or strike the camera
- LCD screen, finder (only models with a finder) and lens
- Do not get the camera wet
- Back up recommendation
- When the camera is used for long periods
- Table of contents
- Getting started
- Basic operations
- ▶ Recording
- ▶ Playback
- Advanced operations
- Before performing advanced operations
- ▶ Various recording
- ▶ Various playback
- ▶ Editing
- Additional information
- Introduction
- Deletes undesired images right away, checking the image after shooting
- Captures images with your computer
- Selects the recording mode from various types of recordings for your situation
- Identifying the parts
- Preparing the power supply
- Installing the battery pack
- To remove the battery pack
- Charging the battery pack
- After charging the battery pack
- Battery remaining indicator
- NP-F330 (supplied)/F550 (not supplied) battery pack
- Auto power-off function
- Note on the POWER ON/OFF (CHG) lamp during charging
- Battery life and number of images that can be recorded/played back
- Notes
- Using the AC power adaptor
- Using a car battery
- Using your camera abroad
- When using the AC power adaptor
- Setting the date and time
- Select the desired date display format with ▲/▼ on the control button, then press the center ●.
- Select the year, month, day, hour or minute item you want to set with ◀/▶ on the control button.
- Set the numeric value with ▲/▼ on the control button, then press the center ● to enter it.
- Select [ENTER] with ▶ on the control button, then press the center ● at the desired moment to begin clock movement.
- To cancel the date and time setting
- Inserting a floppy disk
- Usable floppy disks
- Removing the floppy disk
- Recording images
- Press the shutter button fully down.
- For the number of images you can record on a floppy disk
- Checking the last recorded image (Quick Review)
- Adjusting the brightness of the LCD screen
- To turn off the LCD backlight
- Using the zoom feature
- If you cannot get a sharp focus on a close subject
- Minimum focal distance to the subject
- Digital zoom function
- Using digital zoom
- The indicators on the LCD screen during recording
- Using the self-timer
- Recording images with the flash
- Playing back images
- When the menu bar is not displayed
- LCD screen indicators during playback
- Viewing images using a computer
- Note
- Recommended OS/applications
- os
- Applications
- Viewing images
- For Windows 98 users
- Image file storage destinations and image file names
- When using floppy disks
- For Windows 98 users (The drive recognizing the floppy disk is [A].)
- When using "Memory Stick"s
- For Windows 98 users (The drive recognizing the Floppy Disk Adaptor for Memory Stick is [A].)
- Tips
- JPEG format
- GIF format
- How to use the PLAY/ STILL selector
- How to use the control button
- Turning on/off the operation buttons (menu bar) on the LCD screen
- Selecting items or images on the LCD screen
- How to change the menu settings
- Press ▲ on the control button to display the menu bar.
- ② Select the desired item with ▲/▼/◄/► on the control button, then press the center ●.
- Select the desired setting with ▲/▼/◄/► on the control button, then press the center ●.
- To cancel the setup
- Menu settings
- (self-timer)
- INDEX (Only in PLAY (single) mode)
- DELETE (Only in PLAY (single) mode)
- ▷ (Return) (Only in PLAY (INDEX) mode)
- Setting the image size (IMAGE SIZE)
- The number of images that you can record on a floppy disk
- Recording images for e-mail (E-MAIL)
- To return to normal recording mode
- Recording text documents (TEXT)
- Recording images in macro
- Setting the distance to the subject
- To reactivate auto focusing
- Using the PROGRAM AE function
- Spot light-metering mode
- To cancel PROGRAM AE
- Adjusting the exposure (EXPOSURE)
- Adjusting the white balance (WHITE BALANCE)
- IN DOOR (☀️)
- OUT DOOR (
- HOLD (HOLD)
- AUTO (No indicator)
- To reactivate auto adjustment
- Recording the date and time on the image (DATE/TIME)
- DAY & TIME
- DATE
- OFF
- Record the image.
- Enjoying picture effects (PICTURE EFFECT)
- SOLARIZE
- B&W
- SEPIA
- NEG.ART
- To cancel picture effect
- Playing back six images at once (INDEX)
- To display the next (previous) index screen
- To return to normal playback (single image)
- Enlarging a part of the image (Zoom and trimming)
- To return to the normal size
- To record an enlarged image (trimming)
- Playing back the images in order (SLIDE SHOW)
- INTERVAL
- REPEAT
- To cancel the slide show
- To skip to the next/previous image during the slide show
- Preventing accidental erasure (PROTECT)
- In single mode
- To release protection
- In INDEX mode
- When you select [ALL]
- When you select [SELECT]
- Deleting images (DELETE)
- To cancel deleting
- Changing the recorded image size (RESIZE)
- To cancel changing the size
- Copying images (COPY)
- To continue copying the image to other floppy disks
- To cancel copying partway
- Notes on the Floppy Disk Adaptor for Memory Stick (not supplied)
- Copying all the information on your floppy disk (DISK COPY)
- Insert another floppy disk.
- To continue copying to other floppy disks
- Note on the Floppy Disk Adaptor for Memory Stick (not supplied)
- Selecting images to print (PRINT MARK)
- To unmark the print mark
- Select [ENTER].
- To unmark selected print marks
- To unmark all the print marks
- To print out using the FVP-1 Mavica Printer
- Format
- To cancel formatting
- Precautions
- On cleaning
- Cleaning the LCD screen
- Cleaning the camera surface
- After using your camera at the seashore or other dusty locations
- On floppy disks
- On operating temperature
- On moisture condensation
- Moisture condensation occurs easily when:
- How to prevent moisture condensation
- If moisture condensation occurs
- On AC power adaptor
- On battery pack
- On the built-in rechargeable lithium battery
- Charging the built-in rechargeable lithium battery:
- On "Memory Sticks"
- Power sources
- About "InfoLITHIUM" battery pack
- What is the "InfoLITHIUM" battery pack?
- Effective use of the battery pack
- Remaining battery time indicator
- How to store the battery pack
- Battery life
- Troubleshooting
- Warning and notice messages
- Self-diagnosis display
- Specifications
- System
- Image device
- Lens
- Exposure control
- White balance
- Data compression system
- Recording medium
- Flash
- LCD screen
- LCD panel
- Total number of dots
- General
- Application
- Power requirements
- Power consumption (During shooting)
- Operating temperature
- Storage temperature
- Dimensions (Approx.)
- Mass (Approx.)
- AC-L10A/L10B/L10C
- AC power adaptor
- Rated output voltage
- NP-F330 battery pack
- Battery type
- Maximum output voltage
- Mean output voltage
- Capacity
- Dimension (Approx.)
- Accessories
- LCD screen indicators
- The indicators during recording
- Index
- A
- B
- C
- D
- E
- F
- G
- |
- J
- M
- N
- P
- R
- S
- T
- U
- V
- W
- Z
Mærke : SONY
Model : Mavica MVC-FD87
Kategori : Kamera