Vacubot X3 - Robotstøvsuger aeco - Gratis brugsanvisning og manual
Find enhedens vejledning gratis Vacubot X3 aeco i PDF-format.

Brugerspørgsmål om Vacubot X3 aeco
0 spørgsmål om dette apparat. Besvar dem du kender, eller stil dit eget.
Stil et nyt spørgsmål om dette apparat
Download vejledningen til din Robotstøvsuger i PDF-format gratis! Find din vejledning Vacubot X3 - aeco og tag din elektroniske enhed tilbage i hånden. På denne side er alle dokumenter nødvendige for brugen af din enhed offentliggjort. Vacubot X3 af mærket aeco.
BRUGSANVISNING Vacubot X3 aeco
Vorbereitung
1.
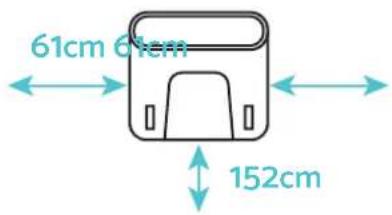
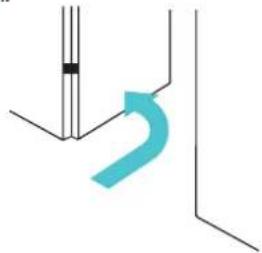
Die Basisstation wird wie in der Abbildung gezeigt aufgestellt und an die Stromversorgung angeschlossen.
2.
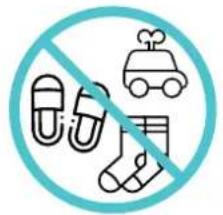
Sicherstellen, dass der Kehrbereich frei von Hindernissen ist.

3.
Bitte beachten Sie, dass alle Türen zu den zu kartierenden oder zu reinigenden Bereichen geöffnet sein sollten.
natural_image
Pure technical line drawing of a bent pipe or duct without any text, numbers, or symbolsErste Schritte
1.
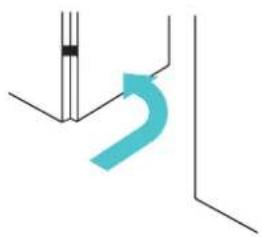
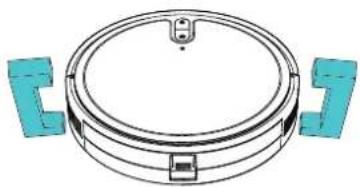
Schutzvorrichtungen am Roboter entfernen.
2.
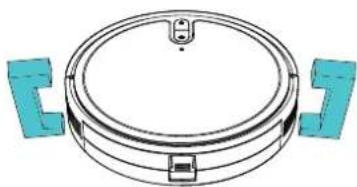
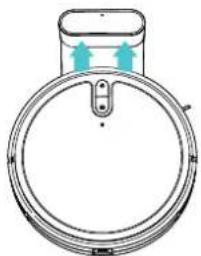
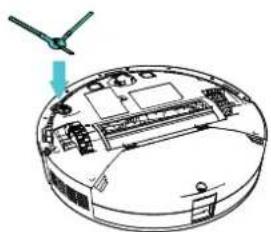
Seitenbürste montieren: Drücken Sie die Seitenbürste feste nach unten bis diese spürbar einrastet, um sie am Roboter zu befestigen.
natural_image
Technical diagram of a circular mechanical component with two blue bracket-like components (no text or symbols)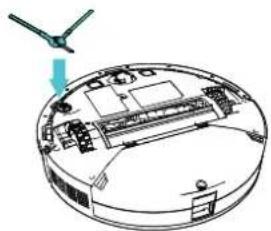
natural_image
Diagram of a circular device with internal components and a small green arrow pointing to the top view (no text or symbols present)3.
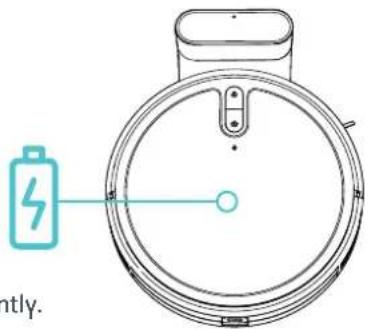
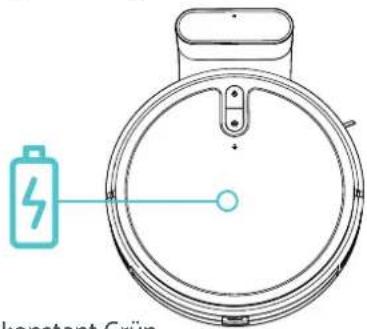
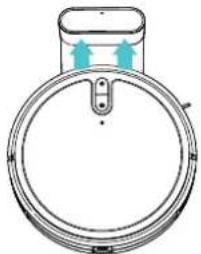
Stellen Sie das Gerät zum Einschalten und Aufladen an die Ladestation. Prüfen sie, dass die Kontakte sich sicher berühren. Das Gerät startet und beginnt mit dem Ladevorgang. Ist dieser abgeschlossen, leuchten Power und die Home Taste konstant Grün.
4.
Scann Sie den QR Code und Laden sie die AX Home App herunter. Öffnen sie die App und melden Sie sich dort mit ihren Nutzerdaten an oder erstellen Sie ein neues Konto.
natural_image
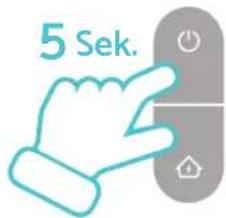
Diagram of a circular device with two upward arrows indicating flow or movement (no text or symbols)

GET IN ON
Google Play


Download on the App Store
Verbinden & Einrichten
1.
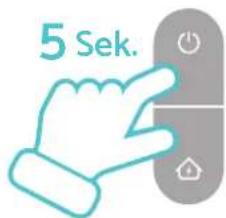
Für die Erstinstallation bitte beide Tasten gleichzeitig 5 Sekunden lang drücken, bis eine Sprachansage ertönt und das WiFi Symbol blinkt.
2.
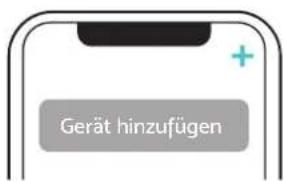
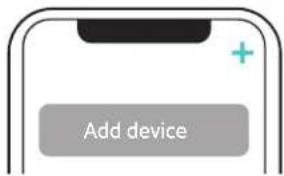
Öffnen Sie die AX Home App und tippen Sie auf das „+“ Symbol oben rechts und danach auf „Gerät hinzufügen“.
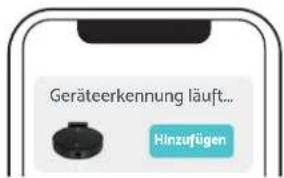
3.
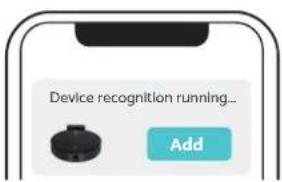
Wurde das Gerät erkannt, wird es am oberen Rand angezeigt. Tippen Sie auf „Hinzufügen“ rechts daneben.
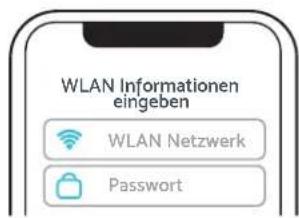
4.
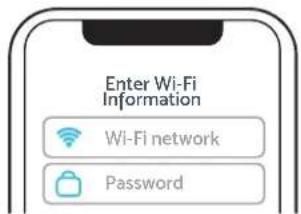
Wählen Sie falls nötig im nächsten Schritt Ihr WLAN aus und geben Sie das Passwort ein. Wechseln Sie bei Bedarf danach zurück in die App.
5.
Tippen Sie auf „Fertigstellen“ und danach auf den Gerätenamen, um mit der Einrichtung fortzufahren. Folgen Sie dabei den Anweisungen in der App.
6.
Aufladen:
Den Roboter auf seinen Platz stellen und vollständig laden.
7.
Ist der Ladevorgang abgeschlossen, leuchten Power und die Home Ta
Quick start guide
Preparation
1.
Set up the base station as shown in the illustration and connect it to the power supply.

2.
Ensure that the sweeping area is free of obstacles.
3.
Please note that all doors to the areas to be mapped or cleaned should be open.
natural_image
Pure technical line drawing with no text, numbers, or symbolsFirst steps
1.
Remove the protective devices from the robot.
natural_image
Technical line drawing of a circular mechanical component with two blue bracket-like components (no text or symbols)3.
Place the device on the charging station to switch it on and charge it. Check that the contacts are touching securely. The device starts and begins the charging process. Once this is complete, Power and the Home button light up green constantly.
natural_image
Diagram of a circular mechanical component with two arrows indicating direction (no text or symbols)2.
Fit the side brush: Press the side brush down firmly until you feel it click into place to attach it to the robot.
natural_image
Diagram of a circular device with internal components and a small green arrow pointing to the top section (no text or symbols)4.
Scan the QR code and download the AX Home app. Open the app and log in with your user data or create a new account.


GET IN ON
Google Play

Download on the App Store
Connect & set up
1.
For the initial installation, please press both buttons simultaneously for 5 seconds until you hear a voice prompt and the WiFi symbol flashes.
4.
If necessary, select your Wi-Fi in the next step and enter the password. If required, then switch back to the app.
2.
Open the AX Home app and tap on the „+“ symbol at the top right and then on „Add device“.
5.
Tap on „Complete“ and then on the device name to continue with the setup. Follow the instructions in the app.
3.
Once the device has been recognized, it is displayed at the top. Tap on "Add" to the right of it.
6.
Charging: Place the robot in its place and fully charge it
7.
Once the charging process is complete, Power & Home button light up green constantly.